

Today we will discuss how to restore file share data with Veeam VBR v11. We can restore file share data in different options, e.g. SMB file shares and folders, NFS file share files and folders, files and folders, etc.
In this demo environment, Veeam Backup and Replication Server is integrated with NetApp ONTAP clusters. Veeam’s integration with ONTAP removes the impact on production NAS by reading data from the NetApp snapshot rather than the production NAS share.

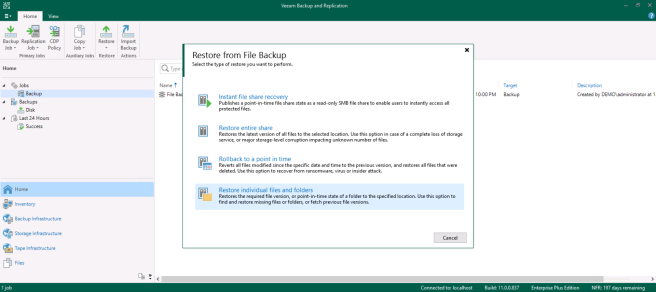
Now we will perform the following file share recovery operation:
- Restore an individual file
- Rollback to a point in time
- Instant file share recovery
Restore an individual file
We created a file share backup job (NetApp NAS share) on Veeam VBR v11. Now we want to restore an individual file on this file share. In Veeam Backup & Replication console, click Restore and choose File Share.

Select Restore individual files and folders, then click Next.
Select the source file share cluster (NetApp NAS share), then click Next.

On the summary, click Finish.

The Backup Browser window will open, select your individual file. Click Restore and Keep.

Wait for the restore to complete.

Rollback to a point in time
Veeam VBR can utilizes NetApp snapshot technology when performing backups and restores. We can restore an entire share when the event of a ransomware attach happen.
Click Restore and File Share. Select Restore entire share.

Add the source NetApp NAS share, then click Next.

Specific where to restore selected location, click Next.

We can select the restore options. In this demo, select “Restore anyway (overwrites the existing file)” option. Click Next.

Click Finish.

We can monitor the restore process. Click Close when the restore has completed.

Instant file share recovery
We can also take any restore point and publish this out though a server from the Backup Repository. In this section, we will use Instant File Share Recovery to mount an SMB share and test it.
Click Restore and File Share. Select Instant file share recovery.

Add the source NetApp NAS share, then click Next.
NOTE: The Instant File Share Recovery feature is limited to SMB only and it also published as ready-only.

Select the Automatic selection, click Next.

Select Set Owner and configure the permissions for this file share, click Next.

Click Next.

Click Finish.

In the Restore Session window, click Open file share and we can see the Veeam server is hosting a new SMB share. Now we can test the files.

Instant File Share Recovery can provide a fast and temporary restore for critical data.

