

Object First is an enterprise-grade object storage appliance designed specifically for Veeam Backup and Replication. It provides a fast, ransomware-proof storage that is easy to deploy and manage.
Before diving into this setup and connection methods fully, I would like to seize this opportunity to appreciate
Since my hardware developed some issues and will be replaced, I have decided to discuss how to access Object First (OOTBI) remotely. This is because the IPMI technology is crucial for IT administrators to access and manage servers, such as OOTBI remotely.
Why should you choose OOTBI by Object First?
Object First acknowledges the persistence and landscape of ransomware attacks targeting businesses. This is where OOTBI comes in and stands out with its out-of-the-box immutability, rendering backup data impenetrable to attacks.
OOTBI, designed around Zero Trust and Data Security Principles, integrates built-in immutability to significantly diminish the threat of ransomware compromising backup data. See Demystifying Zero Trust with Veeam: Design your Architecture.
Reinforcing security measures, a customised hardened Linux operating system further fortifies OOTBI. With zero access granted to the root or operating system, even the most privileged user finds altering OOTBI or its immutable data impossible.
Also, if you’re constrained by legacy solutions like Direct-Attached Storage (DAS), dedupe appliances, or Hardened Linux Repositories that lack explicit optimisation for Veeam and necessitate security expertise and costly technical staff to manage, compromising security, simplicity, or power, you should consider acquiring an Out-of-the-Box (OOTB) appliance.
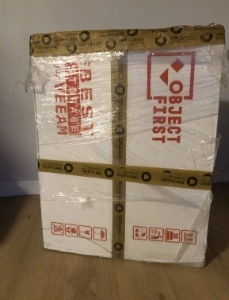
Note: Say no to ransom payments and regain control with OOTBI for confident recovery! So what are you waiting for? Here is how to purchase OOTBI by Object First. You may want to request a DEMO before purchasing one as OOTBI drastically reduces the risk of ransomware affecting your backup data.
Object First OOTBI Appliance Unboxing
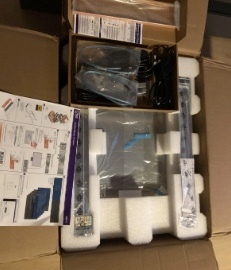
From the image below, the OOTBI appliance came with the following power cords, screws, and other accessories required for the Object First Out of the Box Installation (OOTBI). Installation becomes effortless and takes only a few minutes.
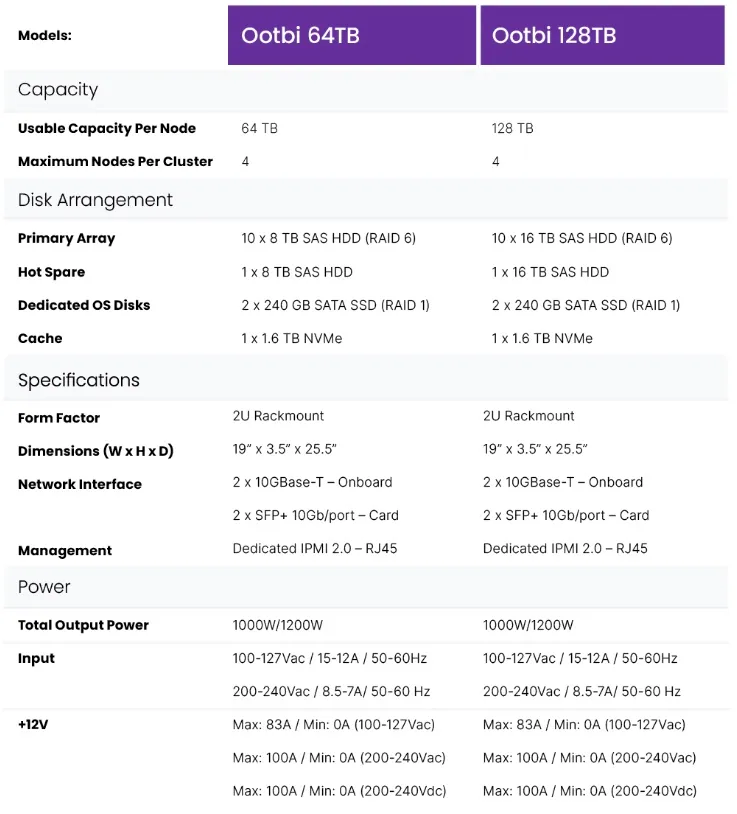
Furthermore, in the image below. You will find the maximum capacity for the cluster depending on the OOTBI appliance you have purchased, storage configuration, specifications etc.
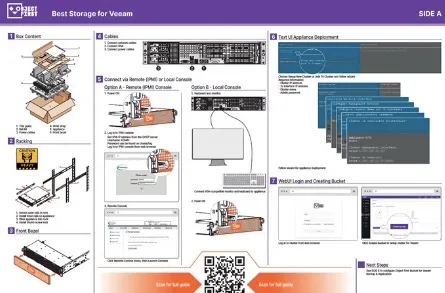
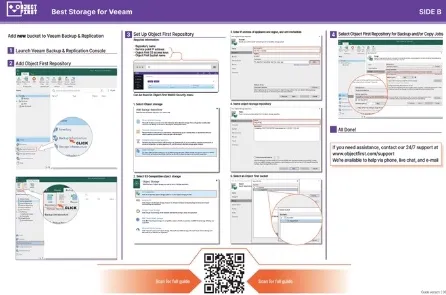
To demonstrate the simplicity of installing and configuring OOTBI appliances. Object First sends alongside a flyer containing step-by-step installation and configuration instructions.
Additionally, the flyer presents the configuration of the Veeam Backup and Replication repository.
OOTBI integration with Veeam?
Veeam Data Platform V12 fully embraces S3 Object Storage as its primary backup target. OOTBI is a Veeam Ready repository that leverages Veeam’s “direct-to-object” functionality, utilising S3 object storage to provide high-performance backup while ensuring security and immutability. Please see the image below for more information.
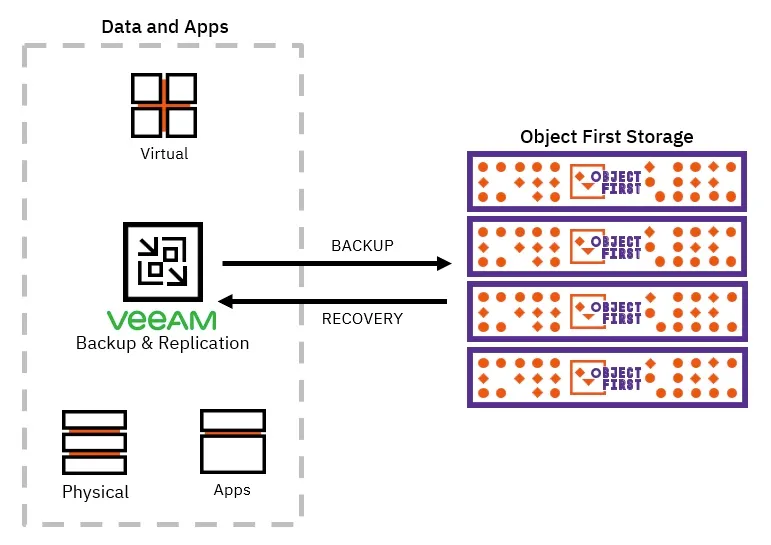
Note: The ZTDR architecture and secure appliance form factor inherently separate the OOTBI from the Veeam Backup & Replication server. This segmentation ensures proper isolation between the Backup Software and Backup Storage layers, thereby guaranteeing ransomware resilience.
It fully supports Veeam Smart Object Storage API (SOSAPI) with HTTPS which ensures secure communication and encrypts all network traffic between Veeam and Ootbi. Since OOTBI was developed with Veeam Backup and Replication in mind. It is optimised to deliver fast backup storage and instant recovery with Veeam as shown in the image below.
The solution also includes data offload automation along with automated load balancing in clustered Ootbi deployments which makes the administrator’s backup-related tasks effortless. You may want to learn the difference between iDRAC, ILOM, IPMI or ILO, and how to Upgrade Windows Server 2019 to 2022 via iDRAC.
OOTBI Physical Security
Ensuring physical security for the appliance is paramount and we can achieve this by placing OOTBI appliances in a secure location such as a dedicated server (equipment) room or service closet with restricted access. Also, access should be limited to authorised personnel only.
The installation site should be dust-free, clean, and well-ventilated, avoiding areas with electrical noise, heat, or electromagnetic fields. Consider employing surveillance to monitor the OOTBI appliance and its surroundings. Physical security hinges on controlling access and monitoring for any potential breaches.
Note: Remember that physical security is often overlooked in favour of cybersecurity but is equally critical and crucial. Allowing unauthorized physical access could compromise your data, regardless of digital defences.
Network Security as it relates to OOTBI
Implement access control measures to limit who can interact with the OOTBI appliance. To achieve this, ensure that the IP addresses of IPMI, Cluster etc are not accessible from the Internet. That is, no public IP address is used. See other aspects to consider below.
- After setup, the IPMI access should be disabled and this can be achieved easily by pulling off the cable.
- Set up Multi-Factor Authentication.
- SSH access is disabled by default. Double-check to ensure it is disabled.
- Change the factory-generated IPMI password.
Accessing the Object First OOTBI Appliance
To complete the Object First OOTBI Appliance Quick Setup. Now that you have racked and placed your OOTBI in a secure location. It is time to access it. As you can see from the flyer attached, we have to options to access the OOTBI appliance.
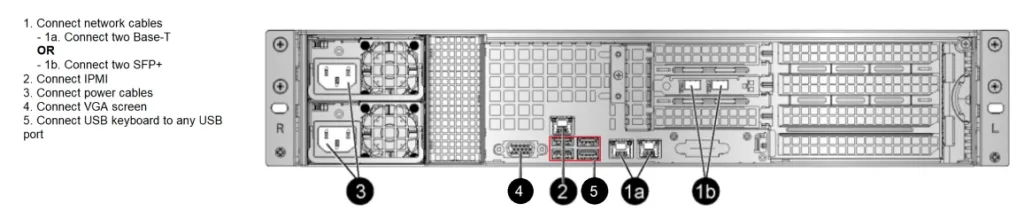
1: Local Console Access: For OOTBI management, where IPMI remote connection is not possible, the console can be accessed locally by connecting a VGA-compatible screen and USB-compatible keyboard to the server during physical server installation and connection.
Once connected, enter the appliance credentials to access Object First TUI. You should be able to interact with the server's IPMI TUI.
2: Remote IPMI Console Connection: The IPMI is a standardised interface defined by the Intelligent Platform Management Interface Forum (IPMI Forum). IPMI is not tied to a specific vendor but is a standardized protocol that various server manufacturers implement in their hardware. You may want to learn the difference between iDRAC, IPMI, and ILO.
If the server's IPMI is configured for remote connection. Plug the IPMI cable and obtain the IP address IPMI interface obtained over DHCP.!-->
Next, launch a web browser on your client machine and enter the URL for the IPMI interface in the following format https://<IP_address_of_server> .
Once you access the IPMI interface URL, you will likely be prompted to enter login credentials. The username is ADMIN and the password is associated with the hardware. You should change these details afterwards.
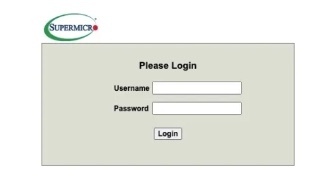
Once the login is successful, the IPMI main screen is available as shown below. !-->
Remote Console Connection Options
IPMI (Intelligent Platform Management Interface) provides remote management capabilities for servers/hardware. We have two options to connect to the Text User Interface (TUI). We have the Java and HTML5 option to access the Text User Interface (TUI) remotely.
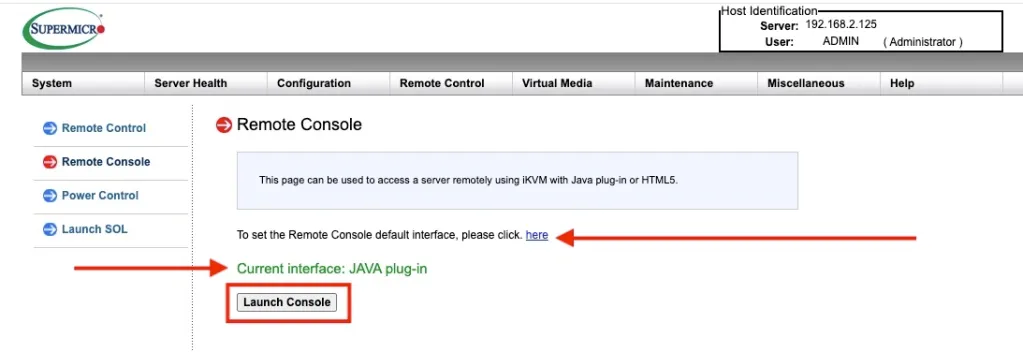
Upon launch and access to the IPMI, we can see the current interface is "Java Plugin". If you prefer using Java over HTML5, please proceed and launch the console.
HTML5 console is often considered better in terms of security, compatibility, and ease of use. Especially considering the decline in support for Java applets in modern browsers. However, the choice ultimately depends on your specific requirements.
Note: Once a remote console session is connected, switching between JAVA and HTML5 is not supported.
Remote Connection Via HTML5
Access to the server's IPMI interface over the network. Unlike the Java method which we will discuss very shortly, the HTML5 method relies on modern web technologies. You need a browser that supports HTML5 and related technologies such as WebSocket for real-time communication.
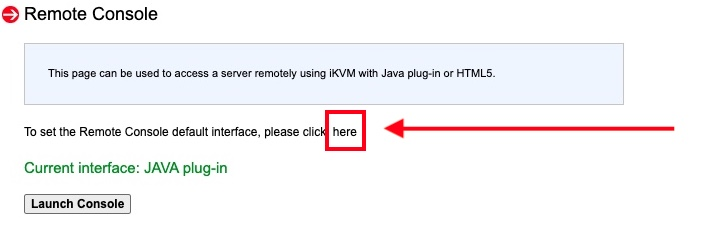
To change the current interface, click the link "here" as shown below.
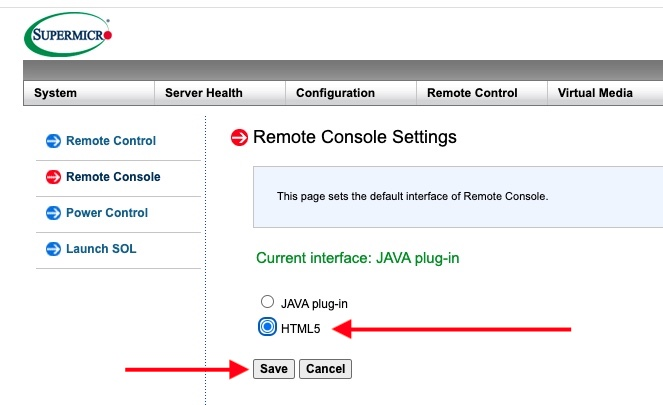
Select HTML5 and click save.
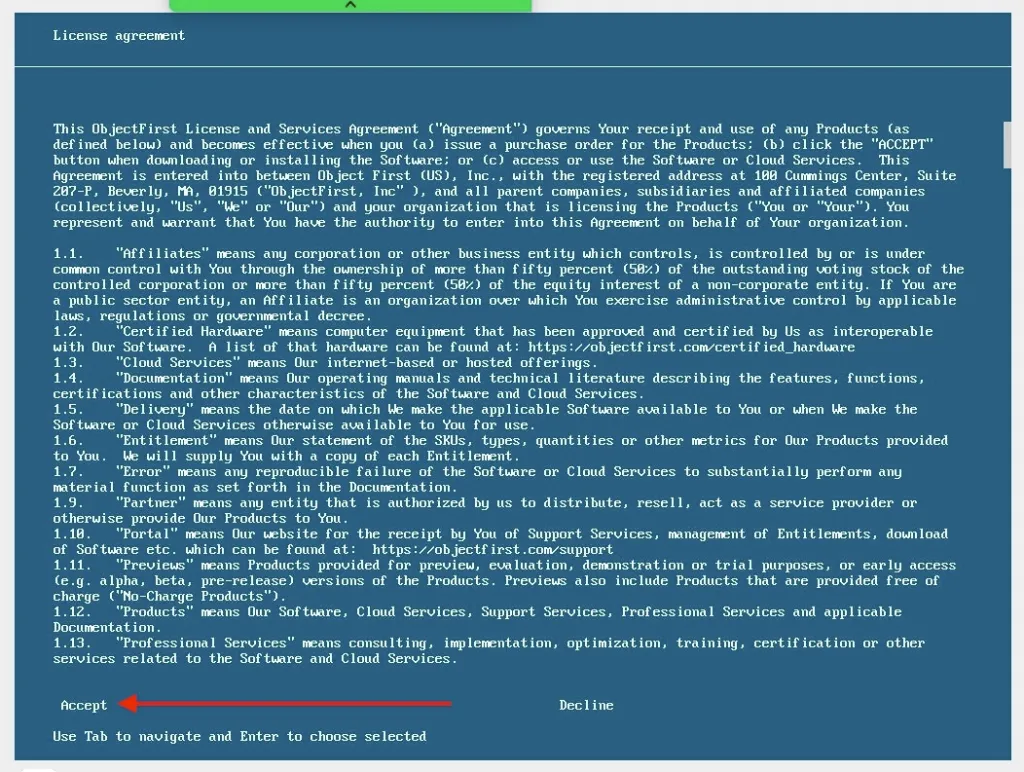
Then launch the remote console again. The interface should load directly within the browser without requiring any additional plugins or installations. You should be able to access the TUI directly through the browser interface, which resembles a traditional command-line interface.
Use the TUI interface to navigate through different menus and options to perform the desired management tasks.
To learn the Remote Connection via Java, You may want to take a look at this blog post. In my next article, I will be sharing the steps to integrate Object First with VBR. Below are some interesting articles already from the community on this topic.
Now that you have completed this article, please take a look at the following guides below to configure your appliance and to integrate OOTBI with VBR.

