Since the introduction of NAS backup capability with v10 of Veeam Backup & Replication there have been many requests for tape support. But as we all know, Veeam’s NAS backup doesn’t support tape (yet?), neither as a primary nor as secondary (backup copy or archive) target.
With v11 we got the new feature called “instant file share recovery” which lets us publish file shares directly from the backups previously created with NAS backup jobs. My colleague Uwe Groening recently came up with the idea to use these shares, published by instant file share recovery, as a source for file to tape jobs within Veeam. This way, it should be possible to create tape copies directly from existing file share backups. This makes a huge difference to other solutions that involve either reading data from the production share again or staging a restore on some (extra) storage prior to using “file to tape” from there.
We discussed this idea in more detail and created a process (for a single NAS backup job) which was then tested manually, step-by-step:
- Run the NAS backup job at least once to create a restore point on the chosen Veeam repository.
- Start instant file recovery sessions of the most recent restore point for each share of the NAS backup job’s backup (each share requires its own instant recovery session, but they can be run in parallel).
- Create inventory objects from the shares created by the instant recovery sessions (“Inventory / File Shares” area within the Veeam console).
- Modify an existing “file to tape” backup job (which is already using the desired media pool and other settings, but using an empty folder as its backup source) using the file share inventory items created in the previous step as sources to be backed up.
- Run the file to tape backup job.
- Cleanup
- Revert modifications that were applied to the file to tape job in step 4.
- Delete the inventory items created in step 3.
- Stop the instant file share recovery sessions that were started in step 2.
Working through this process looked very promising, so the next step was of course to automate it via Powershell. The script I created for this process has the following prerequisites and needs some variables to be customized with respect to your environment:
- It is assumed that this script is located and run on the Veeam backup server. It could of course be run on any server that has the Veeam Powershell module installed, but in this case some extra code will be required (e.g. for establishing connection to the backup server).
- A main NAS backup job must already exist (as a “source” of our tape backup), and the name of this job needs to be referenced in the $NASJobName variable in the script header. The job’s source objects must be SMB shares; if you are backing up shares of a NAS filer (e.g. NetApp), please make sure that the actual shares are selected in the job (not their parent volumes!)
- A File to tape job must already exist, using some empty dummy folder as source (sources will be modified by the script!), and configured to use the desired tape media pools etc. Scheduling should be disabled for full as well as incremental backups and the use of VSS should also be disabled. The name of the file to tape job needs to be referenced in the $FileToTapeJobname variable in the script header.
- A mount server needs to be defined which will be used to host the shares published by the instant file share recovery. This does not have to be the mount server defined in the Veeam repository that’s used as the target for the main NAS backup job, but it must be a “Veeam managed server” that has the required components installed to act as mount server (it has to be a Windows server). The name of this mount server needs to be referenced in the $mountServer variable in the script header. Additionally, the variable $FLRFolder needs to be initialized with an existing empty folder path on this mount server (e.g. C:\VeeamFLR, this is the “empty dummy folder” I’ve been using for the file to tape job, but any other existing folder will do).
- To be able to add file share objects to the Veeam inventory, we need to specify a “Cache Repository” (although this process doesn’t make use of it). The name of an existing Veeam repository that can be used as cache repository has to be defined in the variable $cacheRepository within the script header.
- The $Owner variable within the script header must be initialized with a user account name (in the format “AD-Domain\Username”) that will be used as the owner of the shares created by the instant file share recovery process. The script will allow access to these shares for this user only.
Please note: This user account must be created within Veeam’s credential manager, too! (Although it doesn’t require any special permissions to be created beforehand.) - In the current v11 release of Veeam Backup & Replication, the feature “instant file share recovery” is supported for SMB shares only. Therefore, this solution also works for SMB shares only.
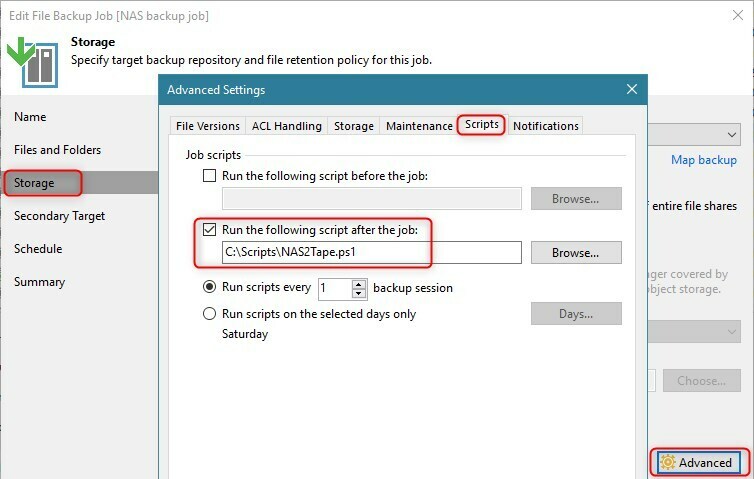
This script should be run immediately after your main NAS backup job finishes. Simply adding it as a “post-job” script to the configuration of the main NAS backup job makes it very easy to keep your tape copy up to date with the most recent NAS backup created on disk.

I’ve tested the script with several SMB shares as well as some Netapp-Filer shares as sources of the main NAS backup job and it worked successfully in my lab environment. Incremental backups work the usual way, only changes between the most recent and the previous NAS backup run will be copied to tape.
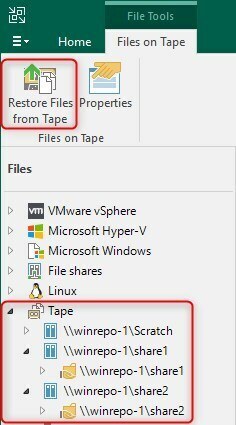
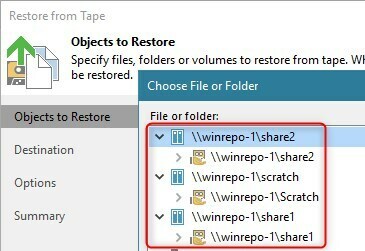
To restore from such tape copies, you have to be aware that the files are listed beneath the mount server name of the Files/Tape section of the Veeam console, as the file to tape job leveraged by the script uses the mount server as the “root” of the shares it’s protecting.


I’m sure the script leaves a lot of room for enhancements, so look at it as being a starting point to build a customized solution for your environment yourself. Have fun!
Disclaimer: The script is provided as-is, without any kind of support or guarantee, so chances are that it might completely fail in your environment or even wreaks havoc on your backups and/or production systems! Do not run it in a production environment without proper testing and validation! Most importantly, don’t use it without taking a valid backup of the environment beforehand!
Script is attached to this article, latest version available on Github.


