

Windows Server Upgrade also referred to as an "in-place upgrade" help move from an older version of the operating system to a newer version, while staying on the same physical hardware without wiping and reinstalling the operating system.
Considering Windows Server 2012 and 2012 R2 is reaching their end of life at the end of 2023, organisations must consider migrating their Veeam Backup and Replication (VBR) Servers from Windows Server 2012 to Windows Server 2022. Below is a related articles and I highly recommend you to take a look at them.
In this article below, I have attached links in the comment section on how to perform various in-place upgrade from various Windows Server Edition.
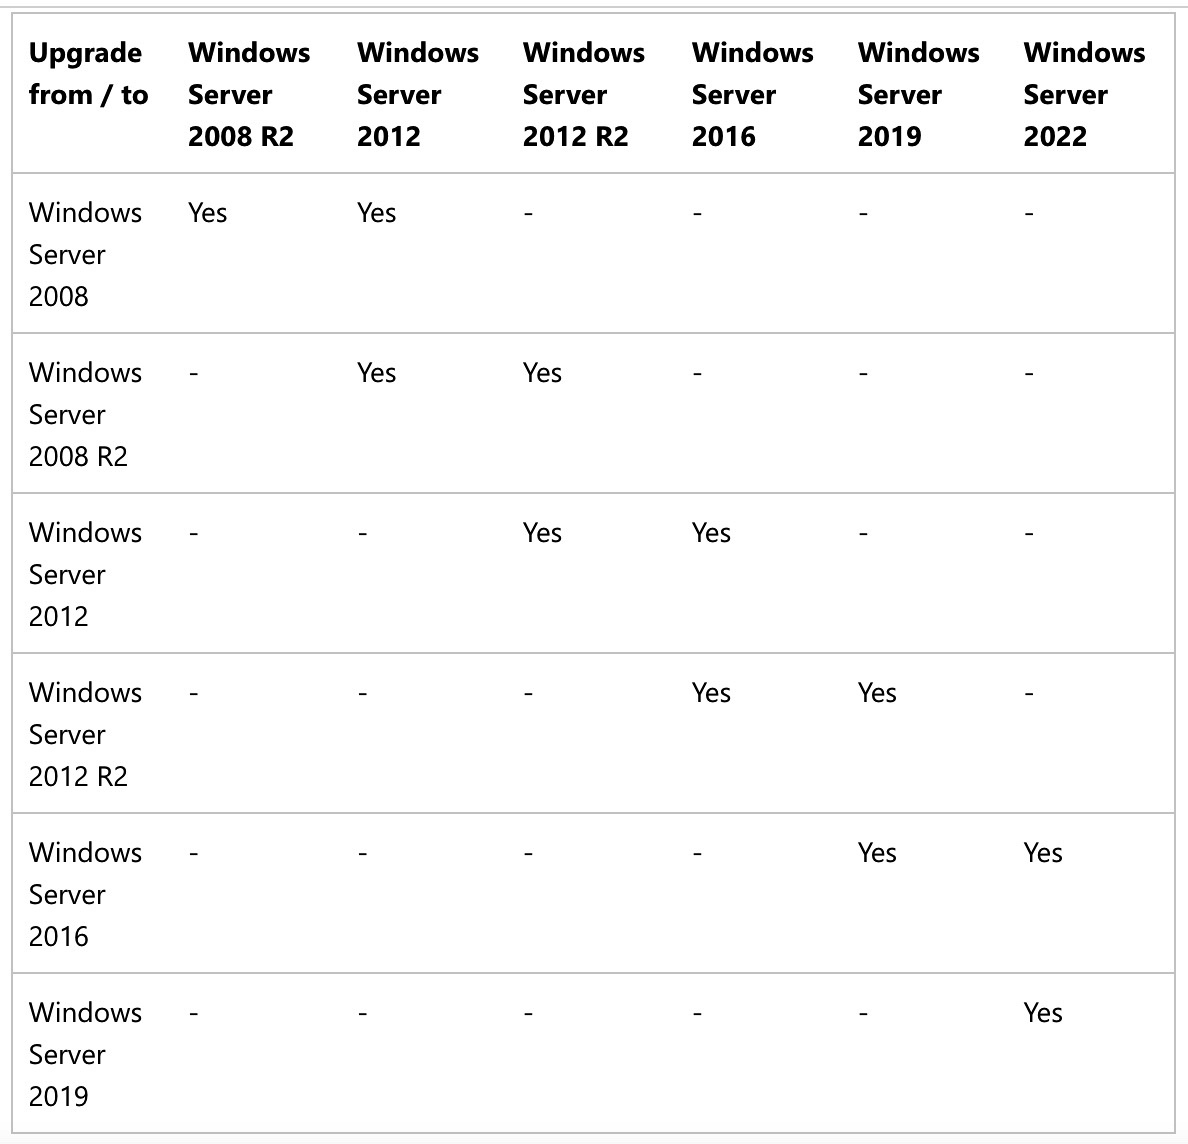
The table shows the supported upgrade paths, based on the version you're currently on. That is, from 2012 to 2022 there are several steps.
Reason for Server Upgrade
Running the latest version of Windows Server allows you to use the latest features? This includes running the latest security features that deliver the best performance. In this link, you will find new capabilities of Windows Server 2022.
In this article, I will be performing the in-place upgrade of Windows Server 2019 to 2022 via iDRAC. This is similar to the process of connecting to the console or via RDP to perform Server Upgrade. But in this case, you will not be disconnected and can stay abreast with the upgrade process (steps) via iDRAC.
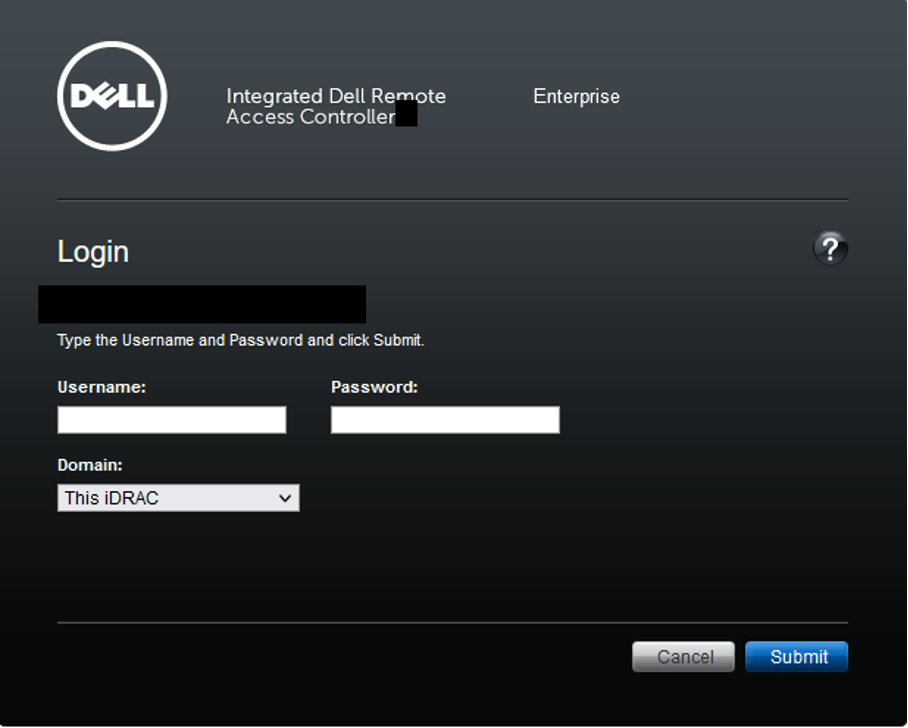
Access iDRAC
Enter your credentials to log in to the iDRAC interface. When you are done, click on submit.
iDRAC provides both a web interface and command-line interface that allows administrators to perform remote management tasks.
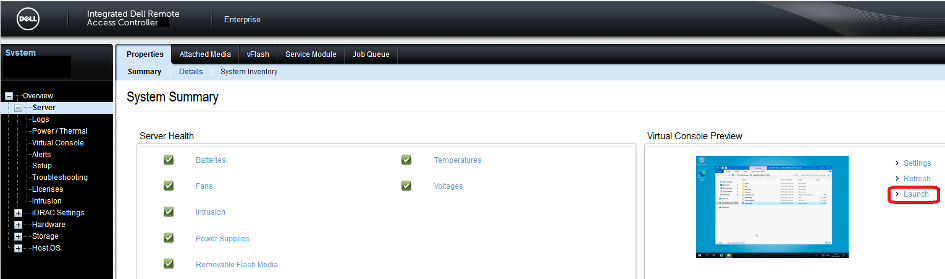
Launch the virtual console
Click on Apply on the Keyboard Macros in the wizard that appears.
Note: Since I have mounted the ISO file already, there is no need to attach the Virtual Media file. Bute, If you have not mounted the ISO file already, please click on attach the Virtual Media File.
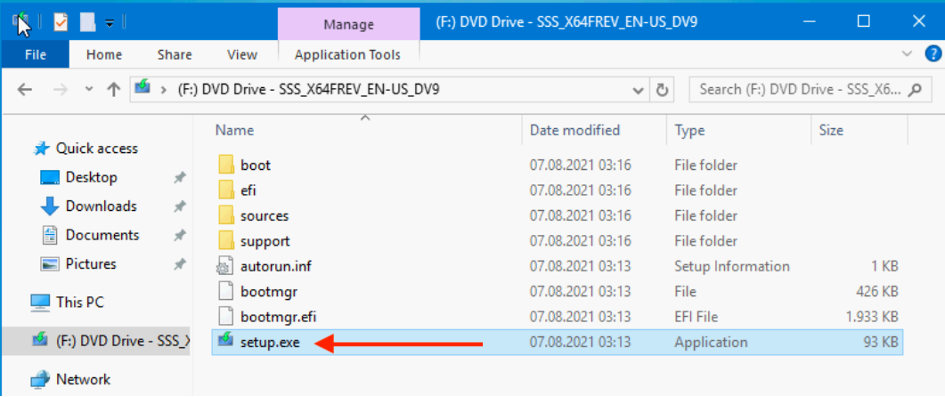
Double-click on the mounted ISO in order to continue the setup.
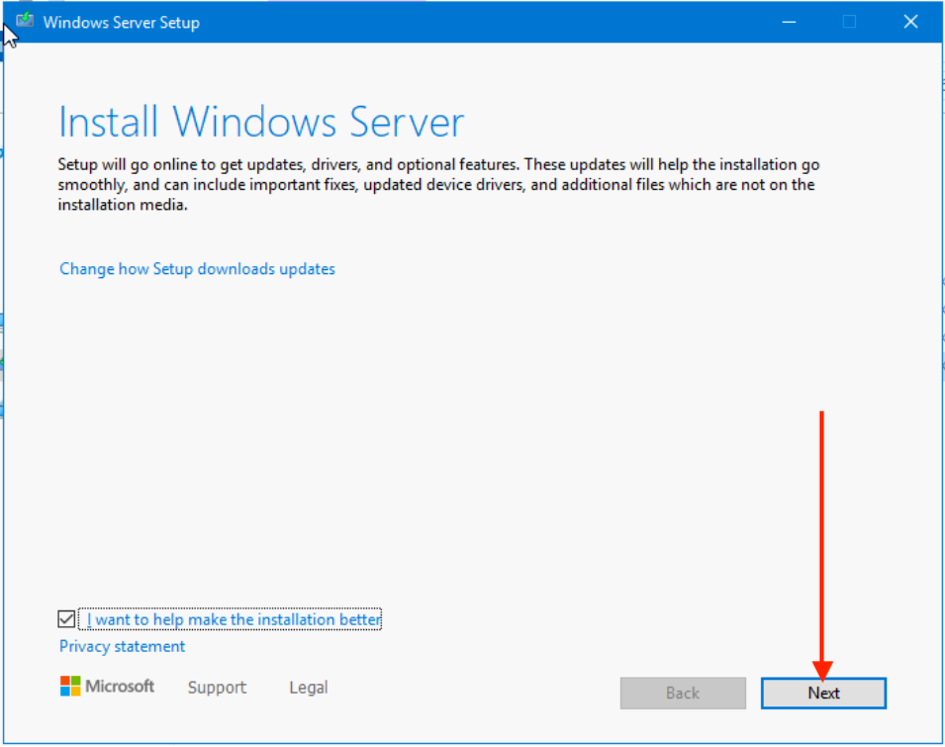
Windows Server 2022 setup wizard opens up. Click on next to continue.
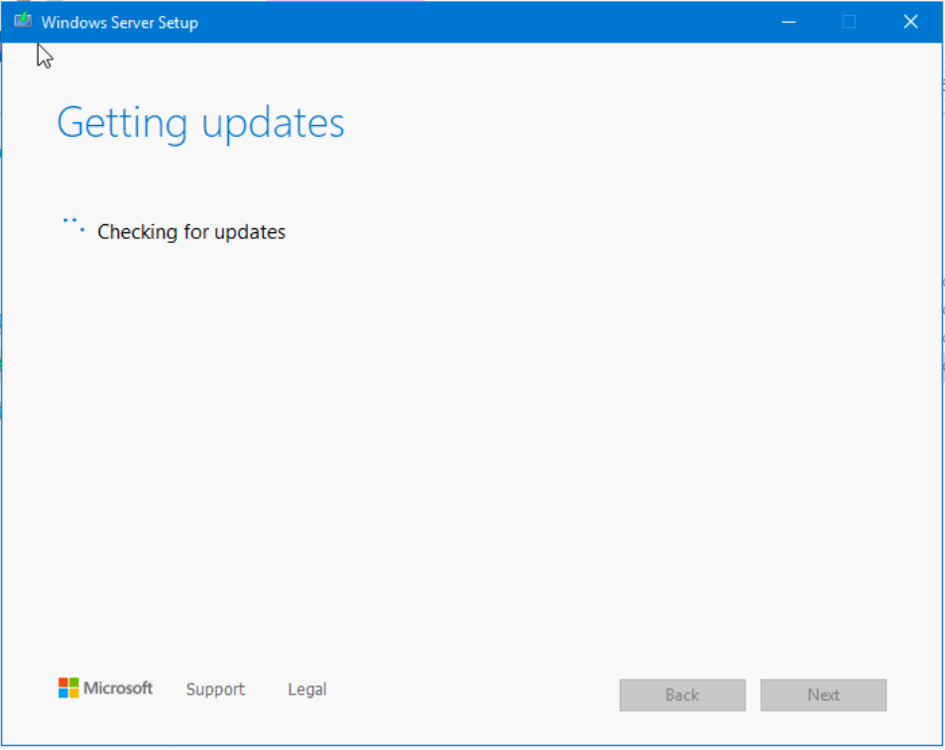
Next steps, it will check for updates, and your PC for the necessary requirements.
This will launch the setup “Select Image” window. You could select any of these by clicking on the Operating System of your choice.
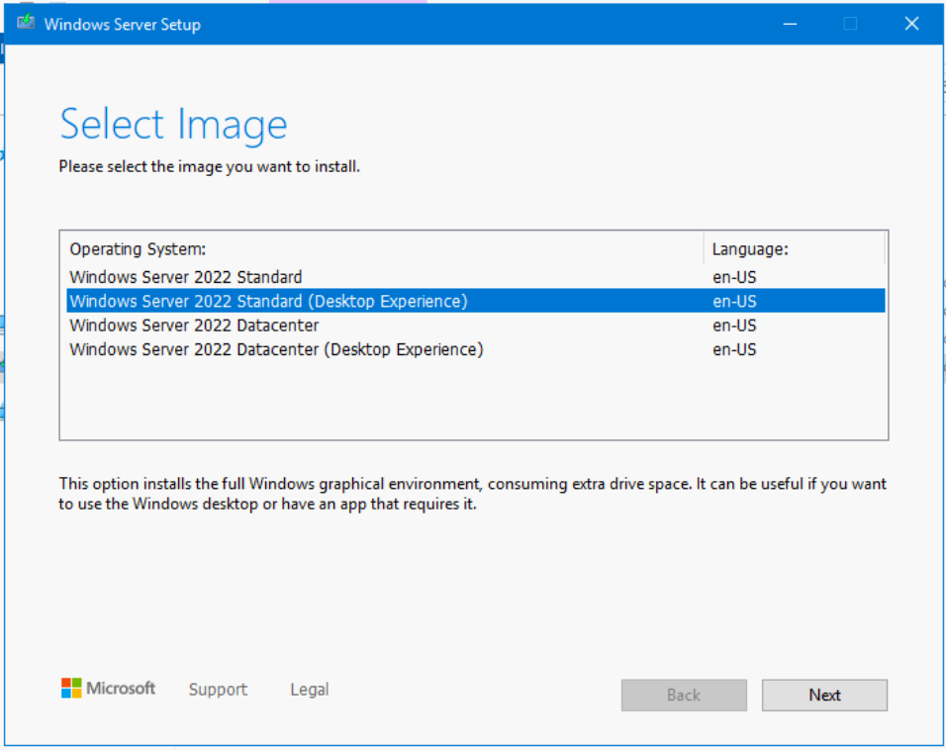
I will select the Windows 2022 Standard (Desktop Experience) and click on Next to continue
- Accept the License agreement
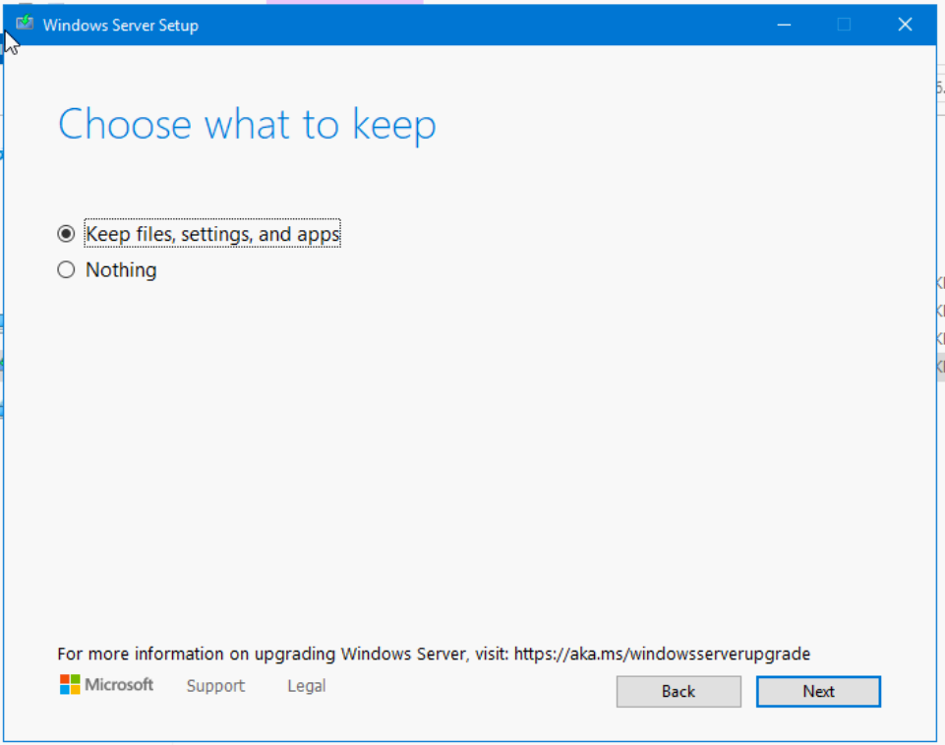
Decide on what to keep
On the next screen, you may select to Keep your personal files and apps or just wipe everything.
Since we care about upgrading and retaining our VBR settings, we will select Keep your personal files and apps, and click Next.
Next, Windows will collect updates and will prepare the system for installation
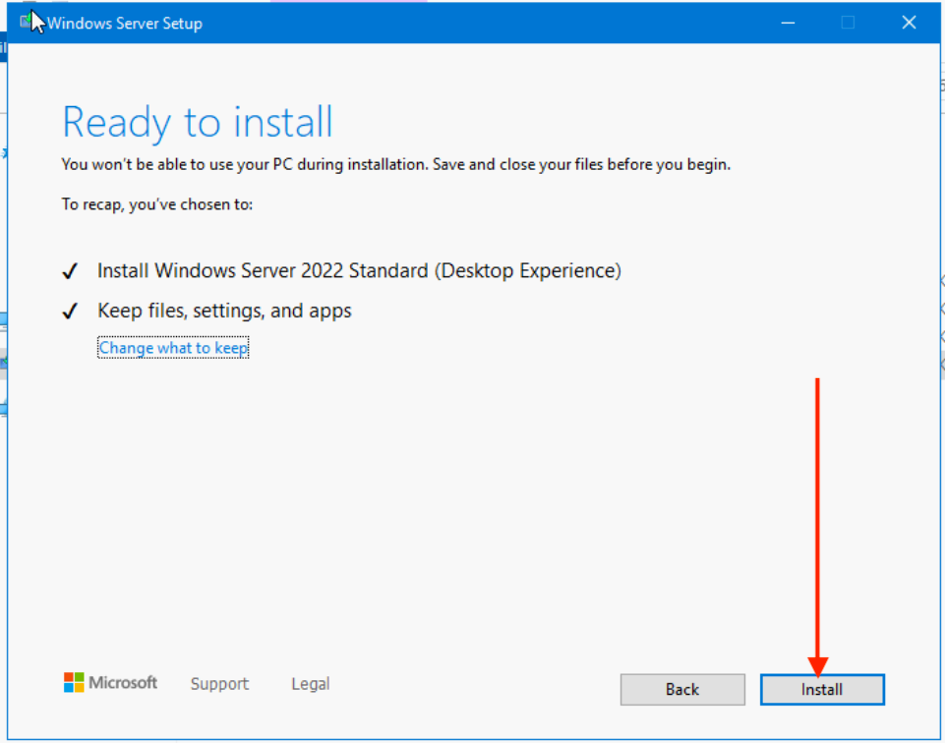
Click on Install to proceed with the installation of Windows Server 2022 (Desktop Experience).
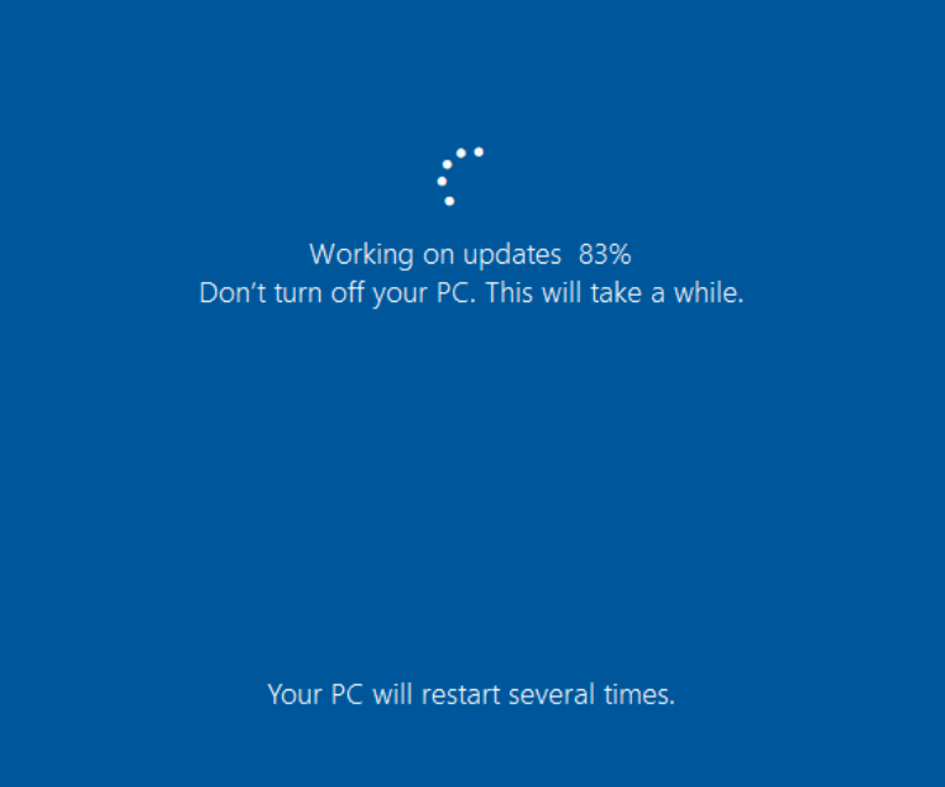
Now the server upgrade process has begun. Please note that the device will restart multiple times during this time.
When Windows is done applying settings, you can now log on to your server or VM via the same process discussed above or via RDP.
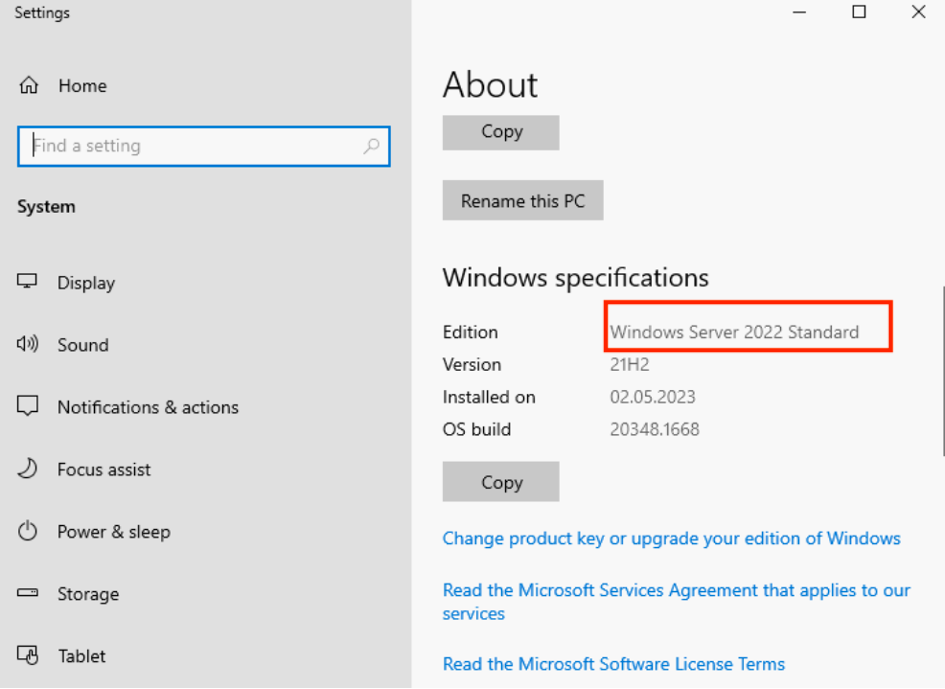
After the upgrade is completed, verify that the upgrade to Windows Server 2022 was successful by going to (About page) as shown below.
Now, you have successfully upgraded from WinServer 2019 to Windows Server 2022. Here is the link to the original blogpost.