
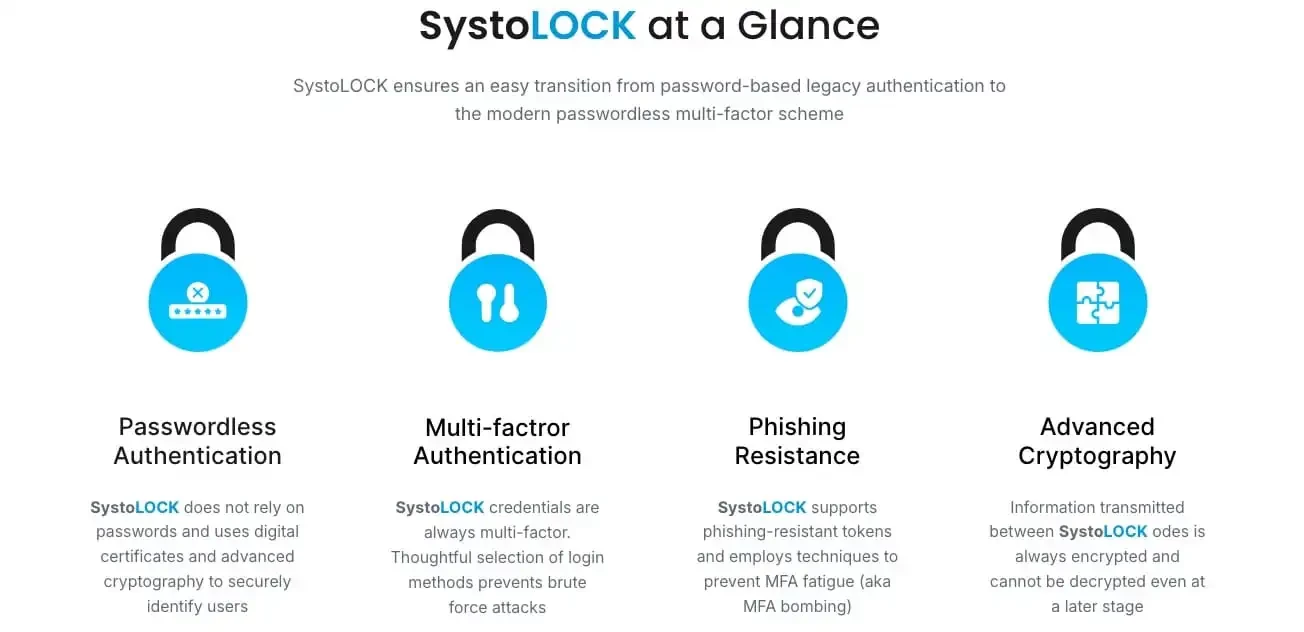
SystoLOCK is a passwordless Multi Factor Authentication (MFA) platform developed by Systola GmbH here in Germany. Below is a similar solution “Cisco Duo”, demonstrated by
If you attempt to install SystoLOCK Server without a properly configured AD CS instance, the installation process will fail unless you specify to have a CA installed during SystoLOCK server installation. Therefore, in this guide, I will show you how to install ADCS to support the deployment. In a different post, we will discuss more about SystoLOCK capabilities as shown in the image below.
Windows domains operate normally without Active Directory Certificate Services (AD CS), provided that no Public Key Infrastructure (PKI) functionality is required. However, SystoLOCK depends heavily on PKI, this means you must deploy and correctly configure a Certification Authority (CA) before installing SystoLOCK.
Important: After you install a CA role, you cannot rename the underlying server. Always finalise the server hostname and domain configuration before installing the CA to avoid reinstallation
Microsoft AD CS supports two deployment modes: Standalone CA and Enterprise CA. SystoLOCK supports only the Enterprise CA mode, as it integrates directly with Active Directory and provides certificate templates and auto-enrollment capabilities. Only Enterprise CAs can issue templates. Standalone CAs won’t show these templates.
Install Domain Wide CA
If you already have an existing CA, you can use it and do not need to install a new one for SystoLOCK, as I will be doing very shortly.
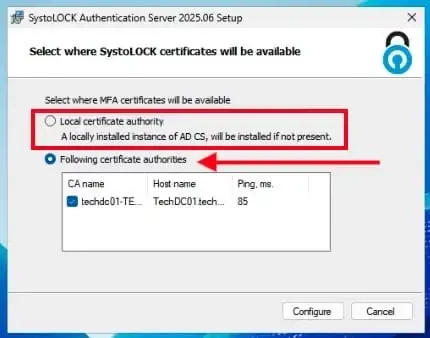
You can also use the SystoLOCK setup to configure a local CA directly on the SystoLOCK Server as mentioned above. SystoLOCK recommends this approach because it allows you to separate responsibilities and maintain clearer control between different CAs. The image below is from a SystoLOCK deployment, and because I have set up a CA as demonstrated in this guide, the option to select the following CA is now available to me.
Install ADCS Role
Start by installing ADCS role. You can take a look at the original blog post here.
Install-WindowsFeature -Name ADCS-Cert-Authority -IncludeManagementTools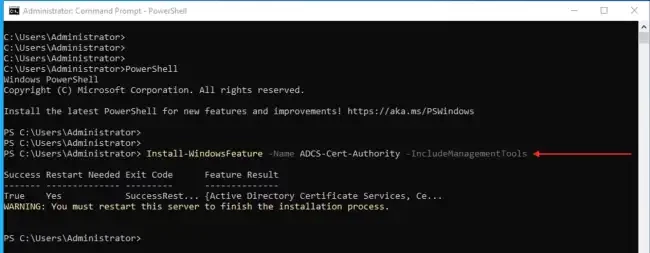
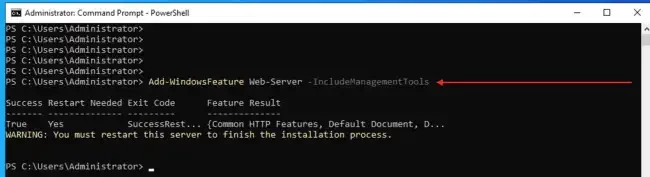
To serve CRLs from the same server, install IIS
Post ADCS installation
Upon restart, the ADCSDeployment module will be loaded and you can configure it as shown below from the Server Manager. But, I will continue with PowerShell as also shown below.
Install-AdcsCertificationAuthority -CAType EnterpriseRootCA -CryptoProviderName "RSA#Microsoft Software Key Storage Provider" -KeyLength 2048 -HashAlgorithmName SHA256 -ValidityPeriod Years -ValidityPeriodUnits 3 -Force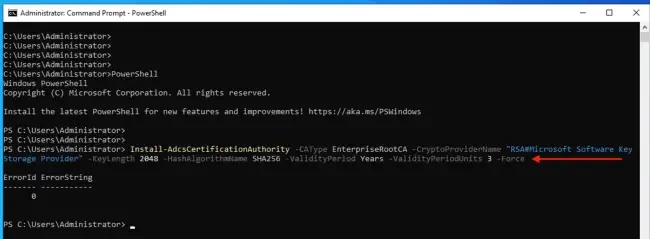
In PowerShell, “ErrorId = 0” means no error occurred. While the “ErrorString is empty” means nothing failed. This means the operation completed successfully. sometimes modules or installers return 0 as a generic “success” even if they didn’t actually add/register what you expected. That’s why you should always verify by checking the results
Configure CRL Distribution Points (CDPs)
To ensure SystoLOCK functions correctly, it’s crucial to configure CRL Distribution Points (CDPs) with HTTP paths, as Windows authentication subsystems may not reliably access LDAP-based CRLs during authentication. While you can retain LDAP URLs if necessary, it’s recommended to prioritize HTTP URLs.
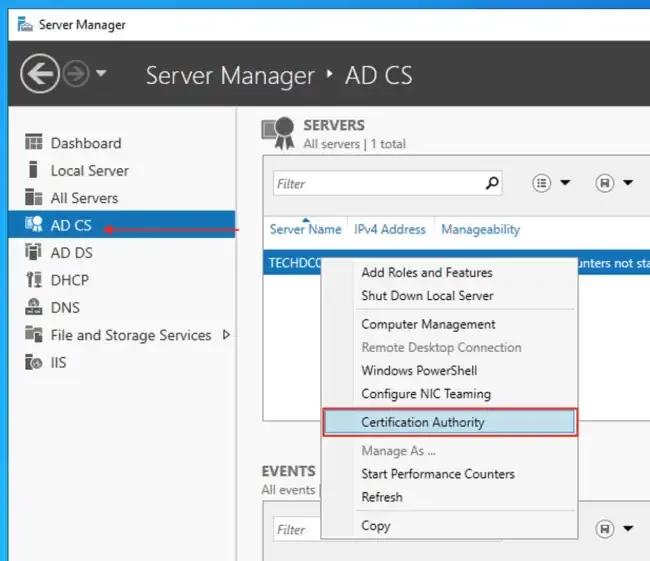
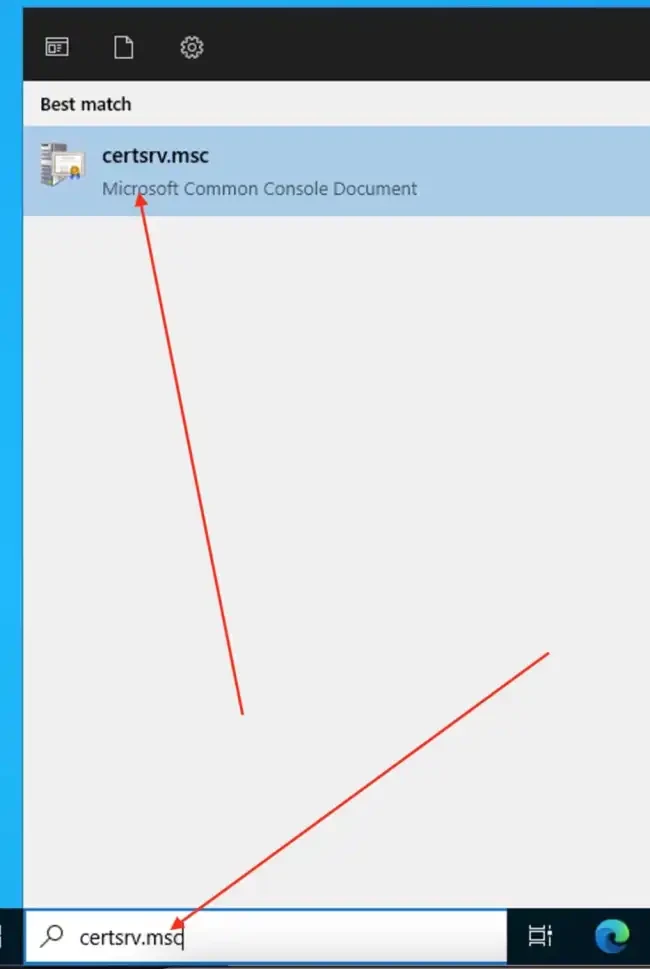
Open the Certification Authority Console as shown below. In Windows, there are numerous ways to launch this. You can also run certsrv.msc to fire up the console.
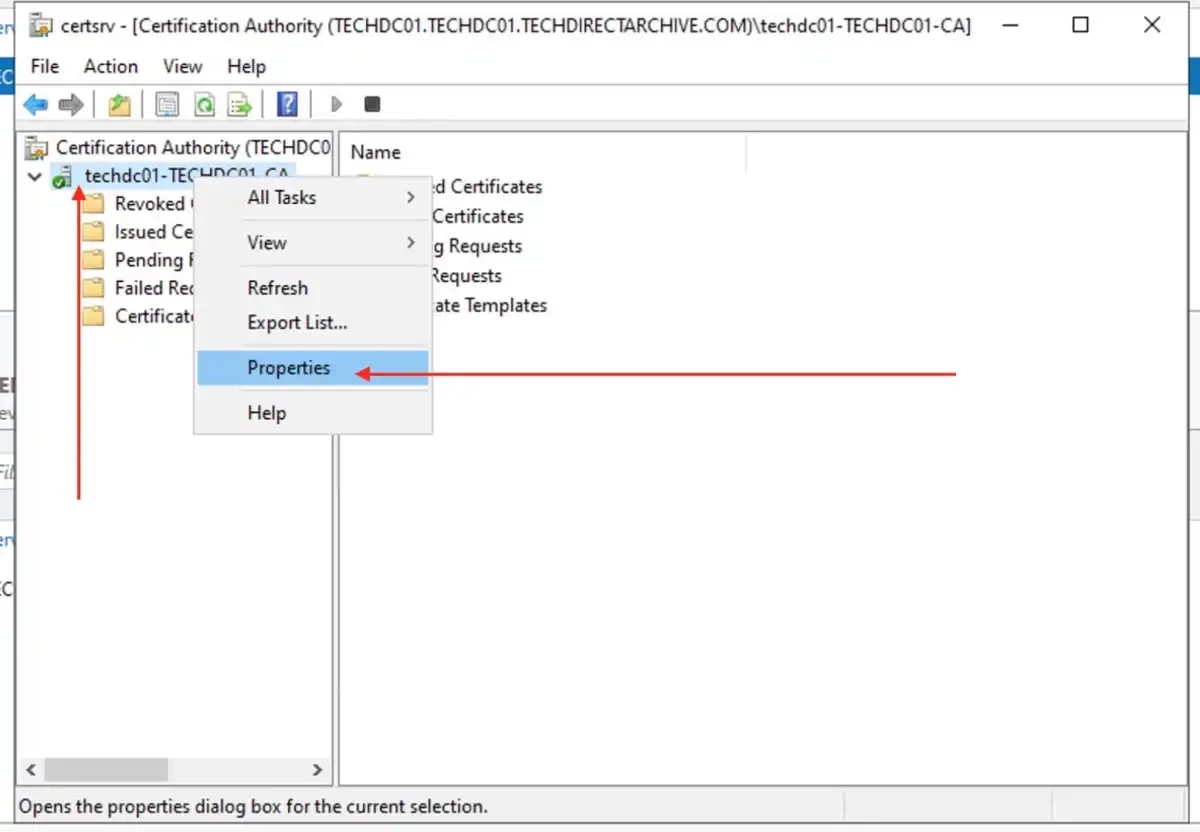
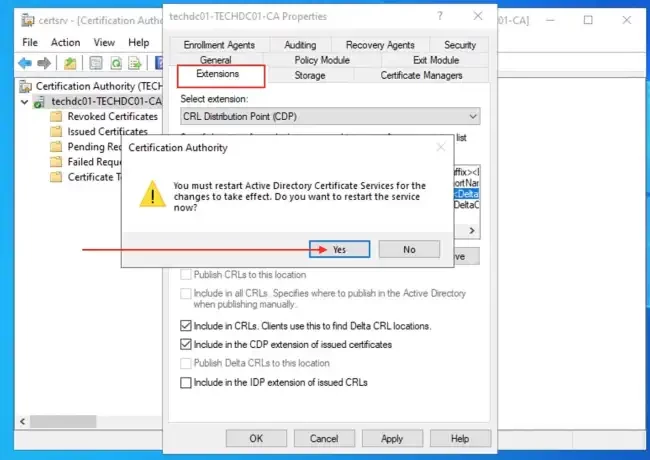
Access the Extensions Configuration by right-clicking on your CA and then select Properties.
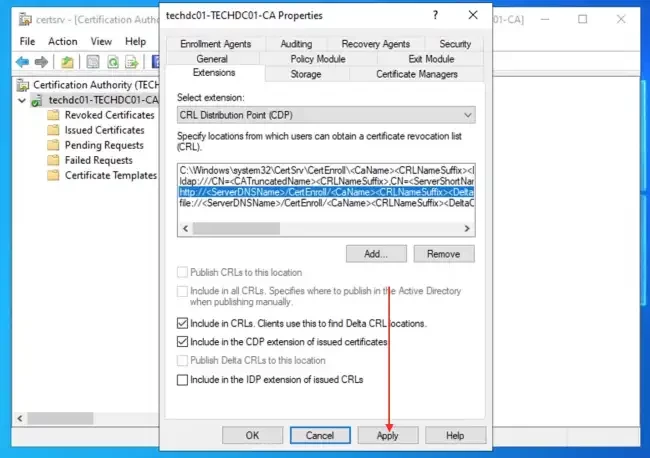
Navigate to the Extensions tab, and select CRL Distribution Point (CDP) from the dropdown if not selected by default. Configure Options for the New HTTP CDP by checking the following boxes for the HTTP entry:
- Include in CRLs. Clients use this to find Delta CRL locations.
- Include in the CDP extension of issued certificates
You will be prompted to restart the ADCS as shown below. Click on Yes.
Note: These placeholders are automatically resolved by the CA when a certificate is issued as they cannot be edited. For example: <ServerFQDN> is replaced with the actual hostname of the CA at issuance time. The placeholder itself is not literal in the issued certificate. It is just a template. This means that when a client or SystoLOCK requests the CRL, the placeholder is already replaced with the correct FQDN of the CA server.
And add CRLs to the Default Website on IIS and make delta-CRLs accessible
The CRL (Certificate Revocation List) and Delta CRLs are generated and stored by the CA. These need to be published via HTTP so that all clients (including SystoLOCK, domain controllers, and workstations) can fetch them.
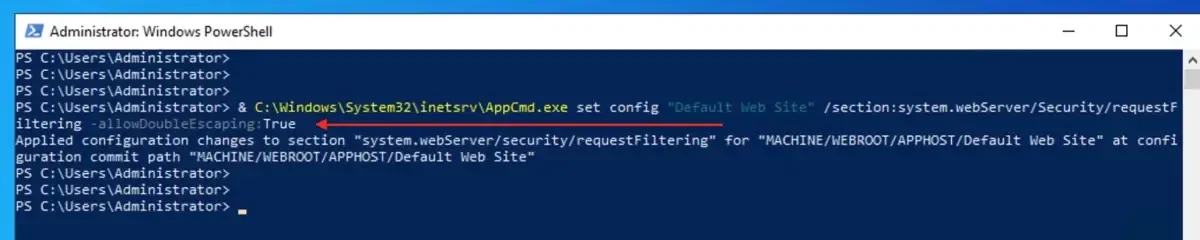
To do this, run the below commands. The below scrips does create a virtual directory /CertEnroll in IIS that maps to the CRL folder, and the second script, adjusts IIS request filtering so special characters in CRL filenames are allowed.
& C:\Windows\System32\inetsrv\AppCmd.exe add vdir /app.name:"Default Web Site/" /path:/CertEnroll /physicalPath:"C:\Windows\System32\CertSrv\CertEnroll

& C:\Windows\System32\inetsrv\AppCmd.exe set config "Default Web Site" /section:system.webServer/Security/requestFiltering -allowDoubleEscaping:True

Note 1: You must correct the above two scripts, if you are using a web server on a different machine, have different URL path(s) or have any other settings that deviate from default values.
Note 2: If you plan on using SystoLOCK outside your organizational network, be sure to make your CDPs accessible from the internet. This also concerns DNS names in CDP’s URLs.
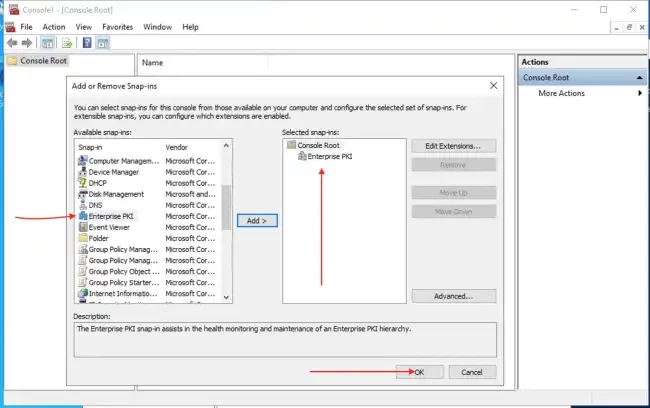
You can check to see if your CA setup is correct by firing up an empty MMC console and adding “Enterprise PKI” snap-in to it as shown below
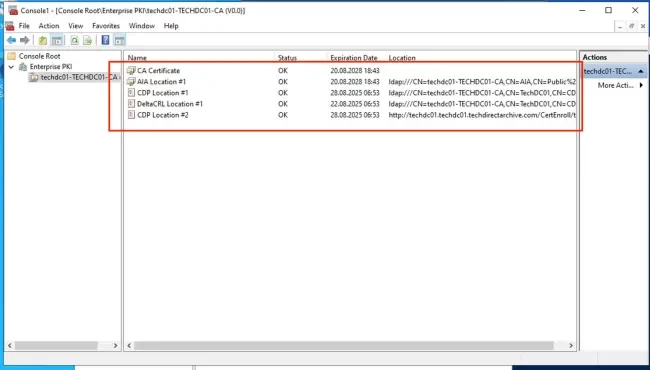
Your output should be similar to the following screenshot and should not include any warning or error signs:
Automatic Database Cleanup
Once SystoLOCK begins issuing certificates, the CA server stores them in its database, which can eventually consume significant disk space. To prevent storage issues, regularly clean up the CA database. Configure this process by creating a scheduled task on each CA server.
I will be creating the task directly on the CA server by running the following PowerShell script. This script register a recurring scheduled task that runs daily.
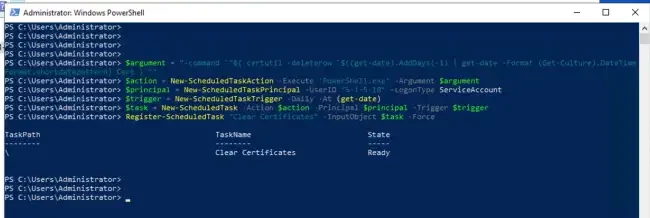
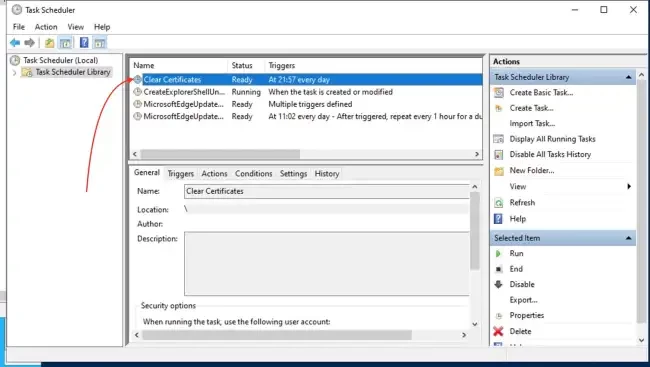
Below is the scheduled task created
Note: Alternatively, if you only want to clear expired certificates one time, and you don’t need to create a scheduled task. This command will delete all expired certificates from the CA database that are older than yesterday’s date. You can just run the cleanup command directly in PowerShell on your CA server. But, this is a manual process and not as effective as the scheduled task created above.
certutil -deleterow (Get-Date).AddDays(-1).ToString((Get-Culture).DateTimeFormat.ShortDatePattern) CertConfigure Domain Controller Certificate Templates
It is strongly recommended to replace the legacy Domain Controller and Domain Controller Authentication certificates on domain controllers with the modern Kerberos Authentication certificate template.
The Kerberos Authentication template is specifically designed for Active Directory domain controllers and includes the KDC Authentication extended key usage (EKU) in addition to Client Authentication and Server Authentication.
This ensures compatibility with current security best practices, supports secure Kerberos authentication (including smart card logon and PKINIT), and aligns with Microsoft’s deprecation of older domain controller certificate templates. Here is a tab that outlines the specific attributes of the Domain Controller Authentication and Kerberos Authentication templates:
| Domain Controller Authentication | Kerberos Authentication | |
| Key Usage | Client AuthenticationServer AuthenticationSmart Card Logon | Client AuthenticationServer AuthenticationSmart Card LogonKDC Authentication. |
| Subject Alternate Name | DNS Name : Domain Controller FQDN. | DNS Name : Domain FQDN.DNS Name : Domain NetBios name. |
Configure the Templates
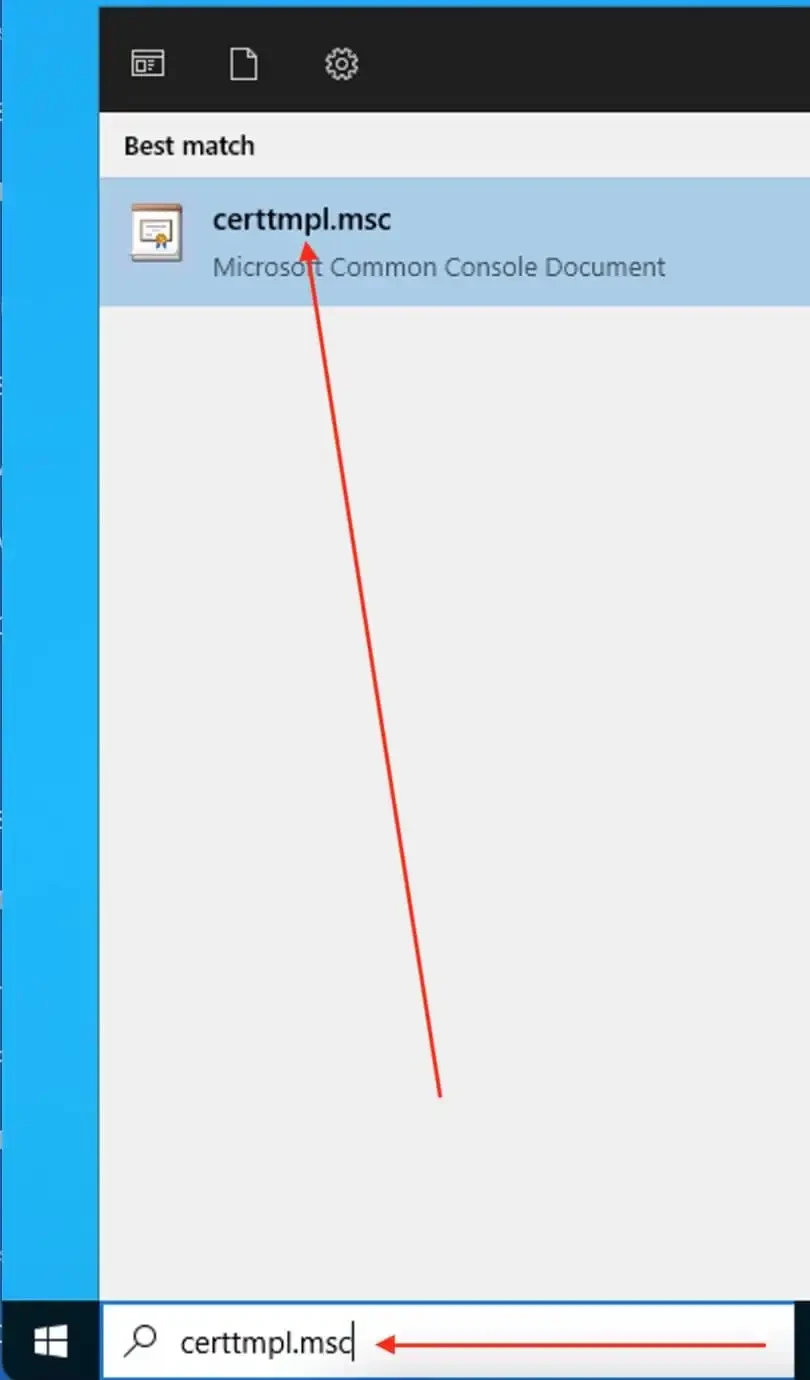
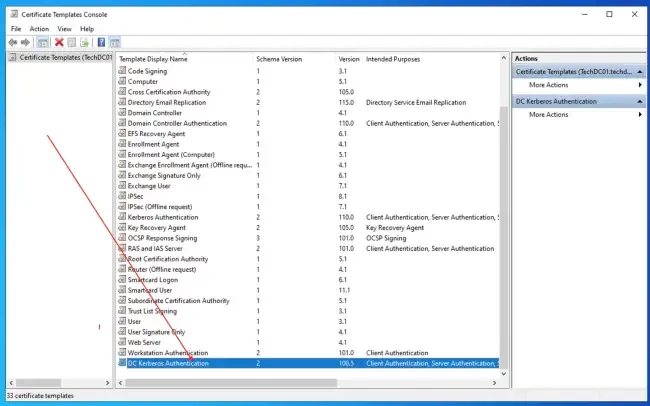
To Configure Domain Controller Certificate Templates, run certtmpl.msc to launch the Certificate Templates Console
Locate Kerberos Authentication in the list and right-click on it. Select Duplicate Template.

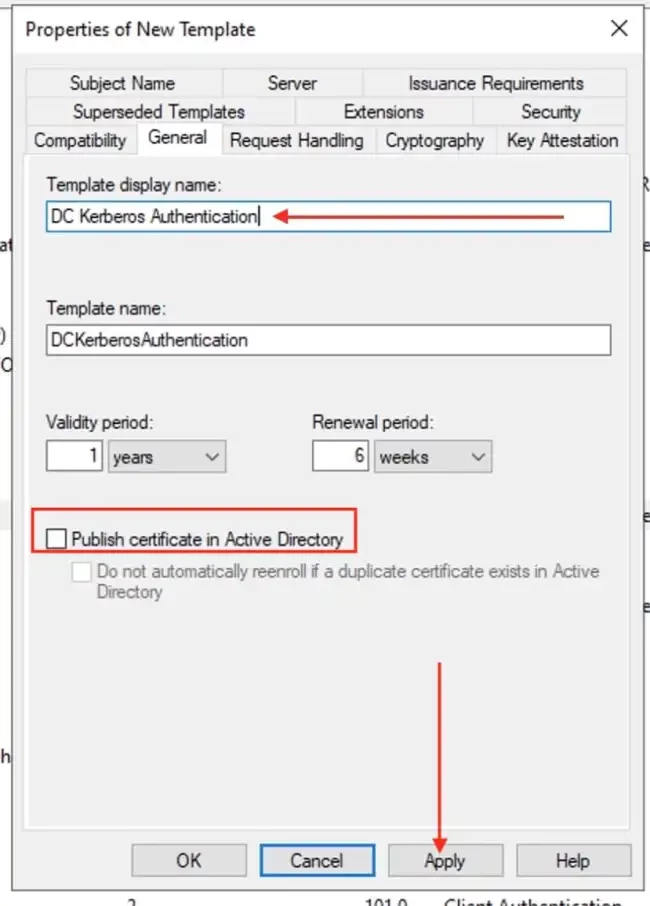
In the General tab, give it a meaningful name, In my case, I will be naming it as “DC Kerberos Authentication”.
Also, under General in the certificate template properties, you should select “Publish certificate in Active Directory” if the certificate is intended for domain controllers, users, or computers that need the certificate to be discoverable via AD.
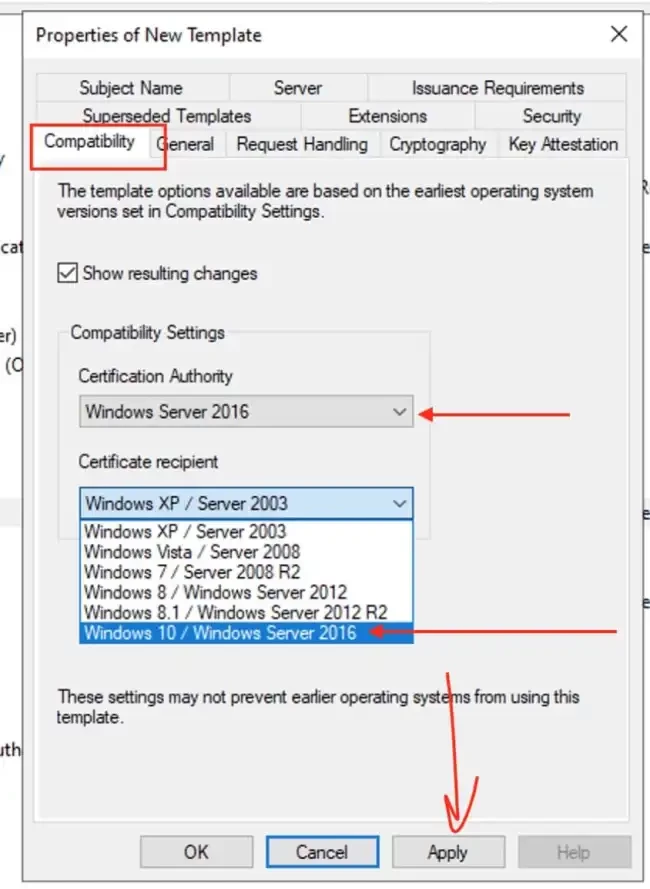
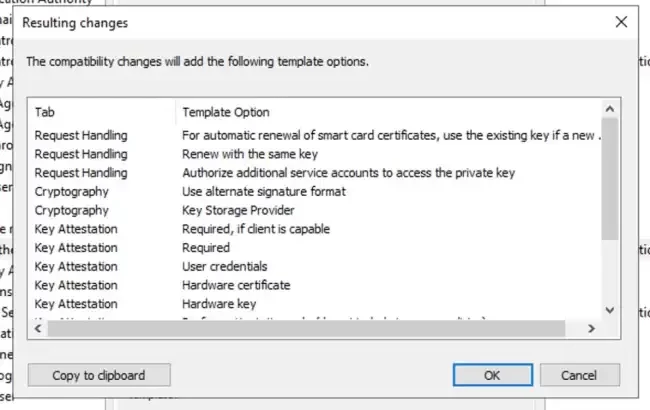
In Compatibility Tab, set the Certification Authority to at least Windows Server 2016. Also, for the Certificate Recipient, I will set this to Windows Server 2016 as this is the highest compatibility available.
Since my Domain Controllers (DCs) are running on Windows Server 2022. I will set the highest available compatibility level, which is Windows Server 2016, in the Kerberos Authentication certificate template. This ensures the certificates leverage the most recent cryptographic features and key usages supported by the template, even though the template cannot explicitly target Windows Server 2022.
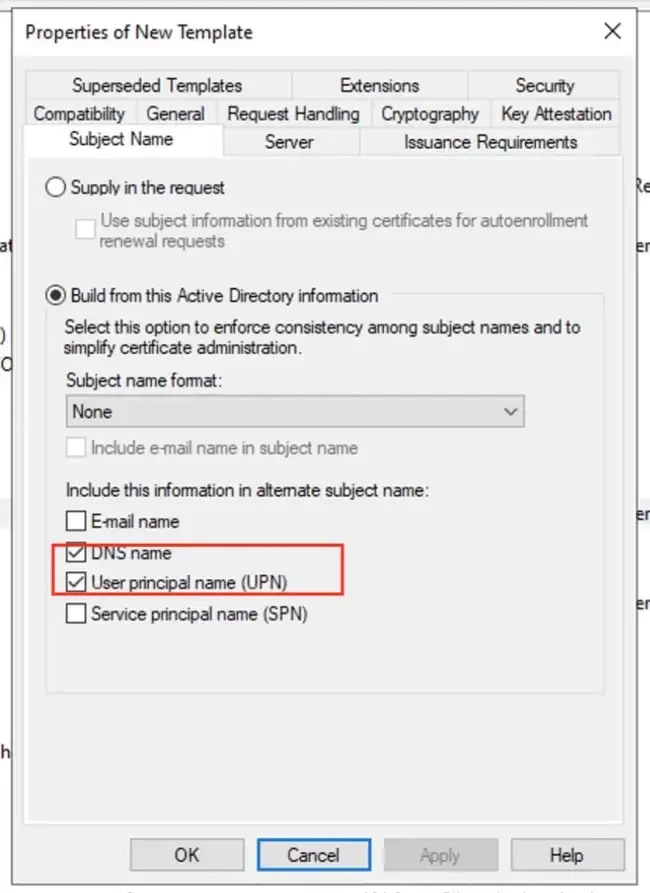
Under the Subject Name Tab, select Build from this Active Directory information. Check DNS name and User principal name (UPN). This ensures the certificate contains the proper Subject that maps to the DC account in Active Directory, which is required for Kerberos authentication.
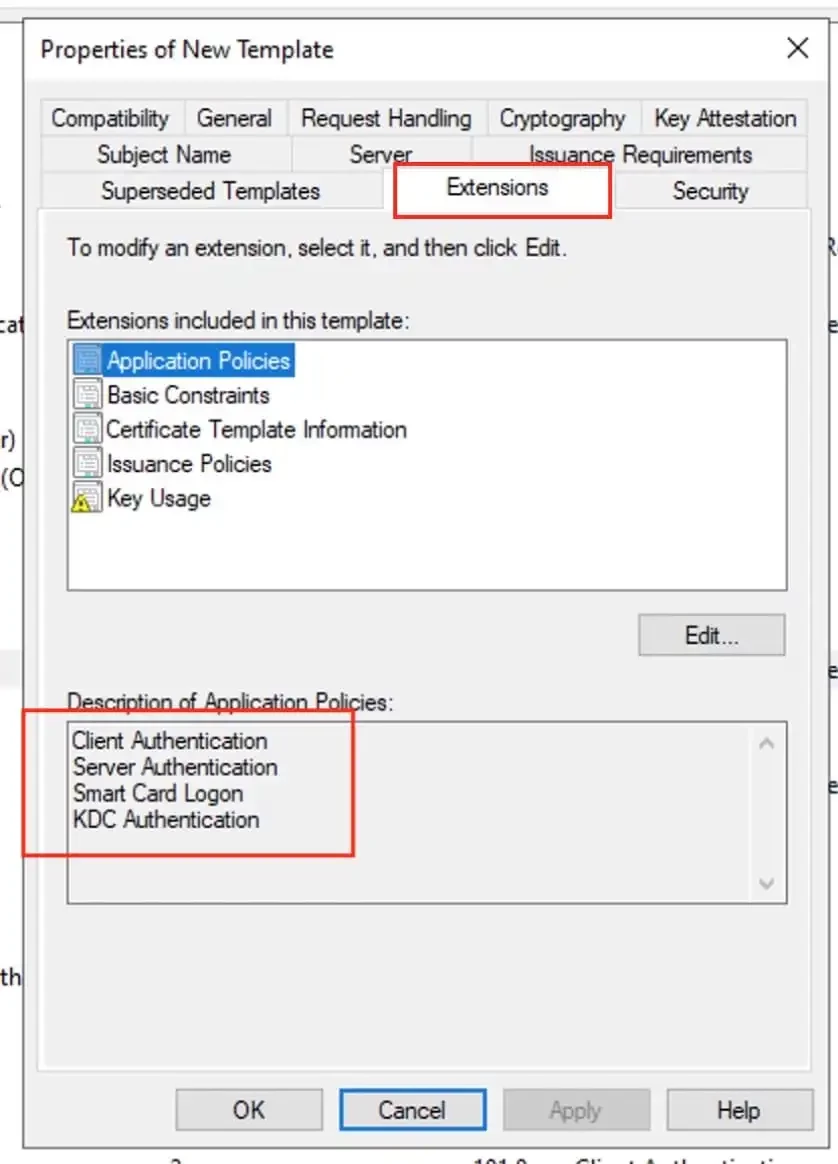
At the Extensions Tab, the “Application Policies” should include the below. If the “KDC Authentication” is missing, Kindly add it as it is required for Kerberos.
- Client Authentication
- Server Authentication
- Smart Card Logon, and
- KDC Authentication
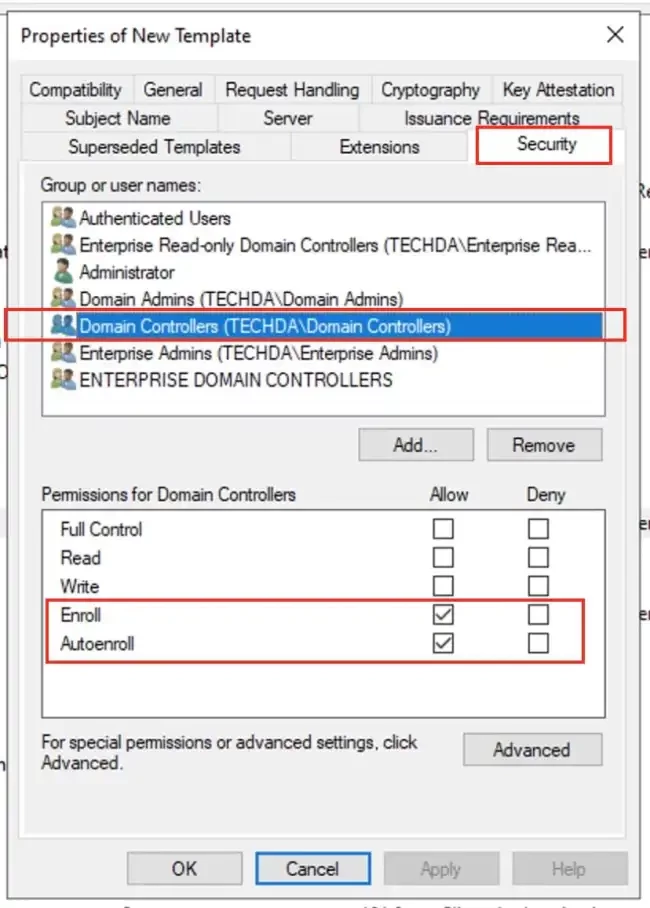
For the Security Tab section, ensure Domain Controllers group has the “Enroll”, and “Autoenroll”.
For the “Supersede Legacy Templates”. You can read more from this Microsoft Guide.
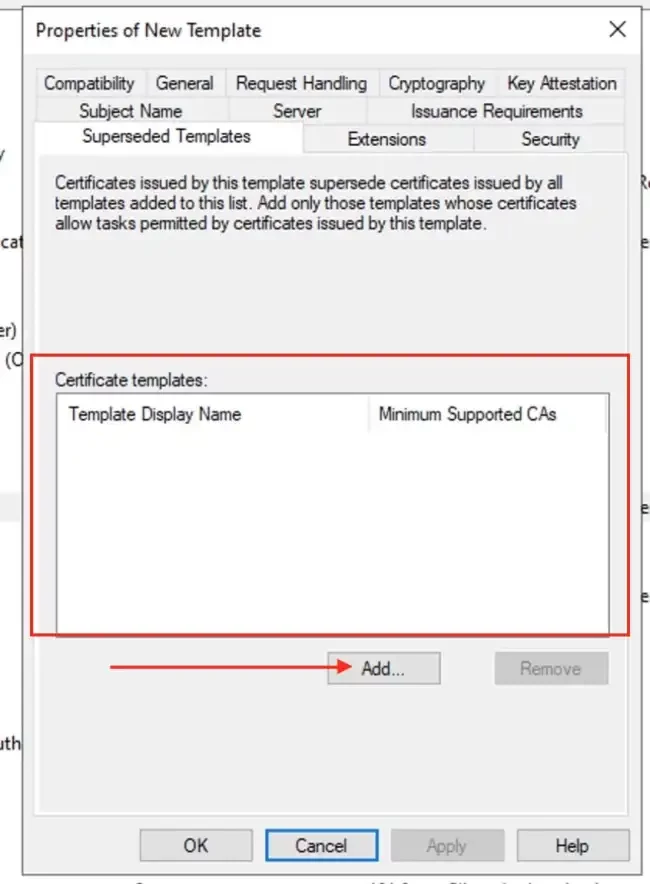
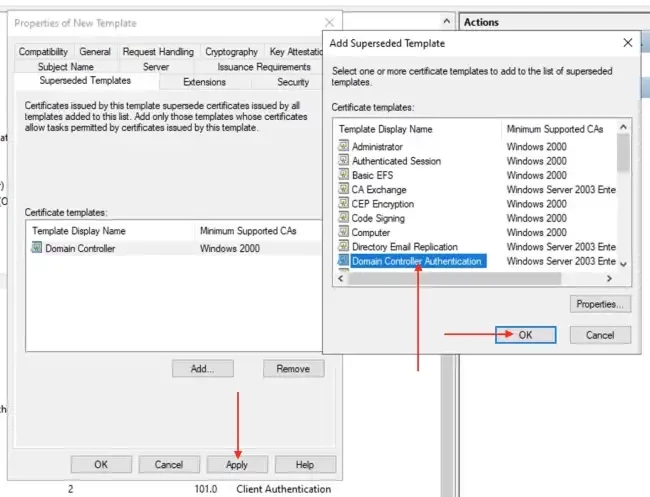
Navigate to the Superseded Templates tab, and add the following legacy templates: “Domain Controller”, and “Domain Controller Authentication”.
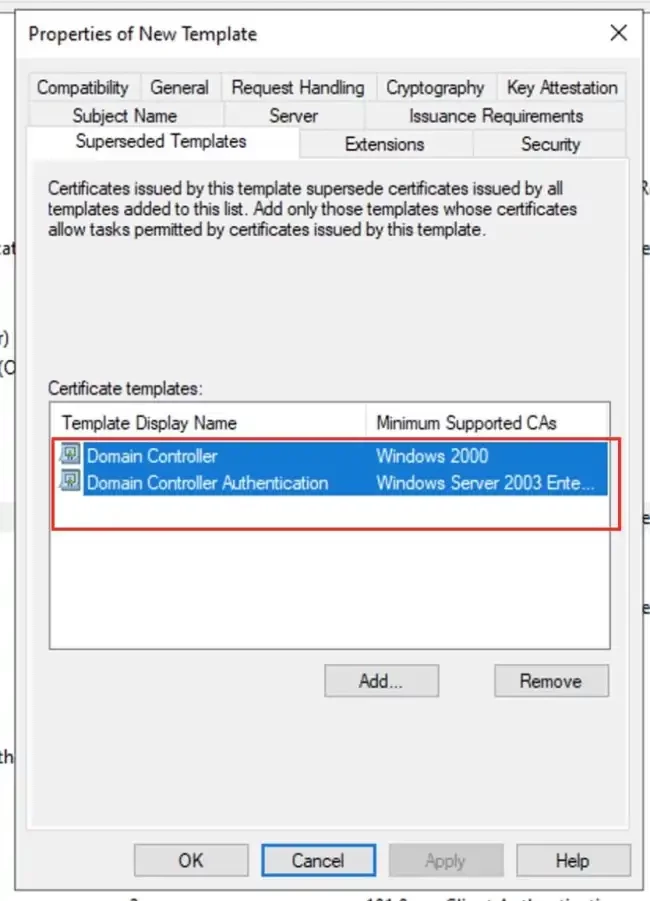
Below is the newly created template.
Publish the New Template
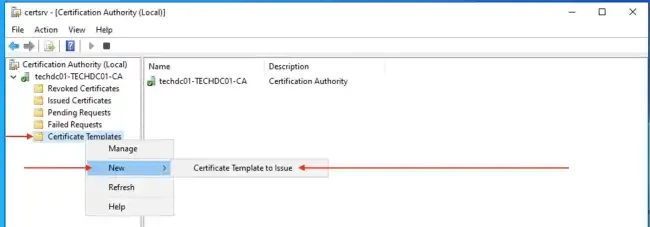
Launch the Certification Authority Console (certsrv.msc).
Right-click Certificate Templates and then on “New” and select “Certificate Template to Issue”
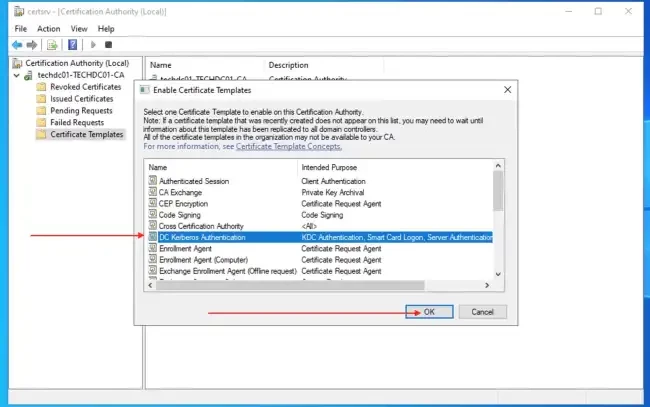
Select your new template (DC Kerberos Authentication).
Next, you will have to “Force Autoenrollment”, by running the command below.

To request a new cert, run the command below as well.
Verify Kerberos Authentication Certificate
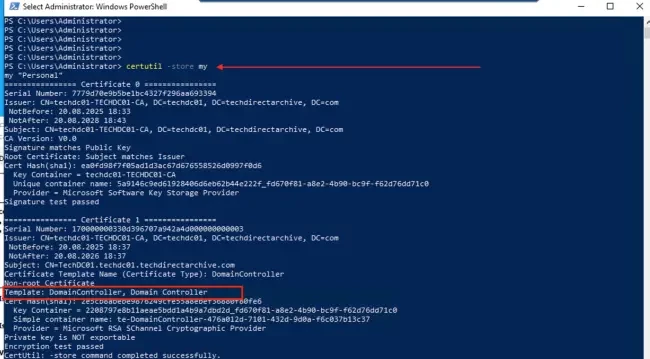
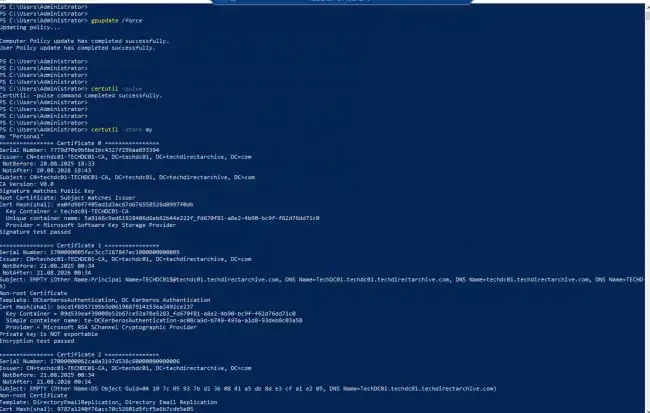
On the domain Controller, look for Kerberos Authentication certificate that has been issued. to do this, run the command below
This will access the Local Computer or Current User certificate store (by default, my = Personal store) as shown below. But as you can see, the Kerberos Authentication Cert is missing. Note that, this command will also lists all certificates in that store with the details below:
- Subject Name
- Issuer
- Validity period
- Thumbprint
- Serial number
- Enhanced Key Usage (EKU)
Even when you open the CA console or the MMC.exe console, the KDC Authentication will still be missing. As you can see, I have the right permissions in place and the template correctly duplicated and published. So I can ignore these and search for new reasons for this error.
Note: If this certificate was to be present, Kerberos authentication will use the new certificate and the old ones will phase out automatically since they’re superseded as configured above.
The Fix to a functional “Microsoft PKI (ADCS) for SystoLOCK Server”
Since the template is already published, cannot be republished and can not be seen under manage etc. Also, the CertificateServicesClient-AutoEnrollment was missing in Event Viewer. This could mean that, the autoenrollment feature is not enabled via Group Policy.
Enable Certificate Services Client – Auto-Enrollment
To remediate this, launch Group Policy and enable auto enrolment as shown below. Navigate to the path below.
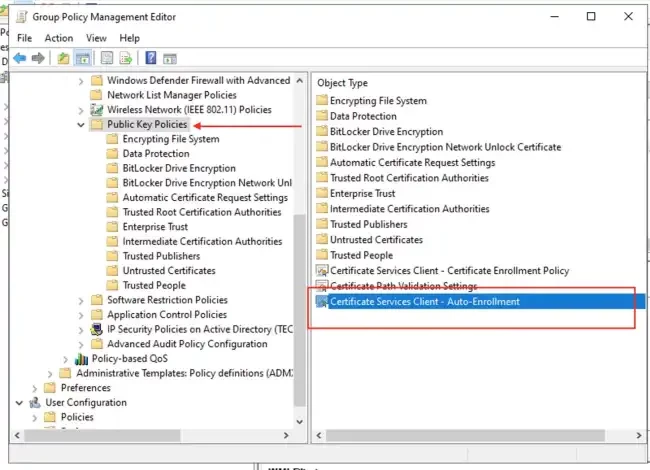
Double click on the policy “Certificate Services Client – Auto-Enrollment” and enable it. As you can see, it was not configured previously.
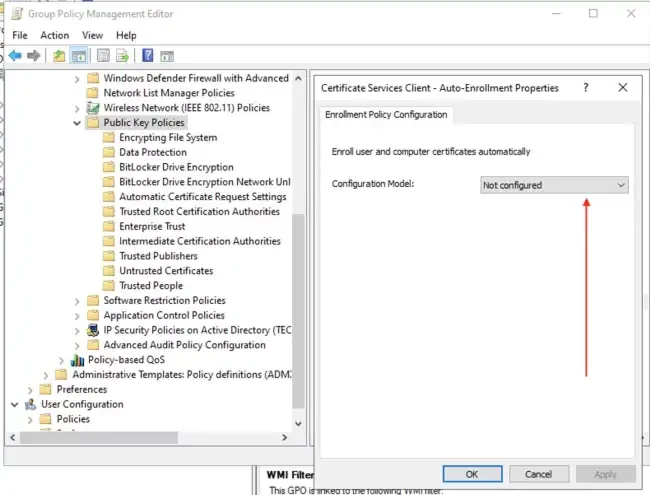
As you can se below, this policy has been enabled and I have set the checkboxes to “Renew expired certificates, update pending certificates, and remove revoked certificate”, and to “update certificates that use the certificate template”.
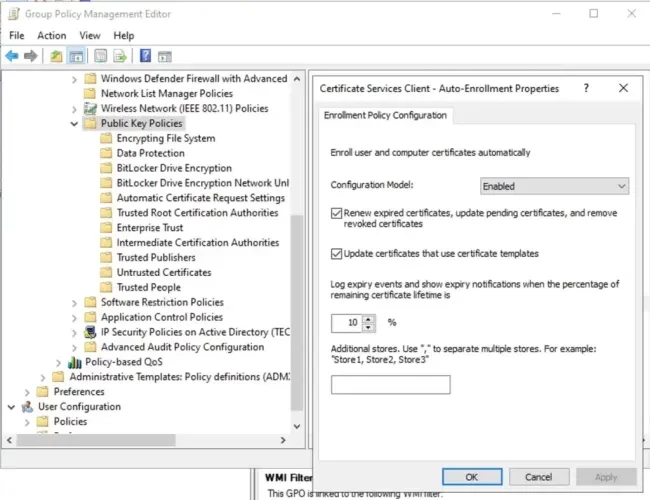
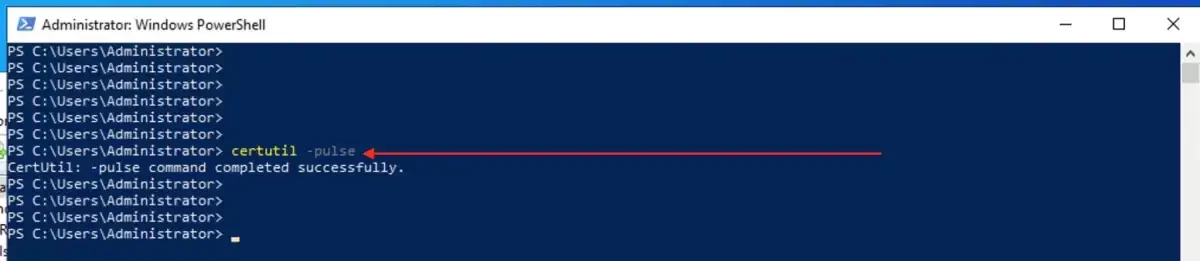
Note: Auto Enrollment only triggers after GPO applies and may require a reboot or gpupdate /force with certutil -pulse. These command will force auto enrolment. As you can see, my desired (DC Kerberos Authentication certificate) is now available.
Ensure the Kerberos Authentication template has KDC Authentication EKU and that the Domain Controllers have Enroll and the Autoenroll permission for this to work correctly.
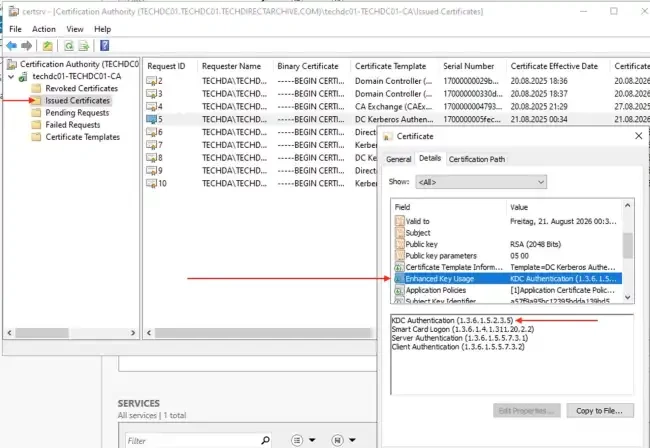
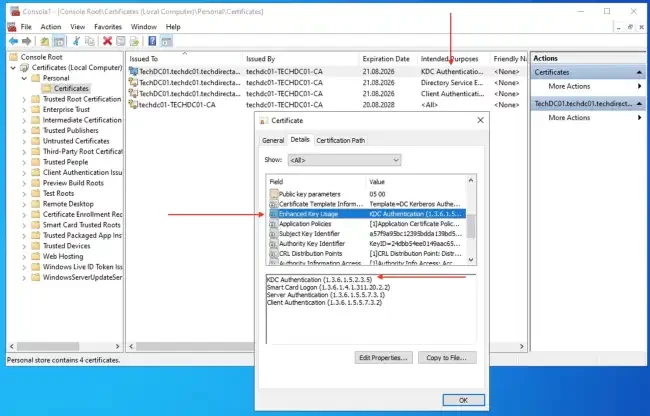
You can also check from the MMC Console or CA console as shown below. The issued certificate should include KDC Authentication, Client Authentication, and Server Authentication etc.
In the next post, I will show you how to protect your devices with SystoLOCK Passwordless Authentication now that I have my CA in place.