
I’ve been using Veeam with IBM storage snapshots for quite a while now, and it’s been excellent. The integration works smoothly and gives you a lot of flexibility in how you want to configure things. One option is to let Veeam handle the snapshot orchestration and leave snapshots behind for a set amount of time. The other is to use IBM’s Safeguarded Copy feature, which gives you immutable snapshots controlled directly by the SAN. Because this is policy based and includes SAN Replication Policies, I opted for this option to have my production data in a second site, with Safeguarded copies there as well.
Each snapshot can be browsed in Veeam, where you can see the virtual machines inside, and even use them for SureBackup jobs or lab environments that mirror production. Having snapshots that are only a few minutes behind production means your test or DEV environments are never out of sync. The ability to snapshot a PB of data ever hour is also quite impressive as a 1 hour backup window is not possible for everyone.
For most of my file servers, I treat it just like a regular Veeam restore. Click the VM, chose a file level restore, use the Veeam Explorer to find the file or folder, Compare with Production, and restore. When it’s on production Flash storage it’s very satisfying having everything work so fast.
When Dynamic Disks Complicate a Restore
Recently, I ran into an issue with a large server that had multiple VMDKs and SAN volumes. The restore failed in Veeam because the server used dynamic disks. Anyone who’s dealt with dynamic disks knows they can have quirks, since they rely on a disk group configuration that doesn’t always restore cleanly across systems.
That got me thinking about verifying that even if a restore had a problem, I could still get to the data quickly using my storage snapshots.
Creating a Thin Clone of the Volume Group
Since the volumes were part of a volume group, I started by creating a thin clone. This is basically a snapshot of a snapshot. It’s also another part of the Safeguarding. I can’t even mount a Safeguarded snapshot it’s so locked down. On the plus side, the thin clone is near instant, takes almost no extra space, and only uses storage for any changes made after creation. If I wanted to keep it around longer or separate it from the original snapshot, a full clone would make more sense.
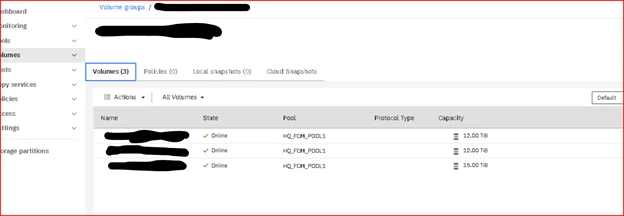
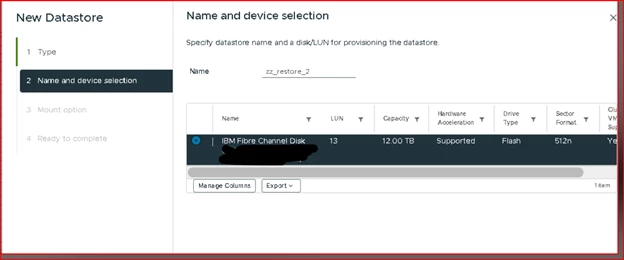
Because my hosts are connected over Fibre Channel, I mapped the cloned volumes back to the host cluster just like any other SAN volume. They showed up as 12 TB LUNs, even though they were barely using any space. After rescanning the storage, I could see the new volumes in vSphere.
I usually only map one at a time to avoid confusion, and I match them by volume UID between VMware and the SAN. For this test, I labeled them ZZ_Restore_1, ZZ_Restore_2, and ZZ_Restore_3.
Assigning a New VMFS Signature
Since these cloned volumes had VMFS file systems, VMware recognized them immediately. You can’t have two datastores with the same signature, so vSphere prompted me to assign new ones. That’s important! If you import the same signature into another VMware environment, it can cause serious issues.
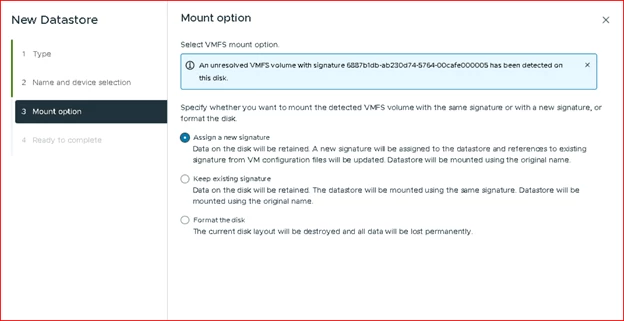
After assigning new signatures, VMware renamed the volumes with a snap-##### prefix in front of the original names.
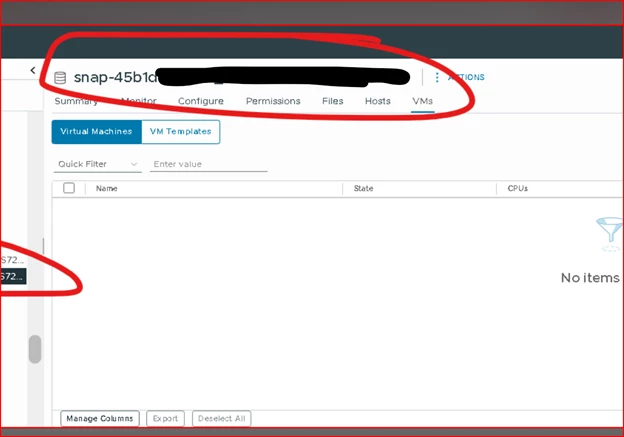
I could browse the datastore and see all the VM files and VMDKs letting me know the data is there.
Mounting the Disks to a Test VM
In this case, I didn’t want to power on the VM because that would cause duplicate IP conflicts. I just needed to grab some files. So instead of restoring the whole thing, I mounted the VMDKs directly to a test VM I had sitting around.
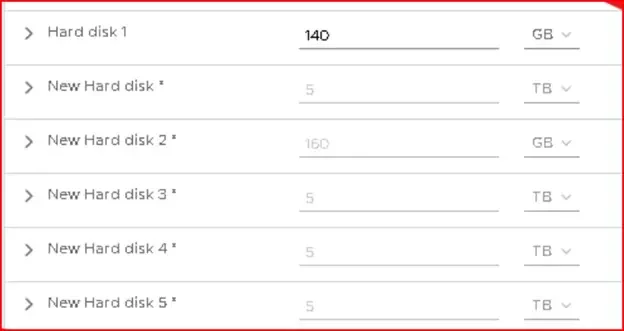
In the test VM settings, I added a new device and selected ‘Existing Hard Disk,” then pointed it to the cloned datastore and the VMDK I wanted to access. If the original VM used spanned or striped dynamic volumes, it’s important to attach all related disks or Windows won’t recognize the set.
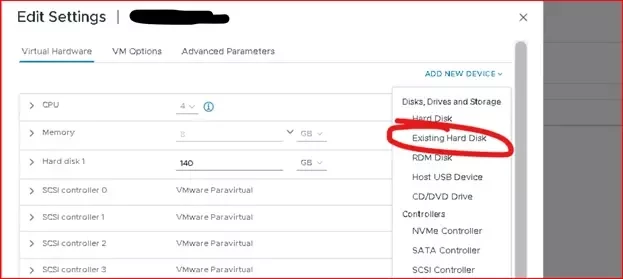
Depending on how many disks you have on the previous server, it is critical to add them all depending on the configuration. In this case, they were spanned so it won’t work if there is missing drives.
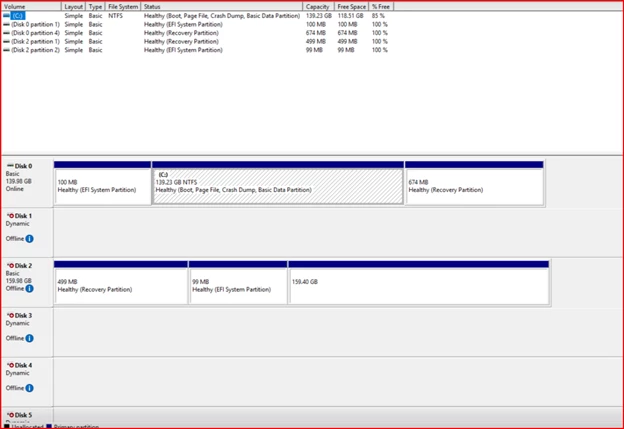
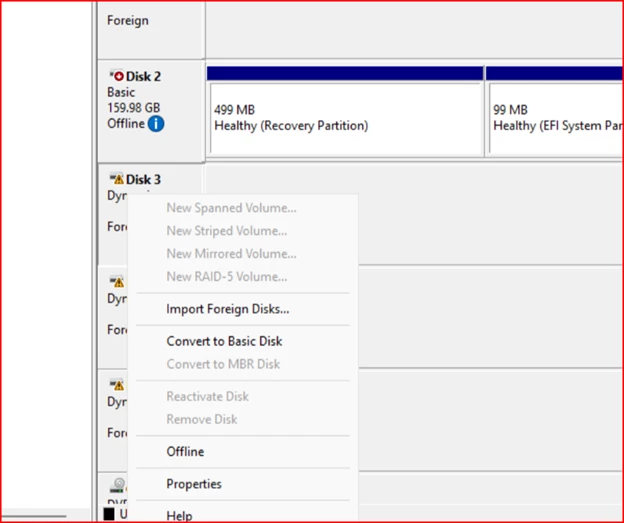
Once the disks were attached, I opened Disk Management inside the test VM, did a rescan, and saw the drives listed as offline. I brought them online (except the old system drive) and got a prompt that the disks were part of a foreign configuration.
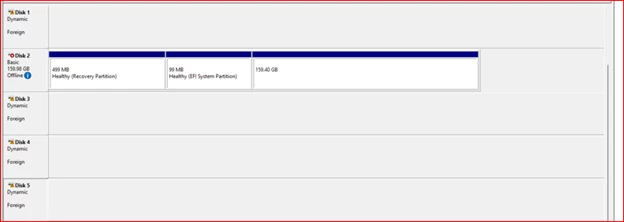
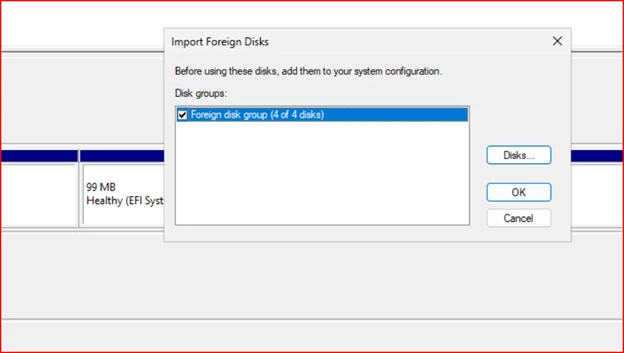
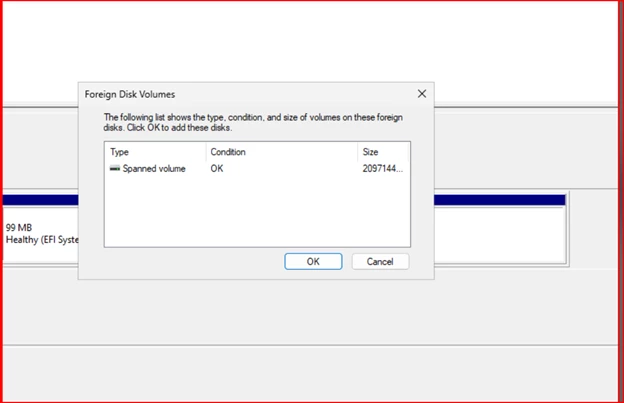
Right-clicking and selecting Import Foreign Disks brought the spanned volume online immediately. Windows recognized the full volume group and all my files were accessible again, complete with NTFS permissions.
Windows will let you know if you are missing and of the disks. It’s also smart enough to see if it’s a span, stripe, or other type of config on the drives.
Back Online in Minutes
At that point, I could have shared the volume, pointed DFS to it, and had a 20TB file server fully restored. The same goes for data migrations, there is no faster way to seed your data. Using Veeam to restore the volume to seed it is a great option as well, but this saves having to transfer anything from my backup storage to my production environment. In my case, I just needed to copy the data back to the original server. The whole process took about 15 minutes to get a 20 TB file server accessible again including NTFS permissions. Compared to waiting for a full restore, this was a huge time saver.
When I was done, I deleted the volumes from the test VM and unmapped them from the host. The end user had their files back quickly, and I had another solid proof point of how useful storage snapshots can be.
Final Thoughts
Storage snapshots are a very powerful tool, especially when they’re integrated with Veeam. With features like immutability built right into the storage layer and deep snapshot integration, there’s no reason not to take advantage of them.
I manage hundreds of terabytes with snapshots being taken every hour. There is no performance impact and they are a great tool utilizing immutability with long-term retention policies. Between Veeam and the SAN, I can restore files, application items, or full VMs directly from those snapshots whenever I need to.
I’ll post more soon about how I’m using Veeam and storage snapshots for Test environments, malware scanning, and restores.