As the proverb says, "A script a week keeps the doctor away". This week, we'll turn our attention to the Veeam Data Integration API. The idea for the script was to program a kind of SecureRestore for Linux VMs. There are many blog posts about the Data Integration API together with Linux, but nowhere could I find a script that covers the following requirement:
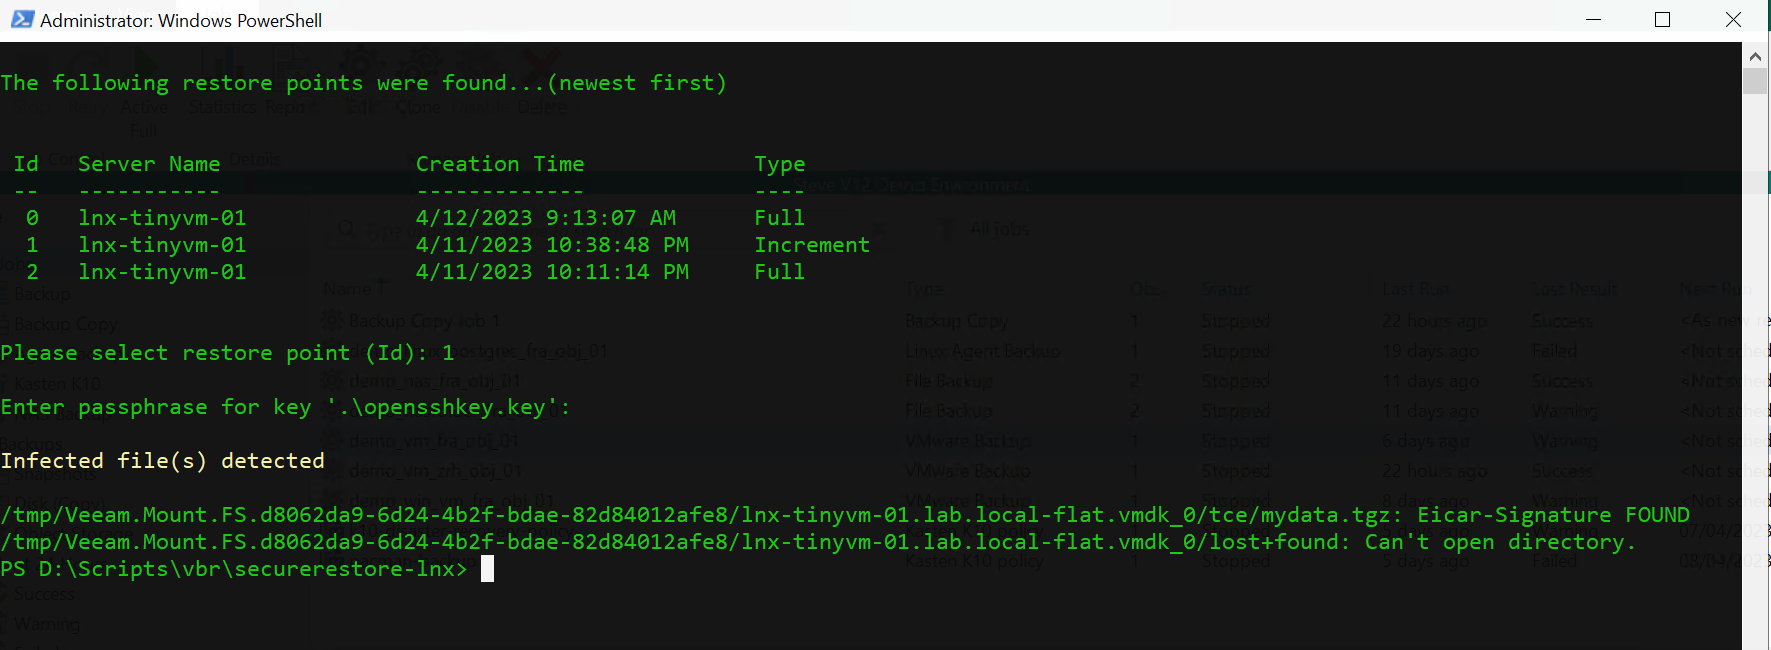
Restore a Linux VM with prior AVscan. Abort the process if a virus is found, otherwise do the restore
Let's start…
Prerequisites
- Install the latest Win OpenSSH package on the host where the script will be used Win32-OpenSSH
- Generate a public/private key pair using PuTTYgen
- A Linux server with ClamAV installed (I used Ubuntu 22.04 LTS)
- Add the Linux server to Veeam Backup & Replication using the generated key: Add Linux Server
- A Backup Job protecting the Linux VM as well as a restore point (the script uses the latest for the Restore)
How to install ClamAV
A quick guide to install ClamAV on the Ubuntu server
Upgrade your package list
sudo apt-get updateInstall ClamAV
sudo apt-get install clamav clamav-daemon -yAfter the installation is done , ensure your ClamAV virus signatures are up to date.
Stop the ClamAV daemon
sudo systemctl stop clamav-freshclamManually update the ClamAV signature database
sudo freshclamRestart the service to update the database in the background
sudo systemctl start clamav-freshclam
Using PuTTYgen on Windows to generate SSH key pairs
Quick guide on creating a new key pair for authentication.
Download PuTTYgen You can also find the binary in your Veeam Backup & Replication Installation, typically C:\Program Files\Veeam\Backup and Replication\Console\PUTTY\
Start PuTTYgen
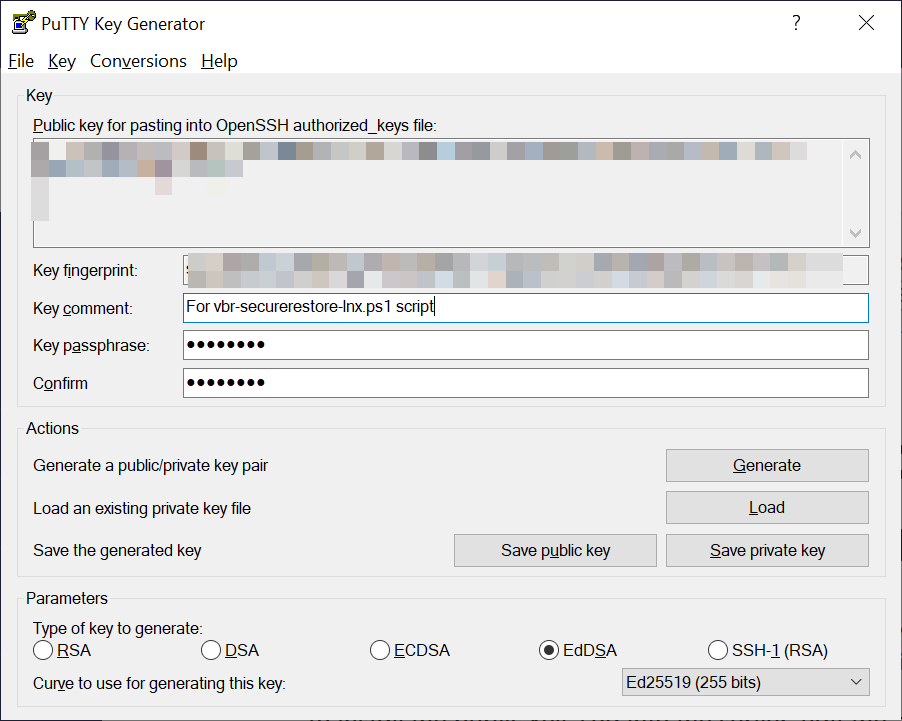
To create a new key pair, select the type of key to generate from the bottom of the screen
Select EdDSA and Ed25519 (255 bits) in the drop down menu

Then click the Generate button, and start moving the mouse within the window.
When done, the public key should appear in the window. You can now specify a passphrase for the key. I strongly recommend using a passphrase for private key files that are intended for interactive use.
Click on Save private key. This .ppk file/key can later be used to add the server to Veeam Backup and Replication.
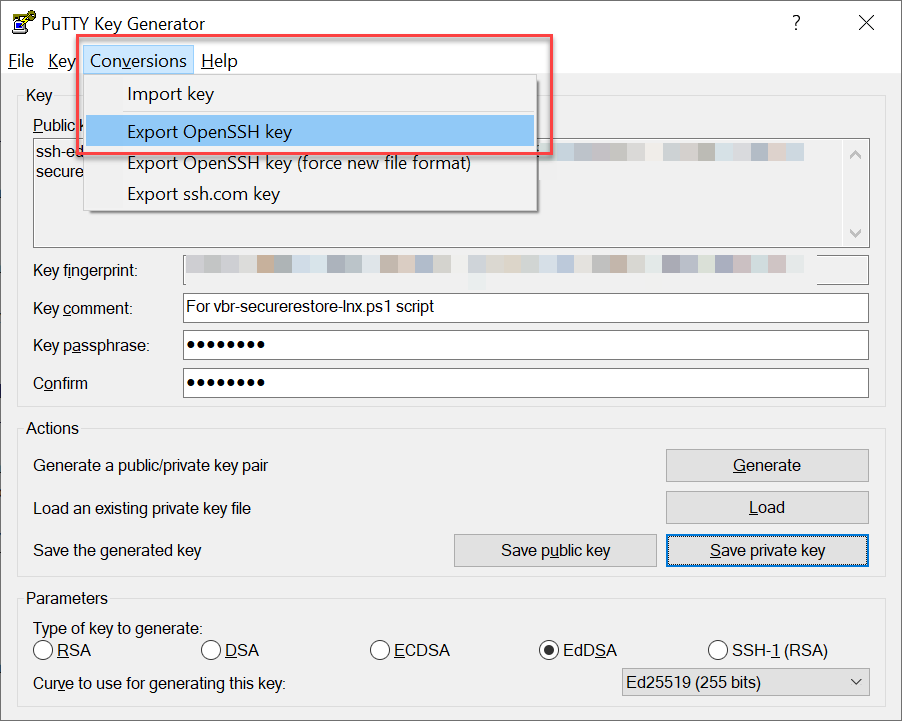
For the script we need to convert the key into the OpenSSH format. Click on Conversions in the menu and then Export OpenSSH key.
Now we copy the public key from the window. This key will be added to the ~/.ssh/authorized_keys file on the Ubuntu server. (~ is the home directory of the user).
To install the public key, log into the Ubuntu server, edit the authorized_keys file with your favorite editor, and copy-and-paste the public key to the authorized_keys file. Save the file.
Test Login using OpenSSH Key
Open a Windows Powershell as Administrator and execute the command as shown in the example below.
ssh <your user>@<your ubuntu server> -i <path to your OpenSSH key> "linux command"Example:
ssh user@ubuntusrv -i .\opensshkey.key "uname -a"Most probably you get this error message:

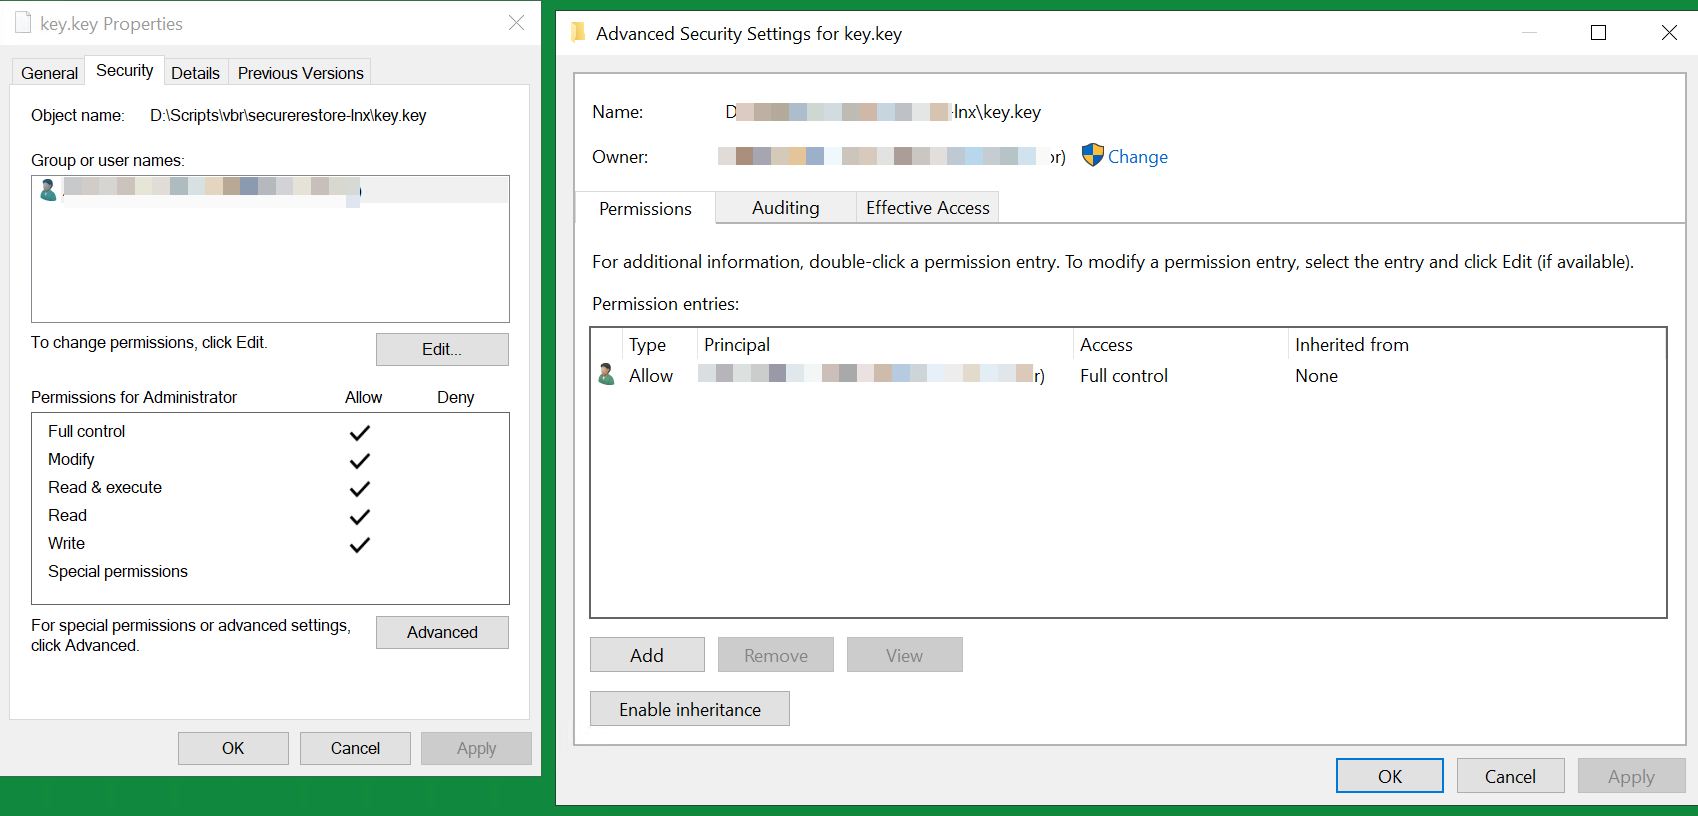
Locate the key file in Windows Explorer, right-click on it then select "Properties". Navigate to the "Security" tab and click "Advanced".
Change the owner to you, disable inheritance and delete all permissions. Then grant yourself "Full control" and save the permissions. Now SSH won't complain about file permission too open anymore. It should look like this:
Let’s try again
ssh user@ubuntusrv -i .\opensshkey.key "uname -a"The output should look like this

The Script
Now you can download the Powershell script from GitHub: vbr-securerestore-lnx
The script needs some parameters to be executed:
| -Mounthost | Ubuntu Server with ClamAV installed. Important: Server needs to be added to Veeam Backup & Replication |
| -Scanhost | The Linux VM to be scanned/restored |
| -Jobname | The Backup Job which backs up the VM |
| -Keyfile | Path to the key file (OpenSSH) |
| -Restore | Optional - If no virus is found, a restore will be executed |
Example (without restore):
.\vbr-securerestore-lnx.ps1 -Mounthost ubuntusrv01 -Scanhost lnxvm01 -Jobname demo_vm -Keyfile .\key.keyNote: Line 48 in the code only print outs the command for starting the restore process. You wonder why? Well, with the command example, the virtual machine would be overwritten without confirmation! So think twice!
Happy Scanning!📡