

Out-of-the-Box Immutability (Ootbi) is a purpose-built backup storage appliance developed by the founders of Veeam, specifically for Veeam!
OOTBI delivers secure, simple, and powerful on-premises backup storage without requiring any security expertise.
It will interest you to know that we have discussed extensively the steps to set up, configure and integrate OOTBI with Veeam. Please refer to the following links on the steps to set up and configure a physical appliance.
If you're unable to test or purchase the physical appliance, you can still explore OOTBI using the virtual Storage Appliance (vSA) in a virtual environment, as demonstrated in this guide. If you have access to a vSphere environment, follow the steps below to set it up in your lab
In this guide, I’ll show you how to deploy the VSA in a Proxmox VE environment. Additionally, here’s a complementary resource showcasing Veeam Hardened Repository (VHR) installed and configured on Proxmox VE.
Note: Because you cannot run a Type 2 hypervisor when you have Credential Guard enabled, due to the following issue: “see how to fix VMware Workstation and Credential Guard are not compatible“. This indirectly enables Hyper-V.
Also, this is applicable if you have a Hyper-V-only environment. This is because Hyper-V is a Type 1 hypervisor and takes exclusive control of virtualisation extensions (VT-x/AMD-V), which prevents Type 2 hypervisors (like VirtualBox or VMware Workstation) from accessing hardware virtualisation directly. Because of this, I will be showing you the steps to run OOTBI on Proxmox-VE.
If you would like to test the VSA without any of these environments, you can run it on VMware Workstation.
But Proxmox VE does not natively support direct OVA/OVF imports. You can work around this limitation by converting the files into a compatible format.
OOTBI virtual Storage Appliance Download
You can download the OOTBI virtual Storage Appliance from this URL. If you would like to test, you can contact the sales team and request a “VSA multi-node license“.
Import OVA into Proxmox
Let’s connect to Proxmox over the terminal. Since I am using a Mac PC. I will open iTerms and connect using SSH
ssh root@<Proxmox-IP>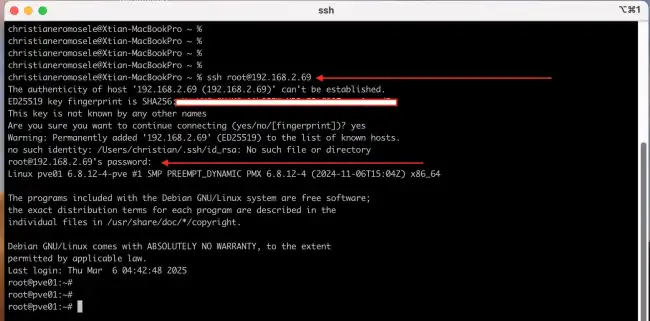
Proxmox’s web GUI does not currently support uploading OVA files directly to the template folder. The upload option is greyed out due to the wrong extension. Also, you cannot upload the OVA file to Proxmox’s local storage through the GUI.
To proceed, locate the OVA file path. On macOS, you can quickly get the full file path of your OVA file on your desktop using the method below. Open Terminal (Cmd + Space, then type Terminal). Drag and drop the OVA file into the Terminal window. This will automatically paste the full path. Next, upload the OVA File to Proxmox using SCP as shown below.
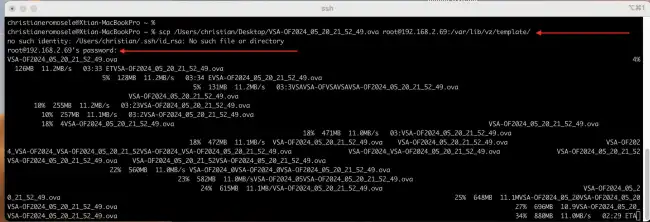
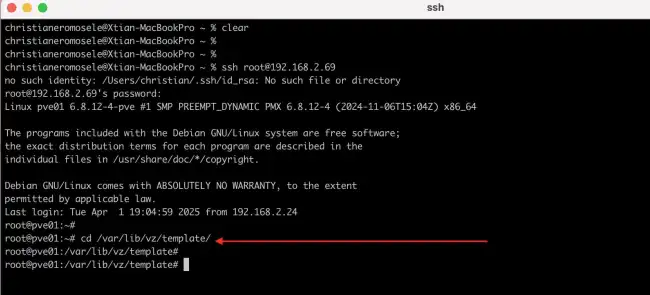
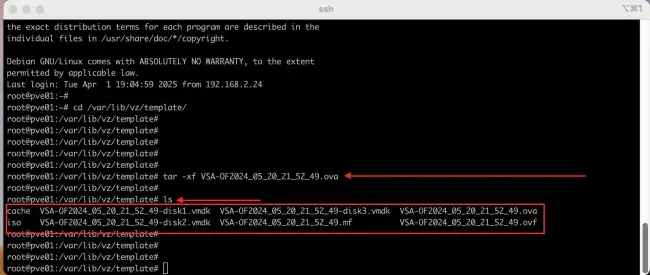
Navigate to the directory where you copied the OVA file
Extract the OVA file using the tar command. Replace ova_file.ova with the actual filename of your OVA file
tar -xf VSA-OF2024_05_20_21_52_49.ovaOnce the extraction is complete, you should have several files. This includes a disk image file. (Here I got this in VMDK format. These represent the virtual machine’s hard drives that will be converted for use in Proxmox.
Note: We have an OVF package extracted from an OVA file, which includes:
- OVF descriptor (
.ovf) - Manifest file (
.mf) - Virtual disks (
.vmdk)
Next, we will have to convert VHDX to Proxmox-Compatible Format
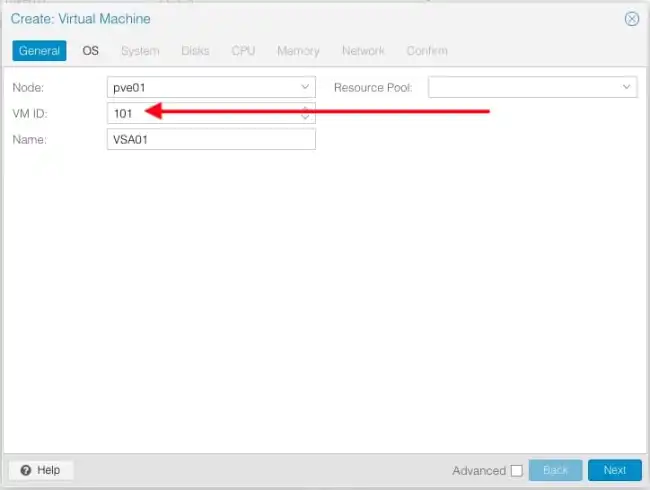
We have to convert this into Proxmox-compatible format (QCOW2 or RAW). But QCOW2 in my case, using qemu-img. Before proceeding with this step, we have to create a Virtual Machine on Proxmox.

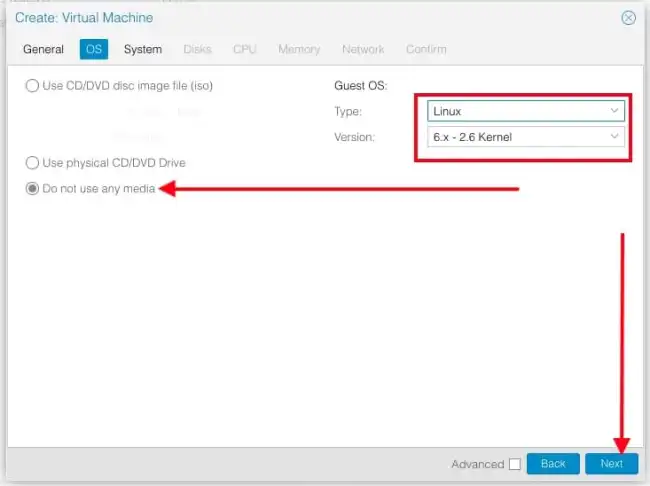
For the OS type, choose the correct OS type (or “Do not use any media”)
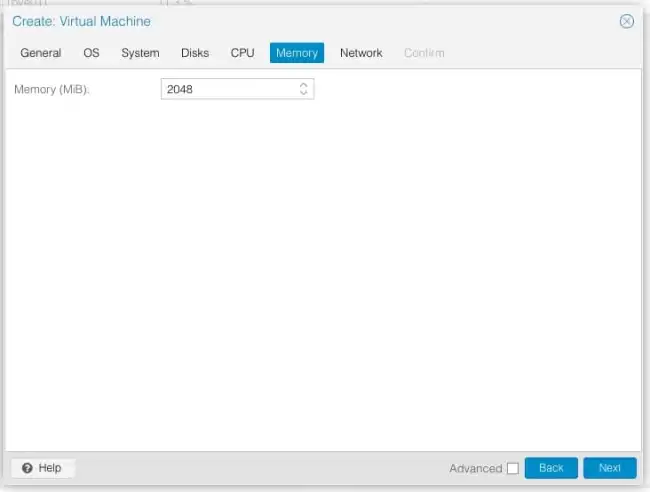
Ensure all necessary VM parameters are set under the system section as shown below. This includes an EFI disk to prevent boot-related warnings on the cluster disk.
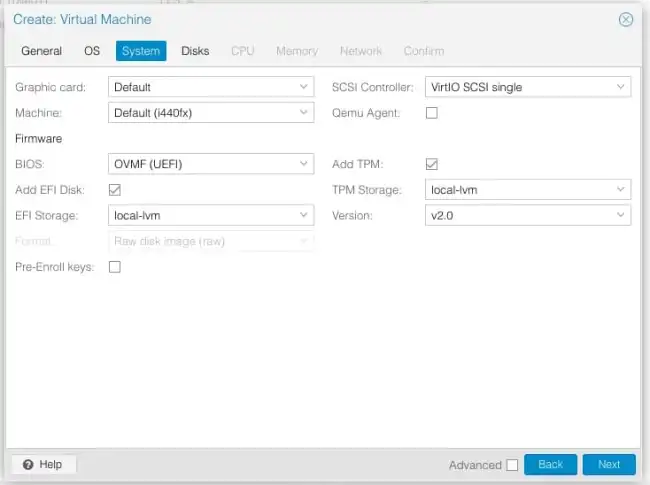
Set to BIOS or UEFI, depending on the appliance’s requirements.
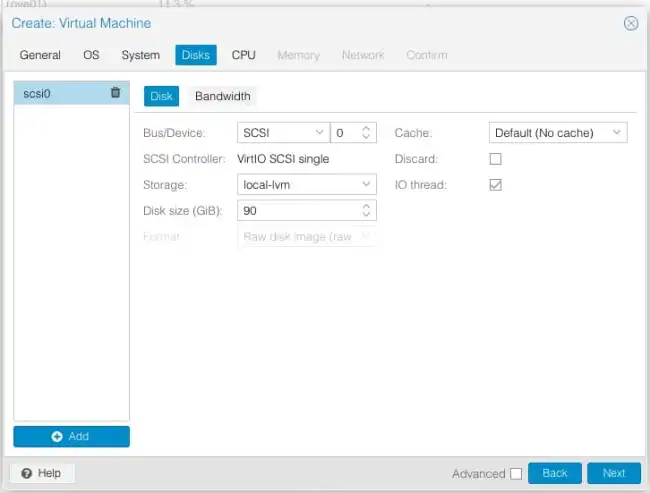
Configure the VM with 2 CPU sockets, 2 cores per socket, and enable the x86-64-v2-AES CPU type for optimal compatibility and performance.

Remember to change the model to vmxnet3, else it will not work. The vmxnet3 is another paravirtualized device, which should only be used when importing a VM from another hypervisor
Convert and move manually (QCOW2 Format)
To manually convert and move a QCOW2 disk, use qemu-img convert to convert the image. To do this, run the following commands one by one

The command mkdir -p /var/lib/vz/images/101/ creates the directory path /var/lib/vz/images/101/, including any necessary parent directories, if they don’t already exist.
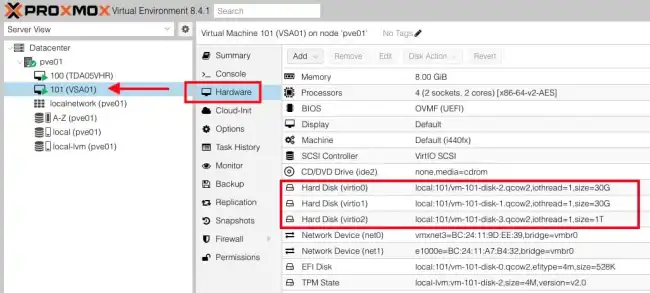
Attach the Converted QCOW2 Disks in Proxmox
After converting your virtual disks to the QCOW2 format, follow these steps in the Proxmox Web UI to attach and boot from them:
To do this, navigate to your VM, and then Hardware and click on Add. Choose Existing Disk, and select the converted QCOW2 file from the correct storage location. Use the VirtIO SCS interface for optimal performance
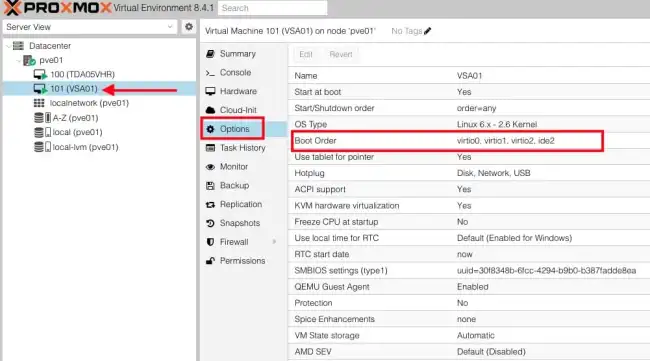
Set the boot order in VM by navigating to options and then Boot Order.
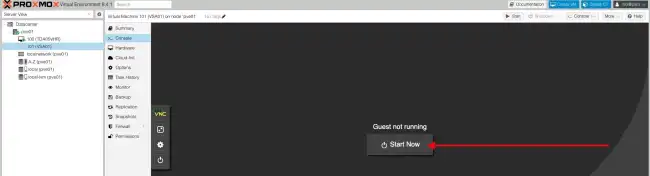
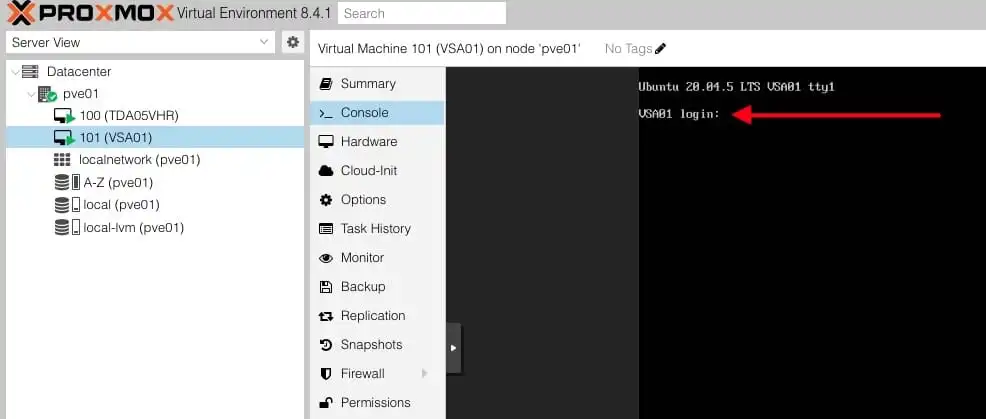
Let’s start the VM.
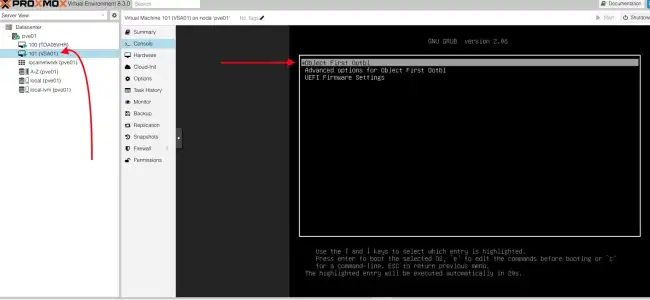
When this is done, you will have to select “ObjectFirst OOTBI from the GNU GRUB bootloader menu as shown below.
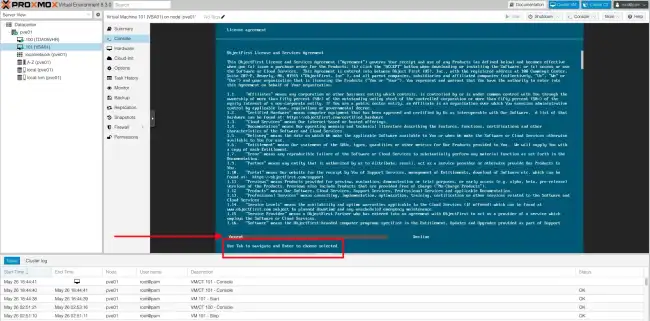
Accept the license agreement when prompted
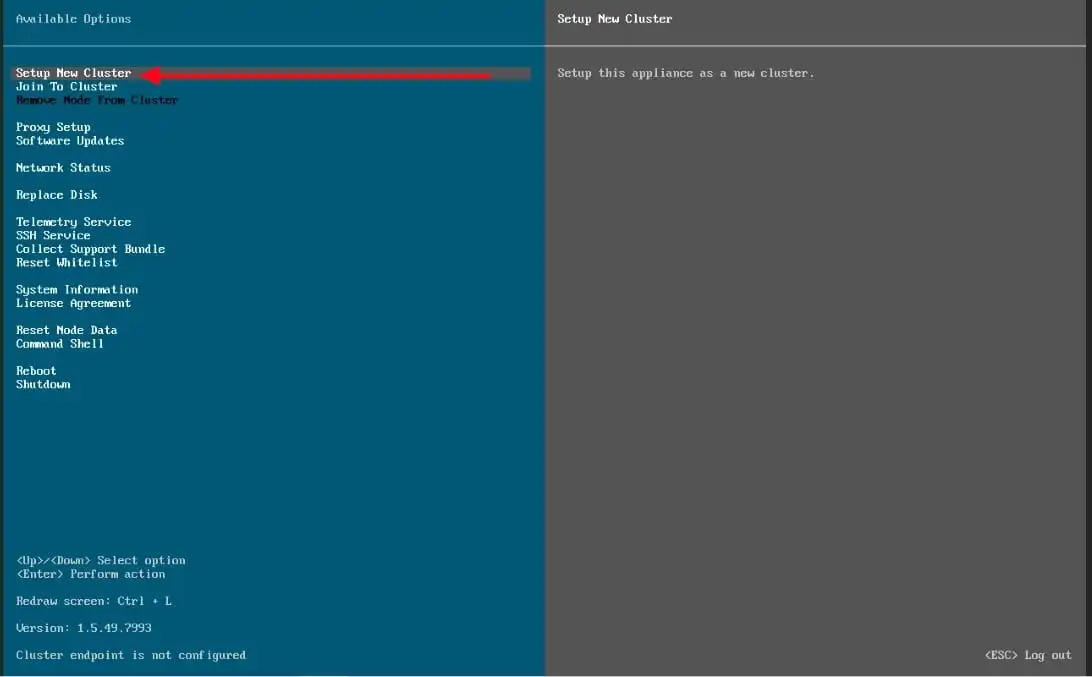
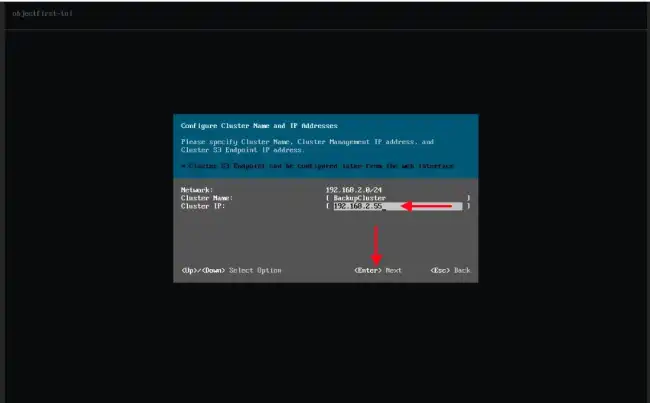
To set up a cluster, please select “Setup New Cluster”.
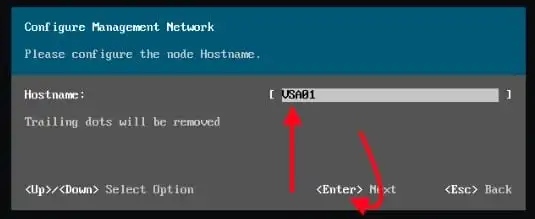
Configure the network interface(s), and then enter the host name and hit Enter to proceed
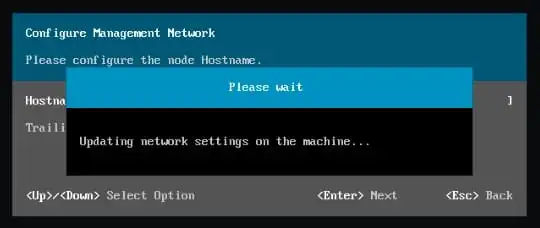
The network settings is currently being updated
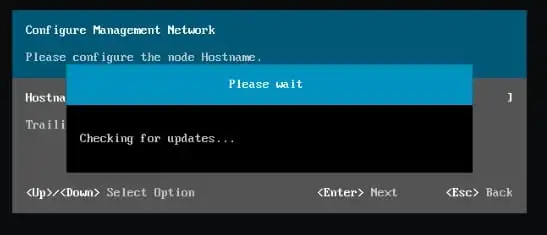
Currently checking for updates.
Next, proceed with the Cluster IP configuration as shown below
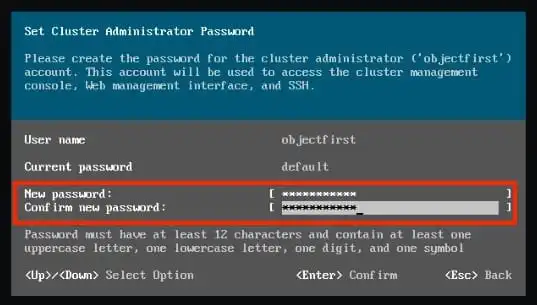
Set the Cluster Administrator password as shown below. Upon configuration, this password will be required to access the Objectfirst-TUI
Note: The cluster management IP address will be used to access the Cluster Web Console for management and monitoring. The IP address of each node could also be used to access the cluster management console. Press Enter to proceed.
As you can see, the cluster has been created successfully. Click on Enter to proceed

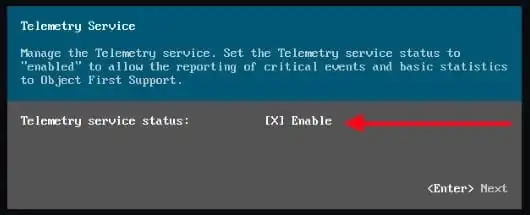
You can enable Telemetry if you wish. In a production environment, this will be vital and will notify support in case of any issues. This enables Object First to react effectively in case of hardware failure, etc.
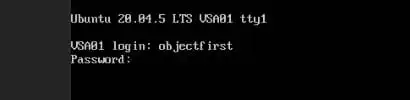
When completed, hit the ESC button to log out. Now, you will be prompted to sign in as shown below
Henceforth, you will need the cluster credential for the Ootbi user that were specified during the setup process to access the TUI.
Access Cluster Endpoint (Web UI Address)
The cluster management console can be accessed using the IP address and credentials we have specified and this step completes the steps to configure Object First OOTBI Appliance.
Your browser is displaying a security warning because the connection isn’t private. Click ‘Advanced’ to view the certificate details or continue to the site because I trust it.
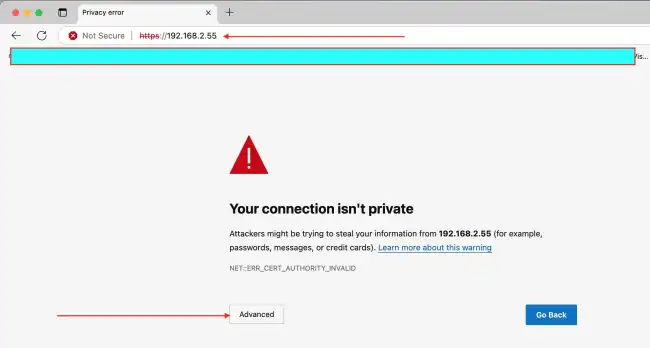
Click “continue to (unsafe) to access the cluster management console.

Integrate OOTBI with VBR
Here is a blog post on “how to integrate ObjectFirst OOTBI Appliance with VBR“. In this blog post, I explain why you should consider purchasing an OOTBI appliance. I walk through the steps to create an S3 key and bucket on OOTBI, and I demonstrate how to integrate the appliance with Veeam Backup & Replication (VBR). If you would also like to take a look at the original blog post, please take a look “how to set up the OOTBI Virtual Appliance on Proxmox VE”
