It is worth noting that Object First Out-of-the-Box Immutability (OOTBI) provides true data immutability and is very simple to deploy, as we will see shortly and addresses the issue of slow recovery times that can make ransomware attacks damaging to operations and reputation.
I will recommend deploying an OOTBI appliance due to the pervasive nature of cyber-attacks on data protection infrastructure (backup). With OOTBI, you will achieve efficient data recovery, a user-friendly and cost-effective solution that can effectively stop ransomware attacks. As you all know, this storage solution was purposely built for Veeam.
Before using this guide, read the following articles below
Please follow the steps below to integrate Object First OOTBI with VBR. You may want to take a look at the original blog post for more information.
Create an S3 Key
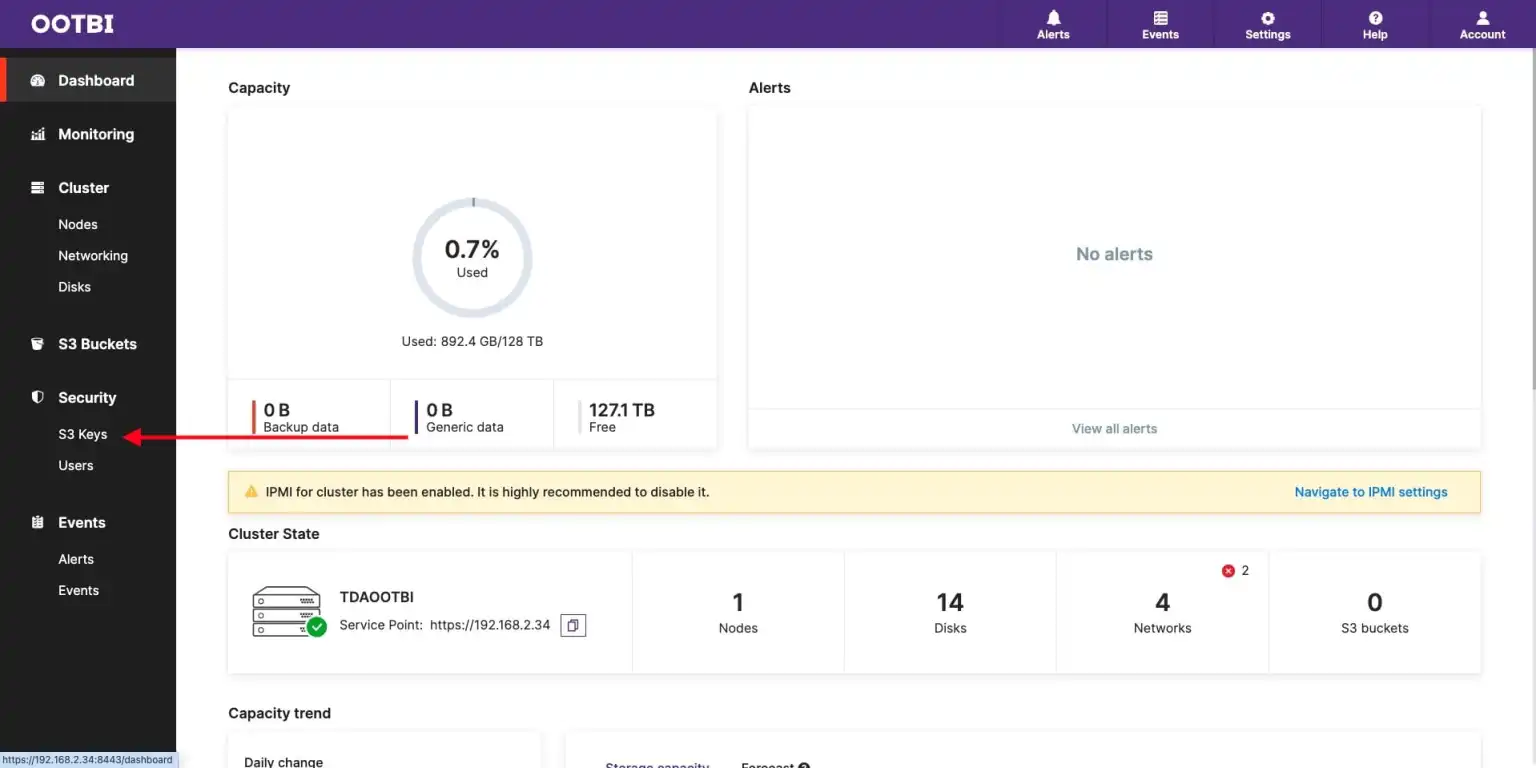
In the previous guide, we have discussed the various ways to access Object first OOTBI web interface. Upon login, we will have to create an s3 key. To do this, click on S3 Keys
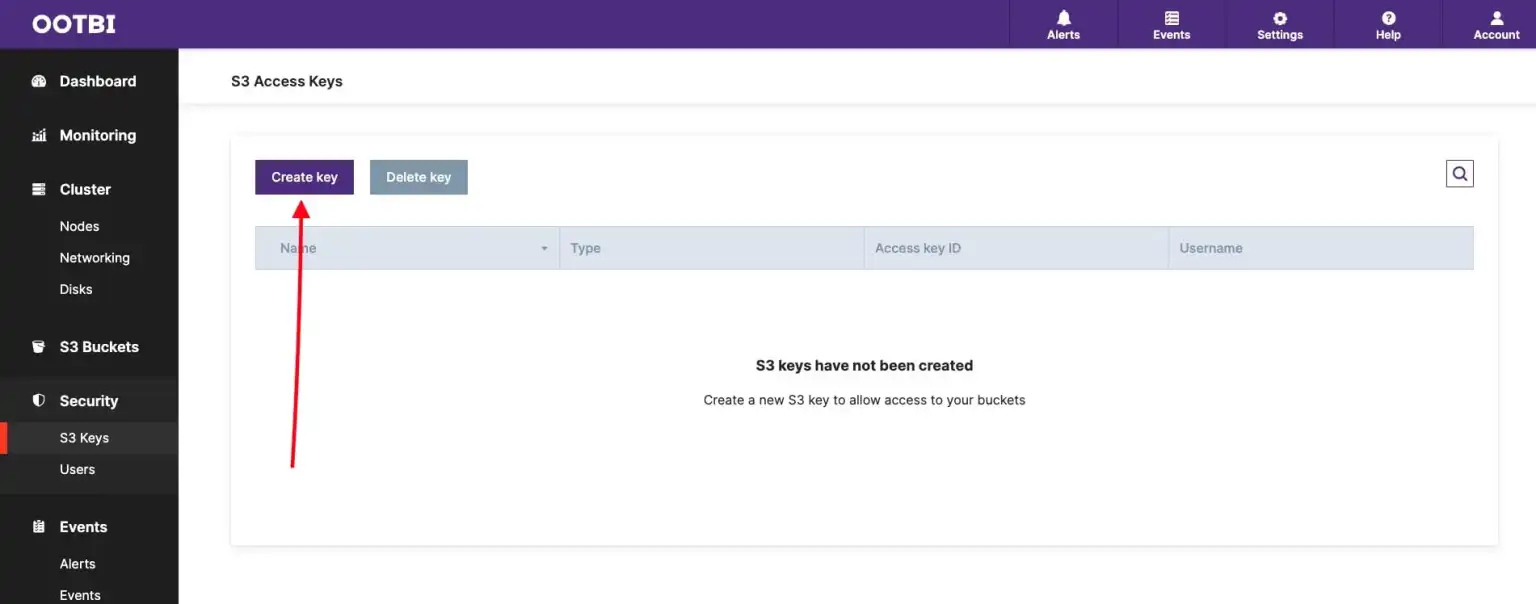
Click on Create Key
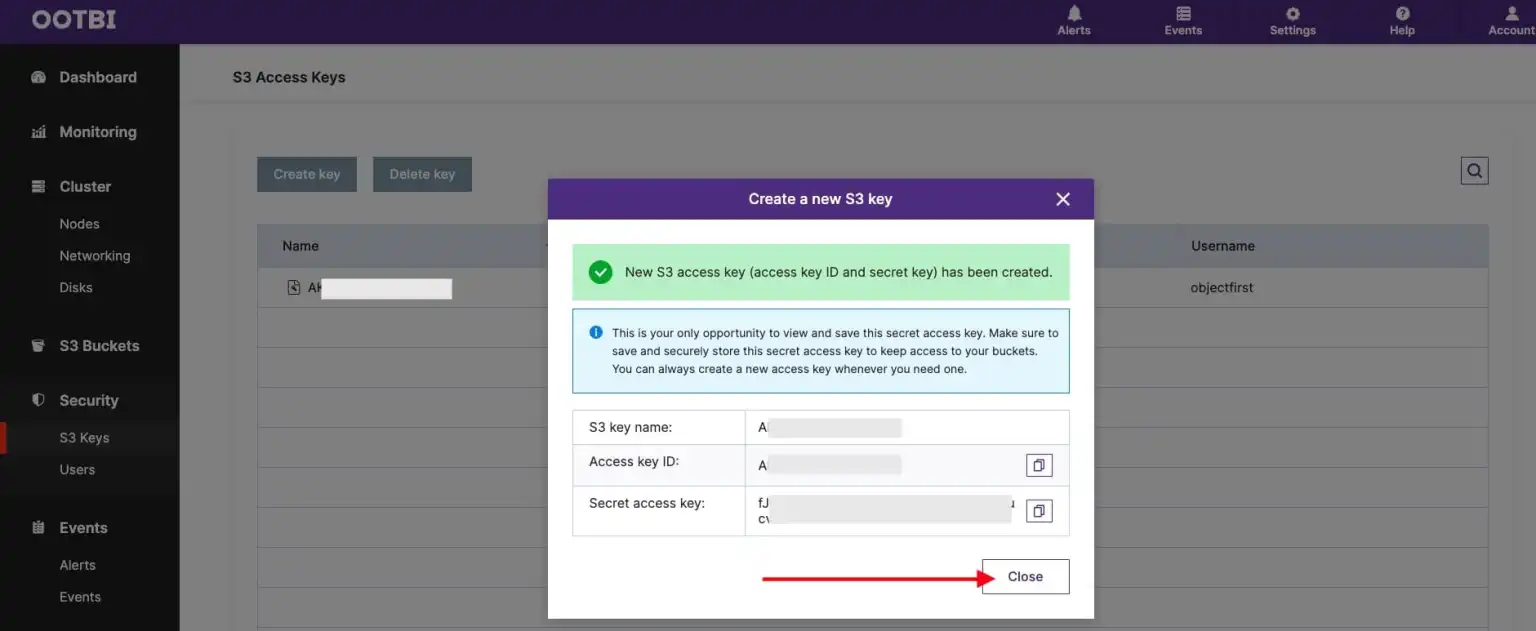
As you can see, our key has been created. Please endeavour to save the Secret Access Key as you may not be able to view this in the future upon closing the window.
Note: If for any reason you are unable to view this secret access key, you can create a new access key and utilise it for your backup need.
Create S3 Bucket
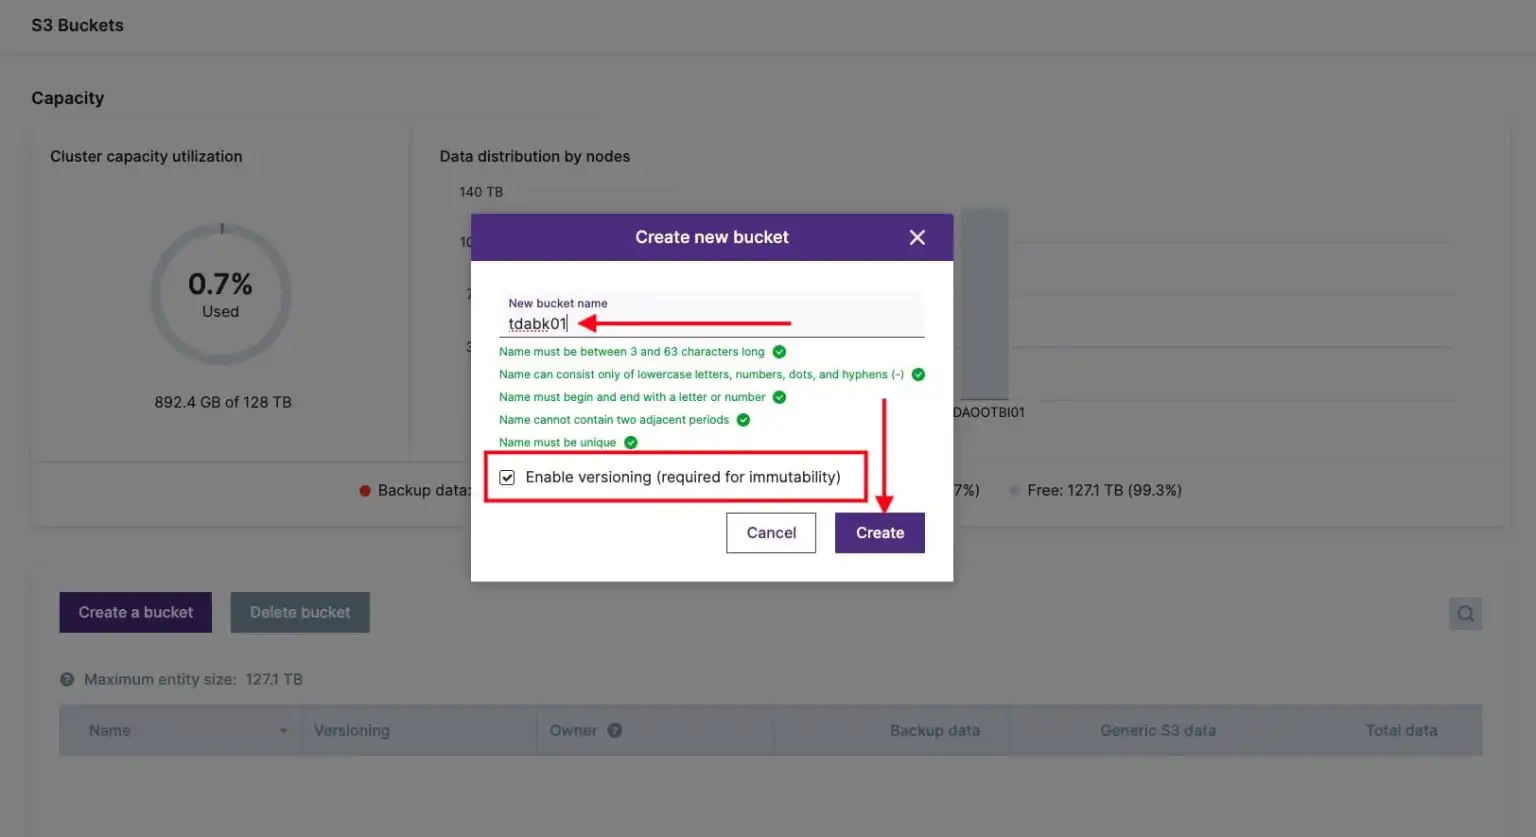
To do this, click on S3 Buckets as shown below. Click On “Create a Bucket.

Enter the bucket name based on your naming conversion. What is OOTBI without immutability? Therefore, ensure you Enable versioning and this is a requirement for immutability.
Note: When this feature is enabled, you must check the box to make backup immutable for a period of time in Veeam Backup and Replication. Else, an error will be prompted. We will see this very shortly.
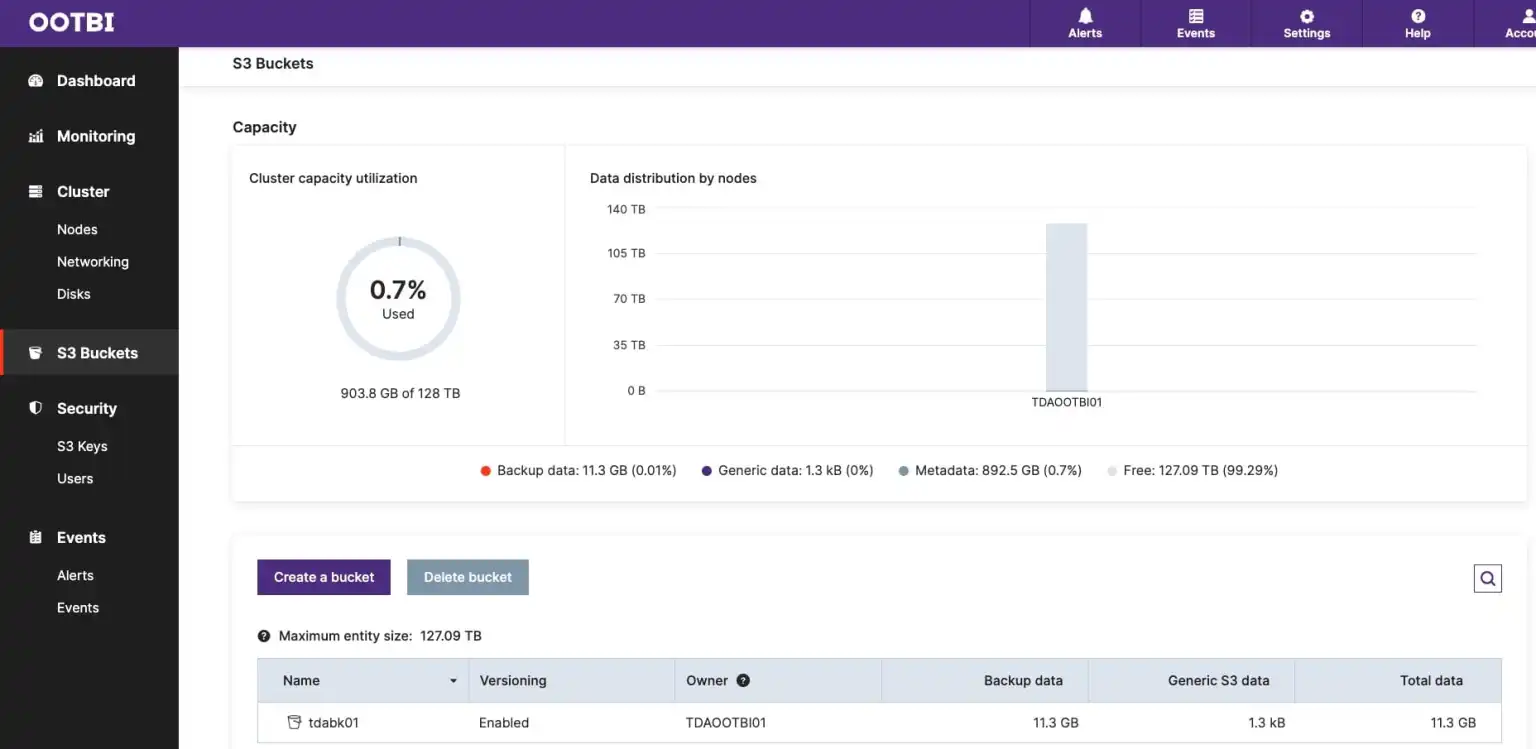
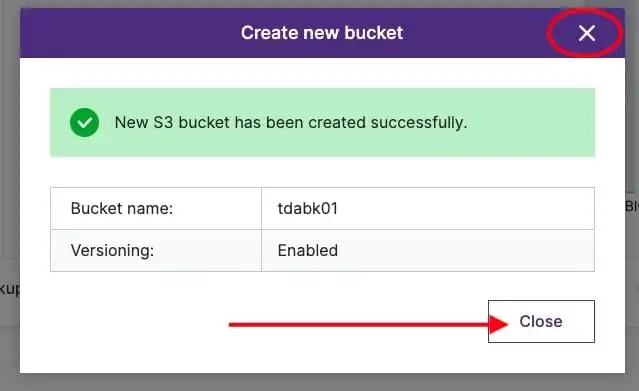
Our S3 bucket has been created. You can now close using any of the functionality below.
Add OOTBI as an Object Storage on VBR
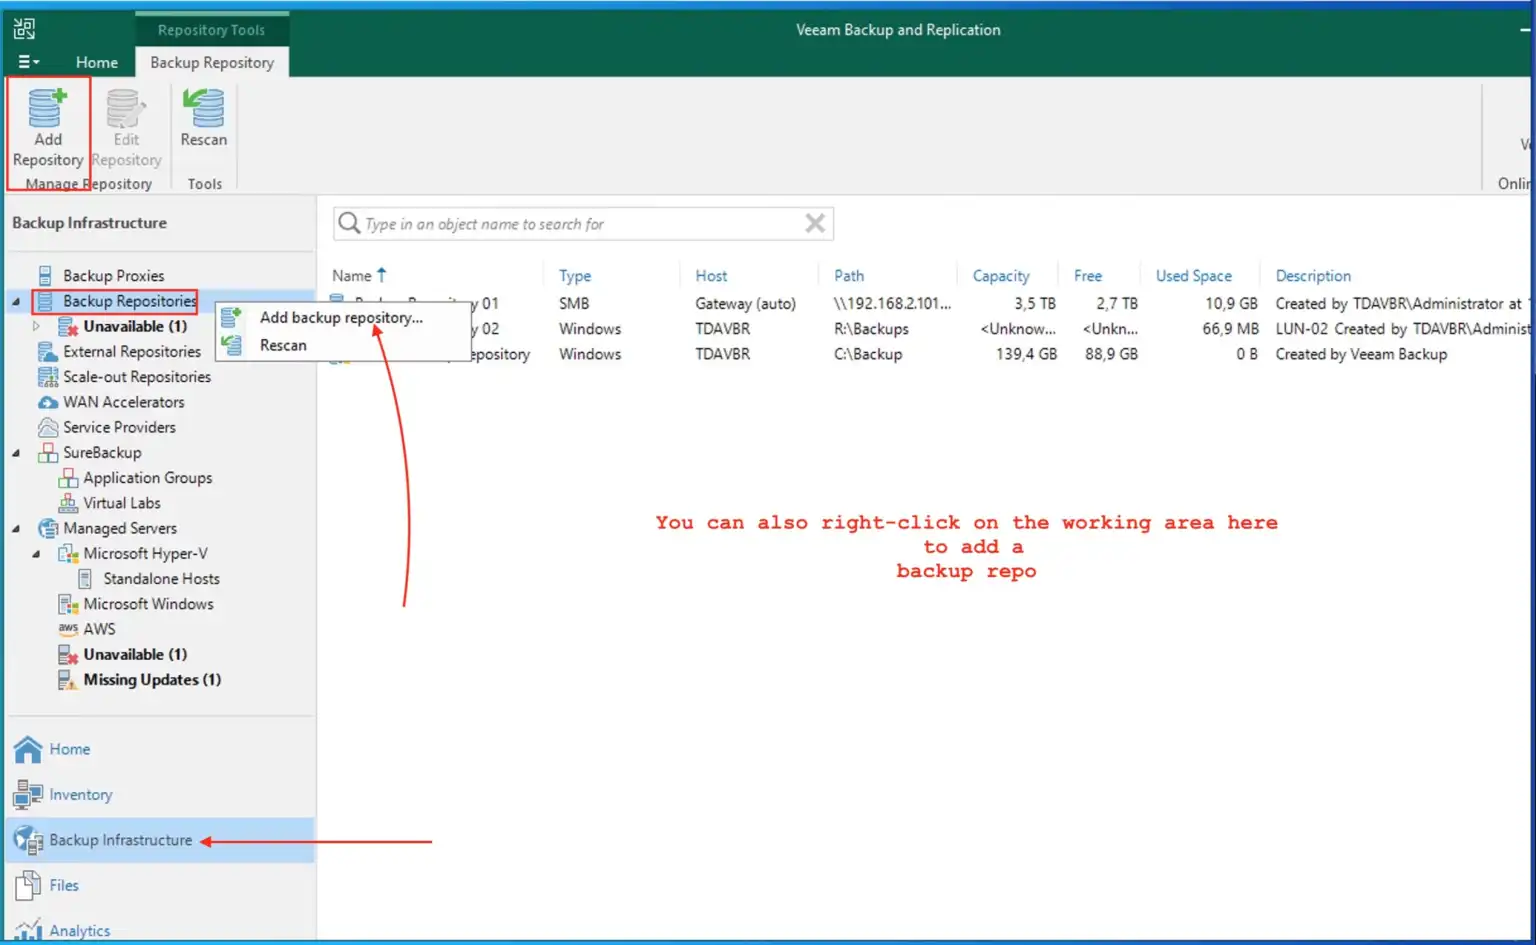
To do this, let us access the Veeam Backup and Replication console by clicking on the shortcut and connecting to it.
Next, navigate to Backup Infrastructure view and click on “Add Repository”. In VBR, there are different ways to achieve this as shown below.
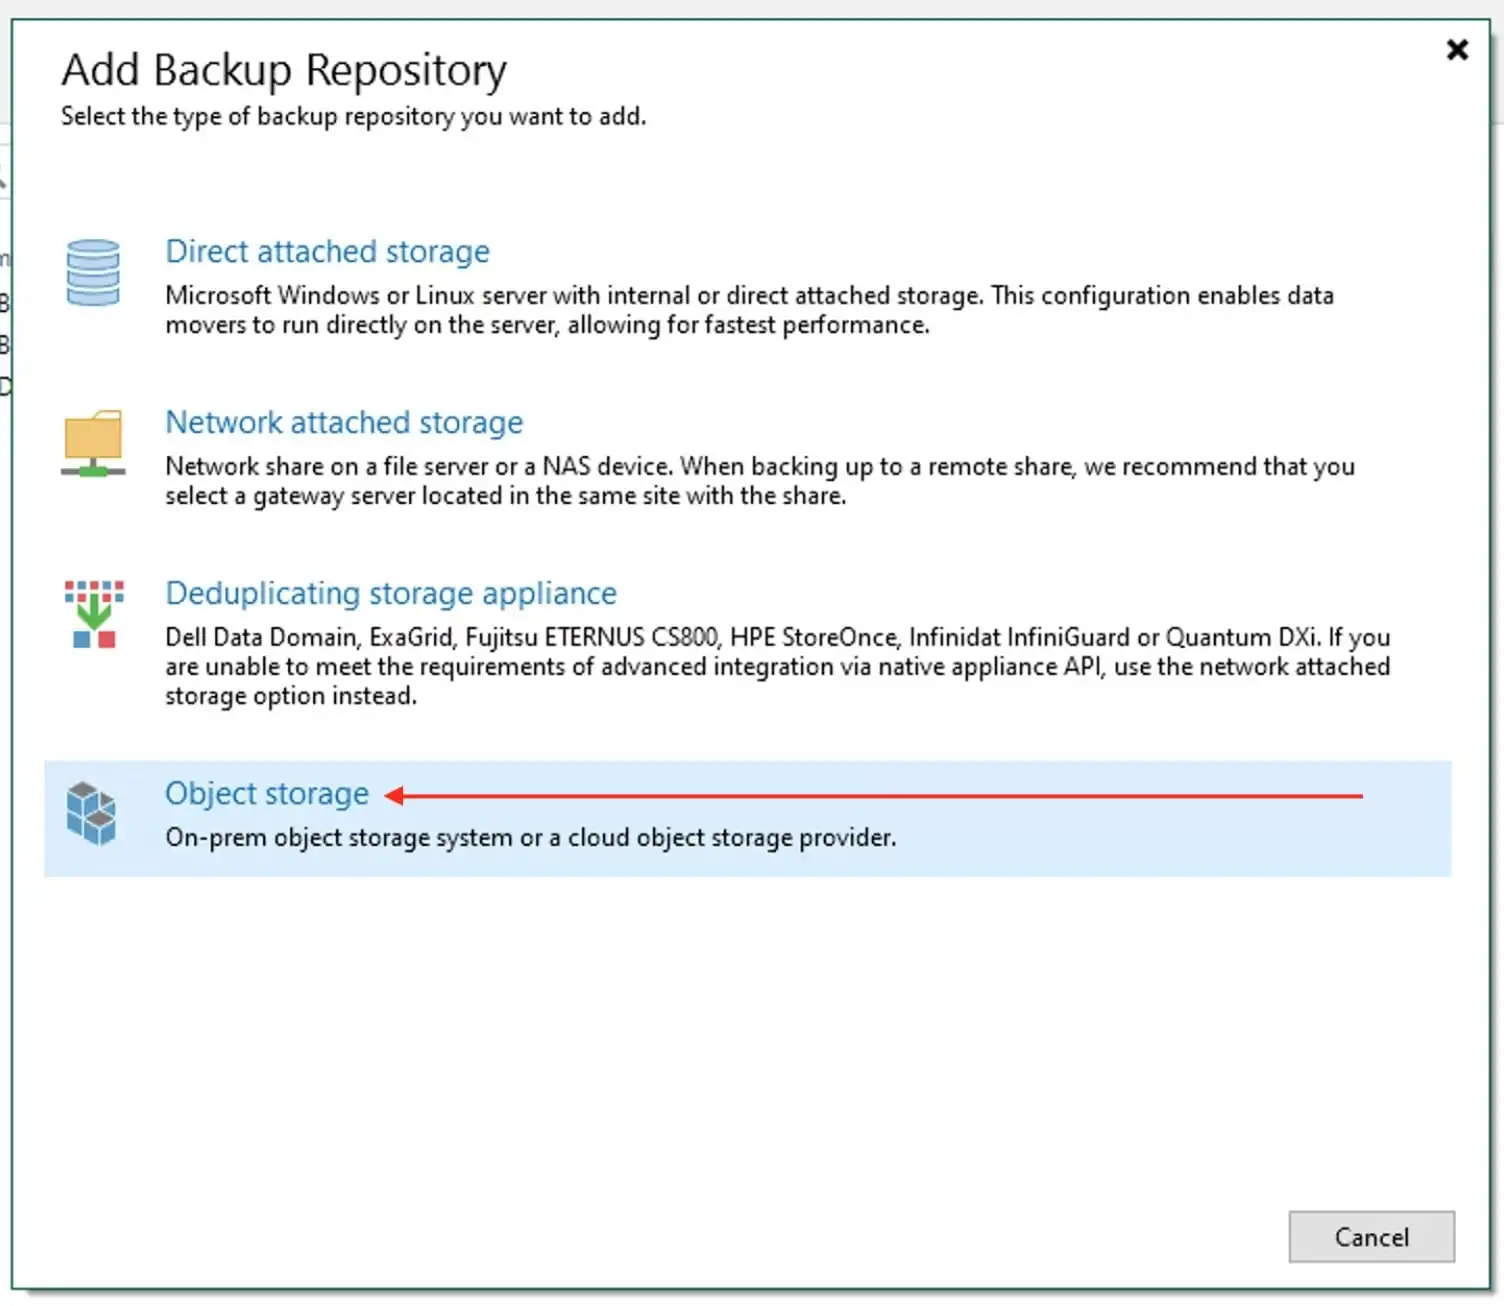
Select “Object Storage”
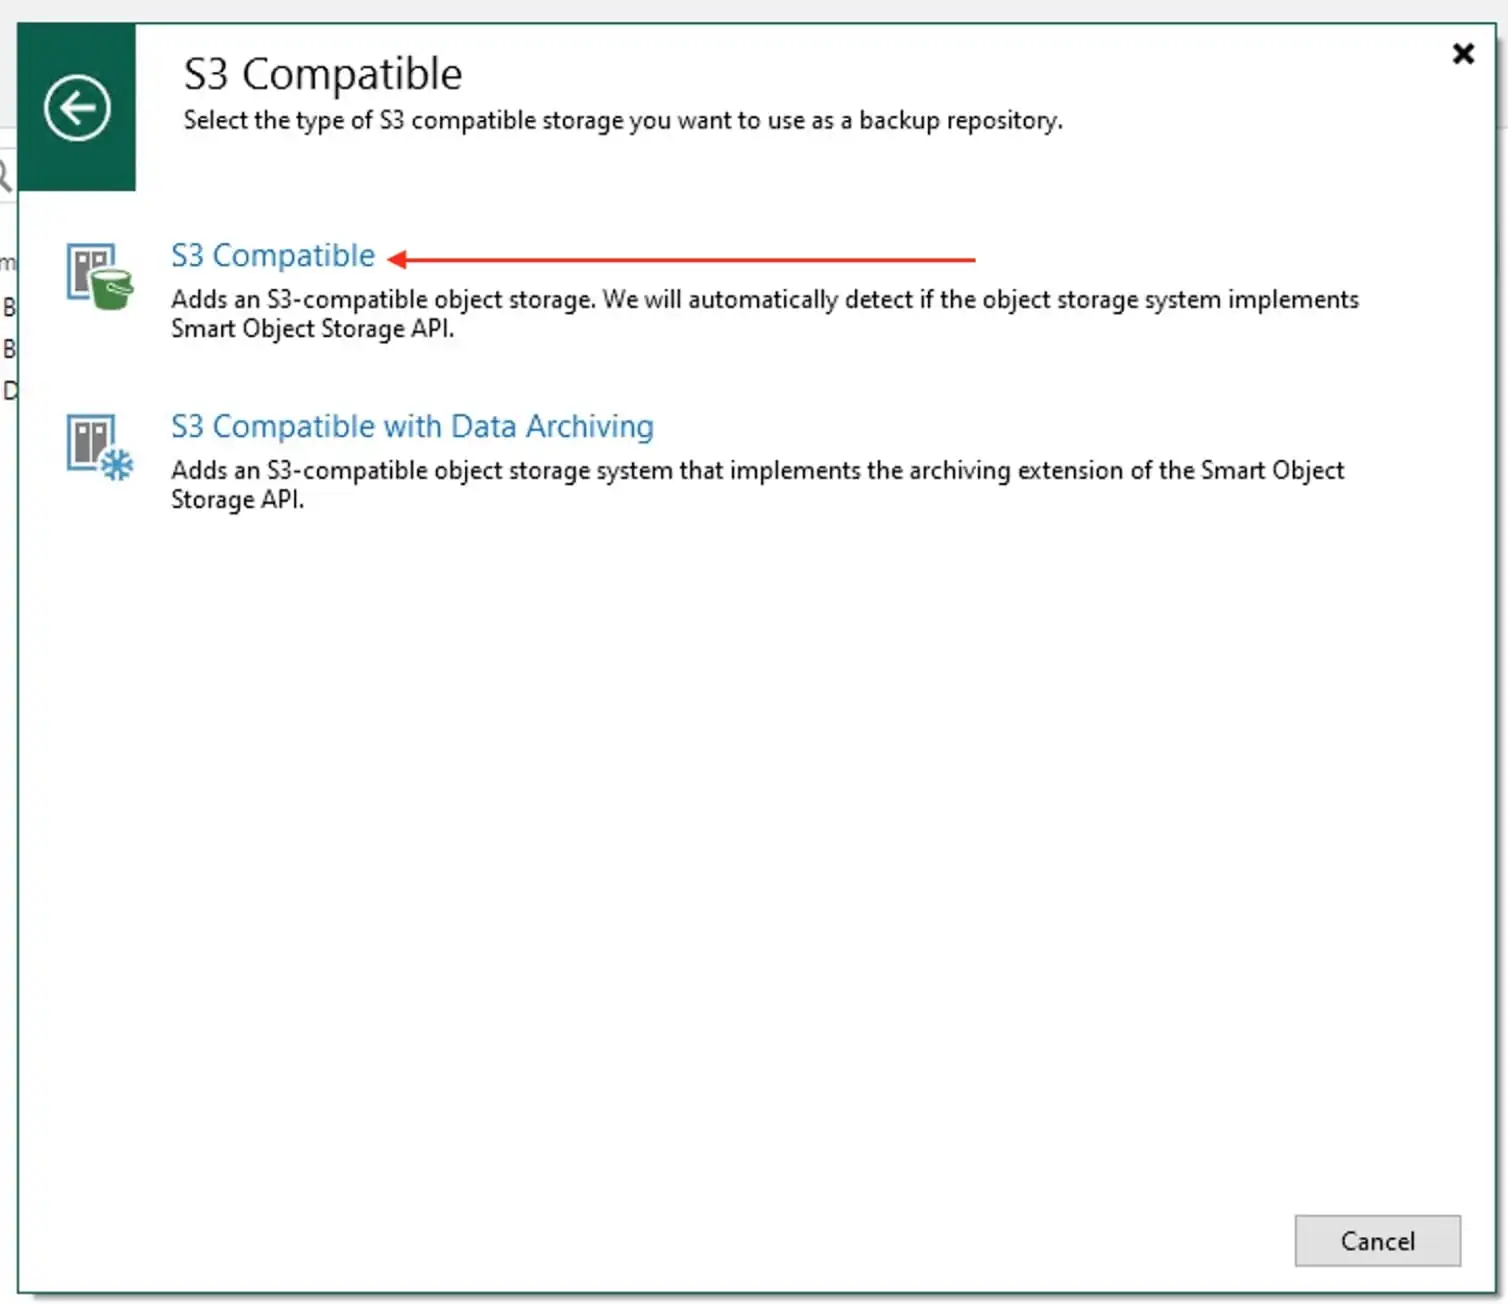
Select s3 Compatible
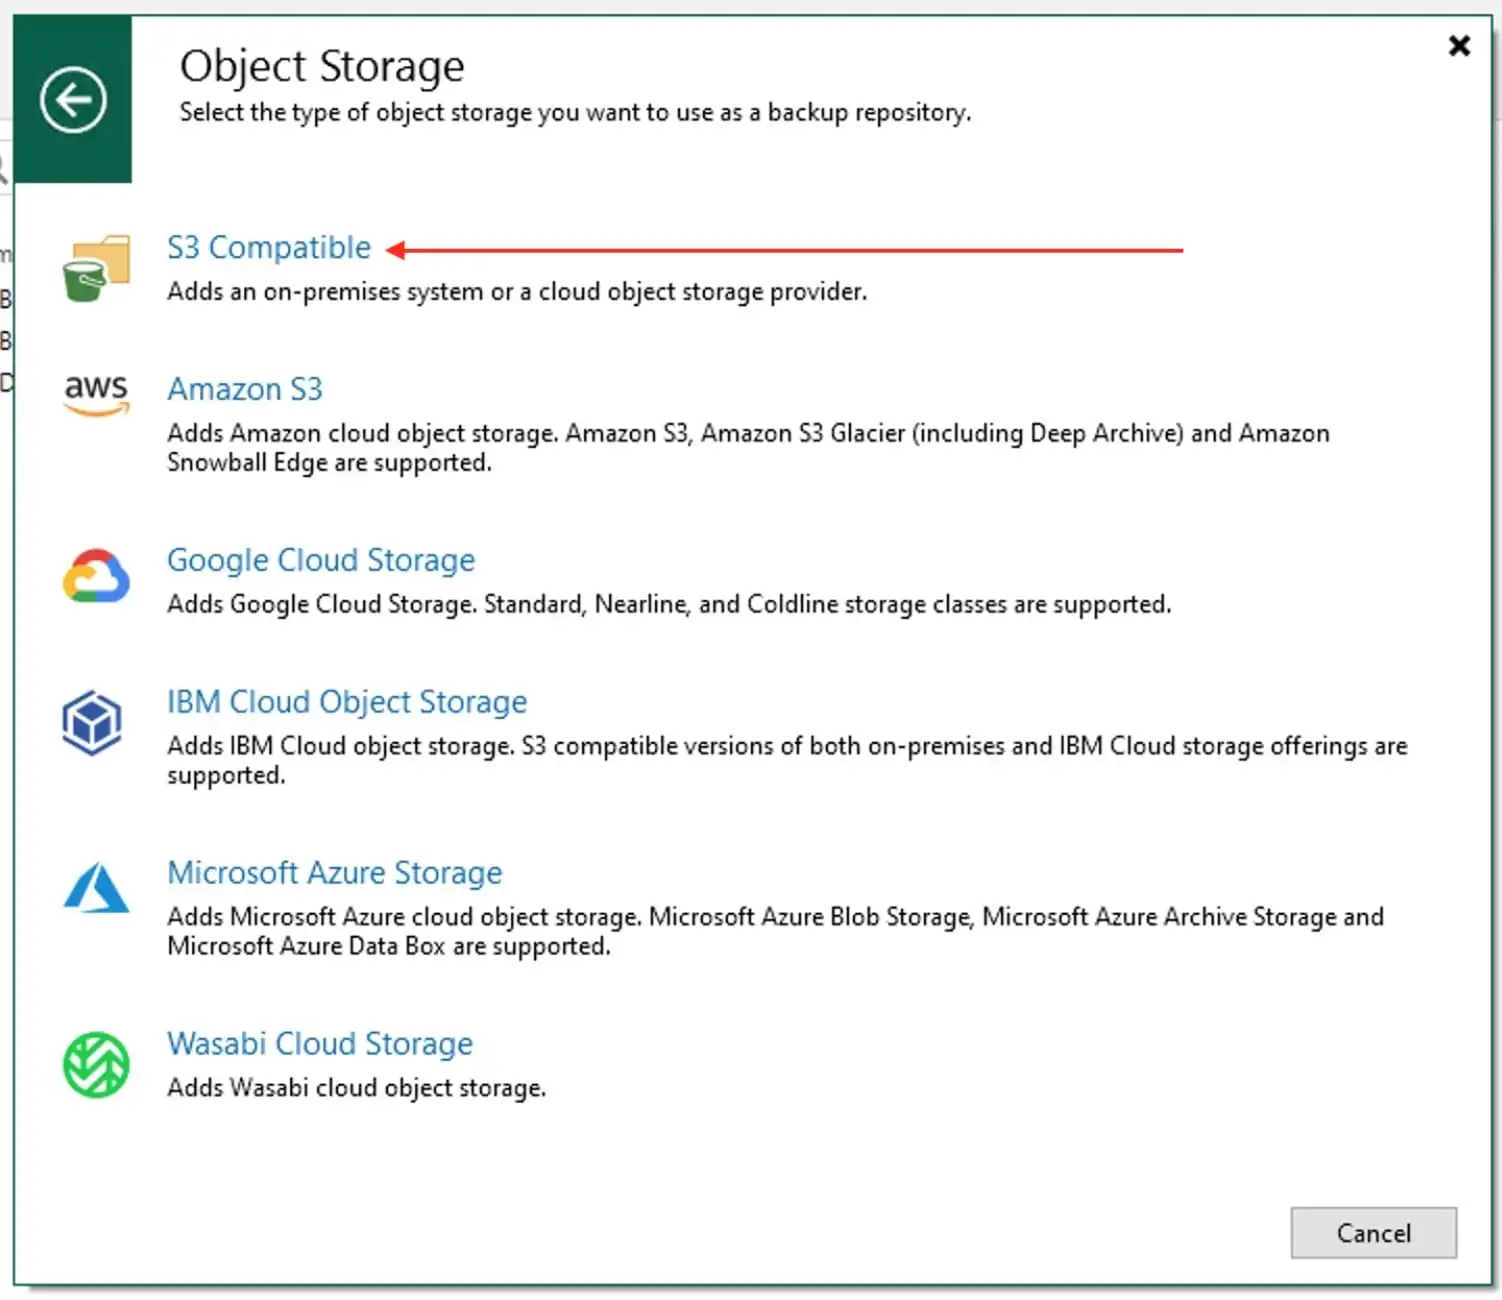
I will go with the first option “S3 Compatible”
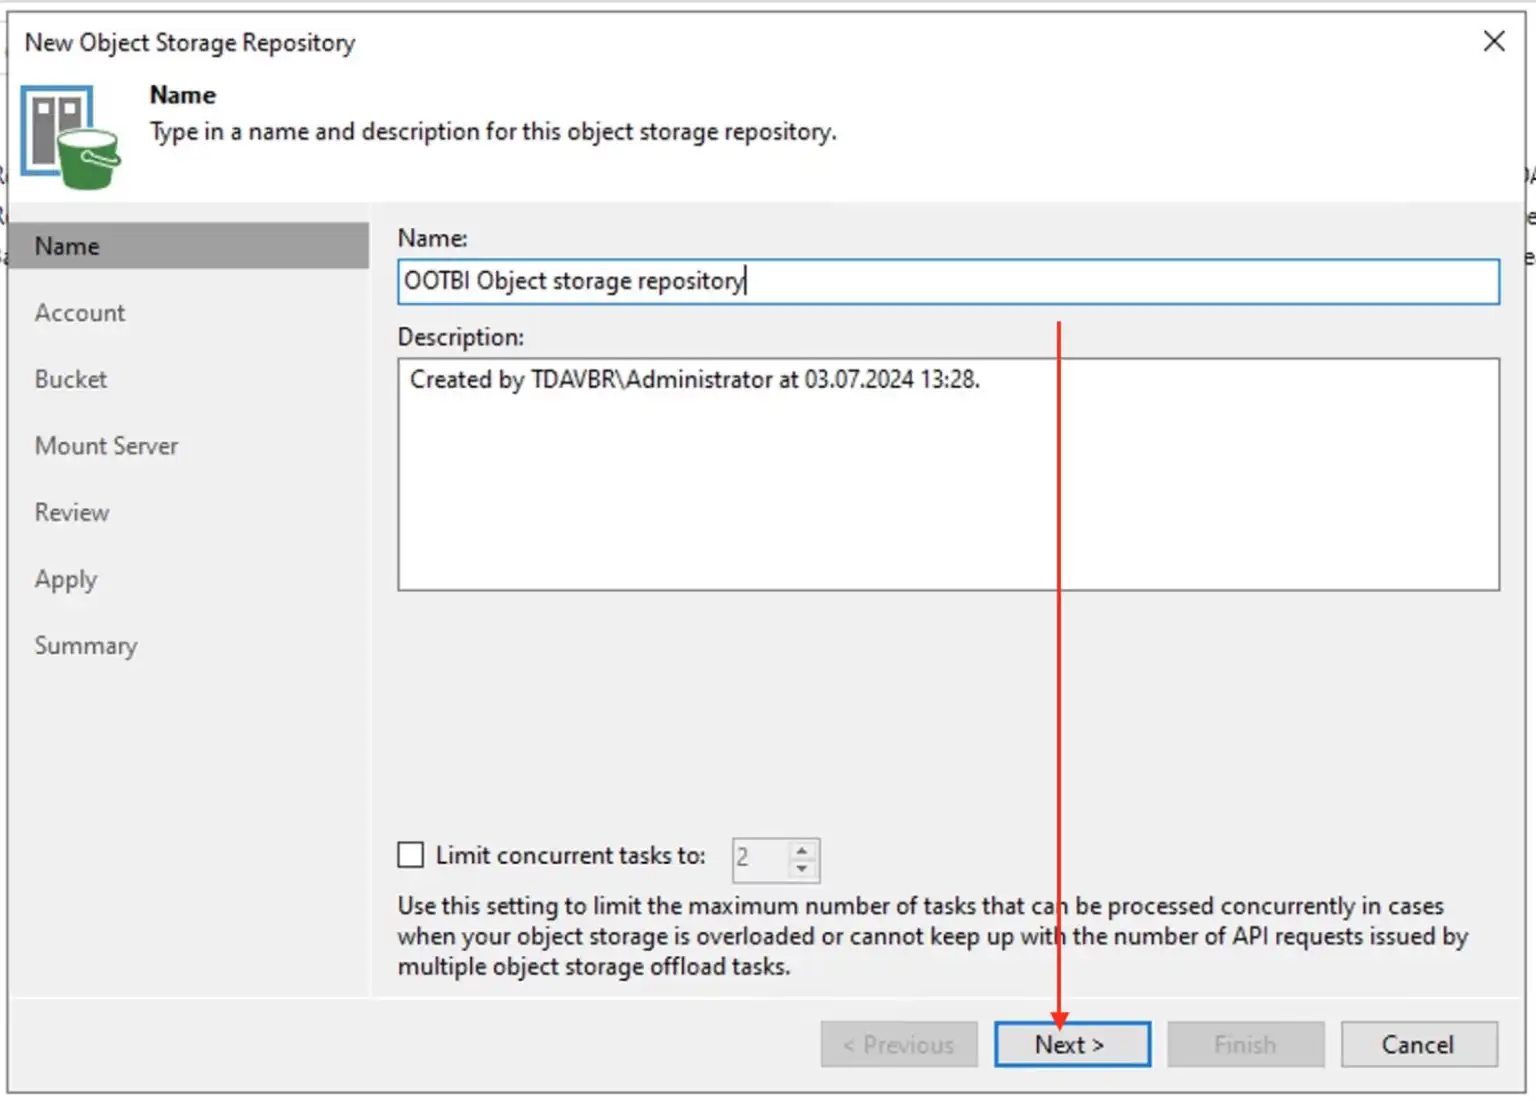
Enter the name for your Object storage repository. You can also enter a description if you wish and click Next to proceed.
Note: I have decided to leave out the concurrent task. Limit the concurrent tasks value to 4. For on-premises storage, increasing the number of concurrent tasks does not improve performance and can cause resource overhead due to more connections involving more resources in data processing. Four connections avoid overhead and ensure optimal performance.
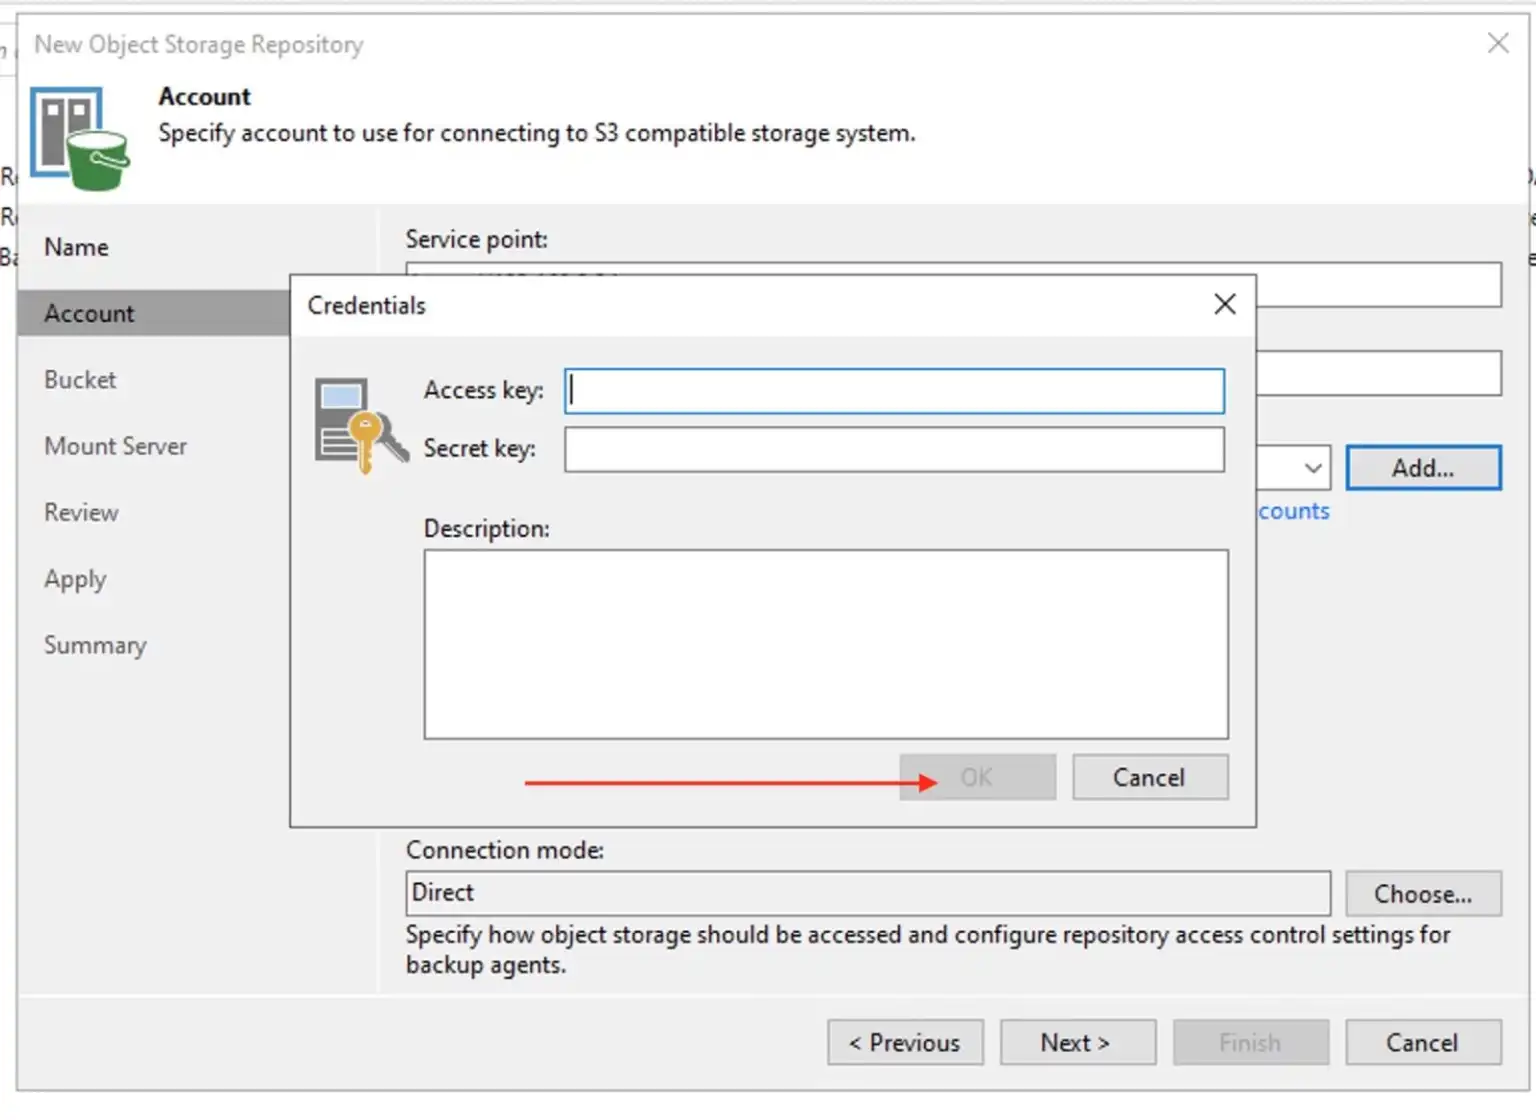
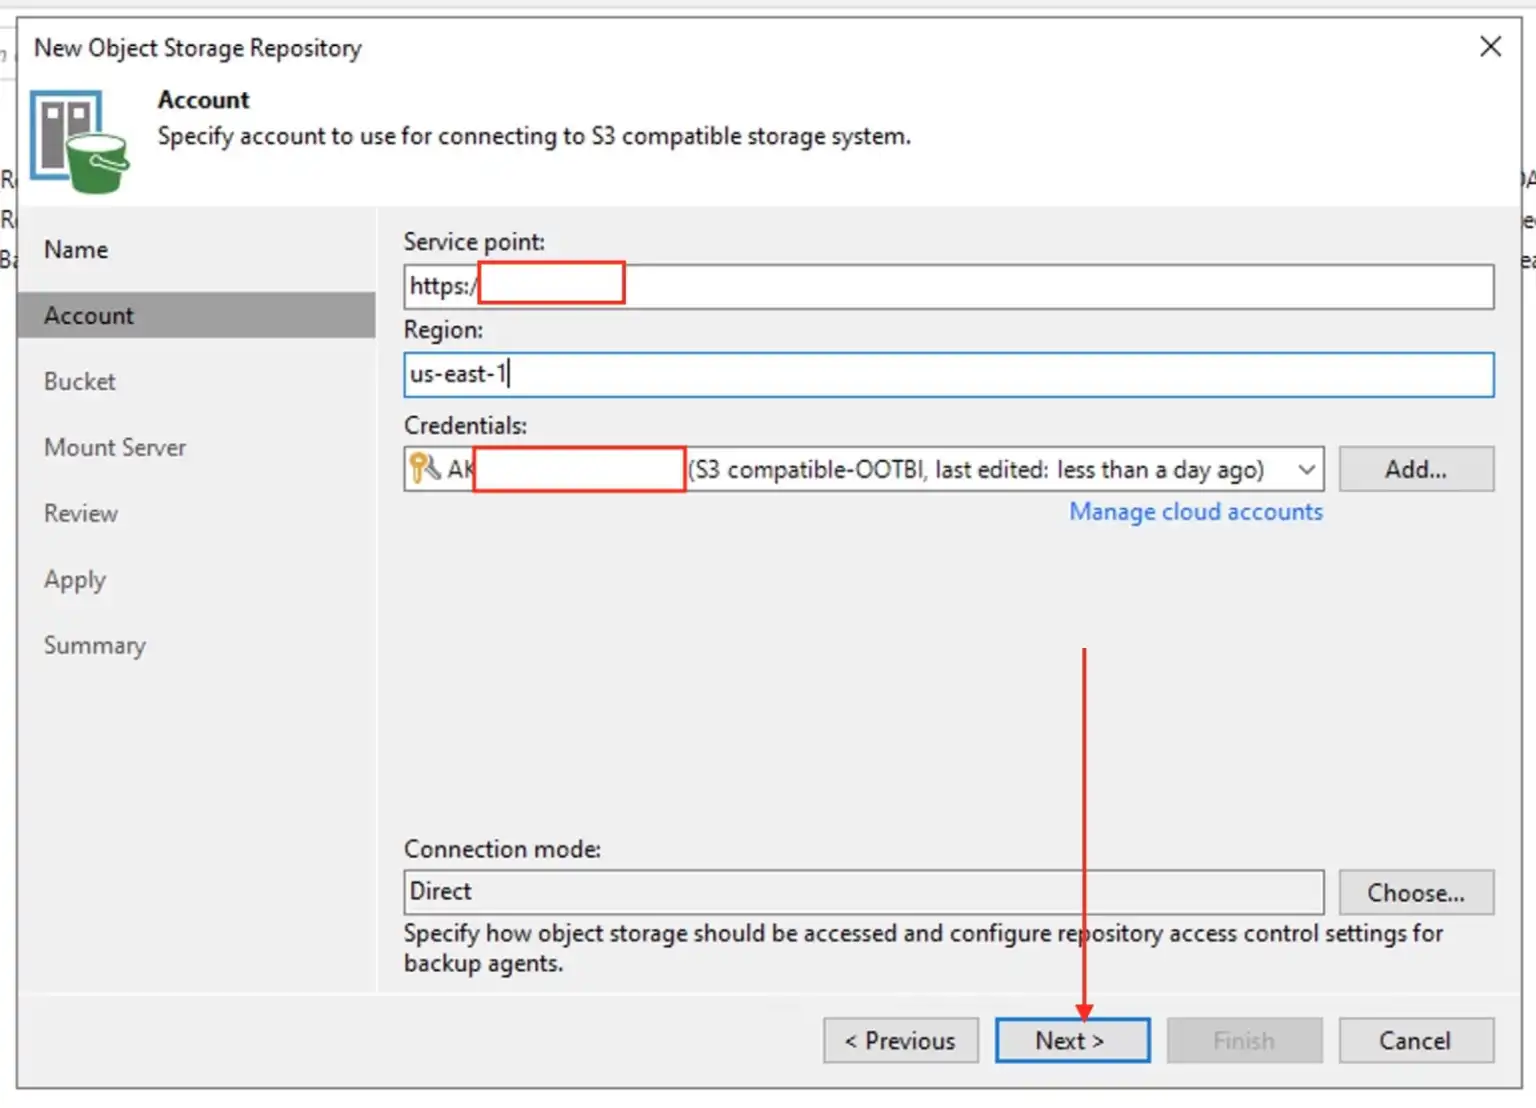
avigate to the OOTBI web UI. On the dashboard, you will be able to find the service point we will be using in the next VBR configuration. Enter the Service Point URL and specify your region. Since this is deployed on-premise, leaving this field blank does not work. Next, add the previously created S3 Key by clicking on Add.
Note: For the connection mode, I am okay with the Direct Mode. This ensures that any job managed by the VBR can access he object storage directly.
Please provide the access key ID and secret access key and click on OK.
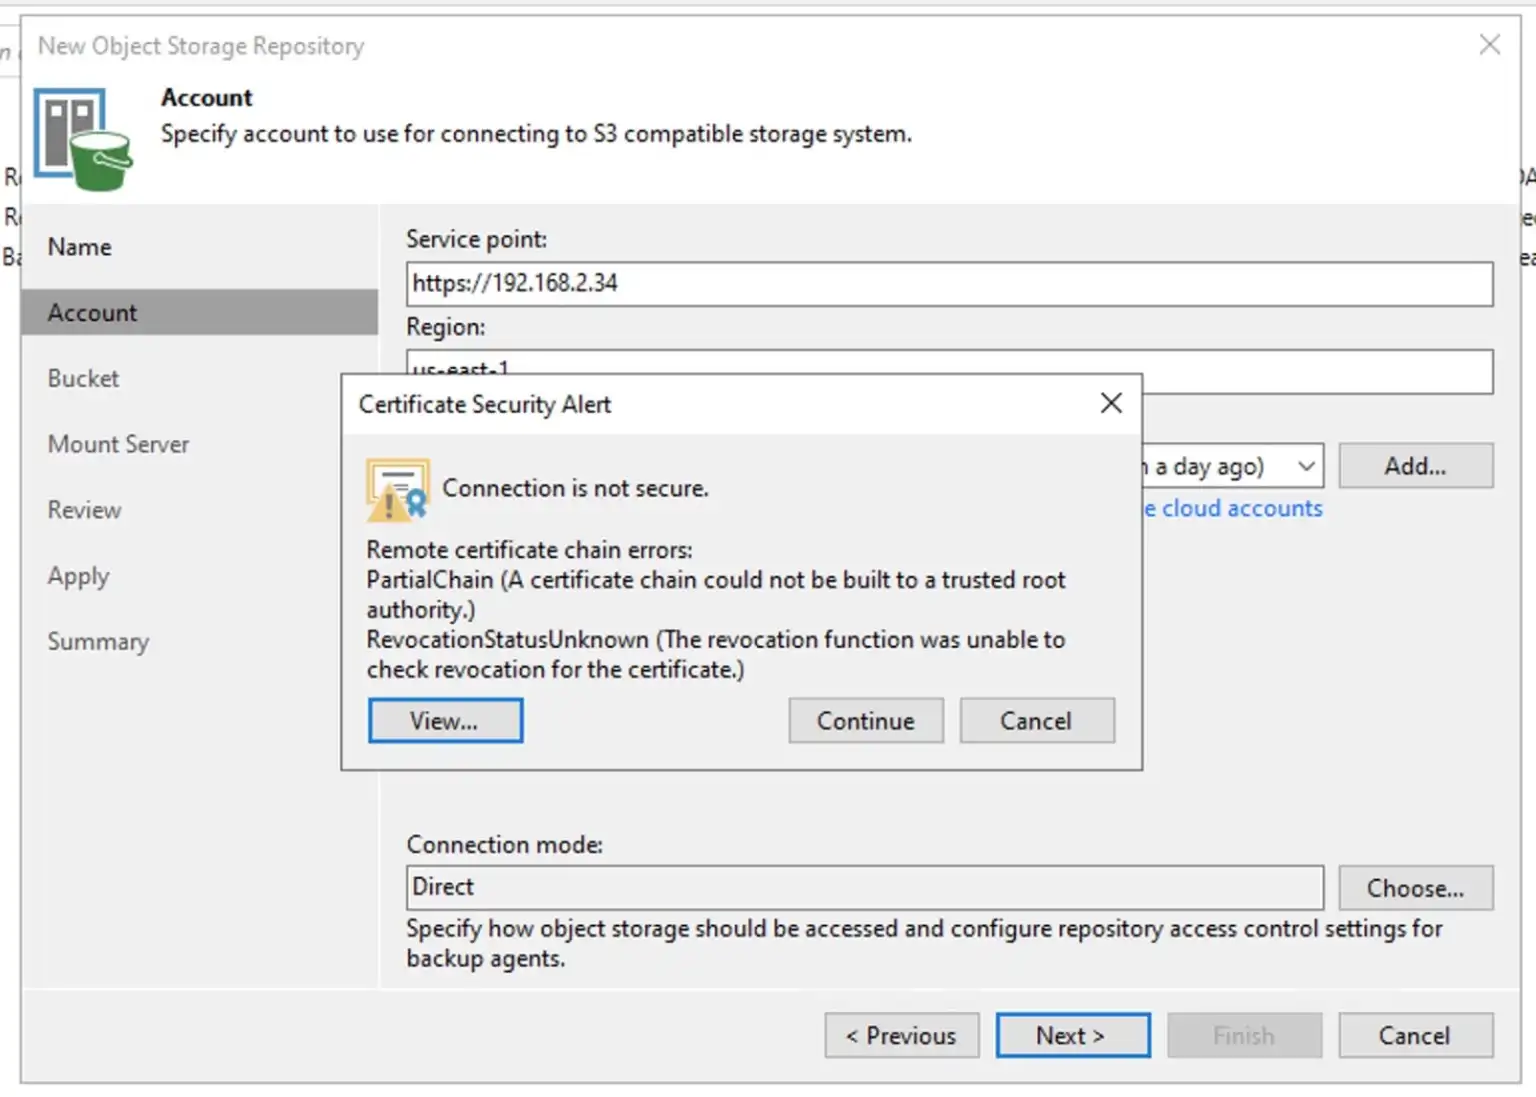
On the Certificate Security Alert, I will click on Continue
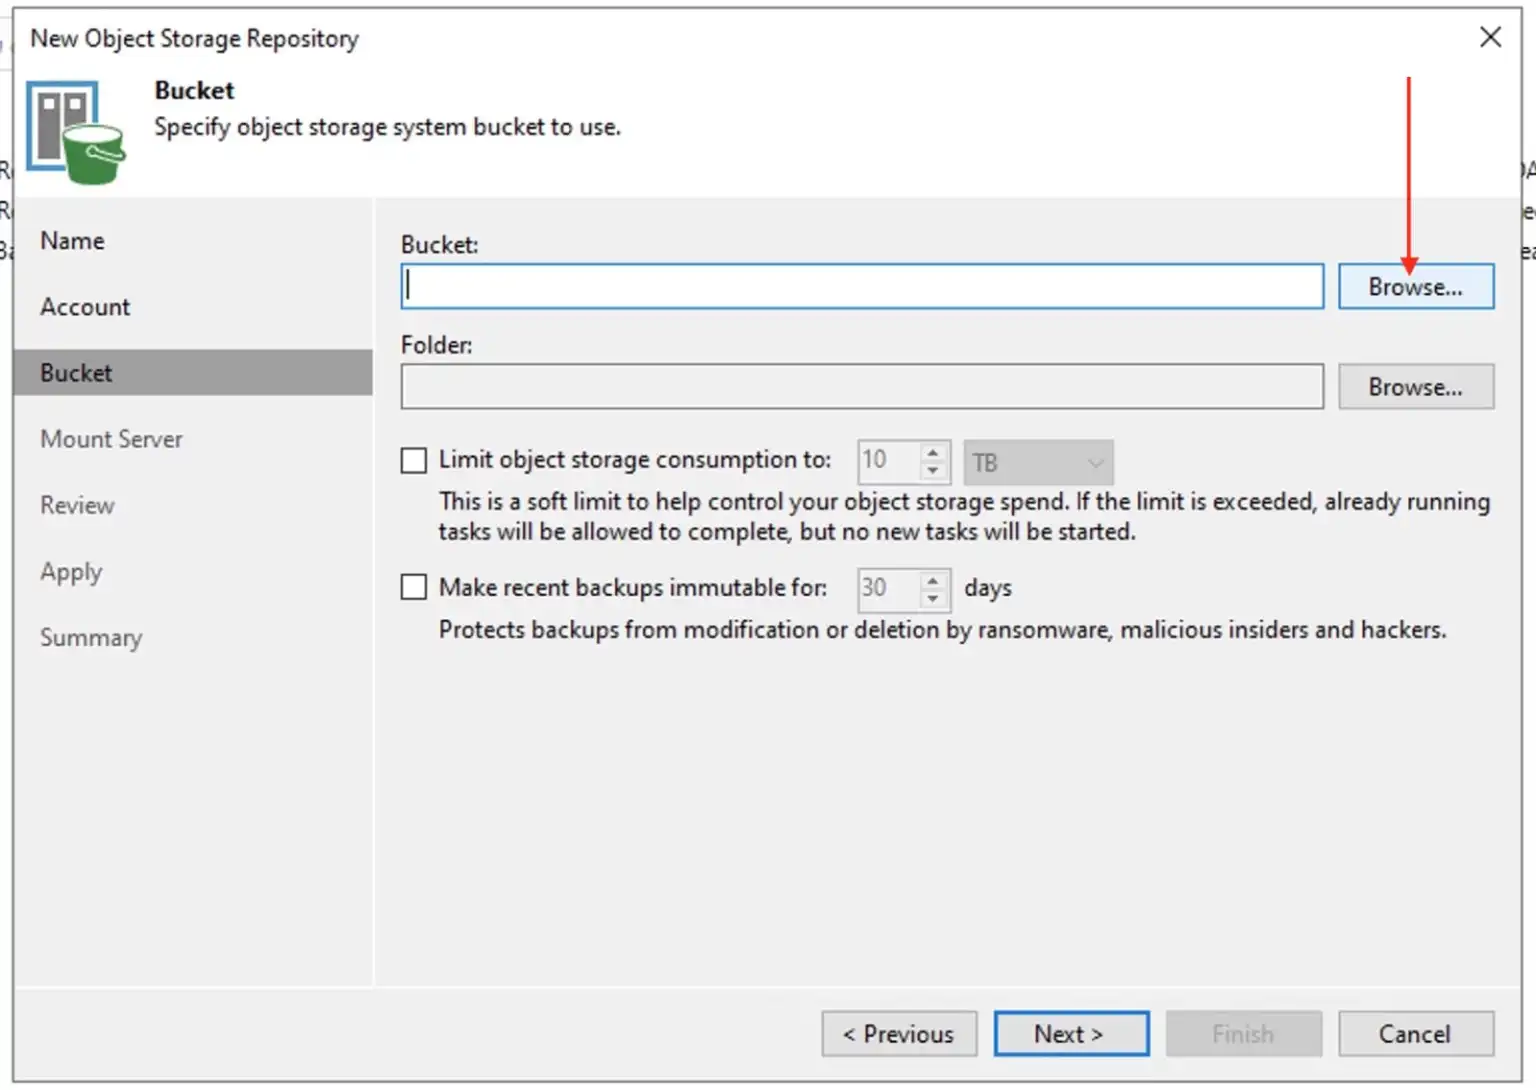
Let us click on “Browse” to add our S3 bucket as shown below.
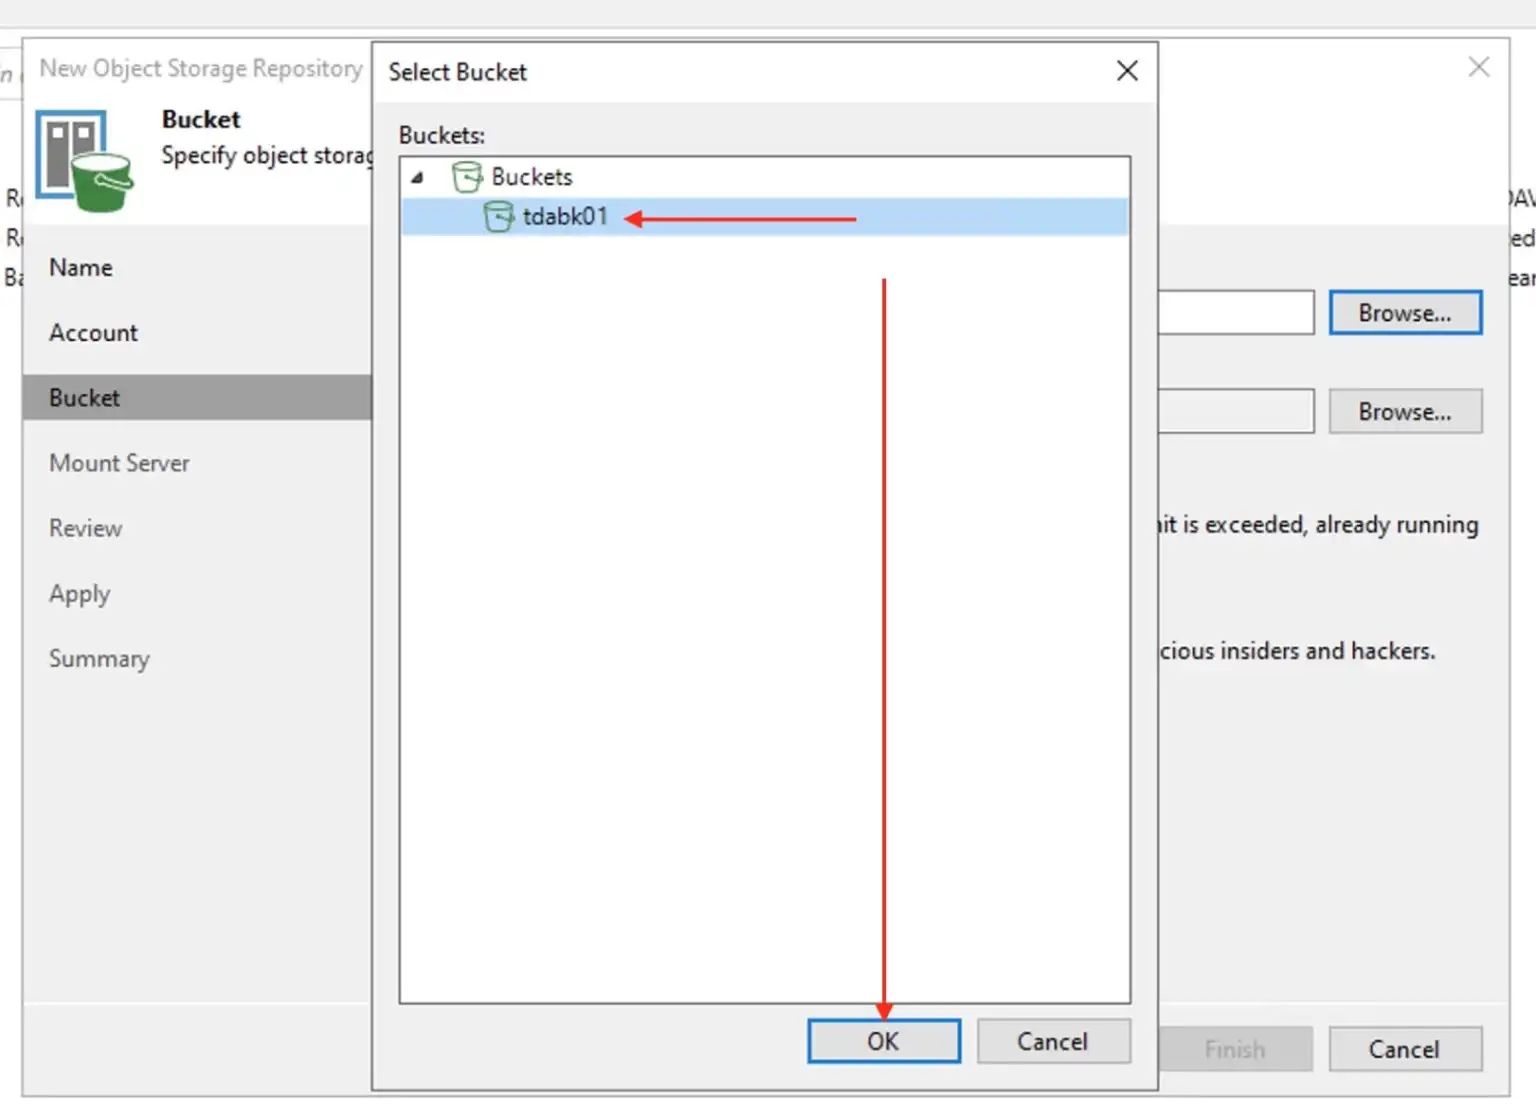
In the lists of Buckets, please select your bucket and click on OK
Also, let us select the folder. By default, these folders are not created. We will have to create on. To do this, click on”Browse”.
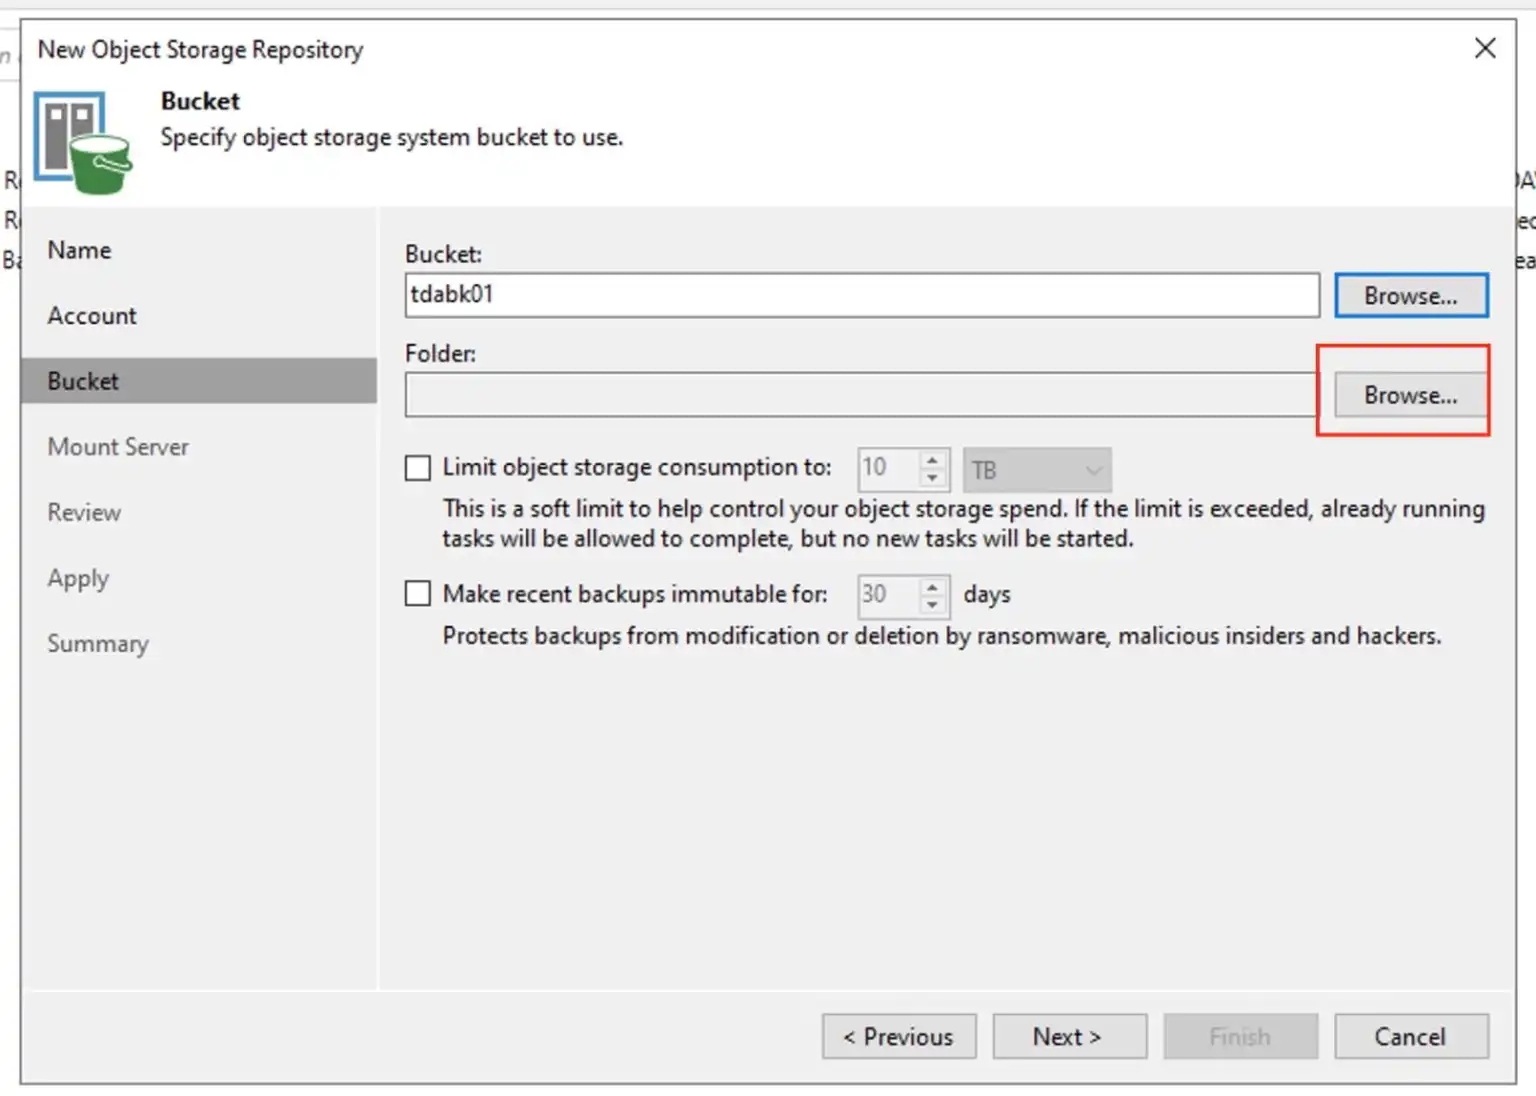
Click on New Folder
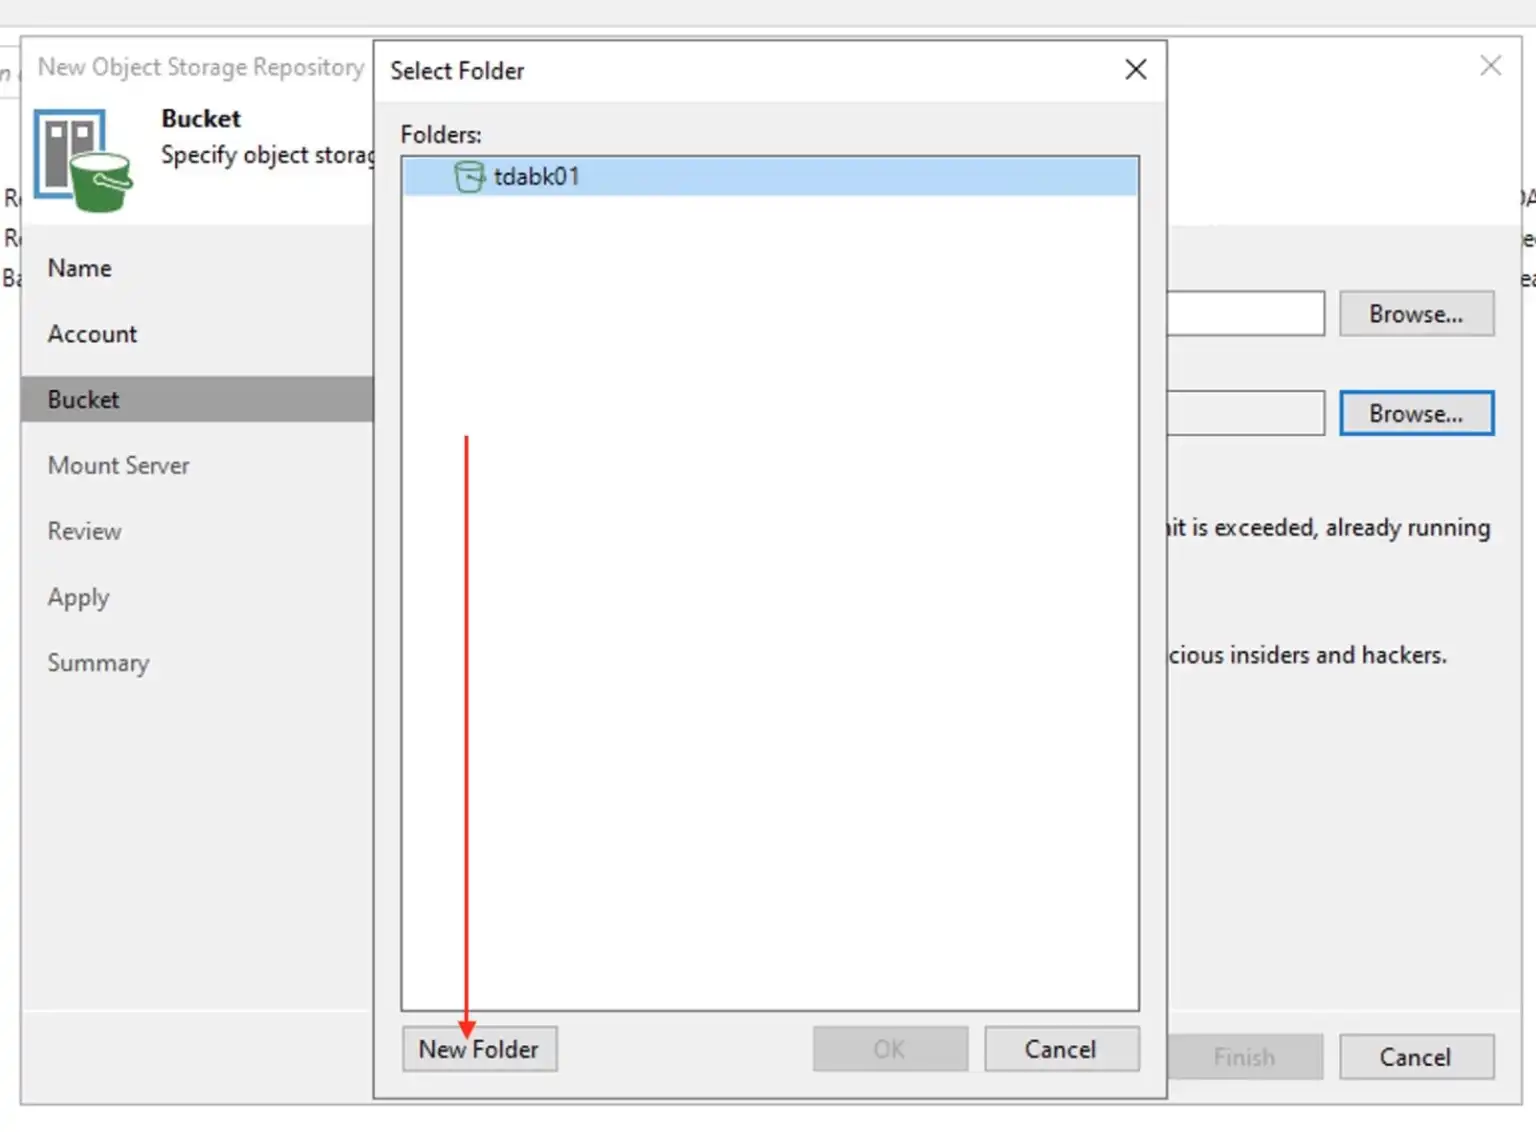
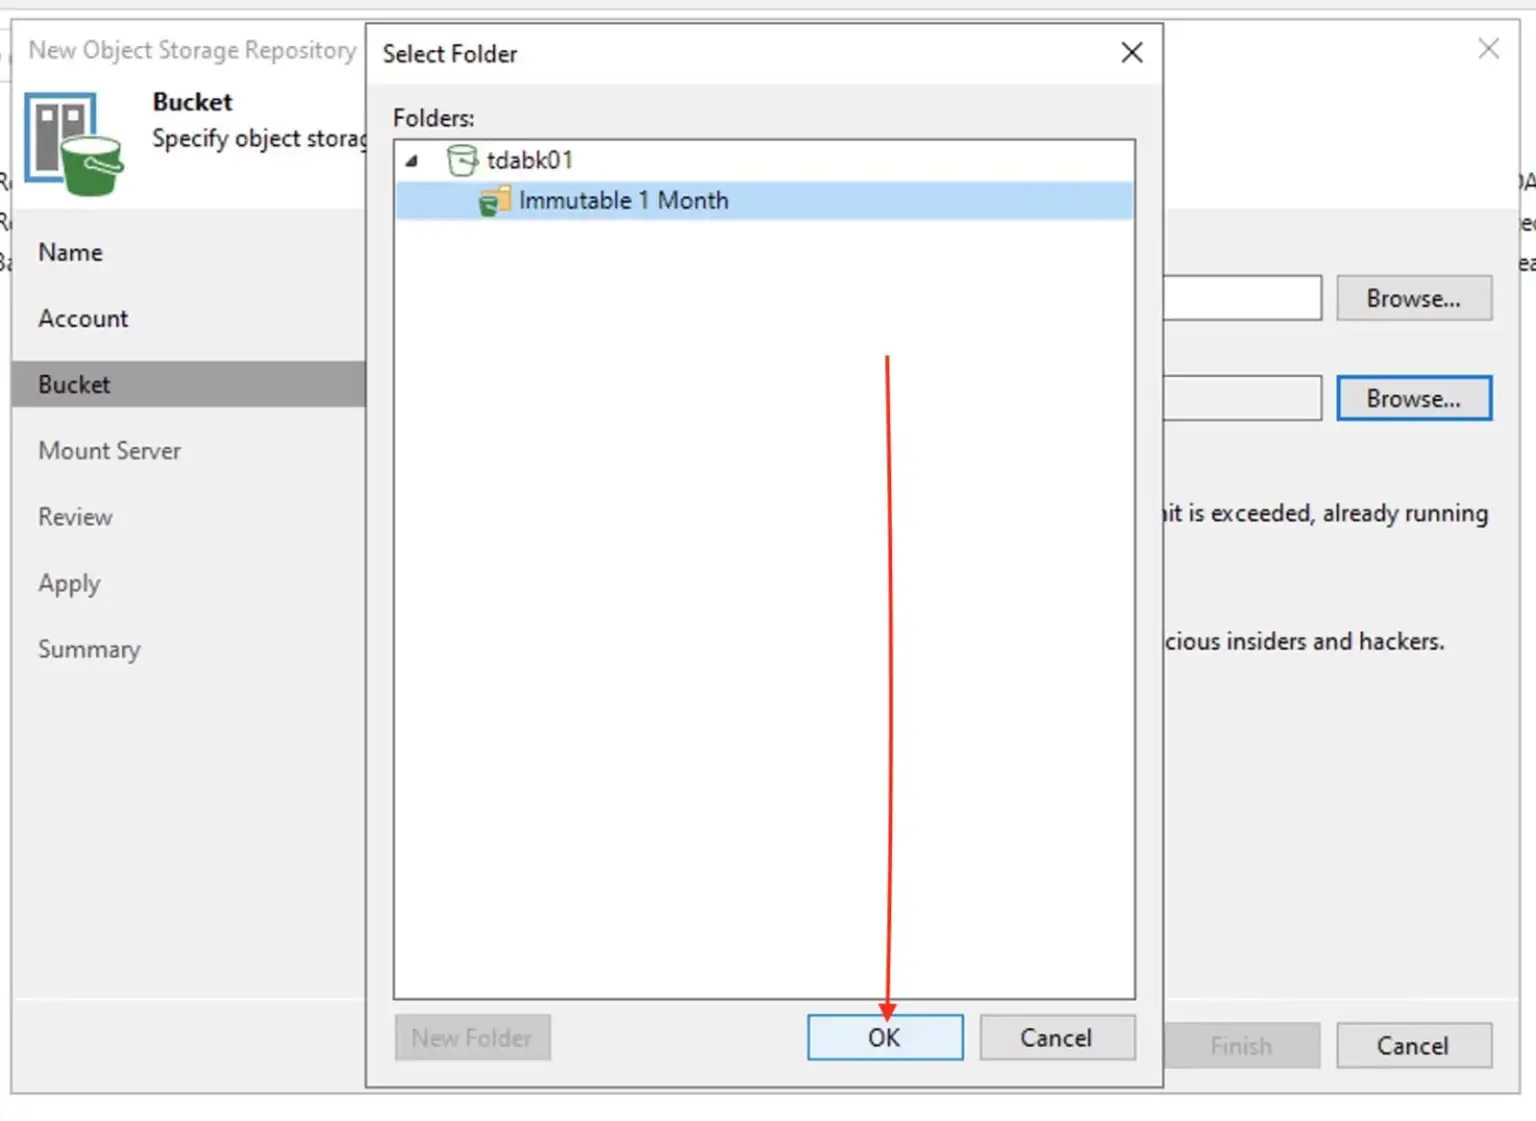
Enter the Folder name and click on OK. When this folder is created, the folder name cannot be changed, and the folder can only be removed using an S3 browsing tool.
Next, we will have to enable the checkbox to make recent backup immutable for 31 days.
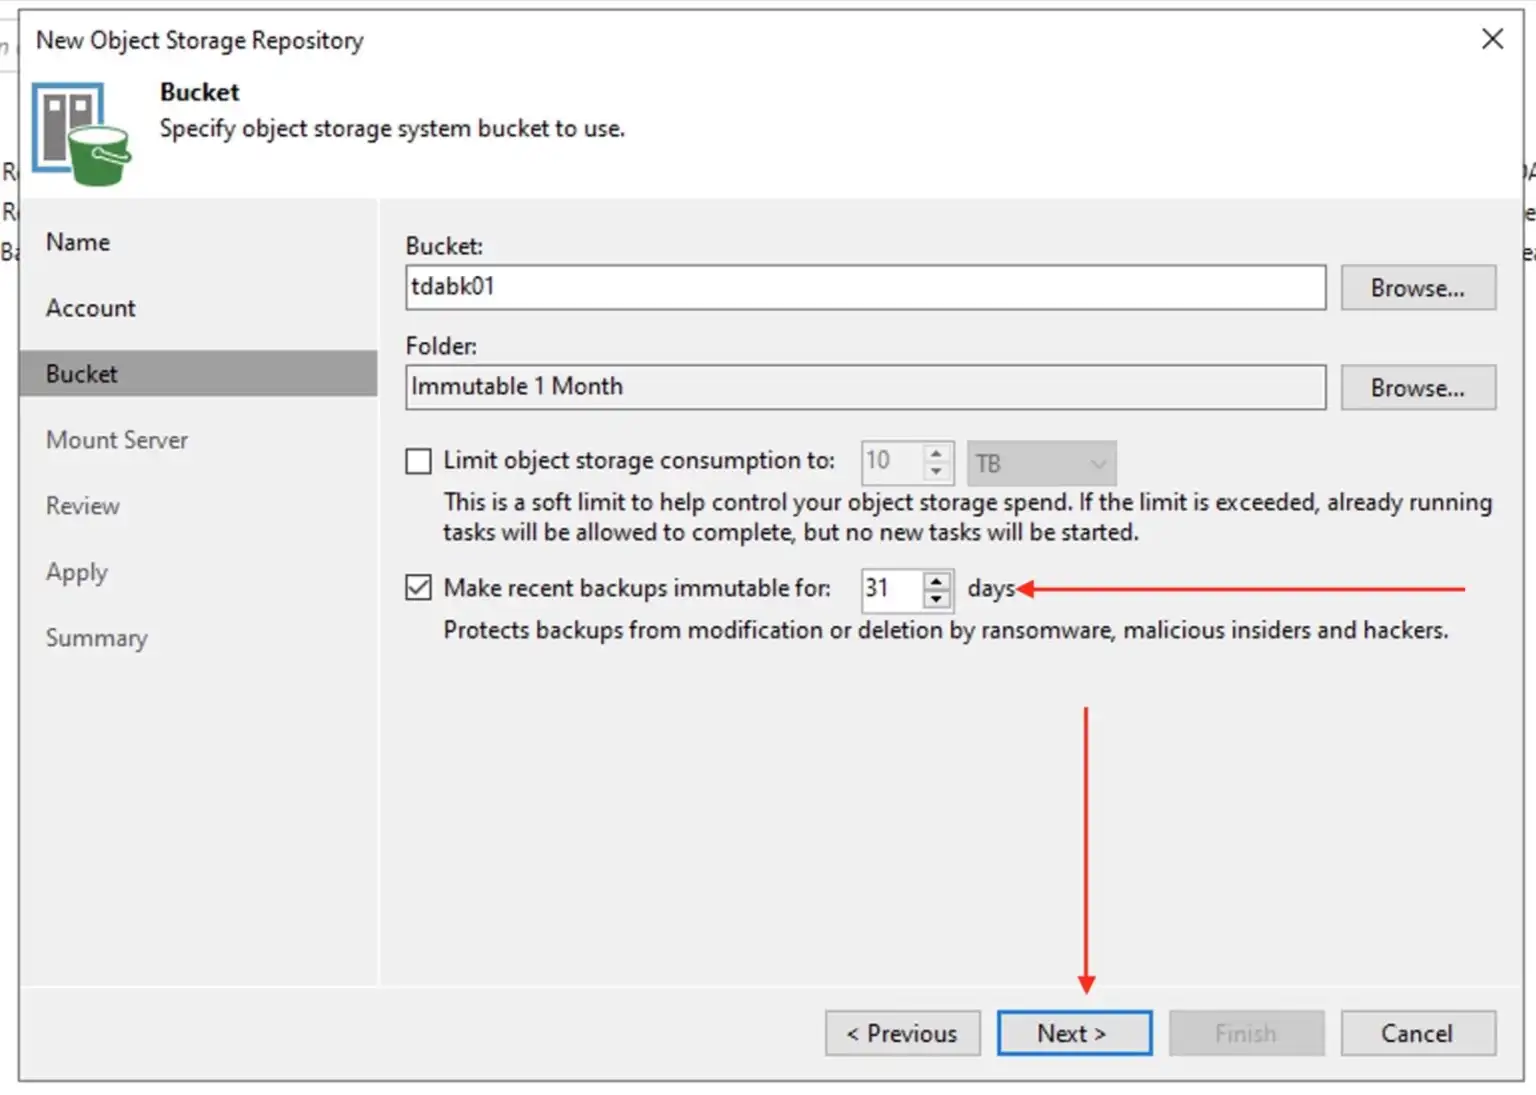
Note: If you do not select to make the recent backup immutable. You will get the error below. Why is this so? This is because we had previously configured the the bucket as immutability in the OOTBI web UI above.
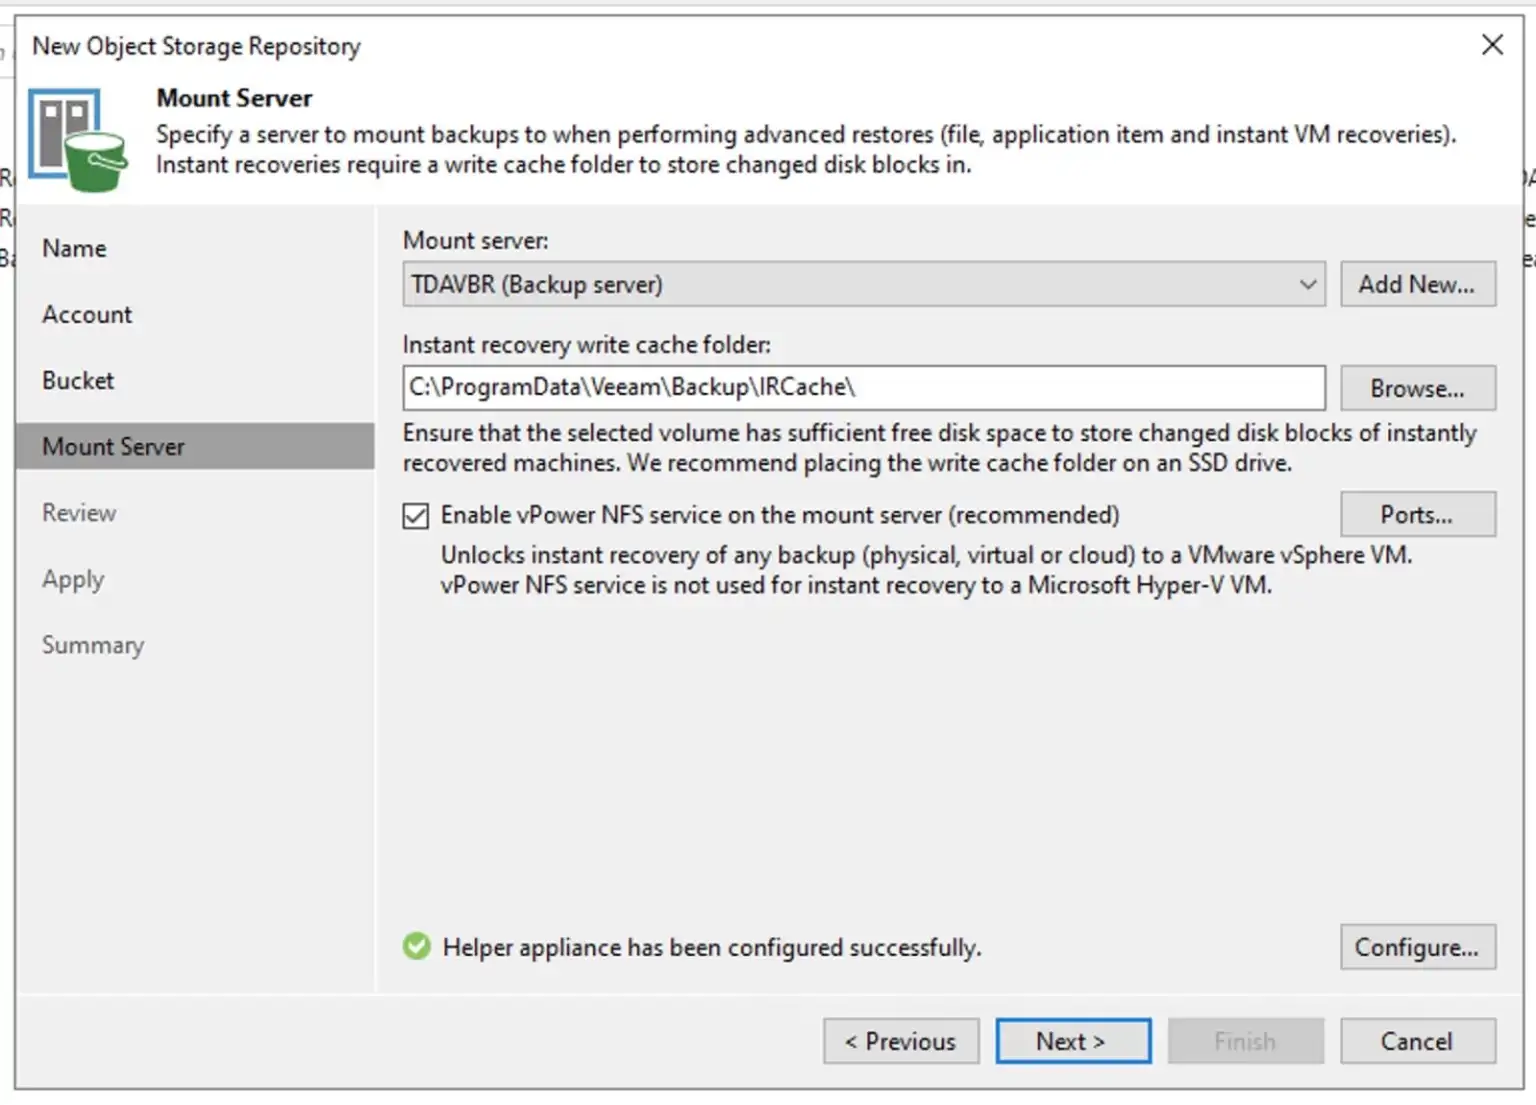
Next, I will select the mount server, and the instant recovery write cache folder. I will just click on next to proceed here.
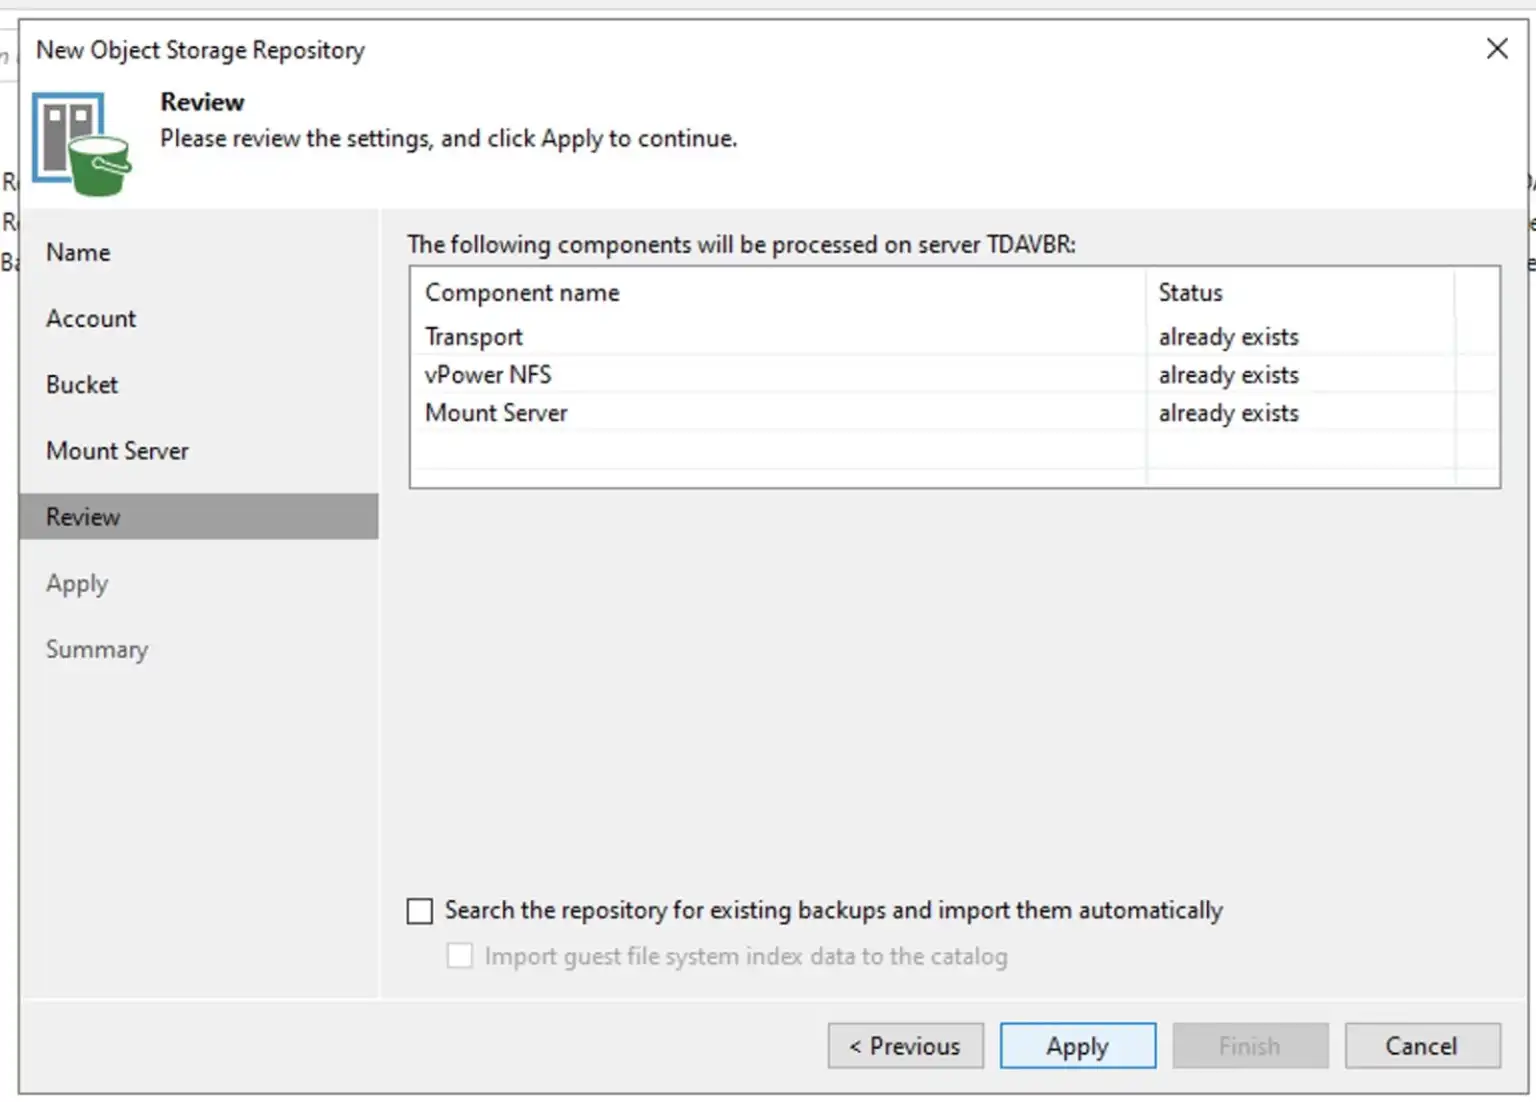
The following components already exists. Click on Apply to proceed with the creation of a new object storage repository.
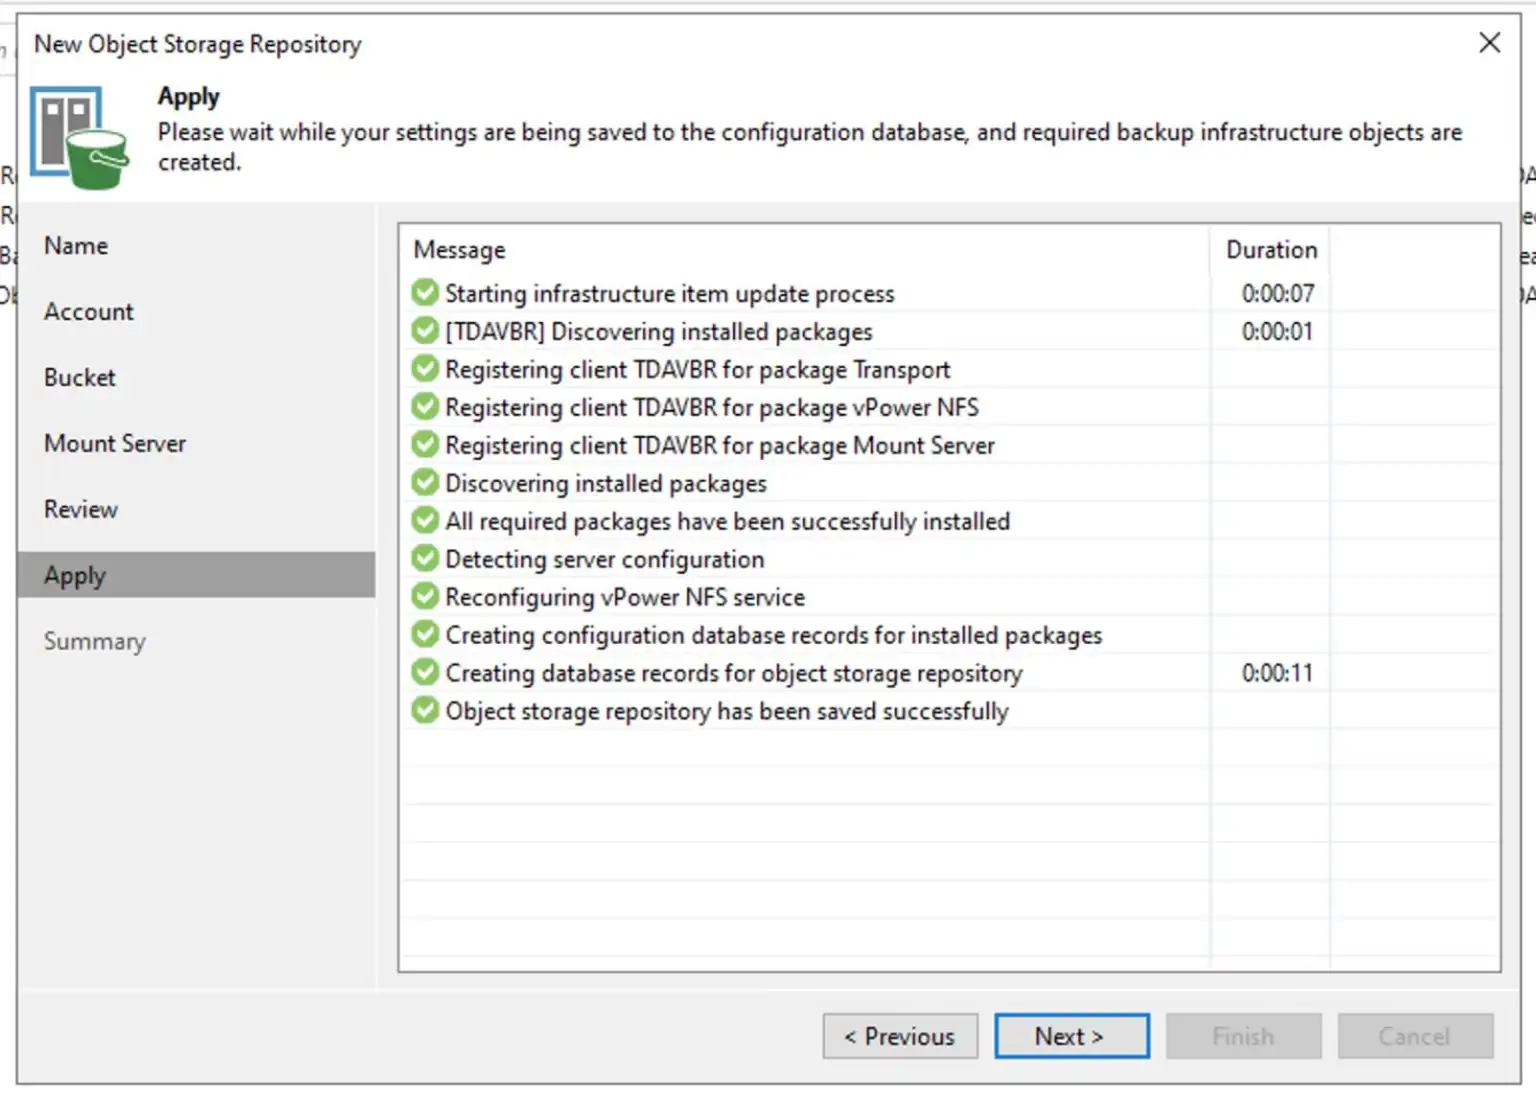
The settings have been applied. Click on Next to continue.
Click Finish on the Summary window as shown below.
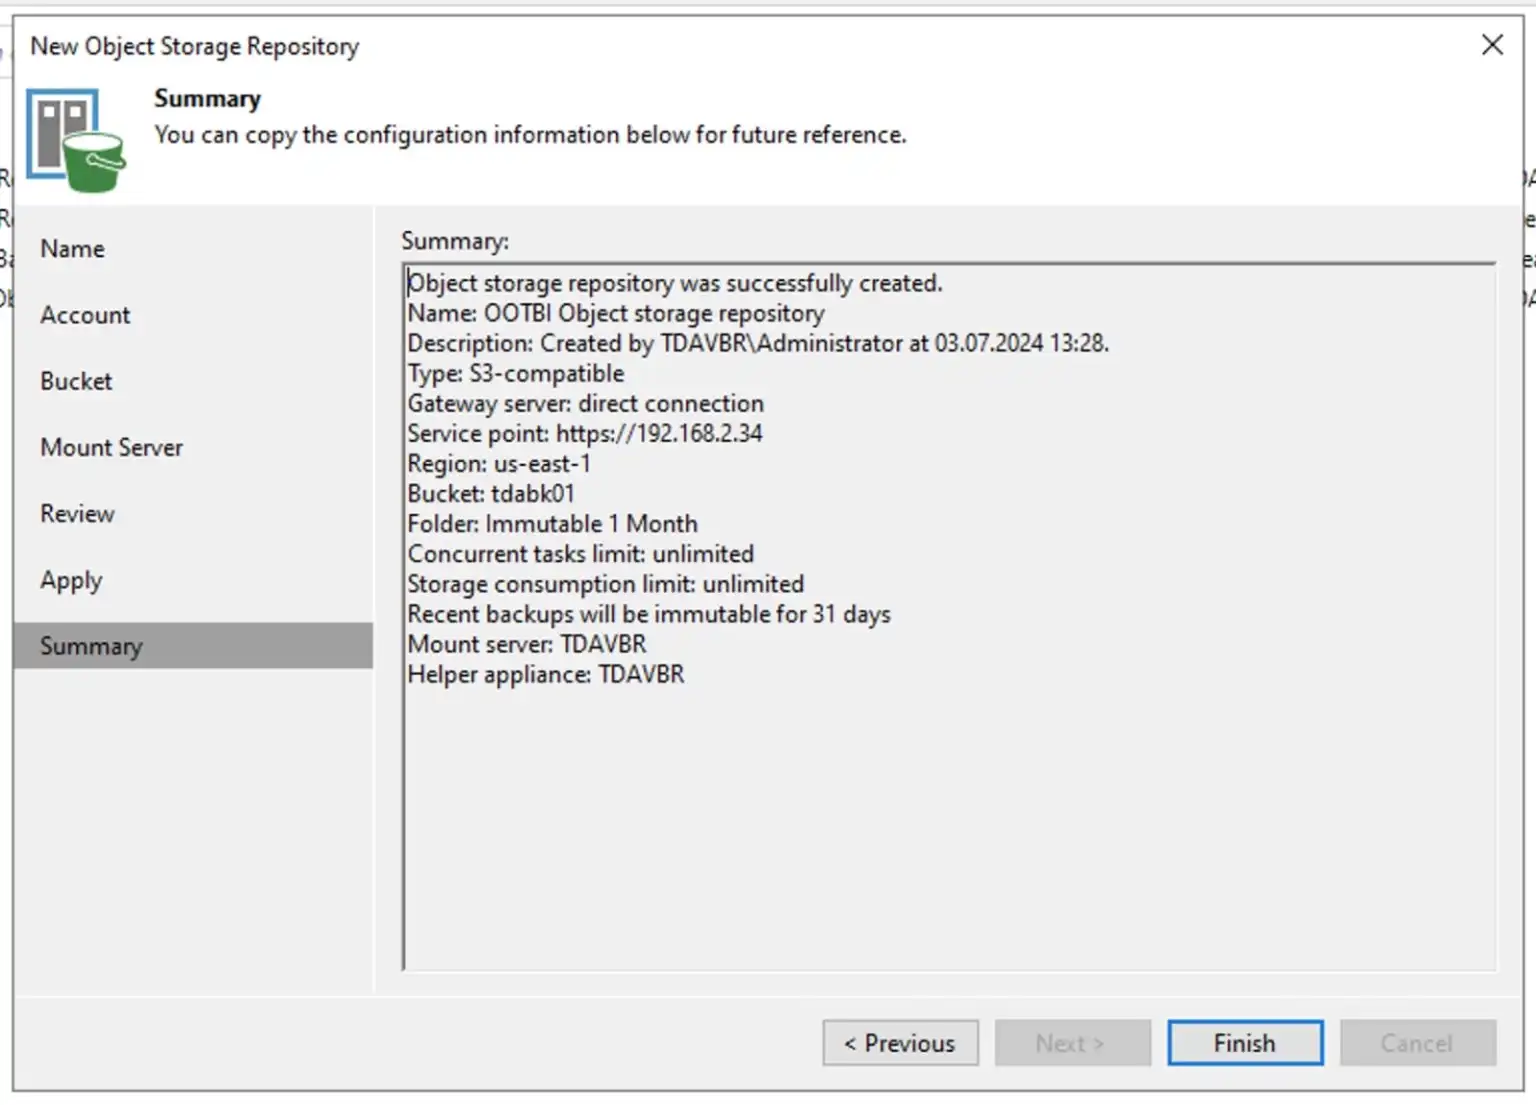
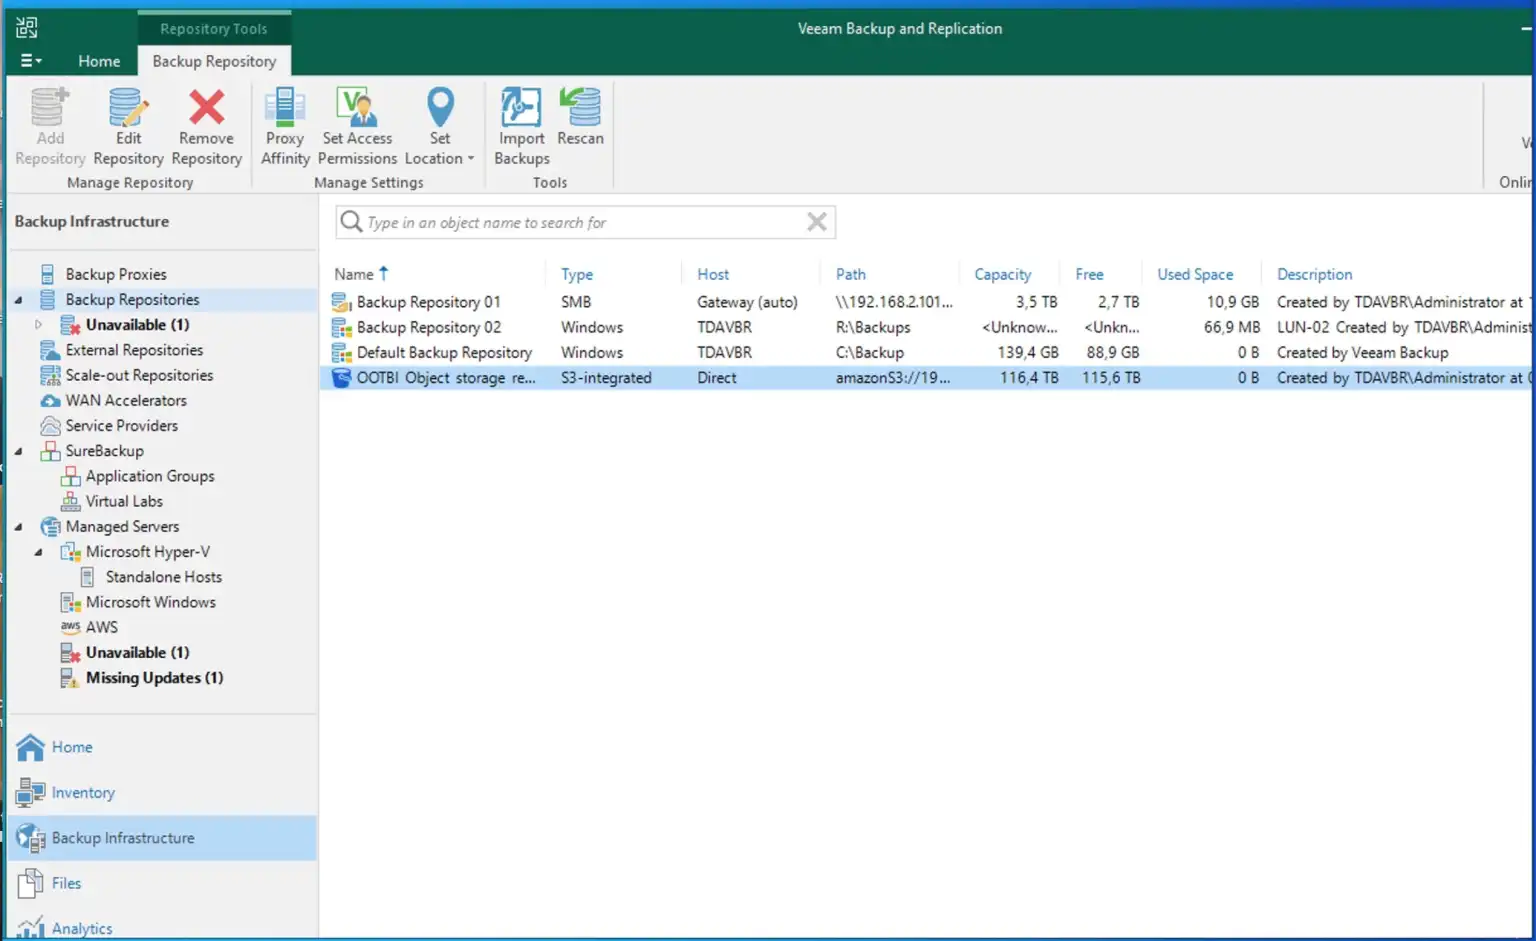
As you can see below, we have successfully created our OOTBI Object Storage Repository, and this is all that is needed to integrate ObjectFirst OOTBI Appliance with VBR.
Now that we are done adding OOTBI as our backup repository, We have to create our backup.
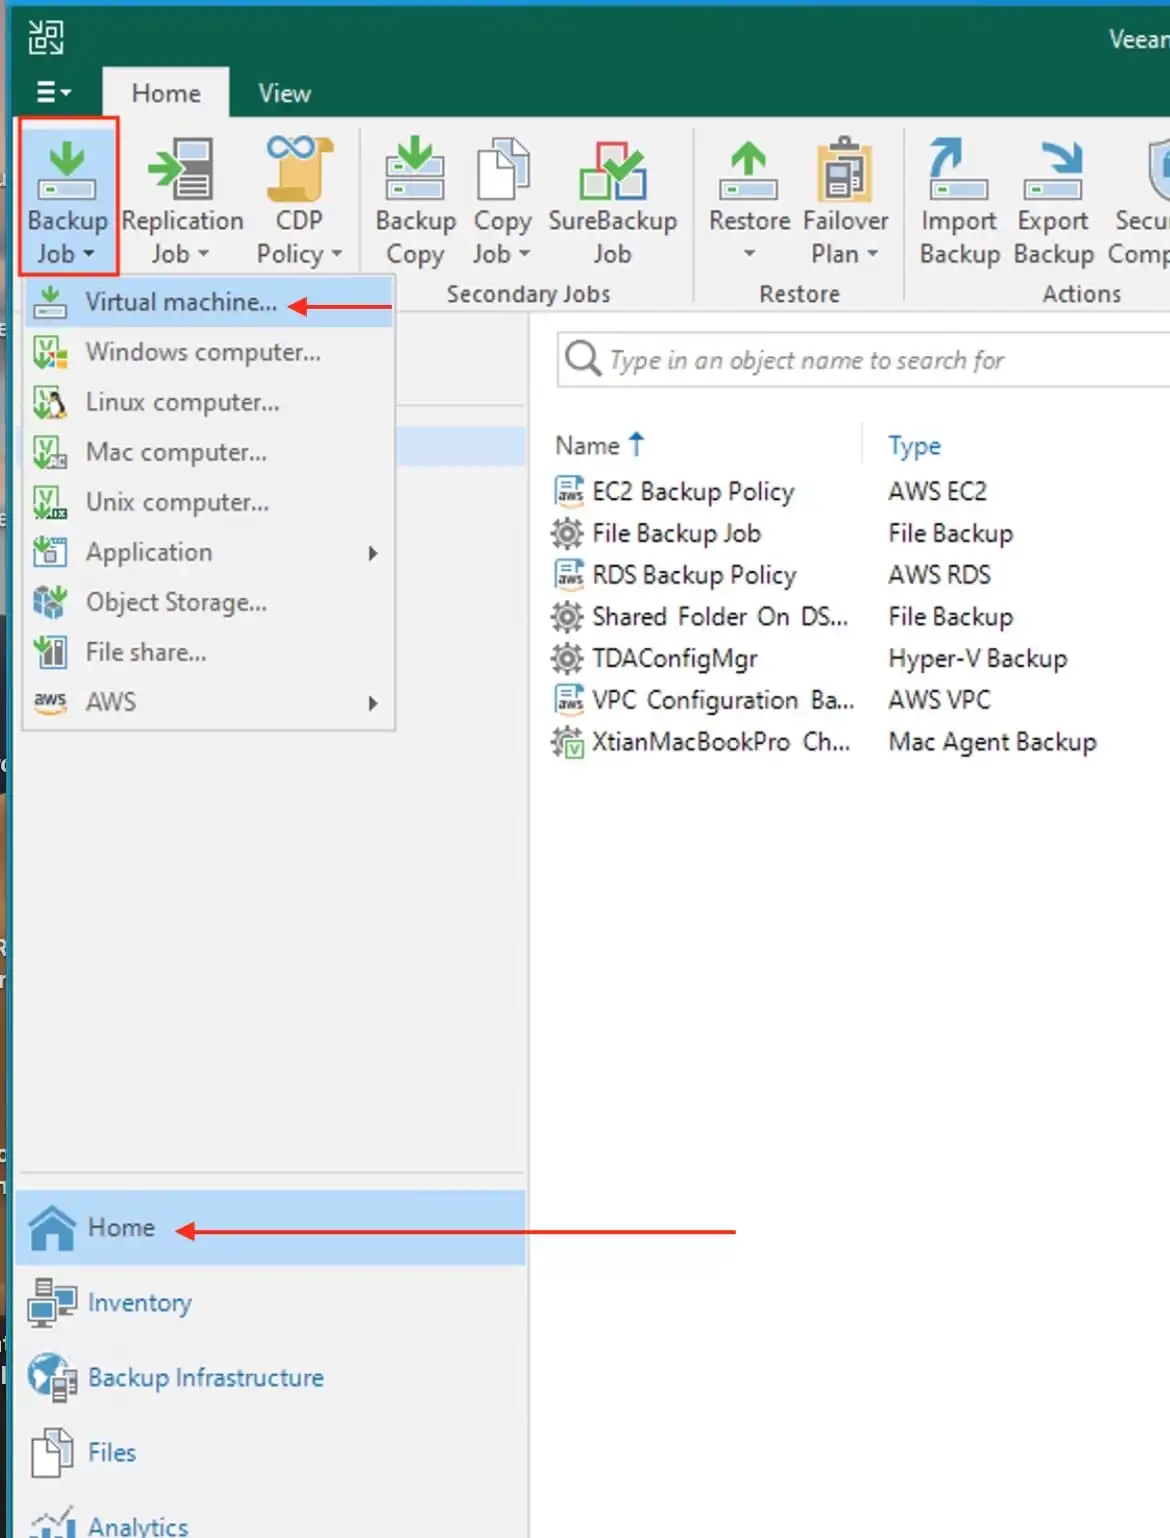
To do this, click on the “Home” view and then select Backup Job. You will also need to select the job type. In my case, it is a Virtual Machine as shown below.
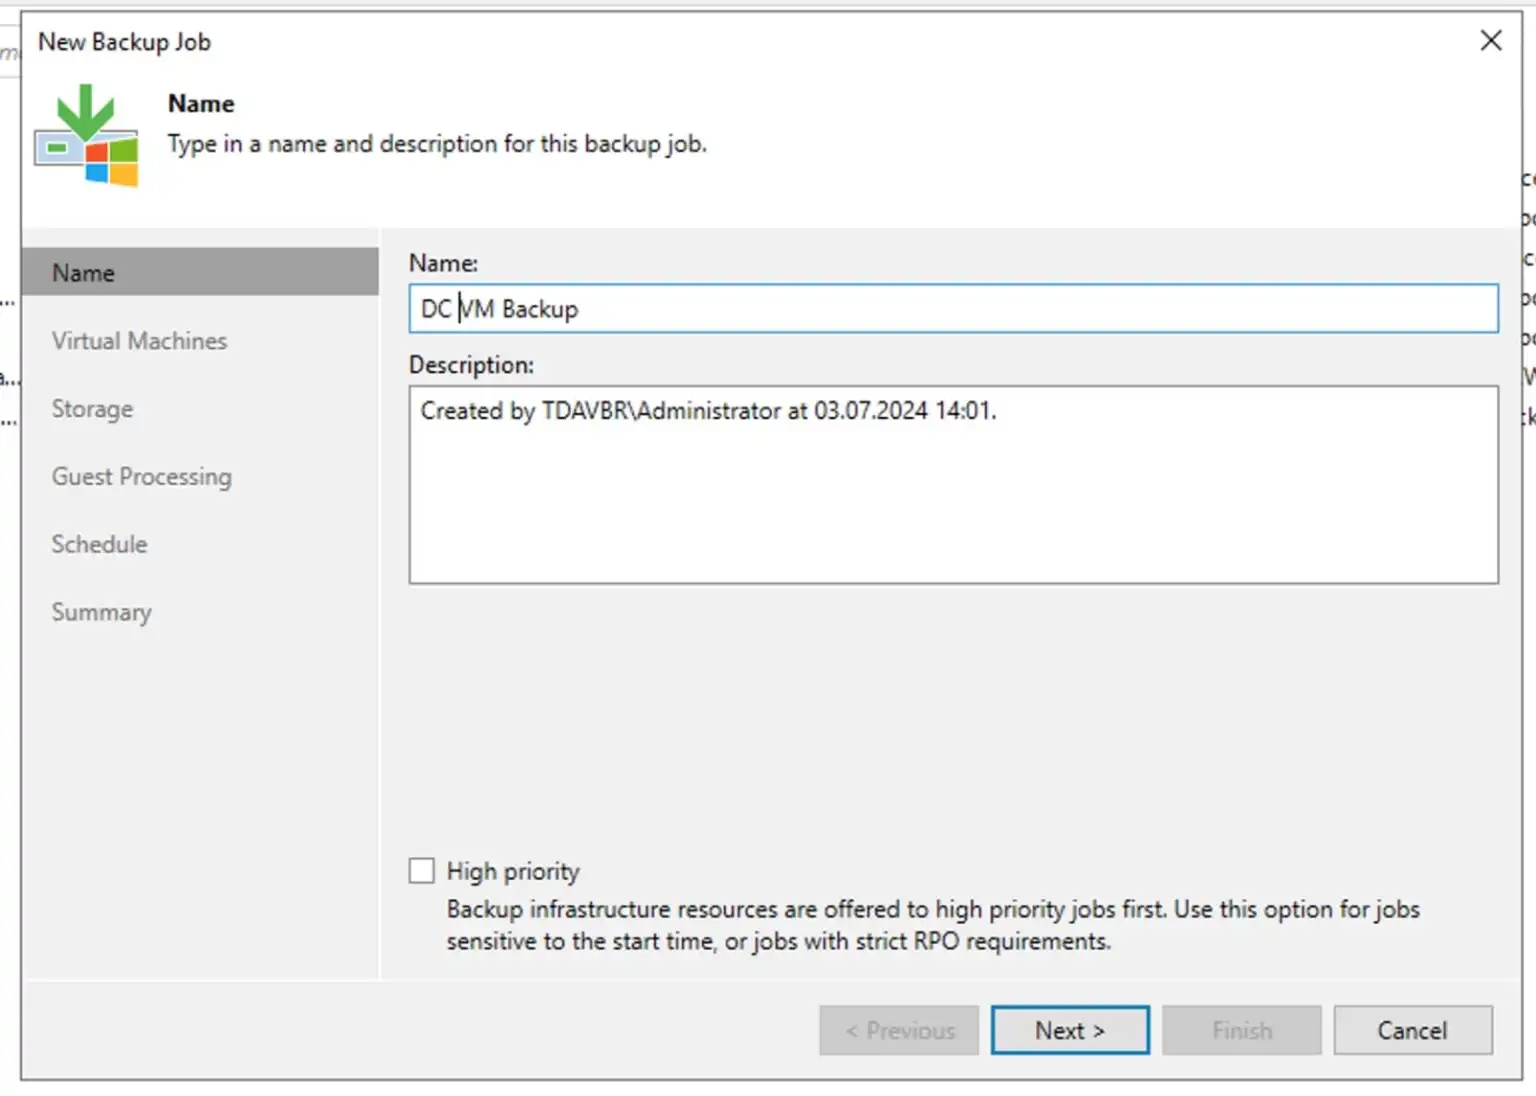
Enter the Backup Name and description.
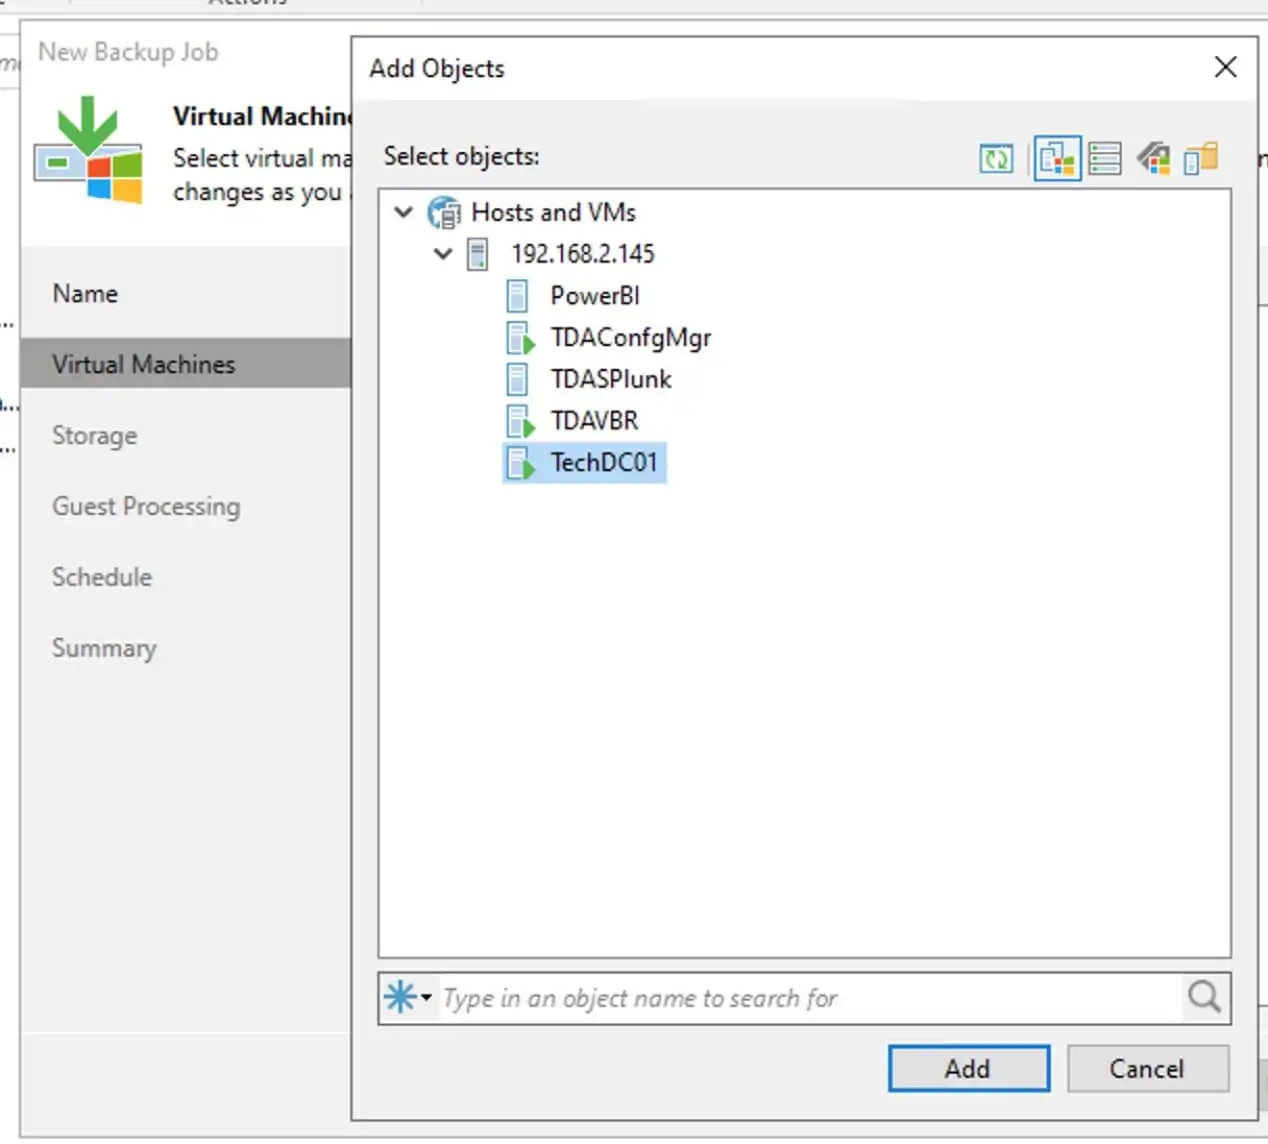
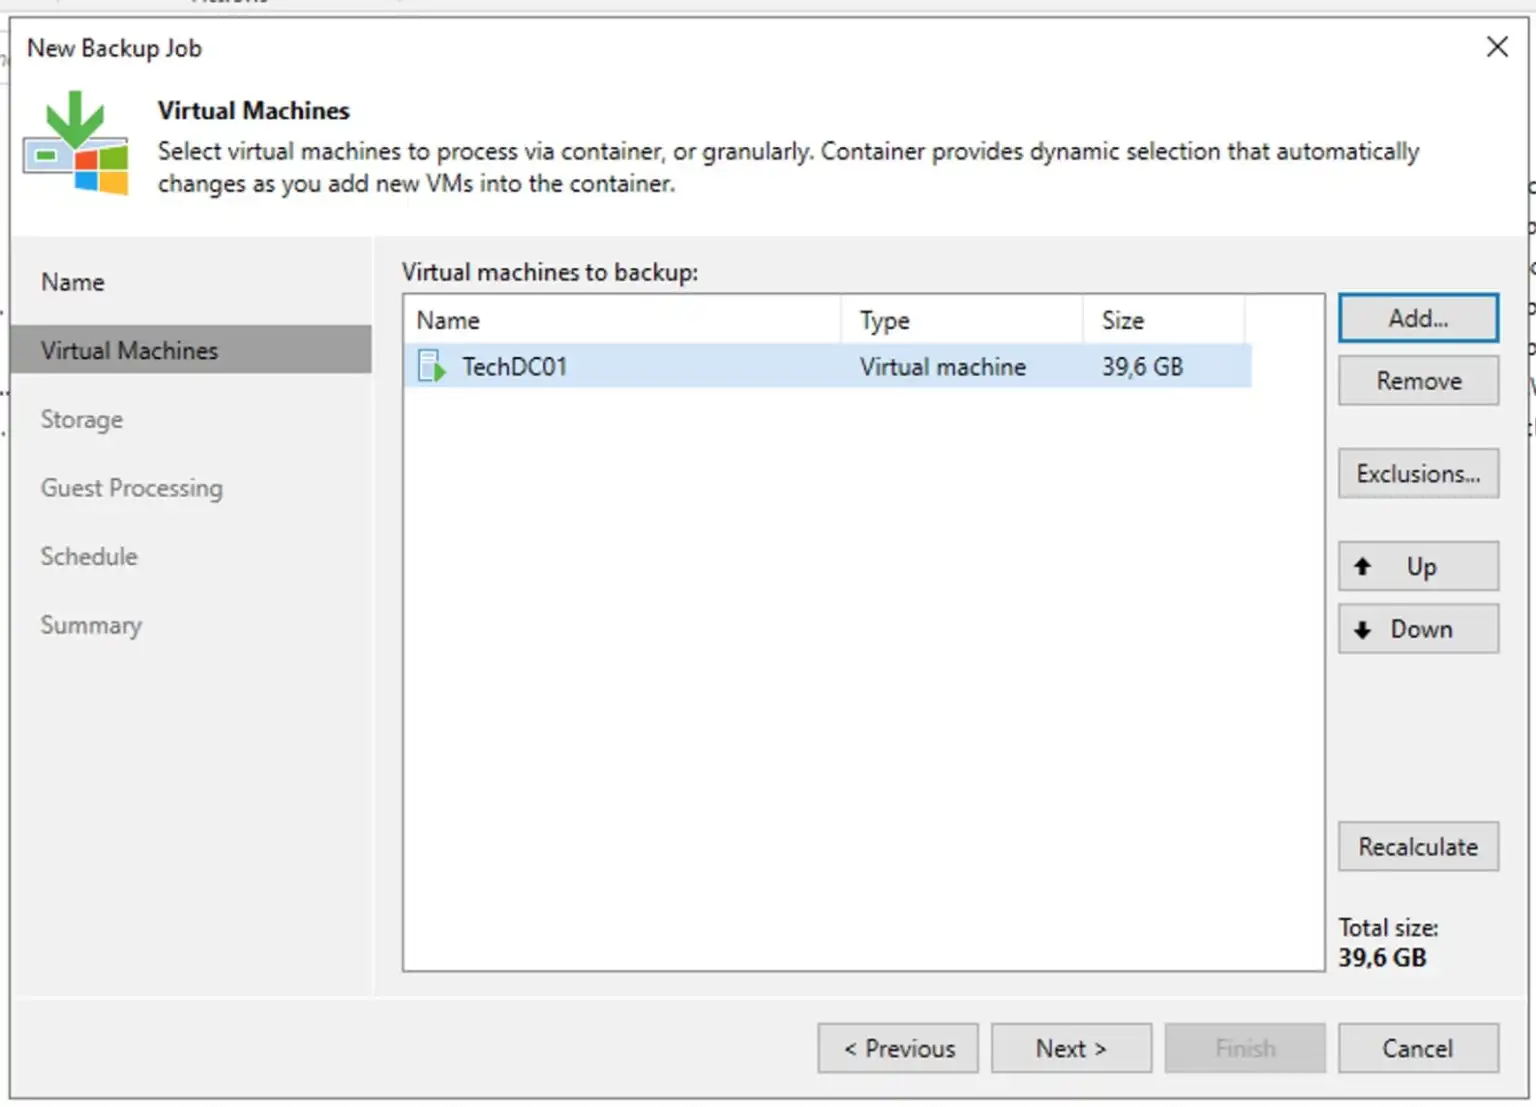
Click on Add to select from the list of VMs and click on Next. Ensure you select the desired VM
Click on Next to proceed
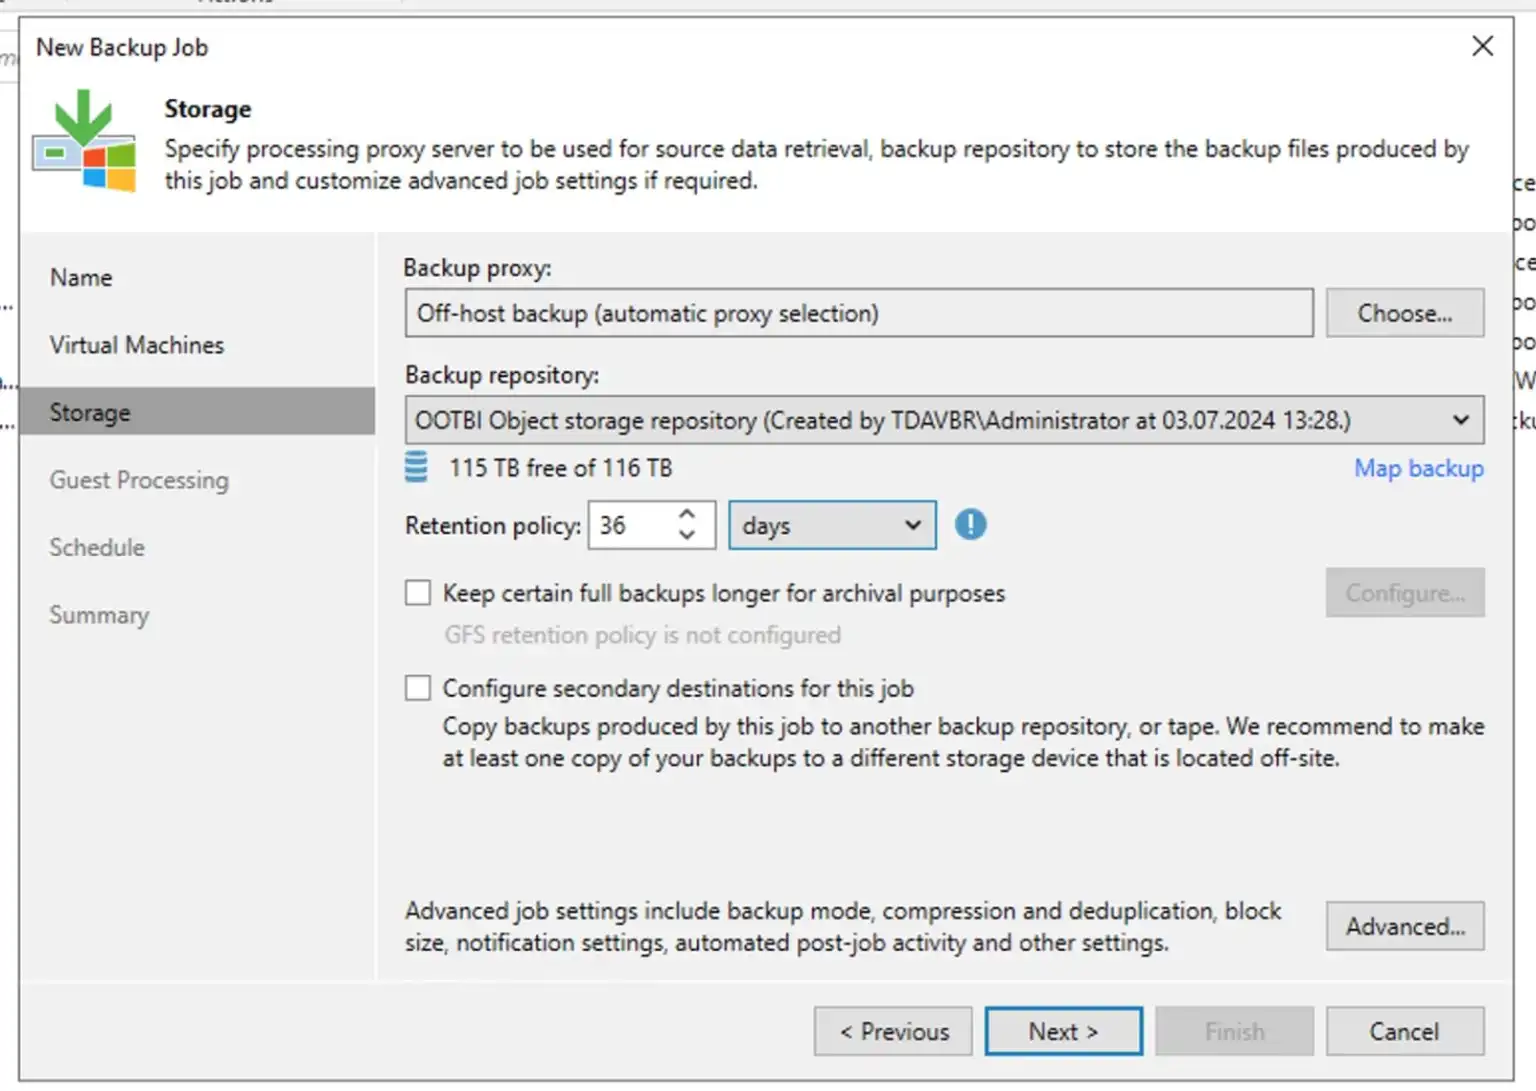
In this field, you must ensure that the right Object Storage Repository is selected. You should configure a secondary location for this backup as a best practice. Configuring a secondary backup location is important to ensure redundancy and reliability in case the primary backup location fails or becomes inaccessible.
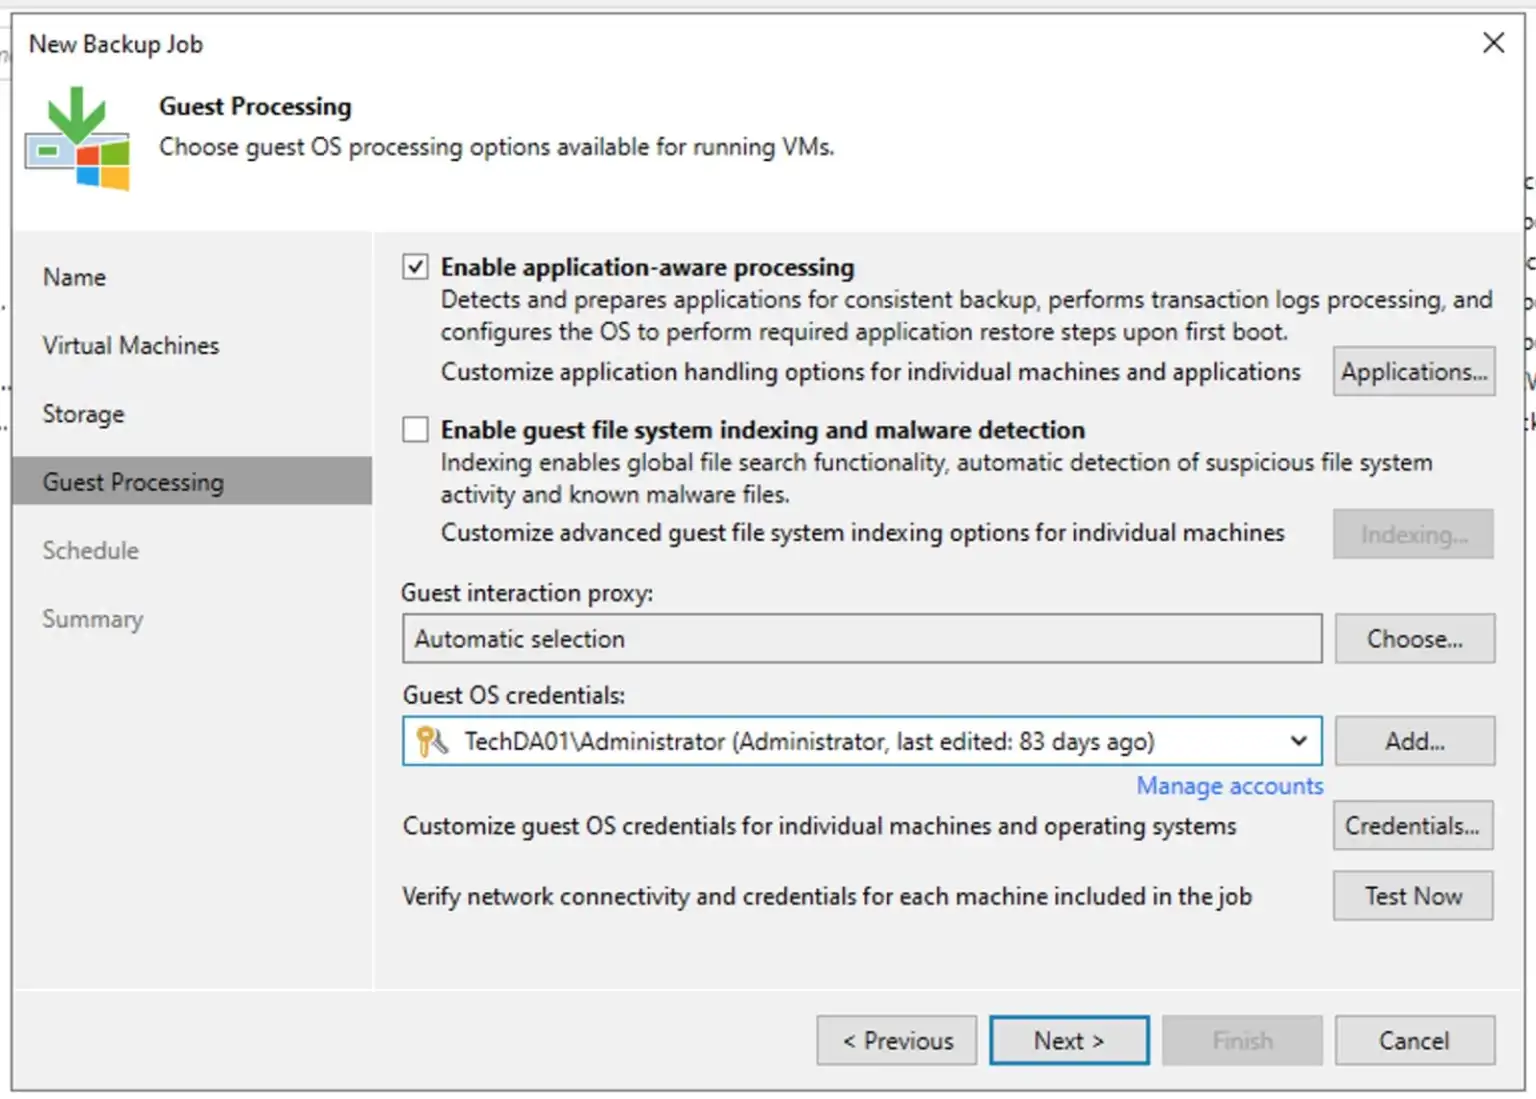
Select “Enable application-aware processing” as shown below as this is a Domain Controller (DC). This will require you to enter the Guest OS credentials. Click on Next to proceed.
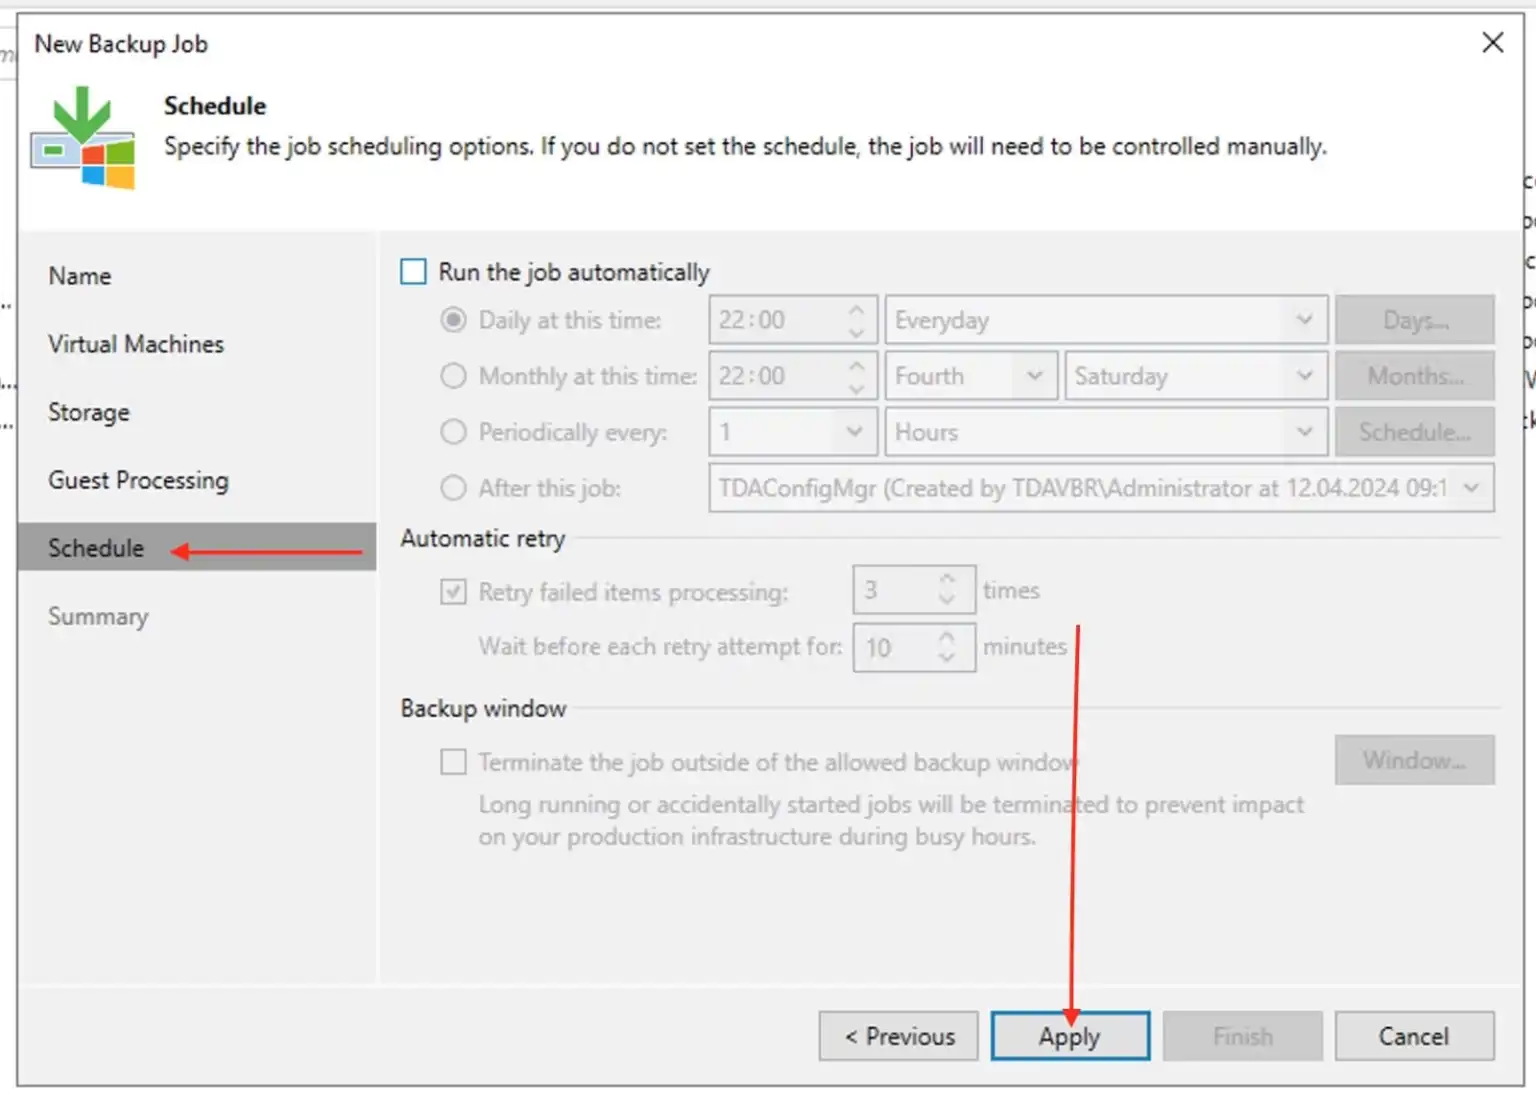
I do not care about automatic job schedule because this is different for everyone. Click on Apply.
To run the job, click on “Run the job when I click Finish”.
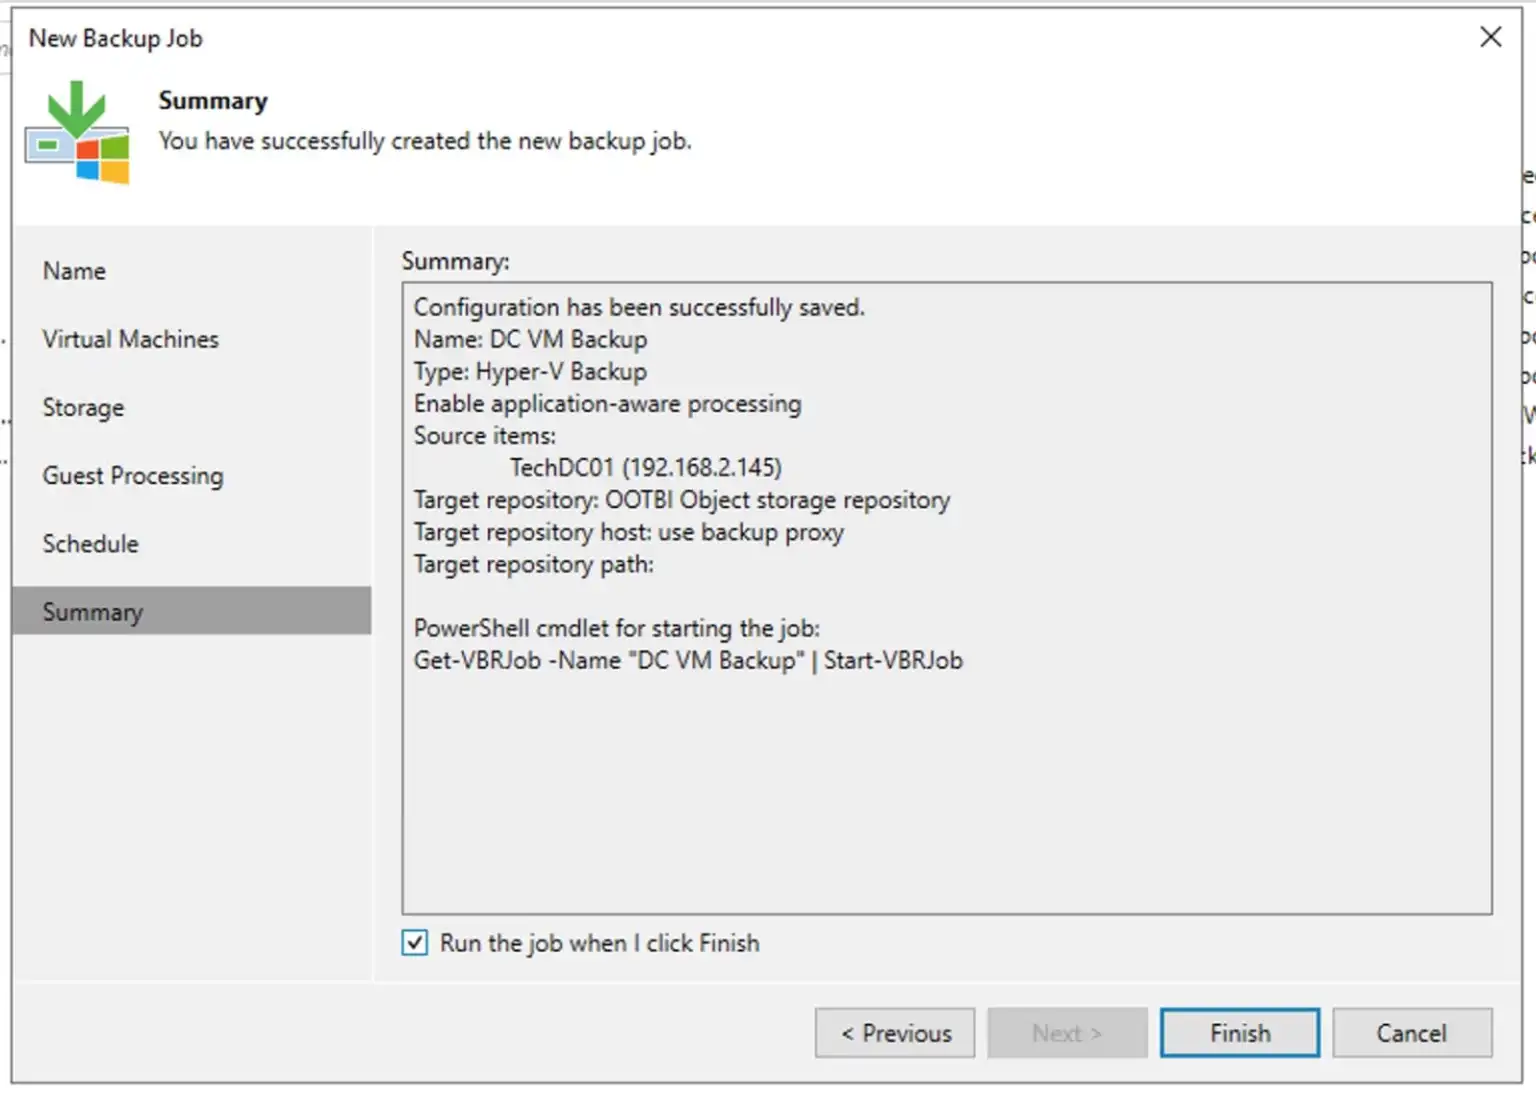
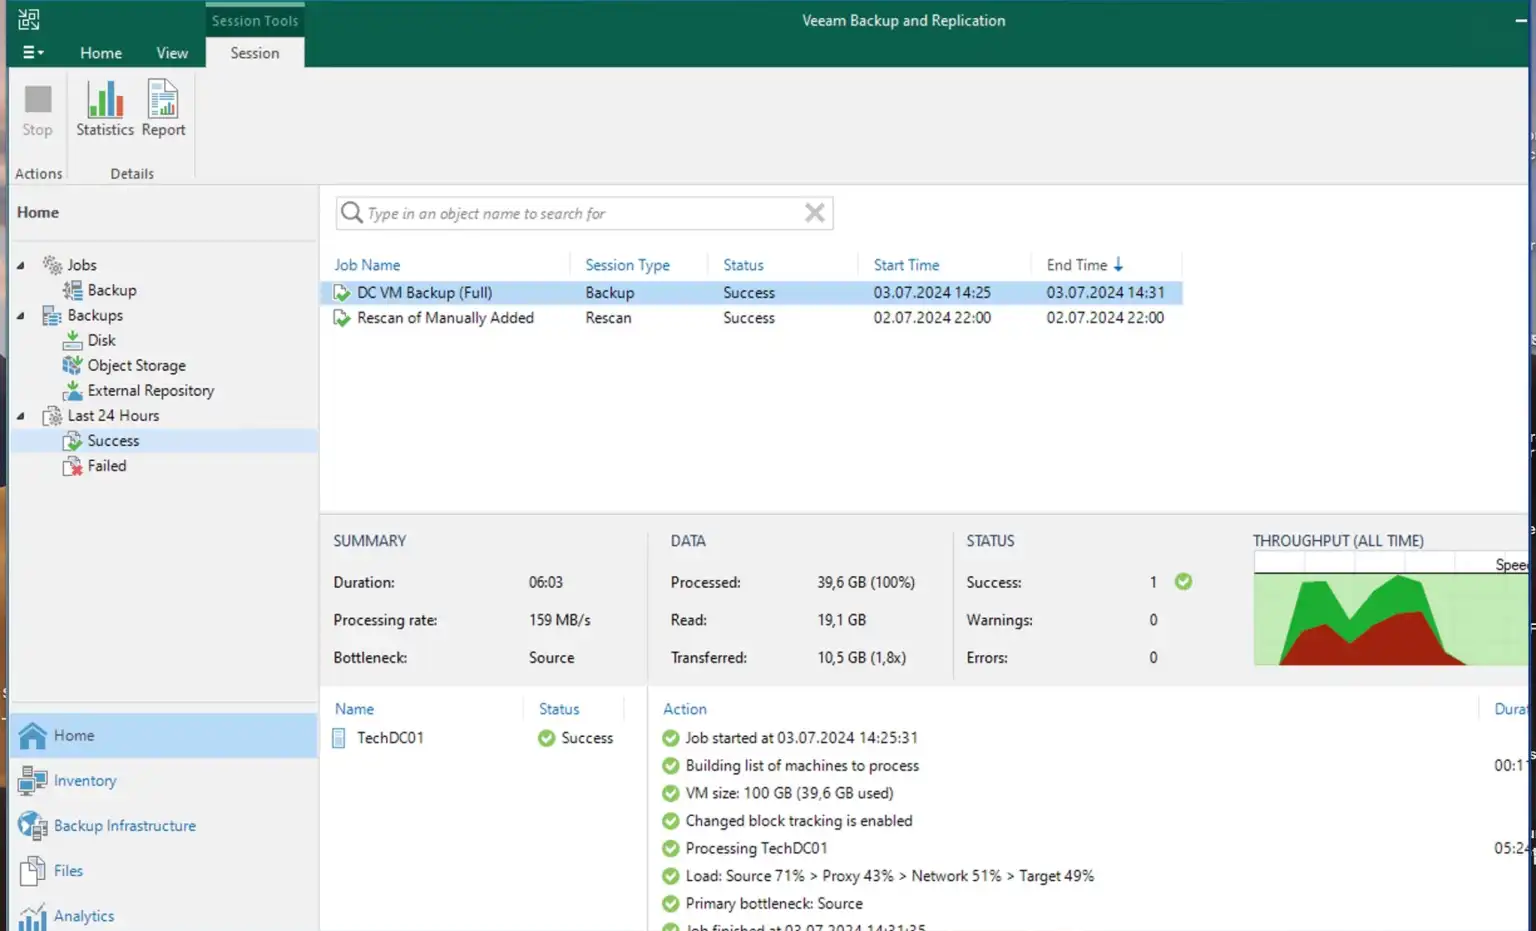
As you can see below, our backup has succeeded
Now that our backup is successful. I will also want to show you how fast to perform a VM restore. From the inventory pane, I will select Object Storage and locate the Job as shown below
BTW, I really appreciate how Veeam allows you to execute processes in multiple ways similar to Windows. You can initiate a restore by clicking on the Home view, using the navigation pane, or accessing the ribbon for your backup restoration
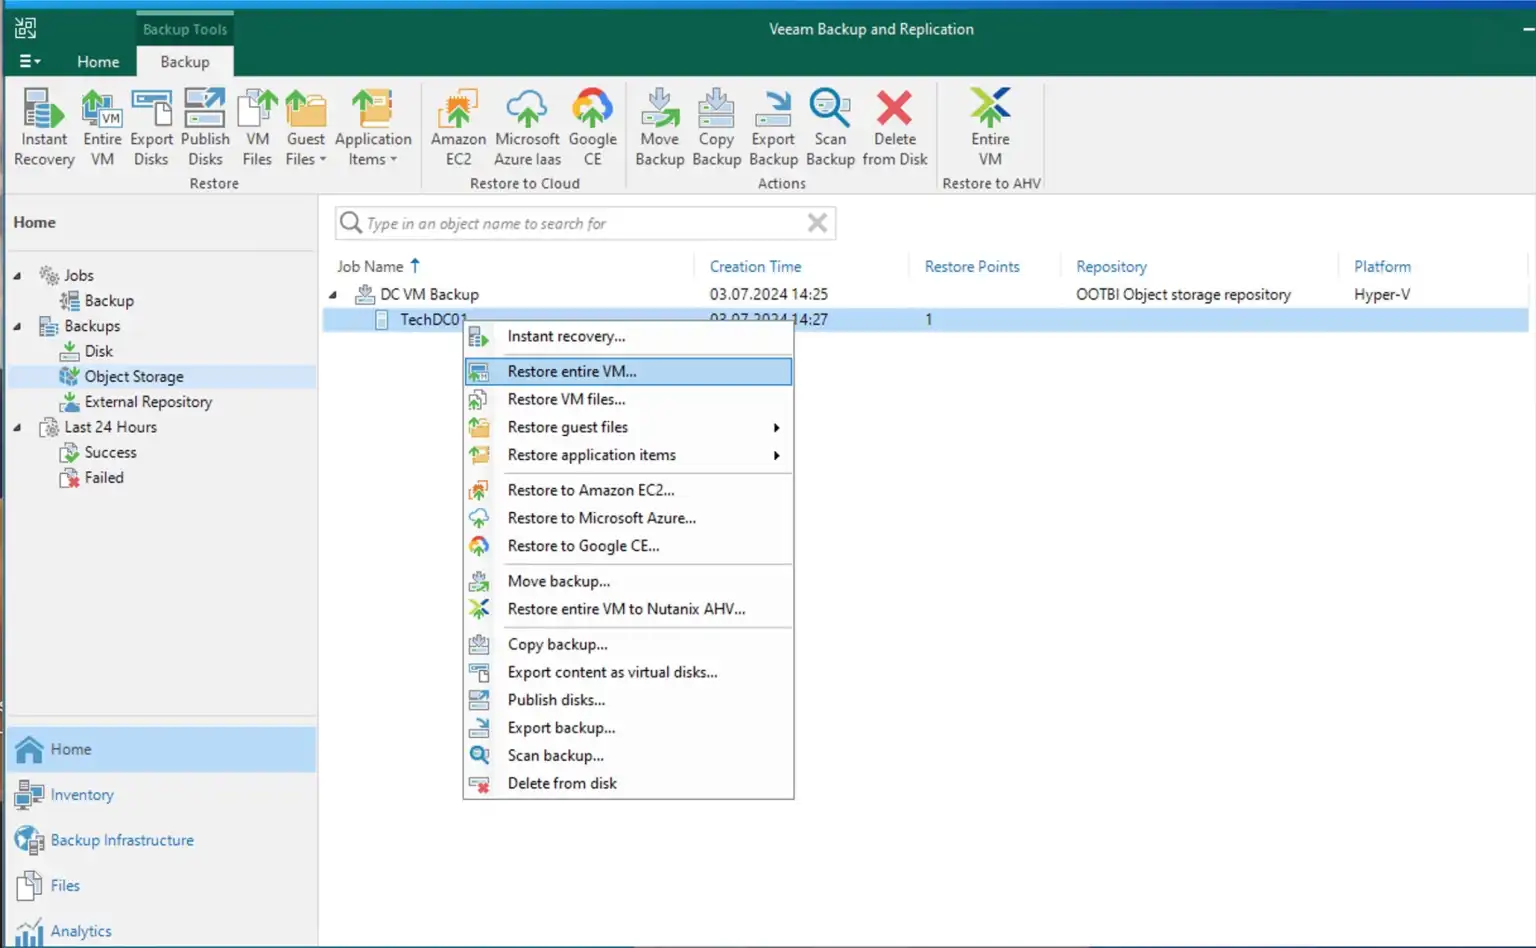
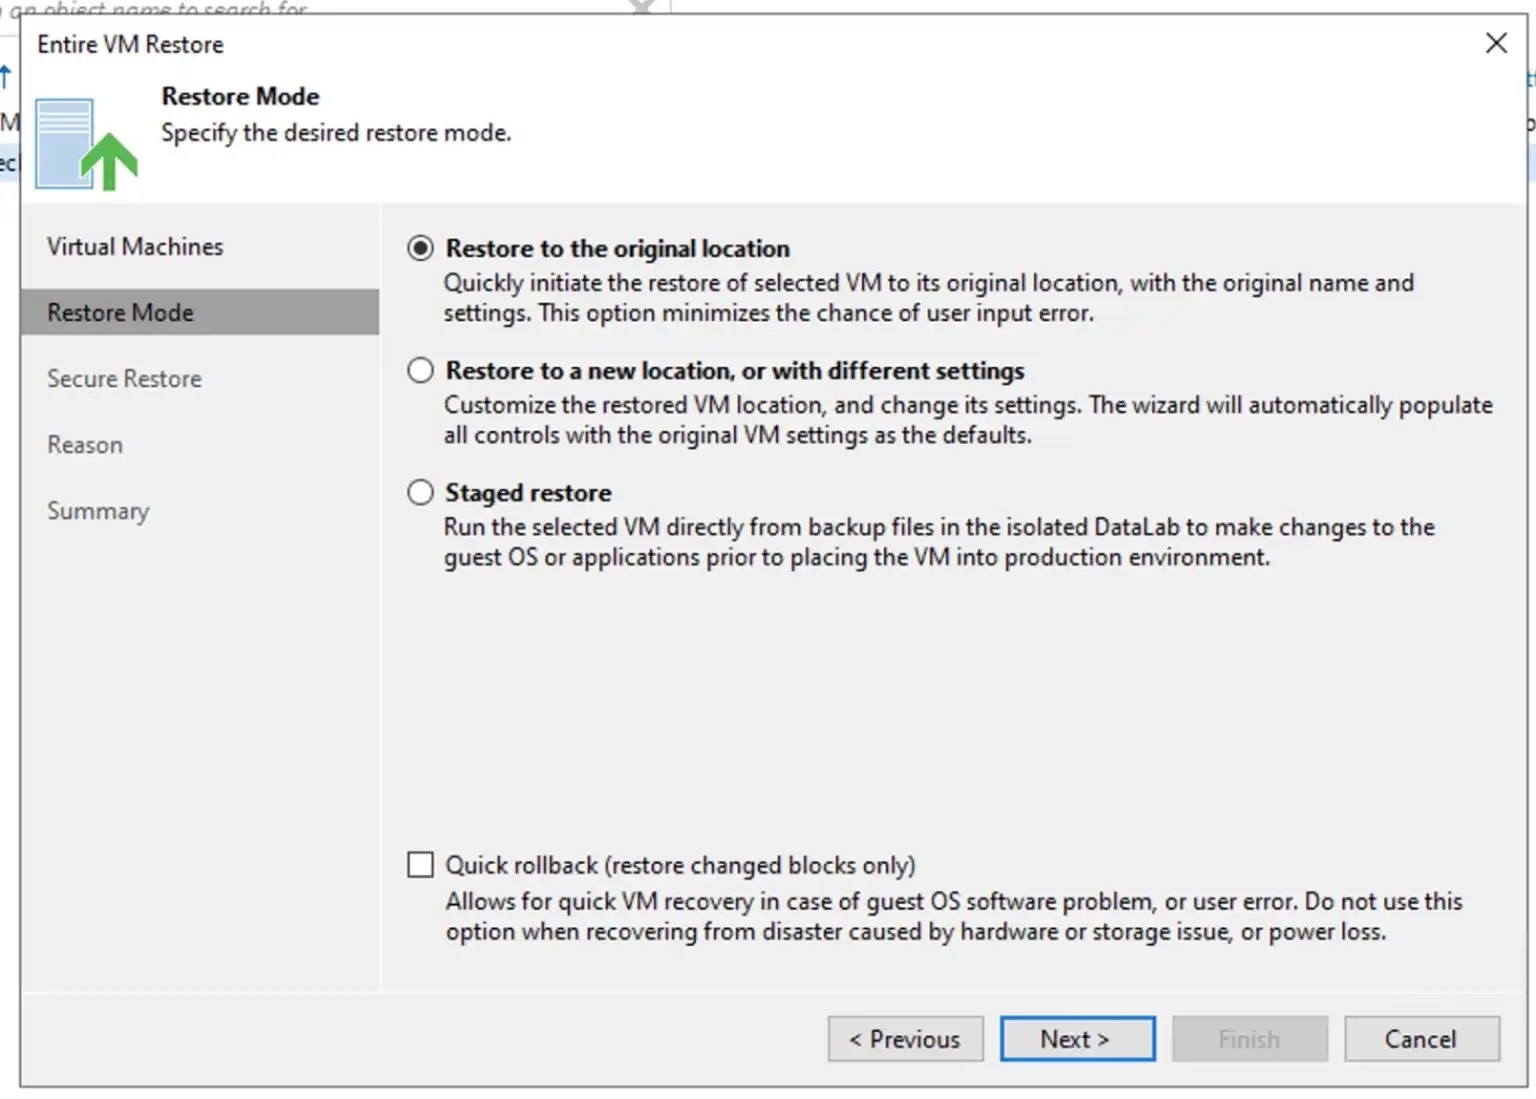
Add the VM restore
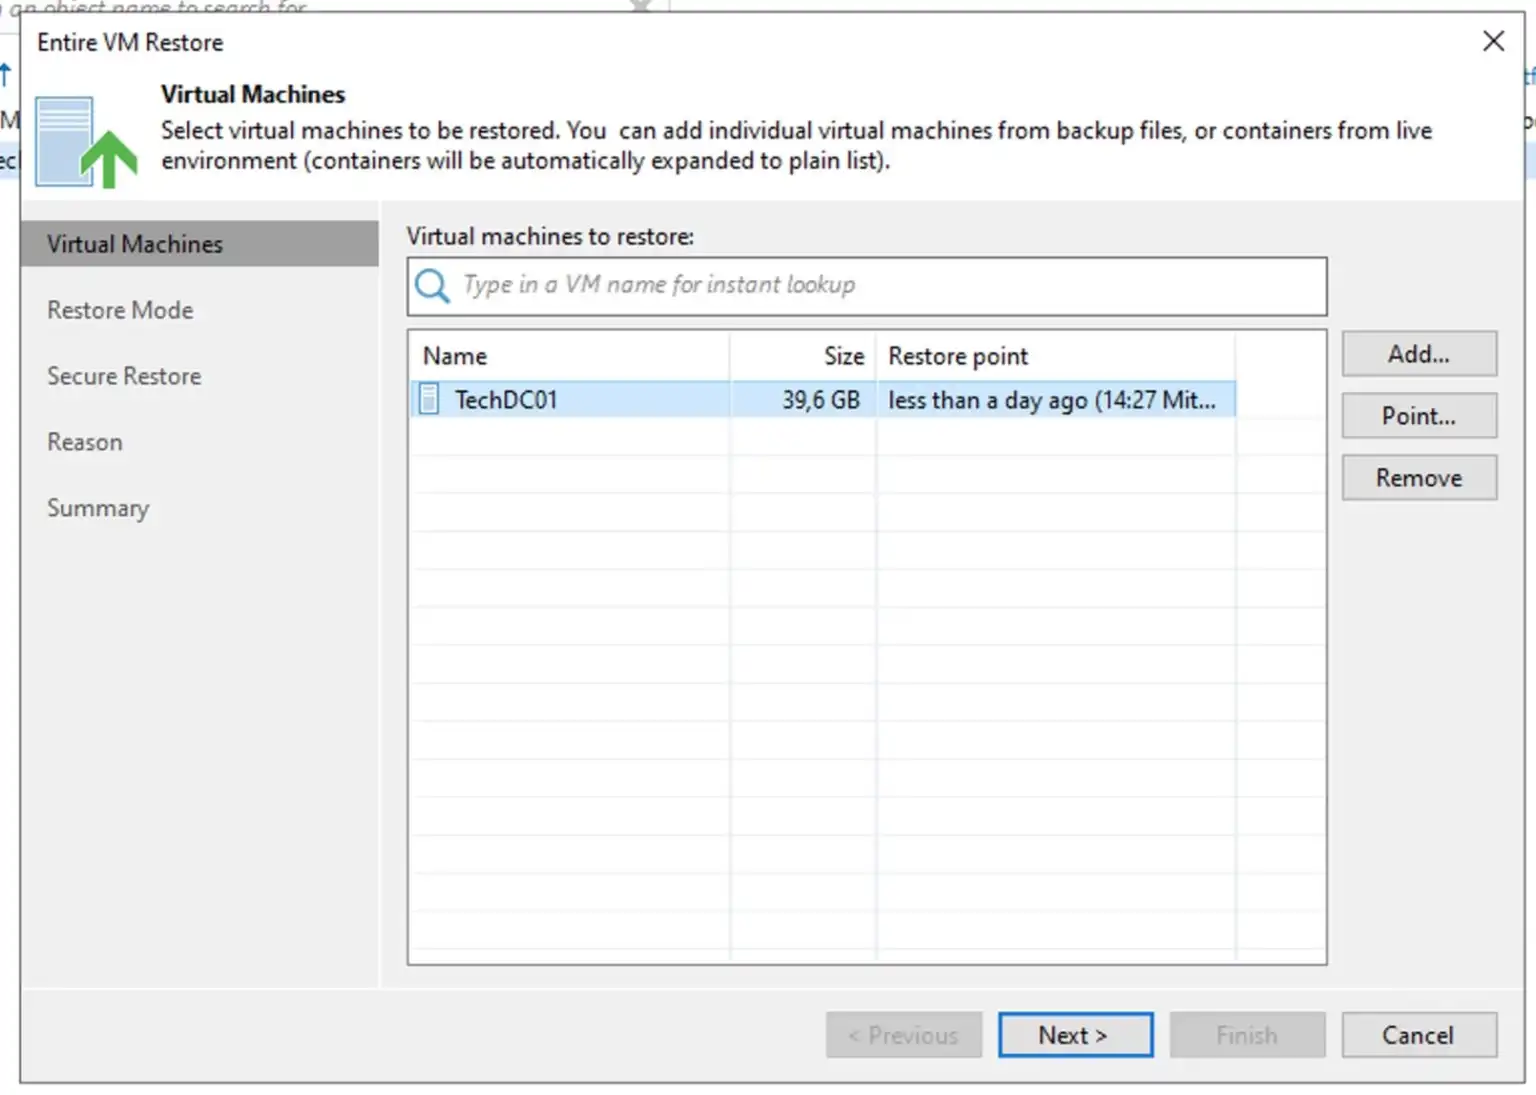
I will be restoring to the original location
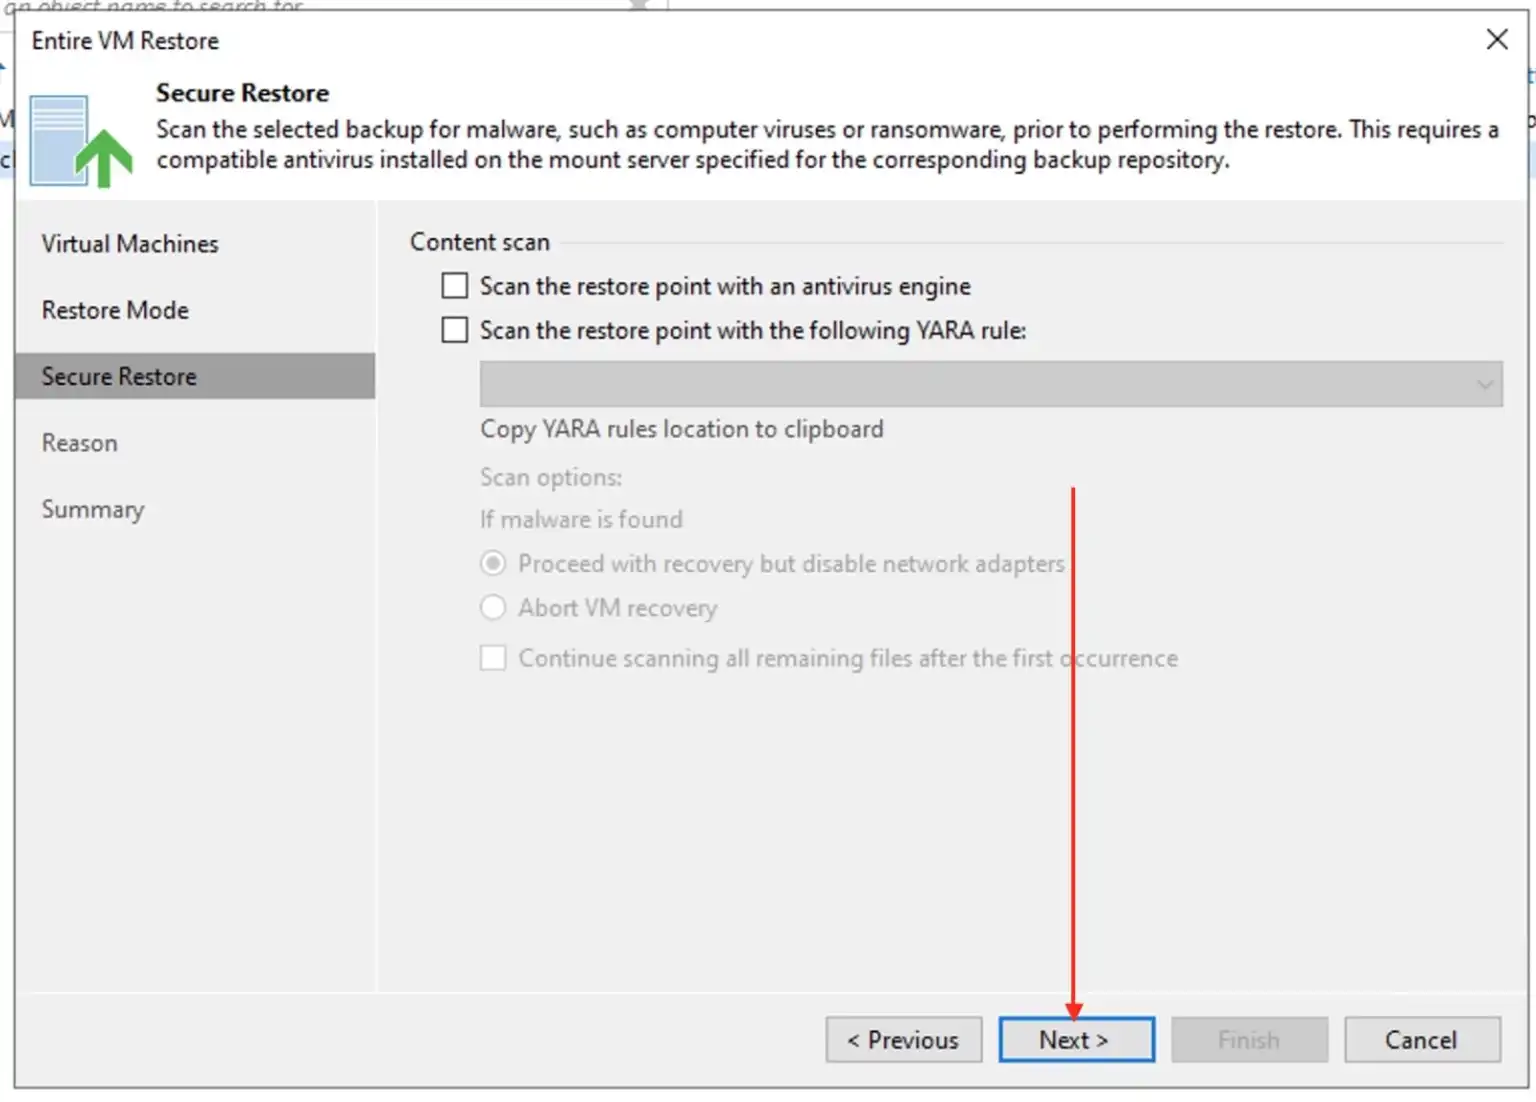
At this time, I am not interested in any of the secure restore scan. I will show you this in the next guide. Click next to proceed.
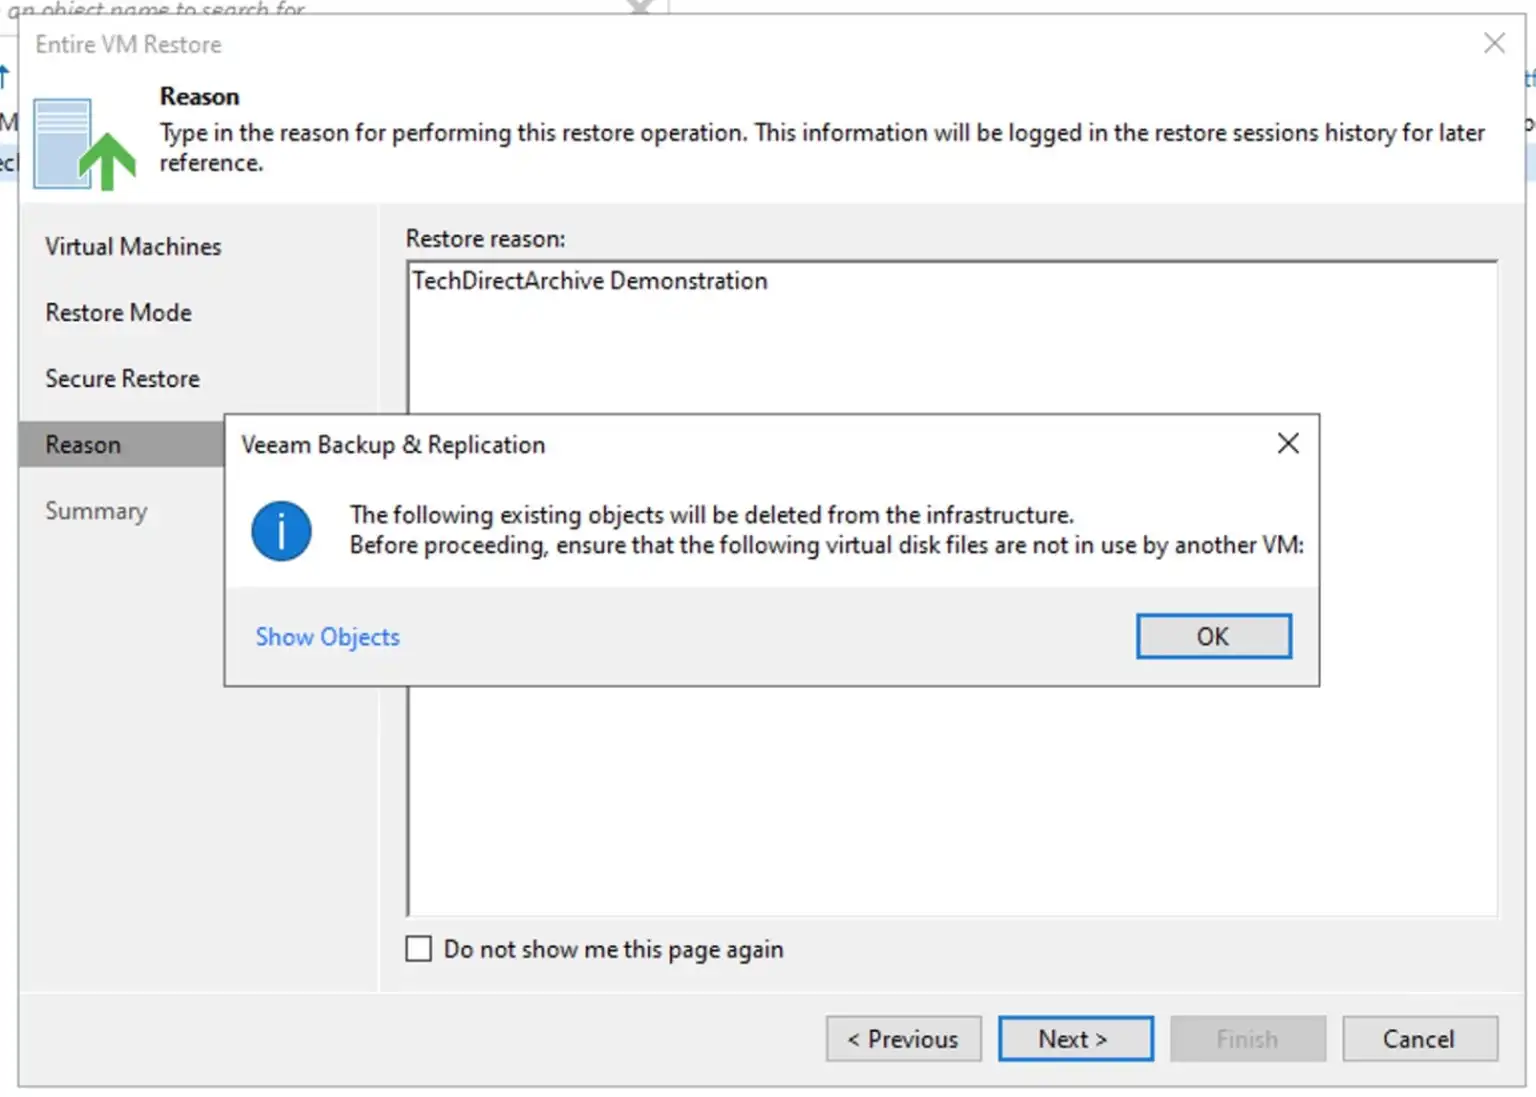
As you can see below, the original VM has been marked for deletion.
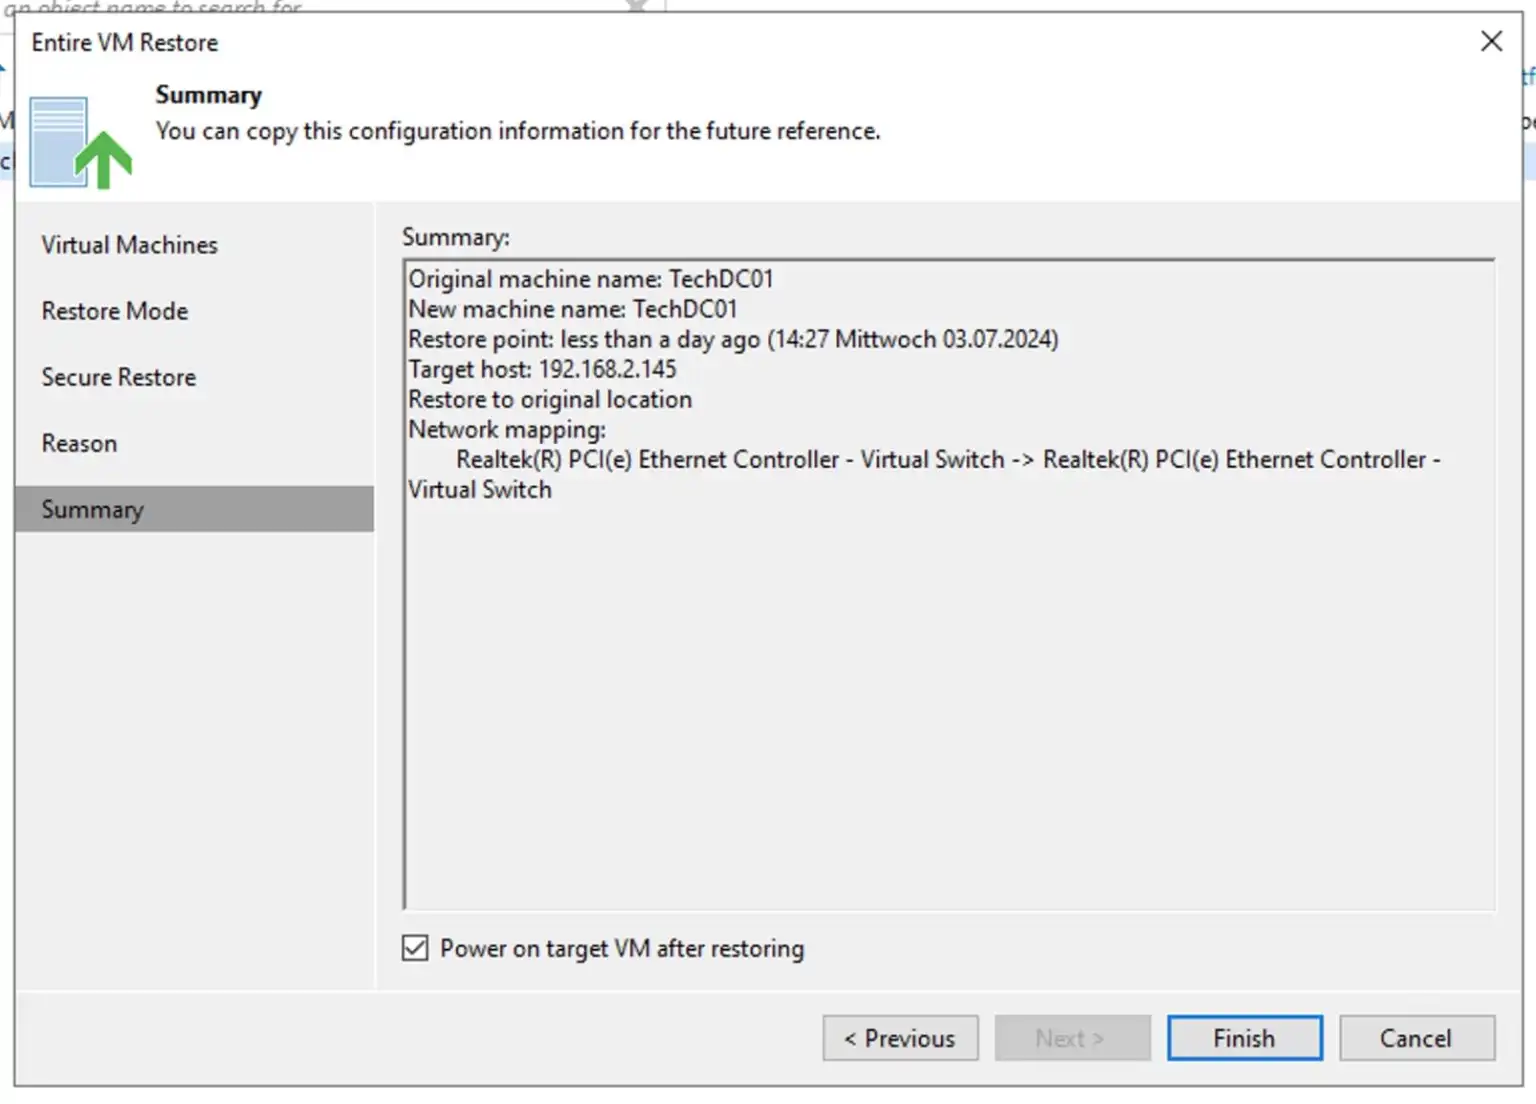
I want the VM to be powered on after restoring it. Therefore, I will click on the checkbox and then click on Finish.
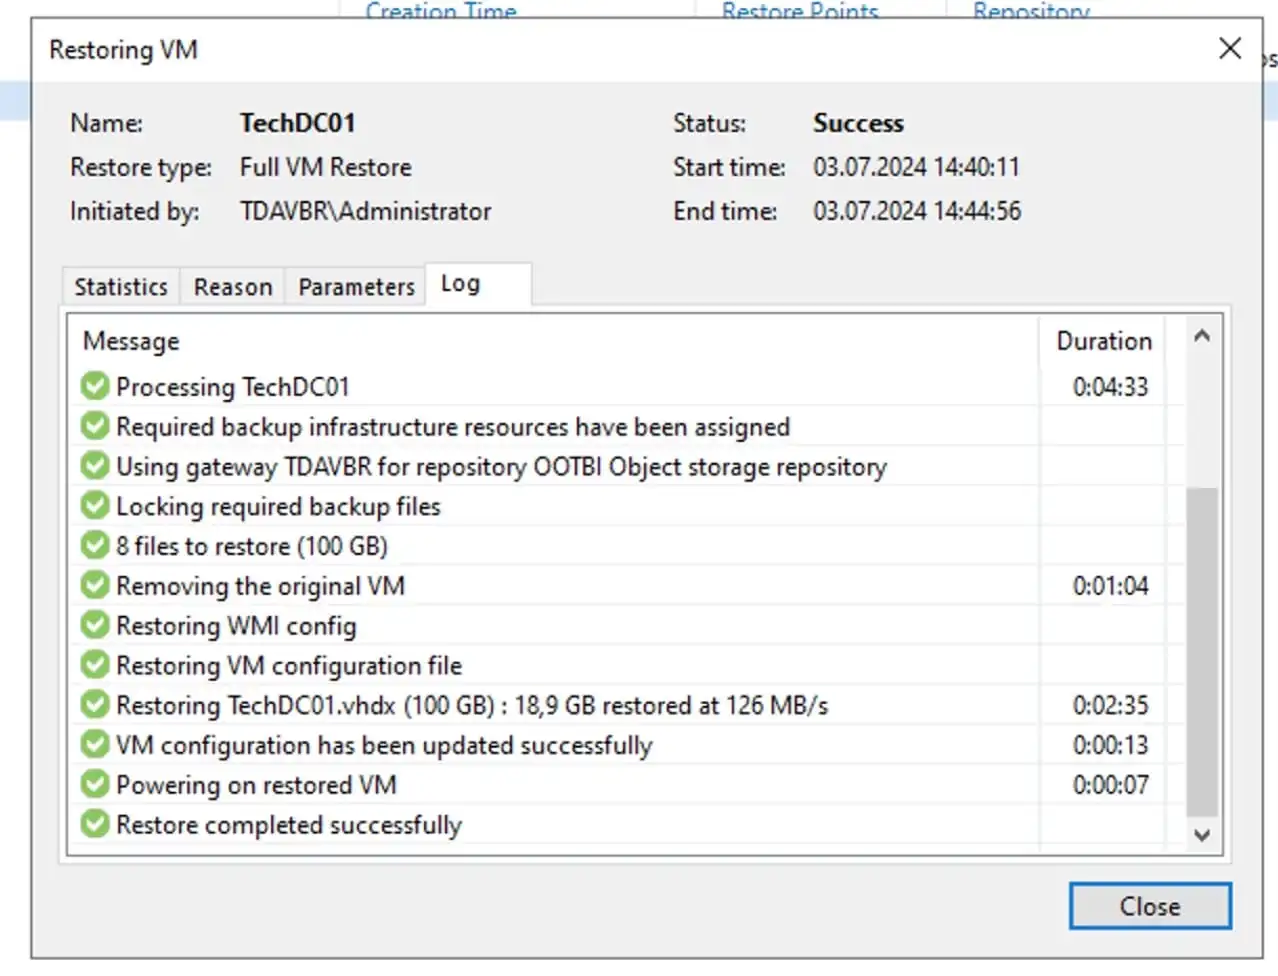
Our VM has been successfully restored as you can see from the log.
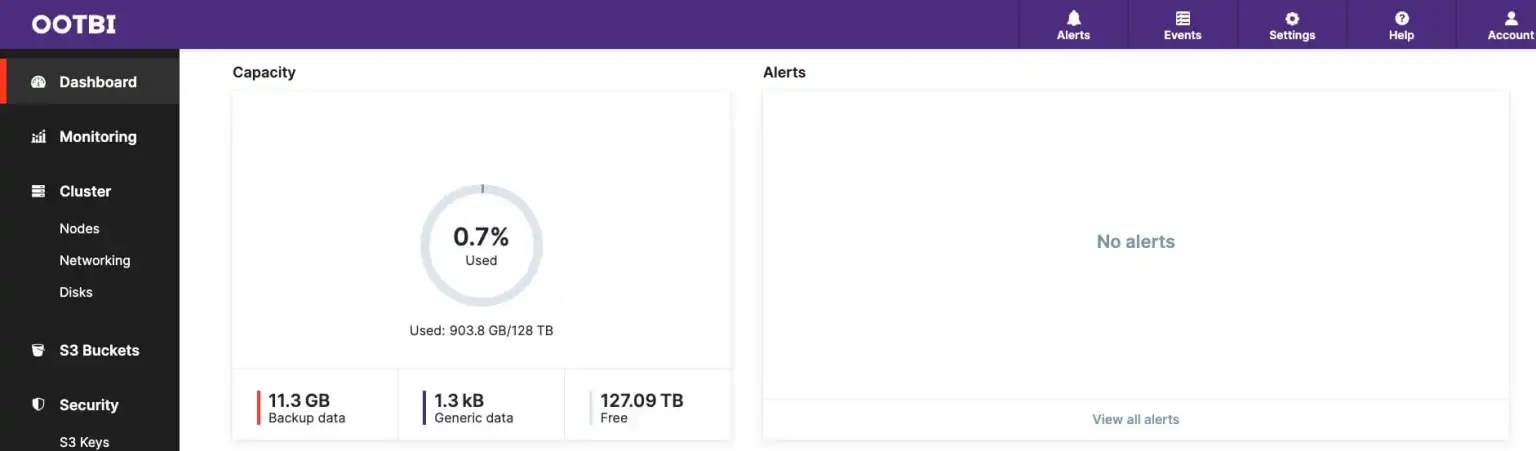
Now you can navigate to the OOTBI dashboard to view essential data, including available storage capacity, storage capacity trends, system alerts, network throughput, S3 operations, and overall system I/O.
The S3 Buckets view displays cluster capacity utilization and data distribution by nodes. This menu also allows for S3 bucket management, including the creation and deletion of buckets as demonstrated earlier