This topic is for Lucho @JailBreak and others who want to easily install OpenShift virtualization.
🚀 Red Hat simplified OpenShift Virtualization setup with a more intuitive and faster installation experience in the Developer Preview of OpenShift 4.19, coming soon in tech preview, 🌐 making it easier in isolated environments and ⚡ speeding up deployment. The highlights its ⭐ key benefits, the new 🖥️ UI, 🆓 registration-free installs, and a 📘 quick start guide.
We’ve made deploying OpenShift Virtualization easier and faster, enabling quicker adoption with:
-
UI-driven configuration: simple guided wizard with best practices.
-
Pre-installed operators: ready from day one.
-
Registry-free installs: work seamlessly in air-gapped environments.
-
Proven Red Hat technology: built on Agent-Based and Assisted Installers.
🤓Now, let’s go through the steps of this updated installation flow. In this example, we’ll demonstrate how to deploy a compact OpenShift cluster in a small test setup using three servers. Each server is booted from a generic Agent ISO (~40 GB) that includes the 4.19 CI release payload along with the core virtualization operators.
STEP 1️⃣
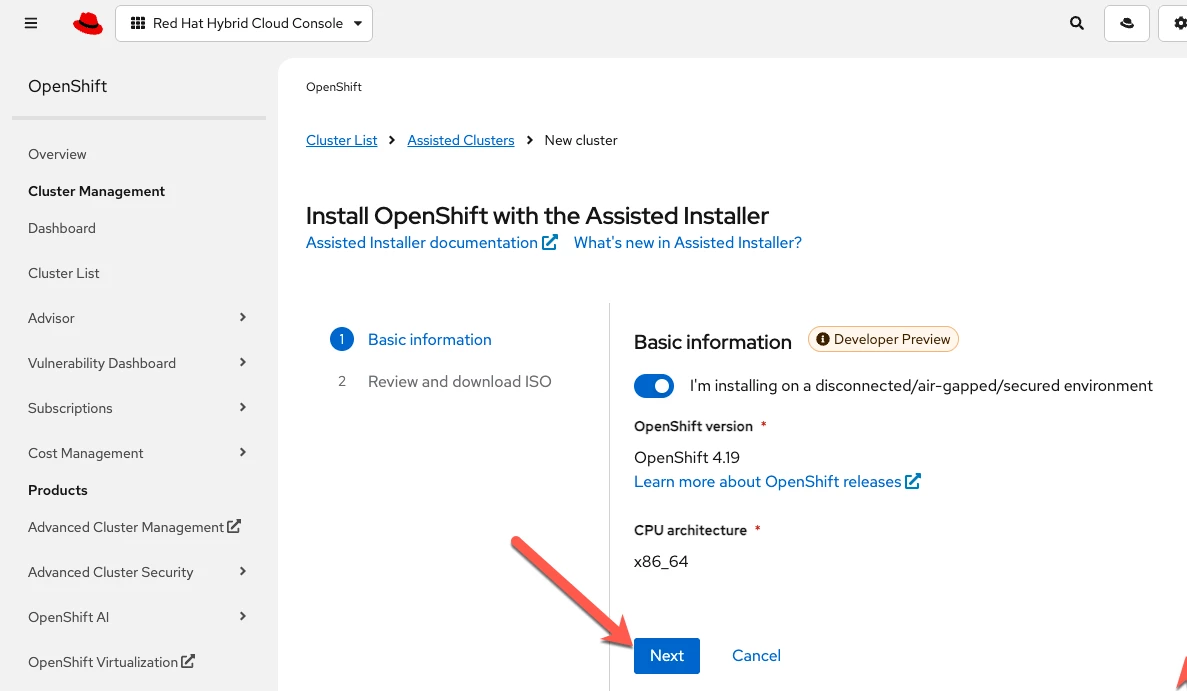
Enter to the Red Hat Console, with your user (You must register if you do not have a user yet.)
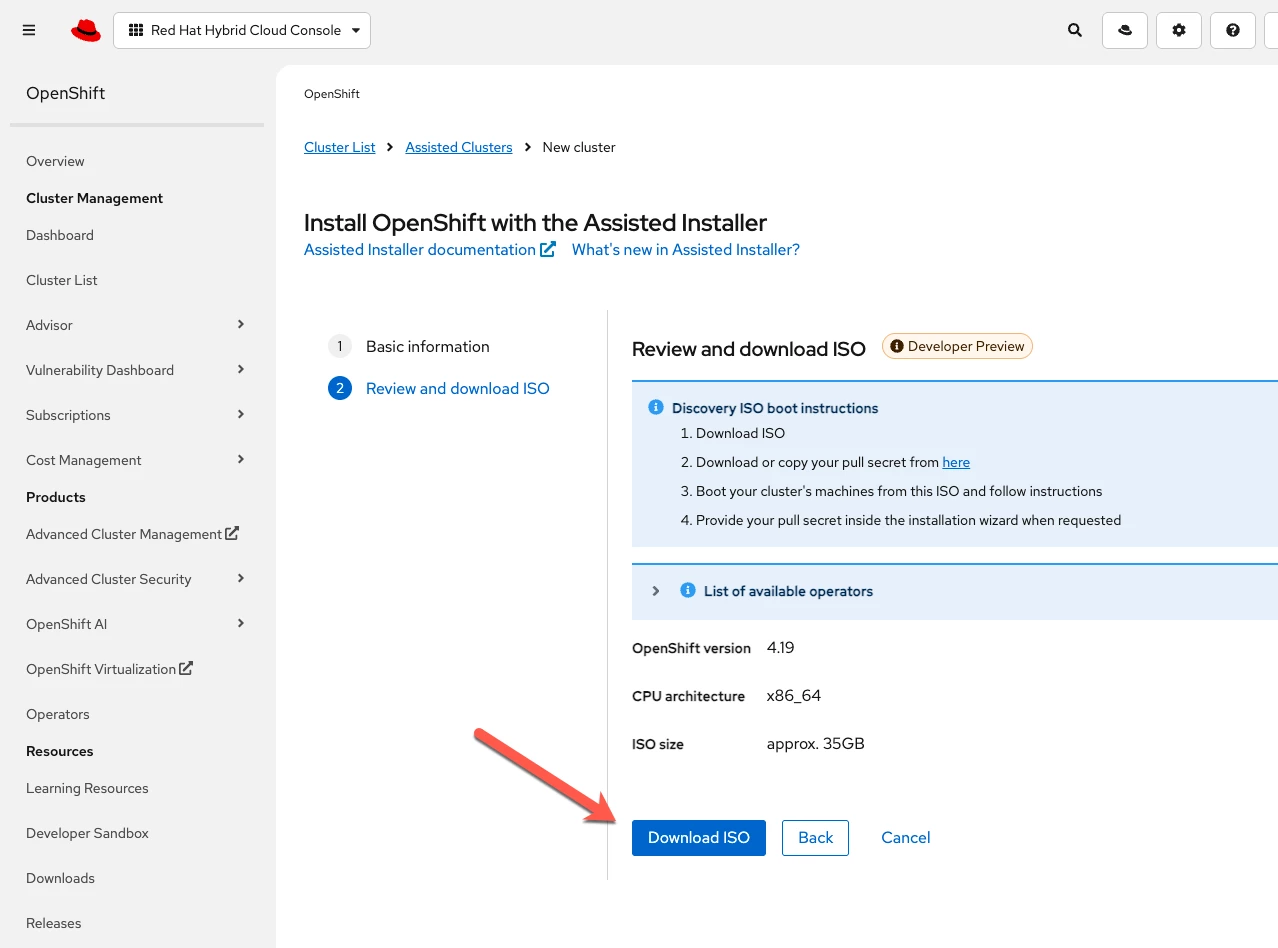
To get the ISO, choose “I’m installing on a disconnected, air-gapped, or secured environment”, and follow the on-screen instructions.

STEP 2️⃣
STEP 3️⃣
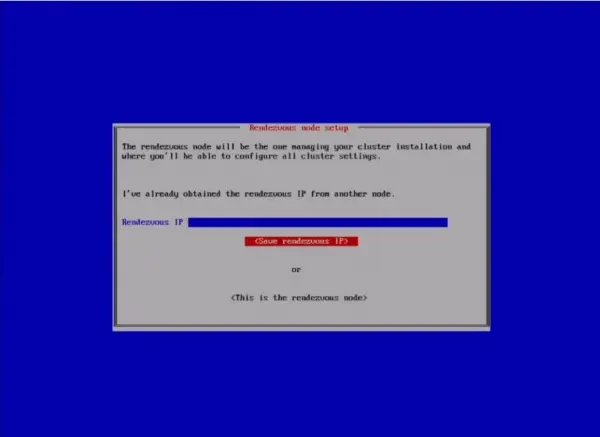
Once the ISO image is downloaded, you can boot all the servers, and a setup wizard will appear to guide you through the process. You’ll configure your first node, choose the Rendezvous server, and then set up the remaining nodes using the selected Rendezvous IP.
This step is essential because:
🔑 The Rendezvous node acts as the main server orchestrating the cluster installation and managing all configurations.
🖥️ On this screen, you can:
-
Enter the Rendezvous IP if you’ve already obtained it from another node.
-
Or select that this server will be the Rendezvous node.
STEP 4️⃣
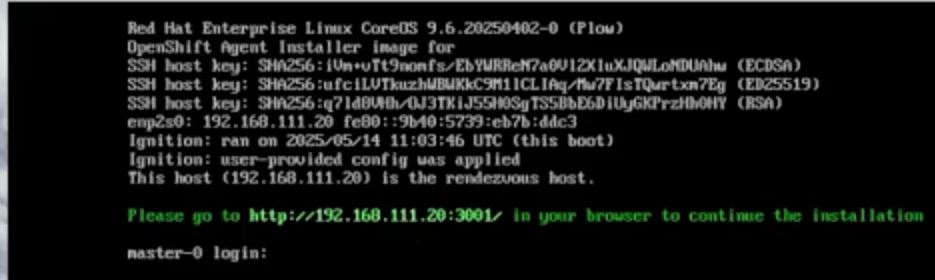
Once the servers finish booting, a URL will be provided that takes you to the Assisted Installer UI to finalize the installation.
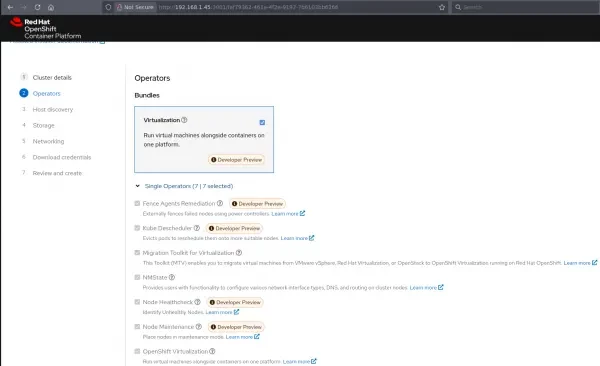
In this interface, you’ll be able to enter deployment details, 1→ Choose the Cluster Name 2→ choose which operators to install (including the virtualization bundle), 3→ & 4→ check the hardware specifications of the servers (Here you will see the 3 servers tha you install the iso Image) and Choose the Disk on the servers, and 5→ configure the network settings for the installation.
STEP 5️⃣
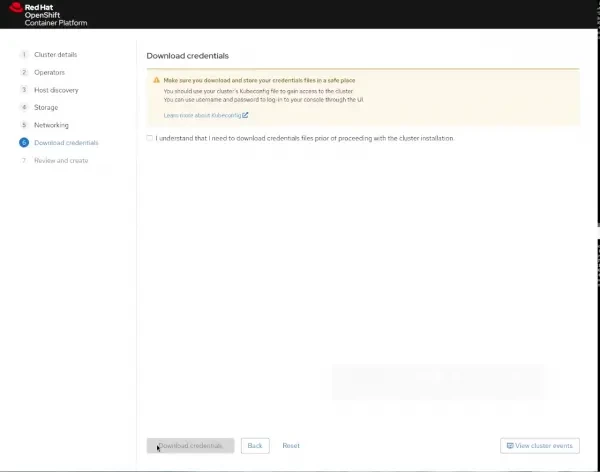
Next, download the credentials and save the kubeadmin password and kubeconfig file — you’ll need them to access and manage the cluster after the installation is complete.
STEP 6️⃣
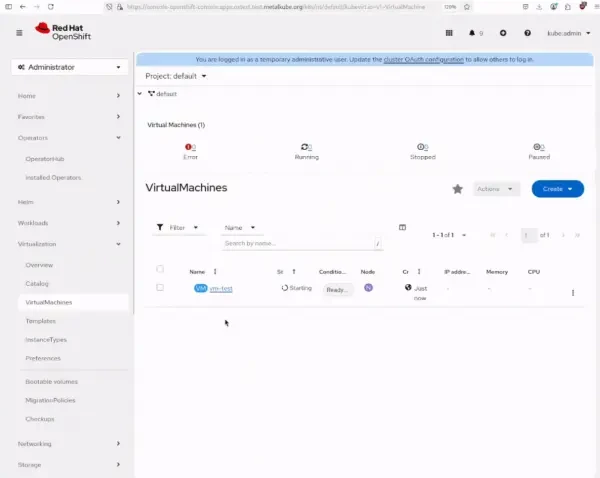
Once the installation is complete, you can open the cluster console and Login.
You’ll notice a new Virtualization tab available in the console.
From here, you can create a virtual machine, and after a few minutes, it will appear as running in the web console
🔎 The new installation experience for OpenShift Virtualization is not just a visual upgrade to the interface. It represents a strategic advancement designed to help virtualization teams adopt the platform more easily, especially in disconnected or resource-constrained environments.
I hope I have been of help 🤓