Creating architectural diagrams is challenging for everyone, not just Backup engineers. While you can find Veeam colors and icons at https://www.veeam.com/company/brand-resource-center.html, these resources may change, making it difficult to keep designs current. I found updating most of the Veeam Best Practice guide diagrams—like those at https://bp.veeam.com/vbr/Support/S_Vmware/backup.html—to be especially time-consuming and frustrating.
I am continually seeking innovative tools to enhance my workflow. Recently, I discovered pikchr, which offers greater versatility than mermaidjs while still enabling diagrams to be created through code.
The layout engine operates from left to right by default, but this setting can be modified as needed. The following example generates two boxes containing the words Proxy and Repository. The word "move" is included to provide spacing between the boxes; without it, they would appear adjacent to each other. The labels “P:” or “R:” at the beginning of each line are optional and serve as identifiers that can be referenced later.
P: box "Proxy"
move
R: box "Repository"
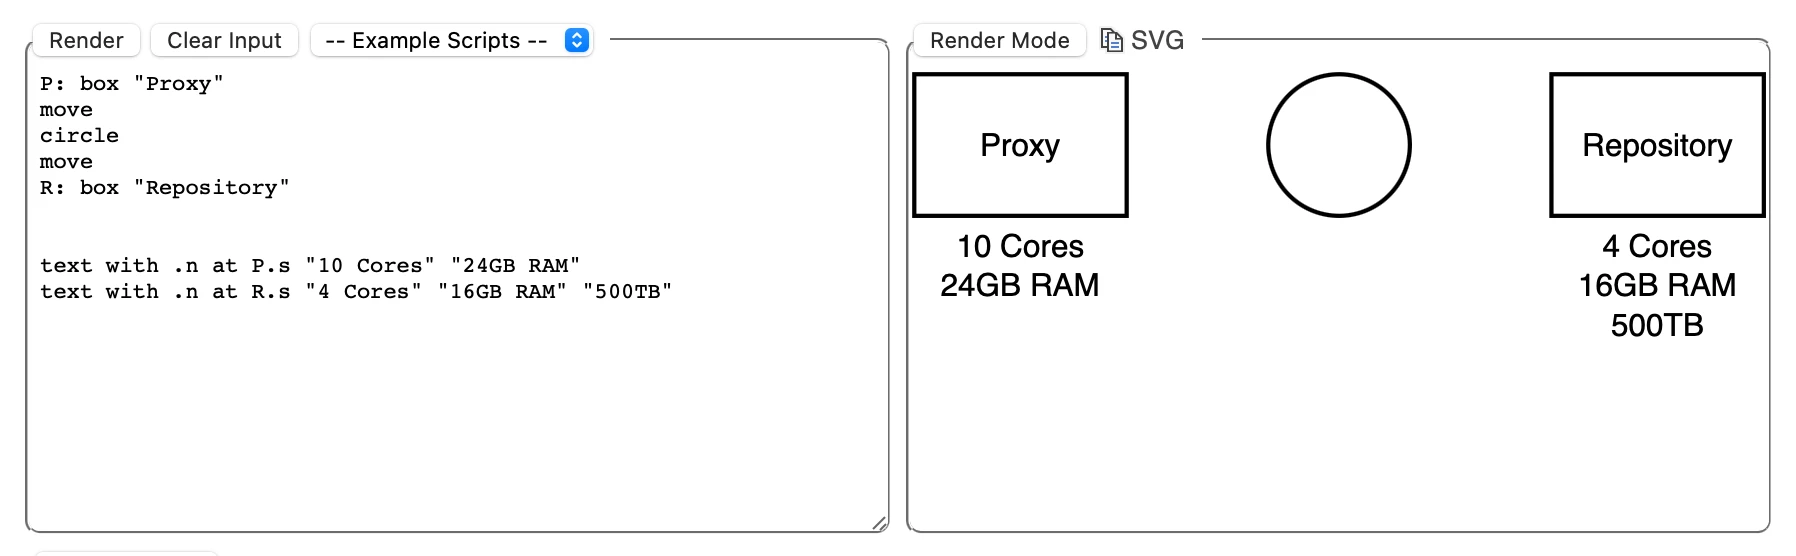
If you wish to add text below "Proxy" and "repository," absolute positioning can be utilized. Alternatively, you may begin with relative positioning and then handle absolute or fixed positioning separately as needed. The code below demonstrates how to add a text label underneath; the label is positioned by aligning its north or .n (top) edge to the south or .s (bottom) of the referenced object.
P: box "Proxy"
move
R: box "Repository"


text with .n at P.s "10 Cores" "24GB RAM"
text with .n at R.s "4 Cores" "16GB RAM" "500TB"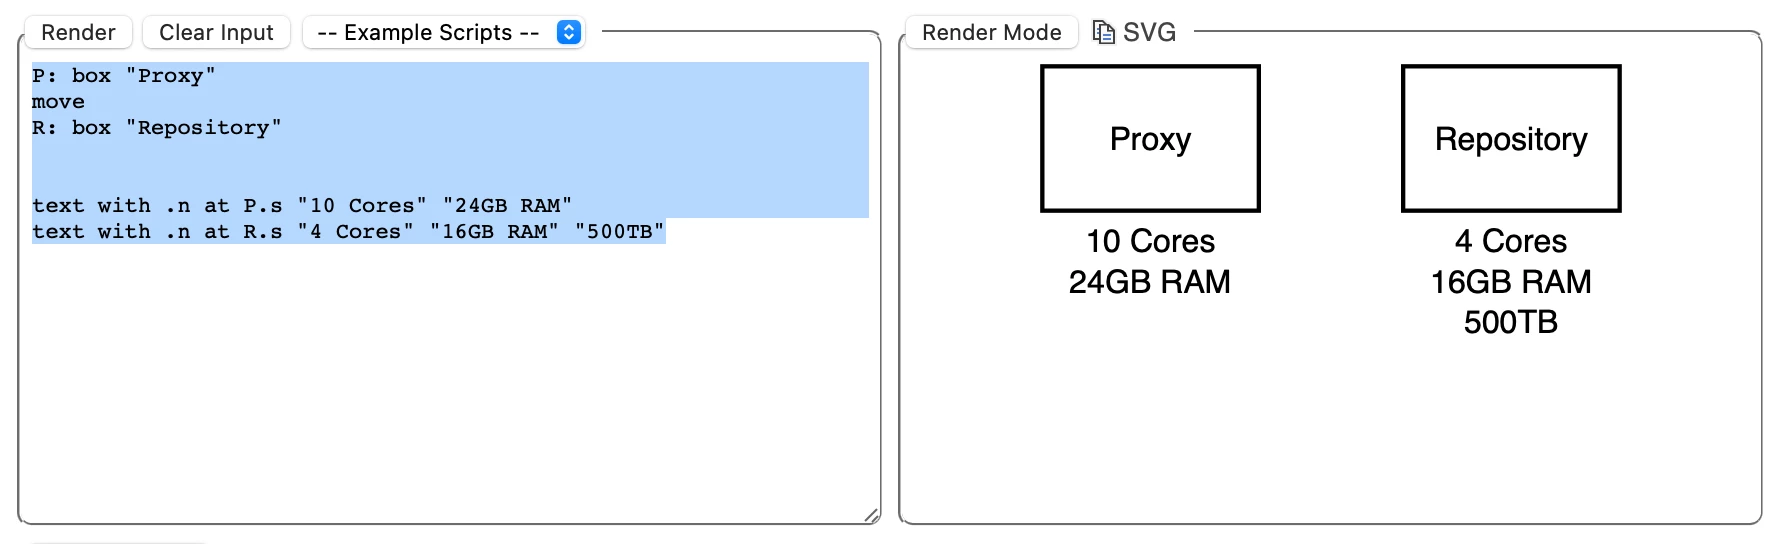
An advantage is that the text now remains fixed. If a circle is inserted into the code, it will move together with the referenced object.
Veeam branding can now be incorporated into the project. According to the official branding guidelines, Veeam Green (also known as Viridis) is represented by the hex code #00D15F.
You can set two parameters: `color` for text and outlines, and `fill` for the fill color. Changing the color affects all following objects unless you specify a color at the end of a particular line to target one object. Pikchr uses `0x` (not `#`) for hex colors. You can also use html color names such as white, black, red etc
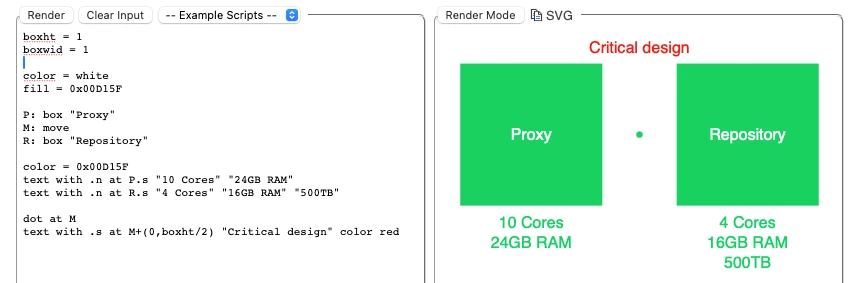
color = white
fill = 0x00D15F

P: box "Proxy"
M: move
R: box "Repository"

color = 0x00D15F
text with .n at P.s "10 Cores" "24GB RAM"
text with .n at R.s "4 Cores" "16GB RAM" "500TB"

dot at M
text with .s at M+(0,boxht/2) "Critical design" color red
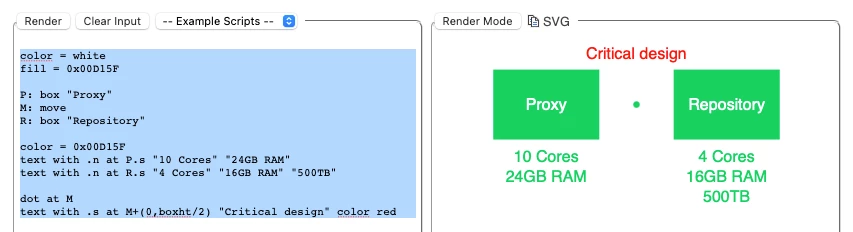
It is possible to add a dot as well. While dots are not commonly used in final designs, they can be useful for visualizing locations. In this example, the “move” statement is labeled with M and positioned accordingly. Text is then added in red and placed slightly higher than the center by referencing M and adjusting the position by (x, y). The x-coordinate remains unchanged at 0, while the y-coordinate is adjusted by adding boxht/2, where boxht is the default box height. Boxwid refers to the default width. Both boxht and boxwid can be modified to create smaller boxes if needed. For example, setting both values to 1 results in a default square shape.
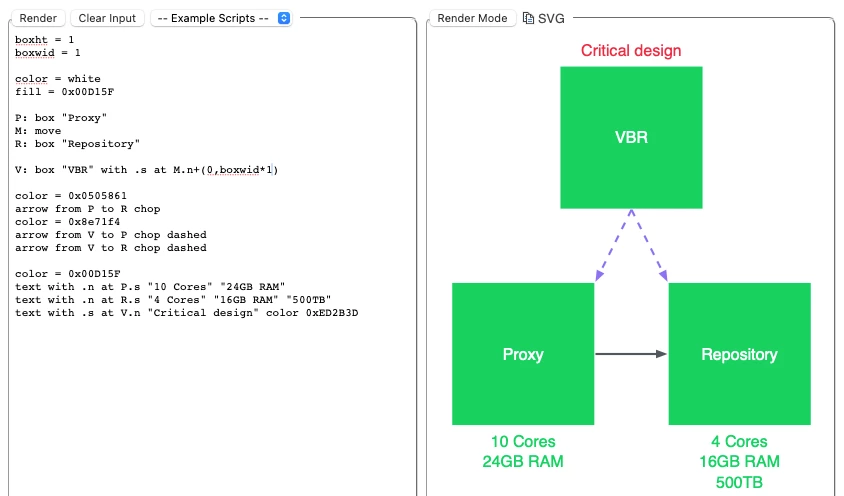
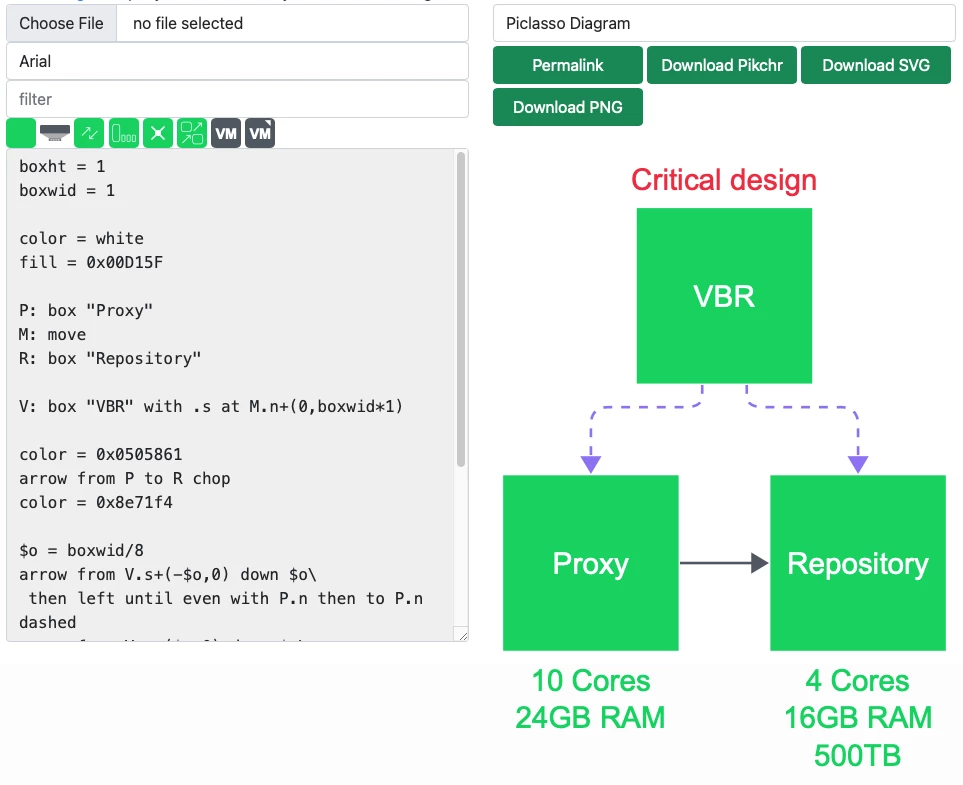
Let's quickly sketch a Backup Server and add arrows, using labels to indicate connections from X to Y. The arrows originate from the central point or ".c" and extend to the second icon. "Chop" indicates that the line will terminate at the boundary.
boxht = 1
boxwid = 1

color = white
fill = 0x00D15F

P: box "Proxy"
M: move
R: box "Repository"

V: box "VBR" with .s at M.n+(0,boxwid*1)

color = 0x0505861
arrow from P to R chop
color = 0x8e71f4
arrow from V to P chop dashed
arrow from V to R chop dashed

color = 0x00D15F
text with .n at P.s "10 Cores" "24GB RAM"
text with .n at R.s "4 Cores" "16GB RAM" "500TB"
text with .s at V.n "Critical design" color 0xED2B3D
It is also possible to control these lines as needed. In the following example, I define a variable $o as one-eighth of the box width. This variable is utilised to ensure consistency in all subsequent adjustments.
(partial code)
$o = boxwid/8

arrow from V.s+(-$o,0) down $o\
then left until even with P.n then to P.n dashed

arrow from V.s+($o,0) down $o\
then left until even with R.n then to R.n dashed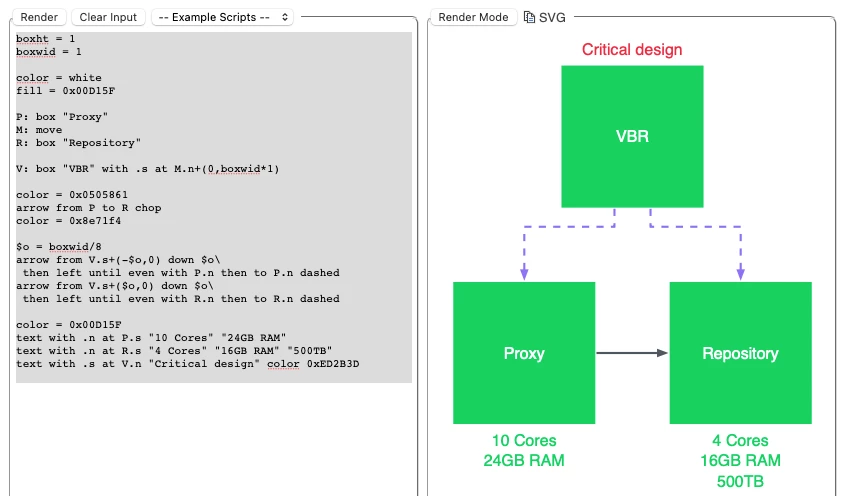
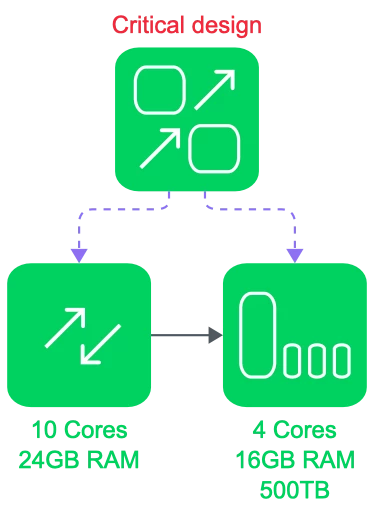
We now have a “crictical design”. You can click the SVG button to copy the code
After copying the code, it can be pasted into a file named design.svg using an editor such as Visual Studio Code. On Mac, it is also possible to use “pbpaste > design.svg”.
You can now drag your SVG into PowerPoint.
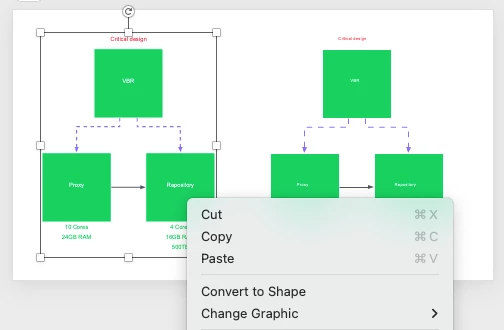
SVG files offer several benefits. As scalable vector graphics, they use XML format rather than storing individual pixels. The size of an SVG can be adjusted without loss of quality. Additionally, right-clicking and selecting “convert to shape” allows PowerPoint to attempt converting the SVG into native shapes, enabling further editing such as colour adjustments within PowerPoint.
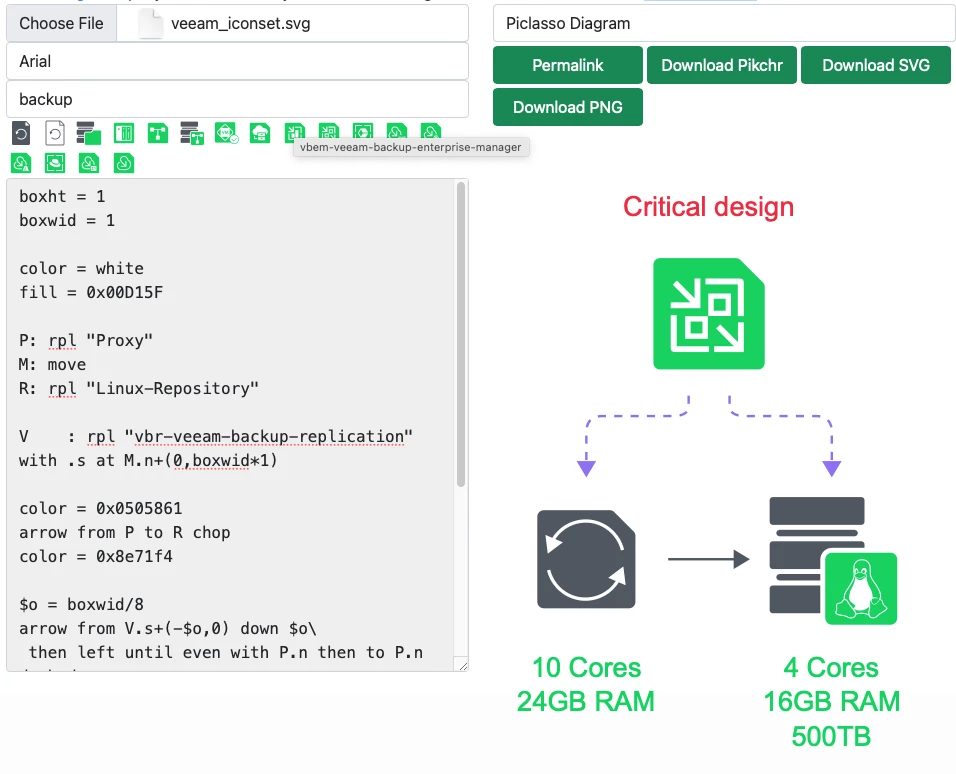
We have a solid design, but it remains basic. To improve this, I developed Piclasso (a "patched" Pikchr with classes), which also includes default settings and easier SVG/PNG downloads. Check it out at https://tdewin.github.io/piclasso/
.
If you input the pikchr code, it will just works as expected . We can now use a construct called rpl which tells that piclasso that we want to replace the box with an icon. The text following is the icon or class name
Our design slightly modified:
P: rpl "Proxy"
M: move
R: rpl "Repo"

V: rpl "VBR" with .s at M.n+(0,boxwid*1)

color = 0x0505861
arrow from P to R chop
color = 0x8e71f4

$o = boxwid/8
arrow from V.s+(-$o,0) down $o\
 then left until even with P.n then to P.n dashed
arrow from V.s+($o,0) down $o\
 then left until even with R.n then to R.n dashed

color = 0x00D15F
text with .n at P.s "10 Cores" "24GB RAM"
text with .n at R.s "4 Cores" "16GB RAM" "500TB"
text with .s at V.n "Critical design" color 0xED2B3D
These are only a few icons. Since I can't redistribute the official Veeam icons, I've created a demo kit instead.
If you follow the instructions on https://github.com/tdewin/piclasso/tree/main/mergedemo , you can build your own icon bundle, which you can then use in piclasso.
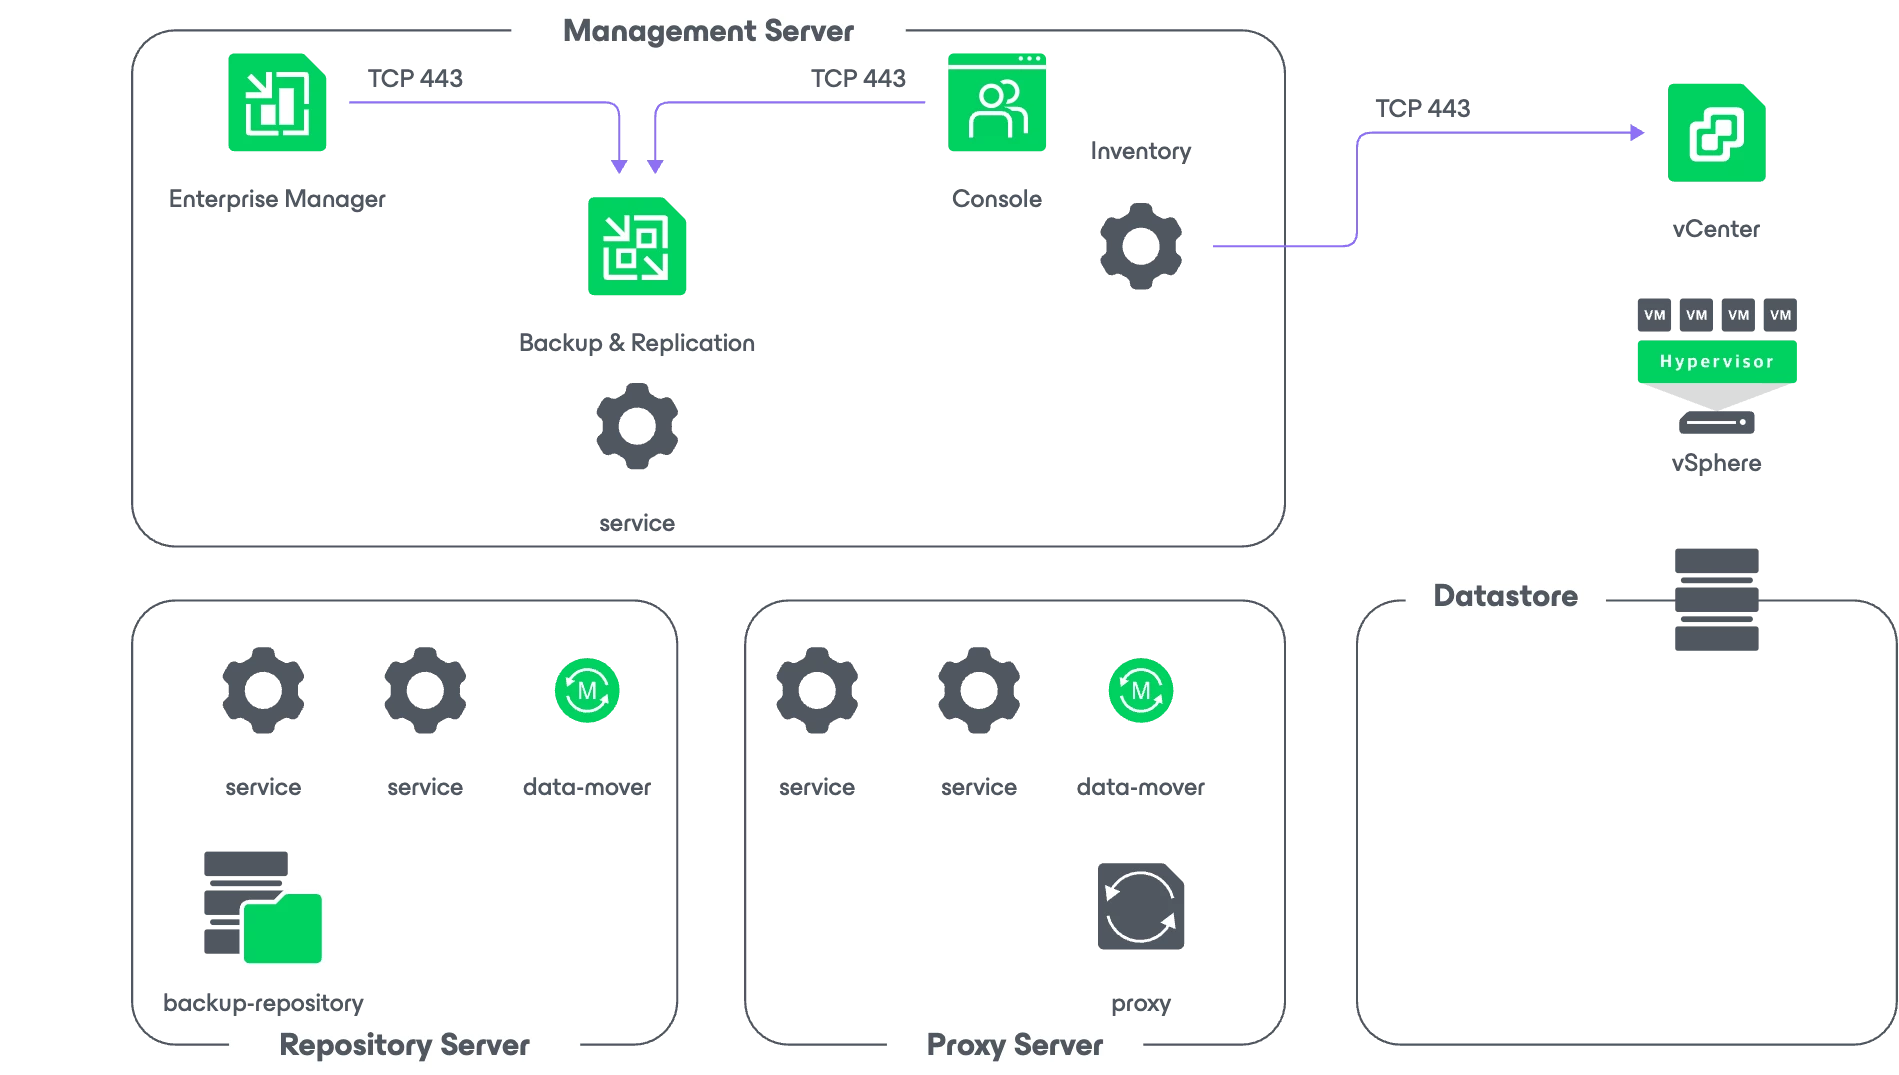
This example below demonstrates the potential complexity of a design. While it may require advanced skills, it offers significant benefits: colour, fonts, and icons can be modified, but the overall layout remains consistent. For me there is another advantage, I’m using it here as a web tool but pikchr is distributed as C code, so you can compile it and create a picture pipeline that can rerender when a new branding occurs. I’m also looking into automatic code generation for example to document firewall ports.
Hopefully it will not only be useful for me in the future, but in any case, I had a blast developing and sharing!