

Hello,
In this article I will tell you about the Veeam Instant VM Recovery feature.
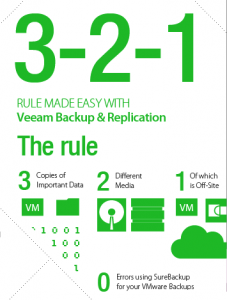
We follow our backup processes, we send our backups to different locations, we take backups to tape cassettes, right?
We must apply the 3-2-1 rule in our infrastructure.
We can return our backups; Well, can we provide service with performance and working as soon as possible in times of crisis?
What is Instant VM Recovery?
Instant VM Recovery restores your virtualization platform by running the virtual machine directly from backed up files rather than keeping users waiting for hours. Thus;
Short recovery times (RTOs) are achieved.
Downtime is minimized.
Downtime of critical virtual machines is minimized.
How does it work?
Instant VM Recovery uses vPower technology to directly place a VM image from a compressed and deduplicated backup file to a vSphere or Hyper-V host.
Since there is no need to export the entire VM from the backup and then copy it to the backup device, you can restart the virtual machine from backup from any restore point (Incremental or Full) in just minutes instead of hours as with a normal restore, and significantly shorten the recovery time.
The backup file of the VM remains read-only to preserve its integrity. When the VM is moved back to the backup device, the changes are stored and combined separately.
With Veeam, you can recover a failed VM in as little as 2 minutes.
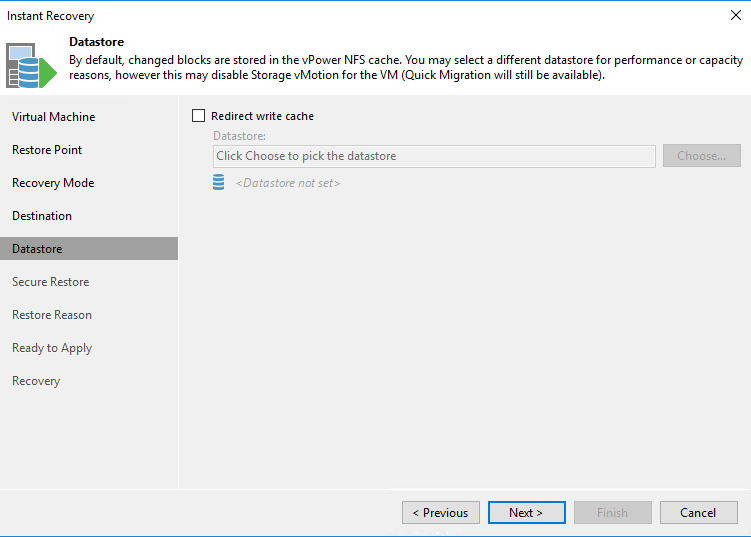
Datastore rewrite cache feature:
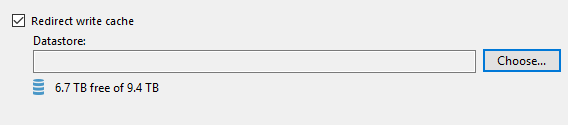
In the datastore rewrite step, you can choose where to do (rewrite, write) while the VM is running without backup. By default, cache files are stored on the vPower NFS server. However, you can print the cache files to a datastore area in the virtual environment. Burning the cache files to performance (eg SSD) disks improves the performance of the virtual machine at the time of the crisis, but the Storage vMotion feature will not work for ESXi 5.x and earlier. As soon as the recovery process is complete, Veeam deletes the cache logs.
If you leave all settings as default in the Instant VM scenario, the reading process proceeds from the backup device. However, when you select the datastore area that exists in your VMware or Hyper-V environment with the datastore rewrite cache, the reading process continues from your backup device and the writing process continues on the storage device.
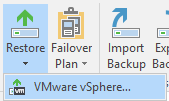
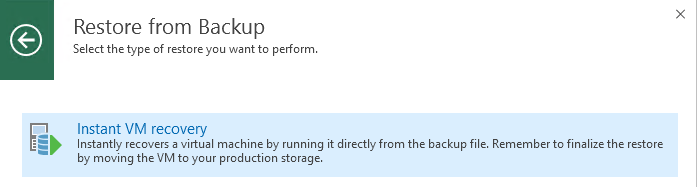
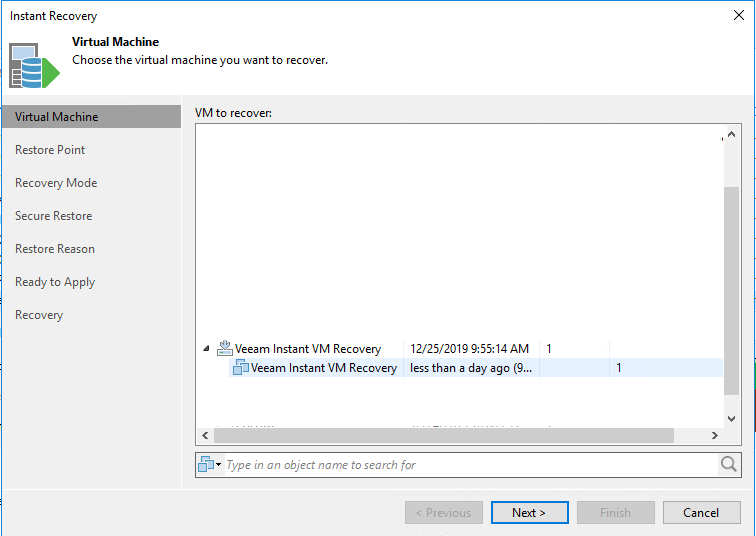
First, we login to the Veeam interface and from the Restore option, we enter the VMware vSphere tab.
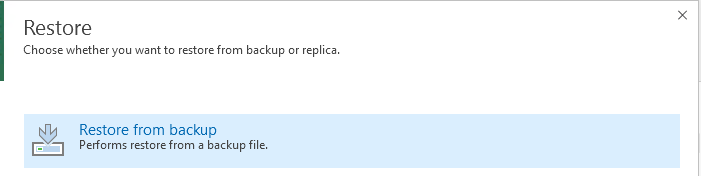
We proceed with the option Restore from backup.
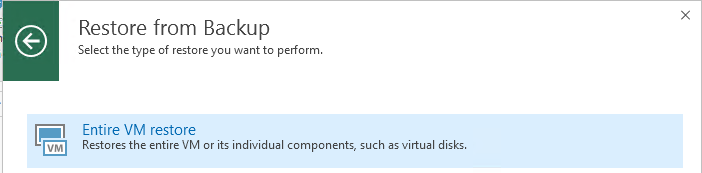
We proceed with the Entire VM restore option
We are moving forward with the Instant VM recovery option.
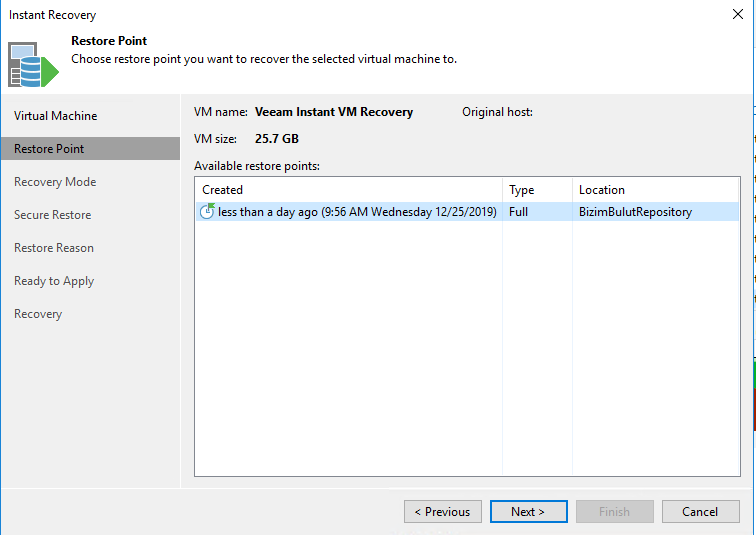
Select the restore point of virtual machine.
There is only one return point on 12/25/2019; After selecting the relevant return point, we proceed by saying next.
If you want to restore the VM with its initial settings and to its original location: select Restore to the original location.
If you want to restore to a new host or with different settings: (eg VM host, network settings, format of disks to be restored), select Restore to a new location, or different settings. Select the Restore VM tags check box if you want to restore the tags assigned to the original VM and assign them to the restored VM.
Veeam will restore the VM with its original tags if the following conditions are met.
The VM is restored to the host it was in before.
The VM tag can be used in the source of the vCenter server.
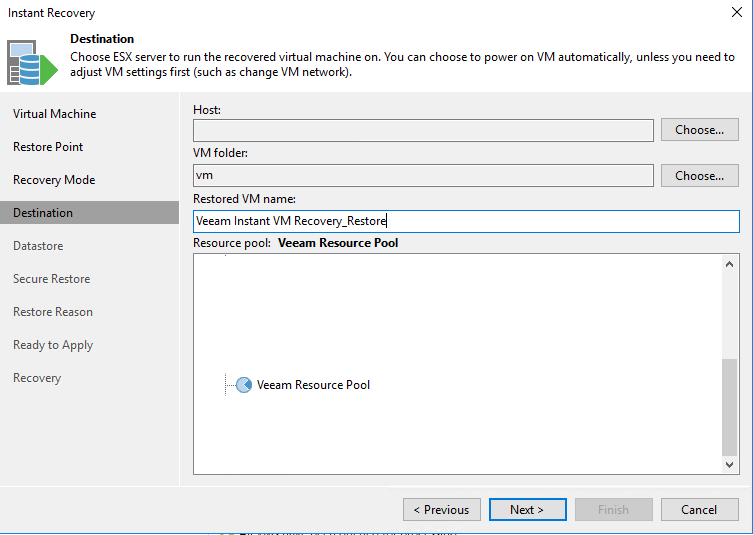
As per our scenario, we proceed with the option Restore to a new location or with different settings.

In the Destination section, we can change the host name of the relevant VM on which VM folder it will be created on or the name of the machine.
We are only making the Restore VM Name change, and proceeding next.
Currently we do not select the Datastore redirect write cache option; We will mount the server directly to Veeam on Repository, perform performance test and compare.
We proceed by saying Next.
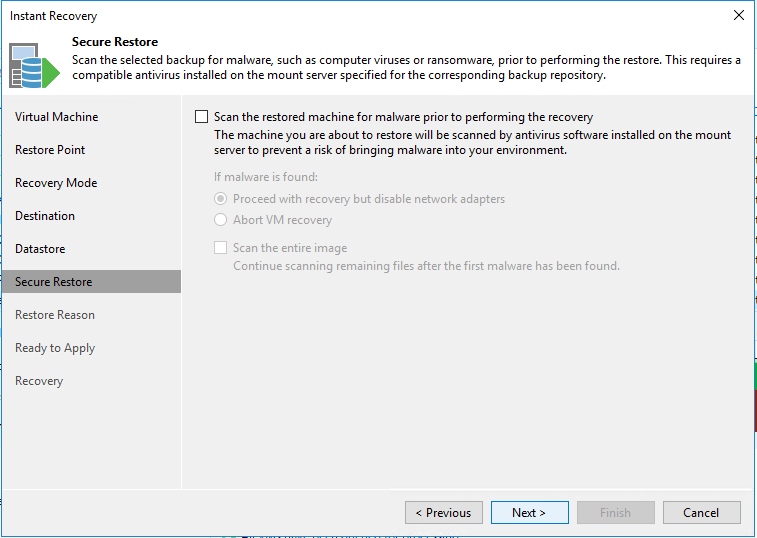
We cannot perform any antivirus scans; We proceed by saying next.
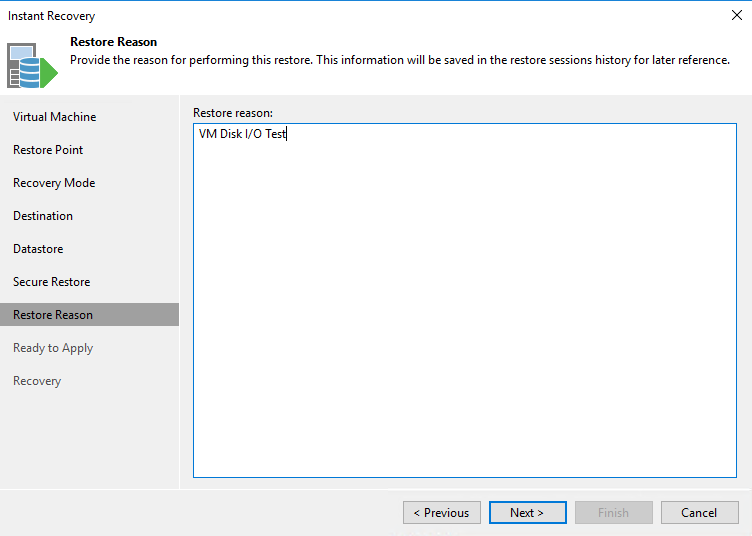
You can enter a description in the section of restore reason; We proceed by saying next.
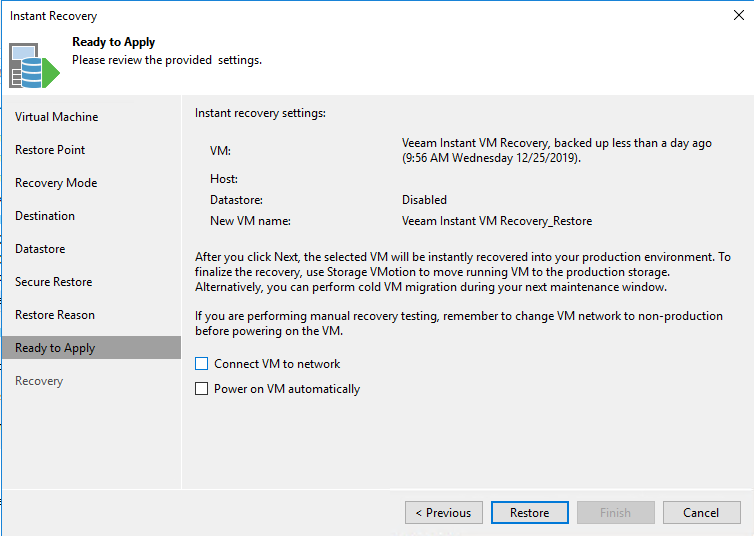
Everything is ready. We restore the machine with the Restore option.
If we wish, after the machine is restored;
With the Connect VM to network option, after the machine is turned on, we can activate the network card.
With the option of Power on VM automatically, we can enable the machine to be turned on after the machine is restored.
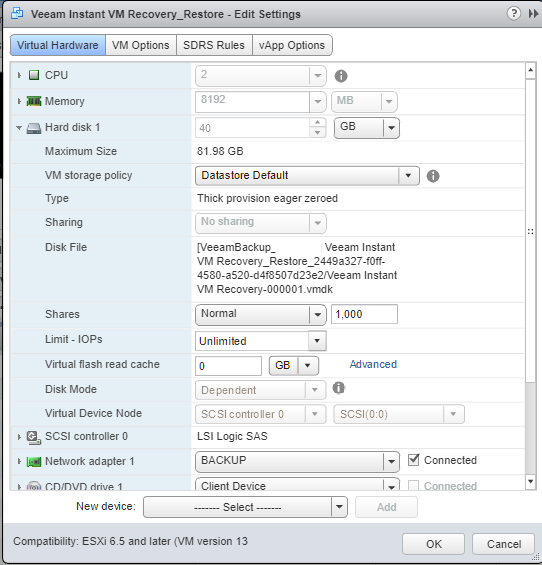
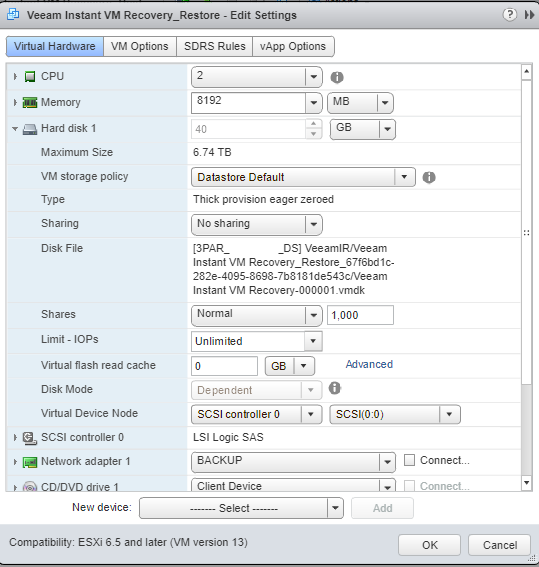
A virtual machine was created in the VMware environment. In the disk part, we can see that the disk has been mounted via the Veeam Backup server.
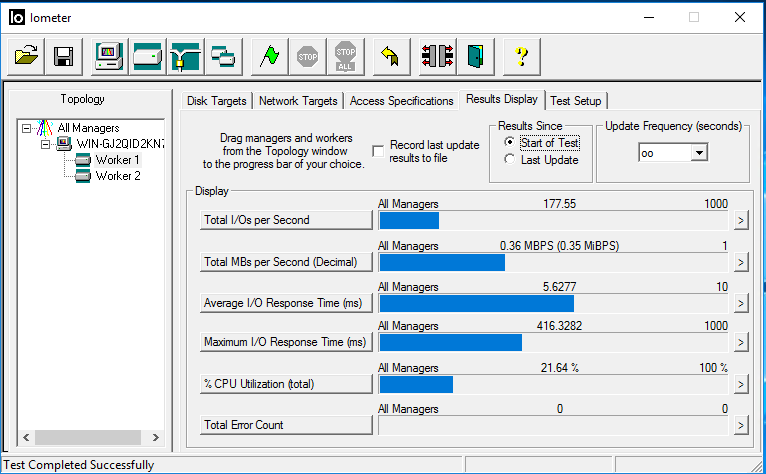
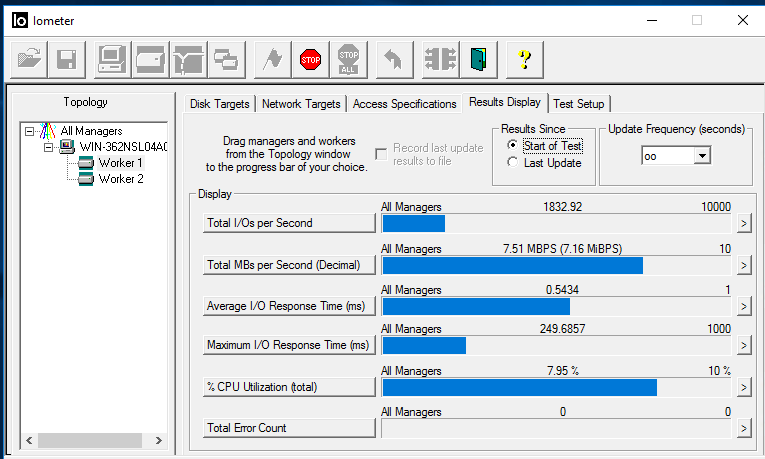
We perform I / O test with Iometer on the server.
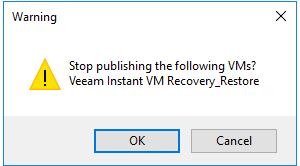
We perform stop publishing on the Veeam console and terminate the mount process.
We proceed with the arrow option.
Now we are doing the same steps, starting over again; but we use the redirect write cache feature and choose the datastore where we want the virtual machine to run.
The relevant machine has been re-created to the VMware environment. This time; On the disk part, we see that the disk is running on an existing Datastore.
We perform I / O test again with Iometer on the server.
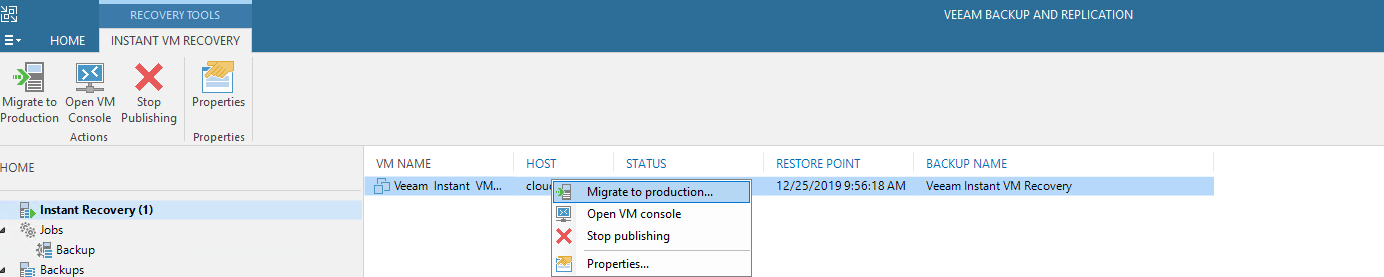
We successfully performed the test process, now let's restore the working machine to the production environment.
In the Veeam console, we click on the Migrate to Production option in the Instant Recovery option.
On the Quick Migration menu, our machine will run; We choose areas such as Host, Resource Pool, Folder, Datastore.
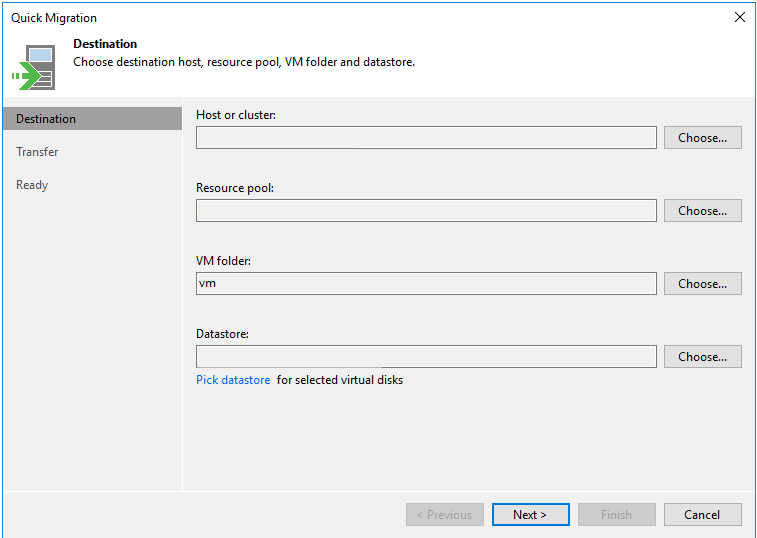
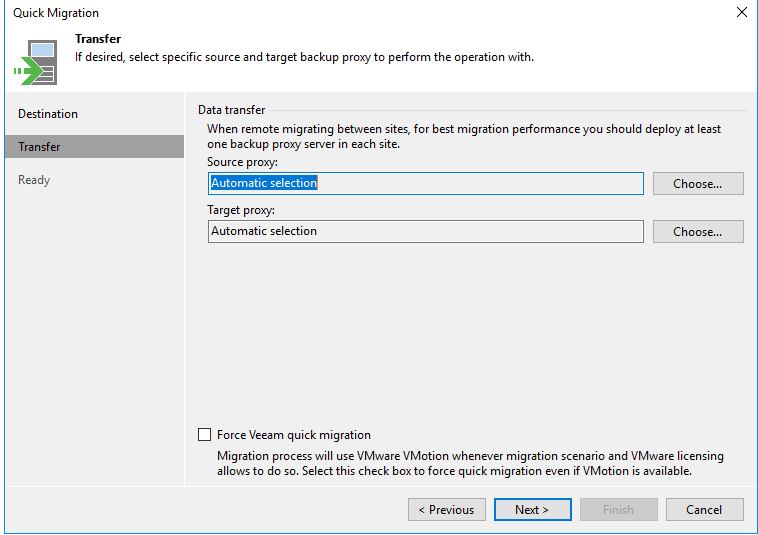
In the transfer menu, if there is a proxy server we want to use in our environment, we can choose it or the proxy server will be selected automatically.
Force Veeam Quick Migration: If you want to use VMware vMotion feature to relocate the virtual machine; Select the Force Veeam Quick Migration check box.
Veeam will try to use VMware vMotion to migrate the selected VMs. Veeam will use its own migration feature if vMotion is unavailable (For example: it may cause data loss or you do not have a VMware vSphere license).
We proceed by saying Next and complete the restore process to the production environment.
I hope it has been useful, thank you for your time, see you again in our next article.
For detailed information, you can visit the Veeam pages.
Veeam Instant VM Recovery
URL: https://helpcenter.veeam.com/docs/backup/vsphere/instant_recovery.html?ver=95u4


