

When integrating a Synology NAS with Proxmox VE. NFS provides a convenient and flexible storage solution for virtual machines, ISO images, templates, and backups. Unlike local Proxmox storage or block-level storage solutions.
Network File System (NFS) shares on a NAS are network-based and accessible to multiple nodes simultaneously, making them ideal for clustered environments or home labs. Kindly take a look at this blog post for more information “Add Synology NFS Storage to Proxmox VE for VMs and Backups”.
One important characteristic of NFS on Synology is that it is not pre-allocated. The storage is thin-provisioned, meaning that VM disk files grow dynamically as data is written. This allows efficient use of disk space. But it also requires monitoring free space on the NAS to avoid unexpected storage exhaustion.
NFS itself is a protocol that allows a client, such as Proxmox to access files over a network as if they were on a local disk. When using Synology NAS as NFS storage for Proxmox, I will be using NFS version 3 due to its stability and broad compatibility. NFSv3 is stateless, simpler, and avoids the permission and mounting issues.
Understanding the NFS Protocol Options
The below table shows the u
| Protocol | Applicability | Traits | Proxmox Compatibility |
|---|---|---|---|
| NFSv3 | Most stable & widely used | Simple, stateless, excellent compatibility, lower overhead | Fully supported and highly reliable |
| NFSv4.0 | Modern, with ACLs and pseudo-filesystem | Stateful, better security, single TCP port (2049) | Works, but sometimes slower or needs manual tuning |
| NFSv4.1 | Adds parallel I/O and session trunking | Complex but efficient on large clusters | Supported, but can cause mount/auth issues on Synology + Proxmox combos |
| NFSv4.1 (all ranges) | Tries all supported versions | Negotiates automatically | May lead to inconsistent mounts or timeouts |
Enable NFS Service
To access a shared folder with your NFS client. First configure your Synology NAS to allow NFS sharing. To do this, launch the Control Panel, click on File Services and then on NFS.

Ensure it is enabled and select the following protocol. You can decide for other protocol/versions depending on your use case.
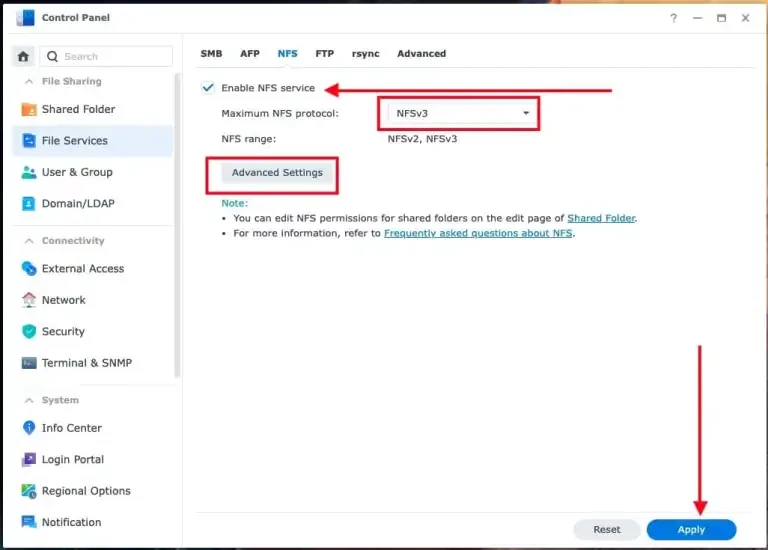
If you want some more advanced settings. You can click on advanced as shown above and make the below modifications
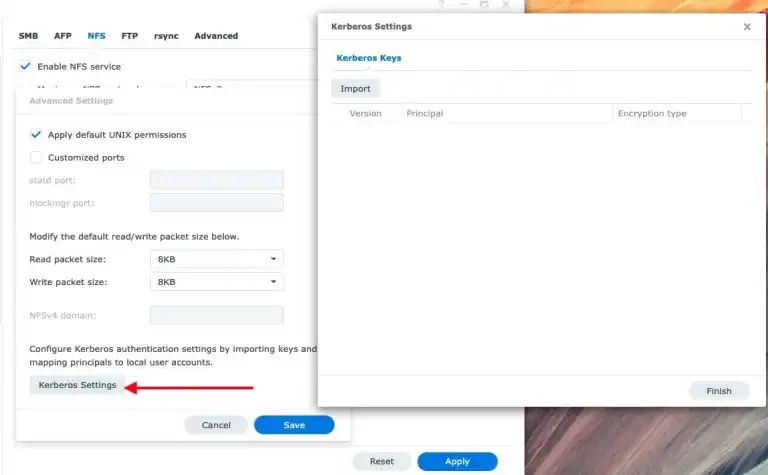
Do not forget to save
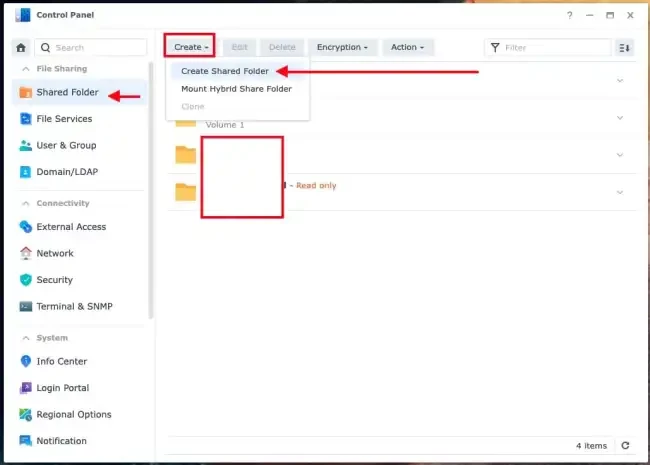
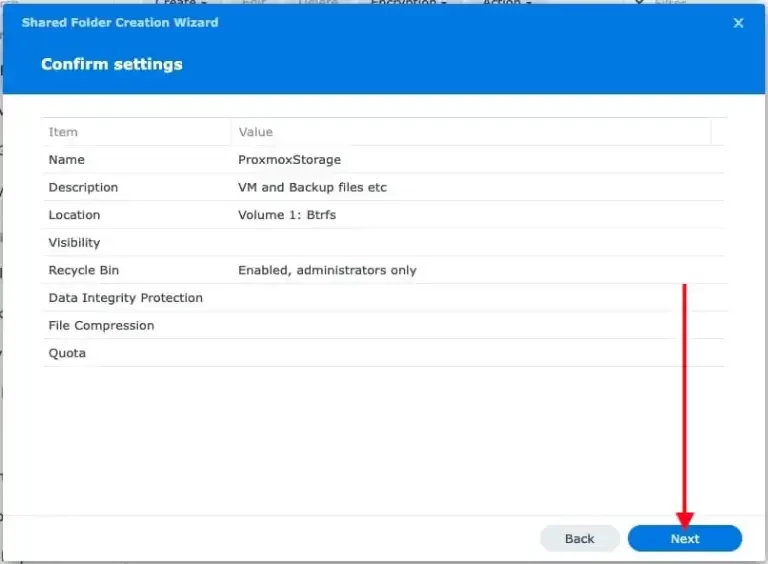
Next, create a share folder from the Control Panel.
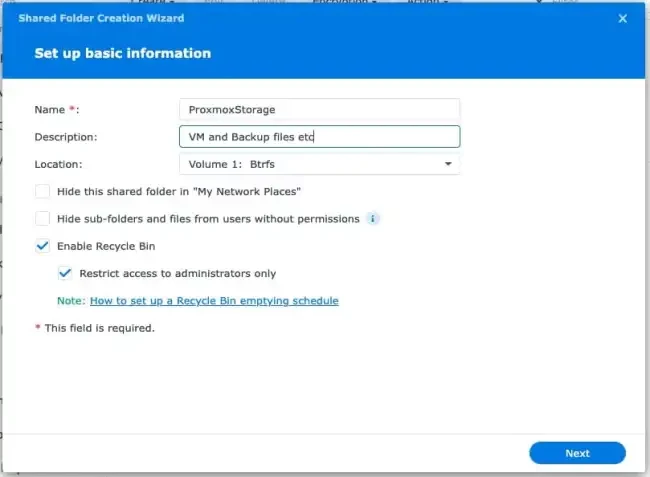
Enter basic info
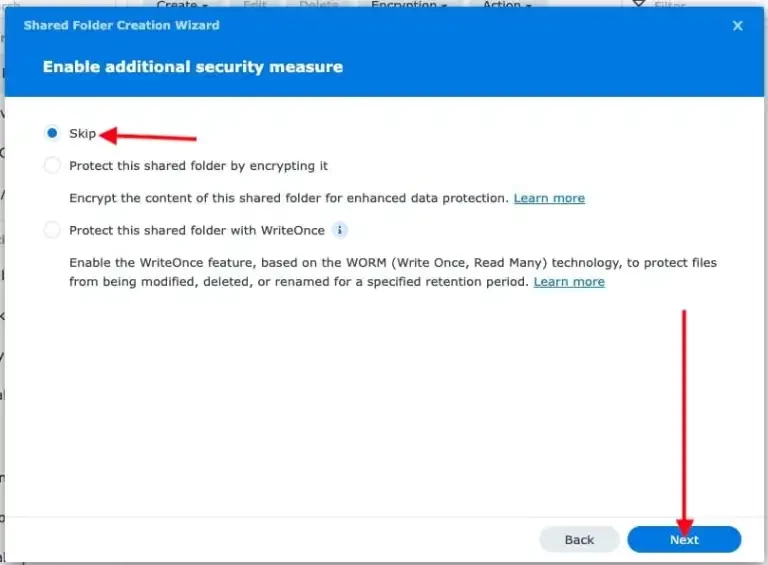
I will skip the “Enable additional security measure” here here. This is because, the Write Once” (WORM) is designed for archival storage where data cannot be modified, but it is unsuitable for Proxmox because the platform requires dynamic read/write/delete access for VM disks, backups, and ISOs.
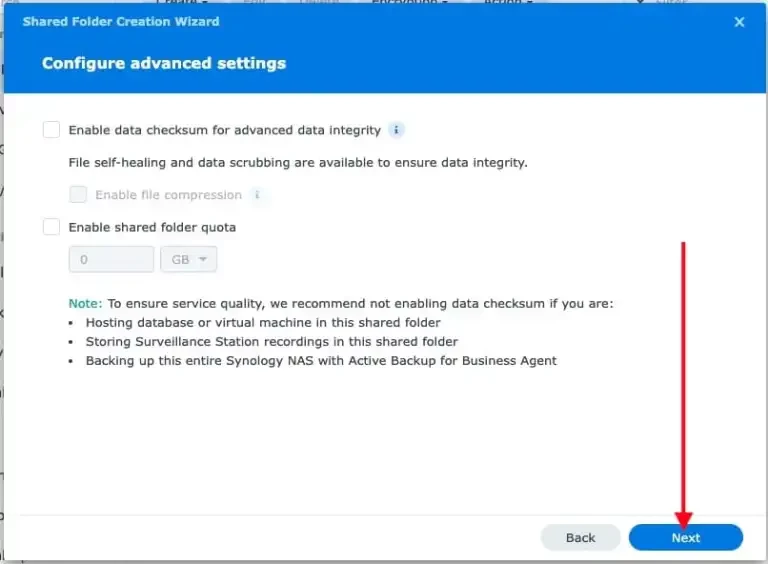
Also, the Synology’s shared-folder encryption protects data on disk. But it requires manual unlocking after a NAS reboot, slightly increases CPU load, and is best suited for sensitive data like offsite backups.
Since my Synology NAS volume uses Btrfs. I have already get some integrity protection by design even without enabling per-share checksum.
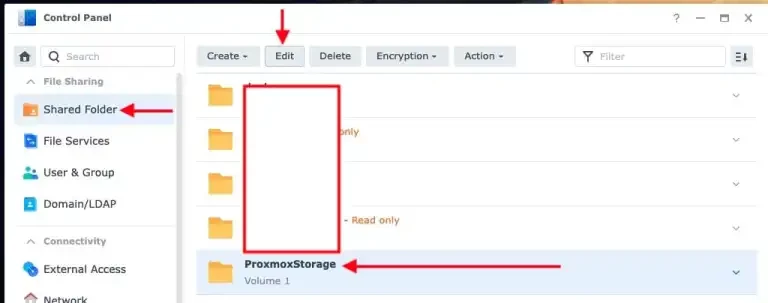
We have successfully created our shared folder. You can configure the NFS permissions of the shared folder before using your NFS client to access it or present it to Proxmox. To do this, select the folder and click on Edit.
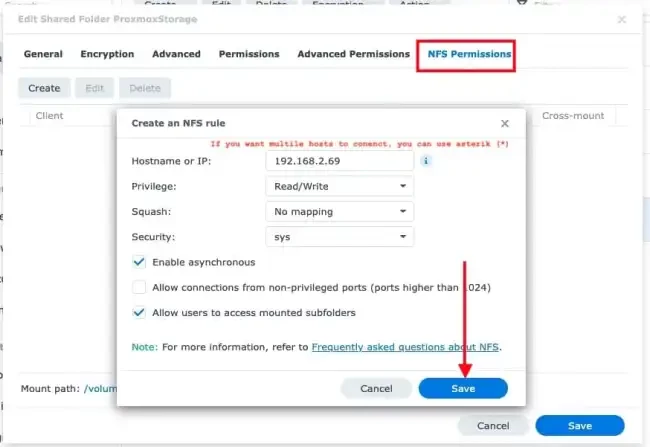
Navigate to the NFS Permission and set as you wish. In my lab environment, I am fine with these settings. Afterwards, I will click on Save. You can also “map all users to admin for Squash”
Verify NFS Share Access
You can confirm export and this verifies that the NFS share on the NAS is accessible from the Proxmox host and correctly exported for Proxmox or client use.
showmount -e 192.168.2.1xxx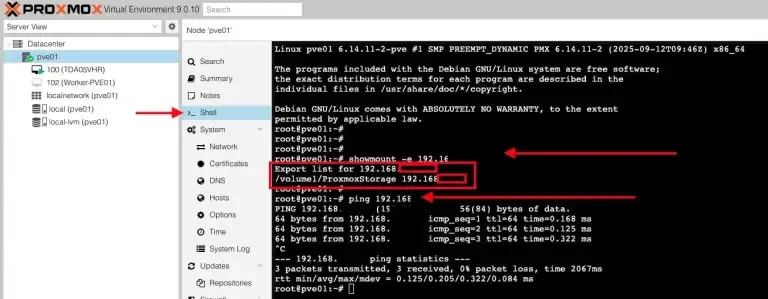
Mount NFS Storage in Proxmox
Removing an NFS datastore does not automatically unmount the corresponding NFS shared folder until you manually unmount it or restart its Proxmox node.
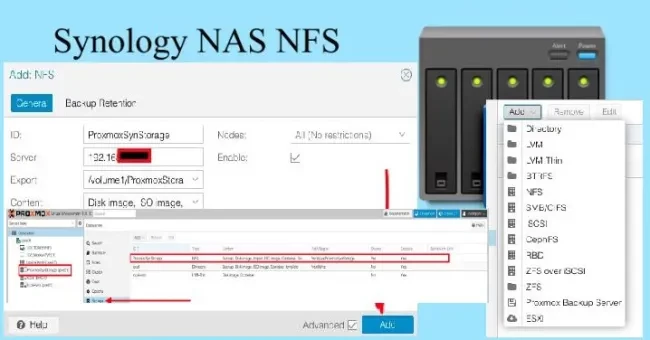
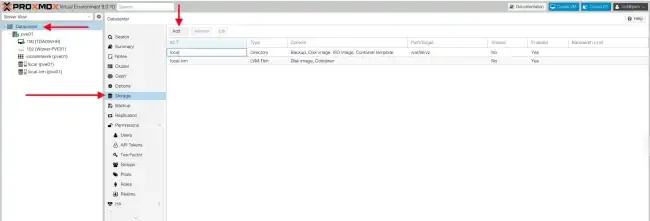
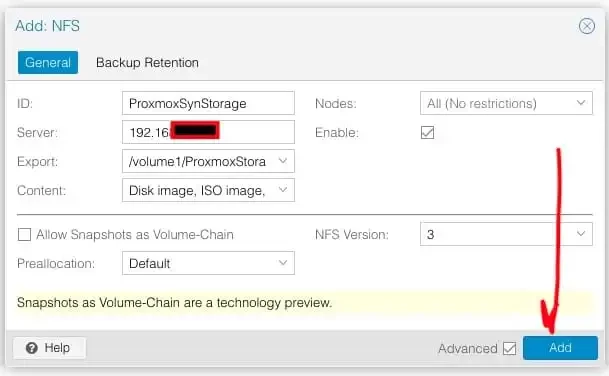
Log in to Proxmox Web UI via the URL with port 8006. Navigate to the Datacenter, then Storage and click on Add.
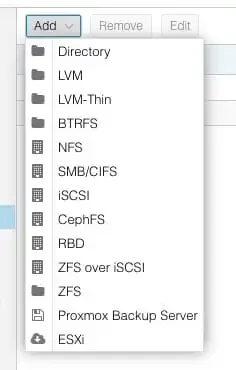
Select NFS
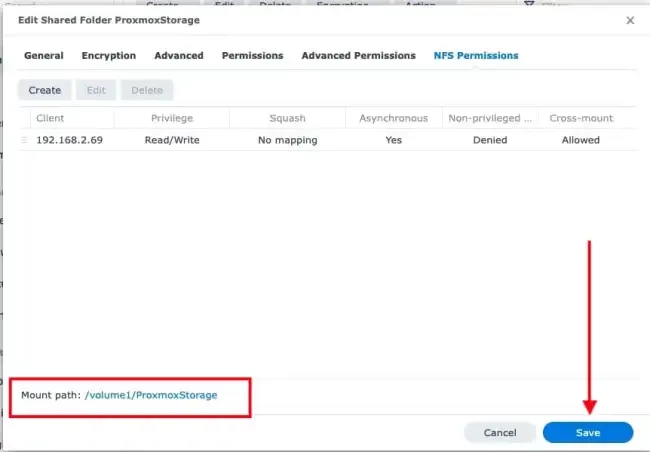
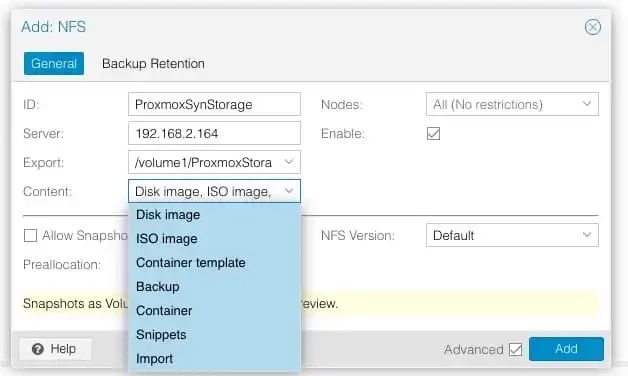
Enter the ID, server IP and under Export. Hit the Synology shared folder path (e.g. /volume1/ProxmoxStorage) you have created. For the content type, I will select all for my Lab usage.
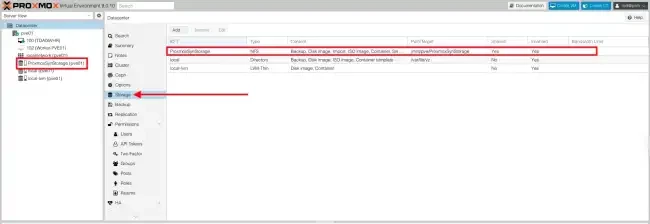
As you can see, the NFS storage on the Storage page as a datastore
For FAQs and other details not shared in this post, kindly refer to this website for more information or leave a comment below.
