

Azure AD is a cloud-based multi-tenant directory and identity service that provides identity and access management capabilities in the cloud.
- Since choosing the correct authentication method is the first concern for organisations wanting to move their apps to the cloud. The following section helps you decide which authentication method is right for you by using a decision tree. It helps you determine whether to deploy cloud or federated authentication for your Azure AD hybrid identity solution.
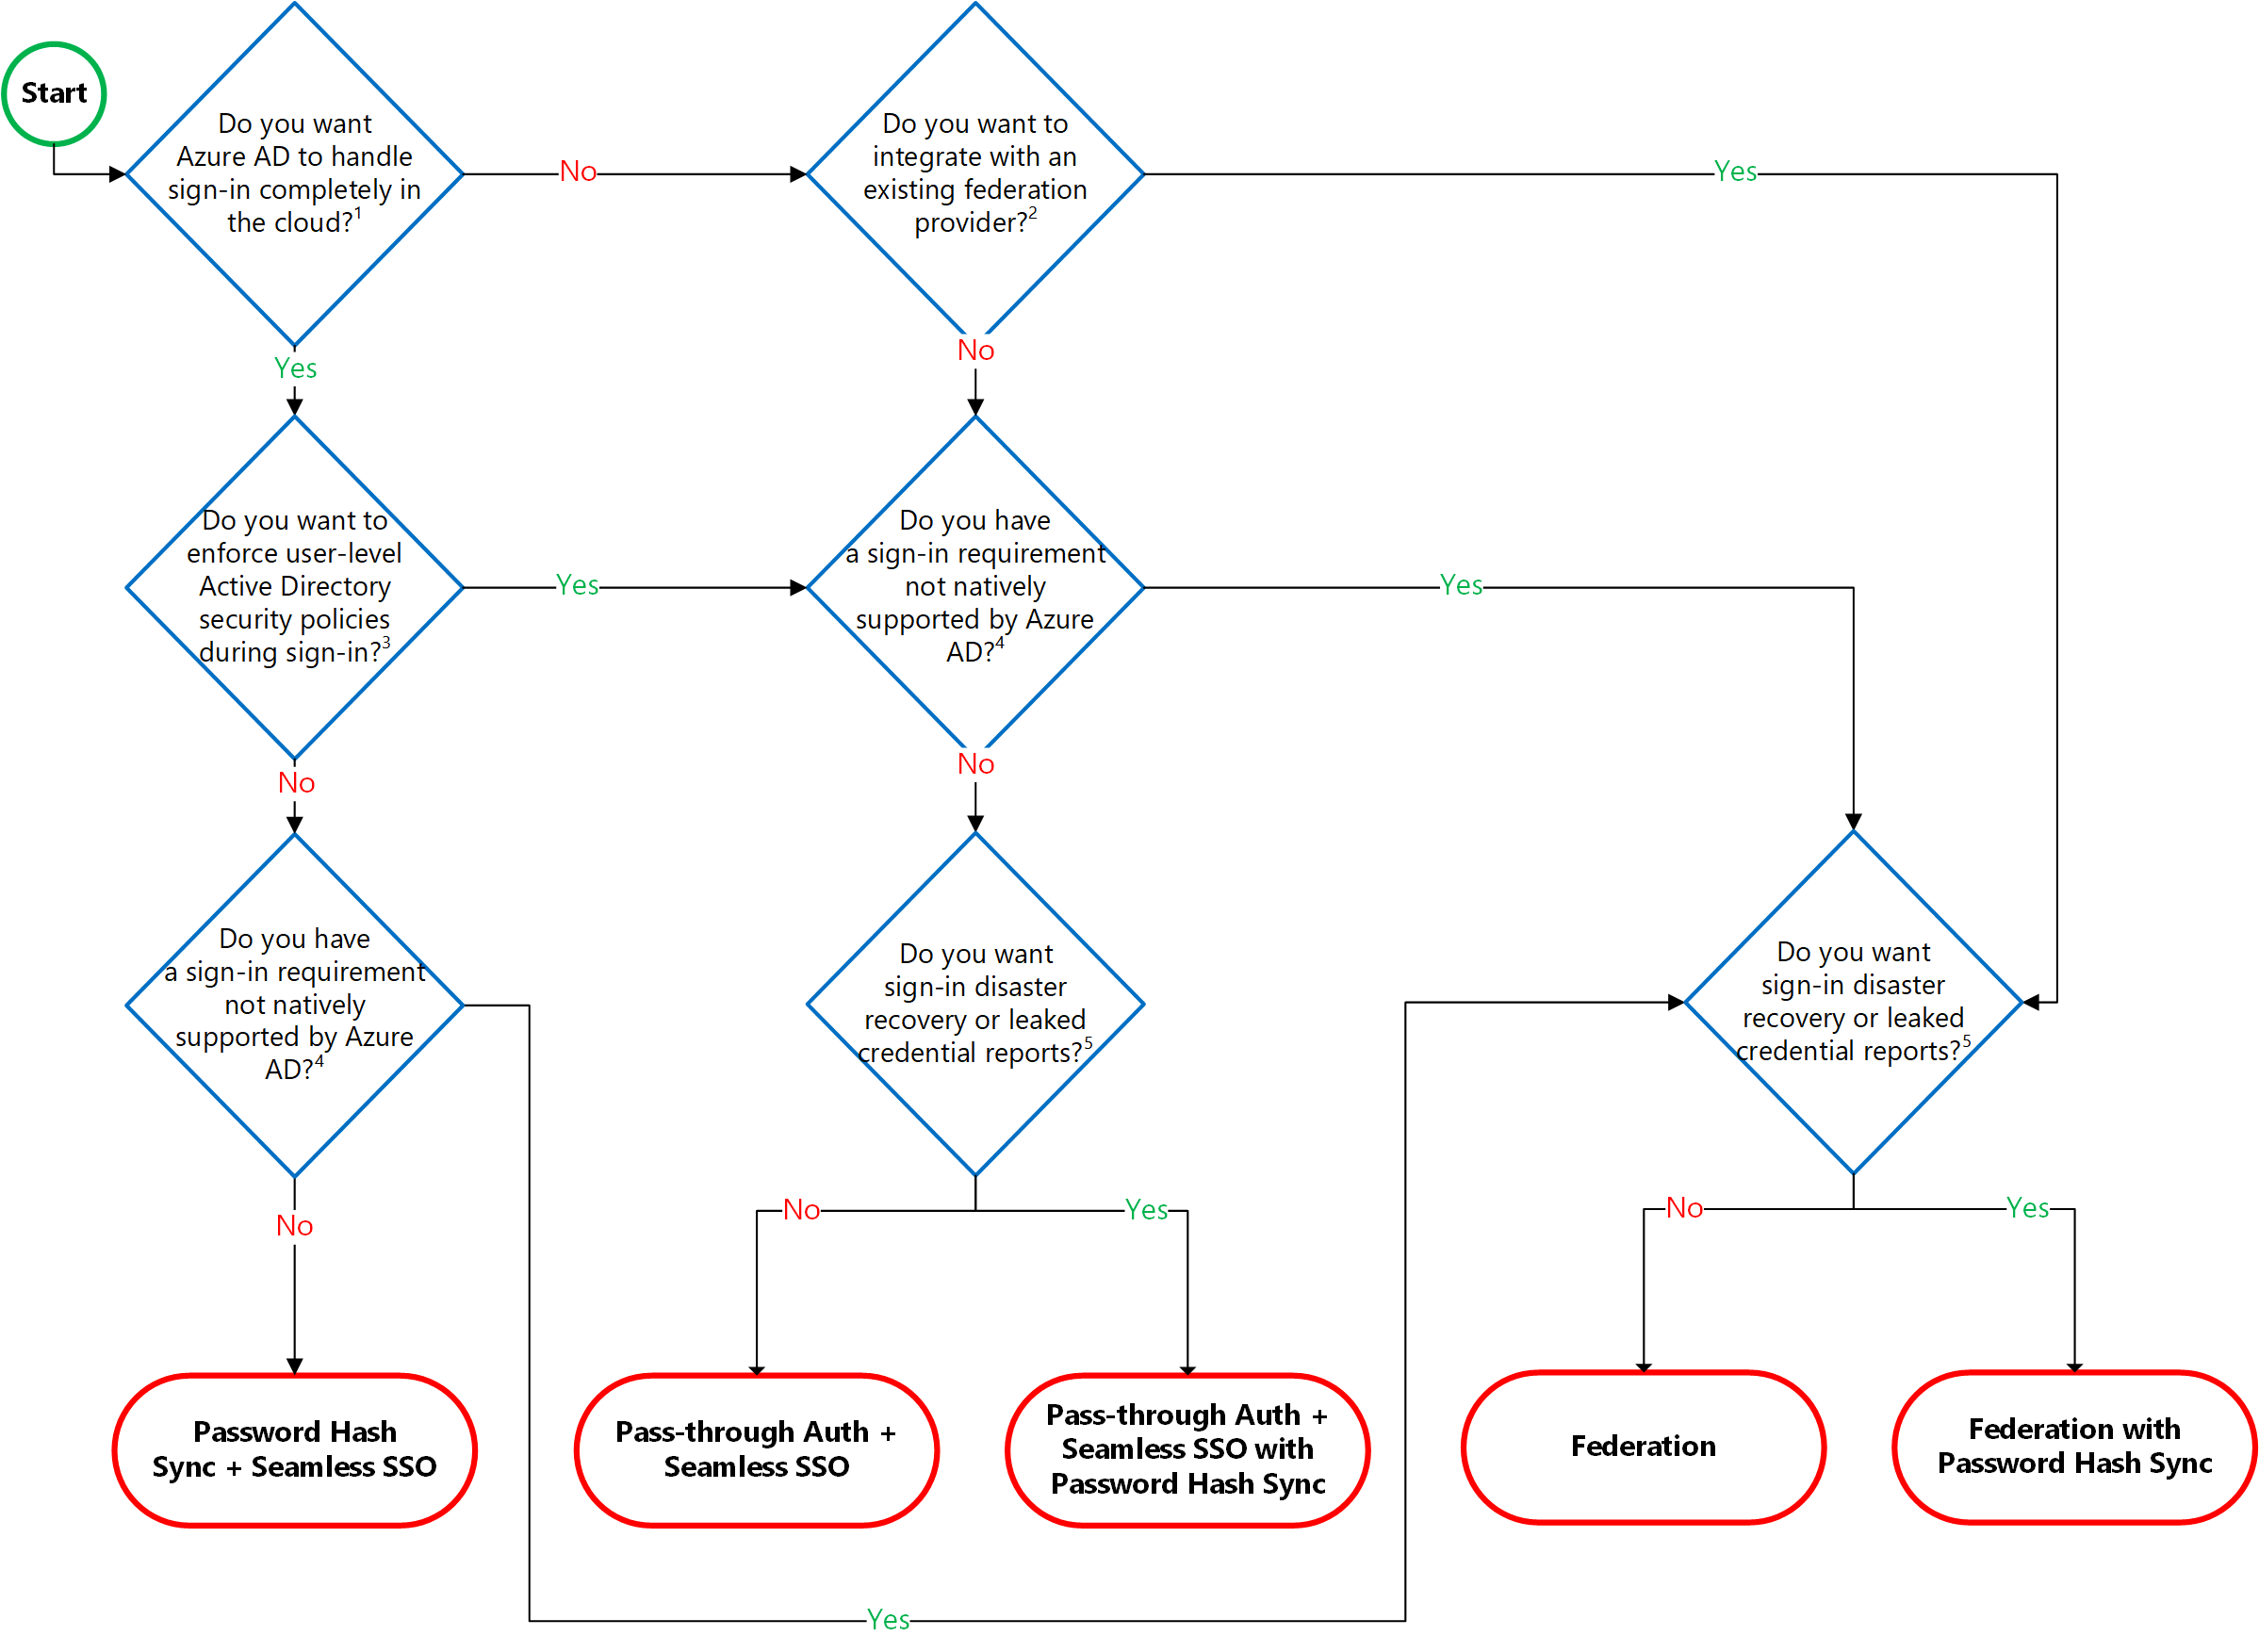
To choose an authentication method, you need to consider the time, existing infrastructure, complexity, and cost of implementing your choice. These factors are different are different from Organisation to organisation. Because of this, I will be highlighting on the different authentication methods. They are as follow;
- Azure AD password hash synchronization: This is basically the simplest way to enable authentication for on-premises directory objects in Azure AD. Users can use the same username and password that they use on-premises without having to deploy any additional infrastructure. Passwords are never stored in clear text or encrypted with a reversible algorithm in Azure AD.
Note: Some premium features of Azure AD, like Identity Protection and Azure AD Domain Services, require password hash synchronisation, no matter which authentication method you choose. - Azure AD Pass-through Authentication: This provides a simple password validation for Azure AD authentication services by using a software agent that runs on one or more on-premises servers. The servers validate the users directly with your on-premises Active Directory, which ensures that the password validation doesn't happen in the cloud.
- Federated authentication: When you choose this authentication method, Azure AD hands off the authentication process to a separate trusted authentication system, such as on-premises Active Directory Federation Services (AD FS), to validate the user’s password. Here is a guide on how to install ADFS and the ADFS post configuration of ADFS to support your hybrid deployment.
Below is diagram illustrating how PTA works when users try to access cloud applications such as Microsoft365 etc.
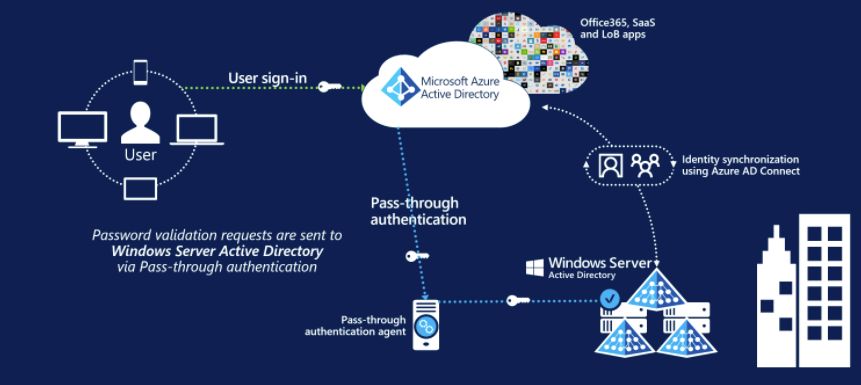
Note: With PHS, your password hashes are saved in the cloud. However, certain organisations wanting to enforce their on-premises Active Directory security and password policies can choose to use Pass-through Authentication instead for better security options.1: In order to integrate your on-premises environment, kindly ensure the following steps are followed strictly. The user should having the following rights.
– Local Administrator account: The administrator who is installing Azure AD Connect and who has local administrator permissions on the machine.
– Azure AD Global Administrator account: used to create the Azure AD Connector account and configure Azure AD. You can view global administrator accounts in the Azure portal. Create an Azure Global or Administrative account: See this guide on how to add a user account and set permissions in Azure.
2: Windows Server with Active Directory (AD) installed (Install Active Directory Domain Services role on your local machine and promote it to a Domain Controller): See the following articles on how to install Windows Server 2019 and Windows Server 2016 or on a Hyper-V Server. After setting up the Windows Server environment, you should install Active Directory Domain Services. To do this, see how to set up a Domain Controller and how to add a second Domain Controller (DC) to your environment.
– Also, you would like to create Active Directory Users and Contacts, to begin with.
3: Microsoft Azure Account (Tenant): See this guide for how to set up an Azure AD Tenant. Also when the tenant is up and running, ensure you add a custom domain in the Azure Active directory.
4: Download the Azure AD Connect: After completing the above steps, we will have to download and install Azure AD Connect to synchronize your on-premises to Azure Active Directory as well.
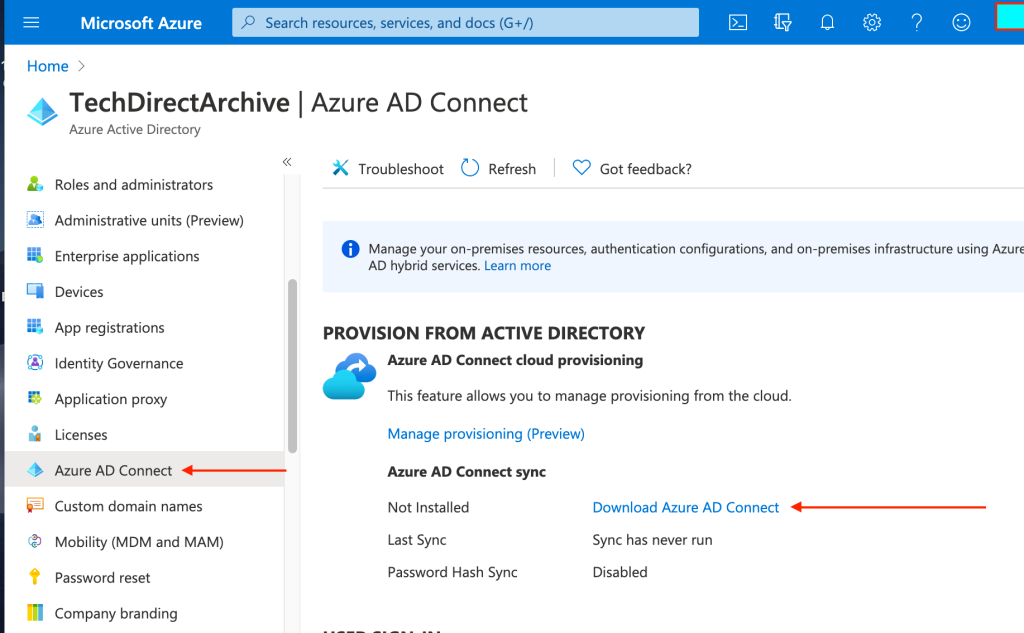
– You can download Microsoft Azure Active Directory Connect here. There are various ways to have this downloaded on the Azure portal.
– Alternatively, you can navigate to Azure AD, select Azure AD Connect as shown below, and click on download Azure AD Connect.
Note: Azure AD Connect can be installed on any server in your on-premise environment. But in my lab, I will be installing it on my Domain Controller.
An Azure AD Connect sync server is an on-premises computer that runs the Azure AD Connect sync service. This service synchronizes information held in the on-premises Active Directory to Azure AD. For example, if you provision or de-provision groups and users on-premises, these changes propagate to Azure AD.NowI have downloaded the Azure AD Connect to my on-premise Active Directory as shown below
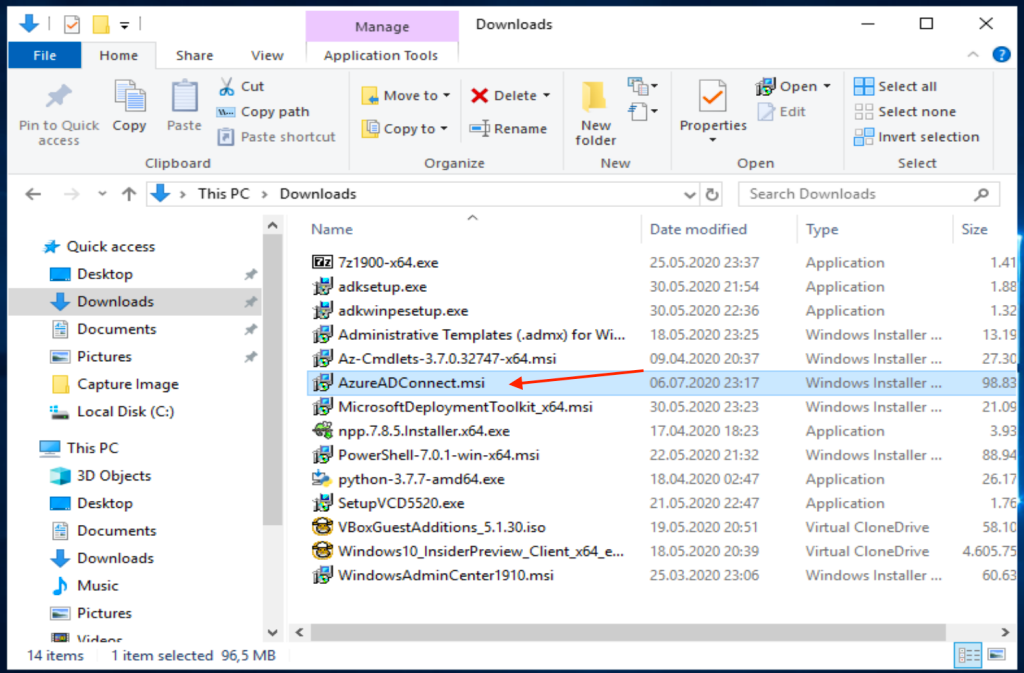
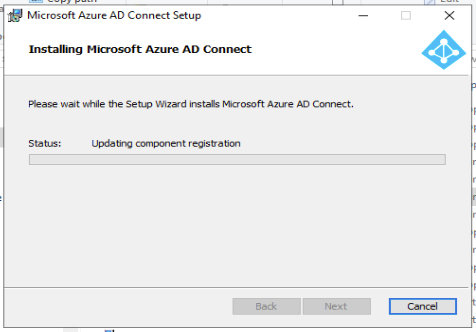
Double-click on the MSI file to start the installation. Note after the components are registered, a new shortcut will be available on the desktop.
As you can see, Azure AD Connect has been installed on my server

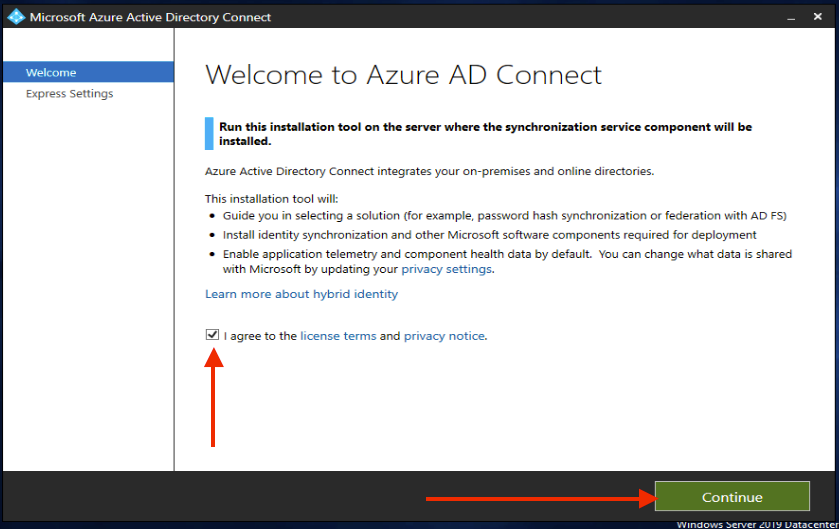
To start the process,
– Launch the Azure AD Connect installation
– Click on “I agree with the License agreements and privacy rules” and
– Click on “Continue” as shown below.
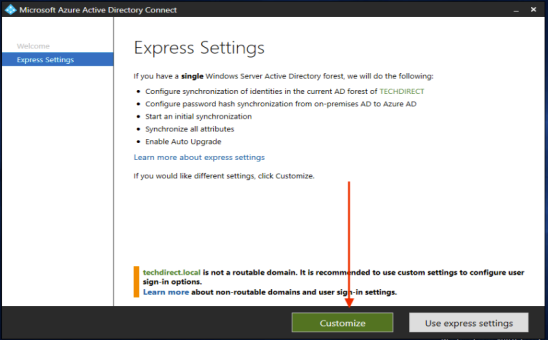
Choose whether you would go with an express installation or a customised installation.
– I will be using the “Customised” installation since I do not want to use the express settings because I do not want to have my password hash etc and also my attributes synchronised.
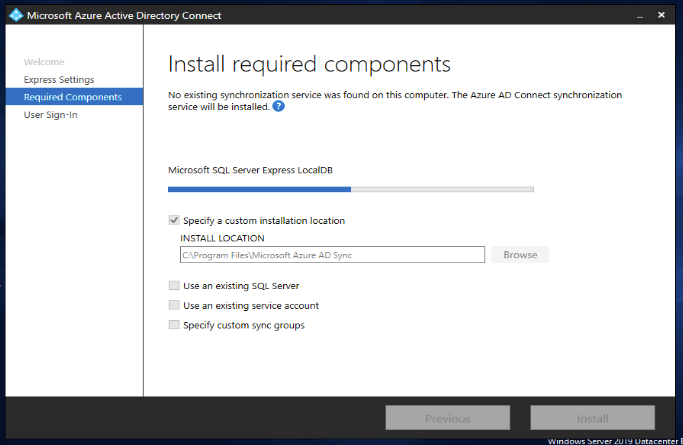
This will open the “Install required components” window
– Click on the checkbox “Specify custom installation location” as shown below and you can browse to whatever location you want. For me, I will leave the default installation path.
Also, you can use an existing SQL Server, but in my case, I will be using the default MS SQL Server Express. If you are syncing over 100 thousand objects, a dedicated (full) MS SQL Server is recommended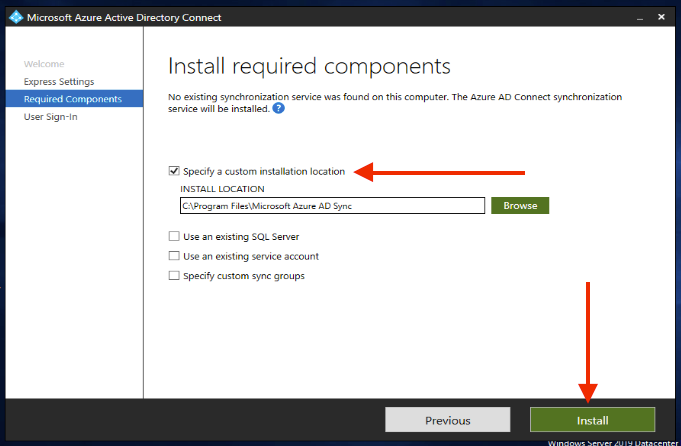
This will work through the SQL Server Express database setup etc as shown below. This will take a little while, please exercise a little patience 

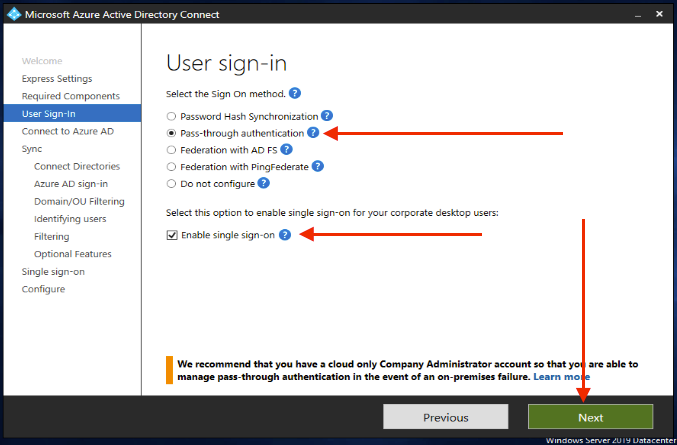
This will open the “User Sign-in” methods as shown below.
– I will be selecting “Pass-through Authentication“.
– Select “Enable single sign-on” as well. This option is available to both password hash sync and pass-through authentication. It provides a single sign-on experience for desktop users on corporate networks.
– And finally, click on “Next“.
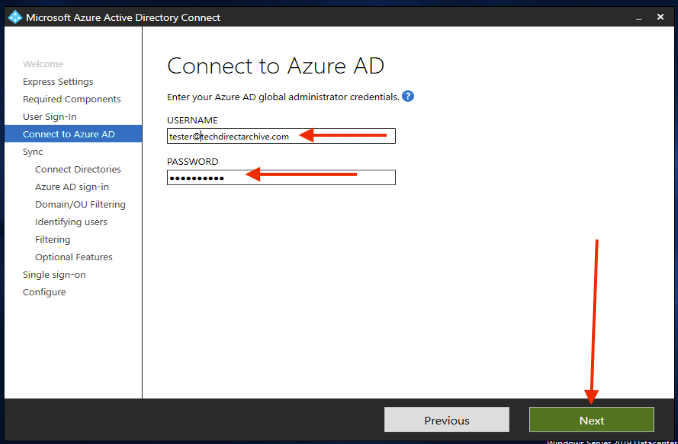
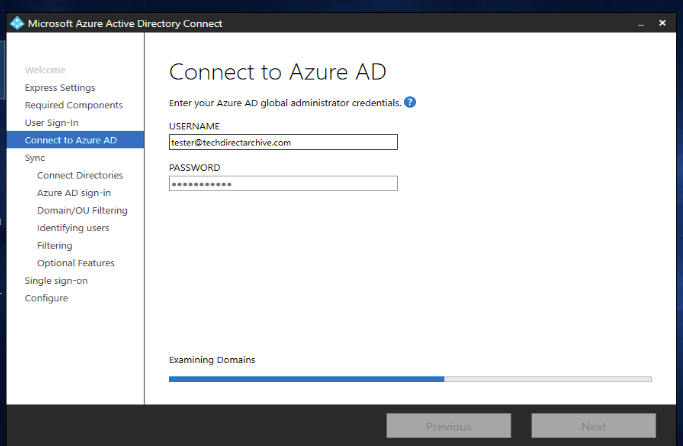
This will open the Connect to Azure AD window.
– Enter your Azure Global Administrator credential in order to authenticate to the Azure AD environment. See this guide on how to add a user account and set permissions in Azure.
You may get an error here saying “The password has expired, update your password and try again”, please use this link to fix the issue.
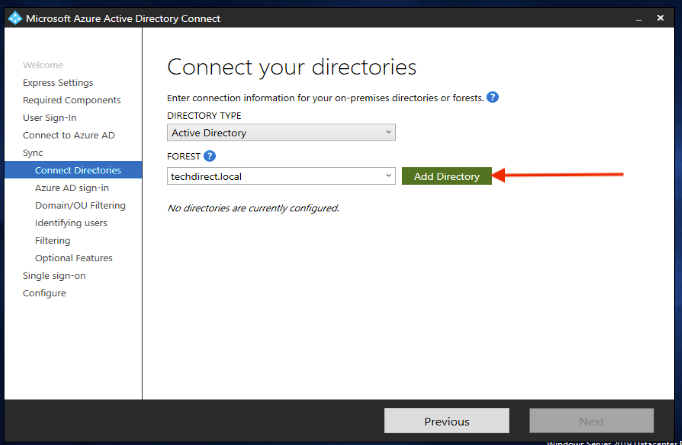
Enter connection information for your on-premise directory or forests and
– Click on add directory (Without this, you can not proceed).
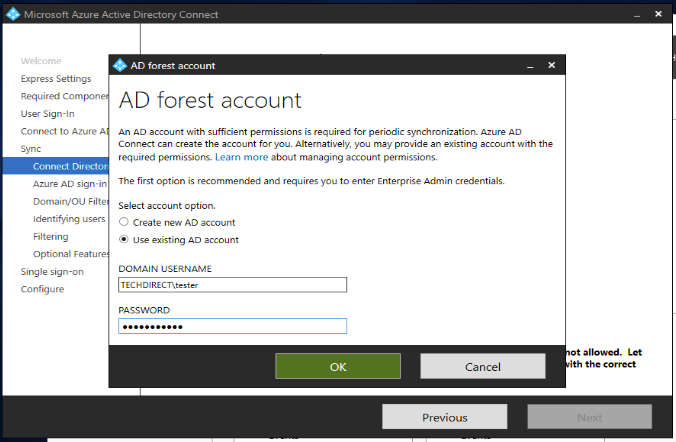
Note: As of build 1.4.18.0, you cannot use your Enterprise or Domain administrator account for your AD Forest account. It is recommended to let Azure AD Connect or you can specify a synchronization account with the correct permission.I will be using an existing account I have in AD.
– Click on “OK” as shown below
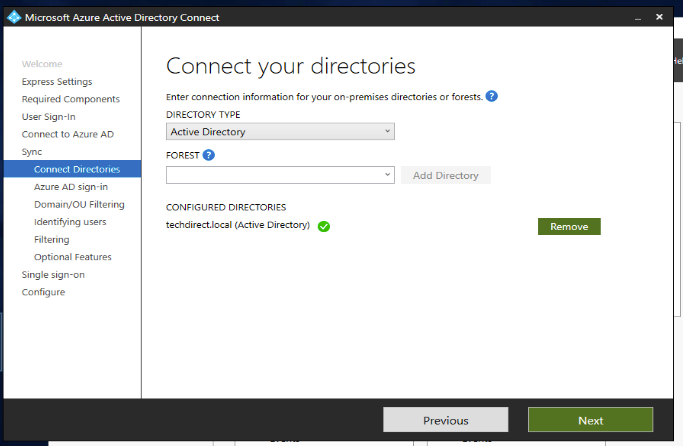
Now, click on Next as shown below
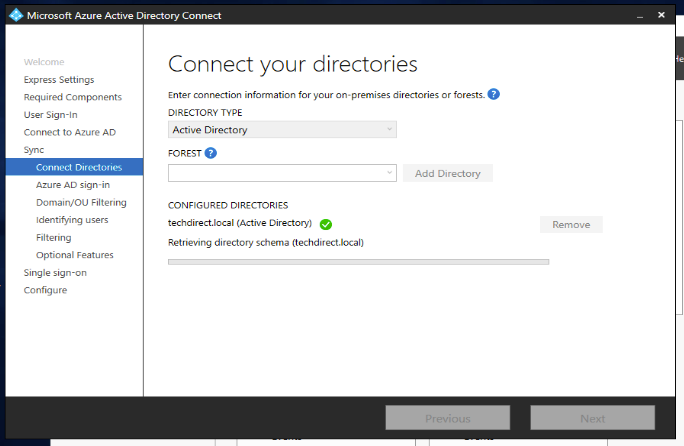
This will retrieve the Directory Schema for TechDirect.Local and prompt Azure AD Sign-in Configuration as shown below.
In the “Azure AD Sign-in Configuration” wizard, click on continue without matching all UPN suffixes to verified domains
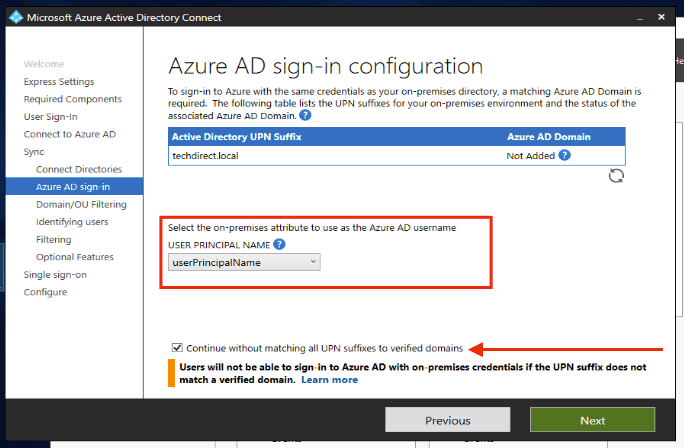
Summary: Users will not be able to sign in to Azure AD with an on-premise credential if the UPN suffix does not match a verified domain.
Review every domain that's marked as Not Added or Not Verified. Make sure that the domains you use have been verified in Azure AD. After you verify your domains, select the circular refresh icon. Refer to this reference link. - Azure AD should verify the domains, also known as the UPN-suffix before users are synchronized.
If the userPrincipalName attribute is non-routable and can't be verified, then you can select another attribute. You can, for example, select email as the attribute that holds the sign-in ID. When you use an attribute other than userPrincipalName, it's known as an alternate ID. - Note: Microsoft recommends that you keep the default attribute userPrincipalName.
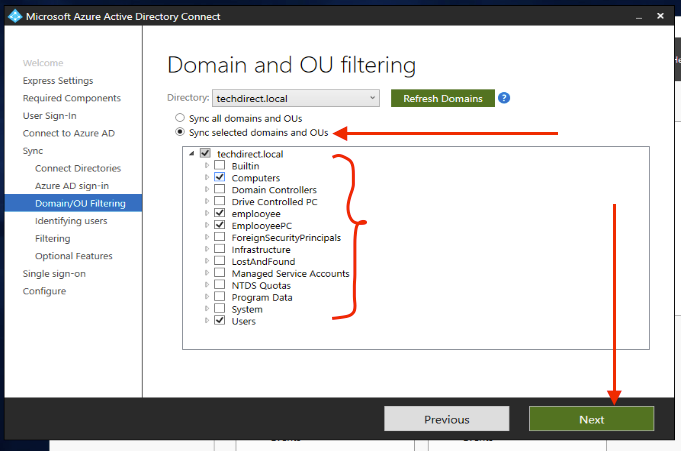
In the next window, you will be provided with the option to sync all the domains or the selected domain. If you plan to use group-based filtering, then make sure the OU with the group is included and isn’t filtered by using OU-filtering. OU filtering is evaluated before group-based filtering is evaluated.
– I will go with the second option “Sync select domain and OUs”
– Unselect the OUs’ you do not want to sync and
– Click on Next to continue
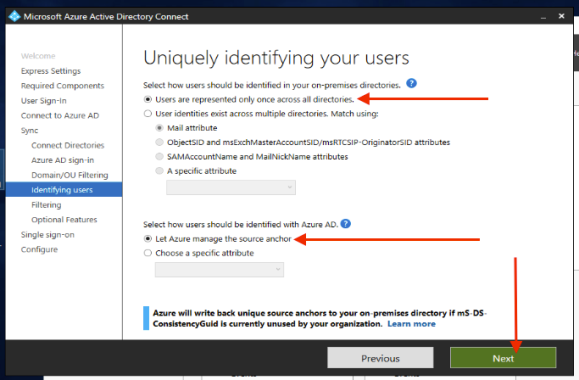
In the next dialog box, select how the users should be identified in your on-premise directory.
– The options I have selected in the image below are enough for my task, there I will proceed by clicking on Next.
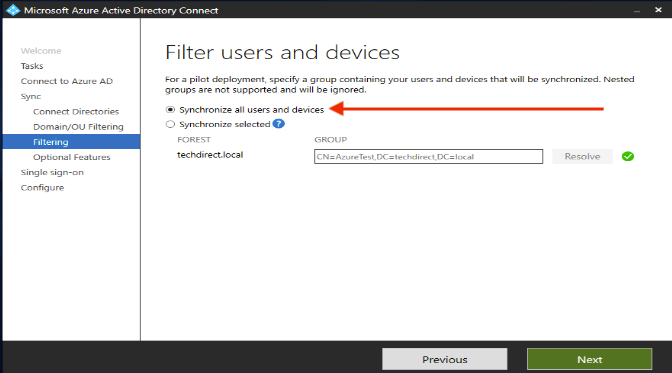
In the window below, you can choose whether to include all users and groups or a selected group and user respectively.
– I will go with the first option here “to synchronise all users and devices”.
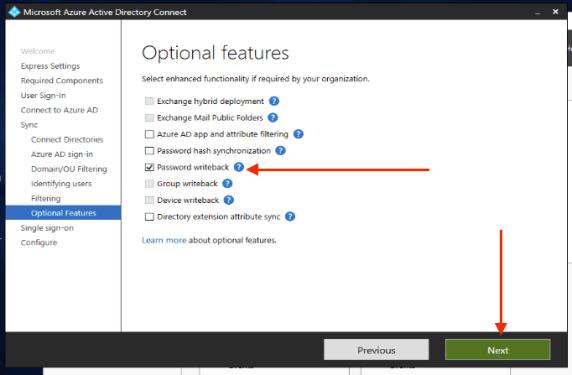
In the “Optional features” as shown below, select the functionalities that are required by your organization. Here some features are greyed out because they require a P1 or P2 license.
– I am okay with the Password write back, so whenever I make changes to my passwords in the cloud, it will be written back to the same user on-premise.
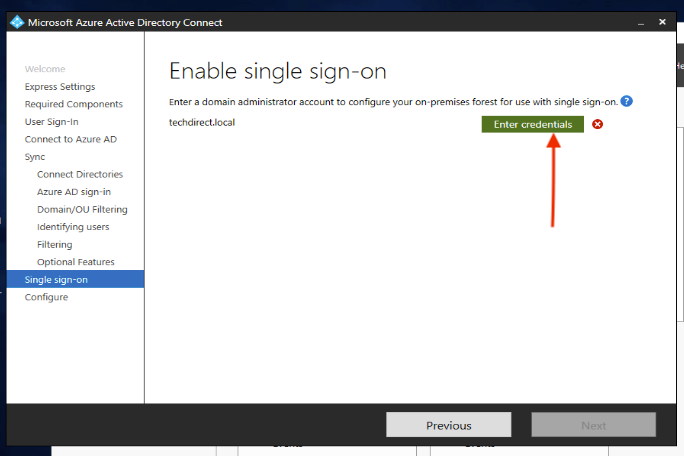
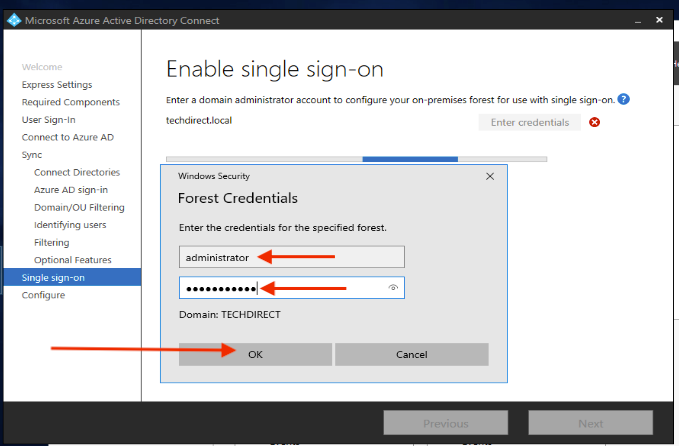
n the “single sign-on (sso)” dialog window, you are required to enter your domain administrator account to configure the on-premise forest to use SSO.
Enter the Domain credential as shown below and this will create the necessary computer account in your on-premises instance of Active Directory.
On the Single sign-on page, you configure single sign-on for use with password synchronization or pass-through authentication as it is in my case. You do this step once for each forest that's being synchronized to Azure AD. Configuration involves two steps: - Create the necessary computer account in your on-premises instance of Active Directory (This is being done in the image below). - Configure the intranet zone of the client machines to support single sign-on.
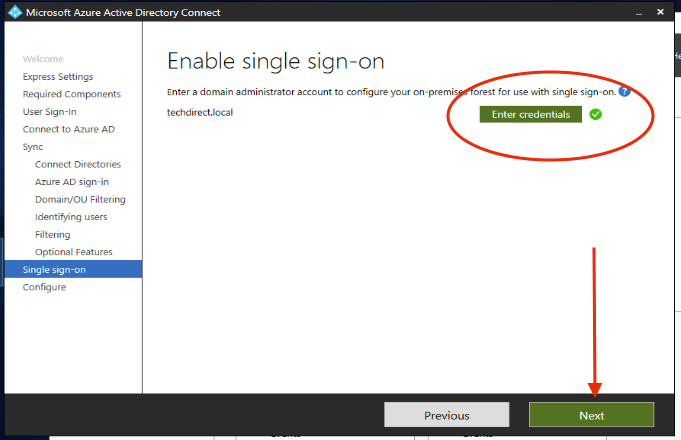
As we can see below, the forest is configured for a single sign-on.
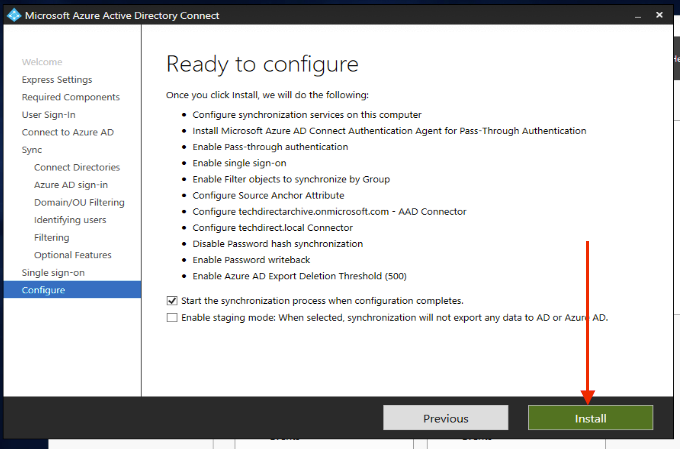
This will open the “Ready to Configure Dialog box as shown below”
– Click on install.
Note: I selected to start the synchronisation process when the configuration completes as well.
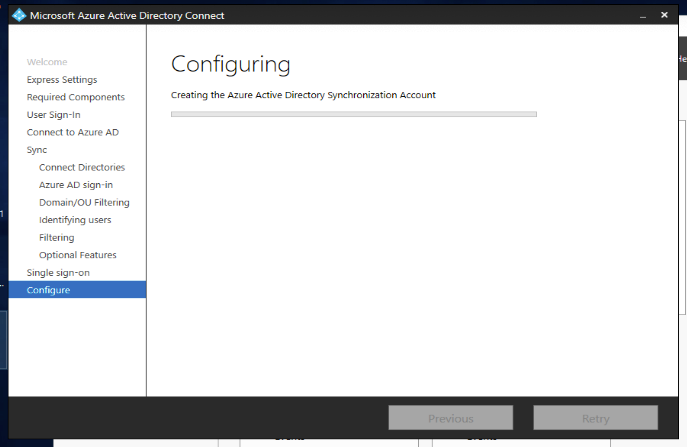
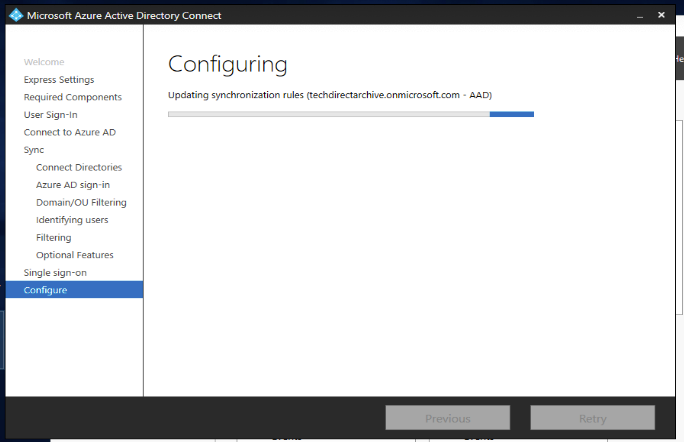
This will continue the installation as listed in the image above
The configuration is now complete and you can verify in your azure AD that the user accounts have been created.
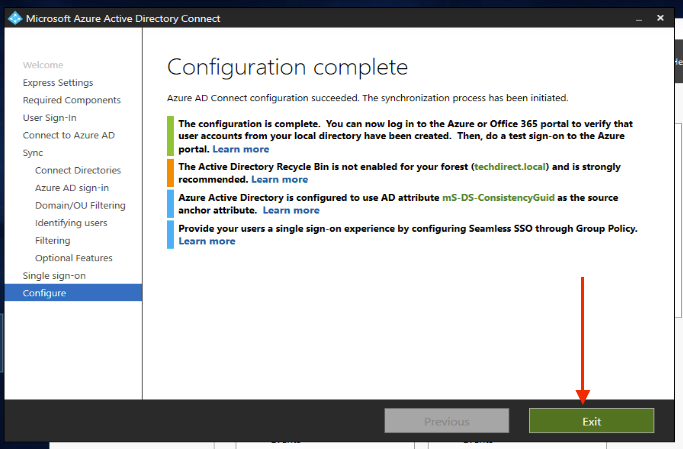
After the installation has been completed, sign out and sign in again before you use the Synchronization Service Manager or Synchronization Rule Editor.
Note: Be aware that this may take a few hours to complete. To verify users are synchronized do the following.
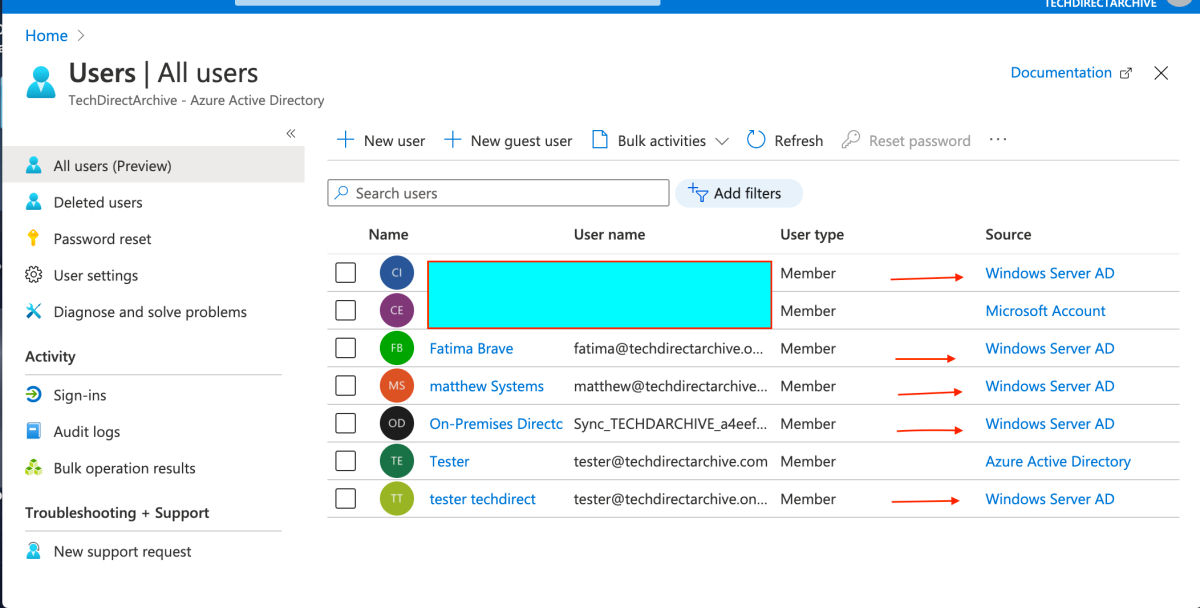
To confirm the synchronization between your on-premises AD with Azure AD, log on to the Azure portal
– Navigate to Active Directory
– Click on Azure Active Directory
– Click on All Users
In the all users list, you will see the following accounts are being added. Therefore, our on-premise AD is fully synchronized with Azure AD.
Note:
Before testing, configure the intranet zone of the client machines to support single sign-on as. You can heed to TechDirectArchive for the completion of this guide :)

