Veeam Backup for Microsoft Azure is purpose-built for simplicity, scale, savings, and security for your Azure environment. Veeam Backup for Microsoft Azure is available as a virtual machine (VM) offer exclusively through the Azure Marketplace in both Free and BYOL editions.
Here are some guides that may interest you: How to set up Veeam ONE 11 Server, What’s new in Veeam Backup and replication v11?, how to install and configure Veeam Backup and Replication 11 Community Edition with its default SQL Server Express Edition, how to migrate Veeam MsSQL Database to a new MsSQL Server, and how to install Veeam Backup and Replication 11 Community Edition with a dedicated SQL Server.
Due to the Shared Responsibility Model by Cloud providers, it is evident that it is still your data and that you retain the responsibility to secure and protect it. You may want to take a look at Veeam Backup & Replication which can also enable you to centrally manage Azure backup with another cloud, virtual, physical, SaaS, and Kubernetes environments. Here is a link for more information.Access the Microsoft Portal
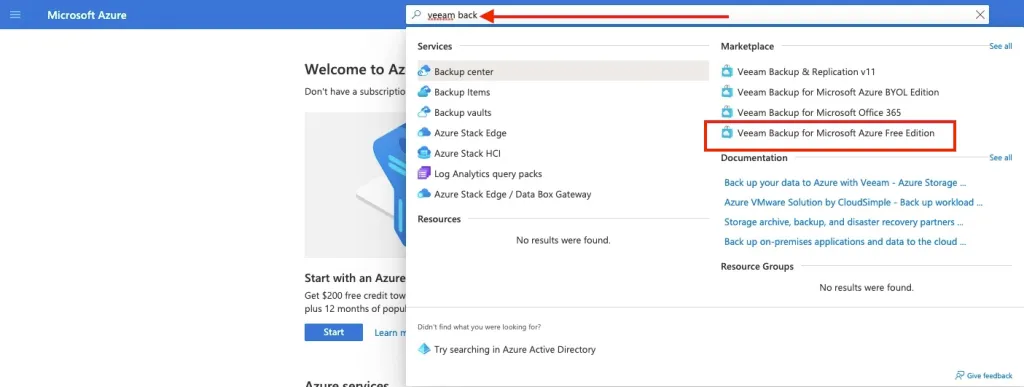
To get Veeam Backup for Azure setup, please follow the steps described below and or get it from the following link “Veeam Backup for Microsoft Azure Free Edition“. Now that we are in the Azure portal, type Veeam backup in the Azure search box and then select the Veeam Backup for the Microsoft Azure Free Edition option as shown below.
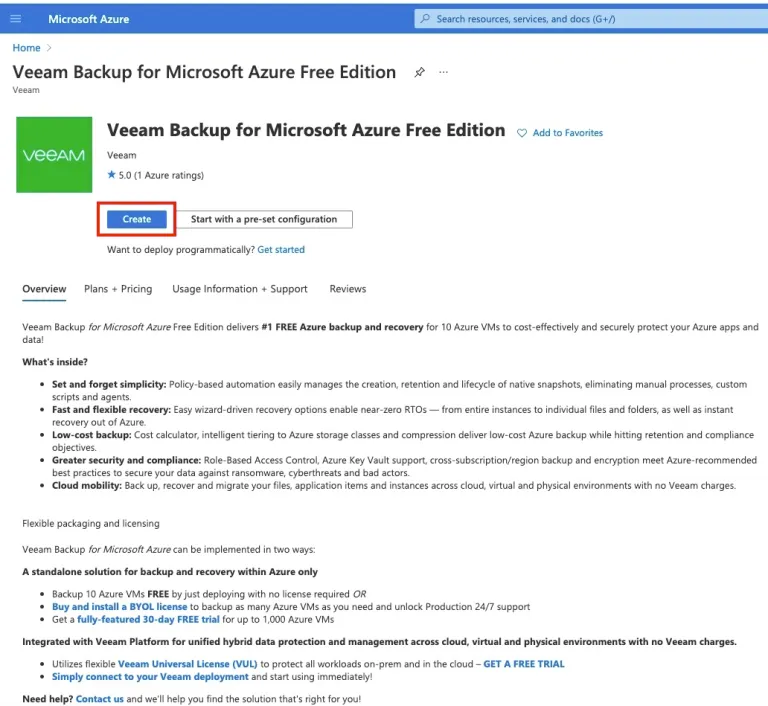
This will display the following page “Veeam Backup for Microsoft azure free edition” page below. Click on the Create button to deploy the VM.
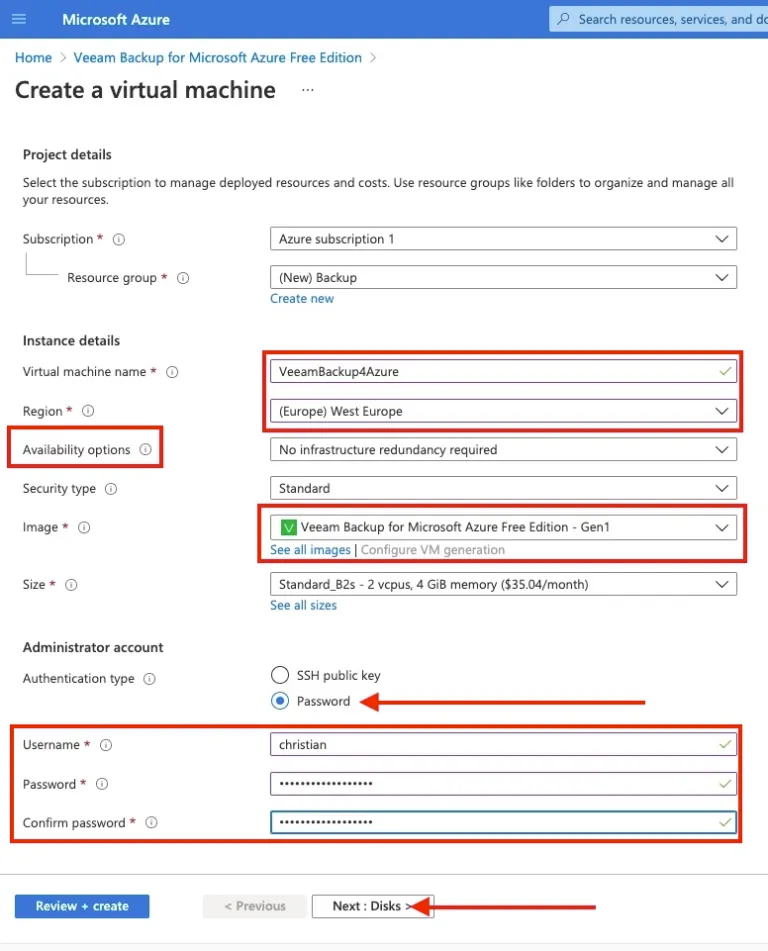
Select your subscription and a resource group. As you can see below, I do not have one, so I will be creating this on the fly. To do this, click on create new.

As you can see, we have successfully created the resource group, selected the authentication type as “password”, and selected the region as well.
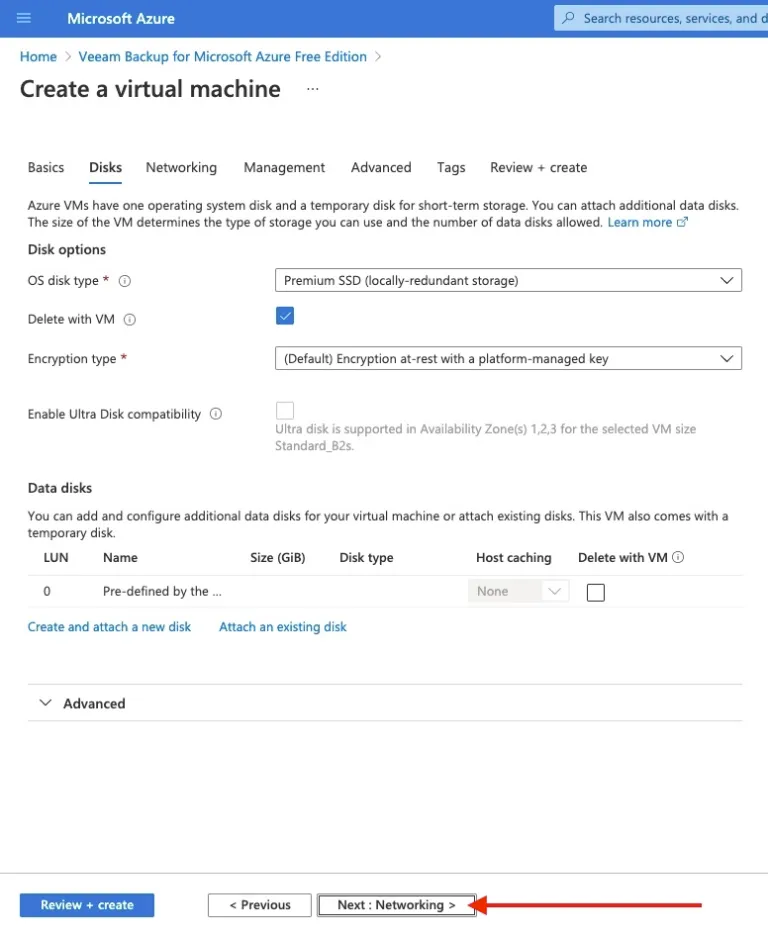
I will leave this section as default and proceed to the next “Networking”.
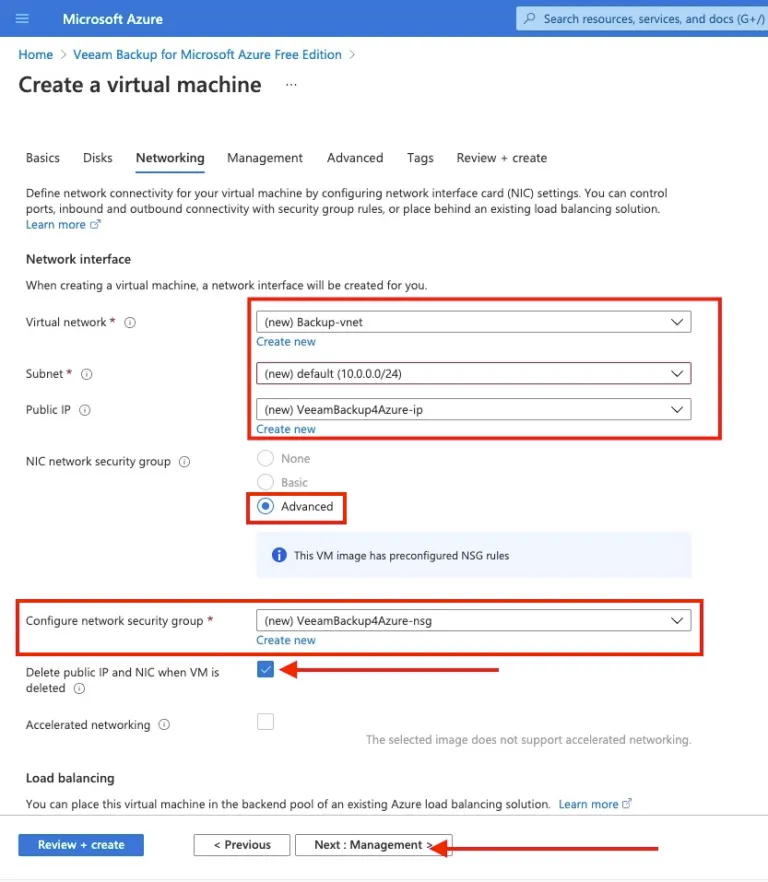
Here, I do not have a Virtual Network, I will be creating one on the fly. No Public IP will also be created. Ensure you select “Advanced” under NIC network security group.

As you can see, we have created all needed network interfaces, etc and I have chosen to select “delete public IP and NIC when the VM is deleted”. Click on Next to proceed to the next section.
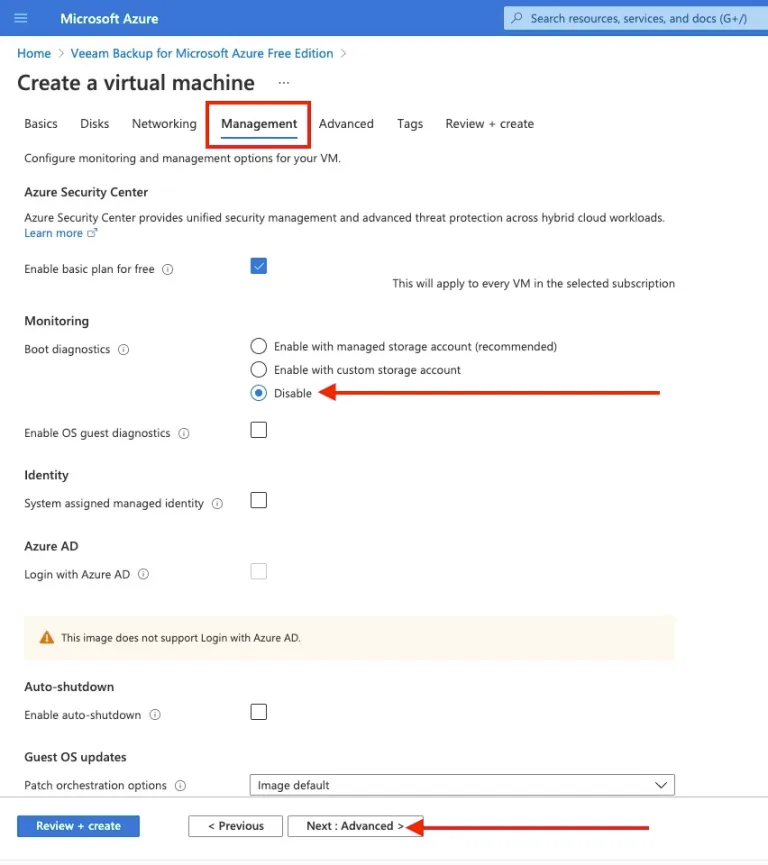
In the Management tab, Please select boot diagnostics off and and proceed to the Advanced tab.
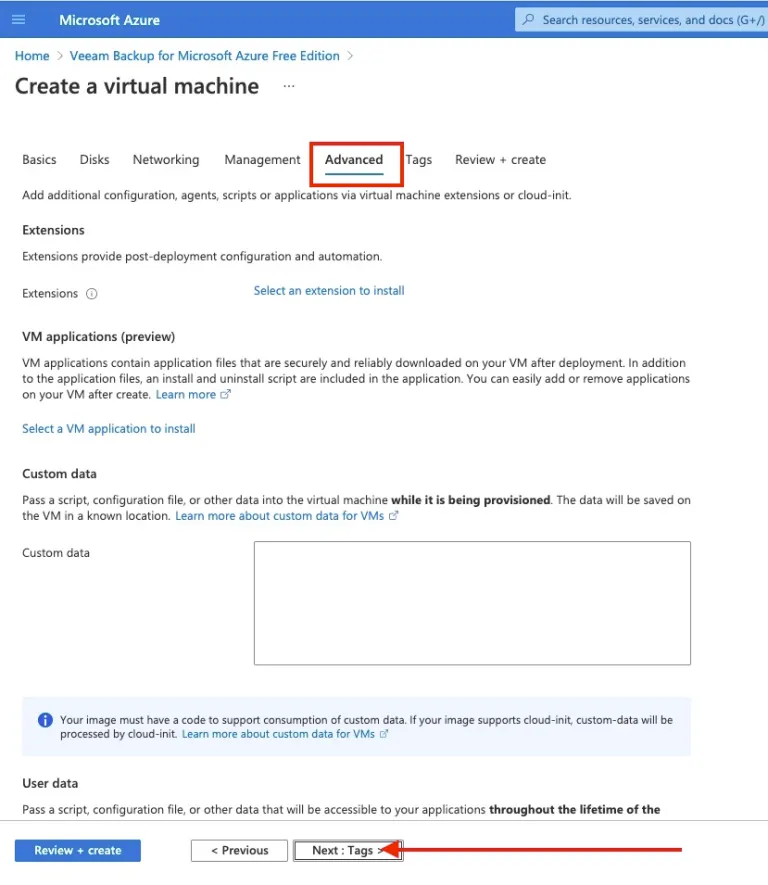
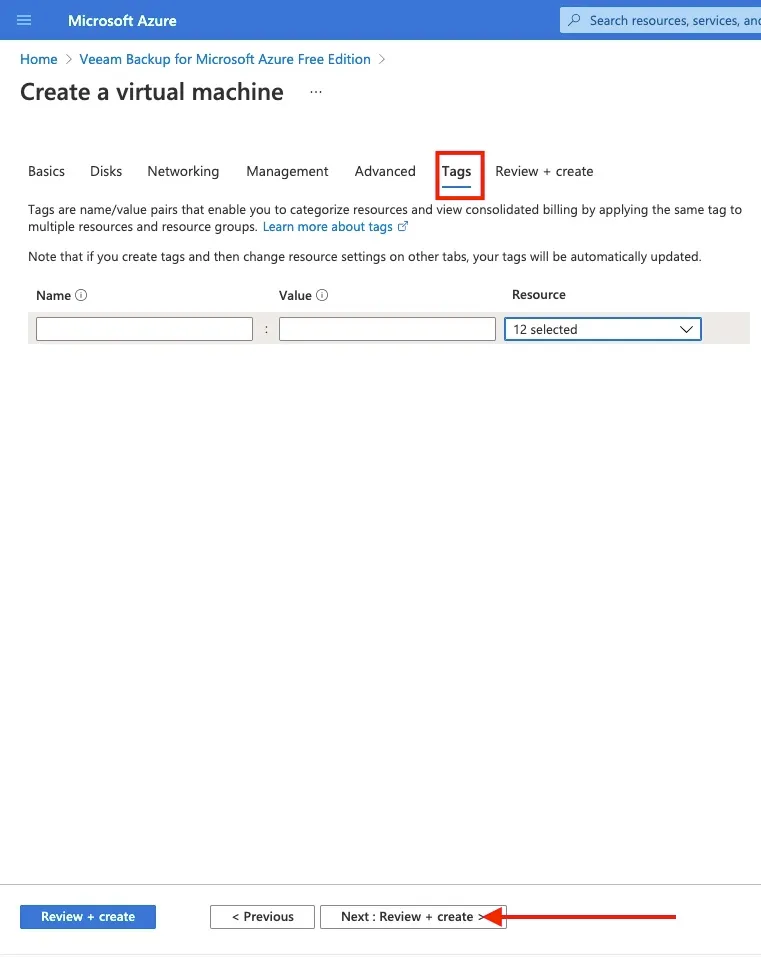
Click on Next and proceed to the Tag tab. In this window, I have no script I wish to run, etc.
Also, In this section, I will not be doing anything as I do not want to associate this VM with a tag. Next, click on Review + Create as shown below.
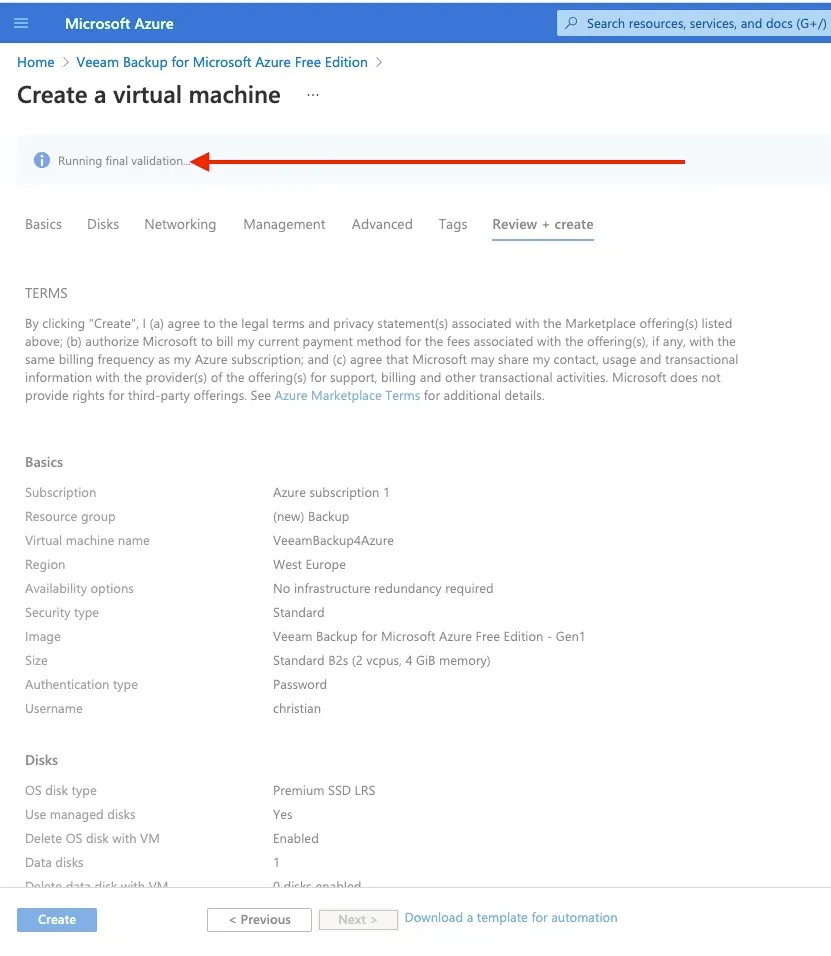
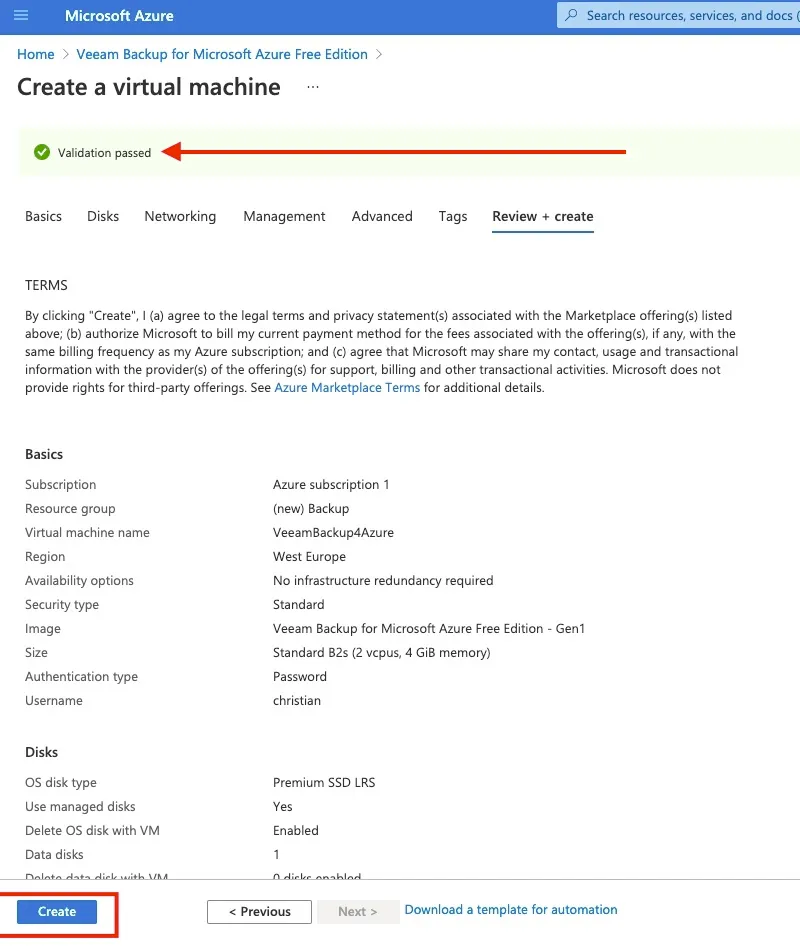
As you can see below, the VM is currently being validated. As you can see in the other image, the validation has passed. Next click on create.
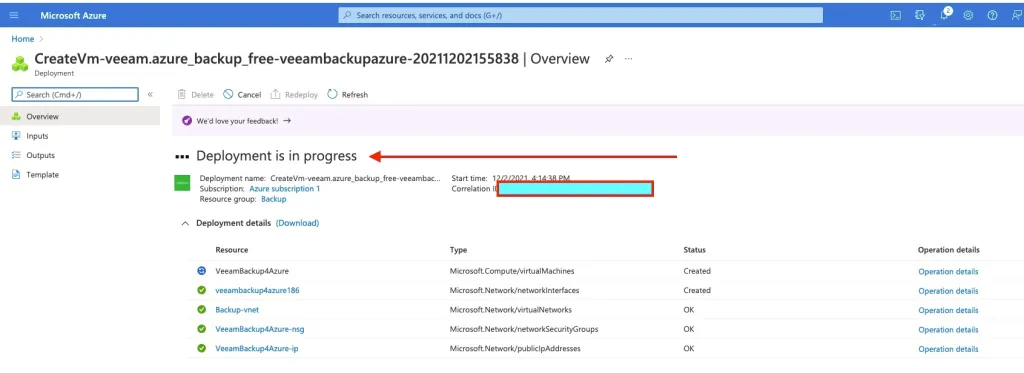
As you can see below, the VM deployment is in progress. Click on “Go to resources” to view the VM details etc.
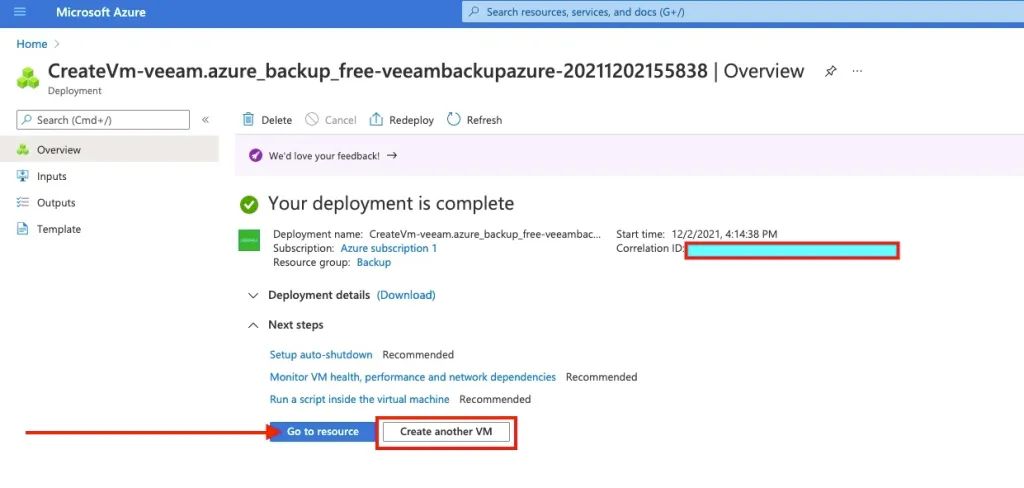
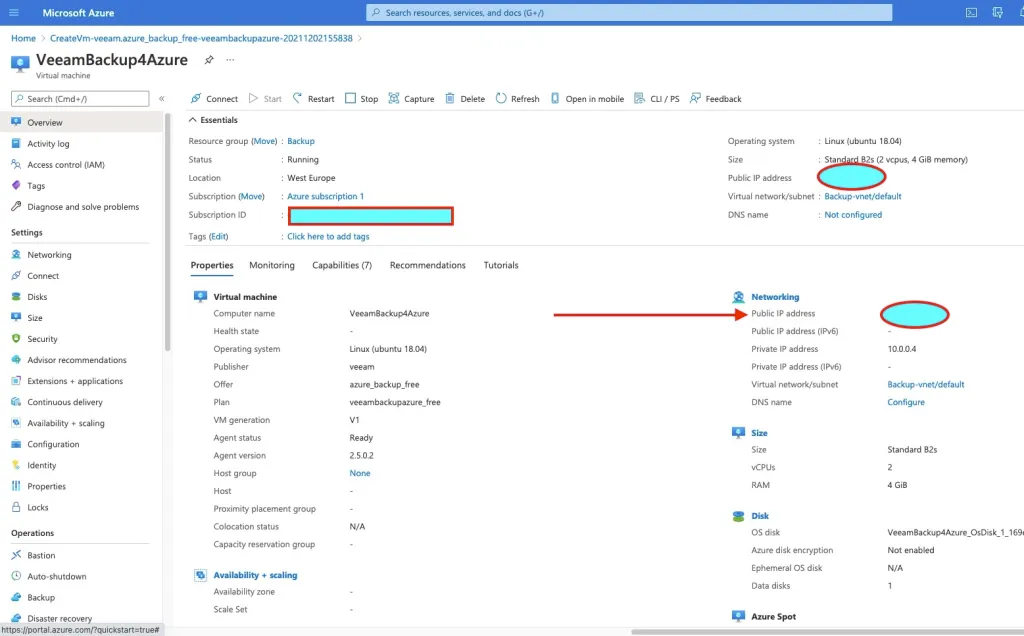
As you can see, the VM is set up and assigned a public IP address etc.
Access the Veeam Backup for Microsoft Azure
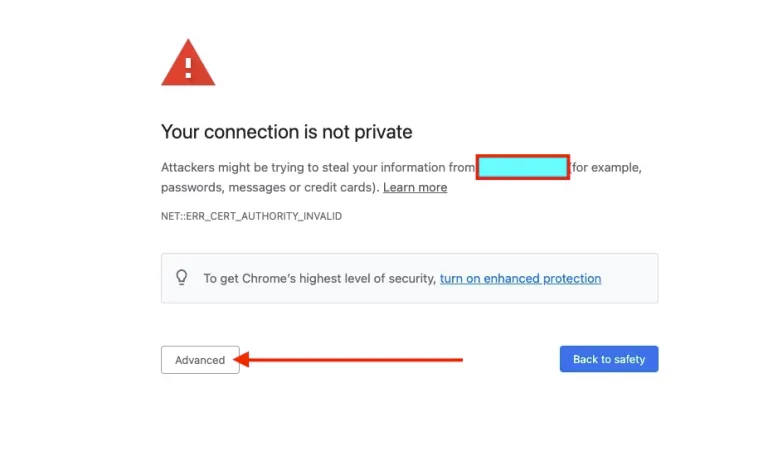
You will need to access a web browser and paste the Public IP address “https://168.xxx.xxx.8x/”. Currently, you do not have a certificate, therefore, it is okay to accept the security warning prompted by the web browser.
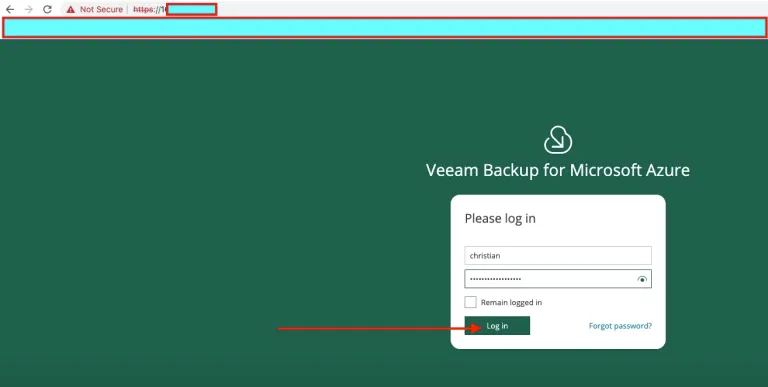
Enter the credentials you previously entered during the VM creation
Agree to the license terms and accept them as shown below.

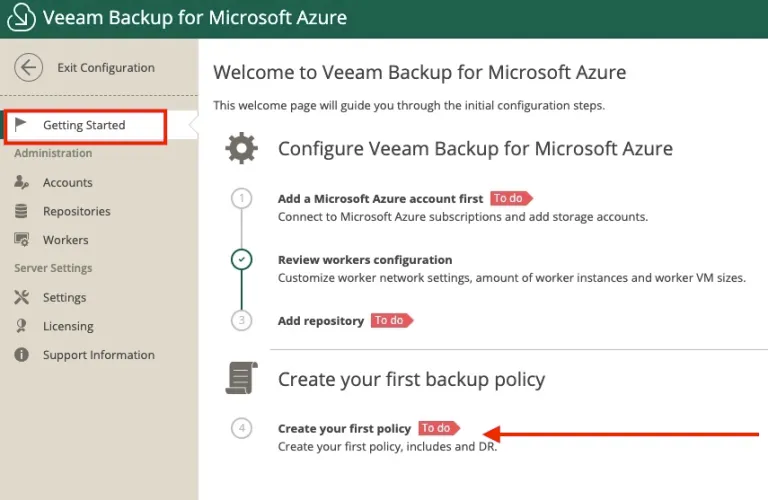
As you can see below, we are being welcomed by the Getting Started page. As you can see in the image, there are the initial steps that MUST be configured. They are as follows: Add Azure Account, the Add Repository, then the Workers, and finally, create your first backup policy.
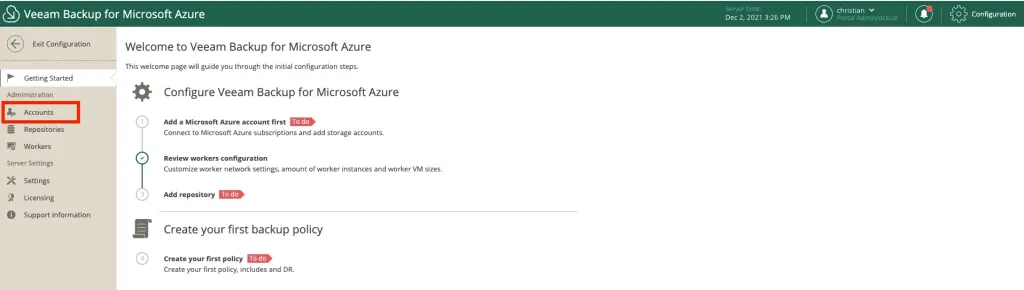
Note: Without creating an Azure Account, you will not be able to add a repository, workers and also not be create your backup policy. Keep an eye for Part 2 of this guide.If you have any questions, please let me know