Virtualization technology has become an integral part of modern IT infrastructures. It provides incredible flexibility, scalability, and cost-efficiency to businesses of all sizes.
Since several hypervisor platforms have gained significant traction in recent years, including Proxmox VE, XCP-ng, and Nutanix AHV etc. As business needs continue to evolve, the choice of virtualization platform must remain equally adaptive. Thereby, aligning performance, scalability, and management capabilities with changing organizational and technological demands
Migrating from one hypervisor to another is a complex process that requires careful planning and evaluation. Organizations must consider factors such as application dependencies, migration timelines, workload criticality, and the potential business impact of application downtime.
Prerequisite
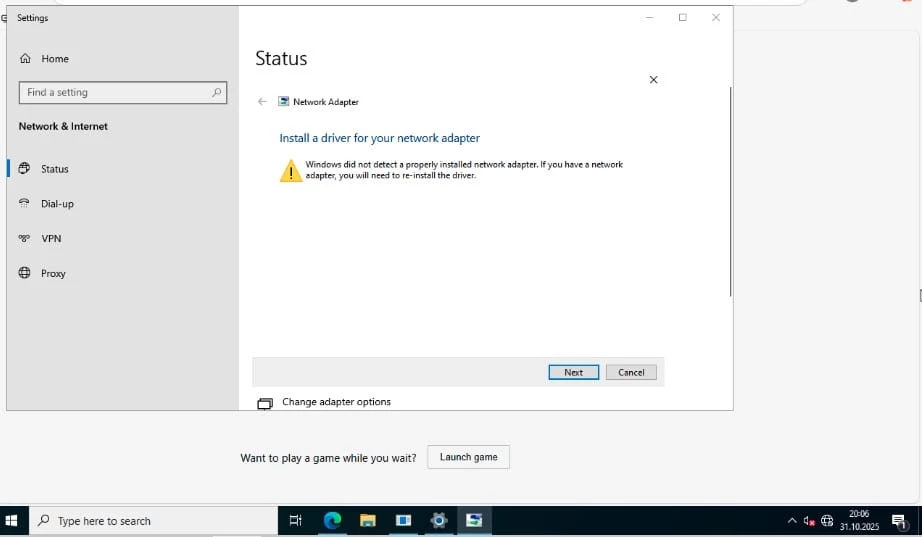
If you fail to install the VirtIO drivers as recommended, you may also encounter issues such as missing or unstable network connectivity etc as shown below. Before performing any migration, it’s crucial to understand the application and component dependencies of the virtual machine to prevent post-migration issues. With Veeam, you can restore Hyper-V VMs directly to Proxmox VE using on-the-fly conversion during the migration.
Deploy VirtIO Drivers in the VM
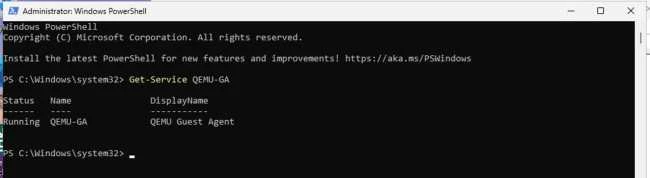
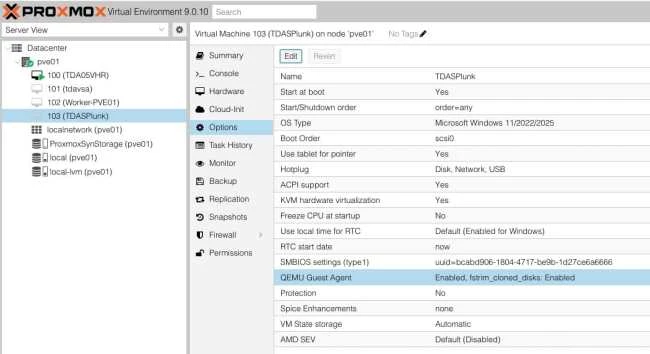
To ensure immediate and stable connectivity after migration, It’s highly recommended to install the QEMU Guest Agent inside the source VM before backup. This prerequisite applies not only to Hyper-V VM restores but also to VMware and other hypervisors. This ensures consistent communication and performance across virtual environments.
VirtIO Drivers are paravirtualized drivers for kvm/Linux. They enable direct (paravirtualized) access to devices and peripherals for virtual machines using them
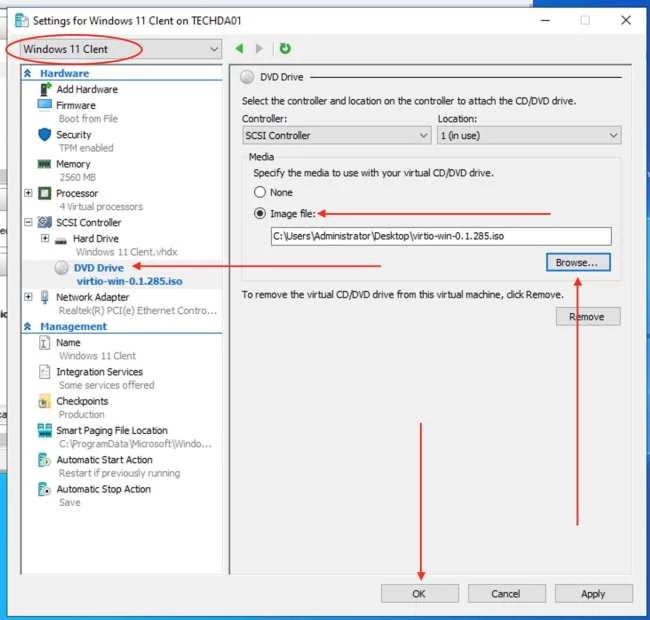
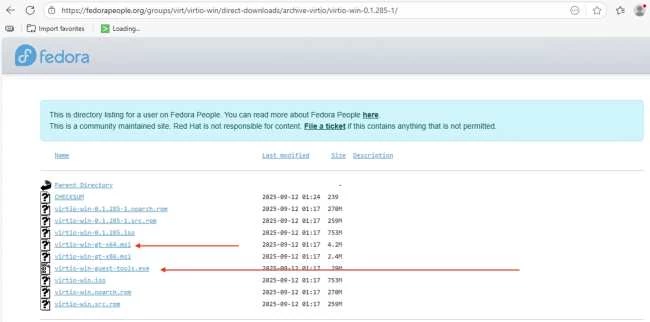
Windows won’t have those VirtIO drivers installed unless you added them before the backup. You can download the latest stable or you can download the most recent build of the ISO.
You can also download the ISO and access the ISO in a VM by mounting the ISO with a virtual CD-ROM/DVD drive on that VM.
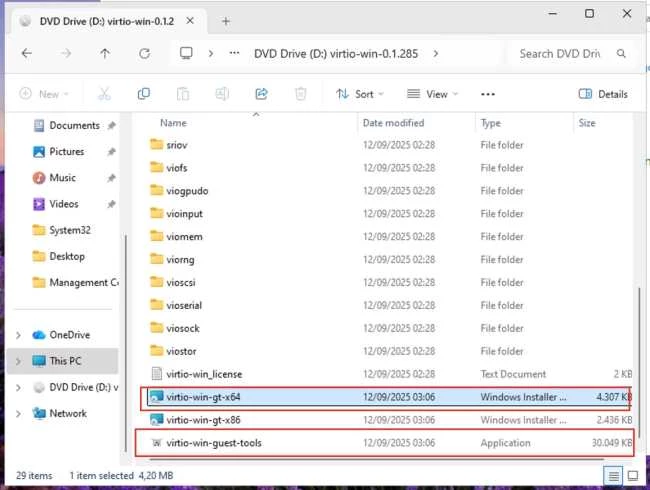
Alternatively, as shown in the image below. Use the download link shared above to download virtio-win-gt-x64, and virtio-win-guest-tools.
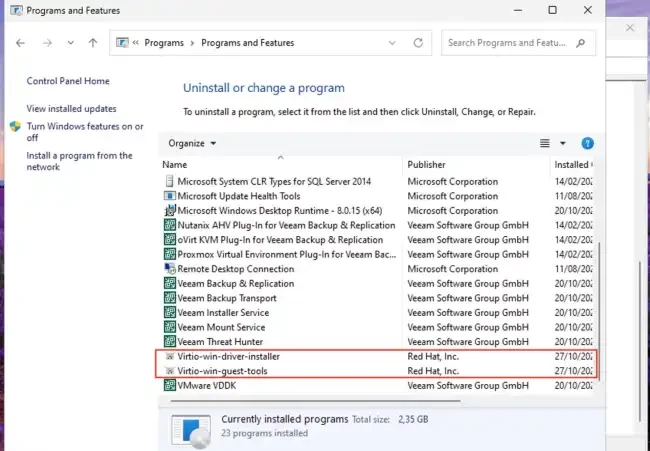
Regardless of the method you are using, you have to install both the virtio-win-gt-x64, and virtio-win-guest-tools as shown below. Open the Windows Explorer and navigate to the CD-ROM drive. Double-click on virtio-win-gt-x64, and when the installation completes. Proceed and install virtio-win-guest-tools.
You can run the command below to determine if the service is running
For an indept steps of this process, kindly visit “Migrate Windows Servers from Hyper V to Proxmox Correctly” for more information.
Run VM backup with VBR
This step should not be strange to you all. For VMs with applications like SQL or Exchange, enable application-aware processing to ensure consistent backup.
VM migration to Promox
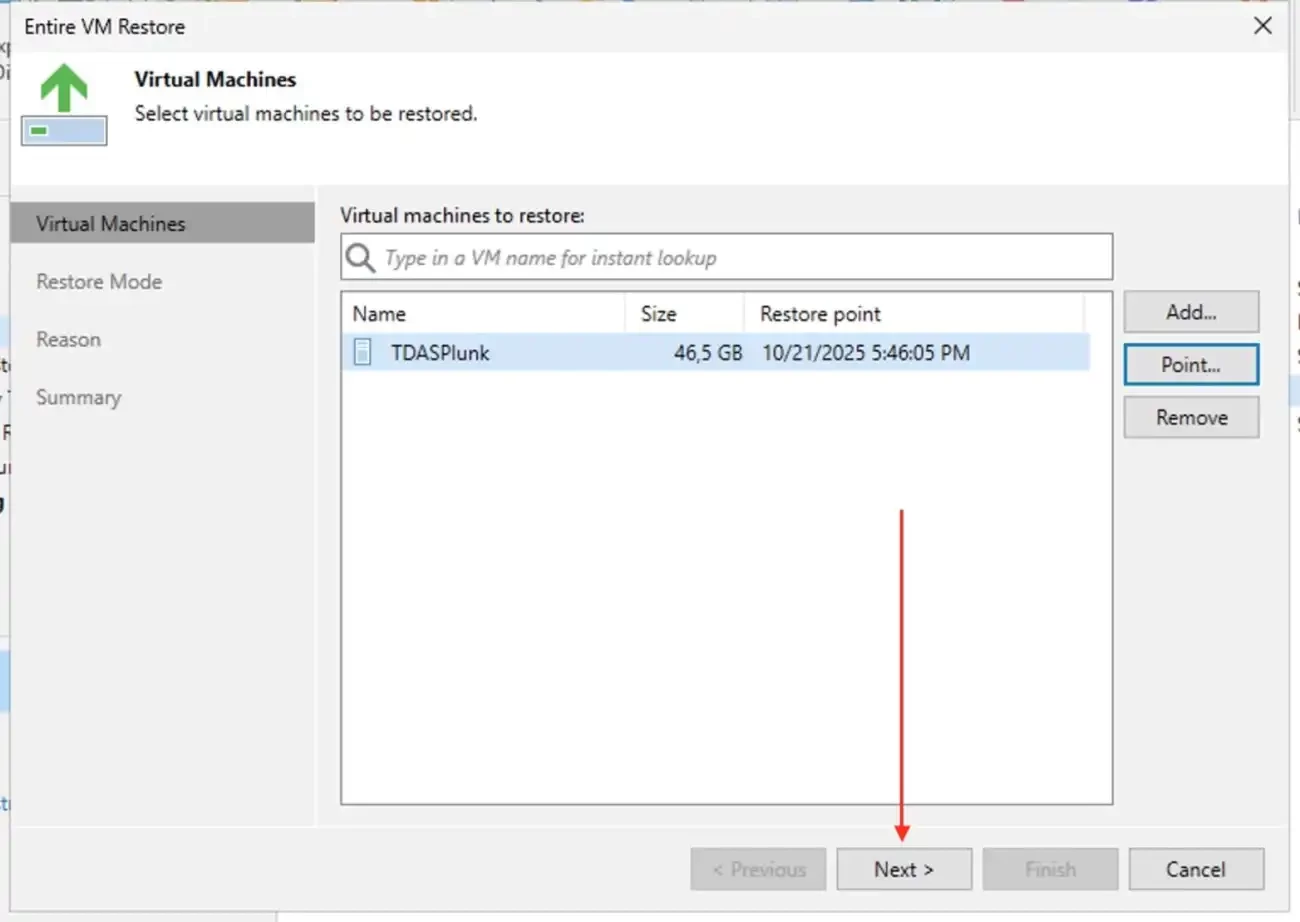
Now that we have the most recent backup, we can now perform “Entire VM restore to Proxmox. To locate the Backup, navigate to Home, Backups and Disk. Right-click on the VM backup and select Restore entire VM to Proxmox VE.
By default, Veeam Backup for Proxmox VE uses the most recent valid restore point. However, you can restore the VM data to an earlier state. Restoring to an earlier state is not the case for me!
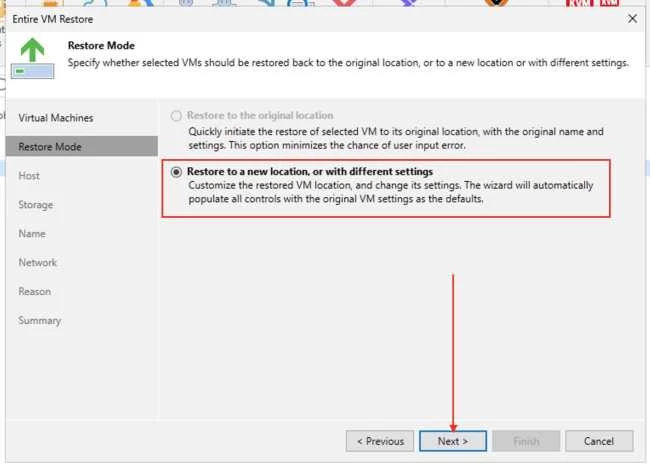
We want to restore to a new location. or with different settings.
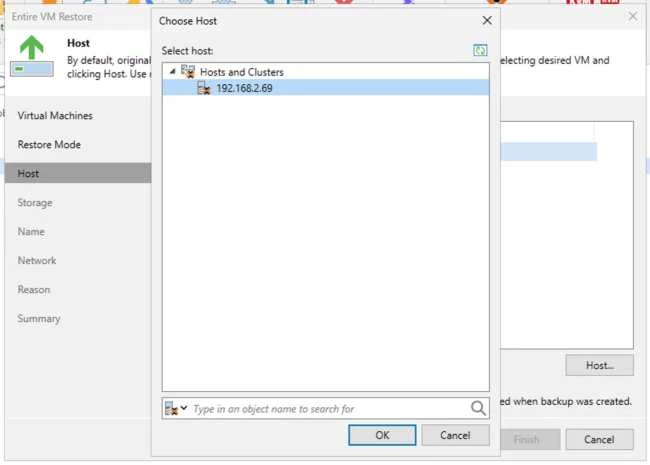
At the Host step of the wizard, choose a host to which the recovered VM will belong. For a host to be displayed in the list of available hosts, it must be added to the backup infrastructure. Please, see how to backup and Restore Proxmox VE virtual machines with Veeam
At the Storage step of the wizard, choose storage where virtual disks of the recovered VM will be stored. For storage to be displayed in the list of available storage, it must be configured in the virtual environment. Please, see how to Add Synology NFS Storage to Proxmox VE for VMs and Backup
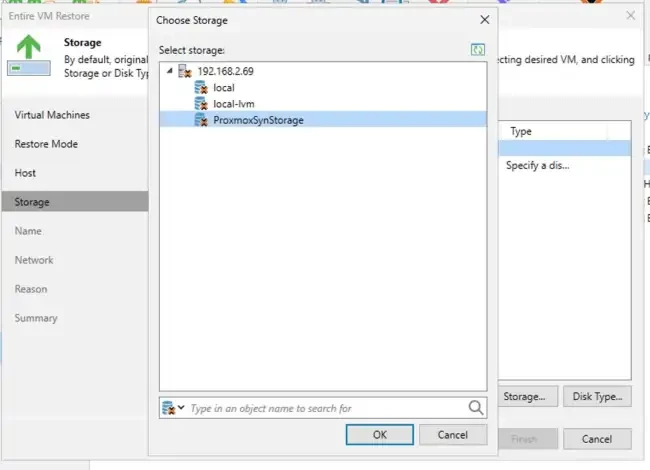
For the Disk Type Settings, you can select QCOW2 or RAW for Proxmox. Next, I will be retaining the same name and click next
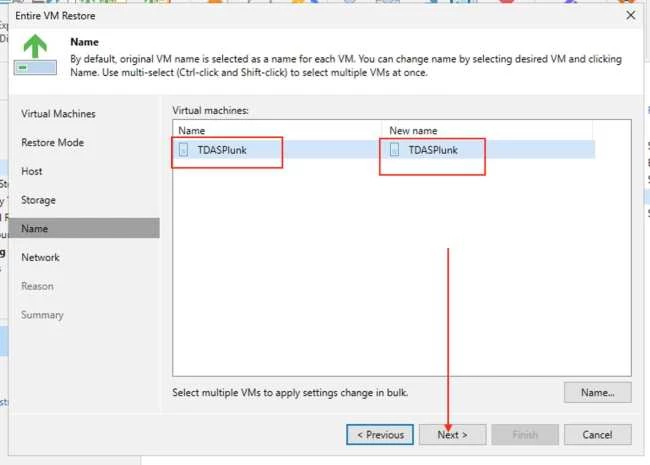
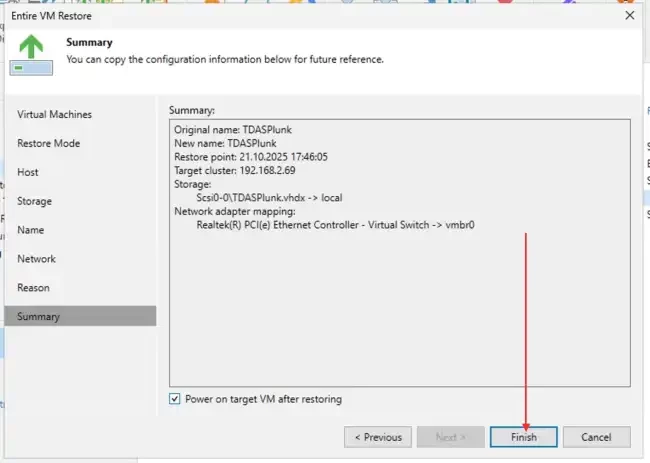
Click on Finish to complete the entire VM restore
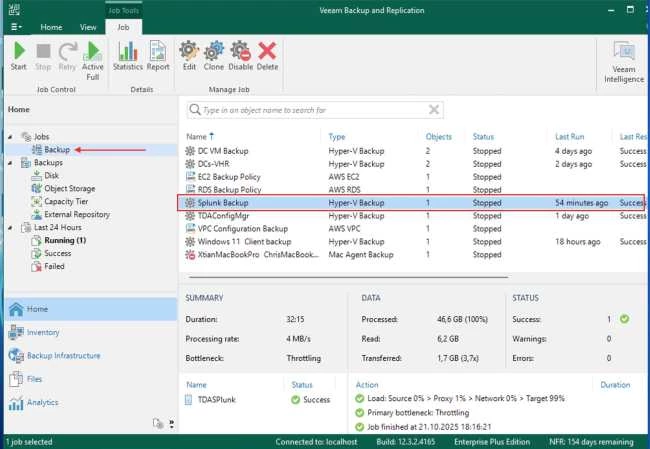
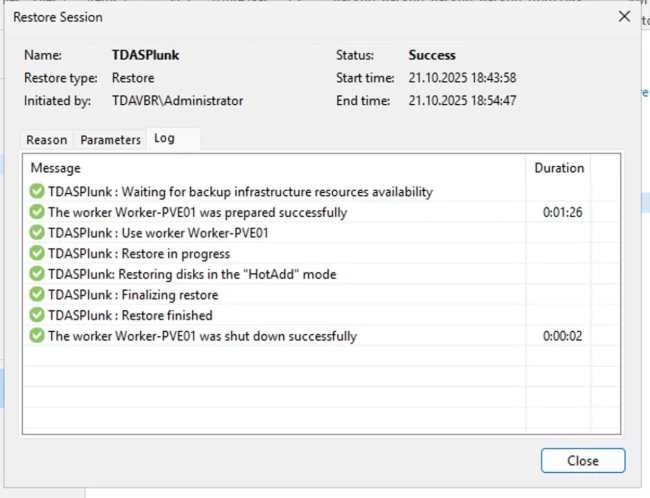
Below shows the logs of a successful VM migrated to Proxmox.
Regardless of the drivers you have preinstalled, you can still run into the following BSOD issues for your information. This is actually why I decided to post this here as the migration step is similar to Restore VM to Original location using Veeam Entire VM restore.
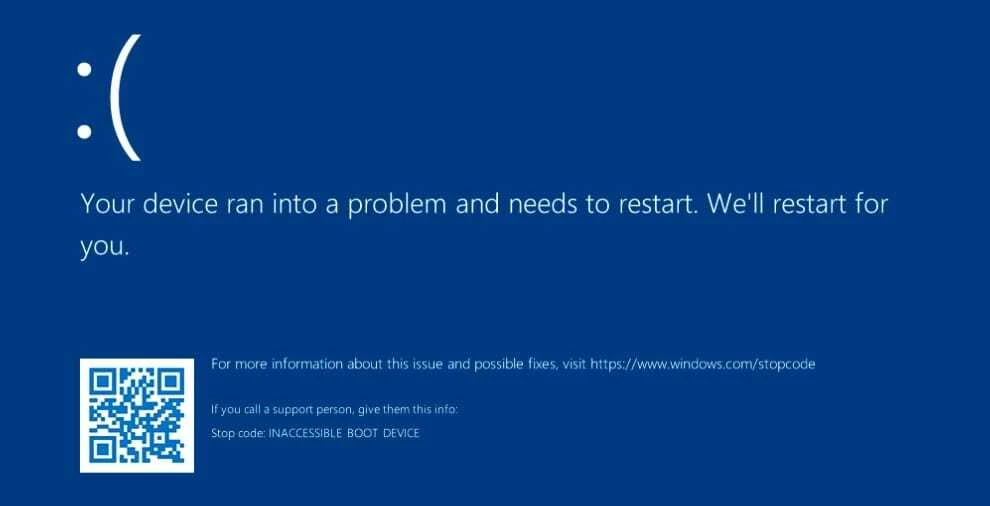
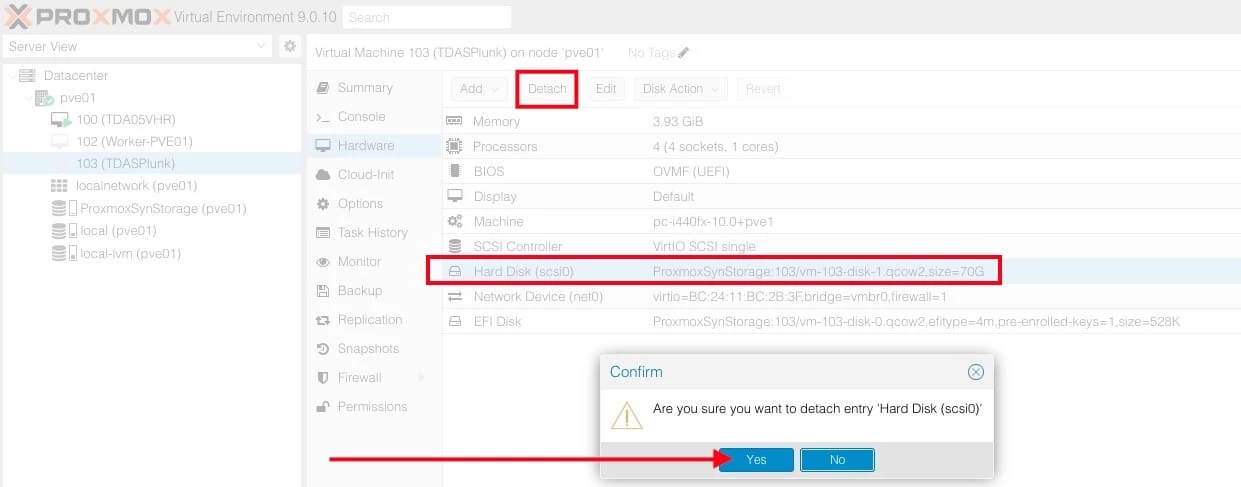
To resolve this issue, change the VM’s boot order from iSCSI to IDE. To do so, detach the hard disk from the VM and then reattach it using an IDE controller.
Windows on Hyper-V often needs VirtIO SCSI or SATA controller in Proxmox. If your VM boots to a blue screen, it indicates that Windows is detected but not fully loading. The boot order currently lists iSCSI and network devices, which suggests that the bootable disk was misconfigured with an incompatible controller type.
Reattaching the disk to an IDE controller ensures Windows can boot successfully using its built-in drivers. To fix this, you will need to detach the Hard disk as shown below.
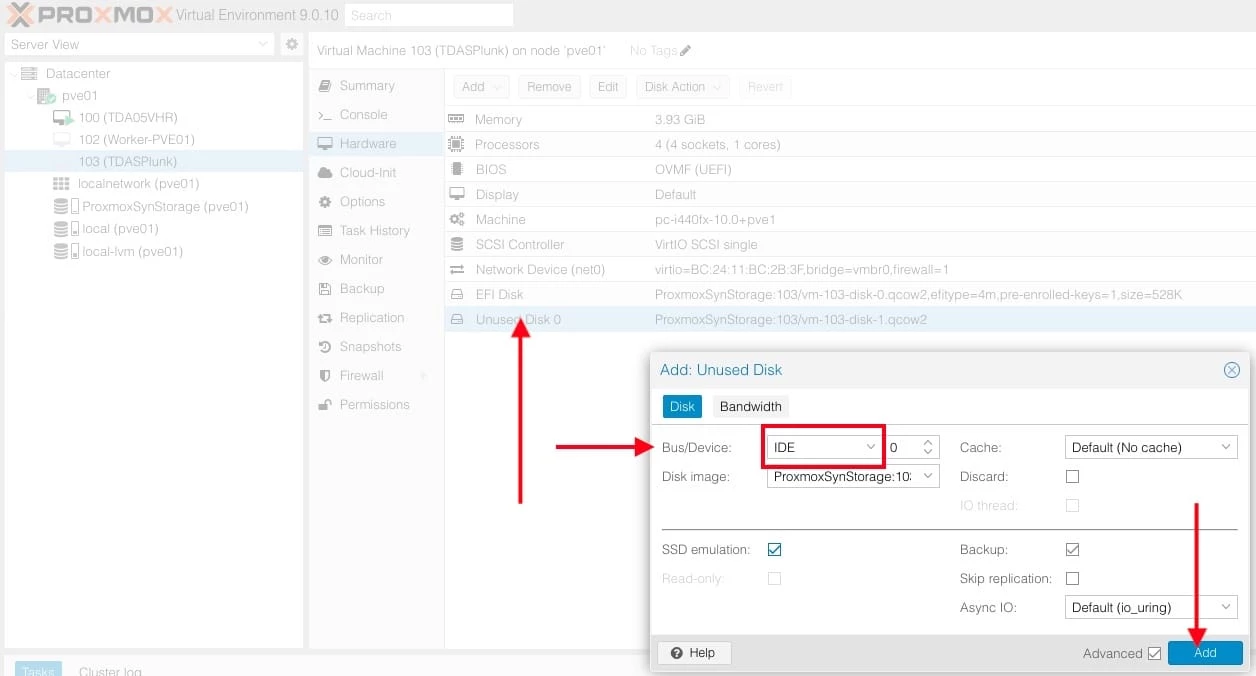
You will need to reattach the Unused disk, and this time, select the “Bus/Device”as IDE
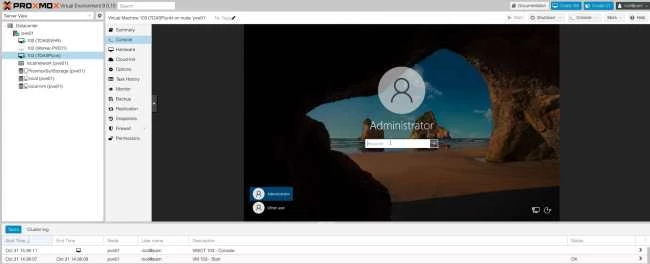
You can now login and use your VM as you wish.
VMs scheduled to be migrated should be shut down immediately prior to a final, successful backup. This process can easily be automated as part of the final backup job if you wish.
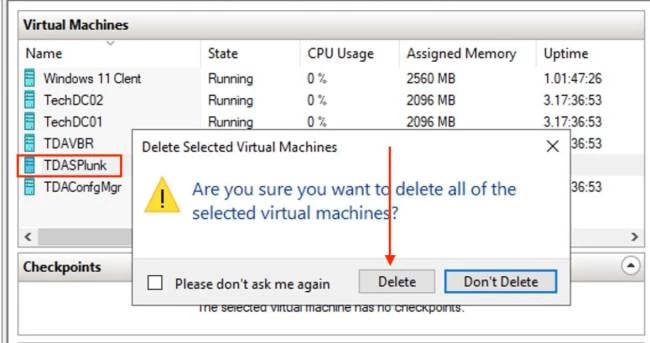
I will be performing a post-restore deletion. Once the VM has been successfully restored and verified on the target hypervisor, the original source VM can be deleted if it is no longer needed. Therefore, I will proceed and delete the first VM as shown below.
Shutting down VMs before backup is required for consistency, and deleting the source VM after a successful restore is perfectly acceptable once verification is complete.