

Greetings to everyone here!😎 Following the Broadcom disruptions in the market, many customers told us they’re investigating alternatives. Those of you who closely follow Veeam might have heard about the work we’re doing to satisfy those needs. But have you heard about the Veeam and Scale Computing strategic announcement with the intent to bring our proven data protection capabilities to the Scale HyperCore hypervisor? We initially targeted Q4 ’25 for this project, but thanks to the incredible work of the R&D team, the Veeam Backup for Scale Computing plug-in is live and you can try it today. While the official announcement and related marketing activities are scheduled for October, let’s not hesitate and take a look right away. Over the last few weeks, I’ve been playing with the solution and with Scale HyperCore, and I’m going to share my findings so you can do the same and save some time fighting configs.
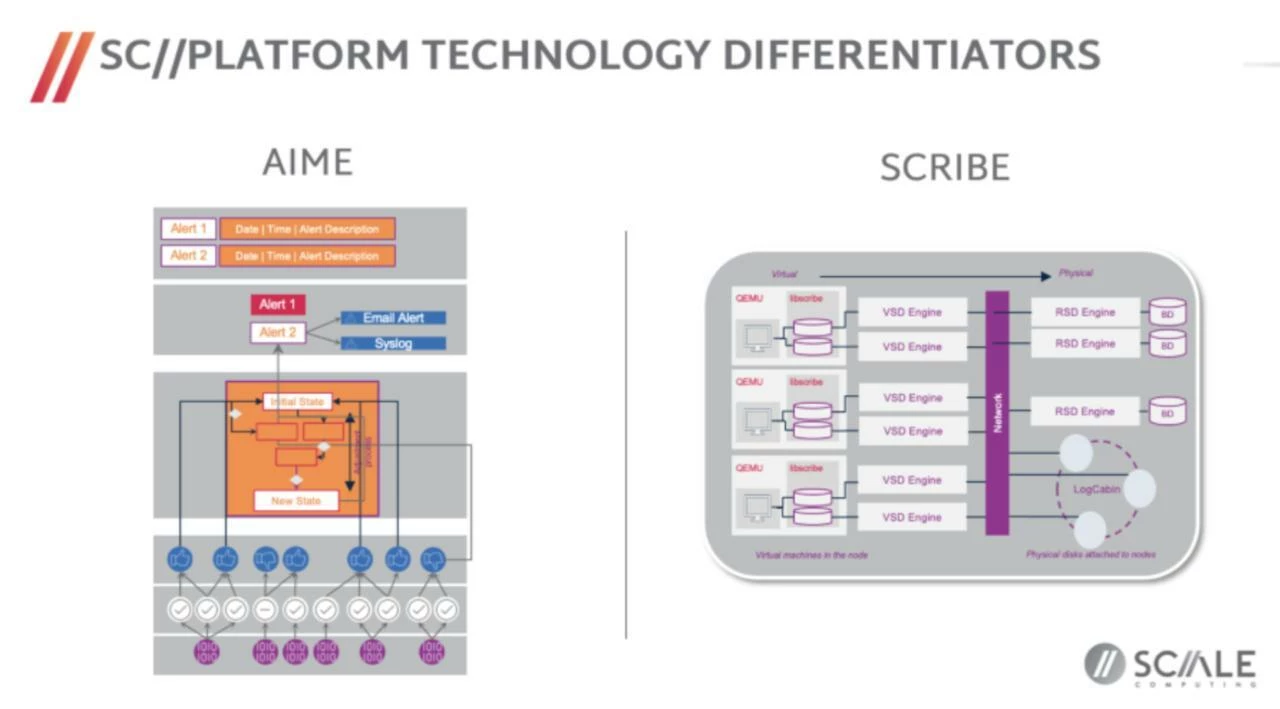
A few words about Scale HyperCore. It’s a KVM-based hyperconverged platform that fuses compute, storage, and virtualization into one OS. They specifically call out 2 differentiating technologies. SCRIBE (Scale Computing Reliable Independent Block Engine) exposes a wide-striped, cluster-wide block pool directly to the hypervisor, so no external SAN, file systems, or controller VMs. AIME (Autonomous Infrastructure Management Engine) is the built-in AIOps/orchestration brain that drives placement, self-healing, and lifecycle tasks (e.g., one-click rolling updates), making HyperCore easy to run at the edge or in small IT teams. Among key differentiators: an all-in-one stack with minimal storage admin, autonomous operations via AIME, and a lightweight footprint with simple UI/REST APIs.
A few more details about Scale vs VMware in this post.
Prereqs for the lab
-
Physical/underlying hypervisor: anything that supports nested virtualization (I used vSphere 7.0.3, but I’d assume Proxmox/Hyper-V can also work). For vSphere, tick Expose hardware assisted virtualization on the VM and for networks set the portgroup security to Accept (Promiscuous, MAC changes, Forged transmits).
-
HyperCore Workbench Edition ISO (version 9.4.32 or later) & key (you should be enrolled into Scale’s Showcase partner program as there is no *open* way to get the key). This edition lets you install HyperCore on your own hardware for evaluations.
-
Veeam: VBR 12.3.2 or later, plus the Scale Computing HyperCore plug-in available via forums for now.
Deploy SC//HyperCore Workbench Edition
-
Create the nested VM on your base hypervisor
-
vCPU: 4+ RAM: 16 GB+
-
Disks: add 3 virtual disks (I used 100 GB / 256 GB / 256 GB in the lab); change Virtual Device Node to use the SATA controller not SCSI for every disk.
-
NICs: NIC1 = VM network, NIC2 = management. Those networks must have different address schemes. The first one is for VM/data and the latter for cluster management (backplane). For both you should provide static IPs to keep discovery and routing deterministic.
-
VM options: Secured boot is disabled, Expose hardware assisted virtualization is enabled
-
Install HyperCore Workbench from ISO
Mount ISO, boot the VM and follow the prompts. The process is quite automated and won’t ask much of you unless there is an issue with hardware/VM configuration somewhere. While you’re drinking coffee, you might notice the VM got powered off. This is expected behavior, which means the HyperCore was installed and now you can boot into the OS to configure the cluster.
-
Go through initial configuration of the HyperCore
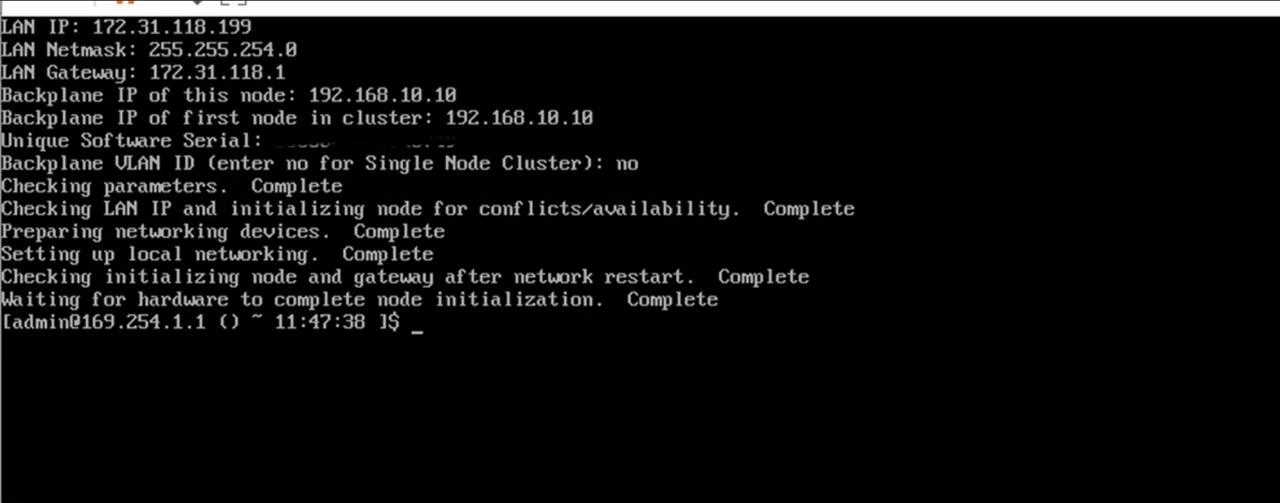
Now, the interesting part. Once you log in to the system (by using default admin account), you’ll see a bash shell and a modified form of AlmaLinux 9.2. Now, let’s setup a single-node cluster. We need to start from initializing the storage node. Run sudo scnodeinit. If the first attempt fails due some networking issue, there is an option to rerun with BYPASS_NETWORK_CHECK=yes sudo scnodeinit but I didn’t find it quite useful, go back to Step 1 and work on completely different IP schemes. For example, if the main network is 172.16.x.x, then use 192.168.x.x for backplane.
Sometimes you need to start from the scratch, so run sudo scnodereset to reset the node. Then, we should initialize cluster. Run: sudo singleNodeCluster=1 scclusterinit and follow the instructions. If the node is automatically discovered within a few seconds and its IP is shown, go ahead and confirm cluster creation.
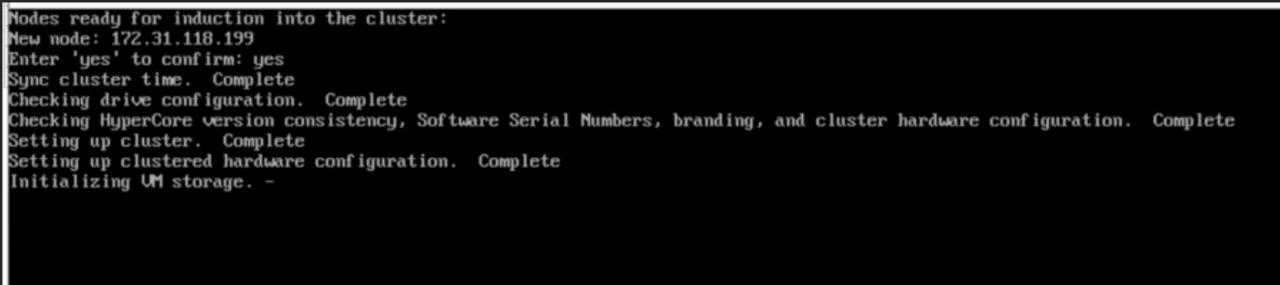
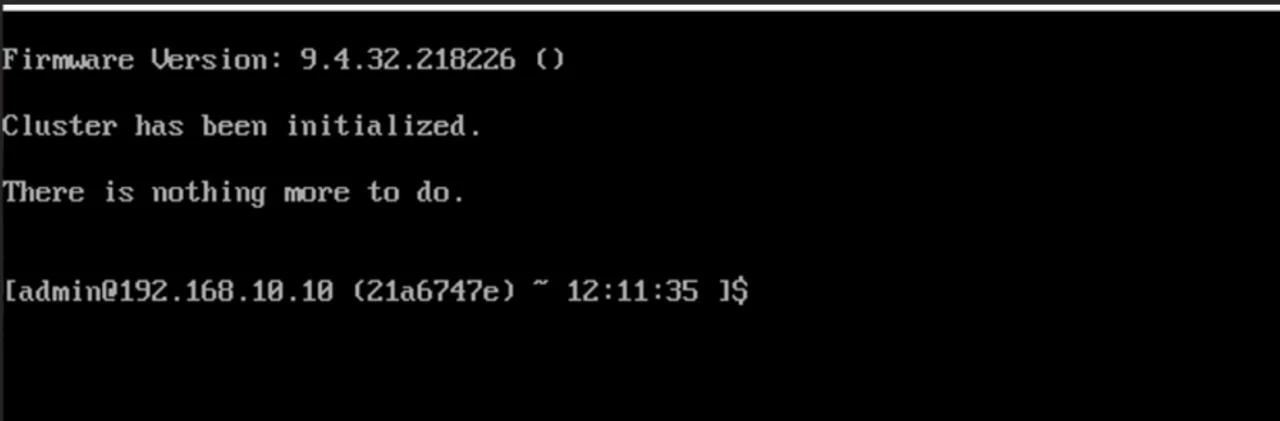
Then wait until you get the confirmation and now you can finally access HyperCore control plane from the browser.
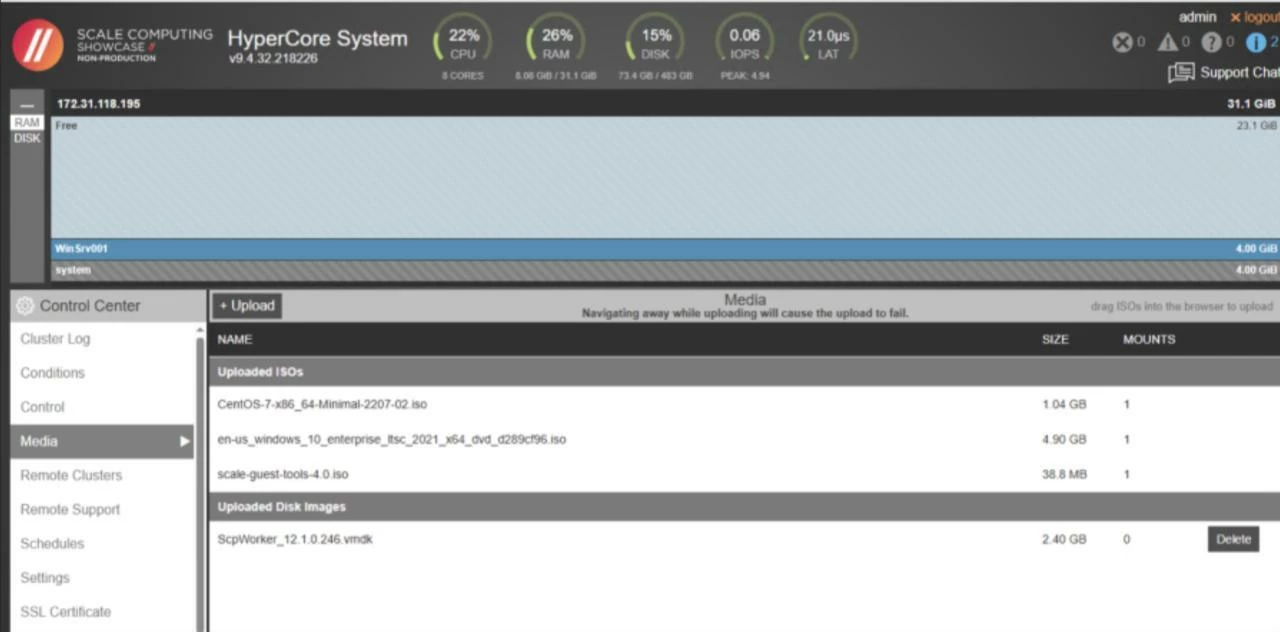
Upload an ISO & create your first VM
HyperCore is primarily UI-driven, but the REST API is excellent for quick checks/automation. Have a look into documentation if you want to dig deeper. For now, let’s get acquainted with the control plane and create a first test VM there.
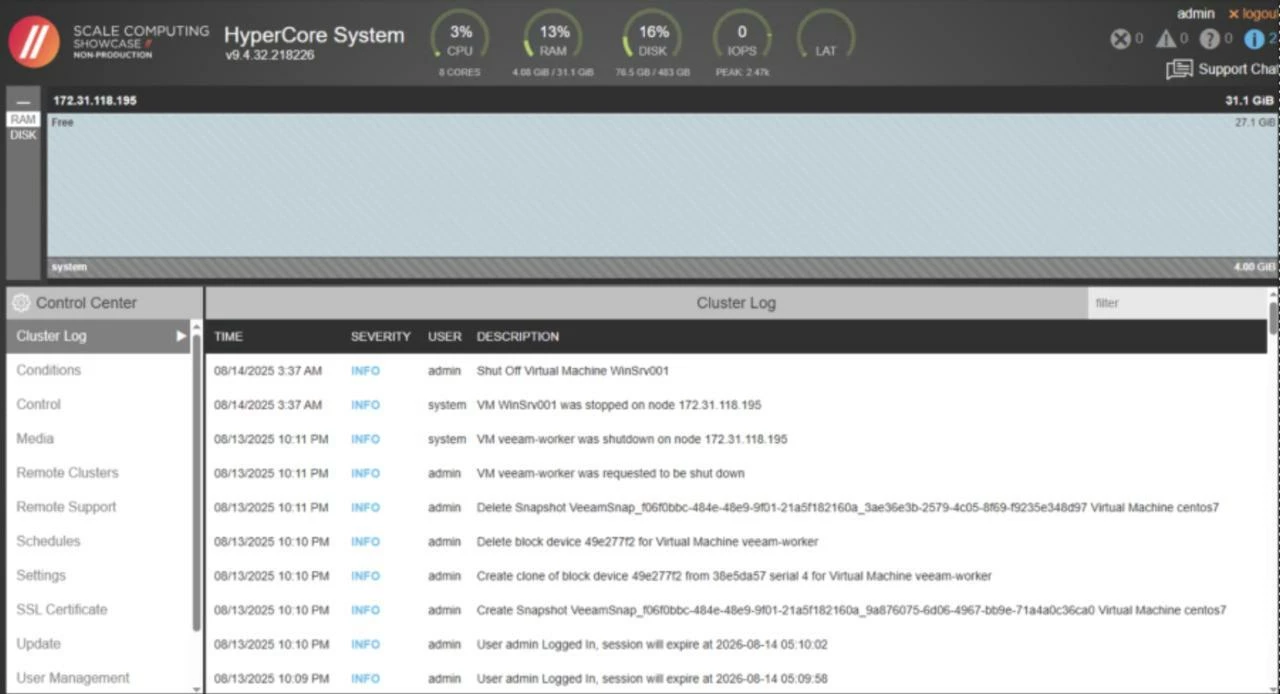
Upload ISO: In Control Center -> Media -> Upload. Drag-and-drop works for standard ISOs. Create VM: Control Center -> “+ Create VM” -> pick OS/CPUs/RAM/Disk -> Boot from your uploaded ISO. Expected result: you can install the guest OS as usual and land at a console.
A few tips here. If you create a Windows VM, there is a chance it will require a special driver to find a block device during the installation and network adapter later. This is common as Scale HC uses VirtIO storage and network controllers by default. I'd recommend for you to find the drivers, but the quick workaround in my case was to change the disk type.

Veeam Backup & Replication + the Scale plug-in
Now, let’s work on Veeam side of things. Install/upgrade to VBR 12.3.2 on your backup server and then install the Veeam Plug-in for Scale Computing HyperCore. Once installed and the service is running, you’ll be able to connect VBR to your HyperCore Cluster.
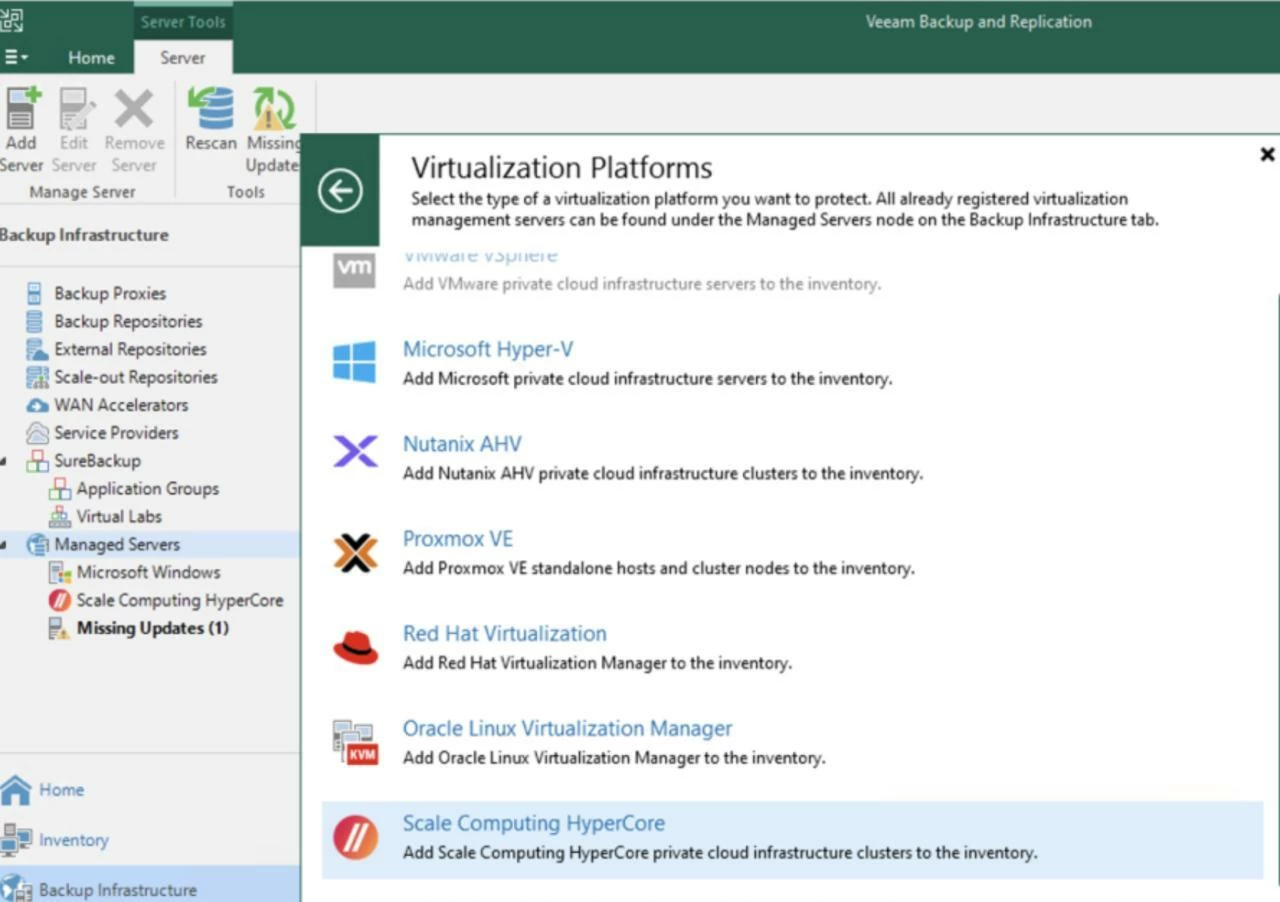
Upon connection, Veeam will enumerate VMs, networks, and storage exposed by the cluster and at the end HyperCore appears under Inventory, ready for protection. Now, let’s deal with the worker(s). You probably know from other our products/plug-ins, what workers are and why we use those. Let’s get going and navigate into “Backup Proxies” node where we can add a worker and define its configuration.
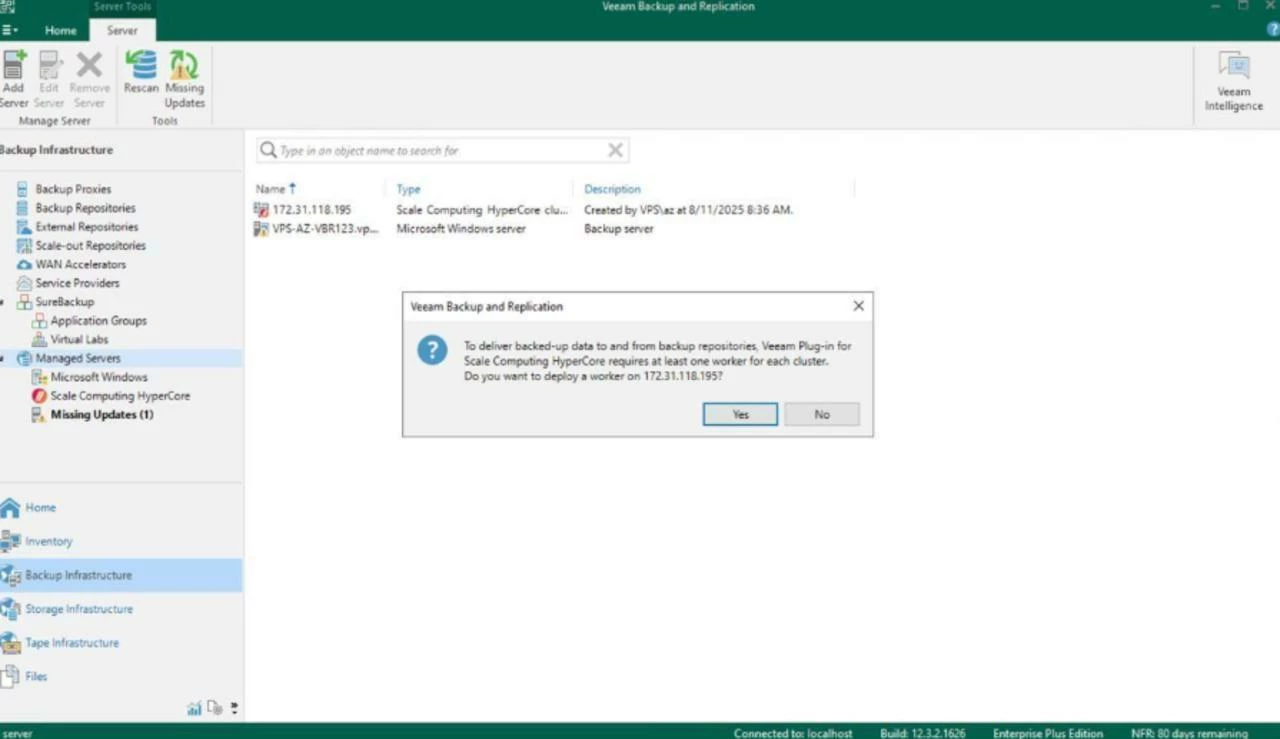
When you configure worker settings and the worker is created in UI, you can’t proceed before you actually run “test worker”. The process could take a couple of minutes, where the worker will be turned on, Veeam will check how it runs, optionally install the latest updates and make sure it’s ready for heavy lifting aka backup/restore tasks.
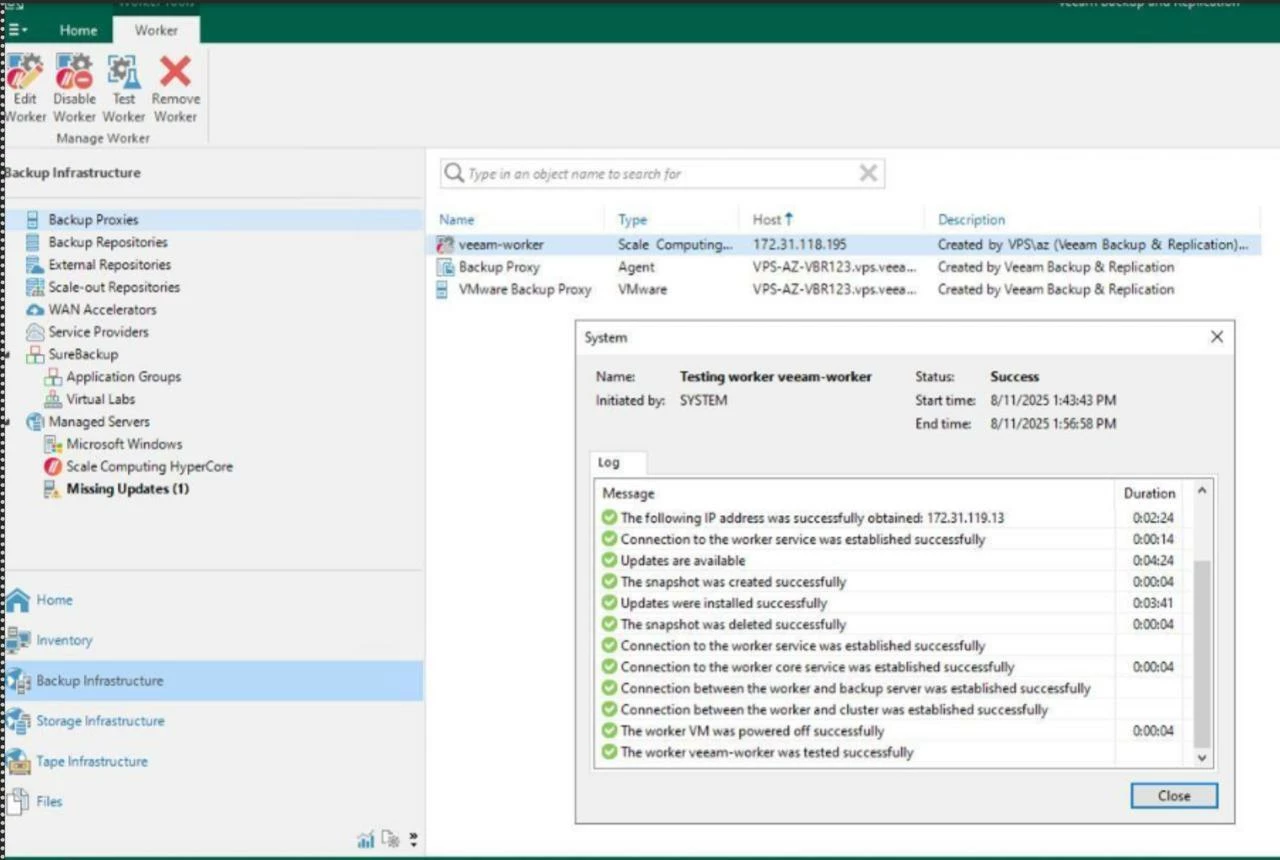
Meanwhile, you check the list of Media (ISOs and disks) in HyperCore, you’ll spot a newly created disk image (SCP_worker), which tells us the bits were successfully uploaded and going be used whenever the worker needs to be spun up.
Now, the environment is fully ready for your data protection operations.
Backup, Recovery and more..
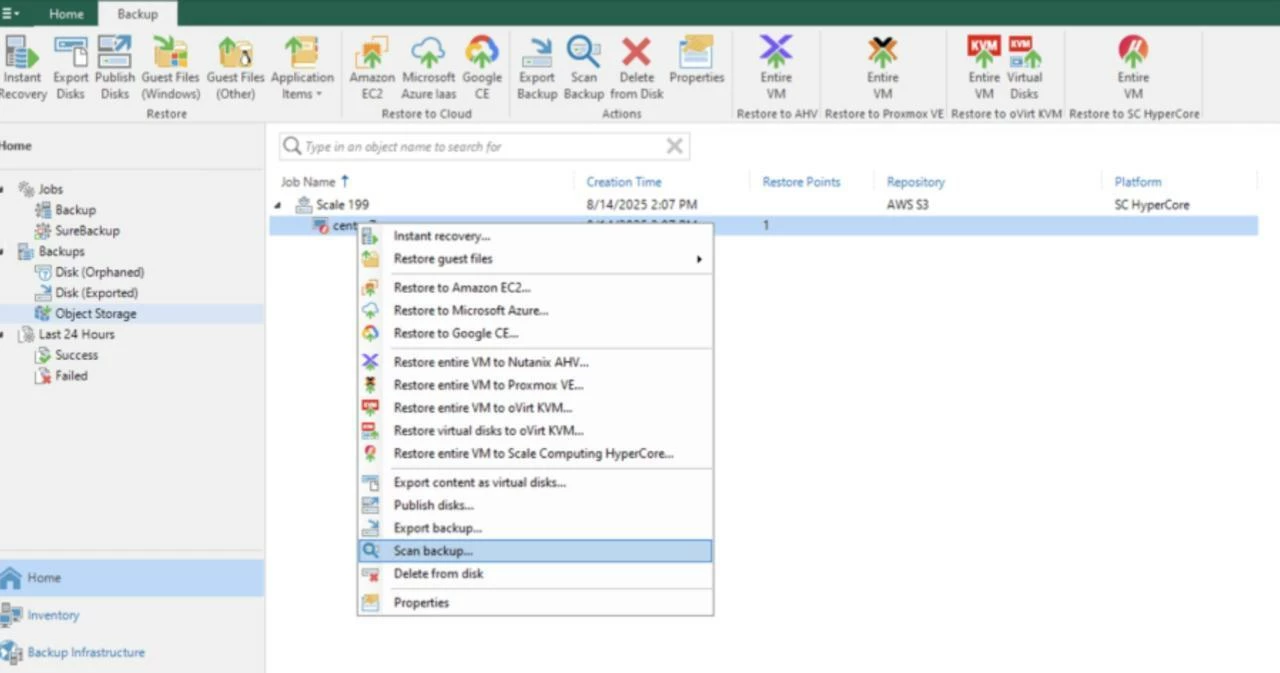
You have two quick backup options: VeeamZIP or a regular Backup job. Because this is v1 of the plug-in, a few capabilities are pending (for example, no Application-Aware Processing yet and yes, people are already asking). On the flip side, I was pleasantly surprised to see features that weren’t in v1 for other plug-ins: direct-to-object backups and security capabilities such as entropy analysis and SureBackup-based scans.
As for VM Recovery, there is no Instant VM recovery back to Scale HyperCore for now, but you can instantly recover VM(s) as VMware vSphere, Microsoft Hyper-V or Nutanix AHV VM(s). Besides that, the rest of the pack is here. Bring the data to the cloud, recover a full VM or only its disks or guest OS files. You probably know those features and I shouldn’t explain how they work😉
Final thoughts
I very much like what I discovered there. While it’s technically “one more platform”, this solution gives much more flexibility and freedom of choice to our customers. It’s still early days, but the fundamentals already feel solid: agentless backups, painless worker lifecycle, and familiar restore flows against a lightweight HCI stack. If you’re exploring post-VMware options or need a simple edge platform, HyperCore plus Veeam makes for an easy lab with real-world potential. I’m genuinely excited to see how people will use it and what comes next.


