With the release of Veeam Software Appliance and JeOS, deployment processes have become significantly more streamlined. In Europe, the prevalence of multiple languages naturally results in a variety of keyboard layouts, such as Azerty for French users, Qwertz for German users, and a Danish variant of Qwerty to accommodate specific characters like Å, Æ, and Ø. However, the rapid installation process does not provide the opportunity to configure keyboard settings during setup.
There is, however, an effective solution. JeOS is an optimised and secure edition of Rocky Linux, and its installation is managed through an automated kickstart script. Settings such as keyboard layout, timezone, timesource, and network configuration are all specified within this script.
To ensure every installation includes your preferred configurations, you can update or remaster the ISO and integrate these settings directly. For this purpose, I have developed a custom script, ksmod.py, which is available at https://github.com/tdewin/fastappliance/blob/main/ksmod.py.
The initial step is to install xorriso, a utility designed for updating ISO files. This demo runs on Fedora 42 (Adams), but any system with xorriso should work.
sudo dnf install -y xorrisoAfter finishing the previous step, download the ISO file to your system. The JeOS is available at https://www.veeam.com/products/data-platform-trial-download.html?tab=extensions. The file may be transferred using SCP from another computer or downloaded directly with curl.
Once you have download the iso, you need to download and install the script
curl -O https://raw.githubusercontent.com/tdewin/fastappliance/refs/heads/main/ksmod.py
chmod +x ksmod.py
You can now update the kickstart script for the hardened repository.
./ksmod.py VeeamJeOS_13.0.0.4967_20250822.iso -o . --keyboard fr --timezone "Europe/France --utc" --timesource "time.cloudflare.com --nts" --staticip 192.168.0.85 --subnet 255.255.255.0 --gateway 192.168.0.1 --dnslist 192.168.0.1 --hostname hardrepo85This command involves several parameters. The first is the ISO reference. The second parameter, `-o .`, specifies that the output should be placed in the current directory. If a directory is provided, it will use the same name as the selected kickstart file. Subsequent parameters configure the keyboard, timezone, and timesource settings. Additionally, a straightforward static IP configuration has been included. While on physical hardware one might prefer to first establish a bond across multiple network interfaces, for demonstration or lab environments this approach can facilitate rapid reinstallation.
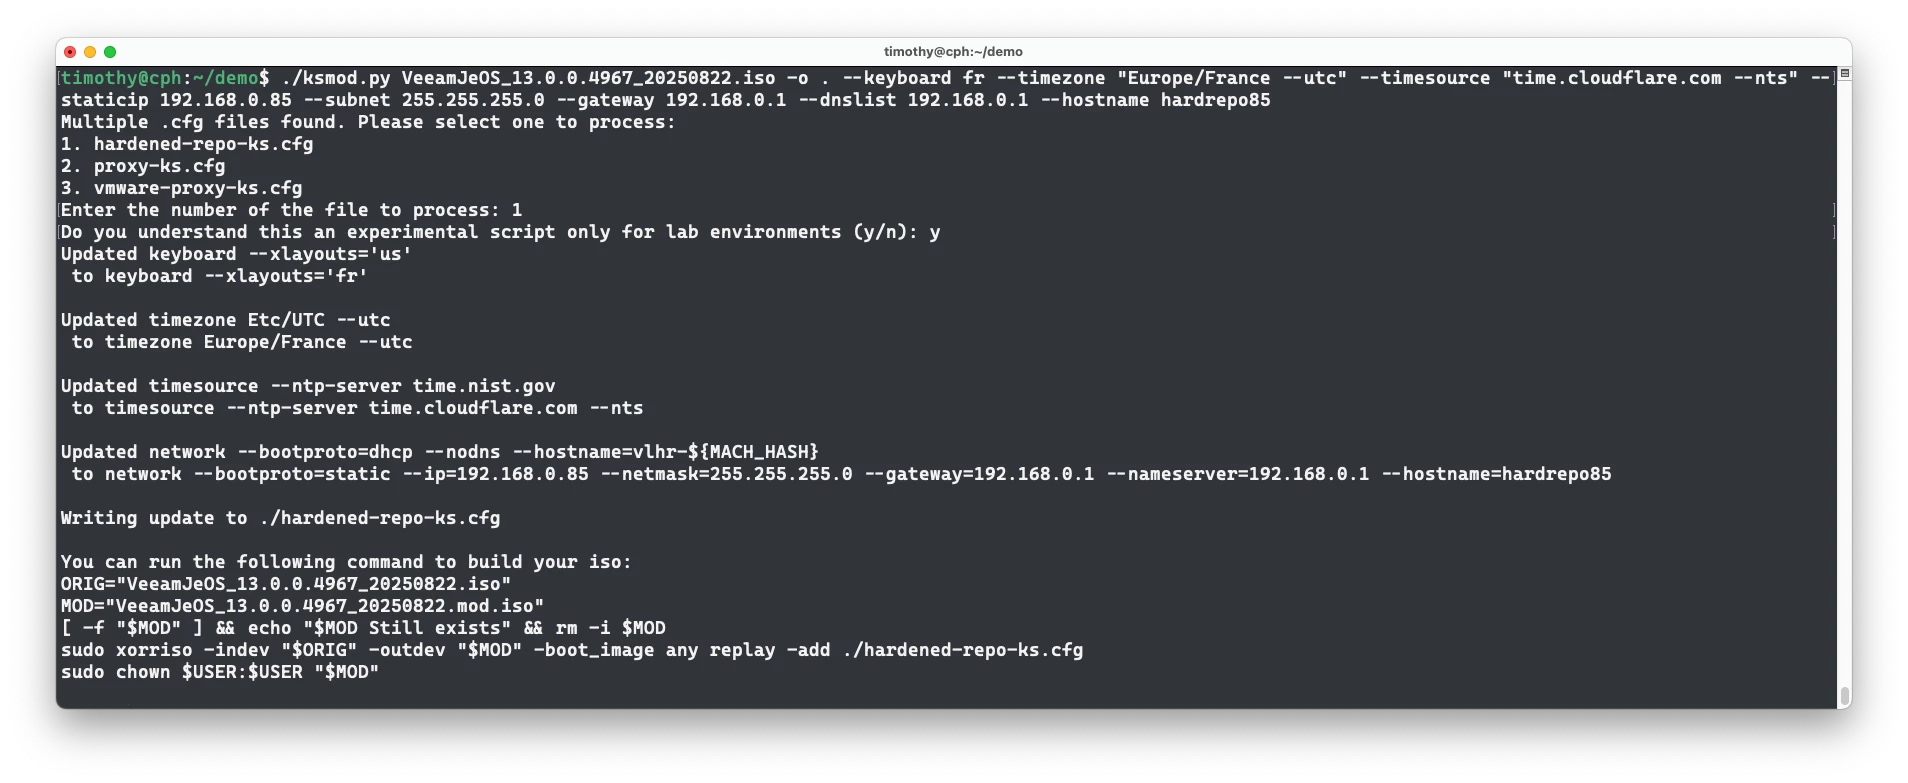
You will be prompted to select the kickstart script you wish to update. JeOS provides options for various types of installations, such as a hardened repository or a proxy. In this example, the process involves updating and installing a hardened repository.
The output will prompt you to confirm your understanding that ksmod.py is experimental, provide details of the updates performed, and explain how to create a modified version with xorriso. The update process is not automated because sudo rights are required, and users may wish to review or modify the kickstart file manually.
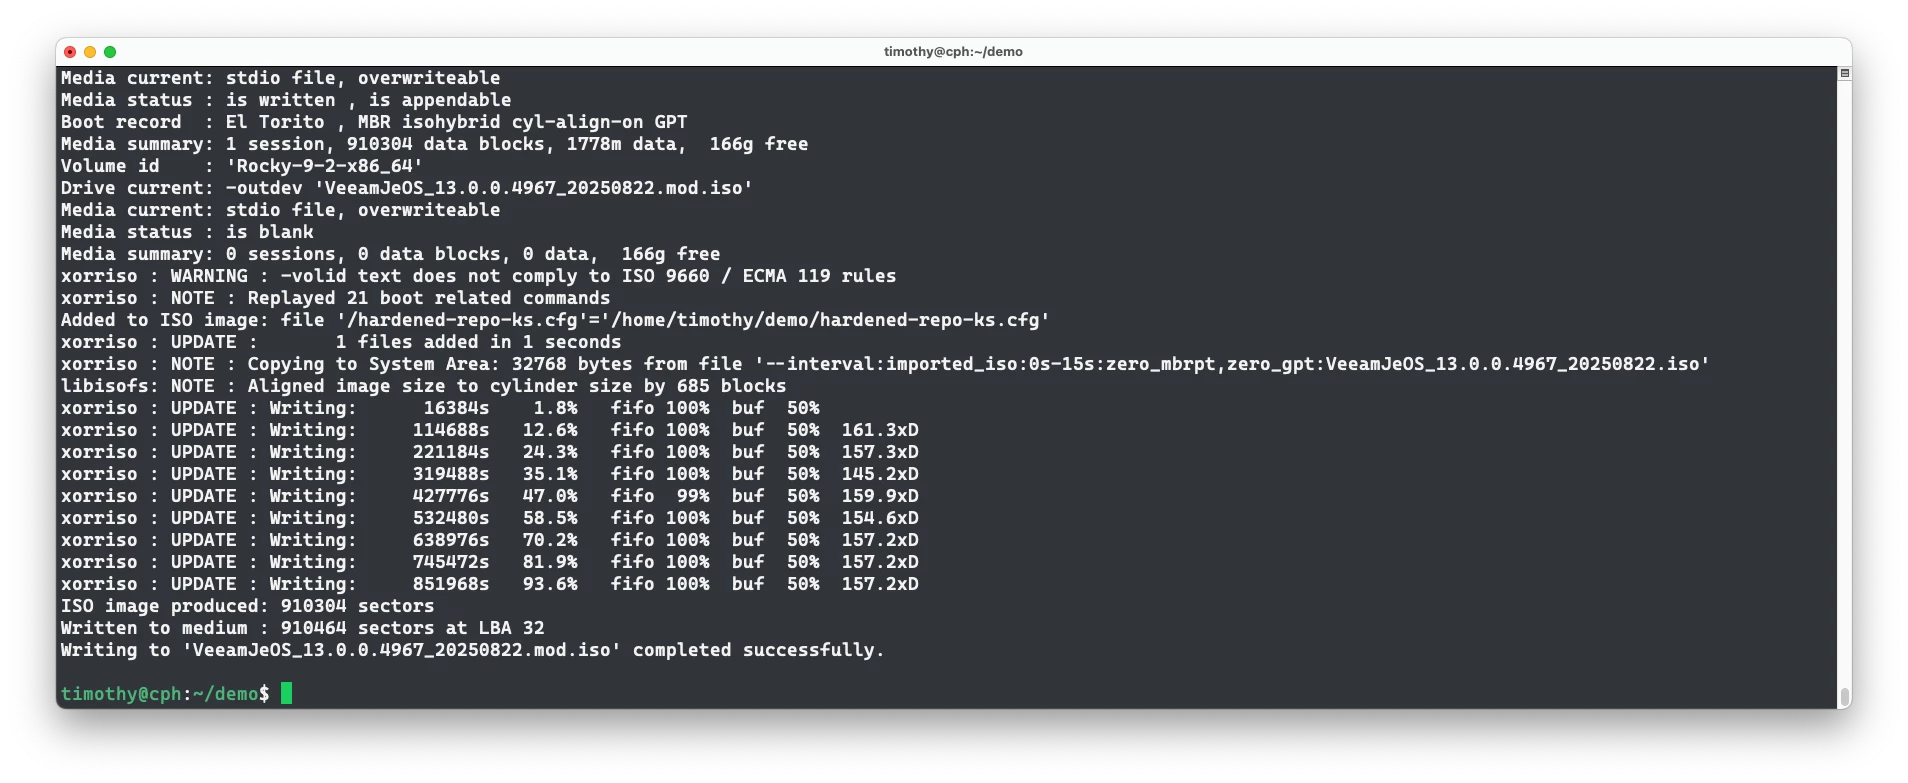
If you are satisfied with the changes, you may proceed to create the newly modified ISO. Copy paste the commands from your output
ORIG="VeeamJeOS_13.0.0.4967_20250822.iso"
MOD="VeeamJeOS_13.0.0.4967_20250822.mod.iso"
[ -f "$MOD" ] && echo "$MOD Still exists" && rm -i $MOD
sudo xorriso -indev "$ORIG" -outdev "$MOD" -boot_image any replay -add ./hardened-repo-ks.cfg
sudo chown $USER:$USER "$MOD"
That’s it, you have a modified ISO
Bonus tip, you can also burn this iso to an USB if you are installing on a physical device. To figure out what the name of your usb device is, you can use “sudo lsblk”. I found another interesting way is to use “sudo dmesg -W” before you plugin the usb stick. Then when you stick it, the kernel will tell you what device is assigned (ctrl+c to stop the process)
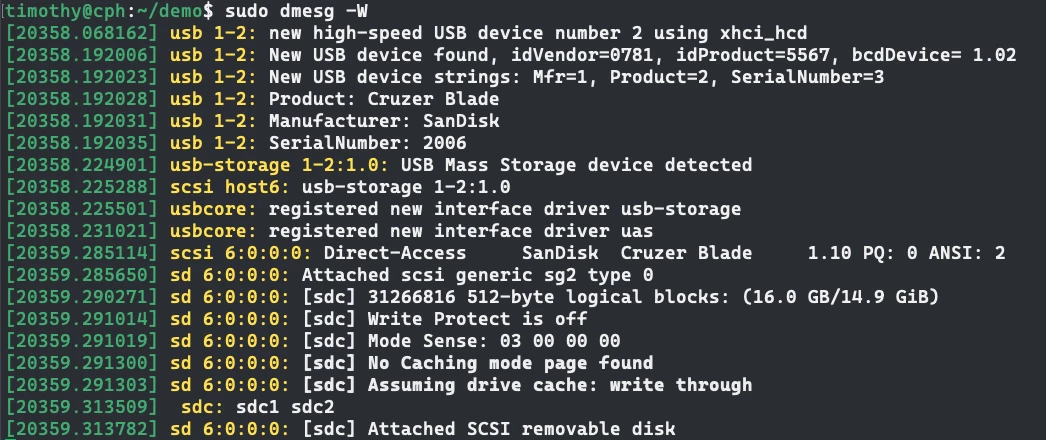
Eg in this example, it is /dev/sdc . I can confirm this with “lsblk /dev/sdc”, which tell me /dev/sdc is 14.9GB and thus definitely the usb stick

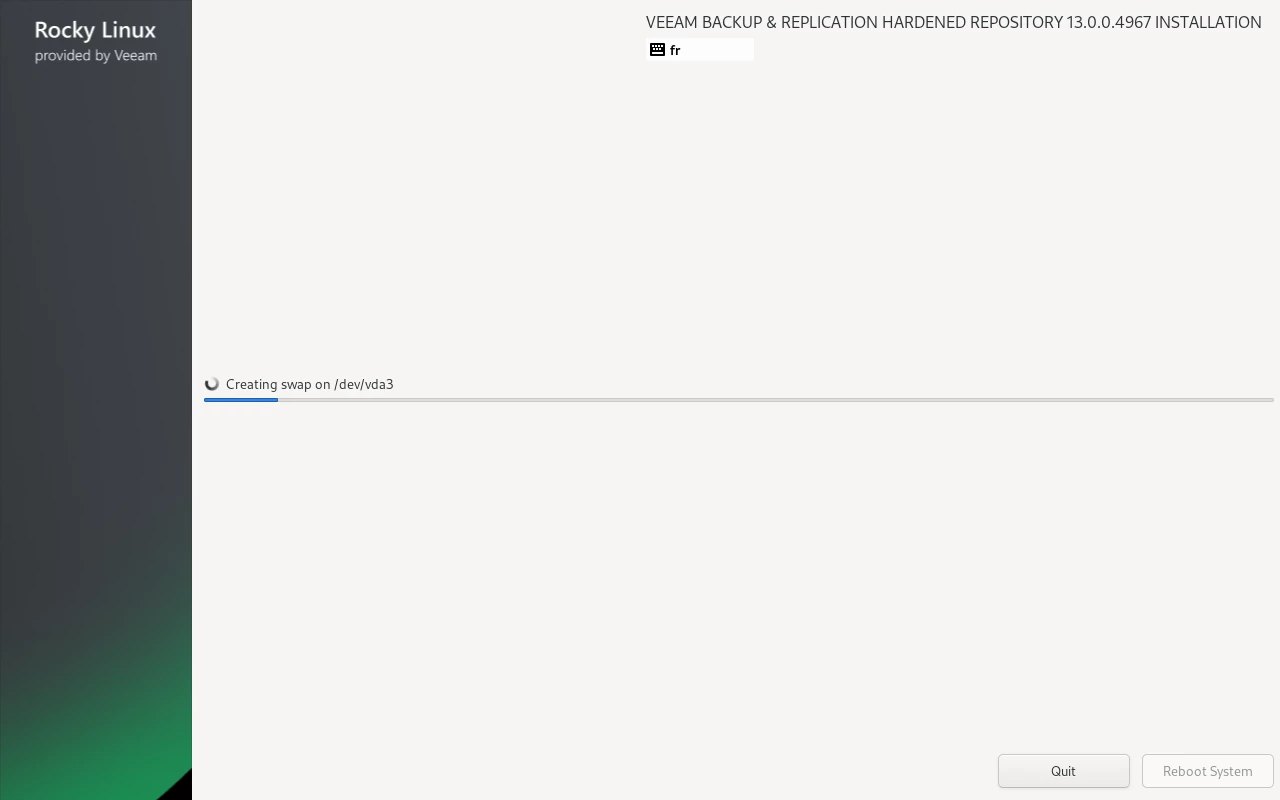
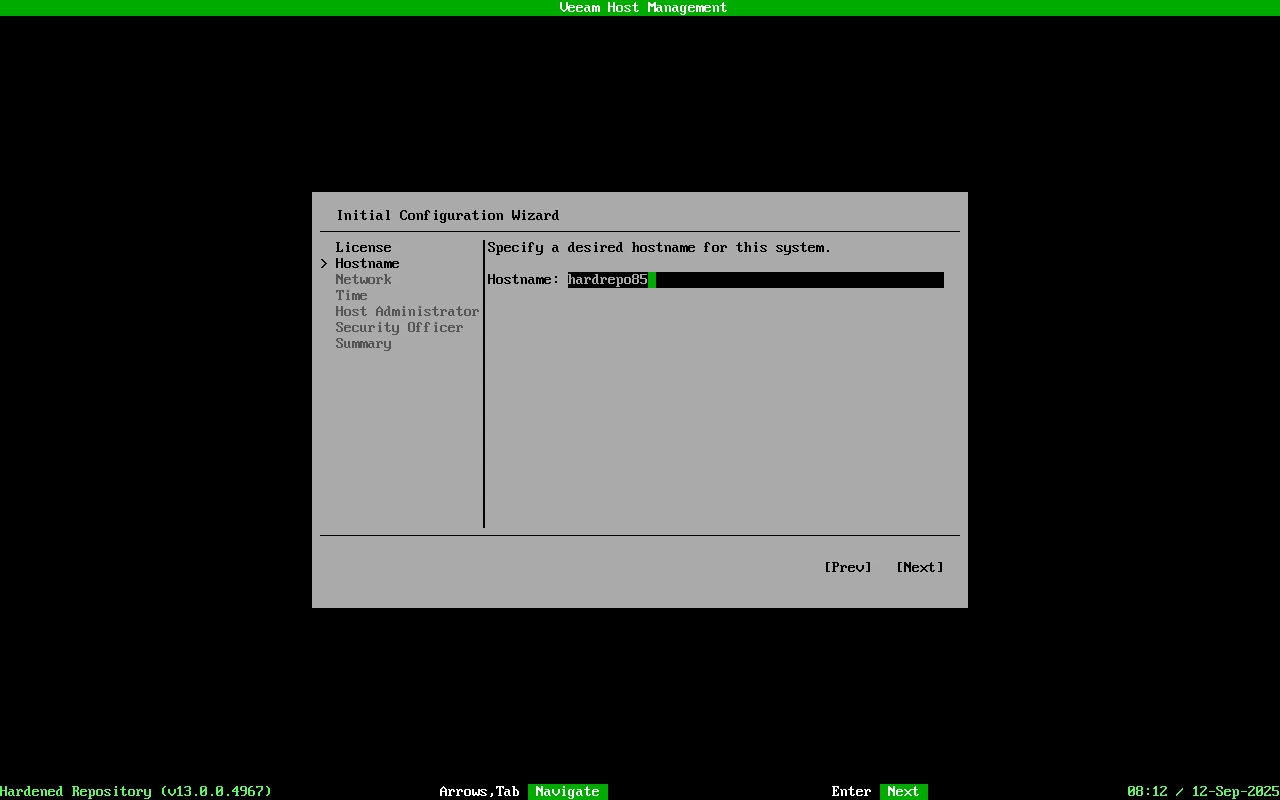
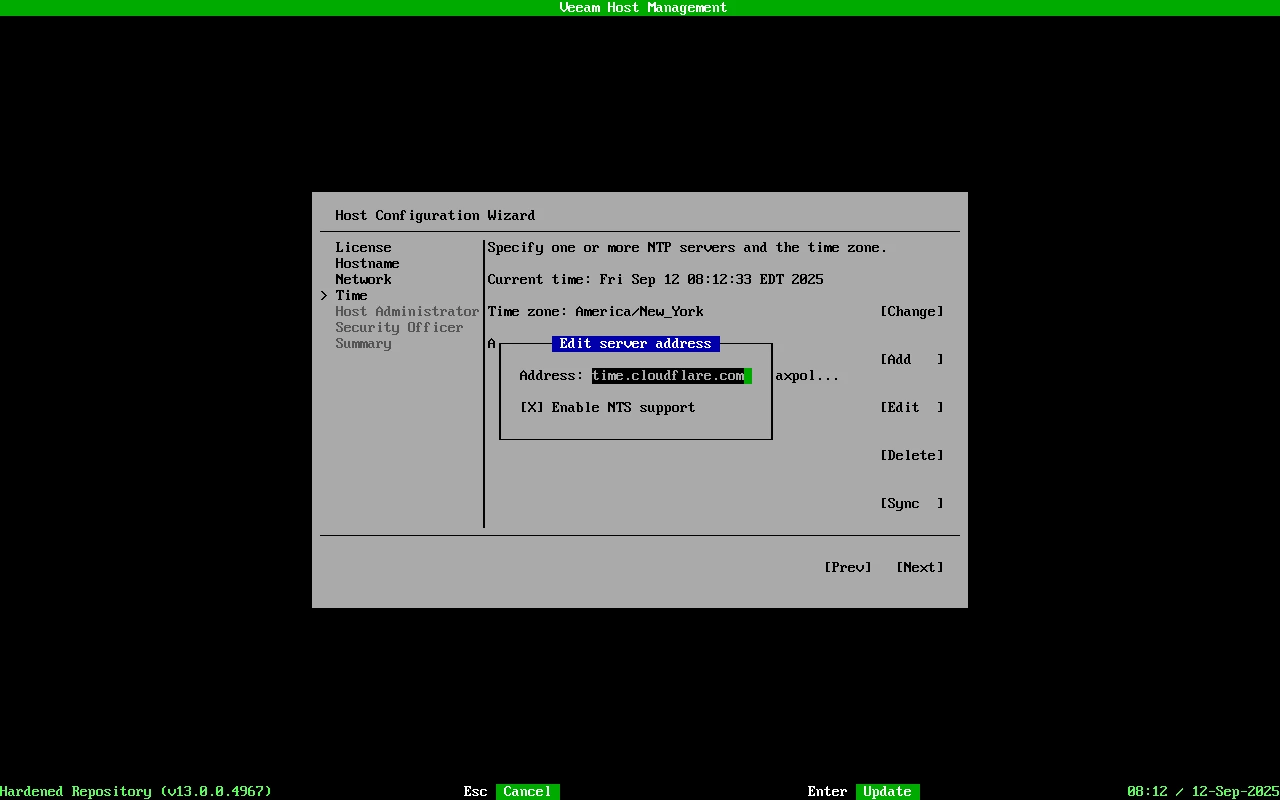
sudo dd if=$MOD of=/dev/<your-usb-block-device-here> bs=4M status=progress oflag=directThe installer can now be executed using either the ISO image or a USB stick, and its effects will be apparent during and after installation. For example, during setup, the presence of “fr” indicates the selection of a French keyboard layout. After installation, entering the password is simplified, the timesource is already configured, and network settings are pre-populated. Utilizing an “install IP” within the kickstart script allows for initial network configuration, which can be modified post-installation if necessary. This approach eliminates the need to manually enter gateway, nameserver, and subnet details.