Introduction
Some customers would like to change the self-signed certificate used by the Web Console for Veeam for Public Cloud products.
In this guide I will show all the steps involved in this process:
- Creating the request
- Creating the certificate
- Importing CA Root certificates
- Changing the certificate
I'm using the Veeam Backup for Azure as an example, but all the steps are the same for Veeam for GCP and Veeam for AWS.
Important:
This guide assumes you have a public domain and that you created the host A record for the DNS name you will use.
Also, I’m using ZeroSSL just to demonstrate the process of requesting a valid certificate, some steps could be different depending on the Certificate Authority used.
Creating the CSR
Let's create the certificate request using OpenSSL.
DigiCert has a web tool to create the command: https://www.digicert.com/easy-csr/openssl.htm
Connect to the appliance via SSH and run the command there.
We don't need to do this directly on the appliance, but we already have the OpenSSL installed in the appliance by default, so it's a good place to use.

This will generate two files:
- vbaz_itproland_com_br.csr - This is the certificate request that we need to request a new certificate
- vbaz_itproland_com_br.key - This is the private key for our certificate. It will be used to generate a PFX file in the end of the guide
Requesting the certificate
With the CSR file, we can request the new certificate.
I will use ZeroSSL, which provides a free valid certificate for 3 months, but we can use any other tool, like Let's Encrypt.
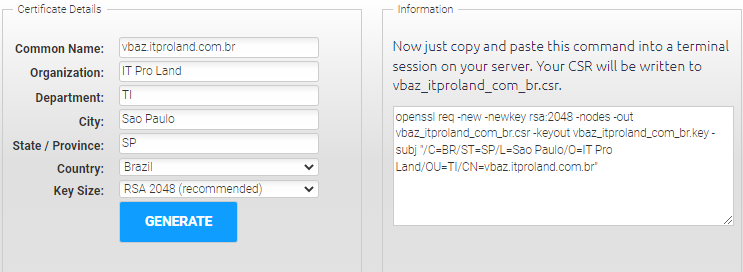
Create an account here: https://manage.sslforfree.com/
After you create an account, log in and go to "New certificate".

Enter the domain name we will use:

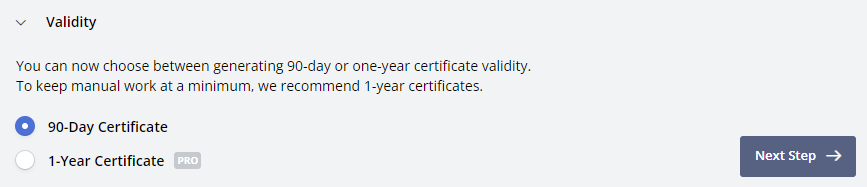
Choose 90-Day certificate:
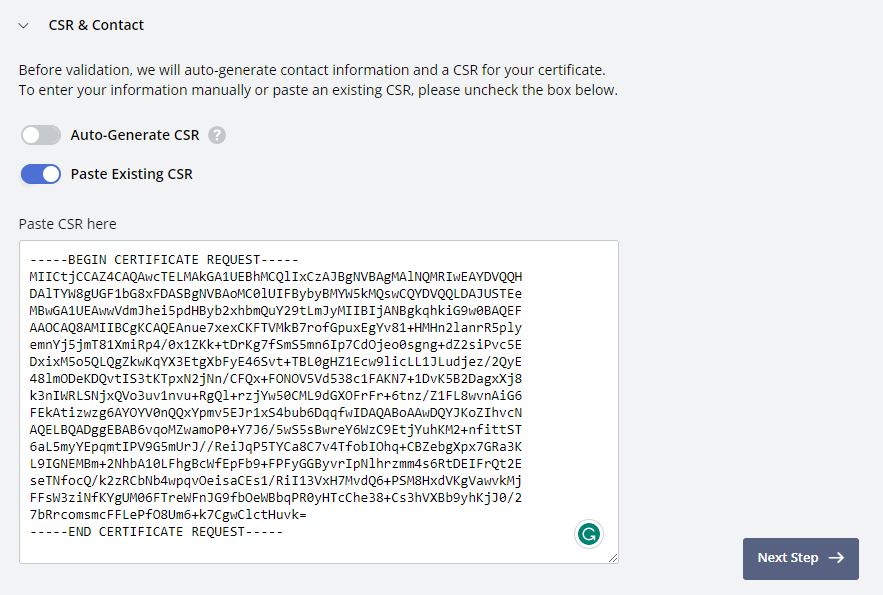
Disable the Auto-Generate CSR option and enable the Paste Existing CSR and paste the content from the CSR file
You must paste the entire content, don't remove the "BEGIN" and the "END" lines.
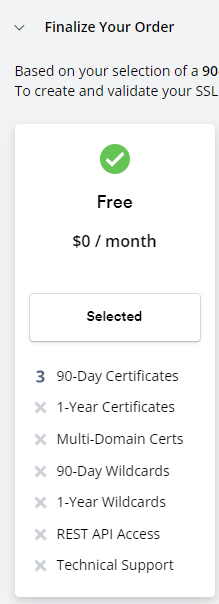
Finalize your order with the Free option
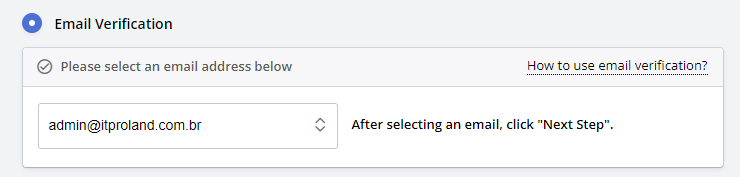
Now you have to verify you own the domain you are using.
I selected the Email verification and chose the e-mail address to receive the email verification.
You should receive an email like this to verify the domain:
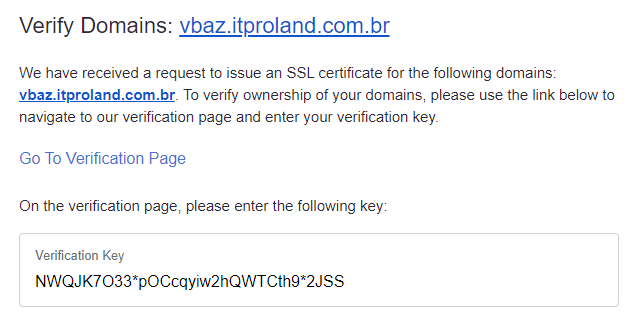
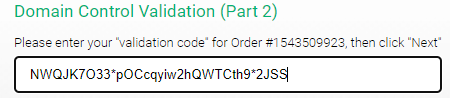
Click on Go to Verification Page and paste the Verification Key
Now we can go back to the Dashboard and download our new certificate.
Choose NGINX and download the zip file.

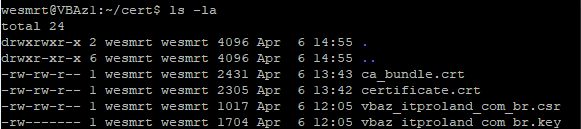
We will have two files on this zip:
- certificate.crt - Our certificate
- ca_bundle.crt - Root CA certificate that we need install in the appliance
Upload both files to the appliance.
I created a folder "cert" and put everything there to be easier to visualize:
Creating the PFX
Let's create the PFX file to be able to import the certificate in the Web Console.
Run the command below:
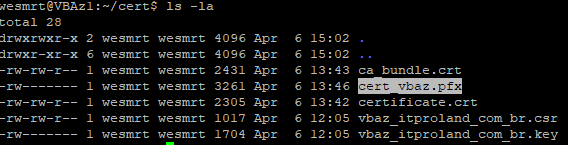
openssl pkcs12 -export -out cert_vbaz.pfx -inkey vbaz_itproland_com_br.key -in certificate.crt
You need to type a password that will be used during the import process on Web Console.

Now we should see the PFX file too:
The last thing we need to do in the appliance is install the root CA certificate for the appliance to be able to recognize the ZeroSSL Certificate Authority.
Move the "ca_bundle.crt" file to the path /usr/local/share/ca-certificates with the command below:
sudo mv ca_bundle.crt /usr/local/share/ca-certificates
Now run the command below to import the certificate:
sudo update-ca-certificates
Then reboot the appliance.
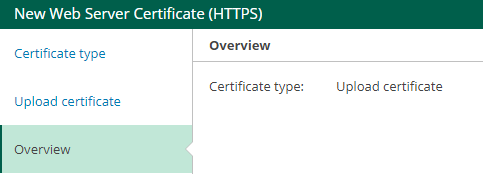
Replace the certificate
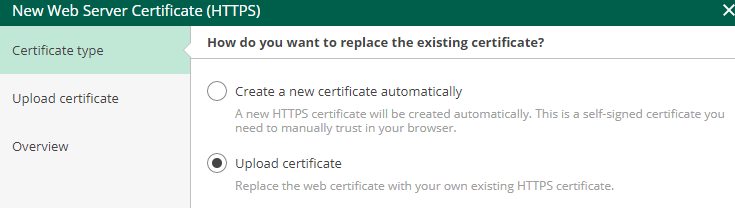
Finally, we can replace the web certificate using the PFX.
Select the Upload certificate option
Choose the PFX file and type the password.
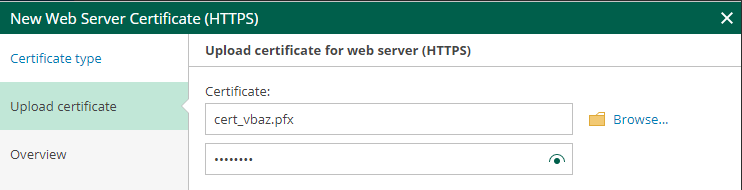
Upload the certificate.
If everything works, the new certificate should change.
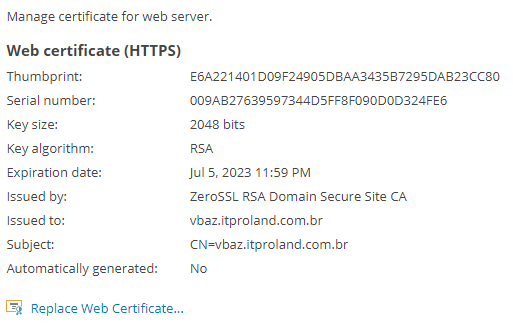
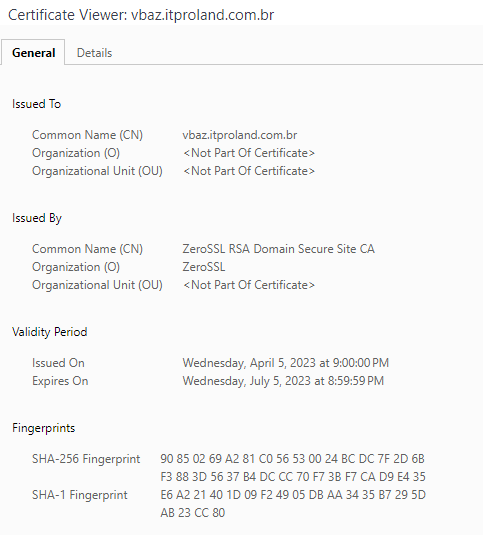
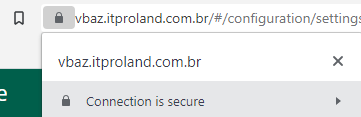
We can see that now the certificate is valid.
We can open the certificate to see the details.