
Setting up and maintaining Veeam Kasten ensures seamless data protection and management within Kubernetes environments. Now, we’ll explore the key aspects of installing Kasten, including best practices and configurations for a successful deployment. Whether you’re deploying Kasten for the first time or maintaining an existing setup, you’ll be equipped with the knowledge to manage installations and upgrades effectively.
Getting Hands-on with Veeam Kasten
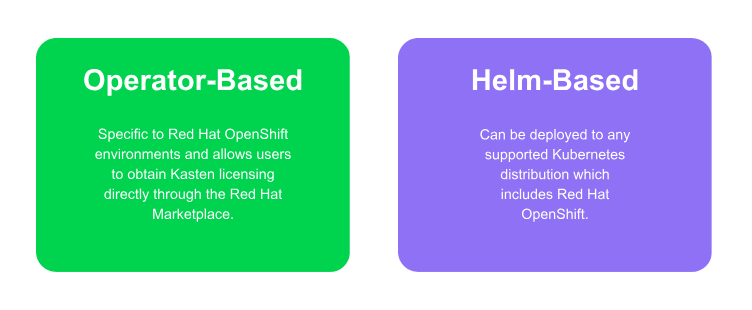
This module will cover examples of the two most common installation methods, OpenShift Operator and Helm while providing some guidance to help you choose the best approach for your environment. Generally, the installation of Veeam Kasten can be categorized into two primary methods that are each suited to different needs:
Veeam Kasten is available in different Operator editions:
-
Veeam Kasten (Free): Free edition of Veeam Kasten for use in clusters up to 5 Nodes
-
Veeam Kasten (Enterprise - PAYGO): Enterprise edition of Veeam Kasten, billed per usage of node-hours
-
Veeam Kasten (Enterprise - Term): Enterprise edition of Veeam Kasten intended to be used with a term license
Taking the Time for Pre-Flight Checks
Assuming that your default kubectl context (or similar tool) is pointed to the cluster you want to install Veeam Kasten on, you can run pre-flight checks by deploying the primer tool. This tool runs in a pod in the cluster and does the following:
- Validates if the Kubernetes settings meet the Veeam Kasten requirements.
-
Catalogs the available StorageClasses.
-
If a CSI provisioner exists, it will also perform a basic validation of the cluster’s CSI capabilities and any relevant objects that may be required. It is strongly recommended that the same tool be used to perform a more complete CSI validation using the documentation here.
Installing the Pre-Flight Check Tool
Note that this will create and clean up a ServiceAccount and ClusterRoleBinding to perform sanity checks on your Kubernetes cluster. The primer tool assumes that the Helm 3 package manager is installed and access to the Veeam Kasten Helm Charts repository is configured.
Run the following command to deploy the pre-check tool:
curl https://docs.kasten.io/tools/k10_primer.sh | bash- Before installing Veeam Kasten, it is essential to have a functional and accessible Red Hat OpenShift environment.
-
Please consider running the pre-flight checks mentioned in the prior section.
-
Optionally, you can create a new project in advance where Veeam Kasten will be installed. Select this project during operator deployment or create a project (namespace) during the operator installation process. By default, the documentation uses the kasten-io namespace.
oc new-project kasten-io \

--description="Kubernetes data management platform" \

--display-name="Veeam Kasten"
Completing a Helm Installation
The helm command mentioned below can be used to install Veeam Kasten in a namespace called kasten-io with token-based authentication and a loadBalancer type of service to expose Veeam Kasten UI. Veeam Kasten assumes SSDs or similar fast storage media support the default storage class. If the default storage class doesn’t meet the performance requirements, use the following option: global.persistence.storageClass to specify a custom storageClass for the Veeam Kasten Helm installation command.
helm install k10 kasten/k10 --namespace=kasten-io --create-namespace \

--set auth.tokenAuth.enabled=true \

--set externalGateway.create=true \

--set global.persistence.storageClass=<;StorageClassName>
Other supported mechanisms expose Veeam Kasten UI and integrate with existing/external authentication providers. Please look at the Authentication and Dashboard Access section of the documentation for further customization of Veeam Kasten configurations.
Let's Complete a Helm Installation!
Validating an Install
To validate that Veeam Kasten has been installed properly, the following command can be run in Veeam Kasten’s namespace (the install default is kasten-io) to watch for the status of all Veeam Kasten pods:
watch kubectl get pods --namespace kasten-ioIt may take a couple of minutes for all pods to come up but all pods should ultimately display the status of Running.
kubectl get pods --namespace kasten-io

NAMESPACE NAME READY STATUS RESTARTS AGE


kasten-io aggregatedapis-svc-b45d98bb5-w54pr 1/1 Running 0 1m26s

kasten-io auth-svc-8549fc9c59-9c9fb 1/1 Running 0 1m26s

kasten-io catalog-svc-f64666fdf-5t5tv 2/2 Running 0 1m26s
Accessing the Dashboard
The Veeam Kasten dashboard will be available at the http://<external-ip-or-path>/k10/ URL path of the DNS or External IP address of the loadbalancer. You can find the External IP by running the command:
kubectl get svc -n kasten-io gateway-ext

NAME TYPE CLUSTER-IP EXTERNAL-IP PORT(S)

AGE

gateway-ext LoadBalancer 10.245.209.113 198.51.100.15 80:31652/TCP

2m49s
If you installed Veeam Kasten with a different release name than k10 (specified via the -name option in the install command), the dashboard will be available at the /<release-name>/ URL path. You can also use kubectl port-forward to access it locally if you have not enabled external loadbalancer.
kubectl --namespace kasten-io port-forward service/gateway 8080:80


This will make the dashboard available at http://127.0.0.1:8080/k10/#/
Air-gapped Installations for Kasten
For environments with Internet connectivity, installing Veeam Kasten requires access to three key repositories to download and configure the necessary components. The Helm repository contains the Veeam Kasten chart, the container registry houses the Kasten container images, and upstream repositories provide dependencies such as Prometheus, ensuring a complete and functional installation.
An air-gapped installation, on the other hand, refers to deploying Veeam Kasten in an environment with no external Internet access. This approach is often used for heightened security or compliance requirements. In such cases, you can still install Veeam Kasten by setting up your own private container registry to host the required images and dependencies, ensuring a secure and isolated deployment process.
Even in offline environments, Kasten can be fully installed and configured using these localized resources. This approach allows organizations to maintain the same level of functionality and reliability while adhering to strict security protocols.