

In the previous post, I shared how to create a cluster with K3s and then add Kasten to develop a demo environment or even a lab for different types of testing: https://community.veeam.com/topic/show?tid=11815&fid=57
In this second part, the goal is to go a bit further and perform the following actions:
-
Connect the K10 instance to an existing VBR. (pending on a third post)
-
Add 2 virtual machines: one will serve as a second K3s cluster with Kasten (following the steps from the previous post), and the other VM will act as our repository.
Once the environment is deployed, you will be able to perform many actions within K10, such as Multicluster, DRP, App Mobility, and more.
Are you ready? Let’s review what needs to be configured…
As mentioned before, you should have two virtual machines, each running K3s and Kasten. One important point is that in order to provide direct access to the Kasten service on the network, you can use the NodePort type. This will allow both clusters to communicate with each other. Here’s how to configure it…
Perform the following steps on both clusters:
Run the command below — this will open the vi editor:
sudo kubectl -n kasten-io edit svc gateway
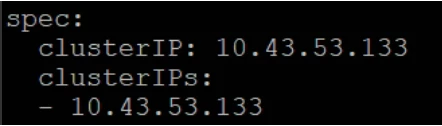
Find the following line and add externalIPs with the IP of your VM with K10:
Before
After:
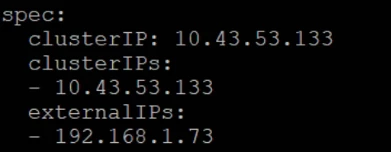
*The IP of my env is 192.168.1.73
Then change the port 80 → 8080 and type to NodePort:
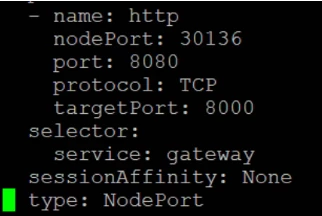
Save the config with :wq
Validate access using:
http://IP:8080/k10/#
This action needs to be performed on both clusters, so you must validate access on both sides.
At this point you will have 2 cluster of one node each with k3s and kasten up and running! 😎
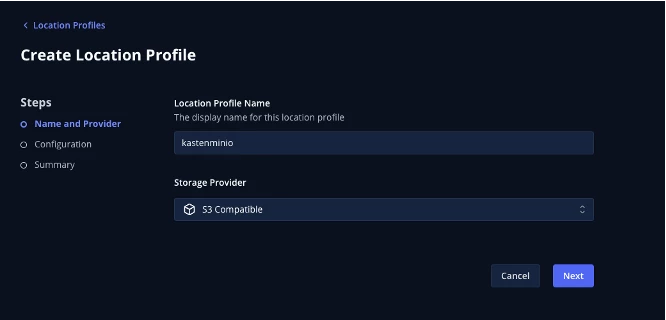
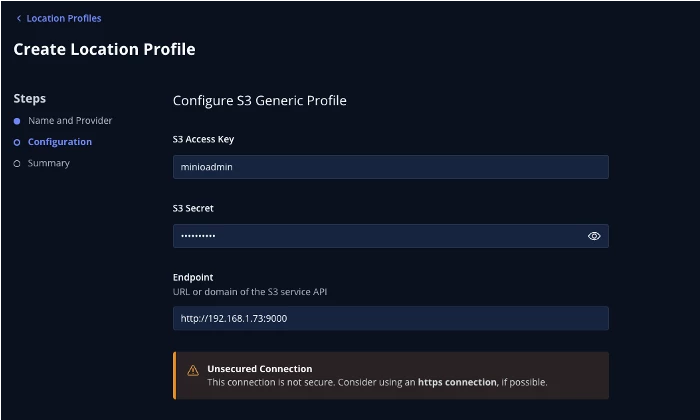
Localtion profile: MinIO
Another alternative for the test environment is to use an object-based repository service such as MinIO: https://www.min.io/
For this lab, a simple deployment will be used. Ideally, you should dedicate a separate virtual machine for this service, using the same operating system you used for Kasten. Here is when the third VM is going to be configured:
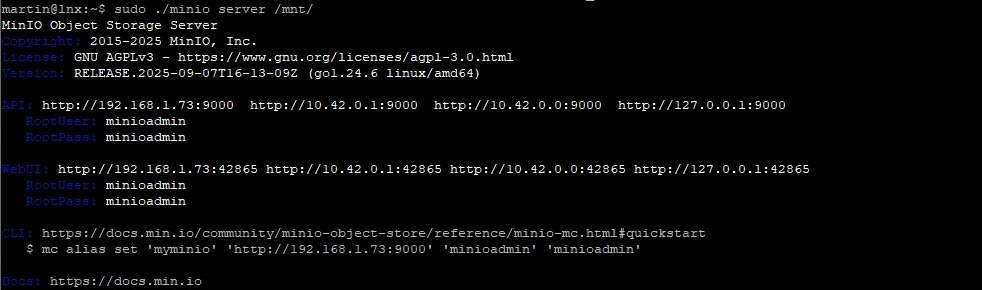
Once you have access to the virtual machine that will host MinIO, run the following commands:
wget https://dl.min.io/server/minio/release/linux-amd64/minio
sudo chmod +x minio
sudo ./minio server /mnt/ &
-
The
/mntparameter represents the directory that will be used for storage. Make sure to validate the correct path. -
You can run MinIO in the background by adding the
&character at the end of the command.
After the service is running, you can use any of the URLs displayed in the console to access the MinIO dashboard.
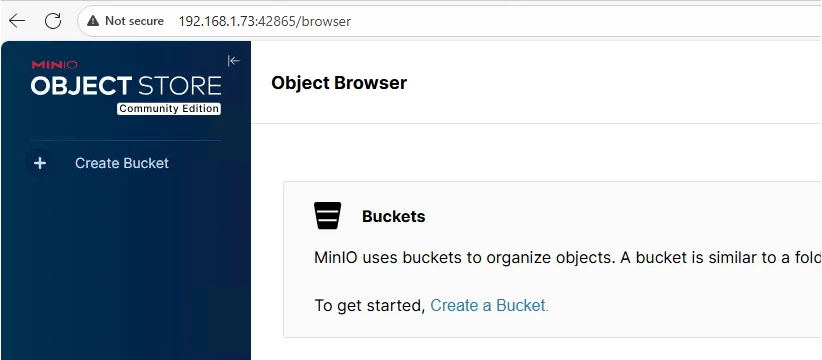
Once inside the dashboard, create the bucket that will later be presented to Kasten.

After creating the bucket in MinIO, go to Kasten and navigate to Profiles → Location to set up the corresponding Location Profile.
Adding the same bucket in both cluster must be done to proceed to the next step.
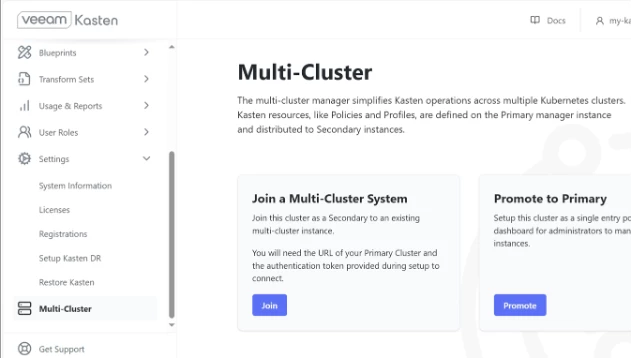
Multi-Cluster
This step will be possible if the following tasks have been completed:
-
Two virtual machines running Kasten and K3s.
-
Each virtual machine must have a Location Profile configured (MinIO).
Once the tasks above are completed, you can configure a multi-cluster environment to unify the management of both K10 instances.
Start by selecting the Multi-Cluster option in one of the Kasten instances and promote it as the primary:
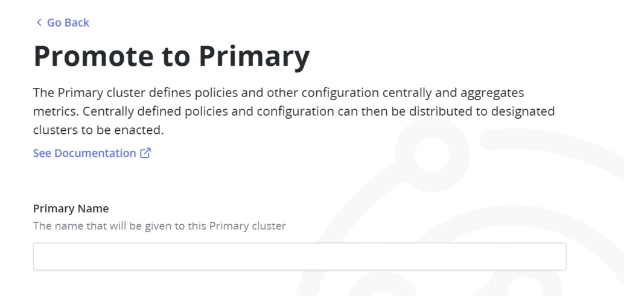
The IP address shown in the image will vary depending on the environment being used:

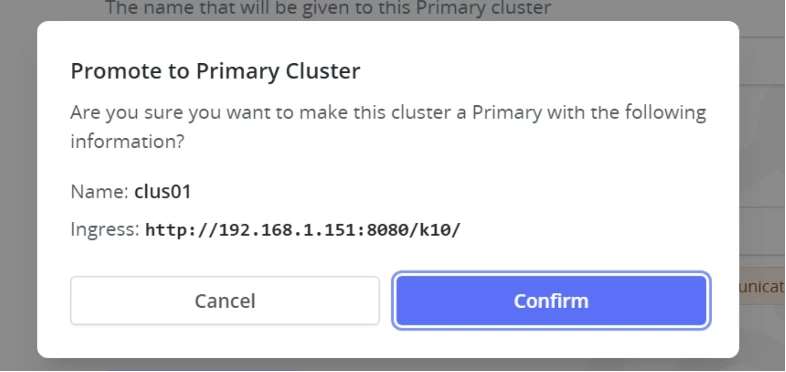
Confirm to promote the cluster as primary.
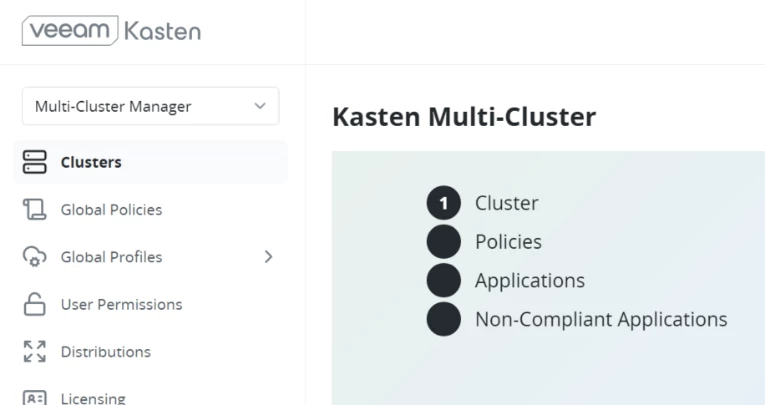
This action will update the initial dashboard, enabling additional options to appear:

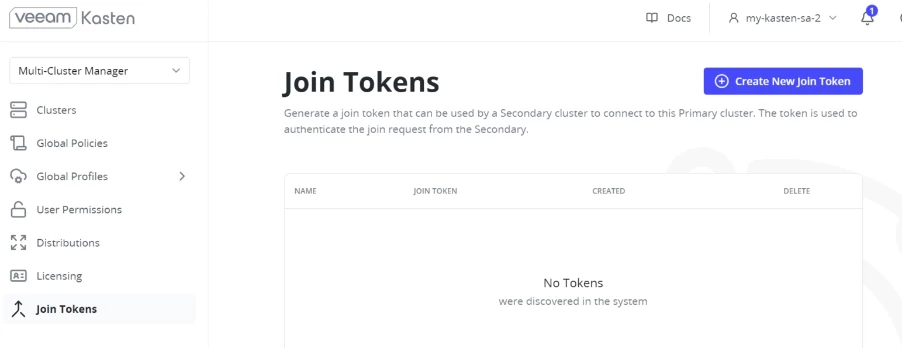
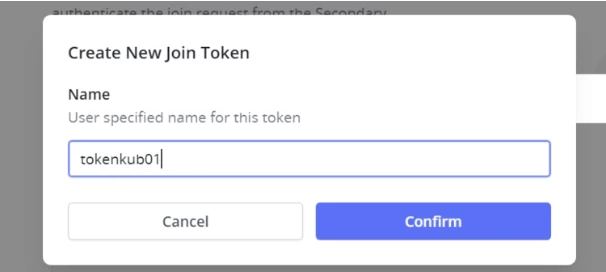
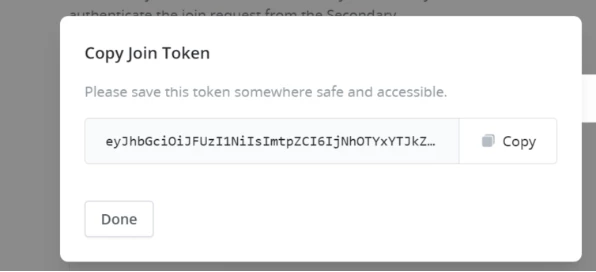
To add the second node, it is necessary to generate a token on the primary node:
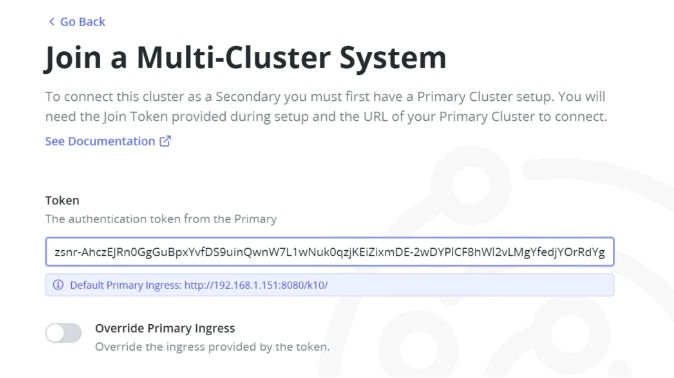
Now… in the second cluster go to the section of multicluster and select the option Join:

Past the token created before:
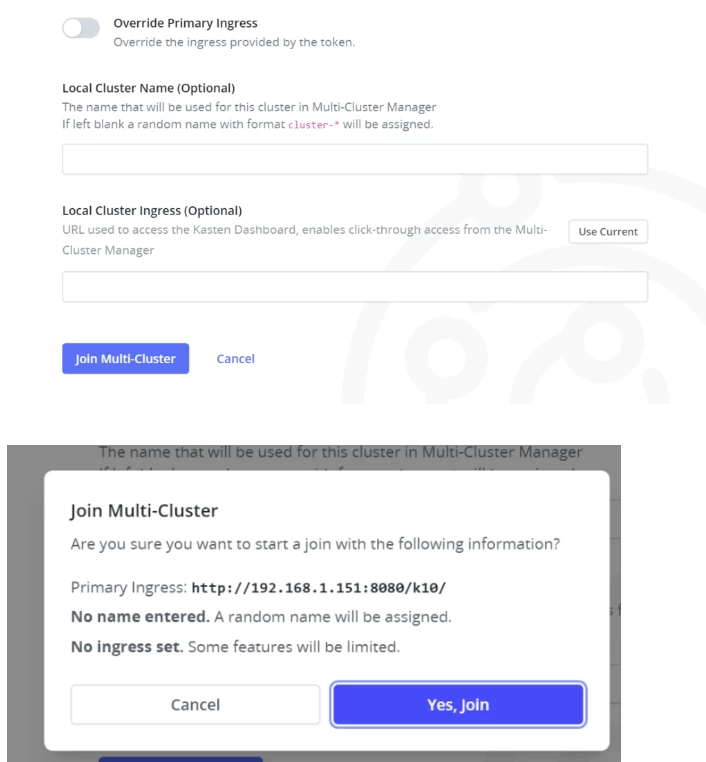
Now you have multi-cluster configured!!
If any connectivity issues occur, it is likely that you will need to perform the following steps before adding the second node. These commands must be executed on the secondary node.
Refer to the documentation: https://docs.kasten.io/7.0.4/multicluster/how-tos/http_primary_ingress_connection.html
Validate on the secondary node — the one you want to add to the cluster — that the ConfigMap is created:
kubectl patch configmap mc-join-config -n kasten-io --type merge -p '{"data":{"allow-insecure-primary-ingress":"true"}}'
I hope this second article helps you continue building and experimenting with your own environments, so you can explore K3s and Kasten in a practical and hands-on way.
Enjoy! 😎😃

