XCP-ng stands for Xen Cloud Platform, next generation and it is an open-source virtualisation platform that allows you to manage virtual machines and networks efficiently.
XCP-ng delivers high-performance enterprise-level virtualization with a rich ecosystem. You can integrate it into your full stack for management and backups. It serves as the modern successor to XCP, which developers originally created as an open-source version of Citrix XenServer back in 2010.
XCP-ng Architecture
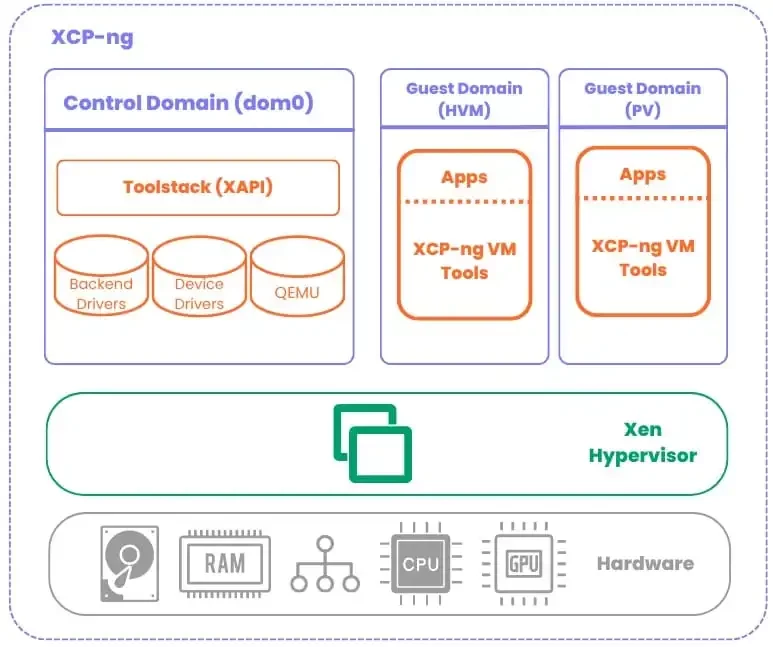
XCP-ng is a secure platform by default and enables you to run any kind of virtualisation workload . It contains multiple components, built around the Xen Hypervisor. It’s meant to run on top of bare-metal machines.
XCP-ng runs Xen hypervisor on bare metal hardware (CPU, RAM, disk, GPU) to host VMs and PVs (paravirtualized guests). Dom0 (control domain) manages everything via tools and APIs, while backend drivers handle storage/network/QEMU emulation for guest domains.
You can download the latest installer for XCP-ng 8.3 LTS from here. See the below for some other interesting articles on XCP-ng written by one of our fine Veeam Legends.
Create an Installation Disk
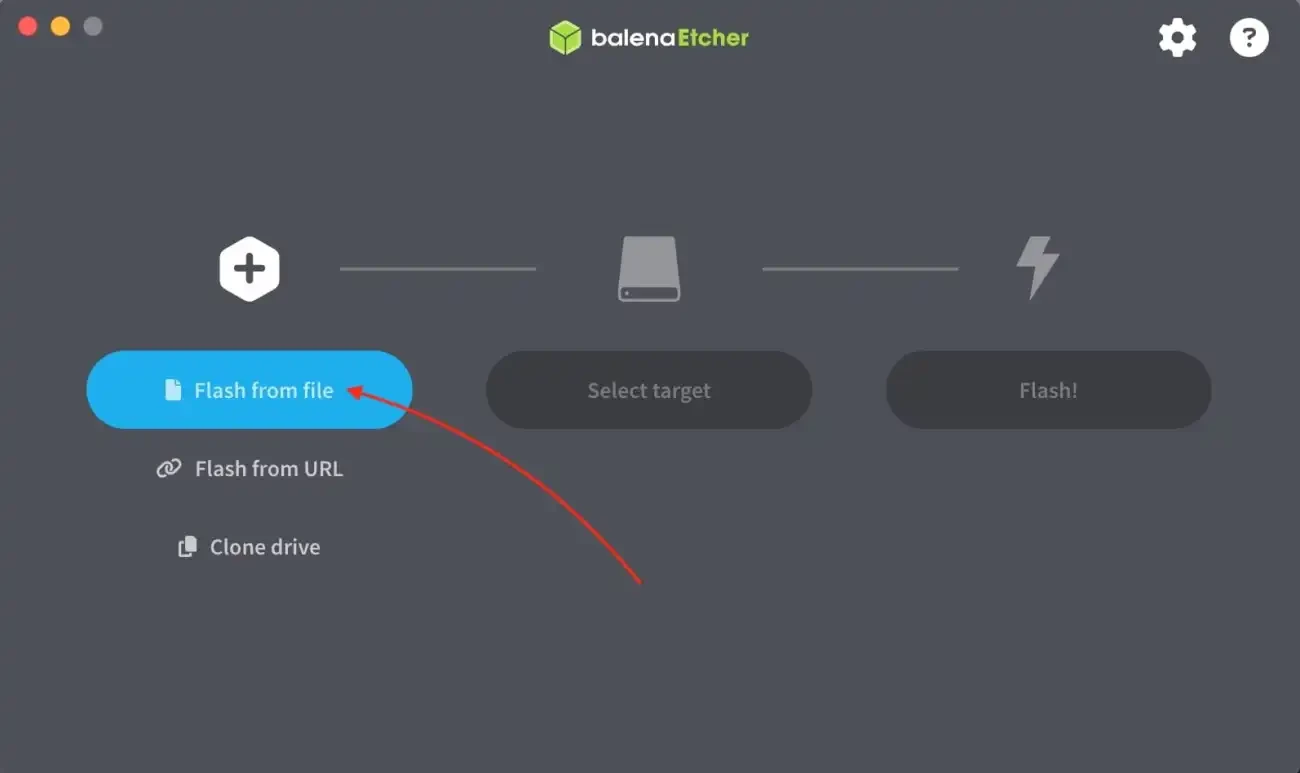
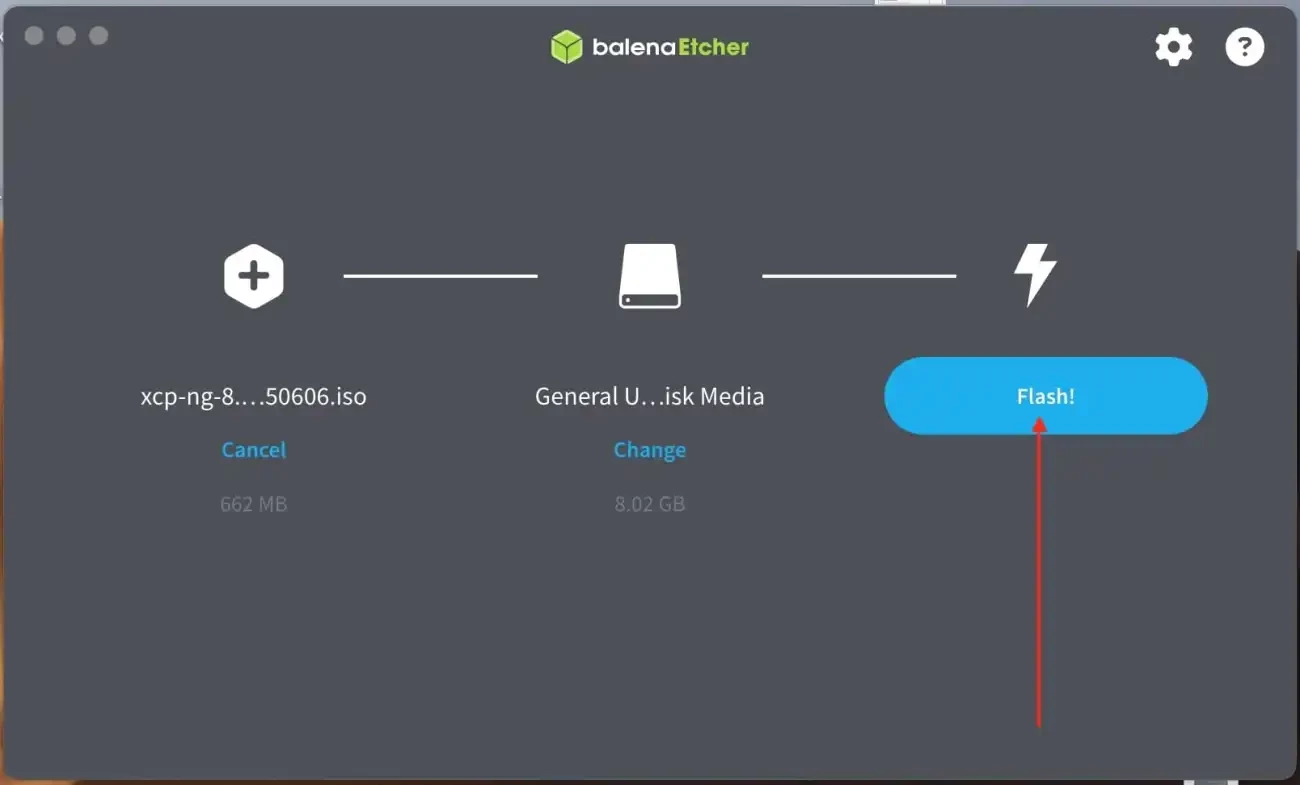
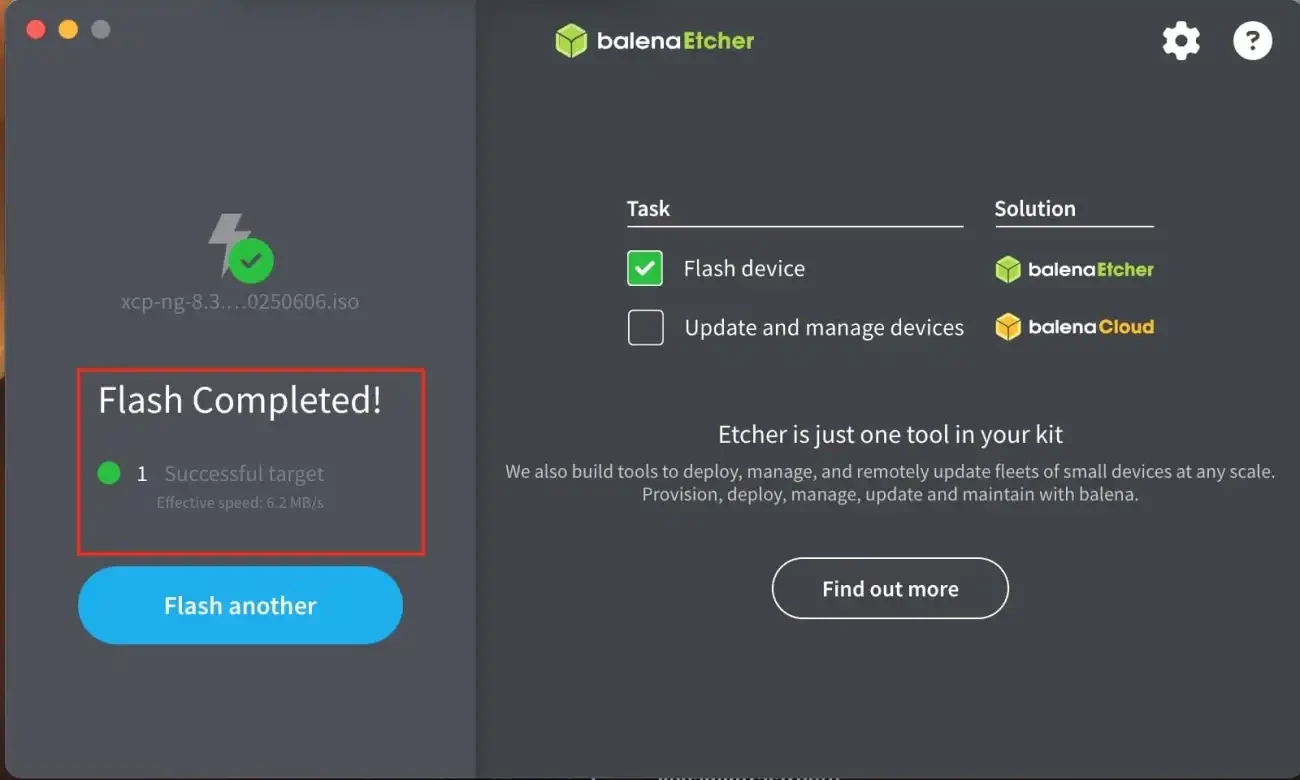
To do this, you can use Rufus on a Windows PC or Balena Etcher on a Mac to create a USB installation media from the ISO file. Since I am on a macOS, I will launch Balena.
Click on the “Flash from file” to select the downloaded ISO. After this step, you will have the opportunity to select a USB target.
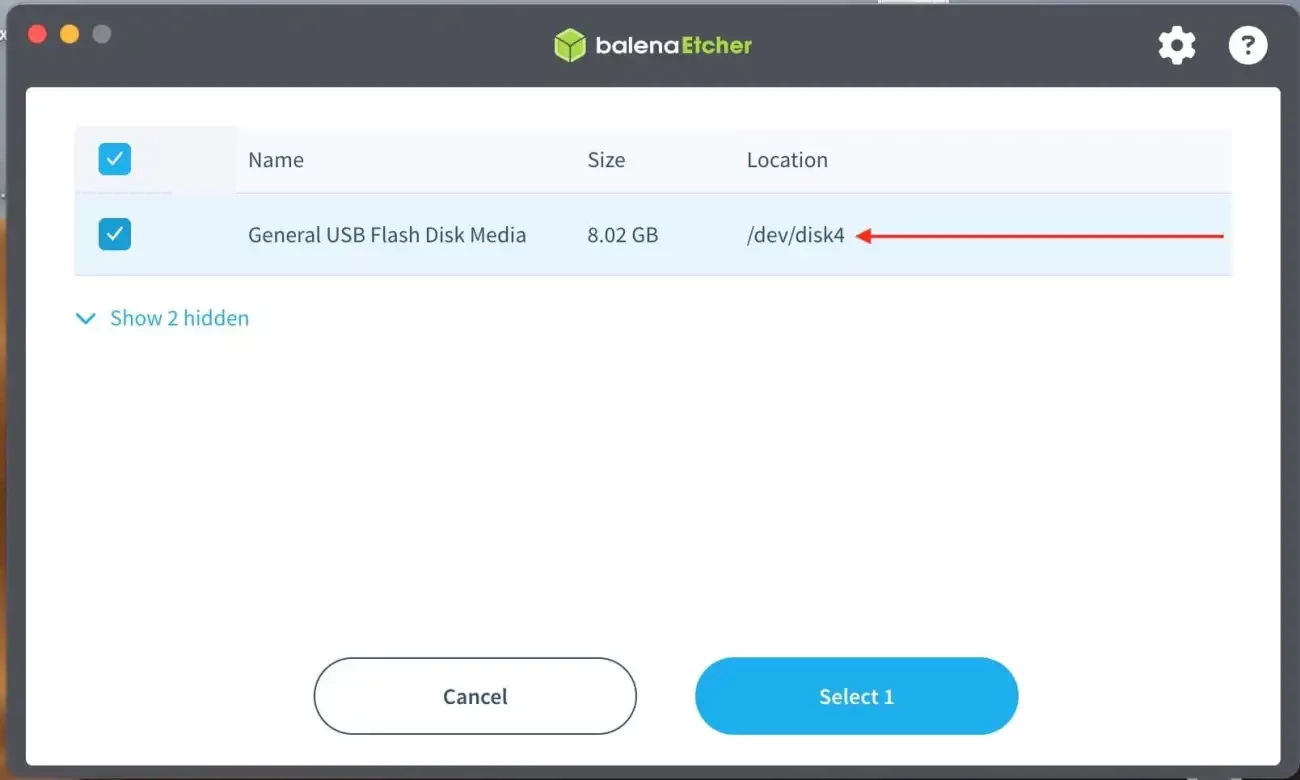
Select the Flash disk media as shown below.
Click on on Flash
You will be required to enter your password in order to be able to flast the disk and click on OK
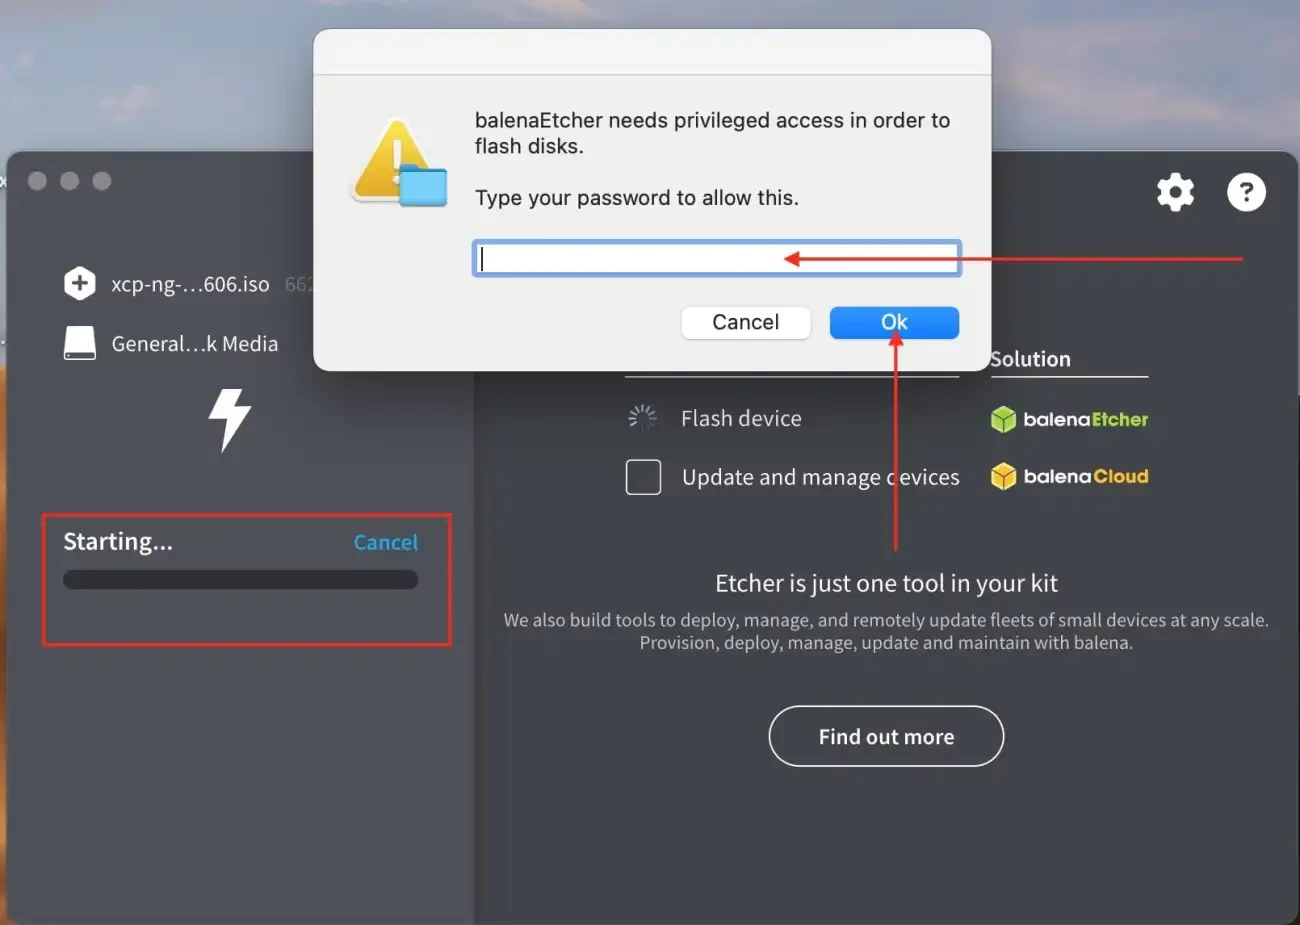
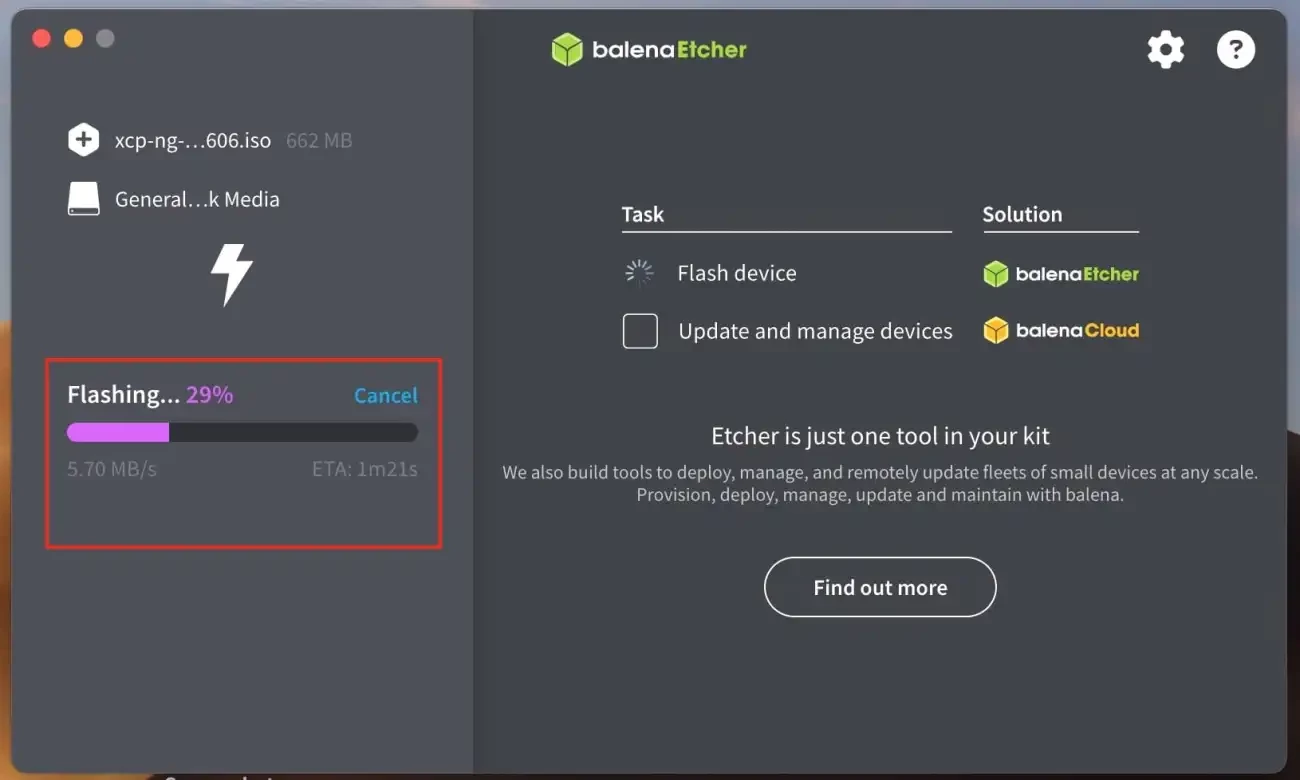
Flashing has begun
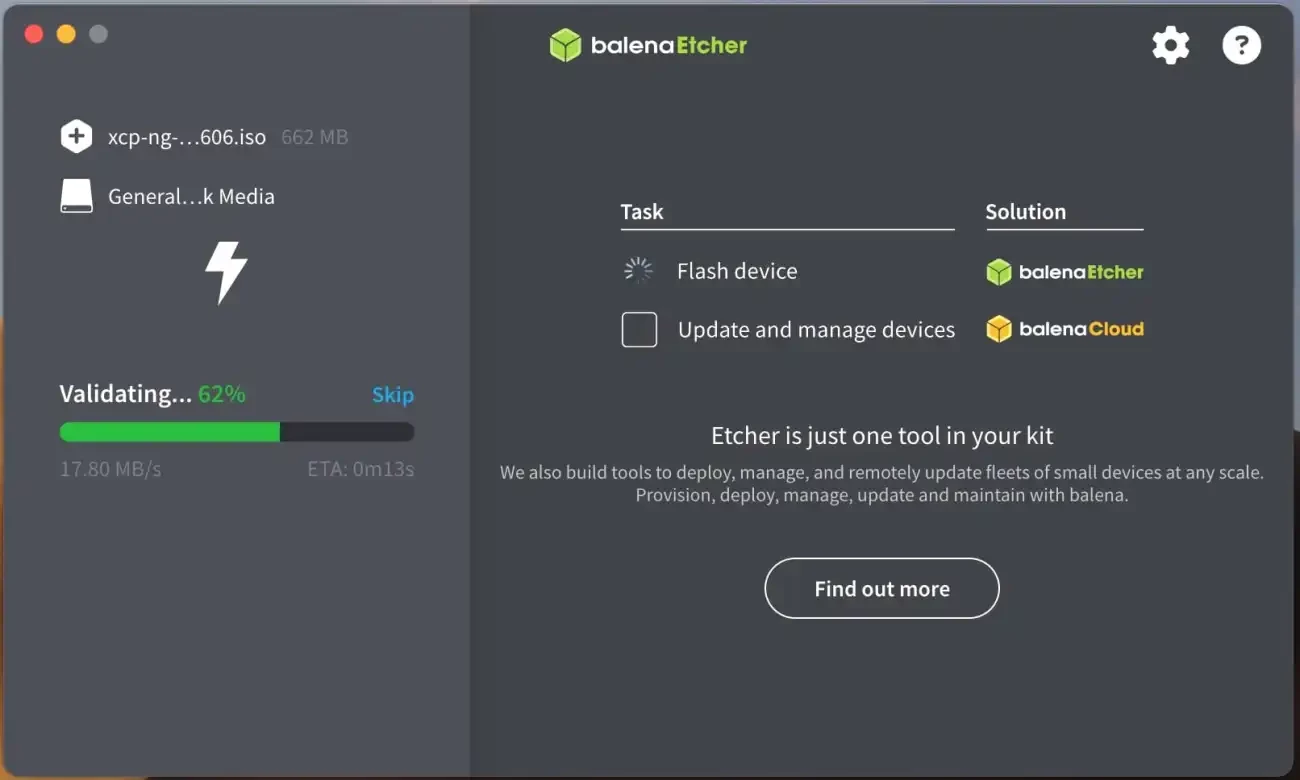
When complete successfully, the window below will be displayed.
XCP-ng Installation
XCP-ng is generally deployed on server-class hardware. But it also supports many workstation and laptop models as we will see very shortly. Kindly take a look at the XCP-ng Requirement and Hardware Compatibility List (HCL) for more information.
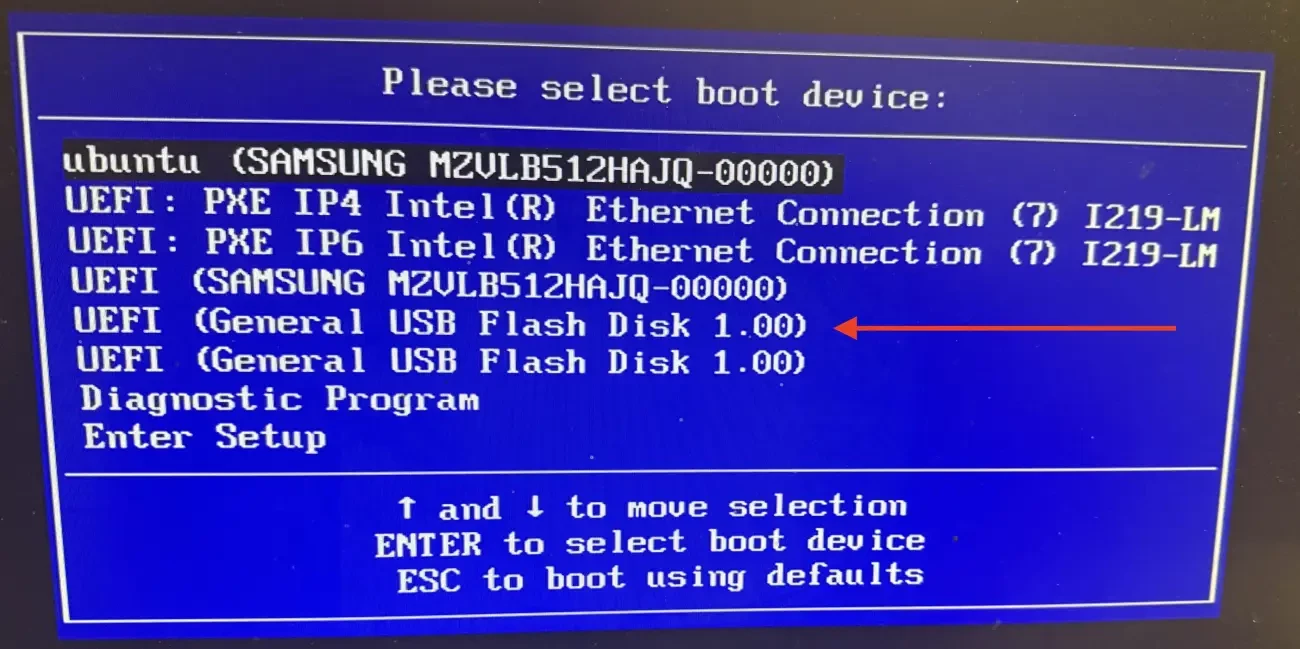
From my Workstation, I will use the F12 key to boot from the USB. As you can see below, I will use the arrow key to select and move to the USB boot device. To do this, you will have to insert the USB drive we have flashed above and repeated hit the F12 button as the system startups until the boot menu appears
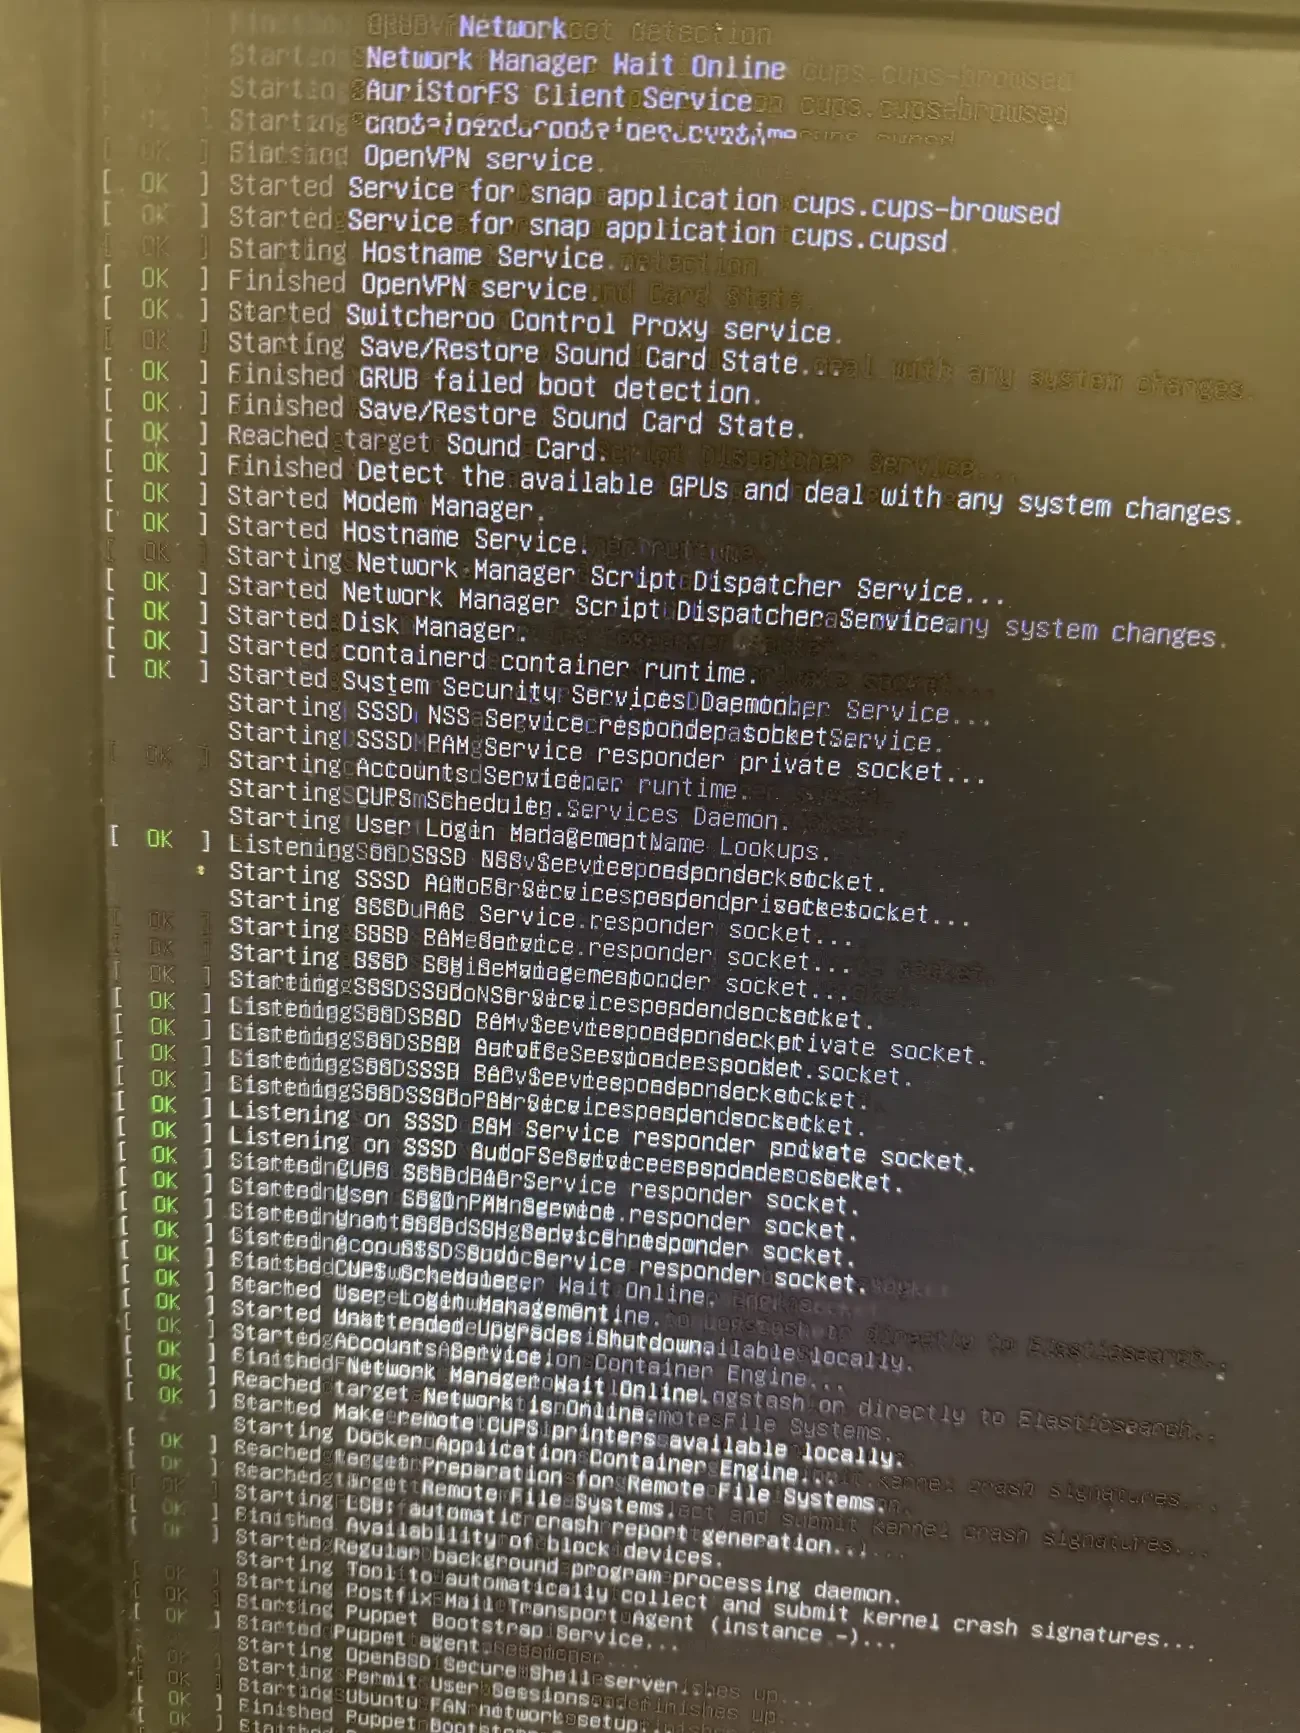
Below shows the systemd service initialisation of the XCP-ng “Installer Environment (Live Environment)” where the OS is loading its management services into memory from the USB before launching an interactive setup window.
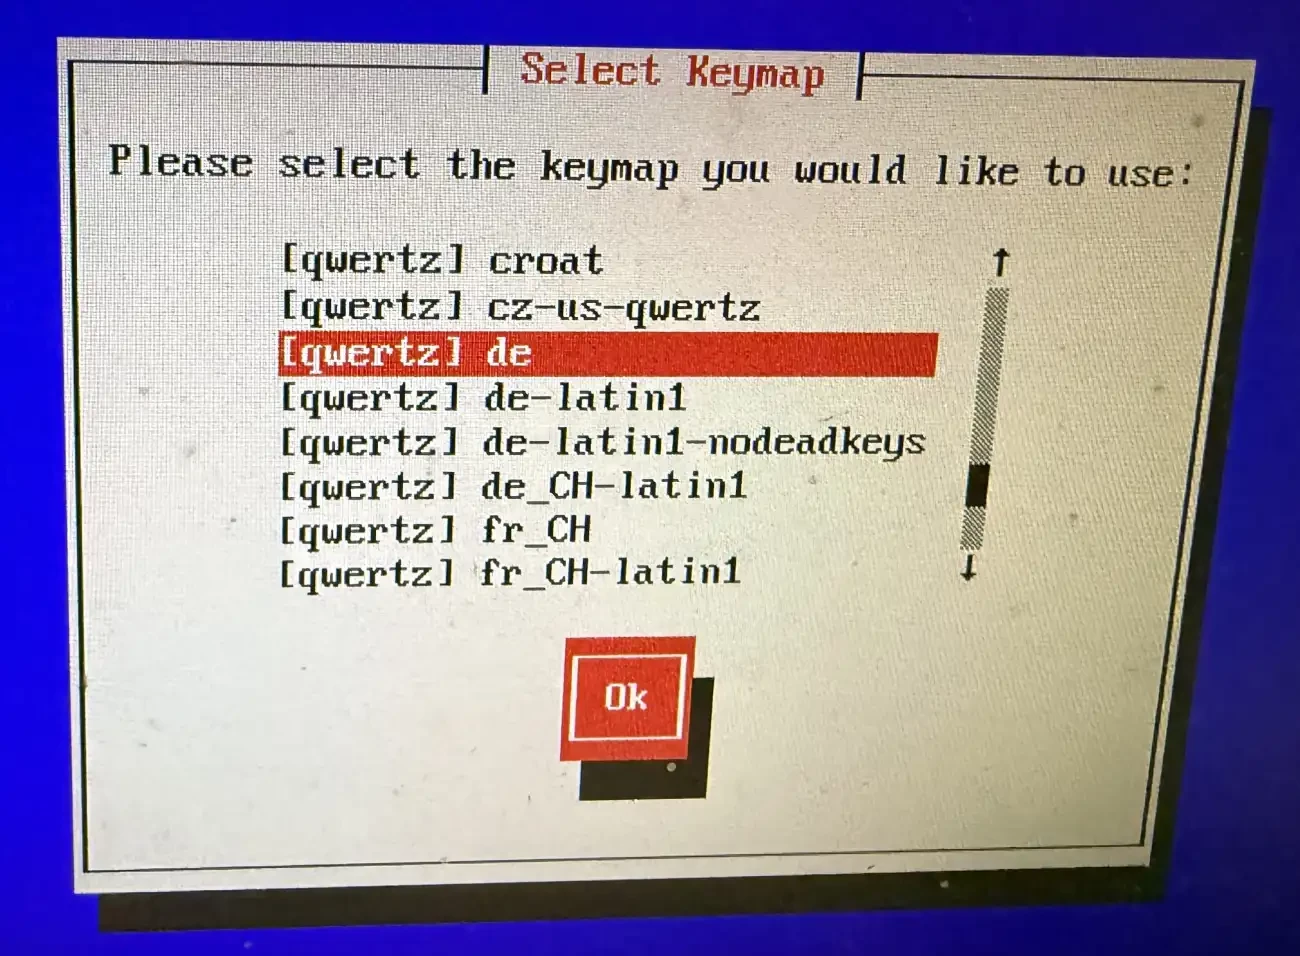
Select your keymap
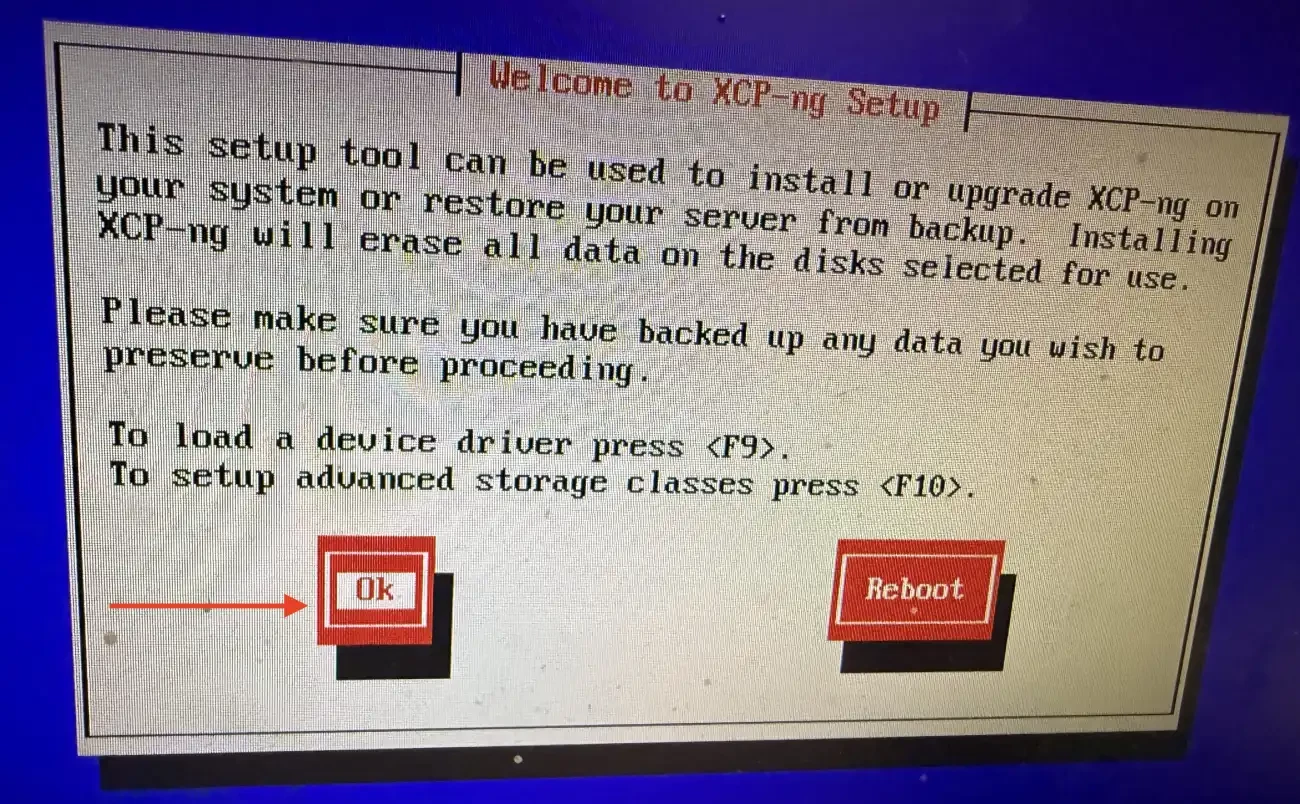
On the welcome scren, select OK
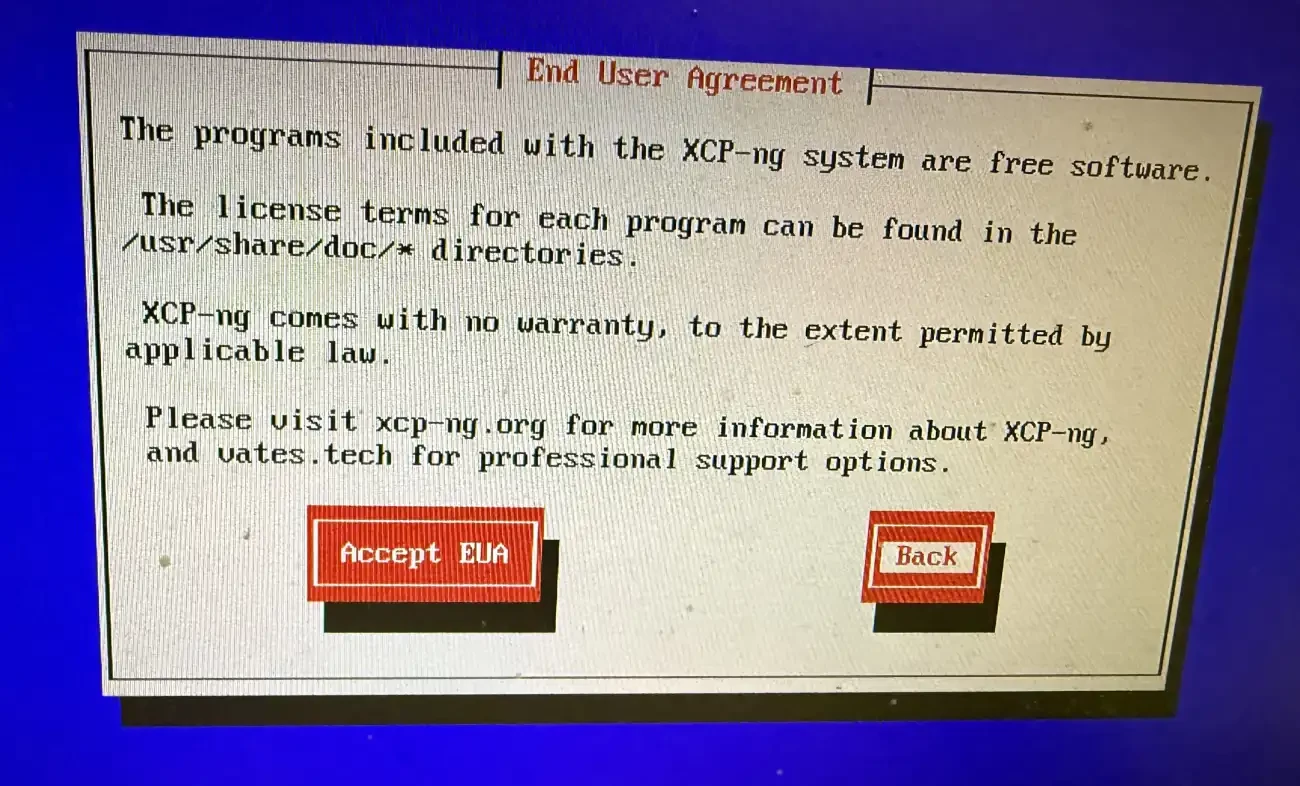
Accept EUA
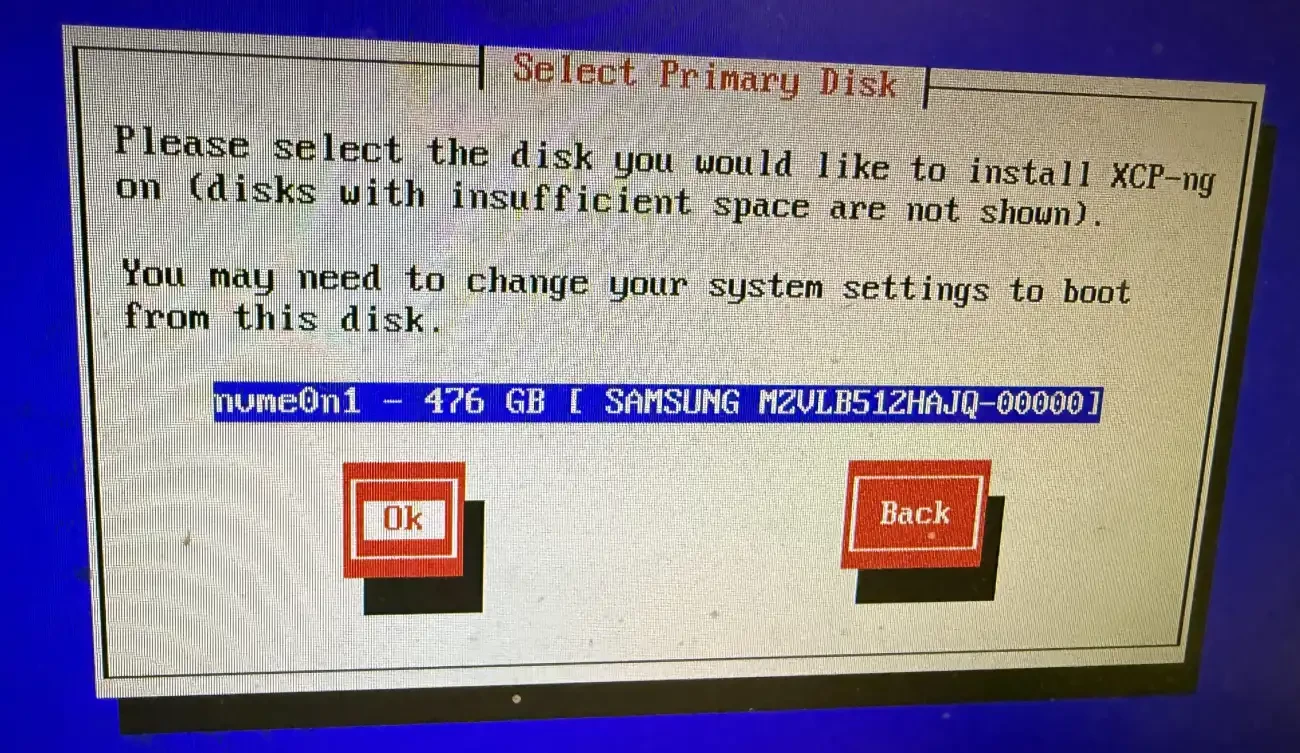
Click on Ok on the next screen
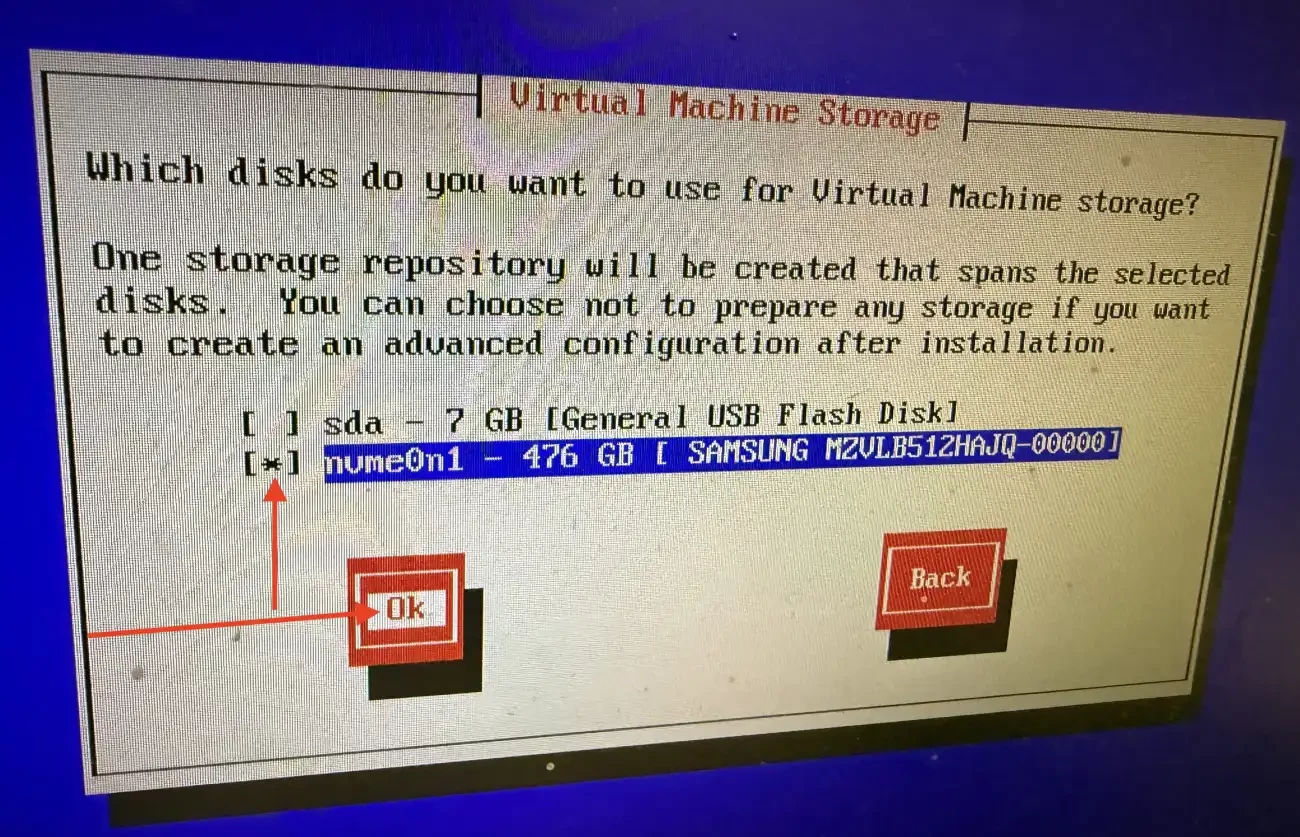
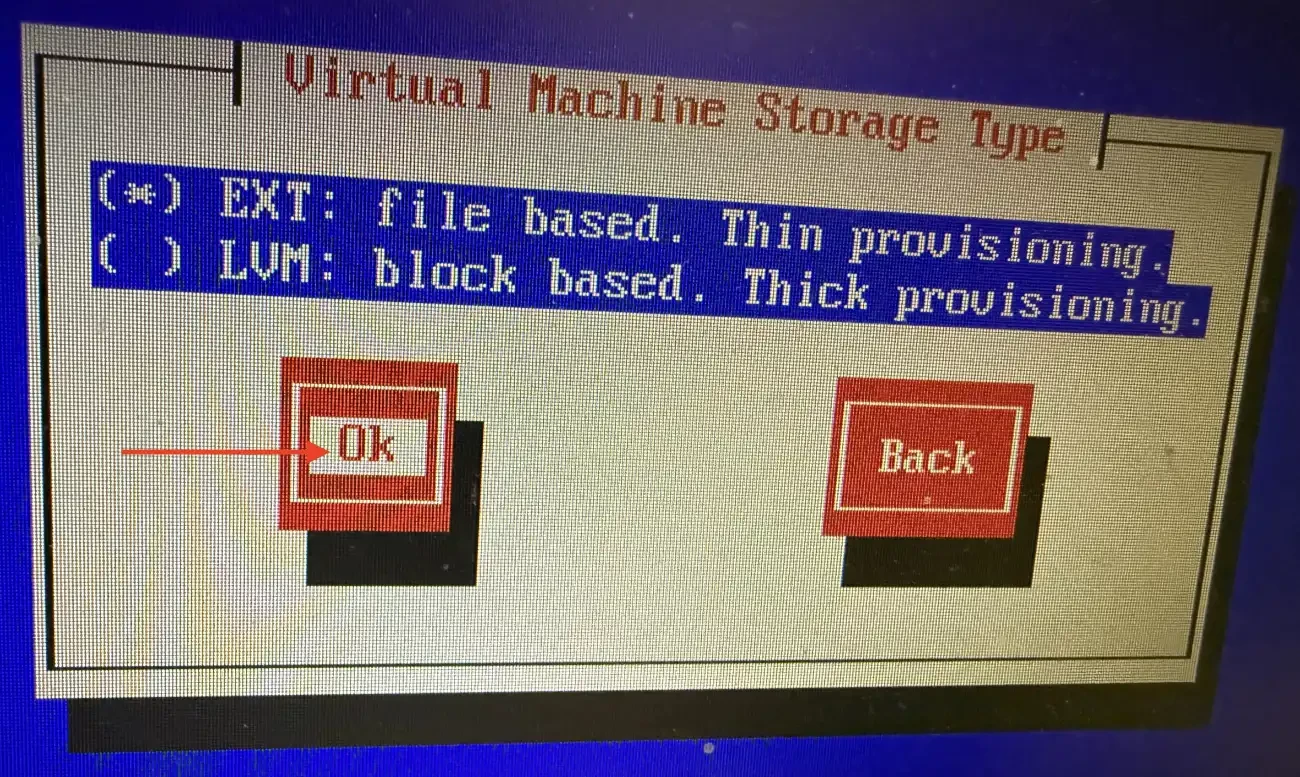
Use the Space bar on your keyboard to select the disk to store Virtual Machine
When installing XCP-ng, the choice to use thin (file based EXT) and Block-based (LVM) storage depends on your priorities for backup efficiency versus raw performance. Also, the thick-provisioned allocates the entire requested disk space upfront. Since I do not have plenty spare spare storage at this time, I will be selecting the “think provisioning” option.
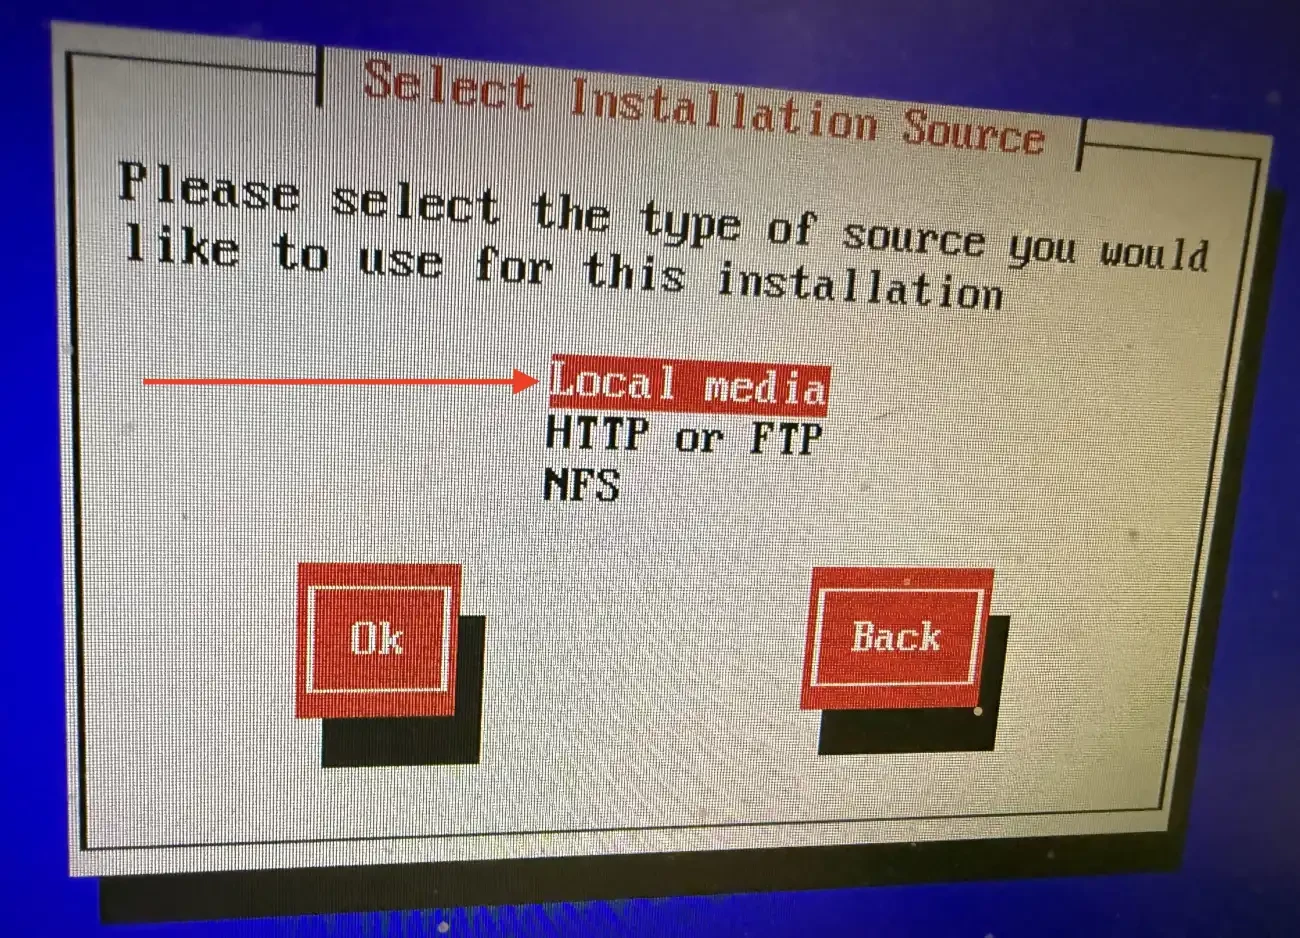
Select the local media as the installation source
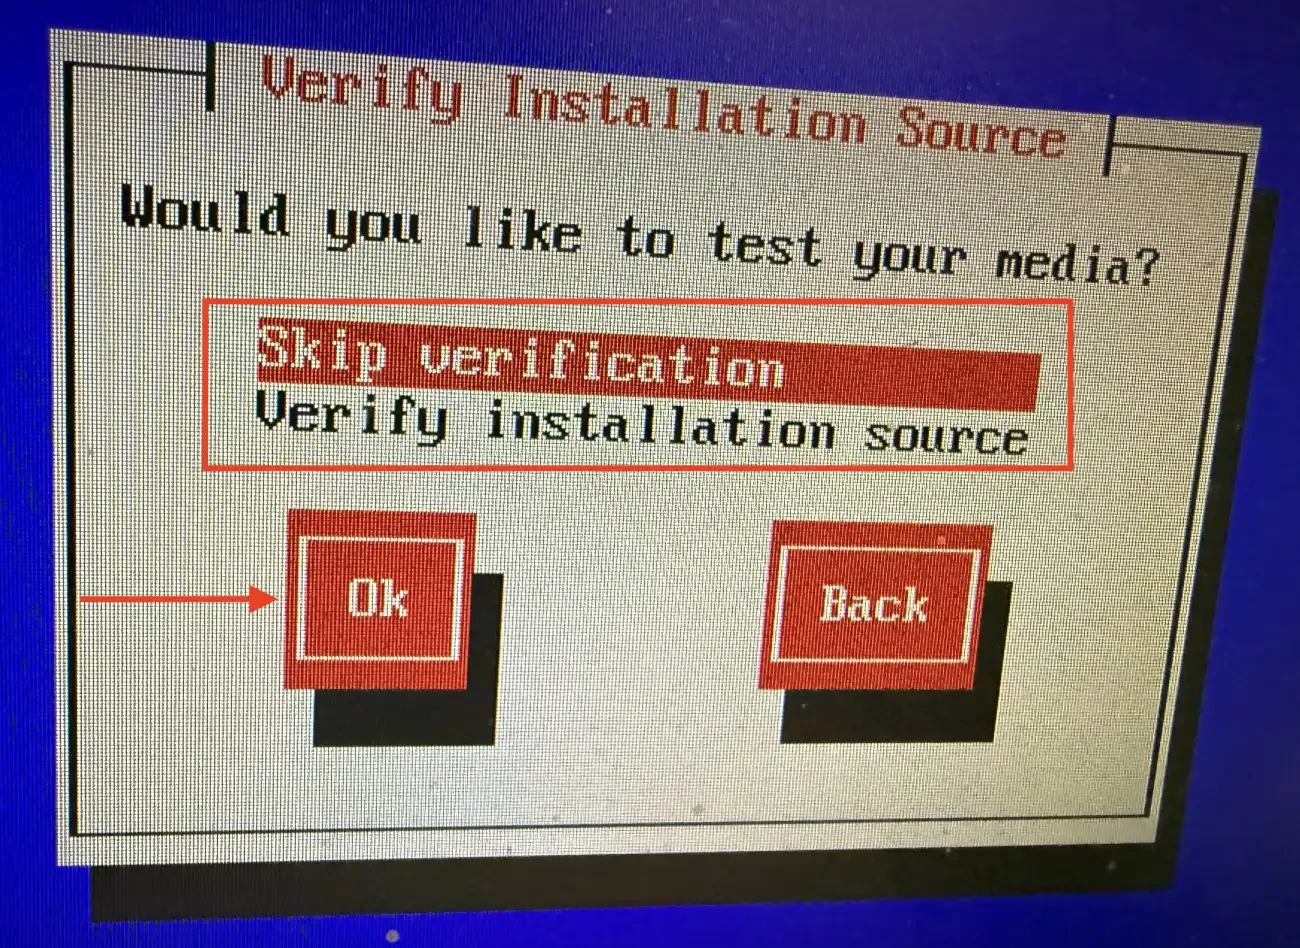
I will skip verifying installation source
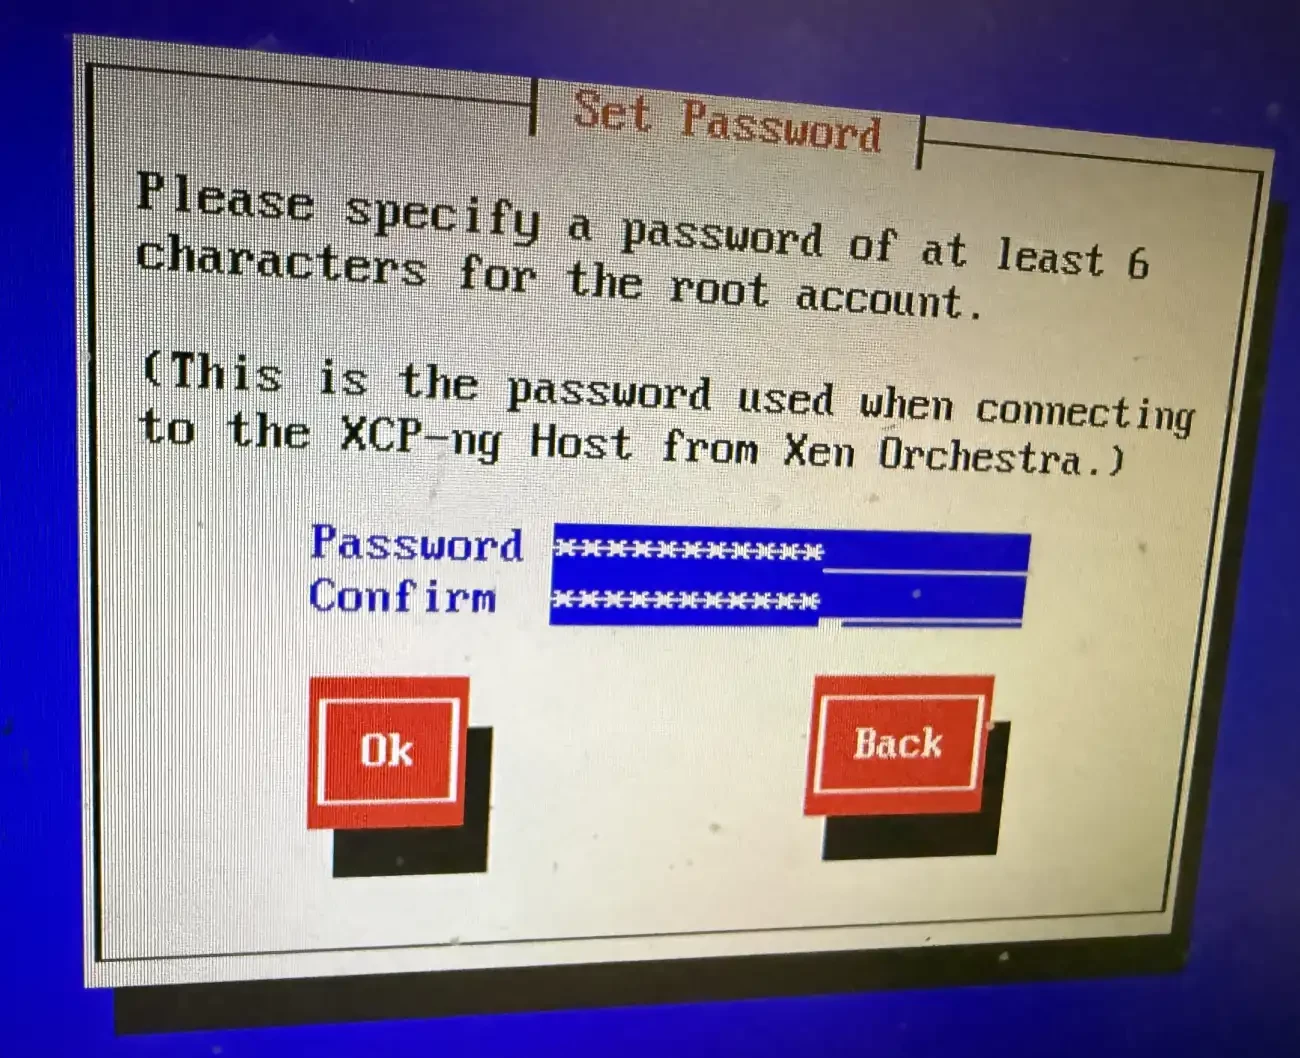
Specify a password for the root user and this will be used to access the web interface and the textbased interface as well.
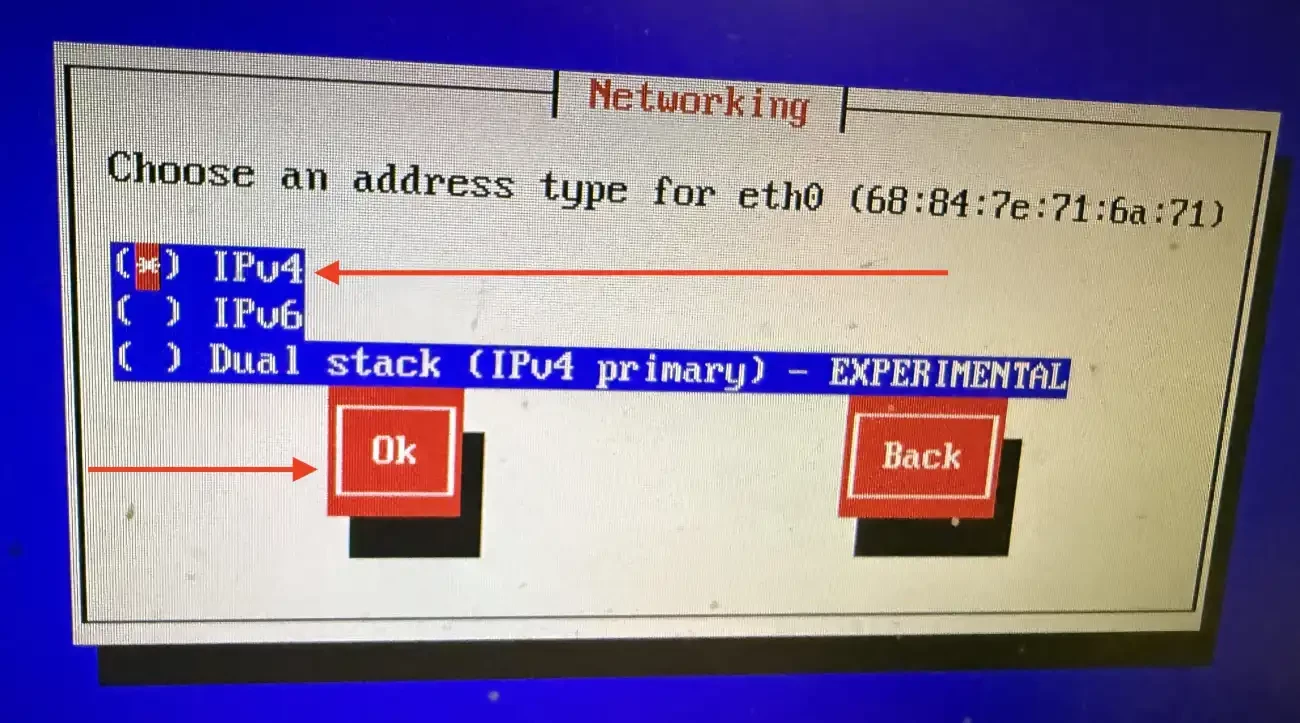
I will be assigning an IPv4 address and will click OK
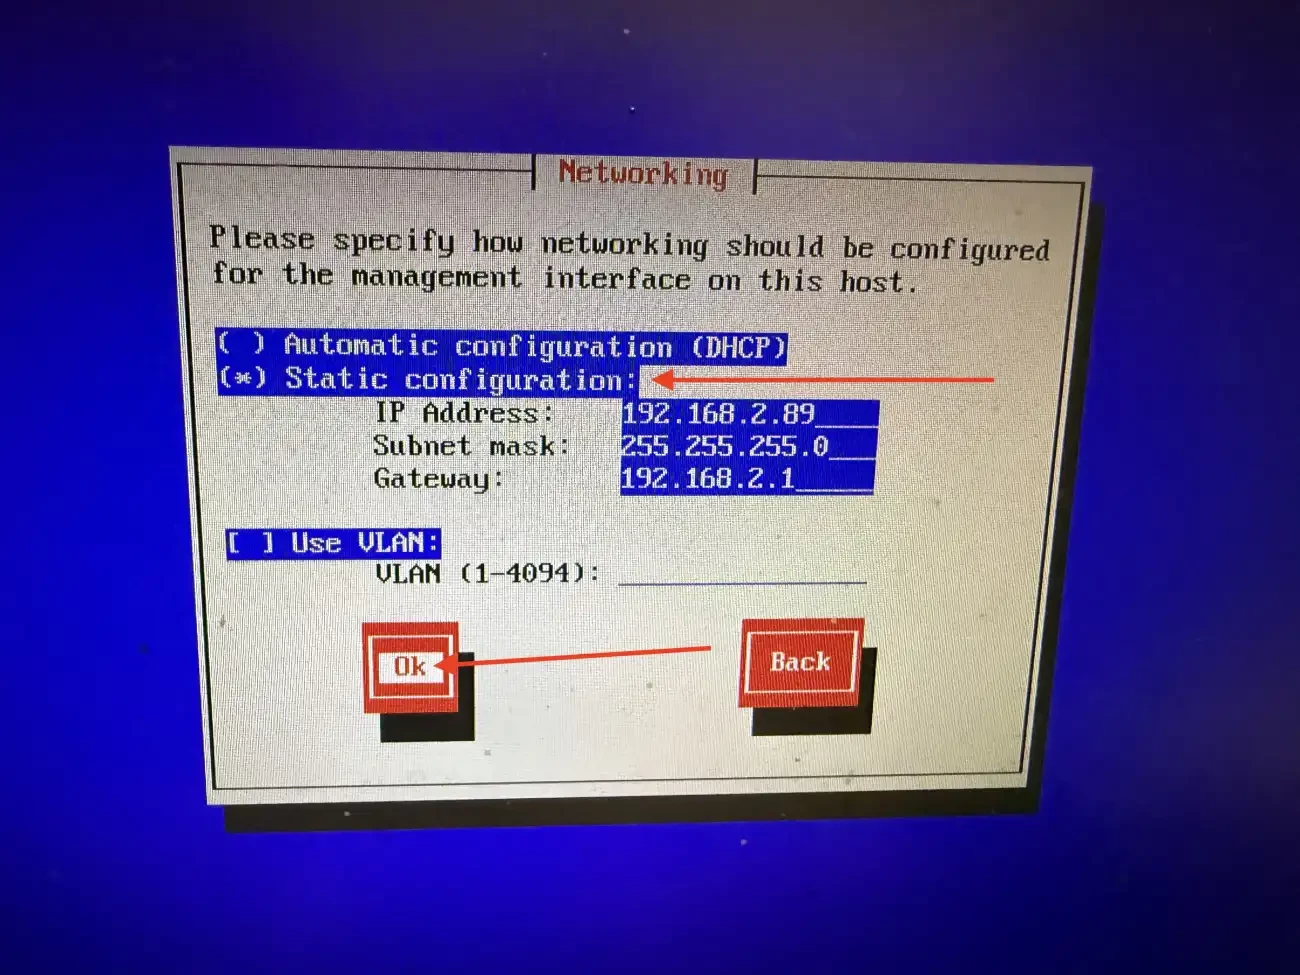
Use the space bar on your keyboard or ensure static configuration is selected. Then, enter the IP parameters as shown below and select OK.
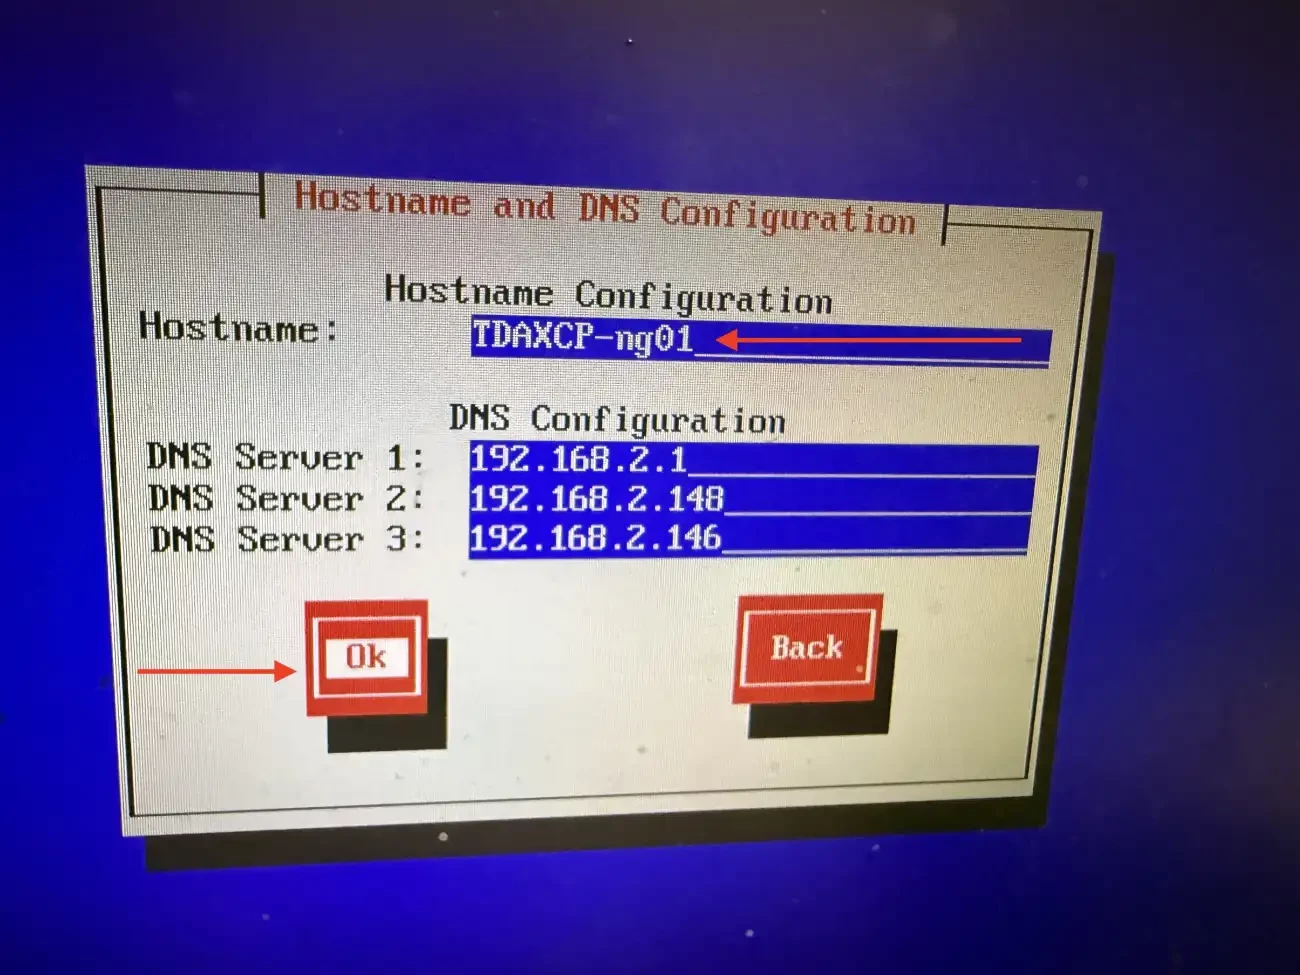
Enter your hostname and DNS information and click on OK
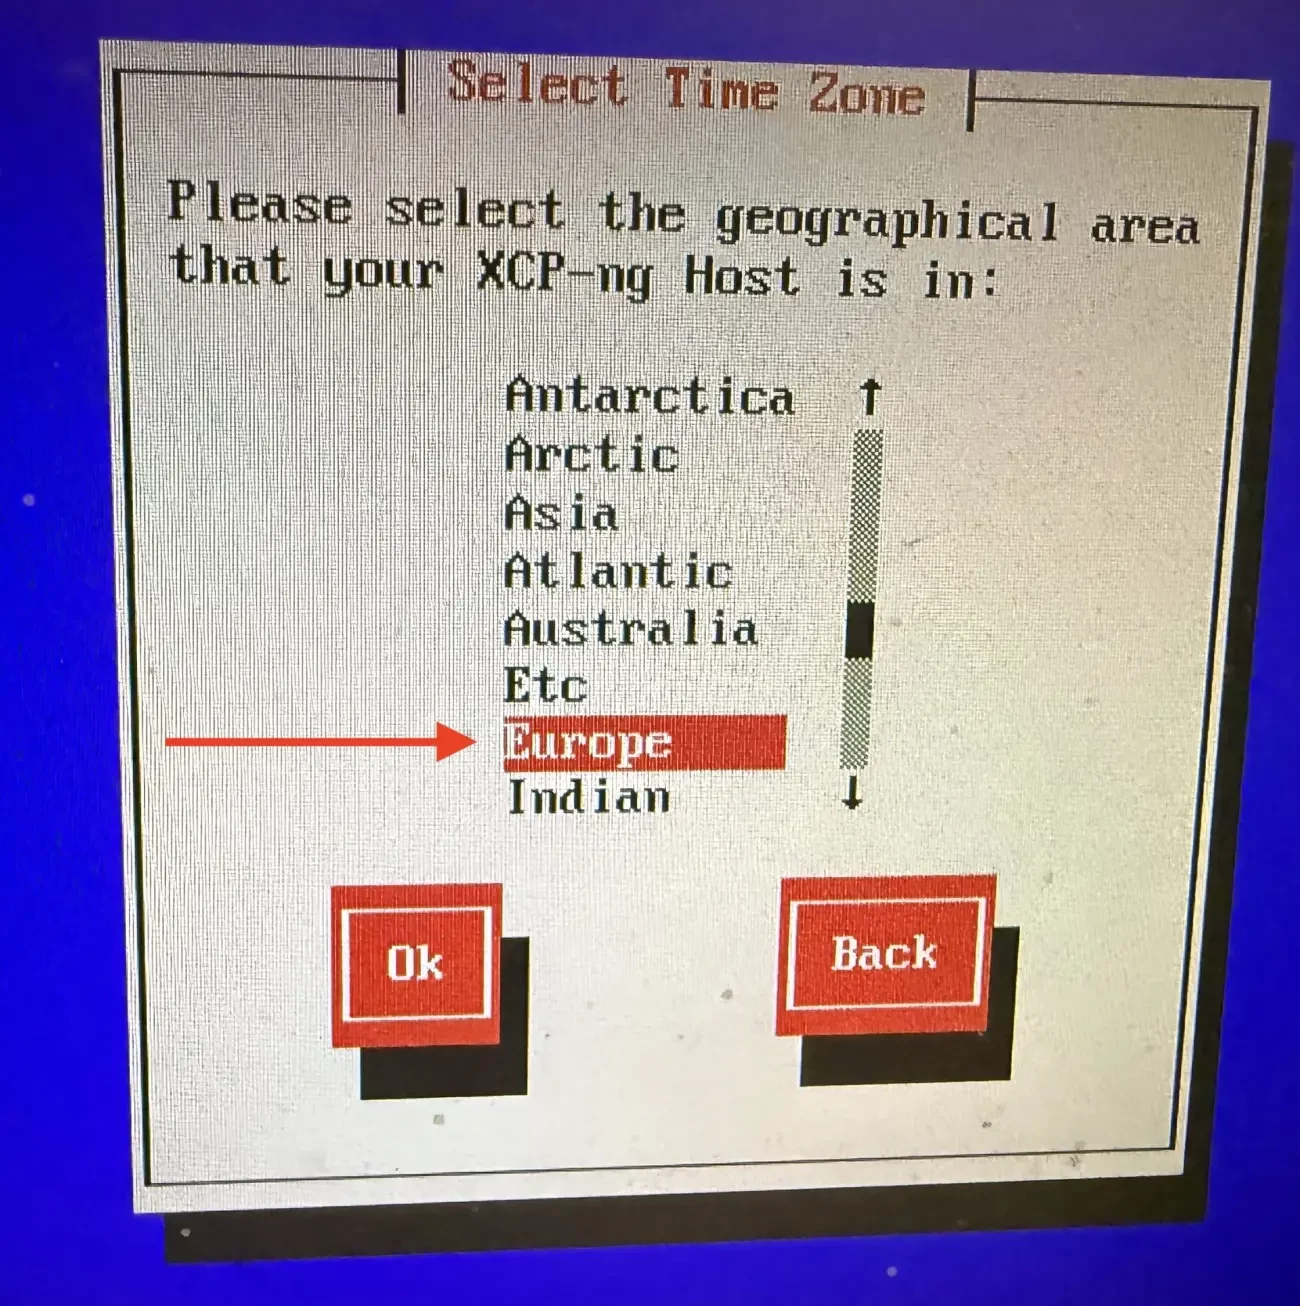
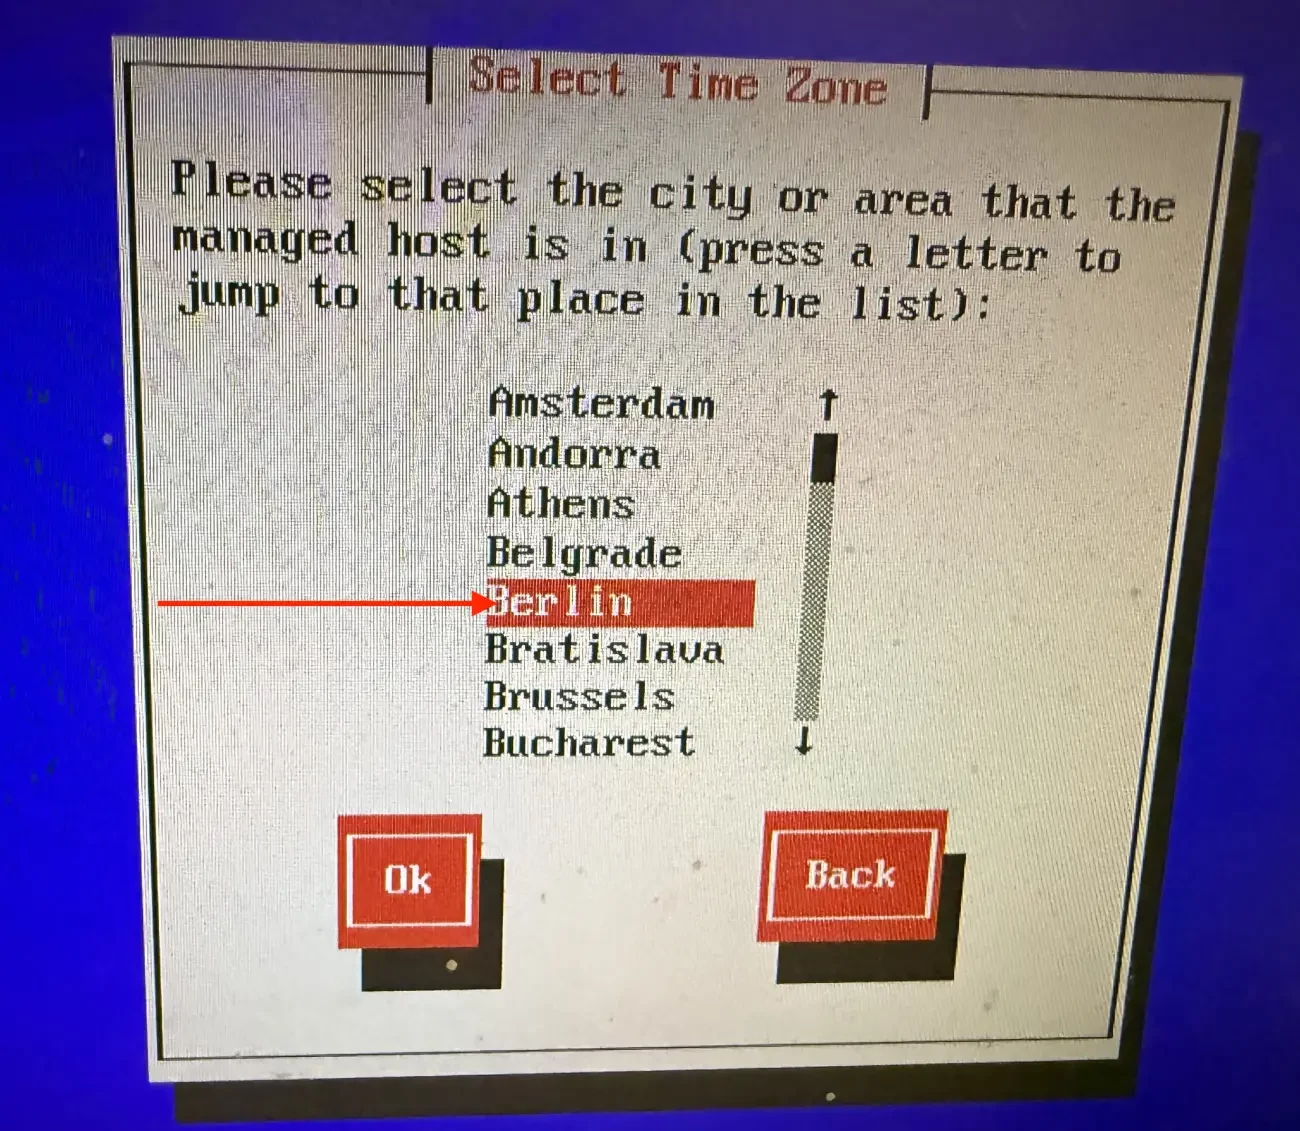
Set your geographical area
Select your city
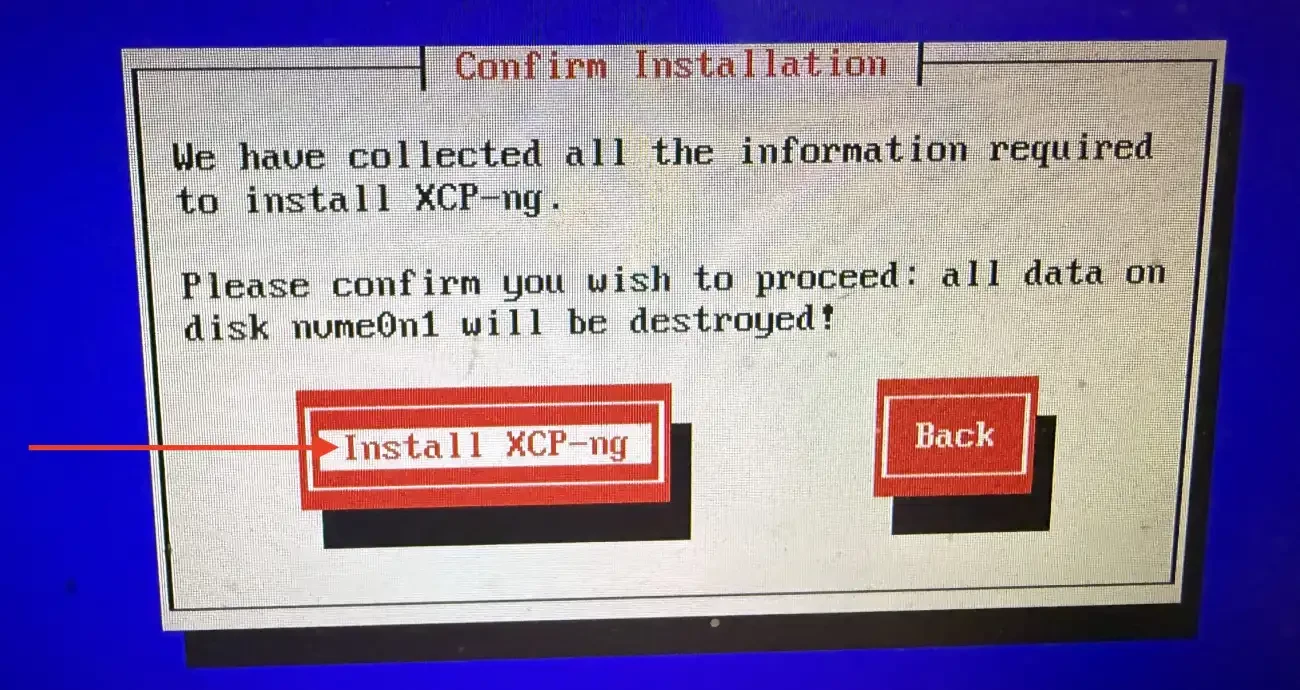
Hit the Install XCP-ng to install as shown below.
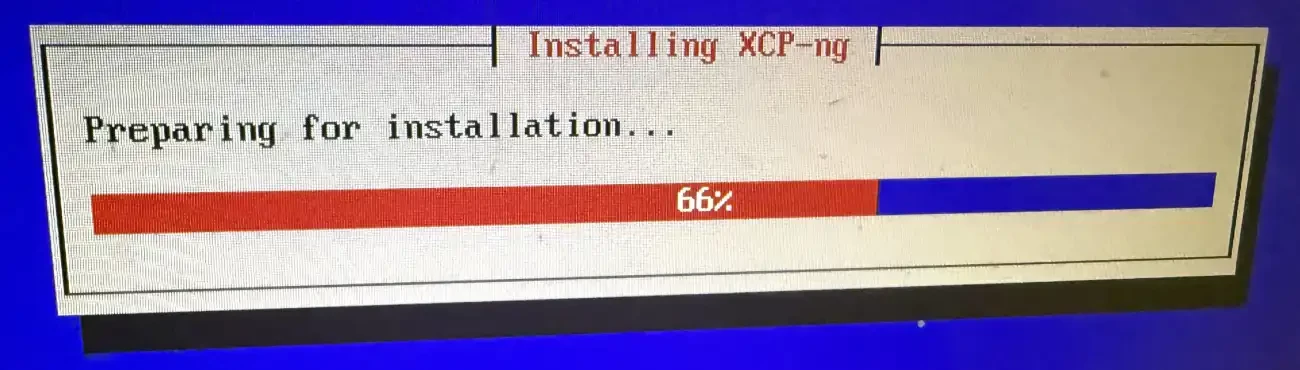
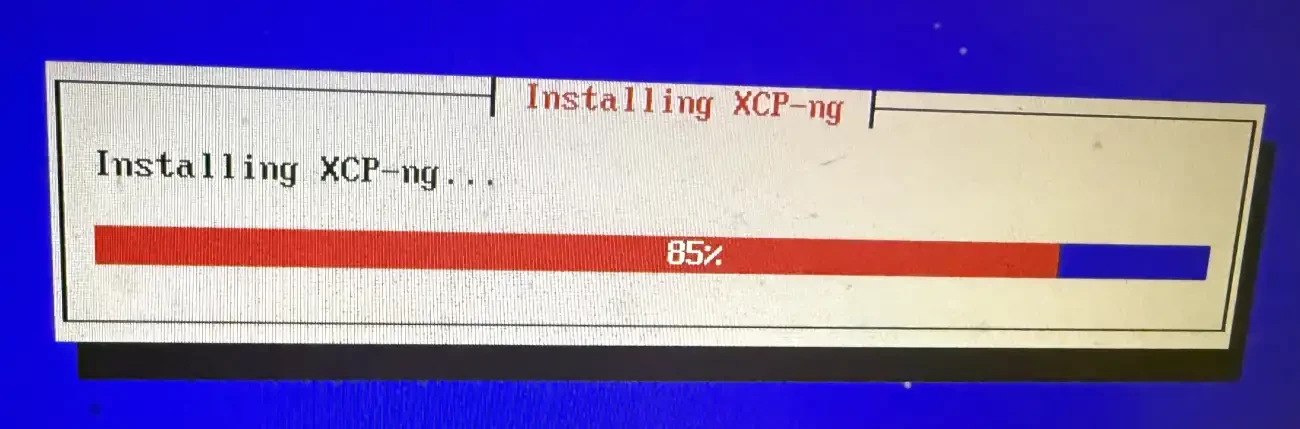
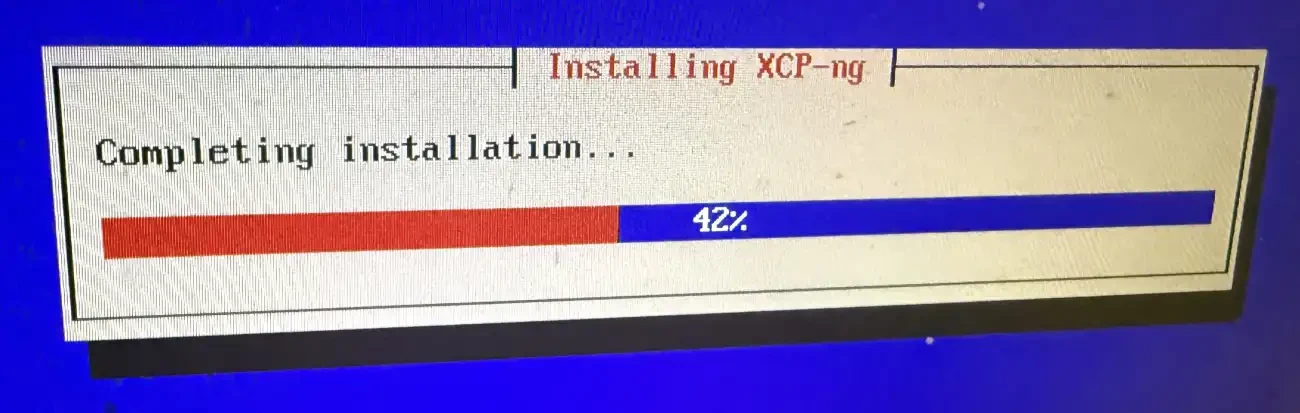
Next steps shows the installation is completing
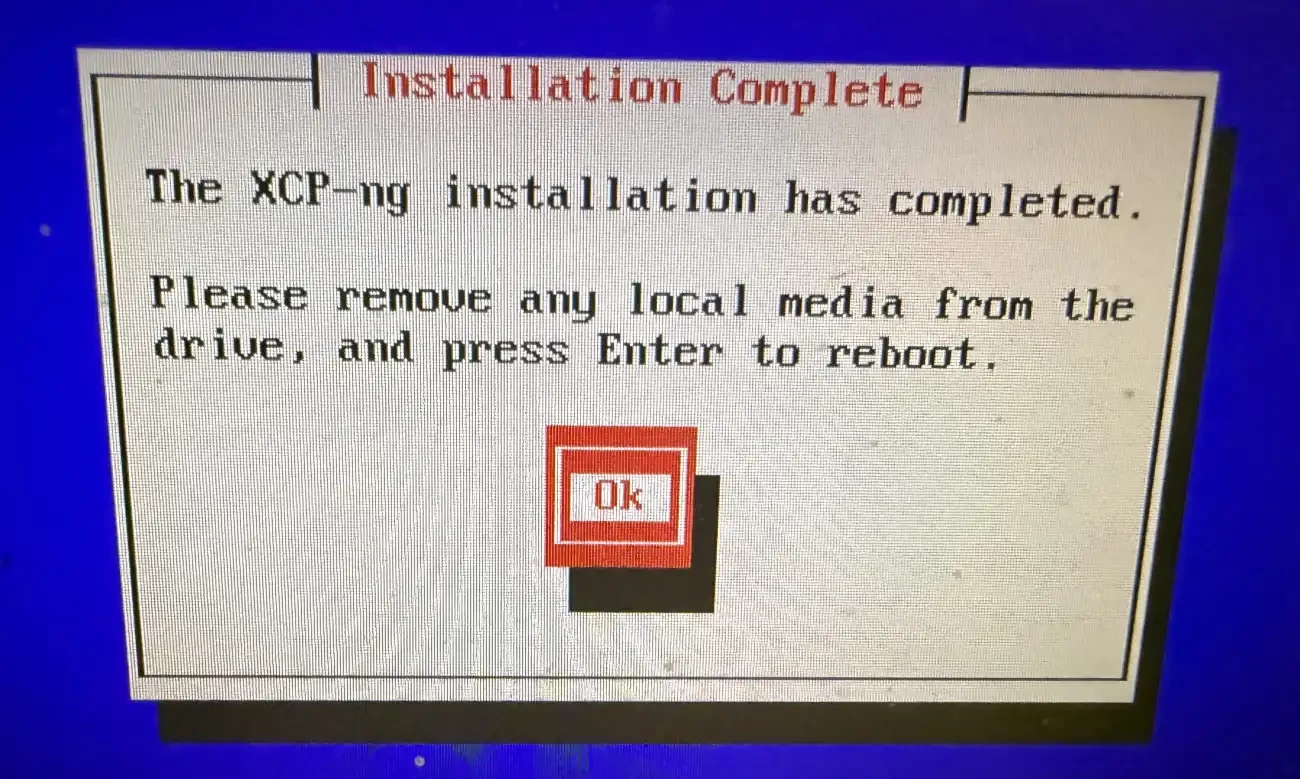
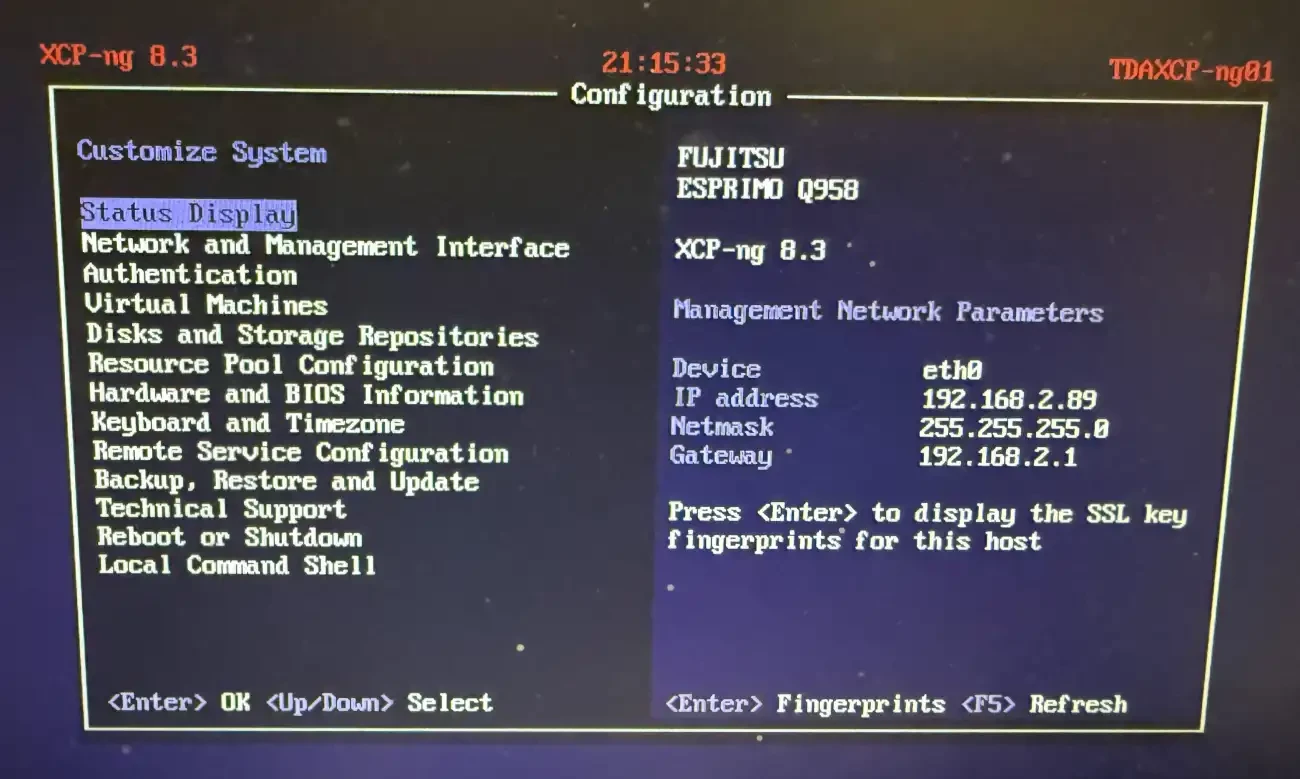
After reboot, you are prompted with the TUI console. From the here, you can manage your XCP-ng instance.
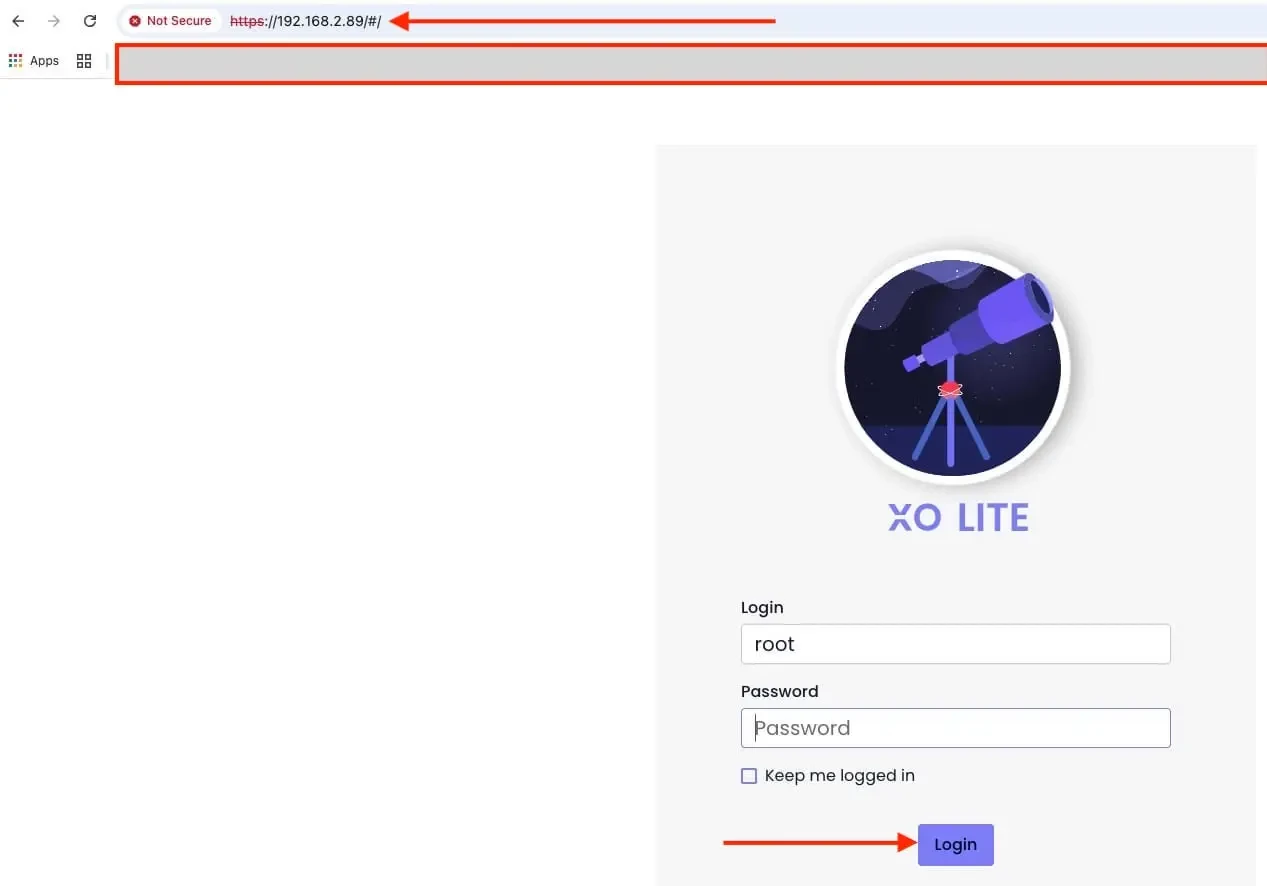
Access XCP-ng Web Interface
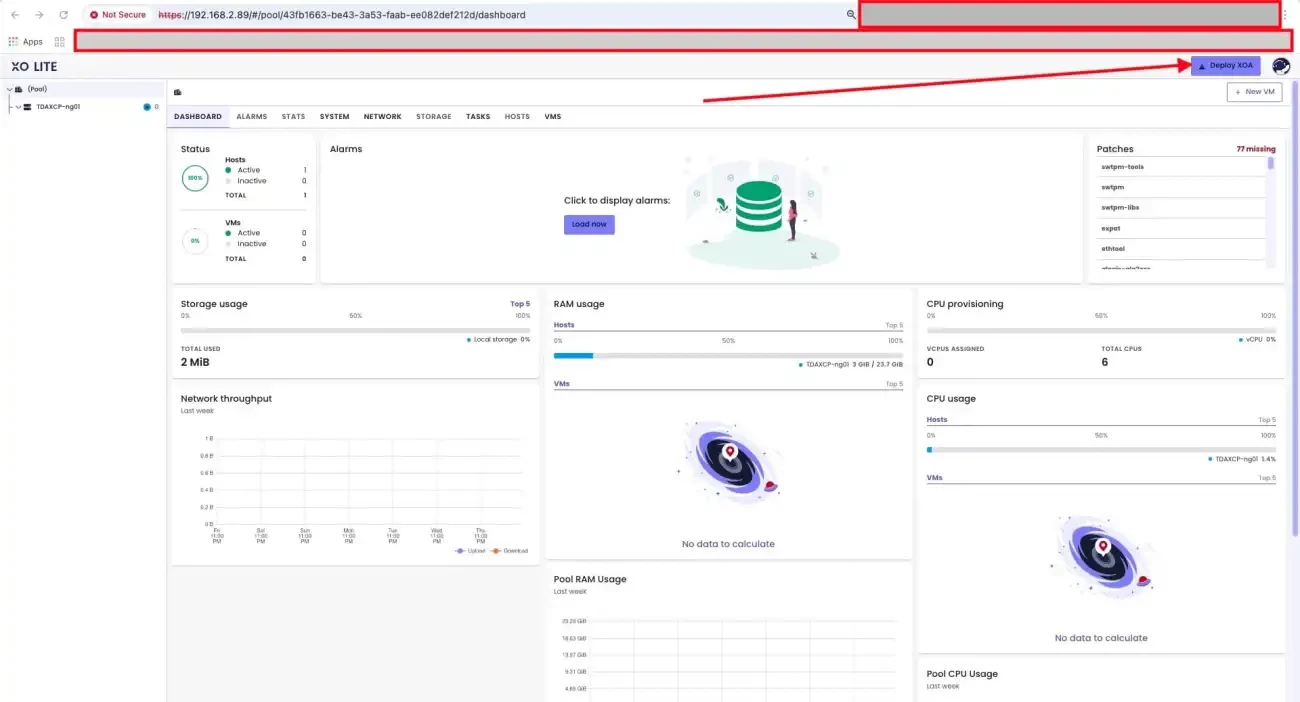
XCP-ng serves as a fully integrated virtualisation platform that requires no deep Linux or System administration expertise. You can manage it centrally through XO Lite, or Xen Orchestra XO(A) whether you run one host or thousands.
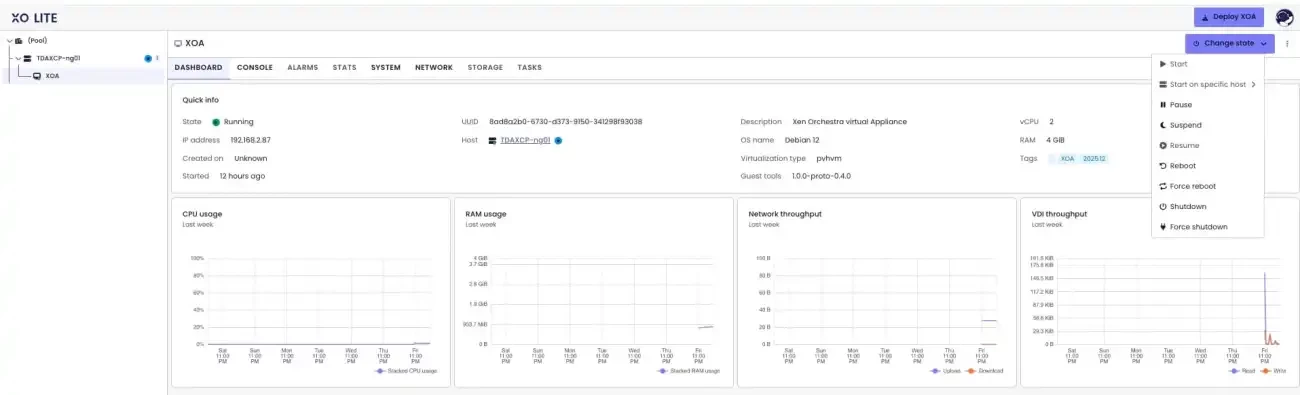
Xen Orchestra also includes built-in backup capabilities. These are the two primary ways to access your XCP-ng web interface. Below is the connection to XO Lite connection web interface
Xen Orchestra Appliance (XOA)
Lets’s deploy the XOA. XOA is meant to be used as the easiest way to test XCP-ng, but also to use it in production. This is the version professionally supported, with an updater and a support tunnel mechanism.
To do this, click on “Deploy XOA”, click on deploy XOA as show
Populate the parameters and click on deploy.
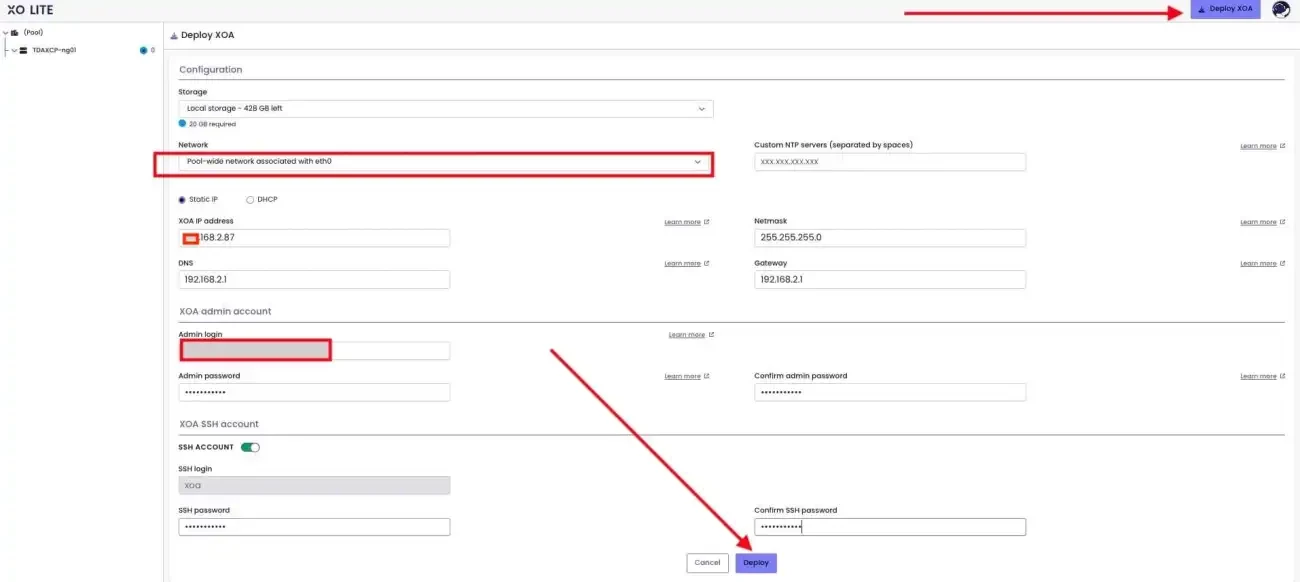
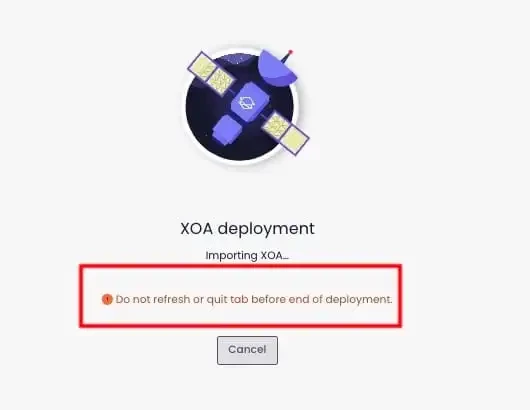
Kindly do not refresh the page below as this can interrupt the deployment of XOA
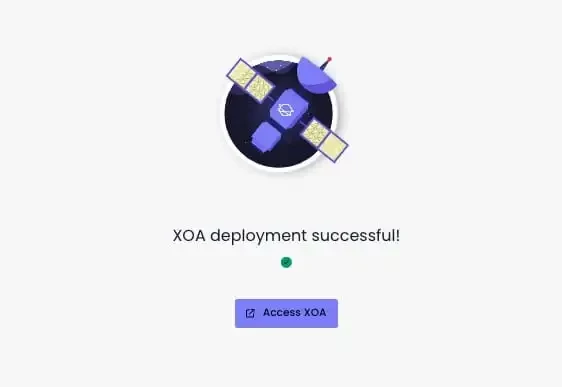
Access XOA
To access XOA, enter the IP address or click on the Access XOA from the window above as displayed in the screenshot
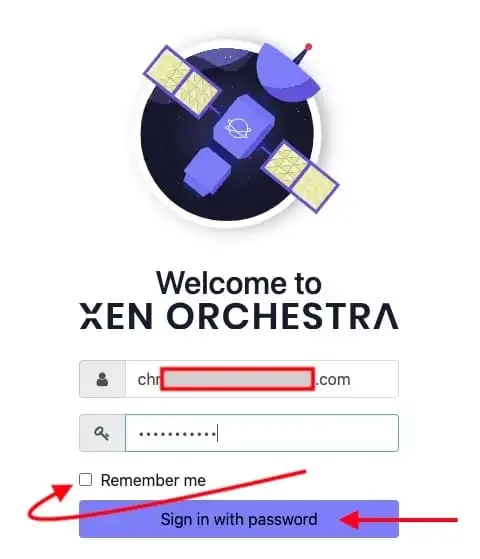
Enter your email and password to access XOA
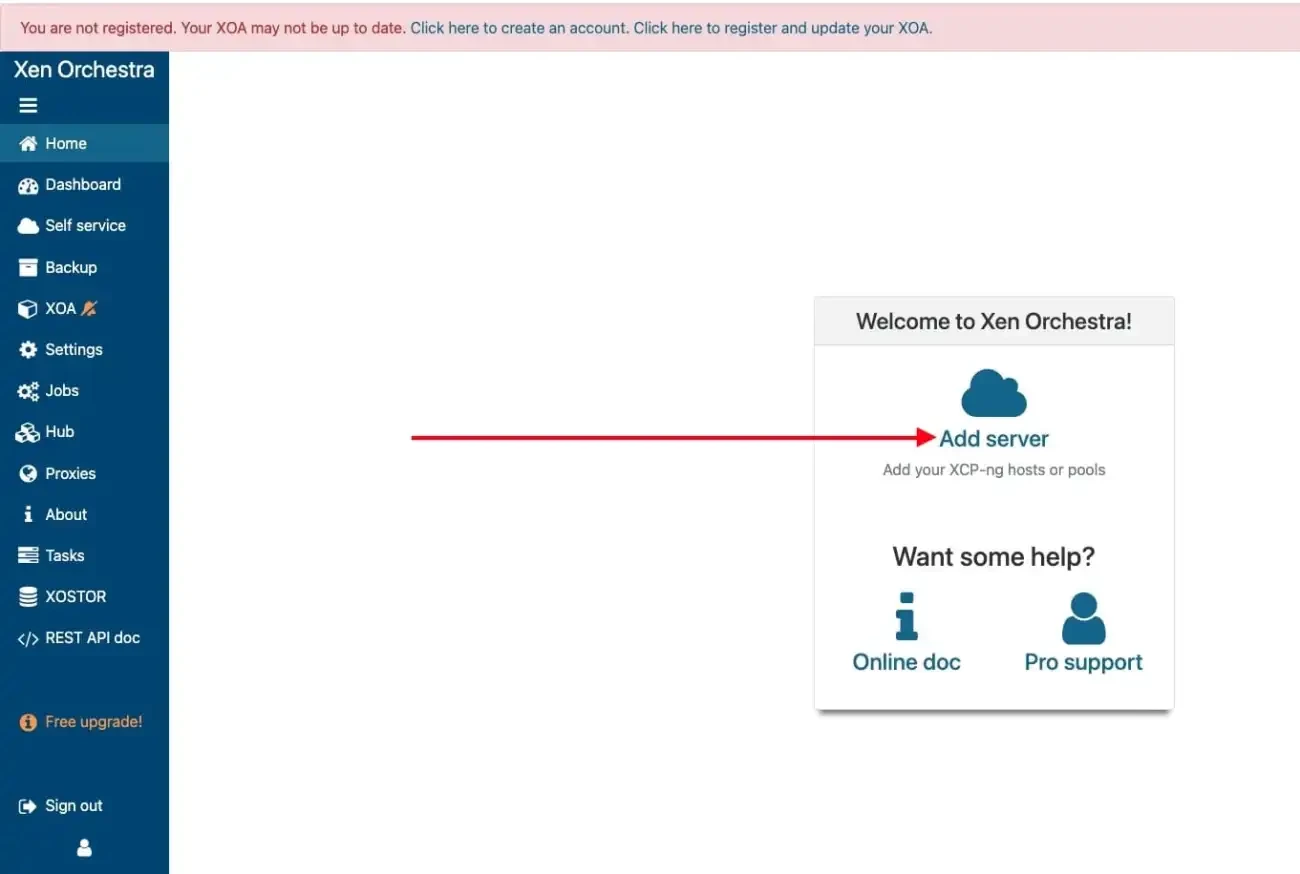
Next, click on “Add Server” to add the XCP-ng server
The default password here is root.
Let’s take a look at the Dashboard.

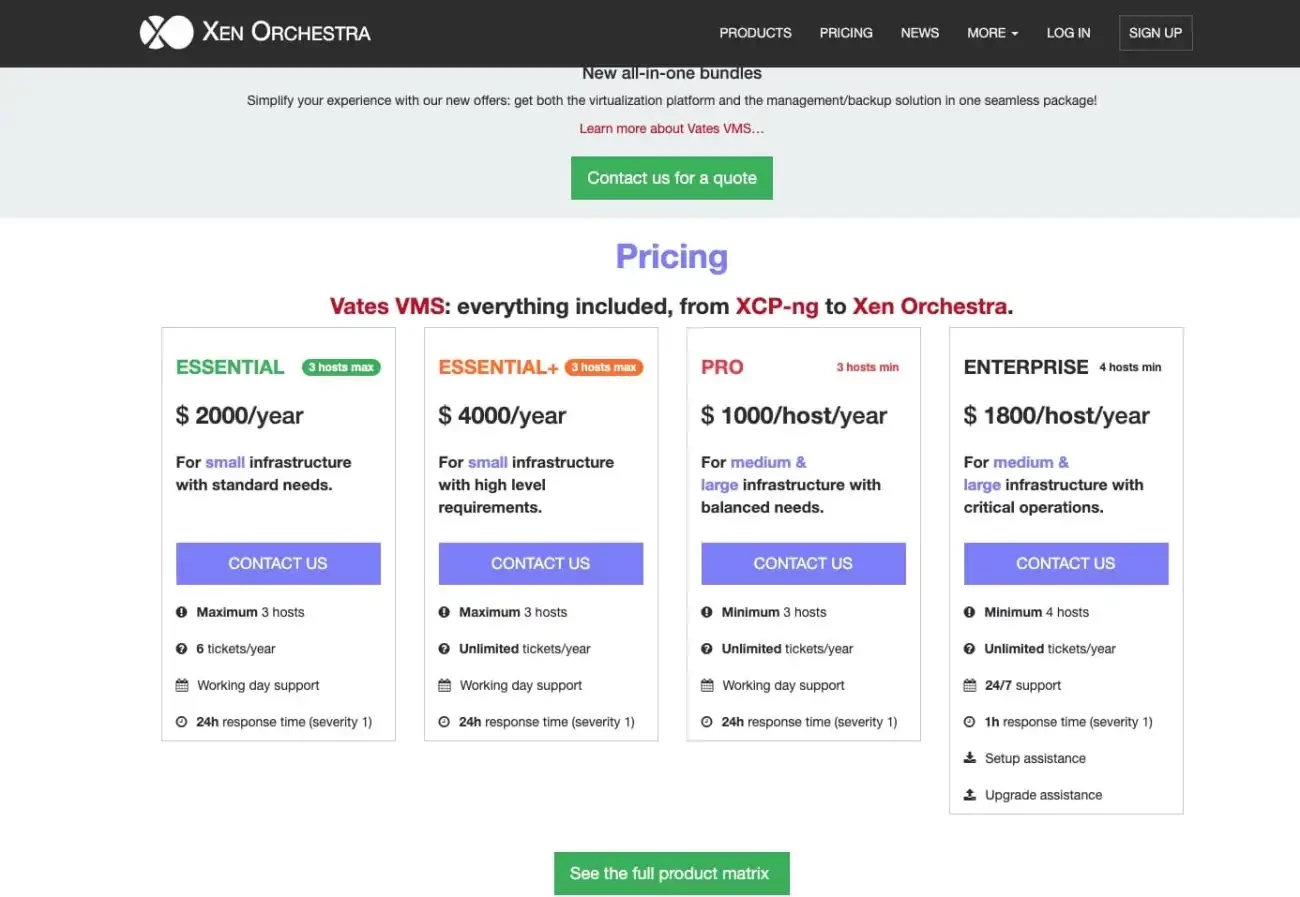
But, if you are bent on using XOA especially in production. Please, see the XOA pricing link below.
Xen Orchestra (XO)
Xen Orchestra (XO) from the sources doesn’t have QA and there’s no stable version. It’s great for a home lab or to make tests, but not for production as recommended by Vates. Here is the XO version from GitHub directly.
Storage in XCP-ng (Option 1 without XOA)
Vates encourages people to use file based SR (local ext, NFS, XOSTOR…), because it’s easier to deal with. Also, you do need at least one Storage Repository (SR) before you can create a functioning VMs in XCP‑ng. To workaround this, you can use the /media as it already exists.
Below are the storage types that are officially supported. Others are provided as-is, in the hope that they are useful to you but not maintained by XCP-ng. And they receive less testing than the officially supported ones.
| Type of Storage Repository | Name | Thin Provisioned | Shared Storage | Officially Supported |
|---|---|---|---|---|
| file based | Local EXT | X | X | |
| Software RAID | X | No. Provided as-is | ||
| NFS | X | X | X | |
| File | X | X (use with caution) | ||
| XOSTOR | X | X | X | |
| ZFS | X | No. Provided as-is | ||
| XFS | X | No. Provided as-is | ||
| GlusterFS | X | X | No. Provided as-is | |
| CephFS | X | X | No. Provided as-is | |
| MooseFS | X | X | No. Provided as-is | |
| block based | Local LVM | X | ||
| iSCSI | X | X | ||
| HBA | X | X | ||
| Ceph iSCSI gateway | X | No. Provided as-is | ||
| CephRBD | X | No. Provided as-is |
Note: Local is not not recommended for production. A local ISO SR is a directory created directly on the dom0 host. It’s only accessible on the host where the directory was created. If you do not want to create a folder before hand, you can use the “
/mediaas the path as mentioned above and click on the Create button”. This way, the below step to make a directory can be ignored. Alternatively, you can use the a cheap USB/SSD →/dev/sdaand then use for Local EXT SR.
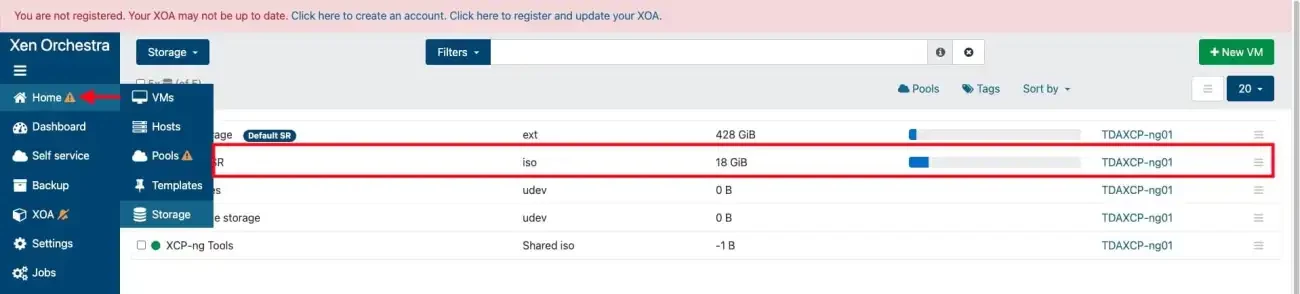
Follow the steps to create a storage before creating a VM. To be able to attach an “OS-ISO” via the XO Lite interface. You are required to create an ISO SR (storage repository) on the XCP-NG Host itself via the XO Lite with the below. You can take a look at this link for more information if you wish to use a specific folder.
mkdir -p /var/opt/xen/iso_store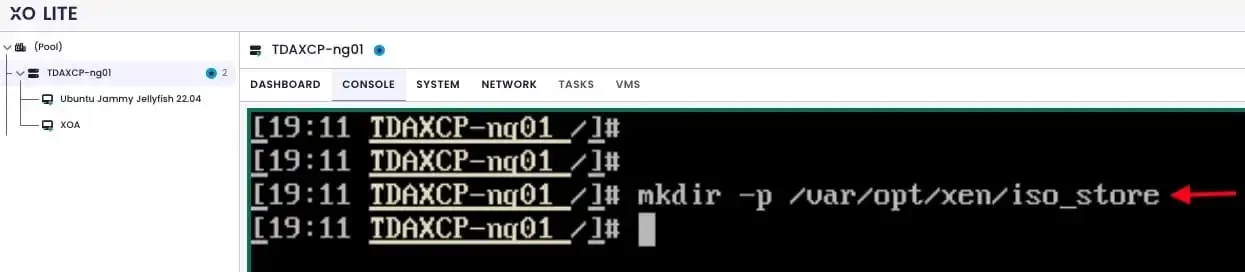
For the rest of this steps. Please, see the original blogpost “A-Z of XCP-ng and Xen Orchestra setup and VM Creation”.
Storage in XCP-ng (Option 2 with XOA)
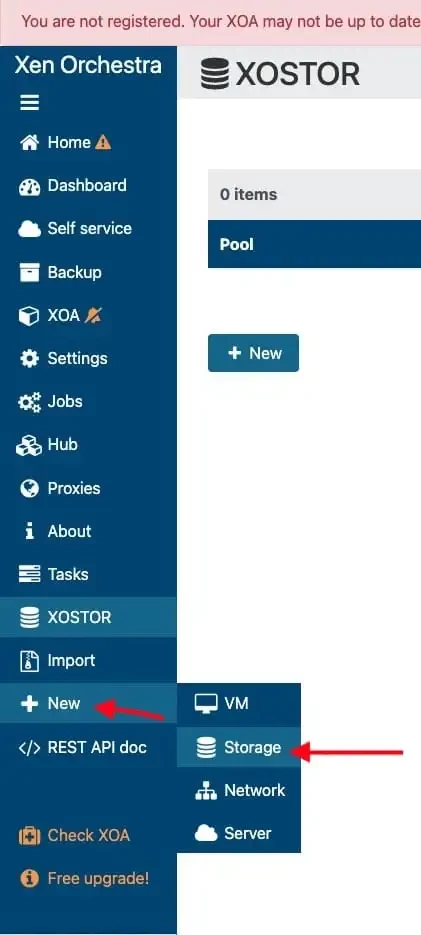
To create a storage, please navigate to the XOA or XO as the case maybe. Click on New and then on Storage as shown below.
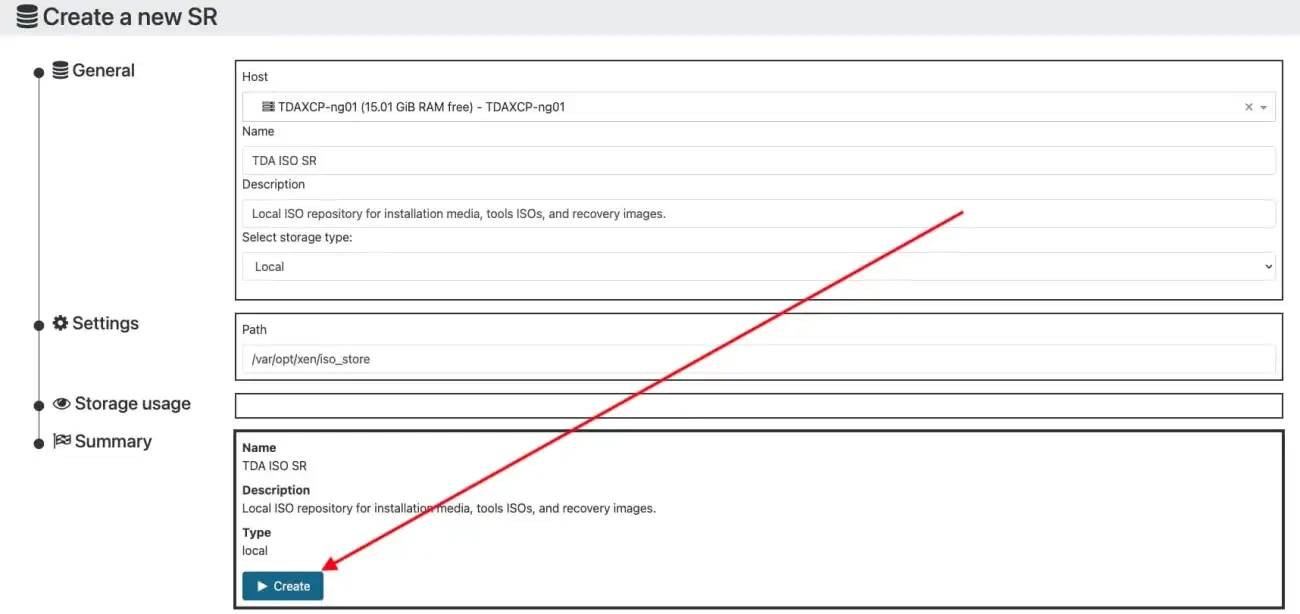
Remember to create your directory as mentioned above. Else, you will have numerous errors in this section except you you use the /media directory. Populate the fields as shown below and click create. Remember to choose the right storage type for ISOs.
Note: Local is not recommended for production. A local ISO SR is a directory created directly on the dom0 host. It’s only accessible on the host where the directory was created.
You can access also from the Home menu as shown below.
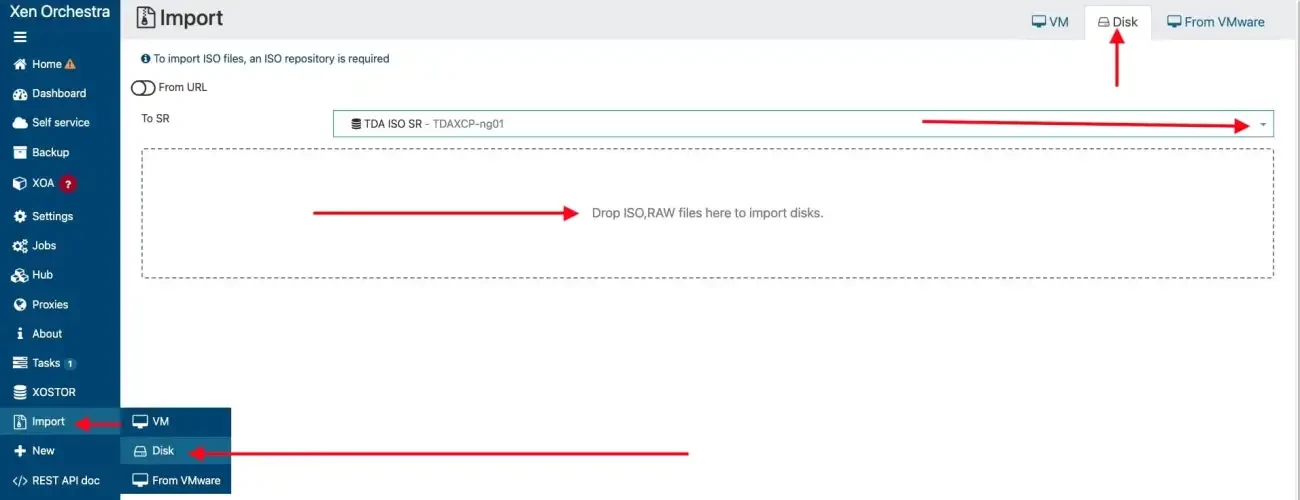
Import ISO to Storage Repository
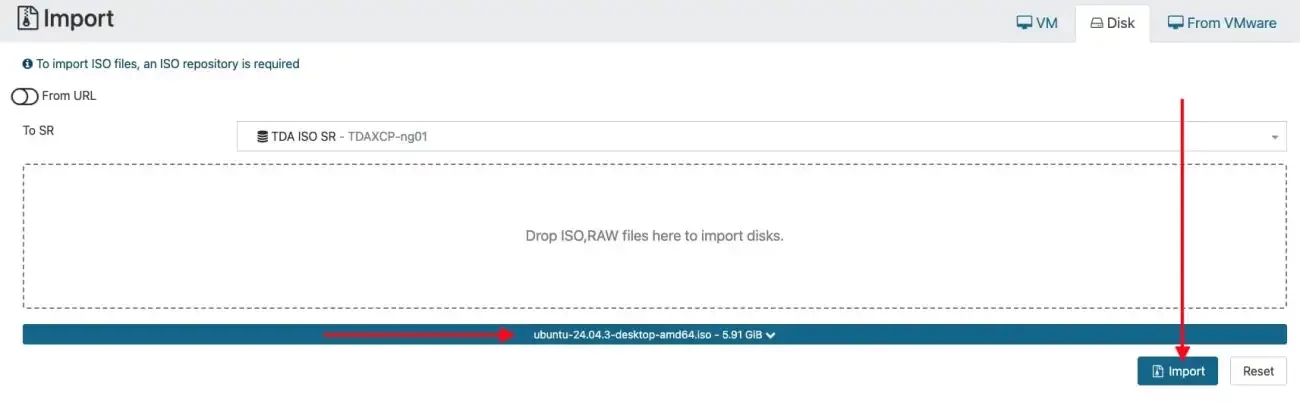
Kindly proceed and download Ubuntu from this link. With this, you will always be prompted to download the most latest version.
Now you can import your favourite distro ISO via Xen Orchestra directly. in the left menu, go in “Import”, then “Disk”, select your freshly created ISOs SR and then drag & drop your ISO.
Hit the import button

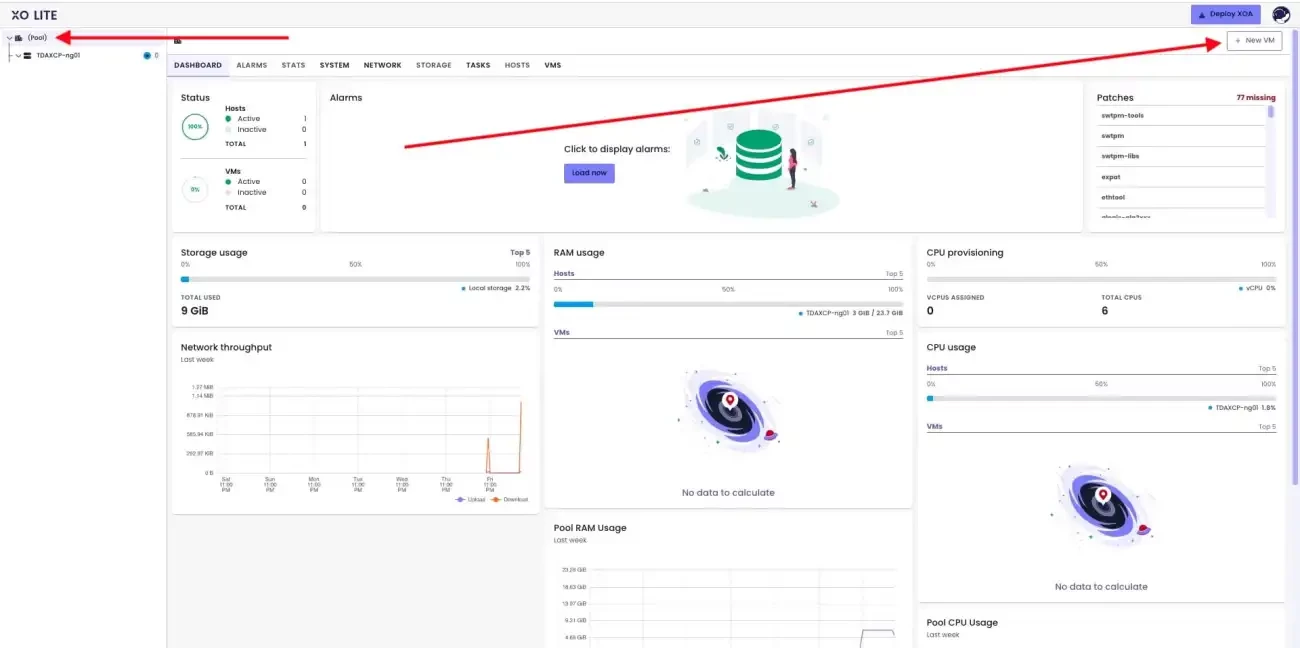
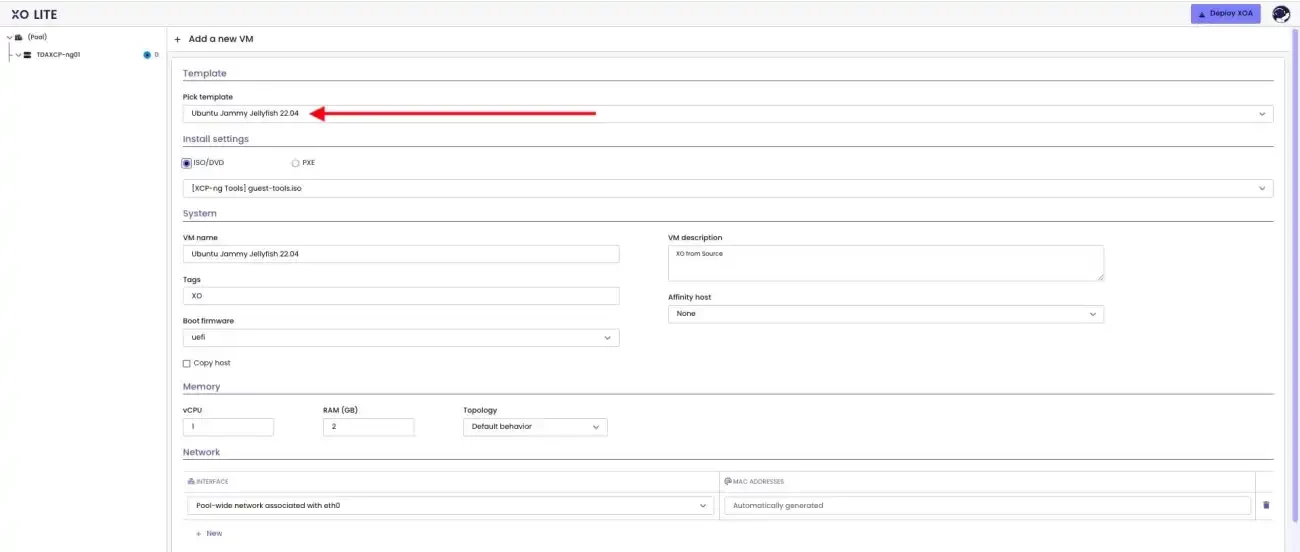
Option 1: Create a VM via the XO Lite
To do this via the XO Lite UI, click on “New VM”. If you follow the steps discussed in in this section “Storage in XCP-ng (Option 1 without XOA)” above. You can have a working VM using the Xo Lite and Commandline.
Option 2: Create a VM via the XOA
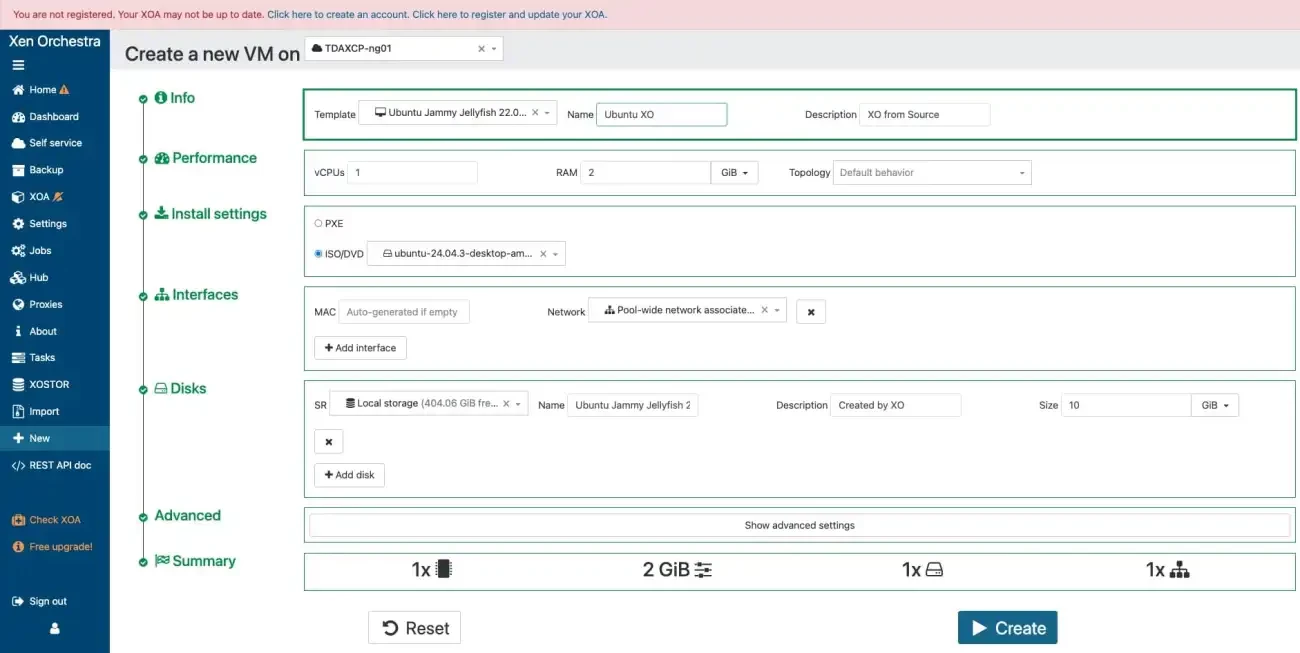
To create a VM via the XOA, click on “New VM”.

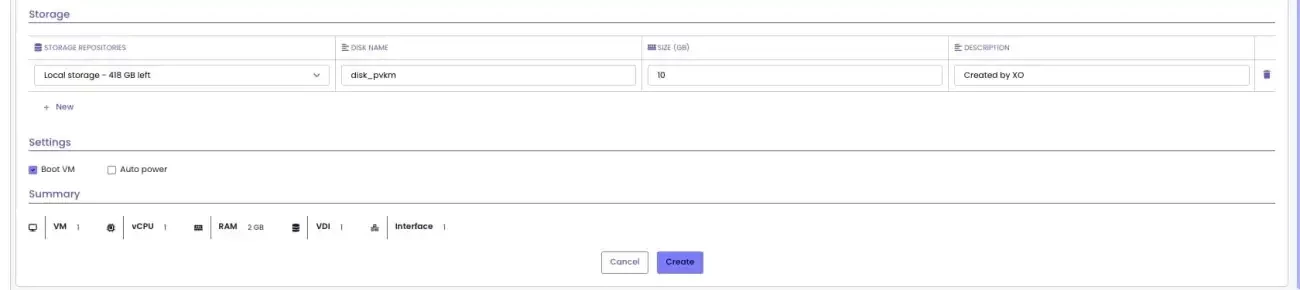
Populate the “create a new VM” fields as shown below.
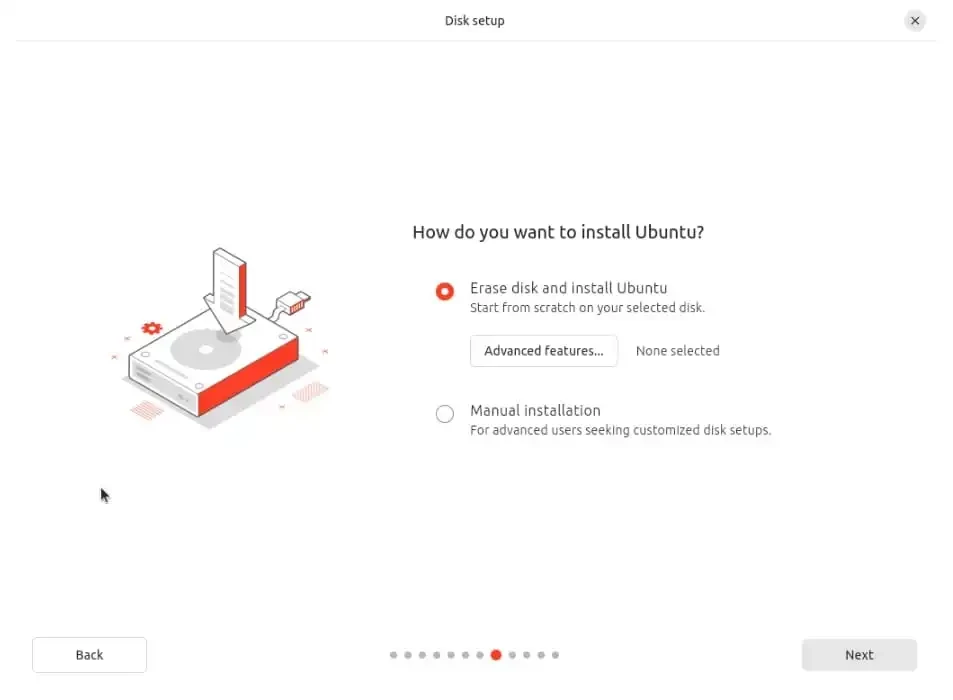
Choose the first option. This will enable you try Ubuntu before installing it
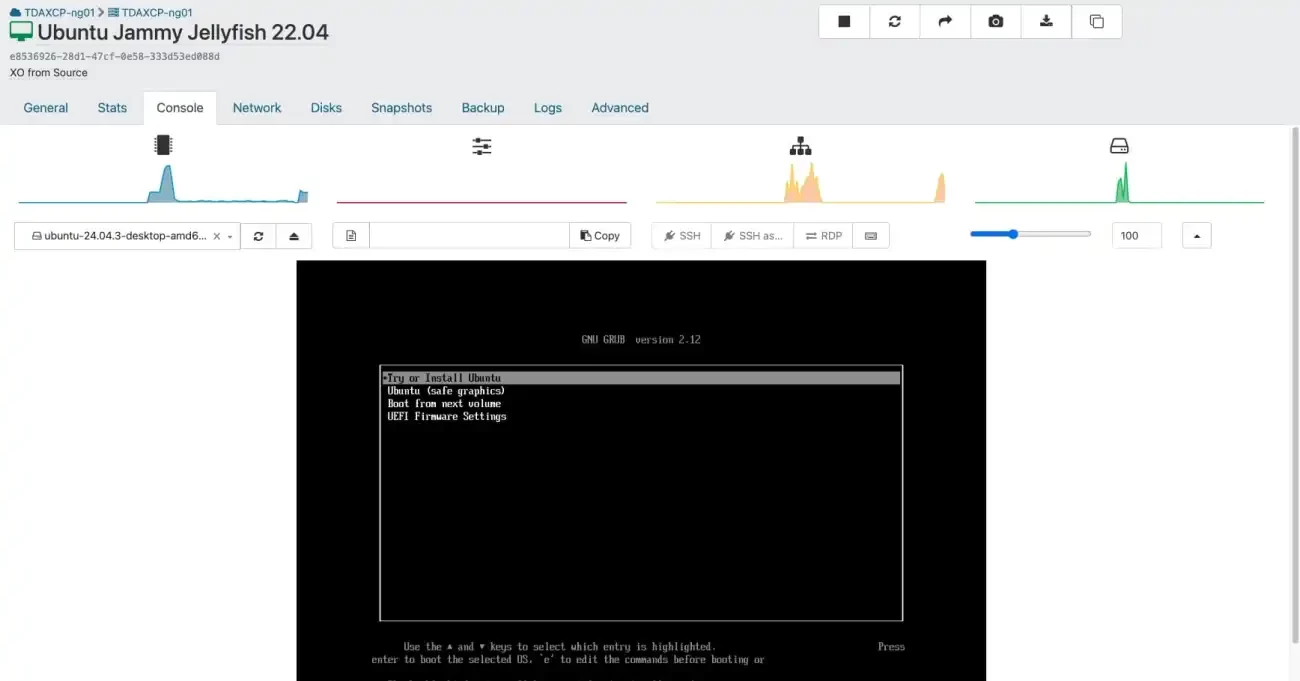
Now, you have booted into the Ubuntu LIVE session (not installed yet). “Try Ubuntu” lets you test before committing; installer still available on desktop. You can safely close and install or continue to test.
Enter your password to access your VM

Install Guest Tools
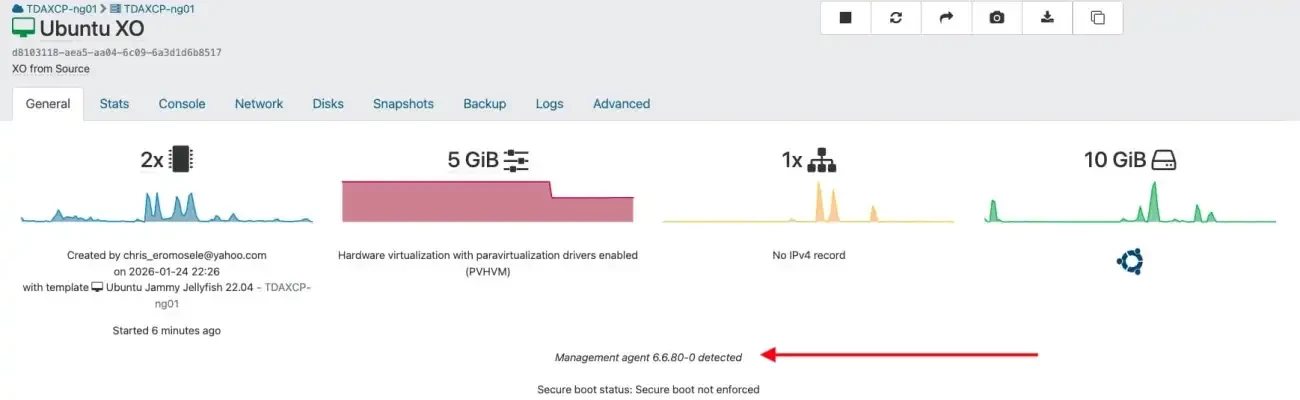
As you can see below in the image, the management agent not installed”. This warning is because of the missing XCP-ng guest tools. When installed, this will fix the console resolution, graceful shutdowns, and perf metrics.

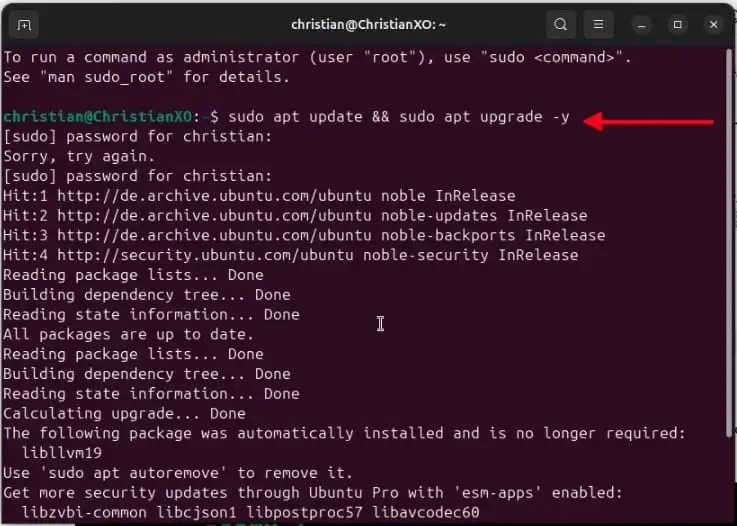
To fix this, launch the Terminal on the XO VM as it is in my case.
Note: We will be using this VM to run the Community Xen Orchestra (XO)
Run the command below to downloads fresh package lists from Ubuntu mirrors (security patches, new versions), and install updates.
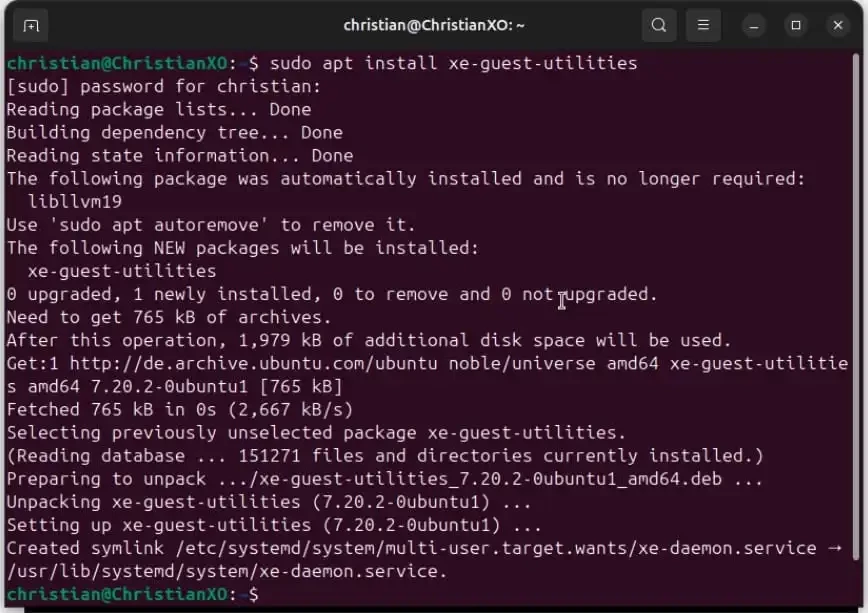
Install the guest utilities
As you can see, the managment agent has been detected.
XO Install
I will be using Ronivay’s script due to the below reasons. Soft life! This is because, it is automated, beginner-friendly, handles SSL/updates, pulls official sources. If you love hard life, you can use the manual GitHub steps
| Aspect | Ronivay Script | Official Manual |
|---|---|---|
| Ease | 1 script, about 15 mins or so | Multi-step, error-prone |
| SSL | Built-in cert gen | Manual OpenSSL |
| Updates | ./xo-install.sh | Git pull/yarn rebuild |
| Support | Community-tested | Official docs only |
| Ubuntu | Perfect match | Generic Debian |
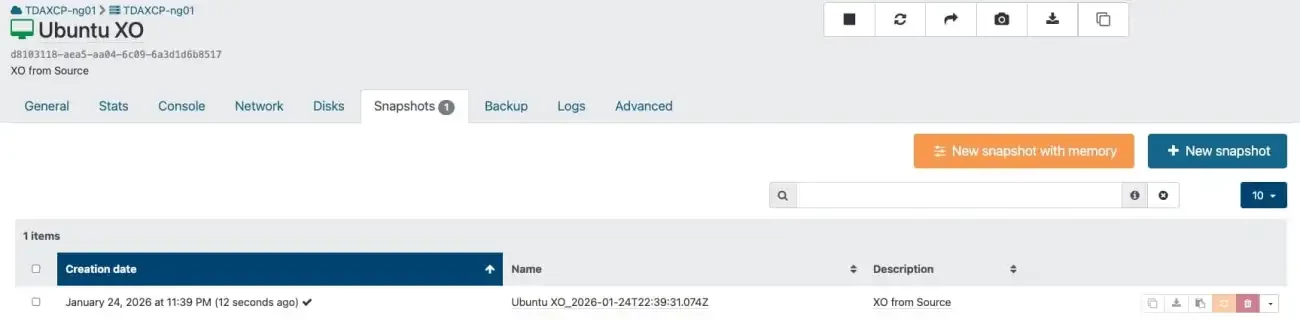
Before proceeding, I will urge you to create a snapshot should in case something goes wrong.
Please, run the command below to install Git
sudo apt install git curl openssl -y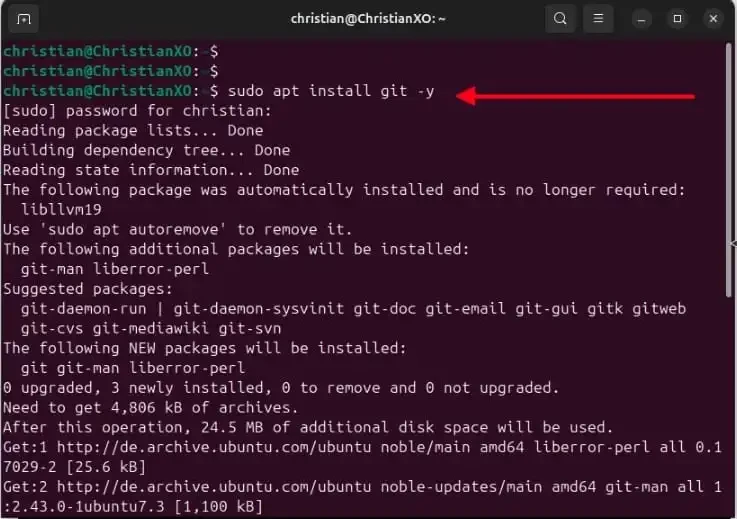
ext, clone Repo with the below command
sudo git clone https://github.com/ronivay/XenOrchestraInstallerUpdater.git
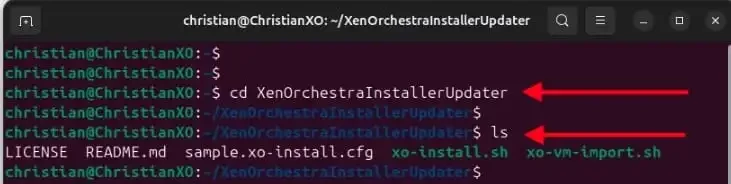
cd XenOrchestraInstallerUpdater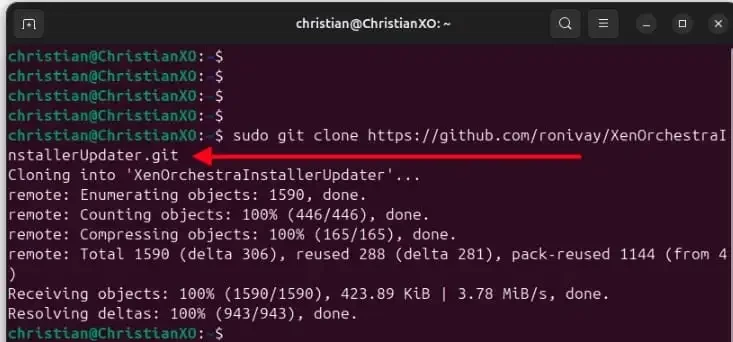
Run the ls command to see the downloaded files.
Next, copy and edit the config. Use the below commands.
sudo cp sample.xo-install.cfg xo-install.cfg
sudo nano xo-install.cfg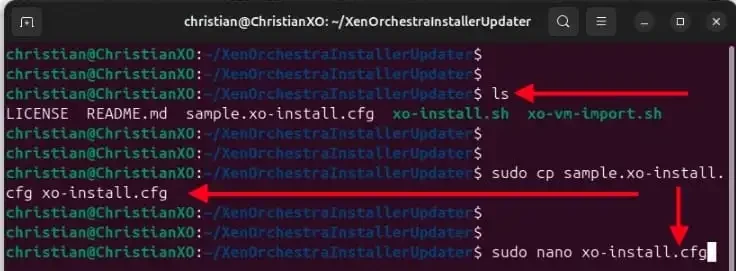
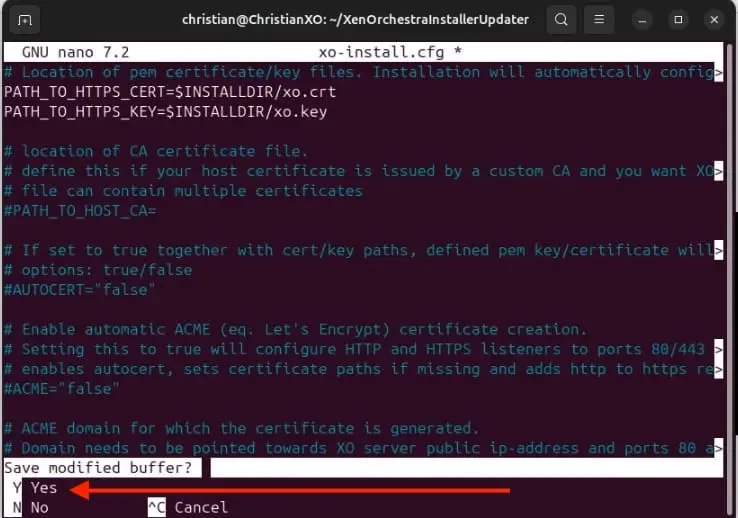
Change Port
Please, change Port from 80 to 443 and uncomment the below
#PATH_TO_HTTPS_CERT=$INSTALLDIR/xo.crt
#PATH_TO_HTTPS_KEY=$INSTALLDIR/xo.key
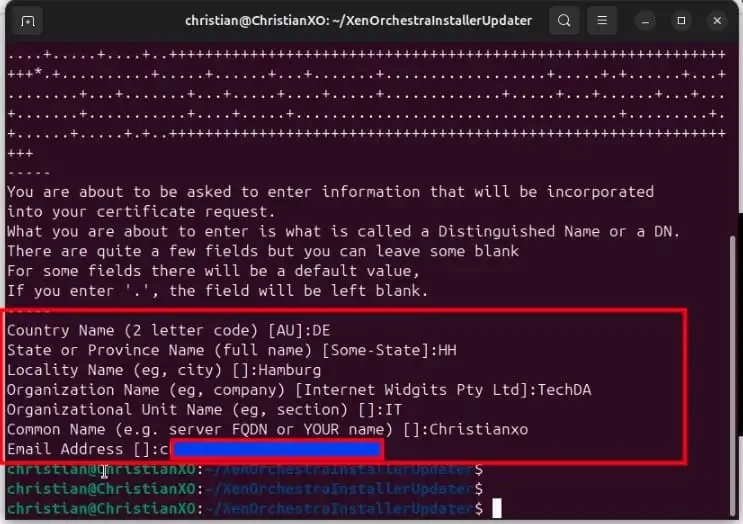
Create SSL cert and directory.
sudo mkdir -p /opt/xo/ssl
sudo openssl req -new -x509 -days 365 -nodes -out /opt/xo/ssl/xo.crt -keyout /opt/xo/ssl/xo.key
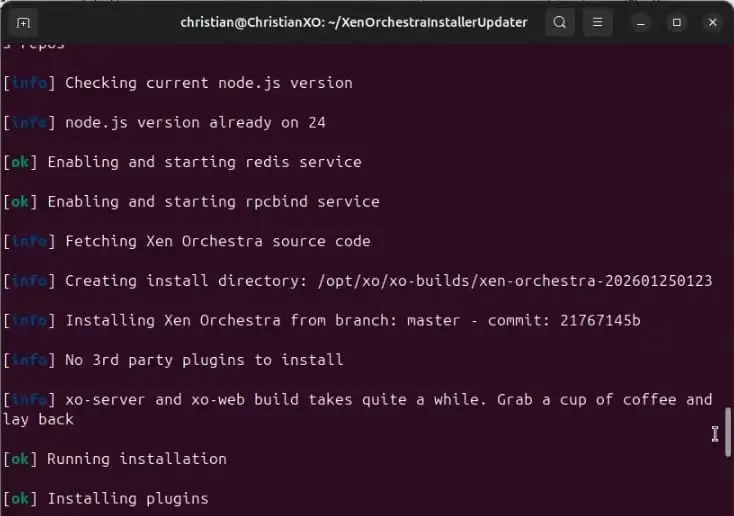
Next, start the installer with the command below and type “1” as shown below. You can run into this issue when installing XO “How to fix the Filesystem root is running low on Disk space”.
sudo ./xo-install.sh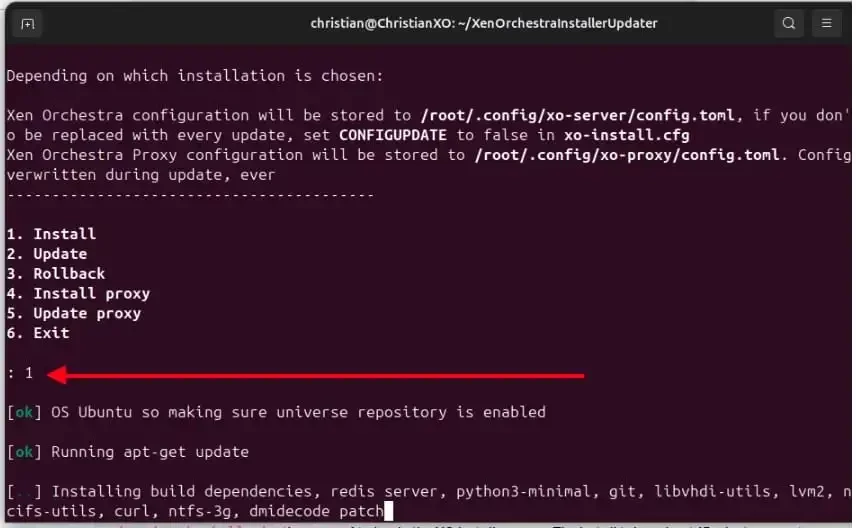
As you can see below, the installation is in process and various services are enabled and started.
As you can see, the XO installation is completed successfully. Kindly note the default username and password as shown in the image below.
Login: admin@admin.net / admin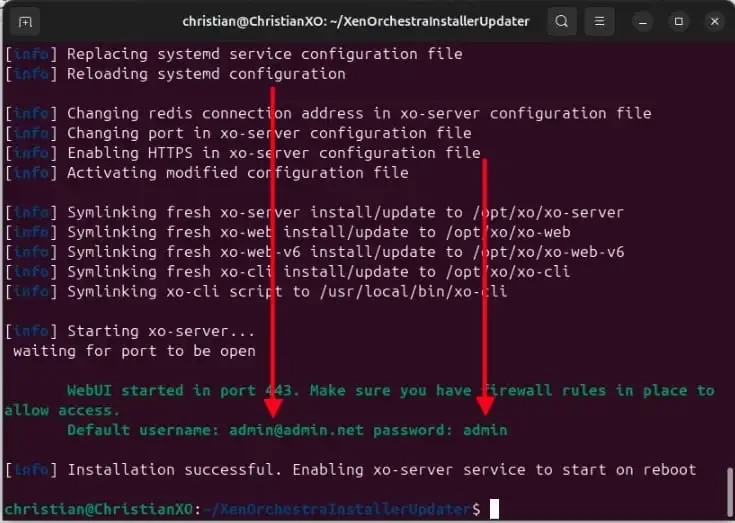
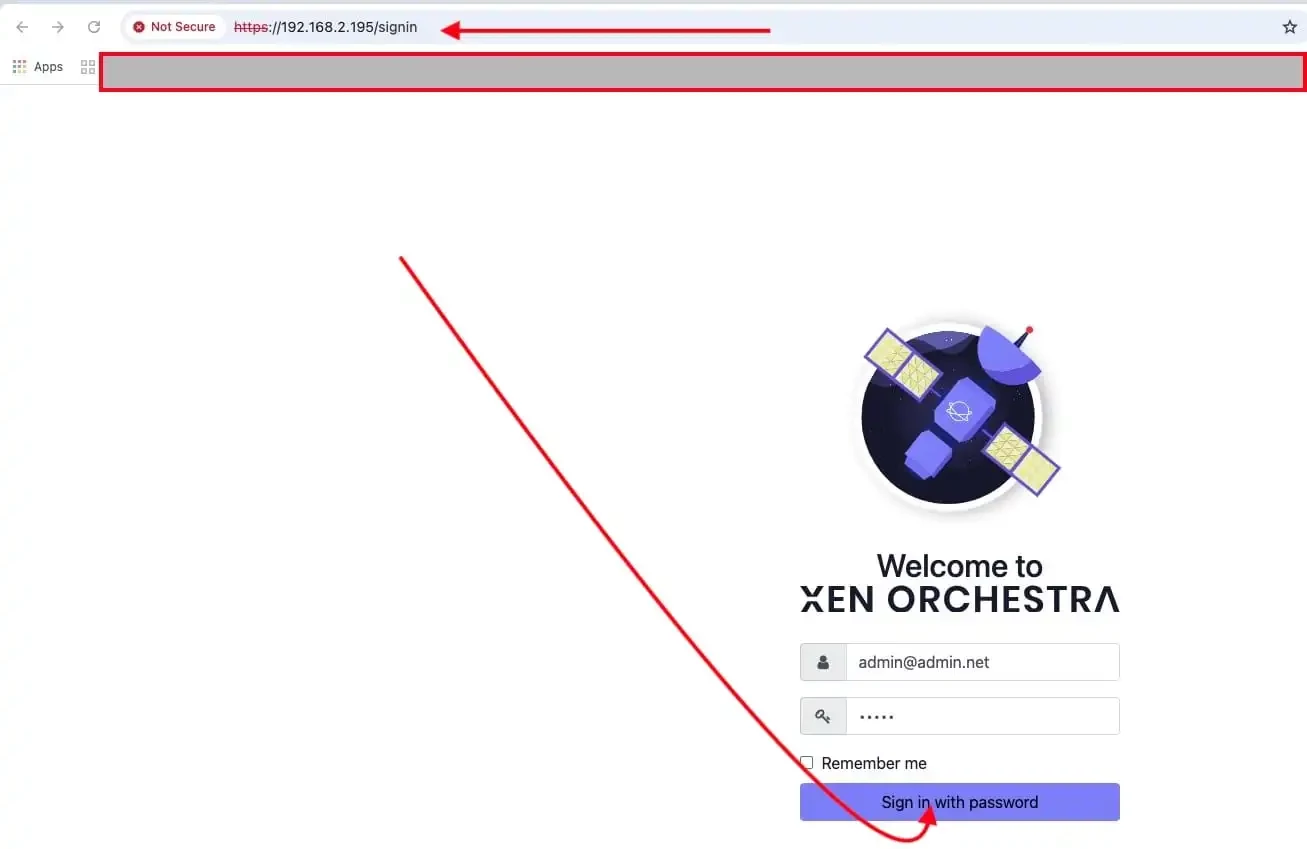
To access XO, please navigate to the IP address of the VM and enter the default username and password to login as shown below.
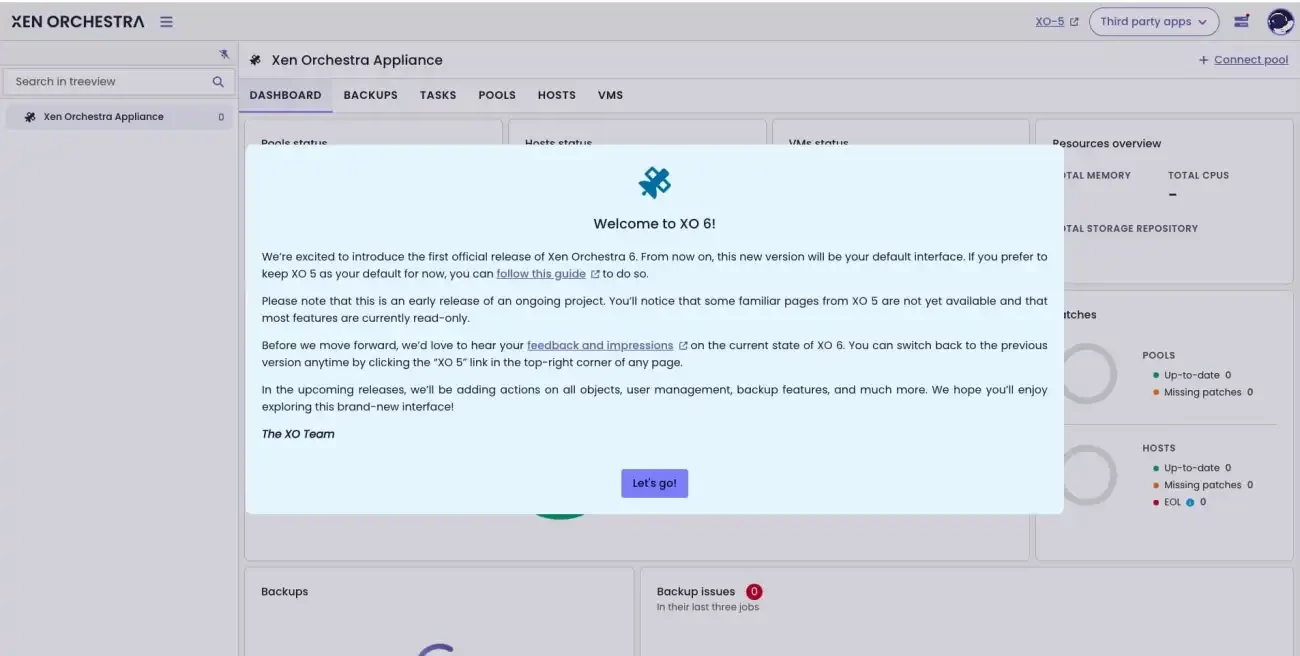
As you can see, we are welcomed with XO v6. Click on let’s go to proceed.
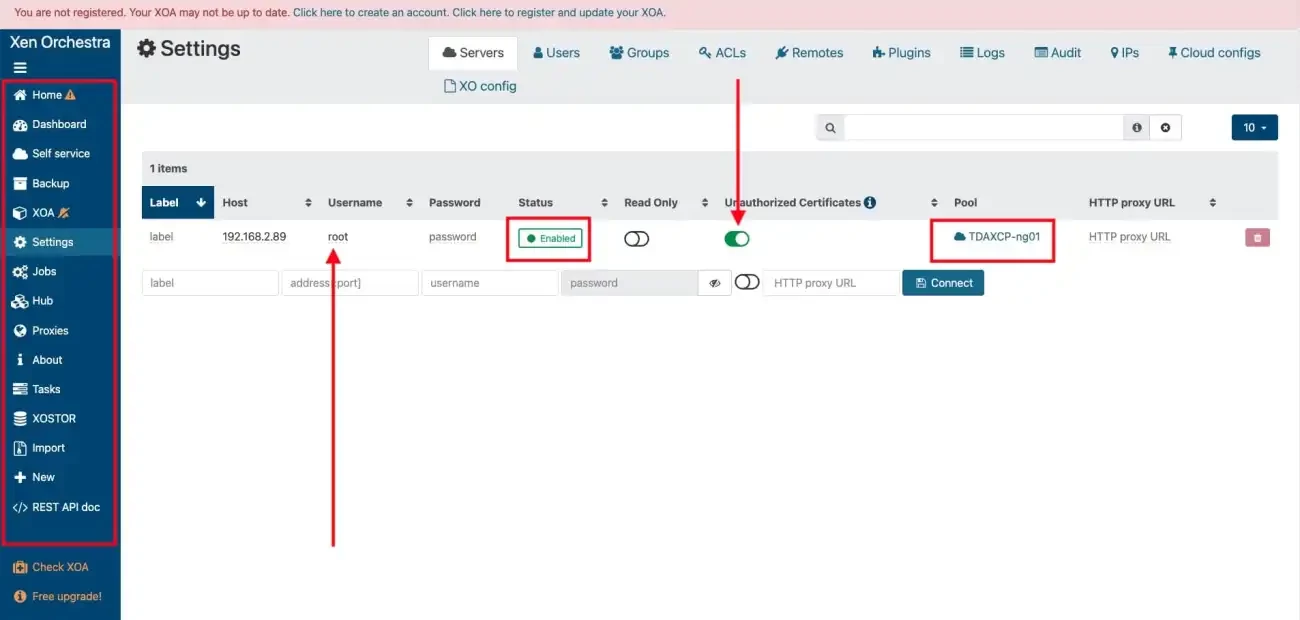
To connect to XCP-ng, click on “Connect Pool”.
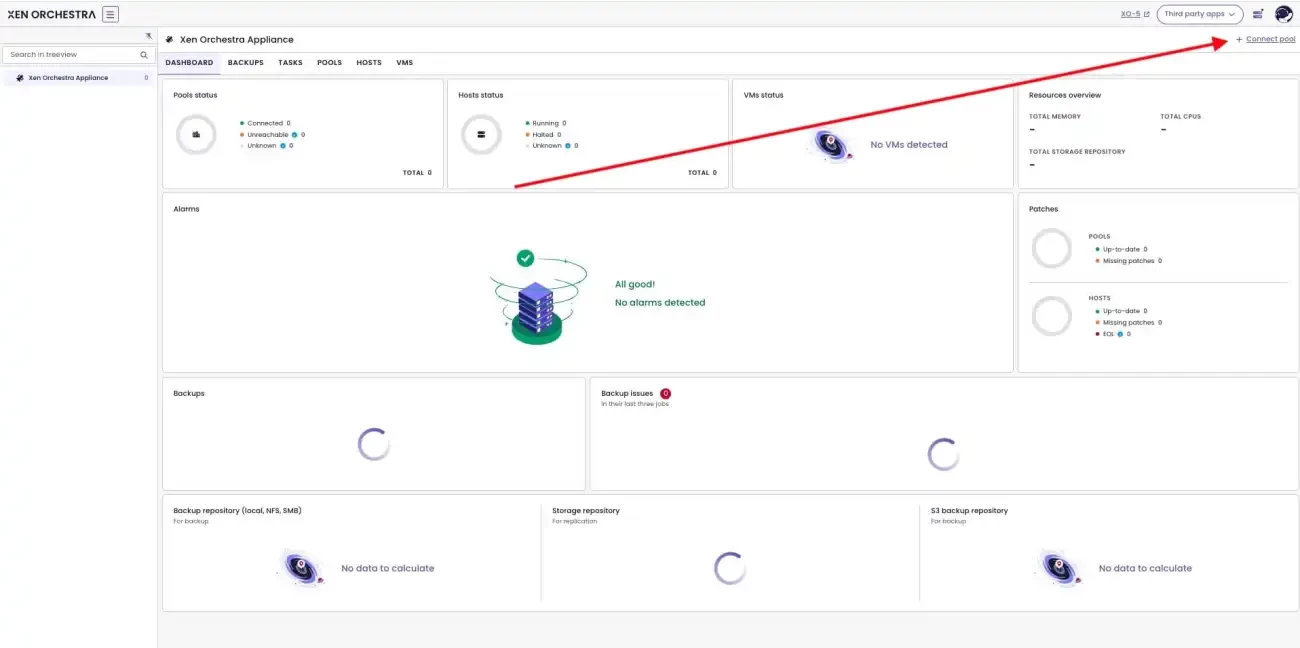
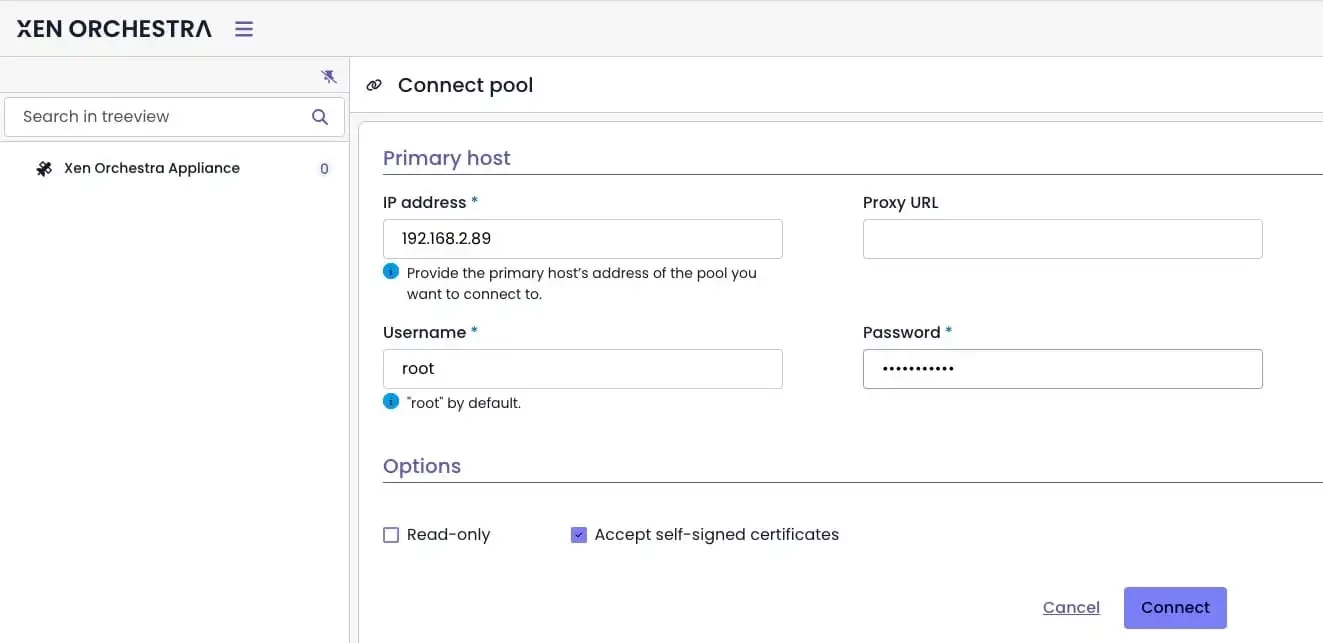
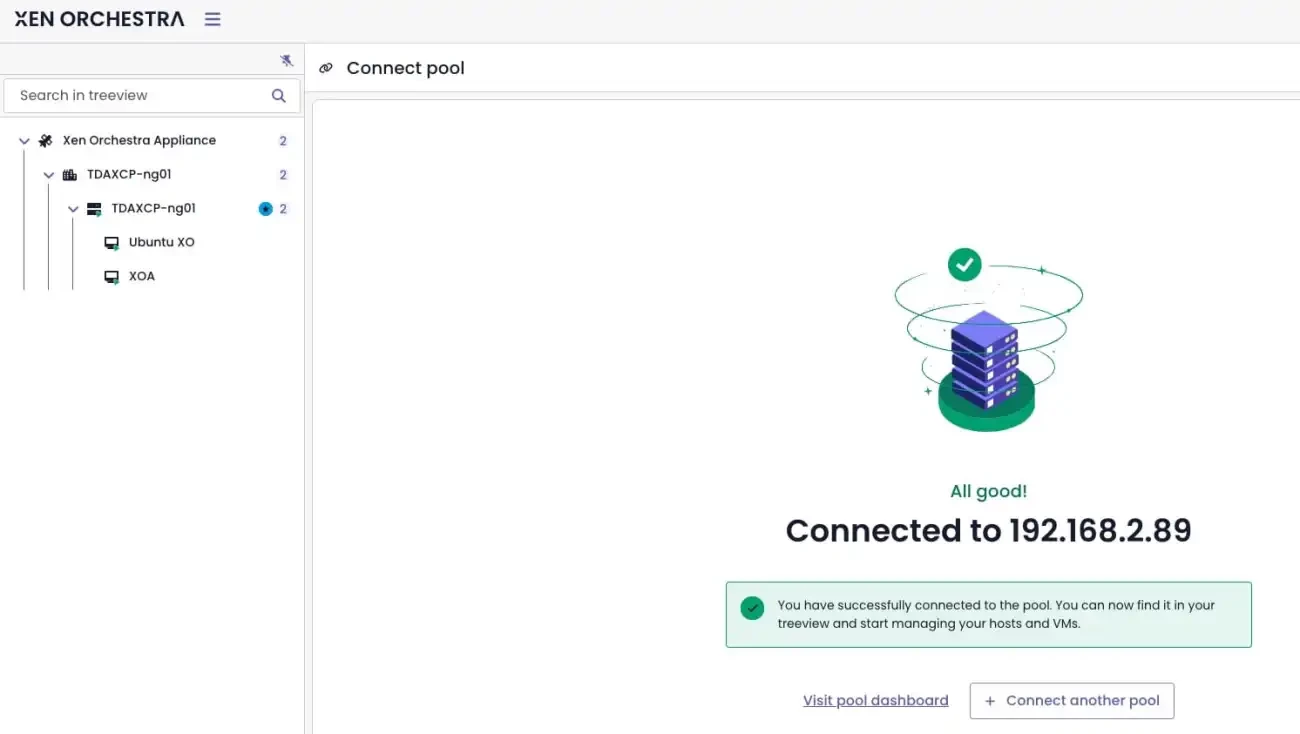
Enter the IP address, usernmae and password and click “Connect”.
Option 3: Create VM via XO
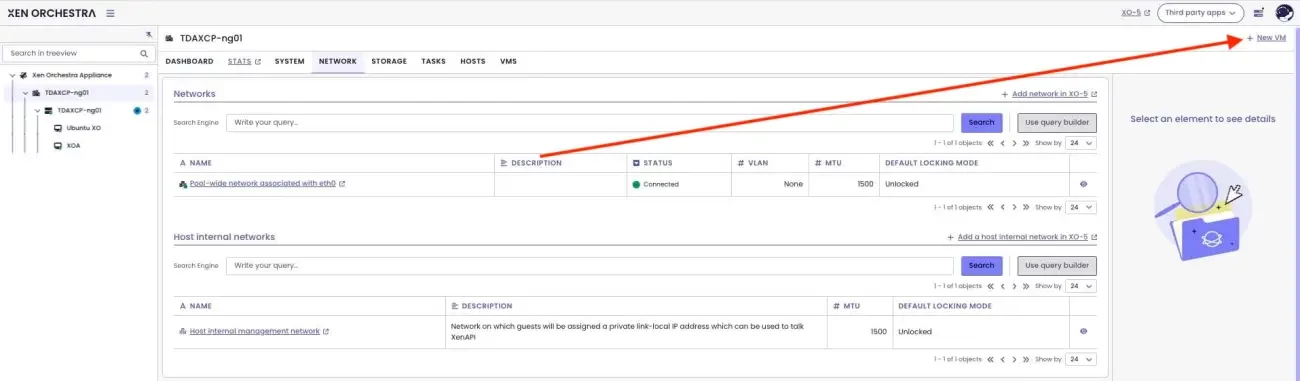
To create a new VM, click on “New VM”. as shown below.
Remove XOA
Tired of these warning and other unsupported features,as shown below

To remove XOA, first shutdown the XOA as shown below. Else, you will not be able to delete the VM.
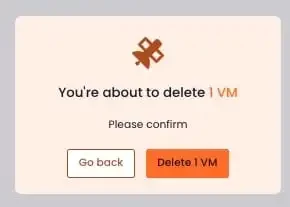
From the Pool, select VMs and delete the XOA
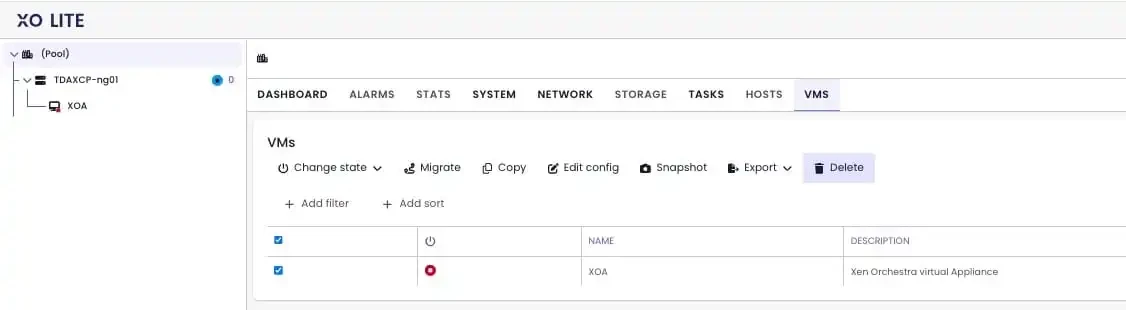
Please confirm deletion as shown below.