We continue exploring this powerfull ![]() site
site ![]() "Veeam Architects Site"
"Veeam Architects Site"
In this topic, I will show you how use this tool ![]() Veeam Networking Port Tool for VBR v10
Veeam Networking Port Tool for VBR v10

![]() Disclaimer
Disclaimer
This tool uses the latest data from the Veeam User Guide. We encourage users to check the results with the user guide, consult a Veeam System Engineer or Solutions Architect..
Ports numbers change, we cannot be held responisble for any changes within the Veeam Software which were made after the date shown below.
This port designation is correct as of August 2020
This tool was developed to simplify the identification of ports required by Veeam software. These need to be operational on your firewall between each component of Veeam Backup and Replication infrastructure when you choose to use them
 How to use this tool
Prepare. Know what servers you plan to use in the design and what you want to do with them, for example have a list of server names, IP addresses, and what Veeam roles you would like to use on each server. From a security viewpoint we do not actually need to know the real names, you can create a list of server names that could be 1-100 as long as you know what they represent in your design, the same for IP addresses, no data is stored using this tool. All is in your browser cache only.
 Steps and Pages
Step 1. Operations
Select the operations you want to perform within the Veeam infrastructure.
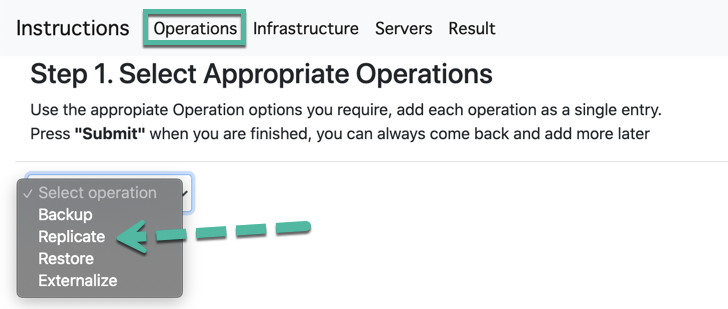
Select each operation and build a list of each option on this page, follow each step as it unfolds and once "Add to List" appears it is complete. There can be many options for each operation so please read each option carefully. If you wish to add multiple similar options, add each one separately. at any point you can come back to this page and add extra operations, the tool is dynamic.

Do not forget to press "Submit".
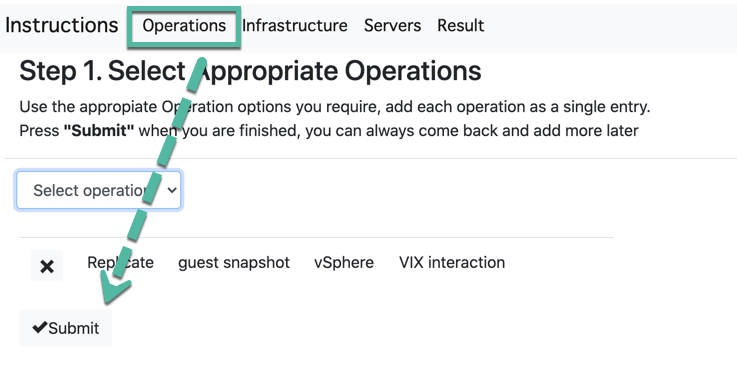
Step 2. Infrastructure
The Infrastructure page offers Veeam infrastructure components roles you wish to add. such as Proxy, Repositories, Hypervisor or storage options. Add each component as requires to build up the required options for the design. Continue to add each option until you have a complete list of options you will need. In this example, I choose Hypervisor

and you can add a vCenter as Infra of the Hypervisor

and I choose a proxy for this Operations.

 The Server Page
There are two steps on this page.
Top of page "Role Mapping" lists the servers you have added and the mapped roles assigned to them.
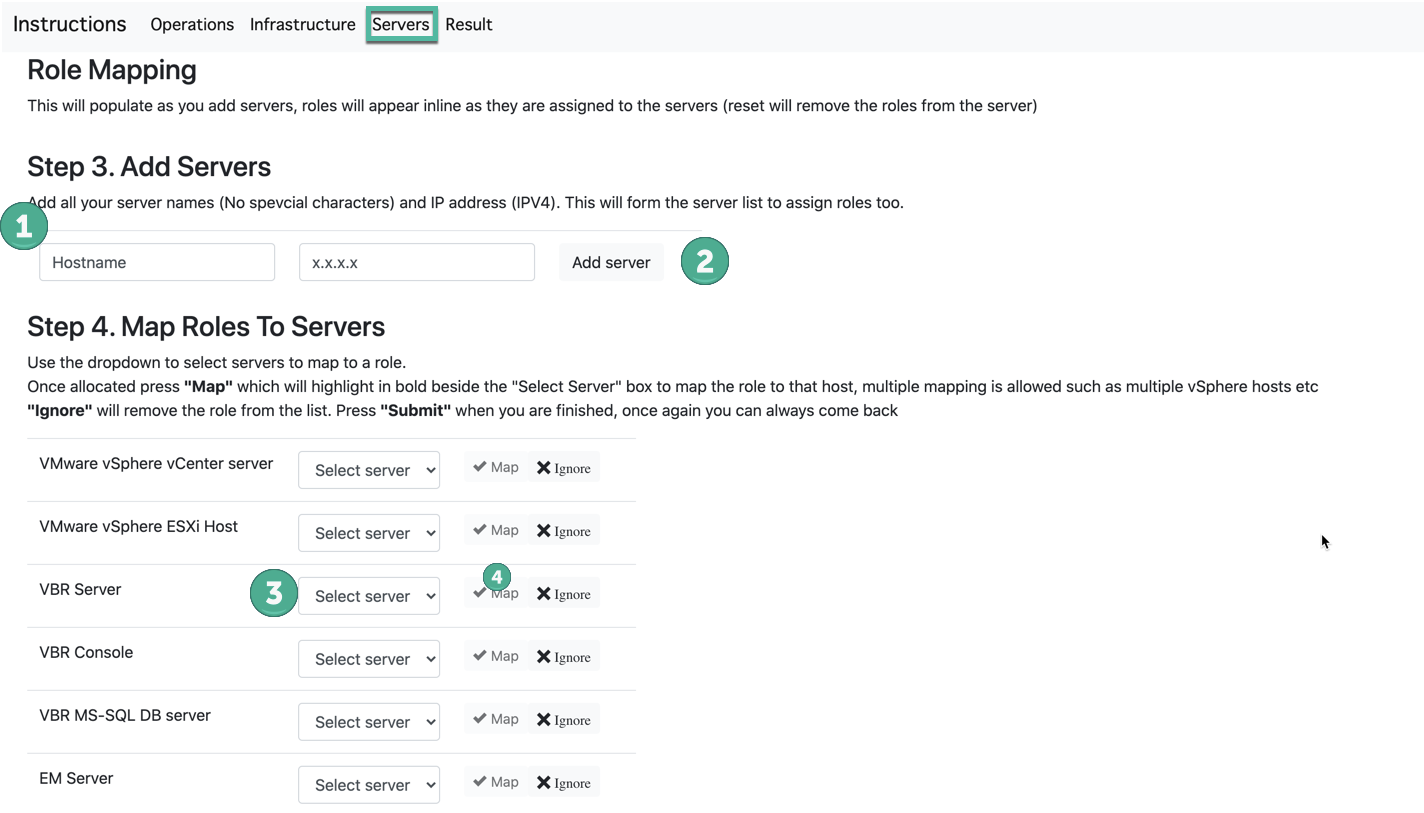
Step 3. Adding servers
Step 4. Mapping roles to servers
When we select the operations, infrastructure with their options we need to be able to map them to servers so we can understand how they fit together.
Step 3. Adding Servers
This is the input of our actual server names and IP addresses we plan to use, whats important with IP addresses is just the basics of same subnets.
With this list we will map the Veeam roles onto each server so it needs to be comprehensive. look down to the Map roles section and you can see what roles are available.
There will also be a need for access to an authentication server so that also needs to be added too, for role assigned.
Step 4. Mapping Roles
At this point we have roles and we have servers added, we now need to add each role to a designated server. using the dropdown box by the side of a particular role you can choose a server from the list, once selected the "MAP" button will highlight and you can press it to assign that role to that server in the page, the Role Mapping at t he top of the page will change to reflect the server is now assigned the role. Servers can have multiple roles and you can assign the same server to other roles to reflect your design accurately. if you see a role that you will not use but was added automatically such and "EM Server" (Enterprise Manager), you can press the ignore and the role will be removed completely (this is irreversible currently). Once you have check all the roles are assigned correctly to the servers you can submit the options to the configuration.
 Result
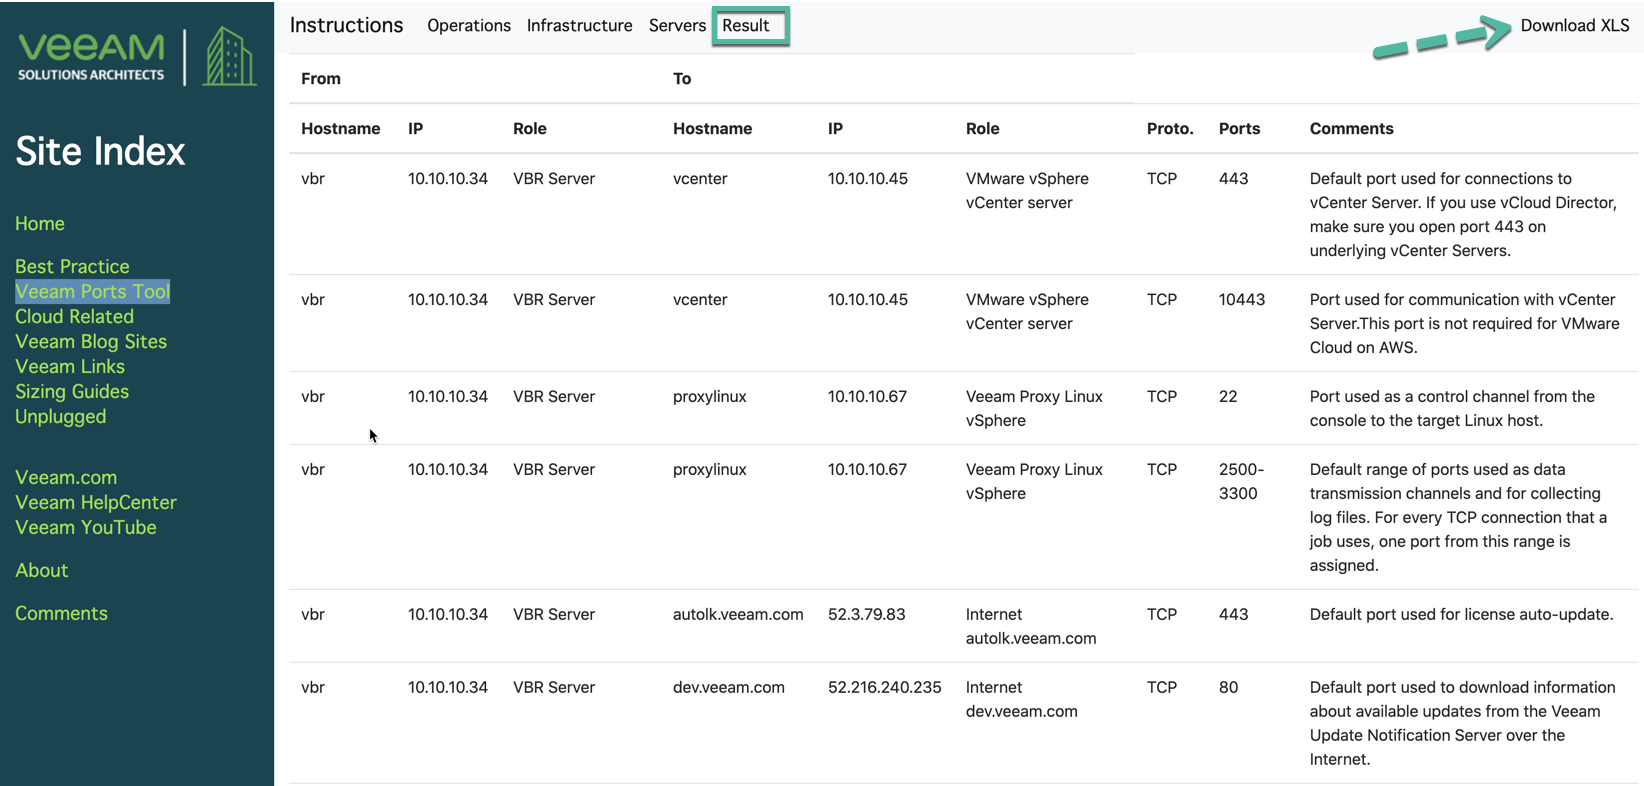
You have all port that you will use in this operations and you can export to XLS
