

Hello,
In this article, I will talk about Veeam Direct Restore to Azure feature.
What is Direct Restore to Azure?
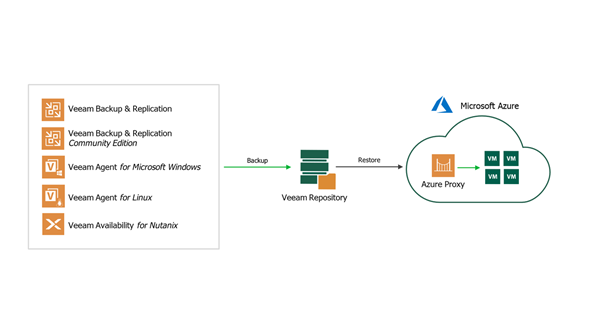
Included in Veeam Backup & Replication ™, Veeam Direct Restore to Microsoft Azure allows users to import and restore on-premises VMware and Hyper-V virtual machines, physical servers, and endpoints to Microsoft Azure.
Restore Microsoft Windows and Linux-based virtual machines, physical servers, and endpoints with Restore to Microsoft Azure.
Today's modern data center is not limited to the location of the physical data center. IT organizations can optimize resource allocation and further improve operational scalability and efficiency with the Microsoft Azure cloud. With Veeam Direct Restore to Microsoft Azure, administrators can restore and migrate physical (P2V) or virtual (V2V) workloads to Azure without the need for complex configurations or additional hardware investments, thereby minimizing operating expenses.
Quickly restore workloads to Azure
Quickly and efficiently restore to Azure via any Veeam backup file. With this technology, there is no need to pre-install a device. You can restore to Azure directly from the Veeam Backup & Replication user interface. Azure Virtual Machine Agent installs automatically (Windows-based virtual machines only) and sequential, parallel disk, and virtual machine restore options are available.
Can perform planned workload shifts
Are you planning to move some of your virtual machines or even your traditional physical server to the Microsoft Azure public cloud? Now you can easily move your planned VMware and Hyper-V VM workloads, and even the rest of your traditional physical servers, to the cloud.
Build an Azure-based test environment
It will be very beneficial for you to use Azure as a test environment. This test environment is the same as your production environment as it is created from your backups. You can safely test your patches and critical updates before they go into production. This also enables it to speed up development cycles without buying or purchasing new in-house hardware.
We enter our interface with the Veeam Backup & Replication console.
We select the machine backup point on the relevant Job from the Backups> Disk section.
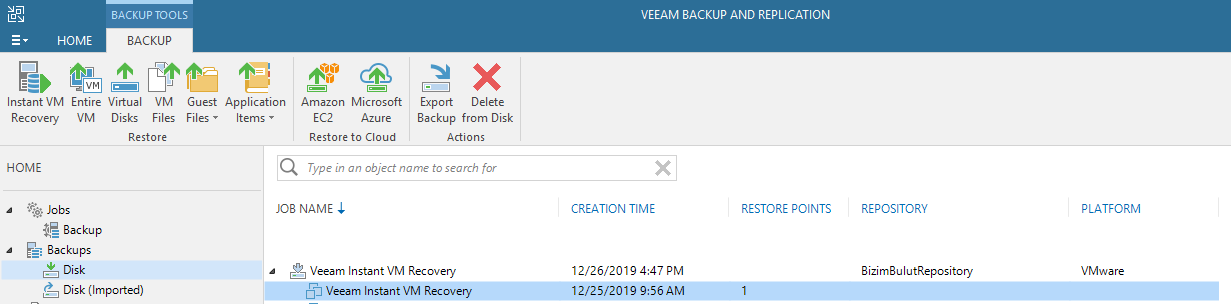
When we click on the relevant backup point, the Microsoft Azure option comes, we proceed by clicking the option.

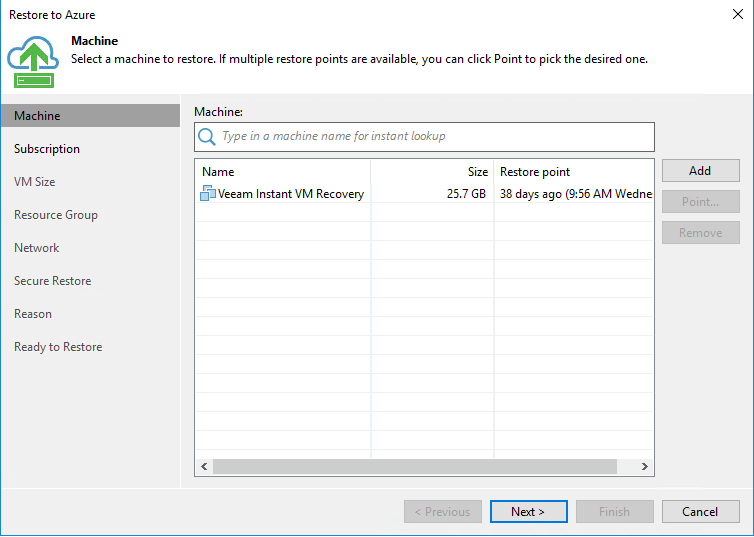
We can start to restore the relevant machine, select the last backup point or a previous backup point and proceed.
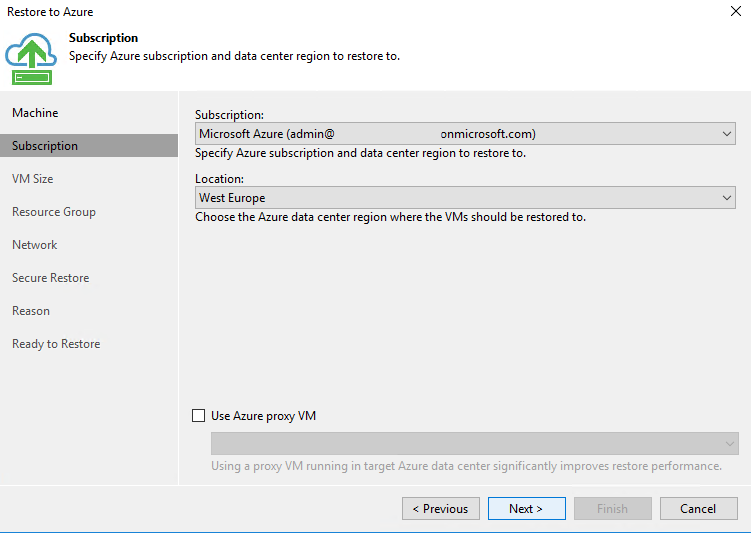
The Microsoft Cloud Credentials information registered on the product appears and we choose the location where we will restore the relevant machine.
Add Cloud Credentials:
URL: https://helpcenter.veeam.com/docs/backup/vsphere/restore_azure_accounts.html?ver=95u4
While our machine is being restored to the Azure side, we choose which resource it should use.
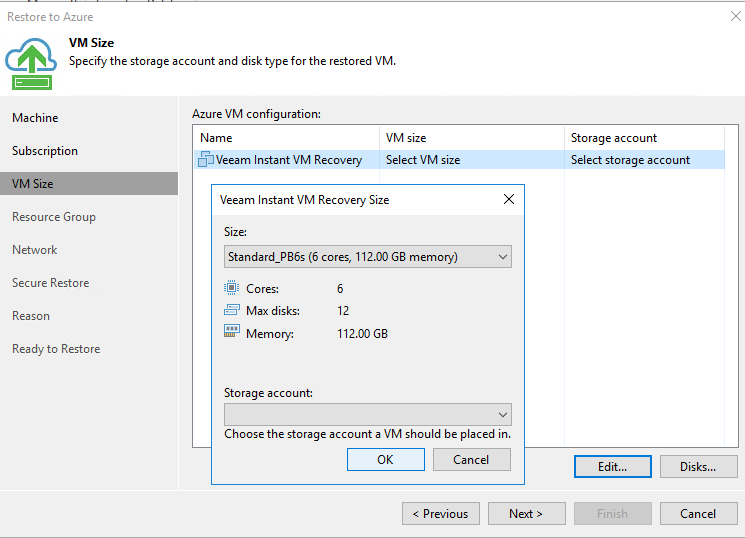
Resource Group, on the other hand, we choose the resource pool where our machine will be located.

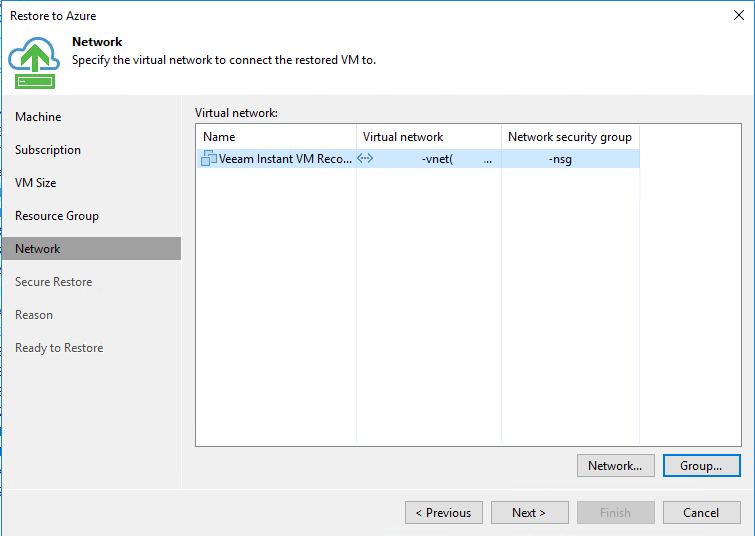
In the network section, we choose which network leg and security group our machine will be.
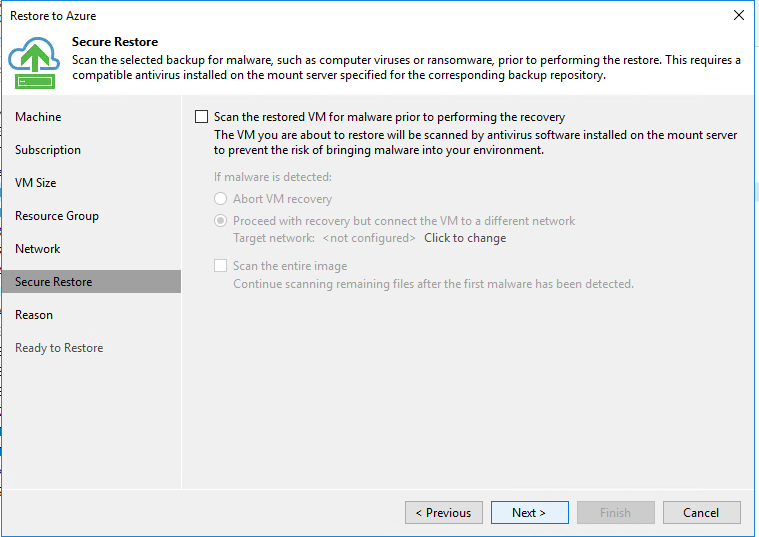
If we wish, we can choose the scanning option with the anti-virus application on the server while restoring our machine.
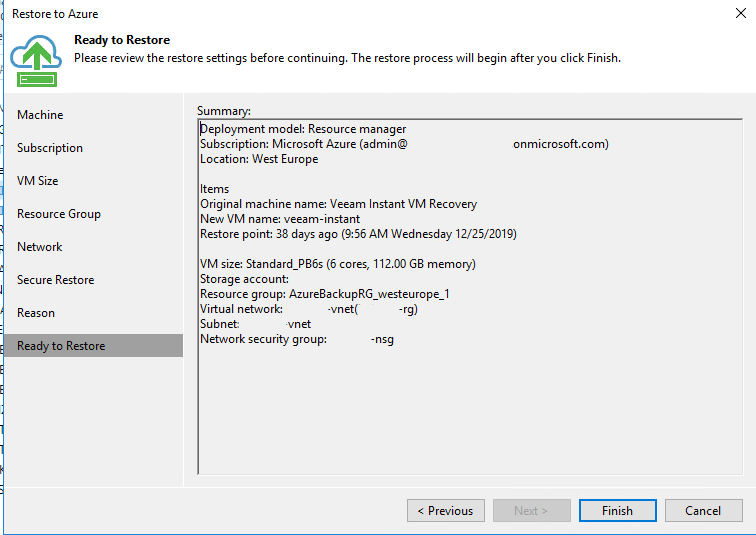
All adjustments are complete, we can start to restore our machine with the finish option.
I hope it has been useful, thank you for your time, see you again in our next article.
For detailed information, you can visit the Veeam pages.
Veeam Direct Restore to Microsoft Azure URL: https://www.veeam.com/tr/cloud-data-recovery-azure.html

