

I recently stood up a new Nutanix cluster and needed it protected with Veeam before workloads went live. If you are used to doing this with VMware or Hyper-V, the Nutanix AHV workflow in VBR v13 feels different. The proxy model is different, and the old AHV proxy appliance is no longer part of the setup.
This walkthrough covers the adding the Nutanix environment, configuring AHV workers, running the first backup, and proving both full VM and file-level restores.
What you should have before you start
- VBR v13 with the Veeam Plug-in for Nutanix AHV installed on the backup server. Veeam documentation currently lists VBR 13.0.1.1071 or later with AHV plug-in 13.9.0.212+ as the supported baseline.
- Nutanix AOS 6.8.1.6+
- Prism Central pc.2022.6 through pc.2024.3.1.10, or pc.7.3+. Versions 7.3.1.2, 7.3.1.3, and 7.5.0.0 are explicitly excluded.
- Admin credentials for Prism Central or Prism Element.
- iSCSI Data Service IP configured in the Nutanix cluster settings. If it is not set, backup jobs can fail when they try to access VM disks. Set this first (really).
- UEFI boot support in the AHV environment.
- Network connectivity between VBR, the Nutanix cluster, workers, and the repo.
Adding the cluster to VBR
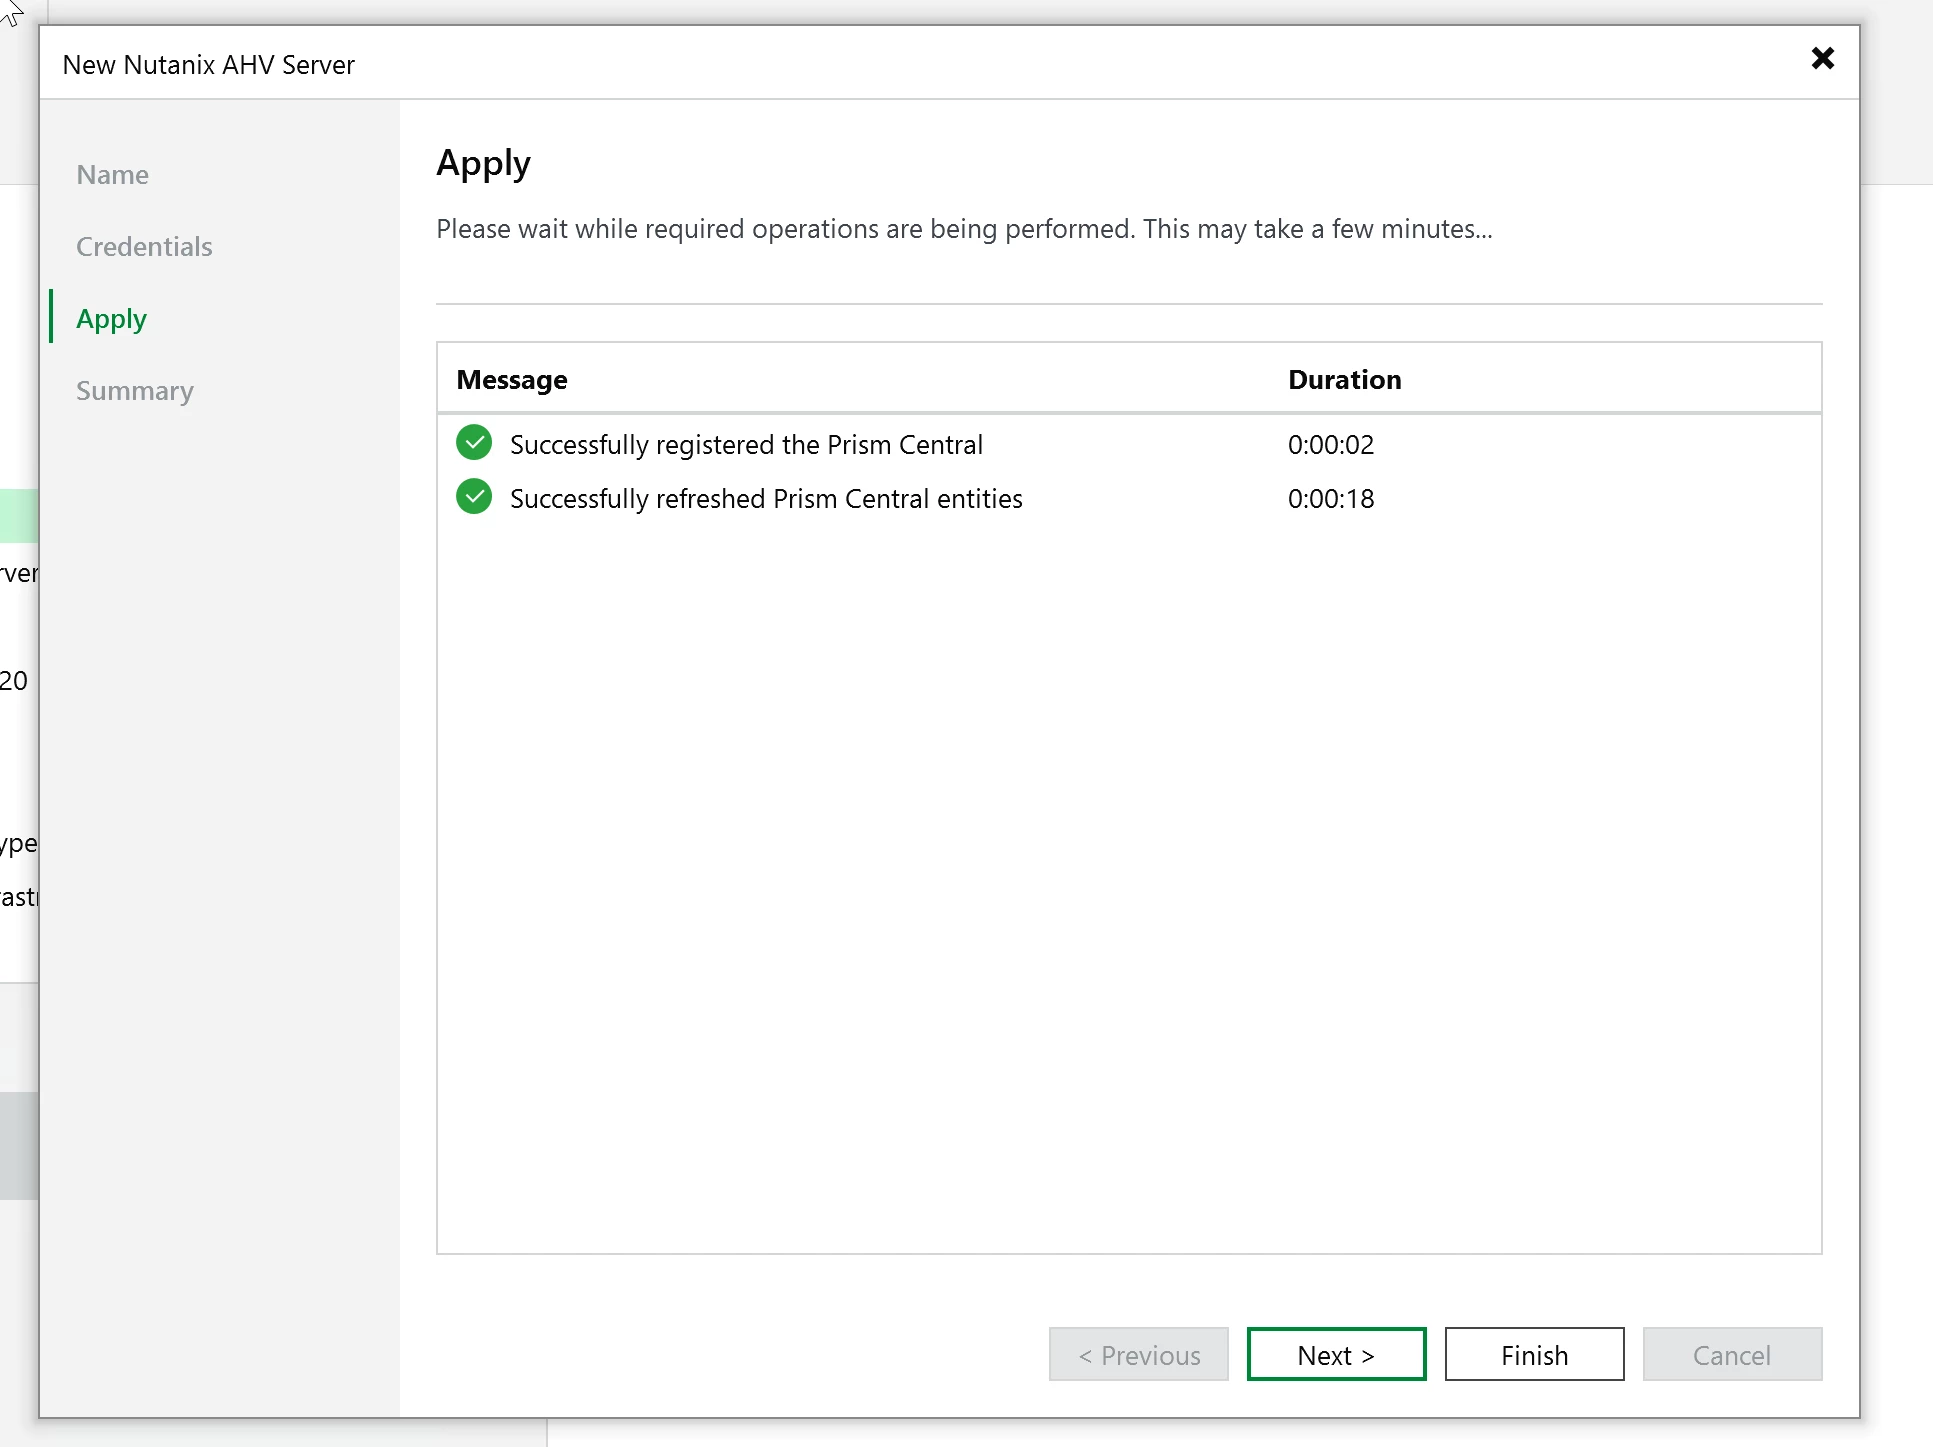
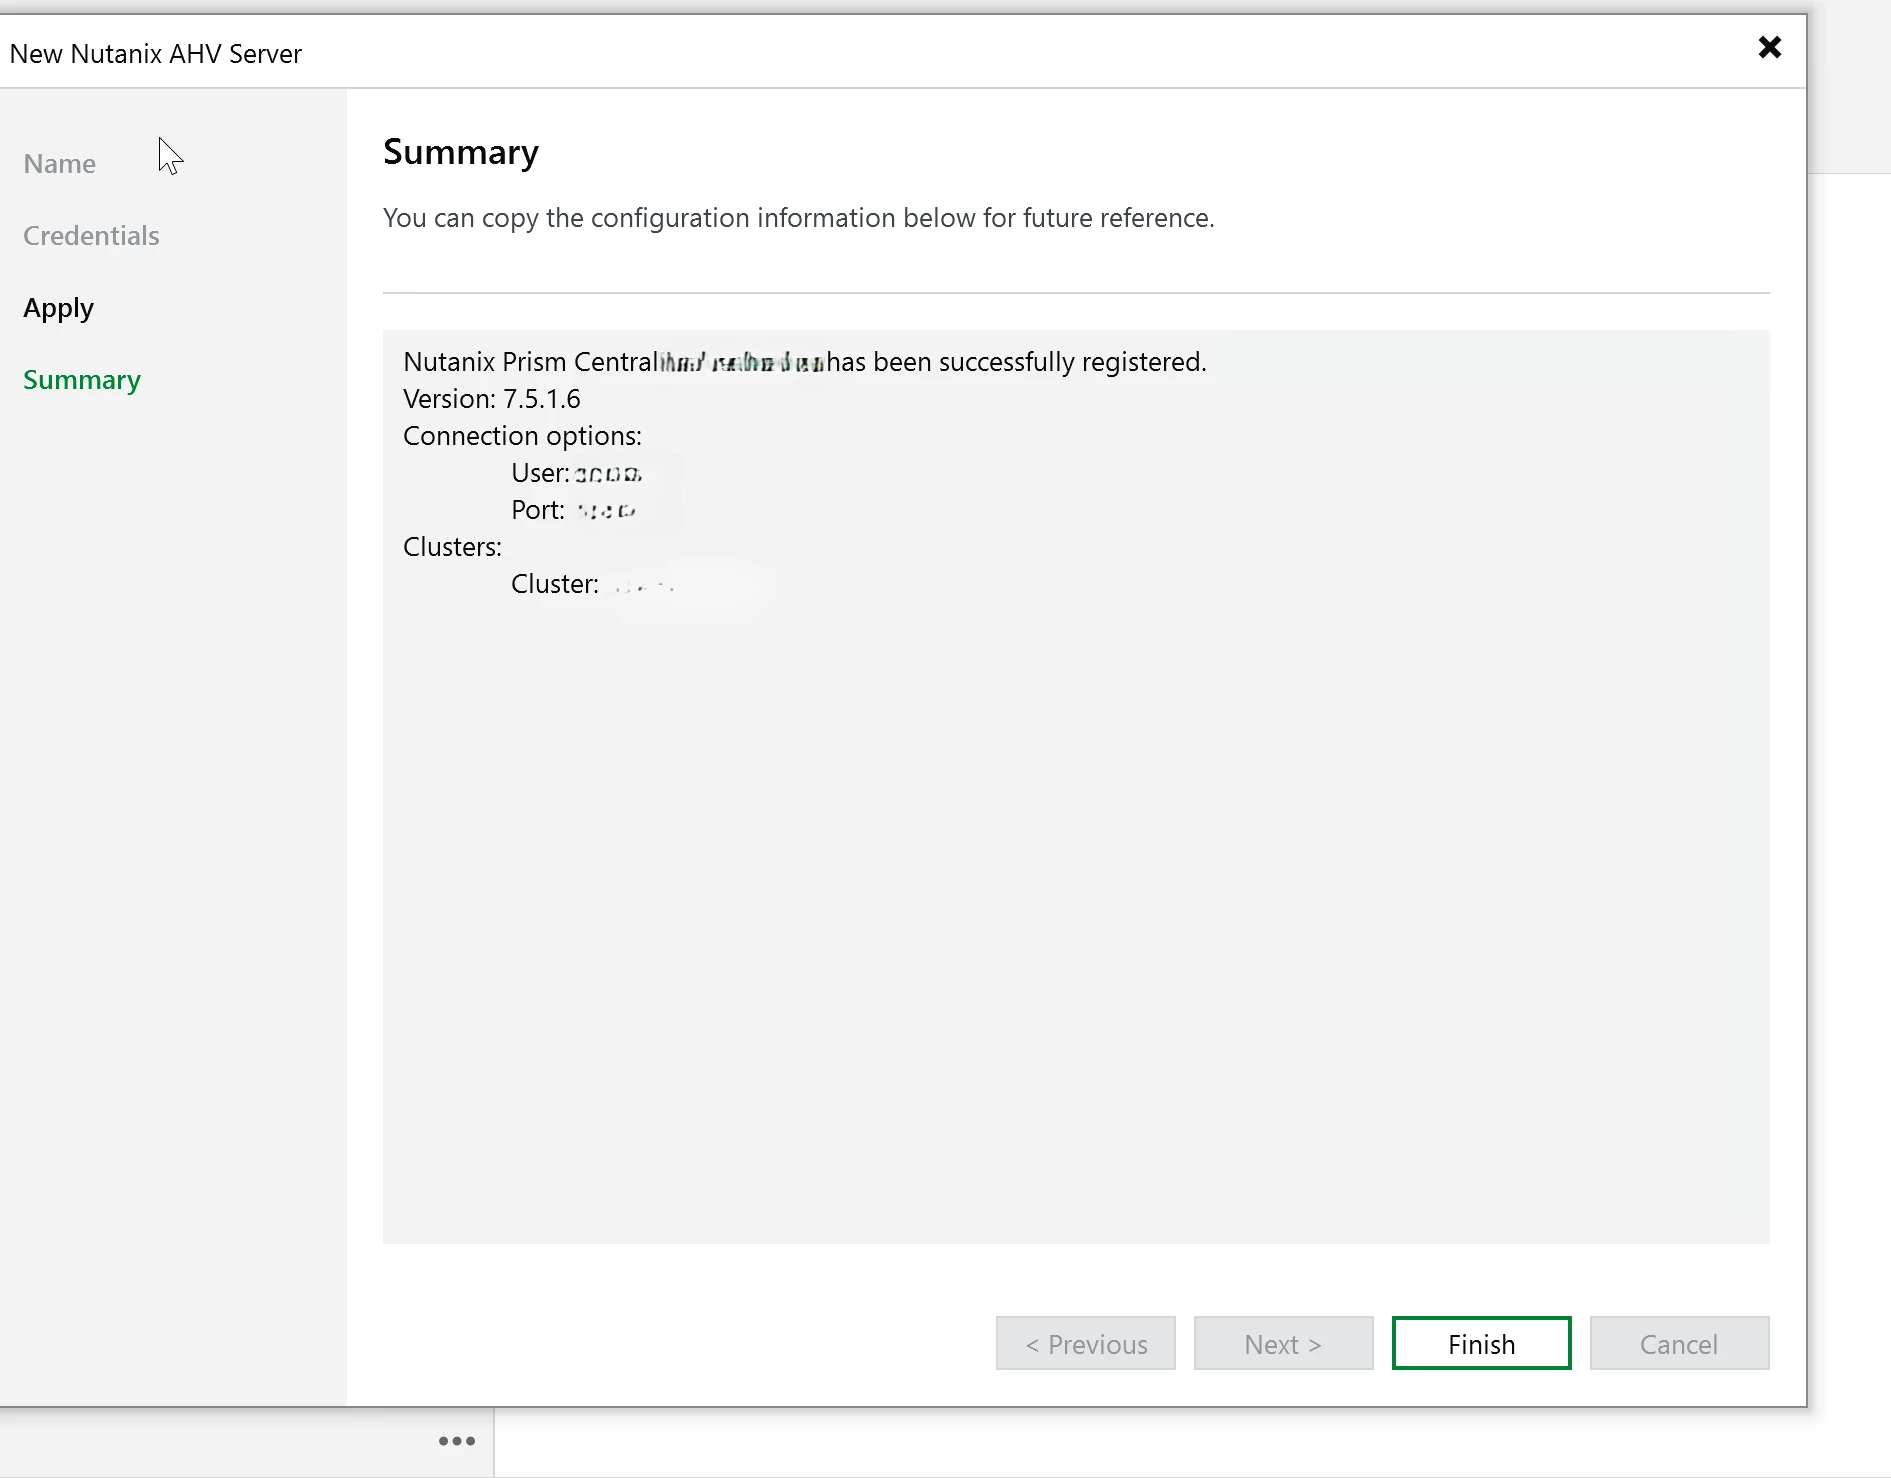
In the VBR console, go to Backup Infrastructure. Right-click Add Server, then choose Nutanix AHV.

Enter the IP address or FQDN for Prism Central or Prism Element, click next, then provide the admin credentials.
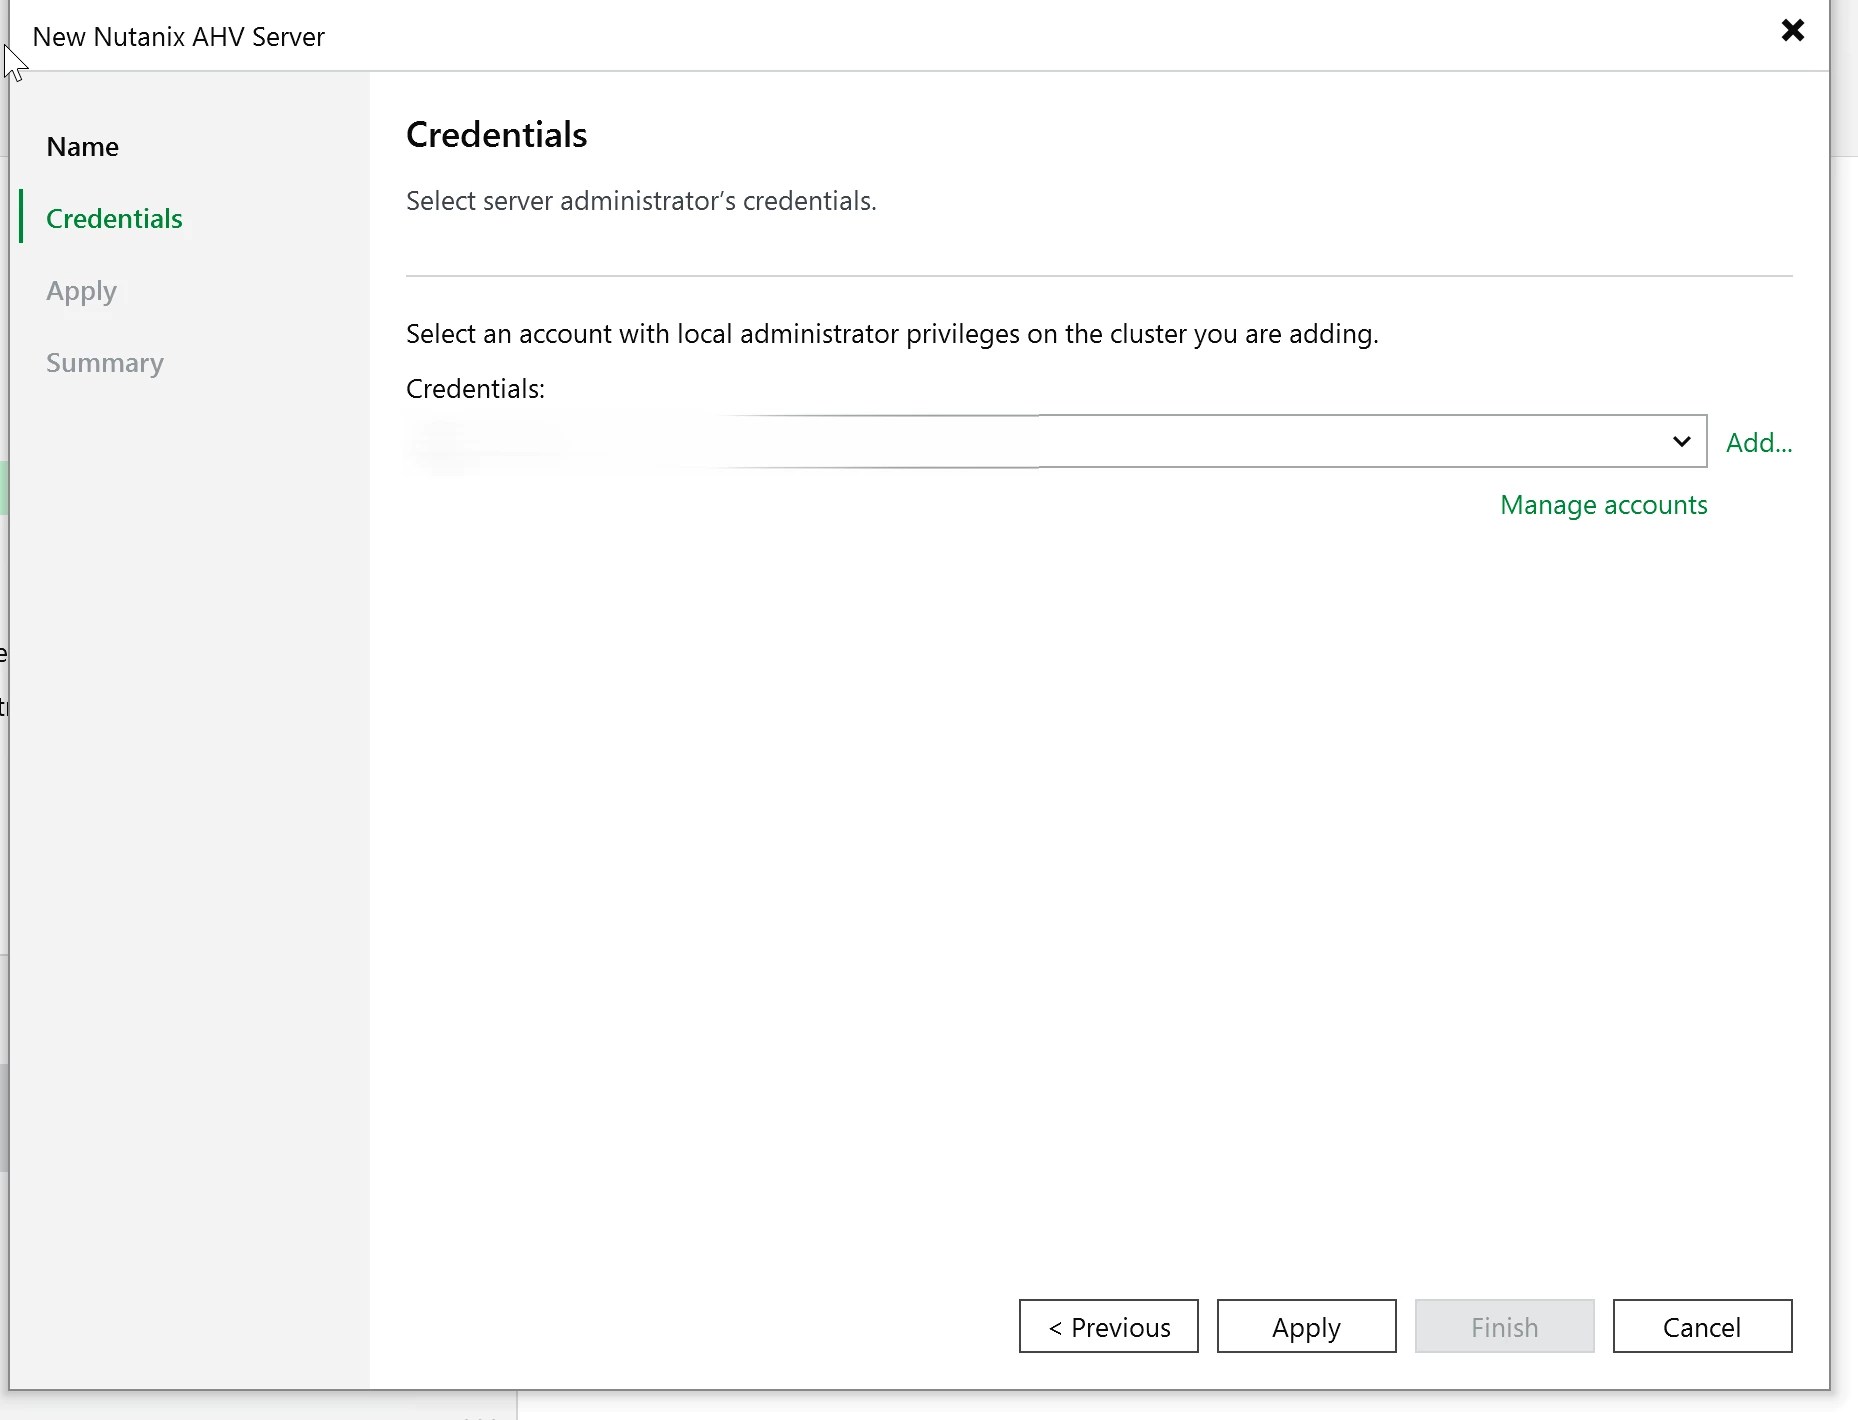
VBR validates the connection and pulls the cluster topology. Confirm what it found and continue.
Configuring AHV Workers
This is where Nutanix AHV feels different from the VMware and Hyper-V workflows. In v13, you are not deploying the old AHV proxy appliance (Thanks Peter :) ). The Nutanix AHV plug-in is integrated with VBR, and workers handle the backup and restore traffic.
Workers are Linux-based VMs that VBR uses for data movement. They read from the Nutanix environment and send backup data to the repository. You configure them from the VBR console under Backup Infrastructure and Backup Proxies.
The worker setup is pretty straightforward. Pick the Nutanix environment, set the worker name, choose the storage container, configure networking, and set host affinity if you need it.
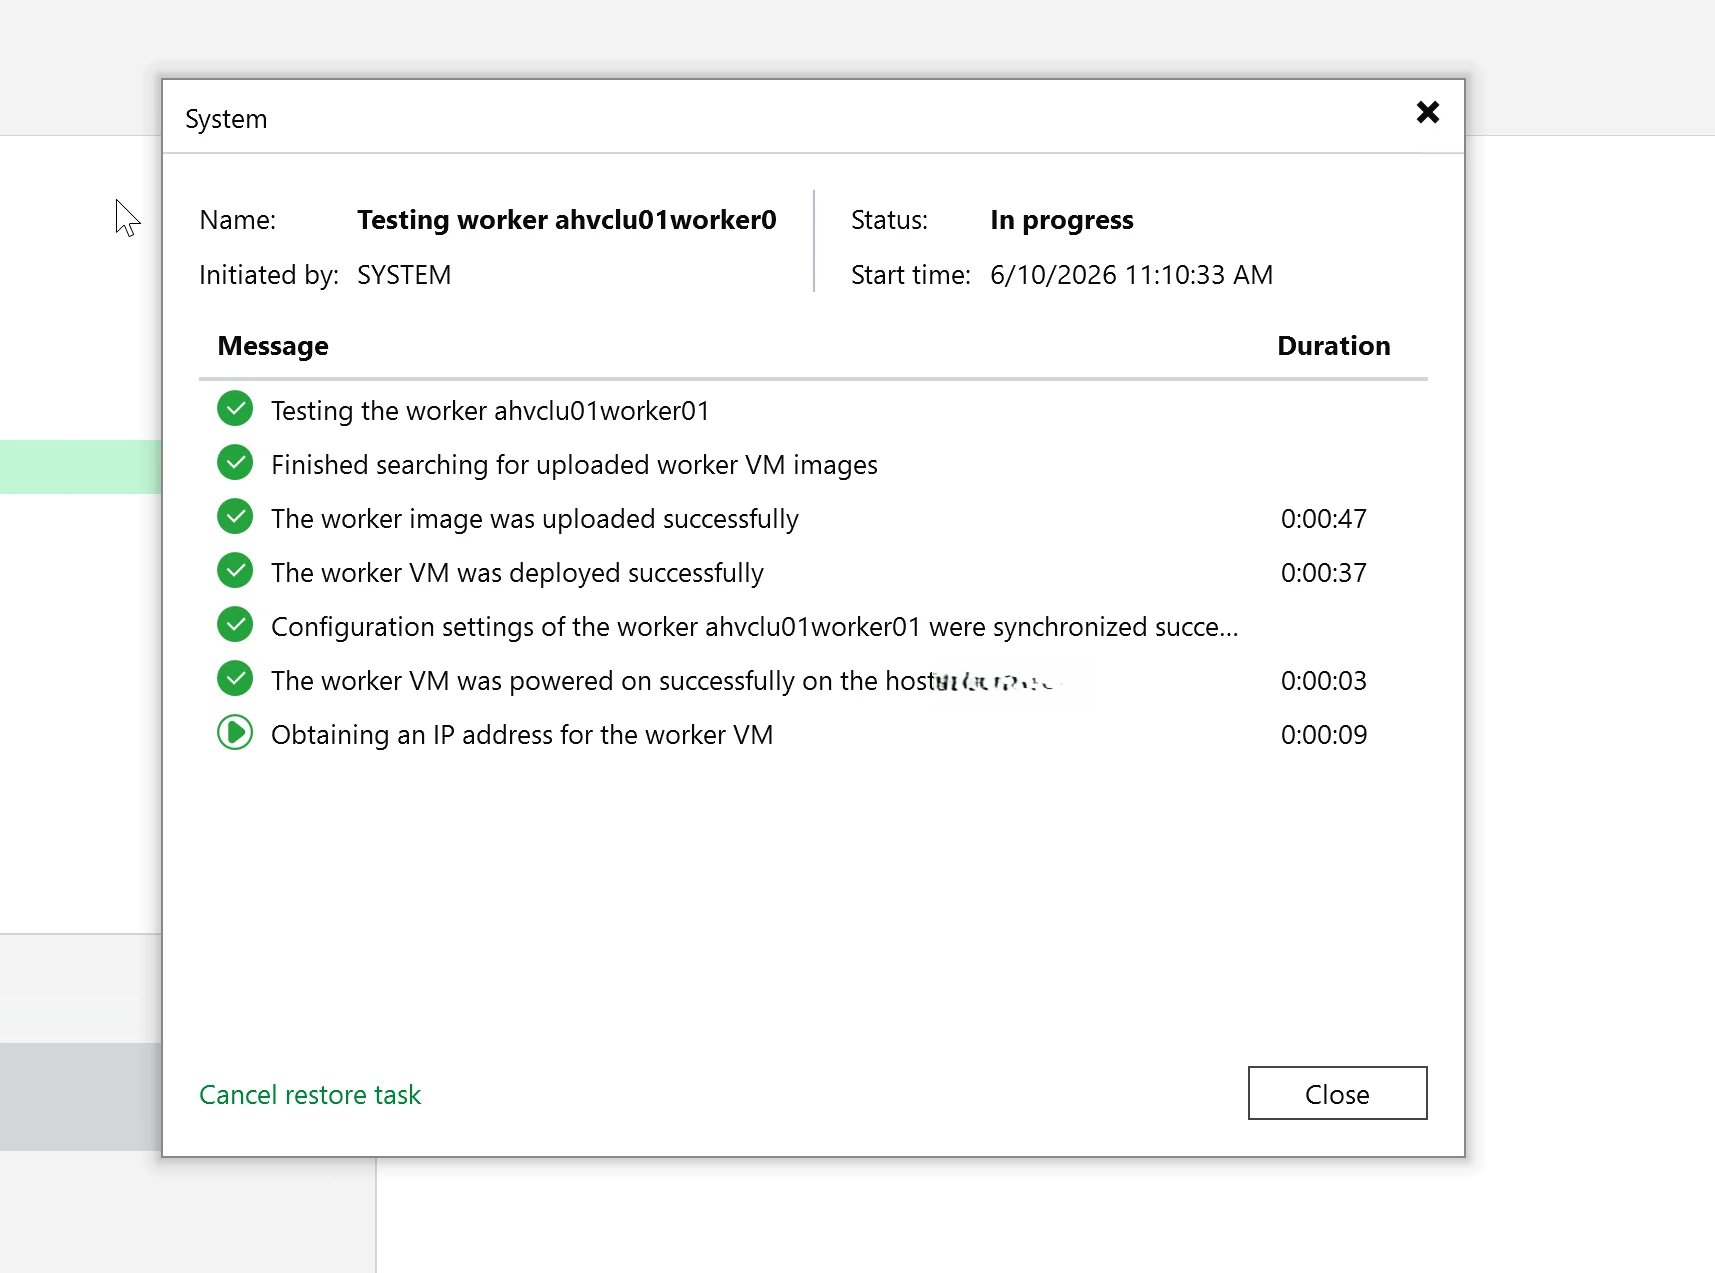
Click Apply and let VBR save the configuration. When a backup or restore session needs a worker, VBR brings it online for the job. When the session finishes, the worker shuts back down.
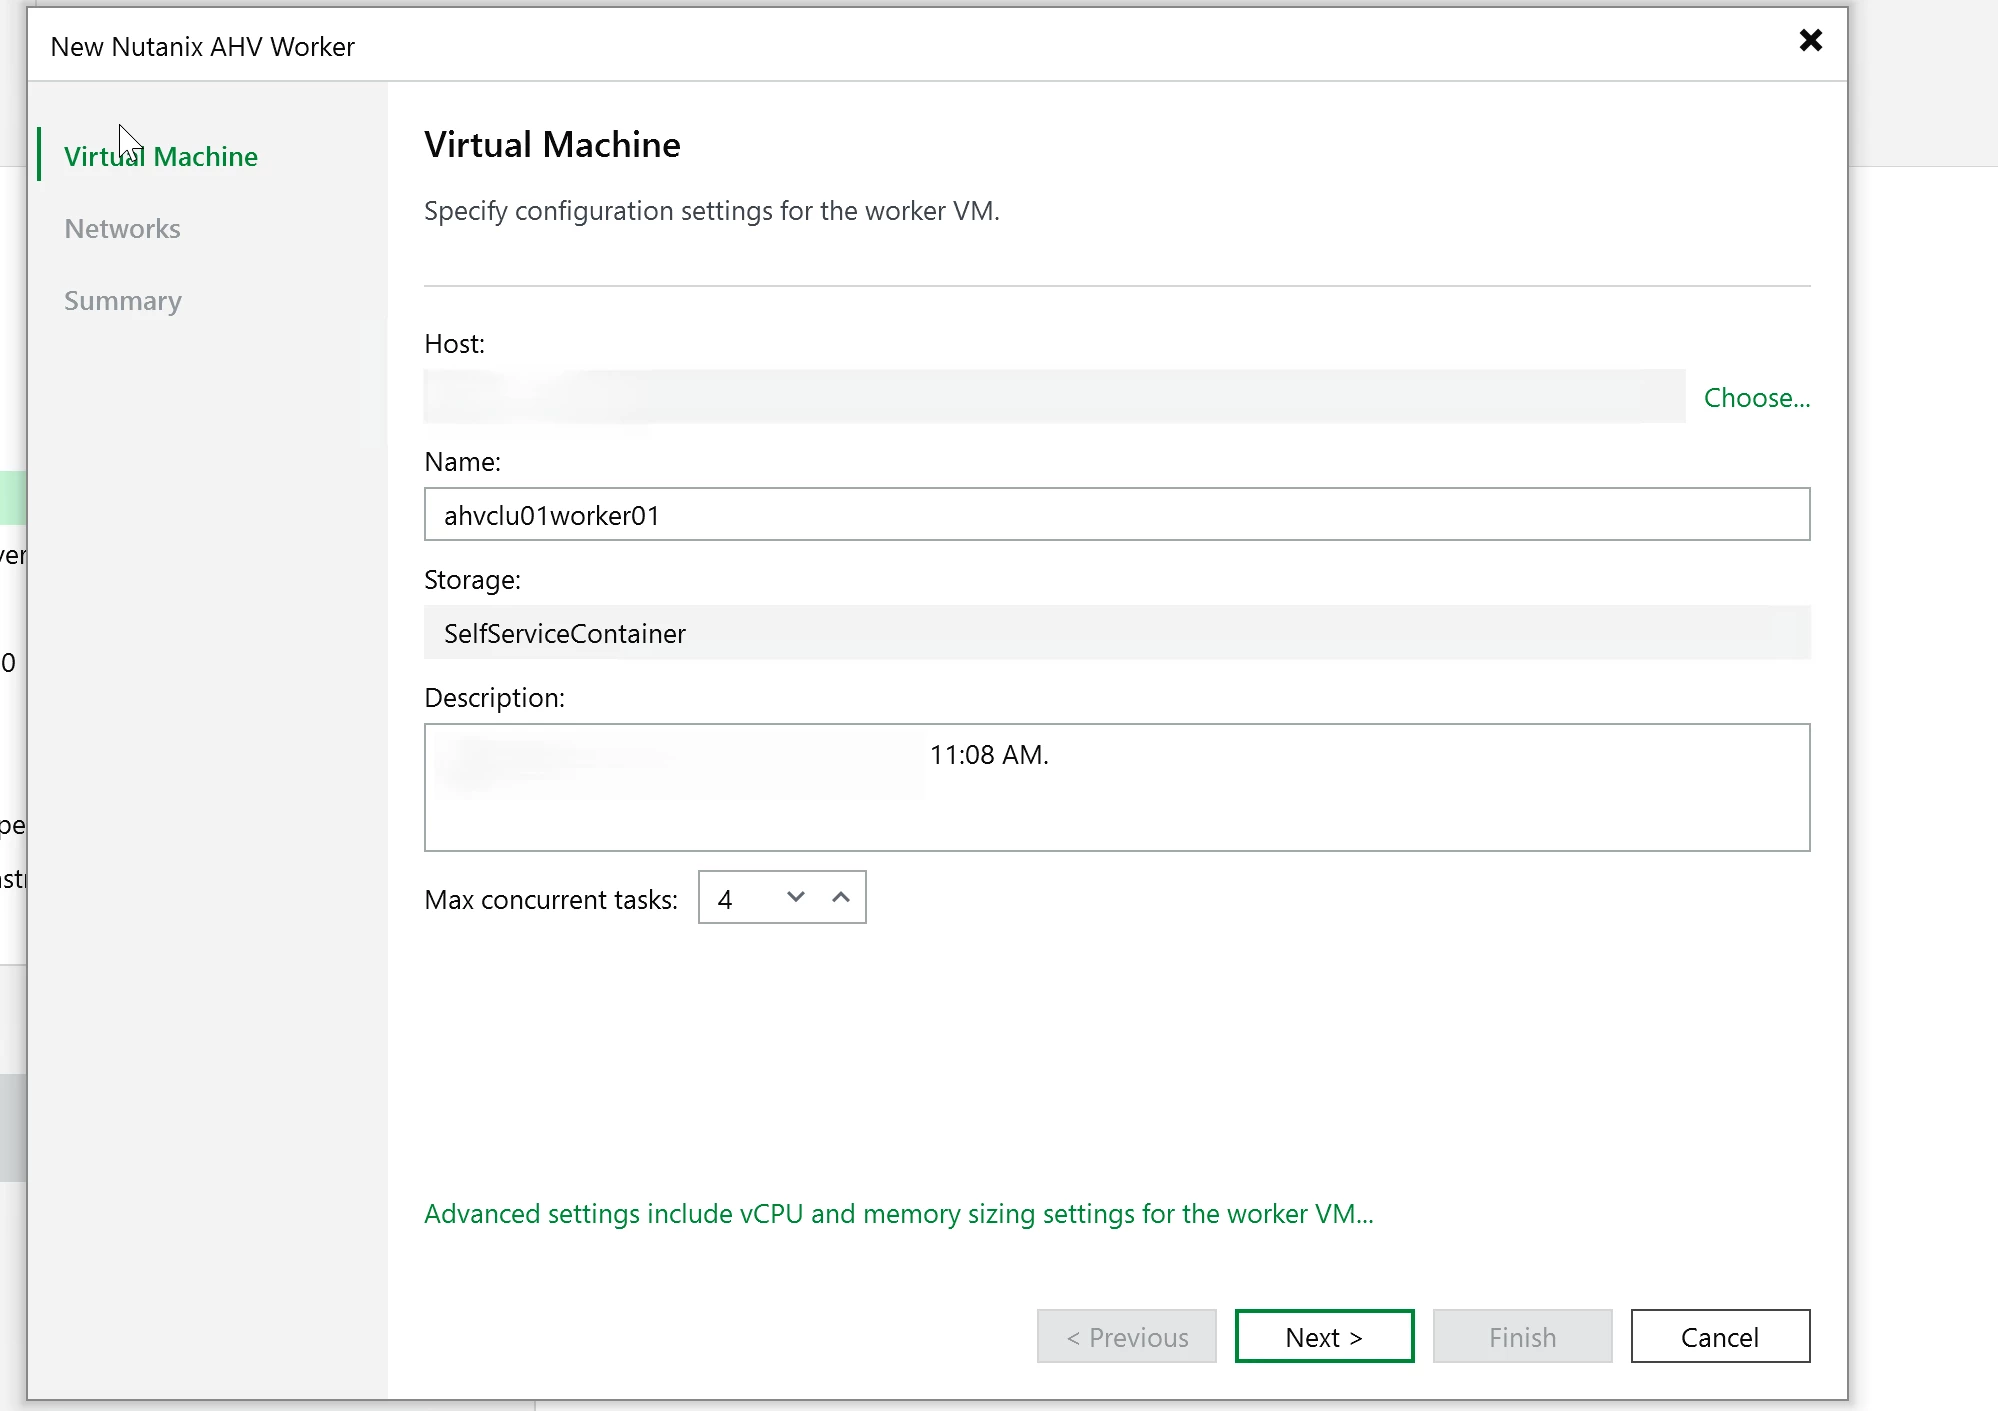
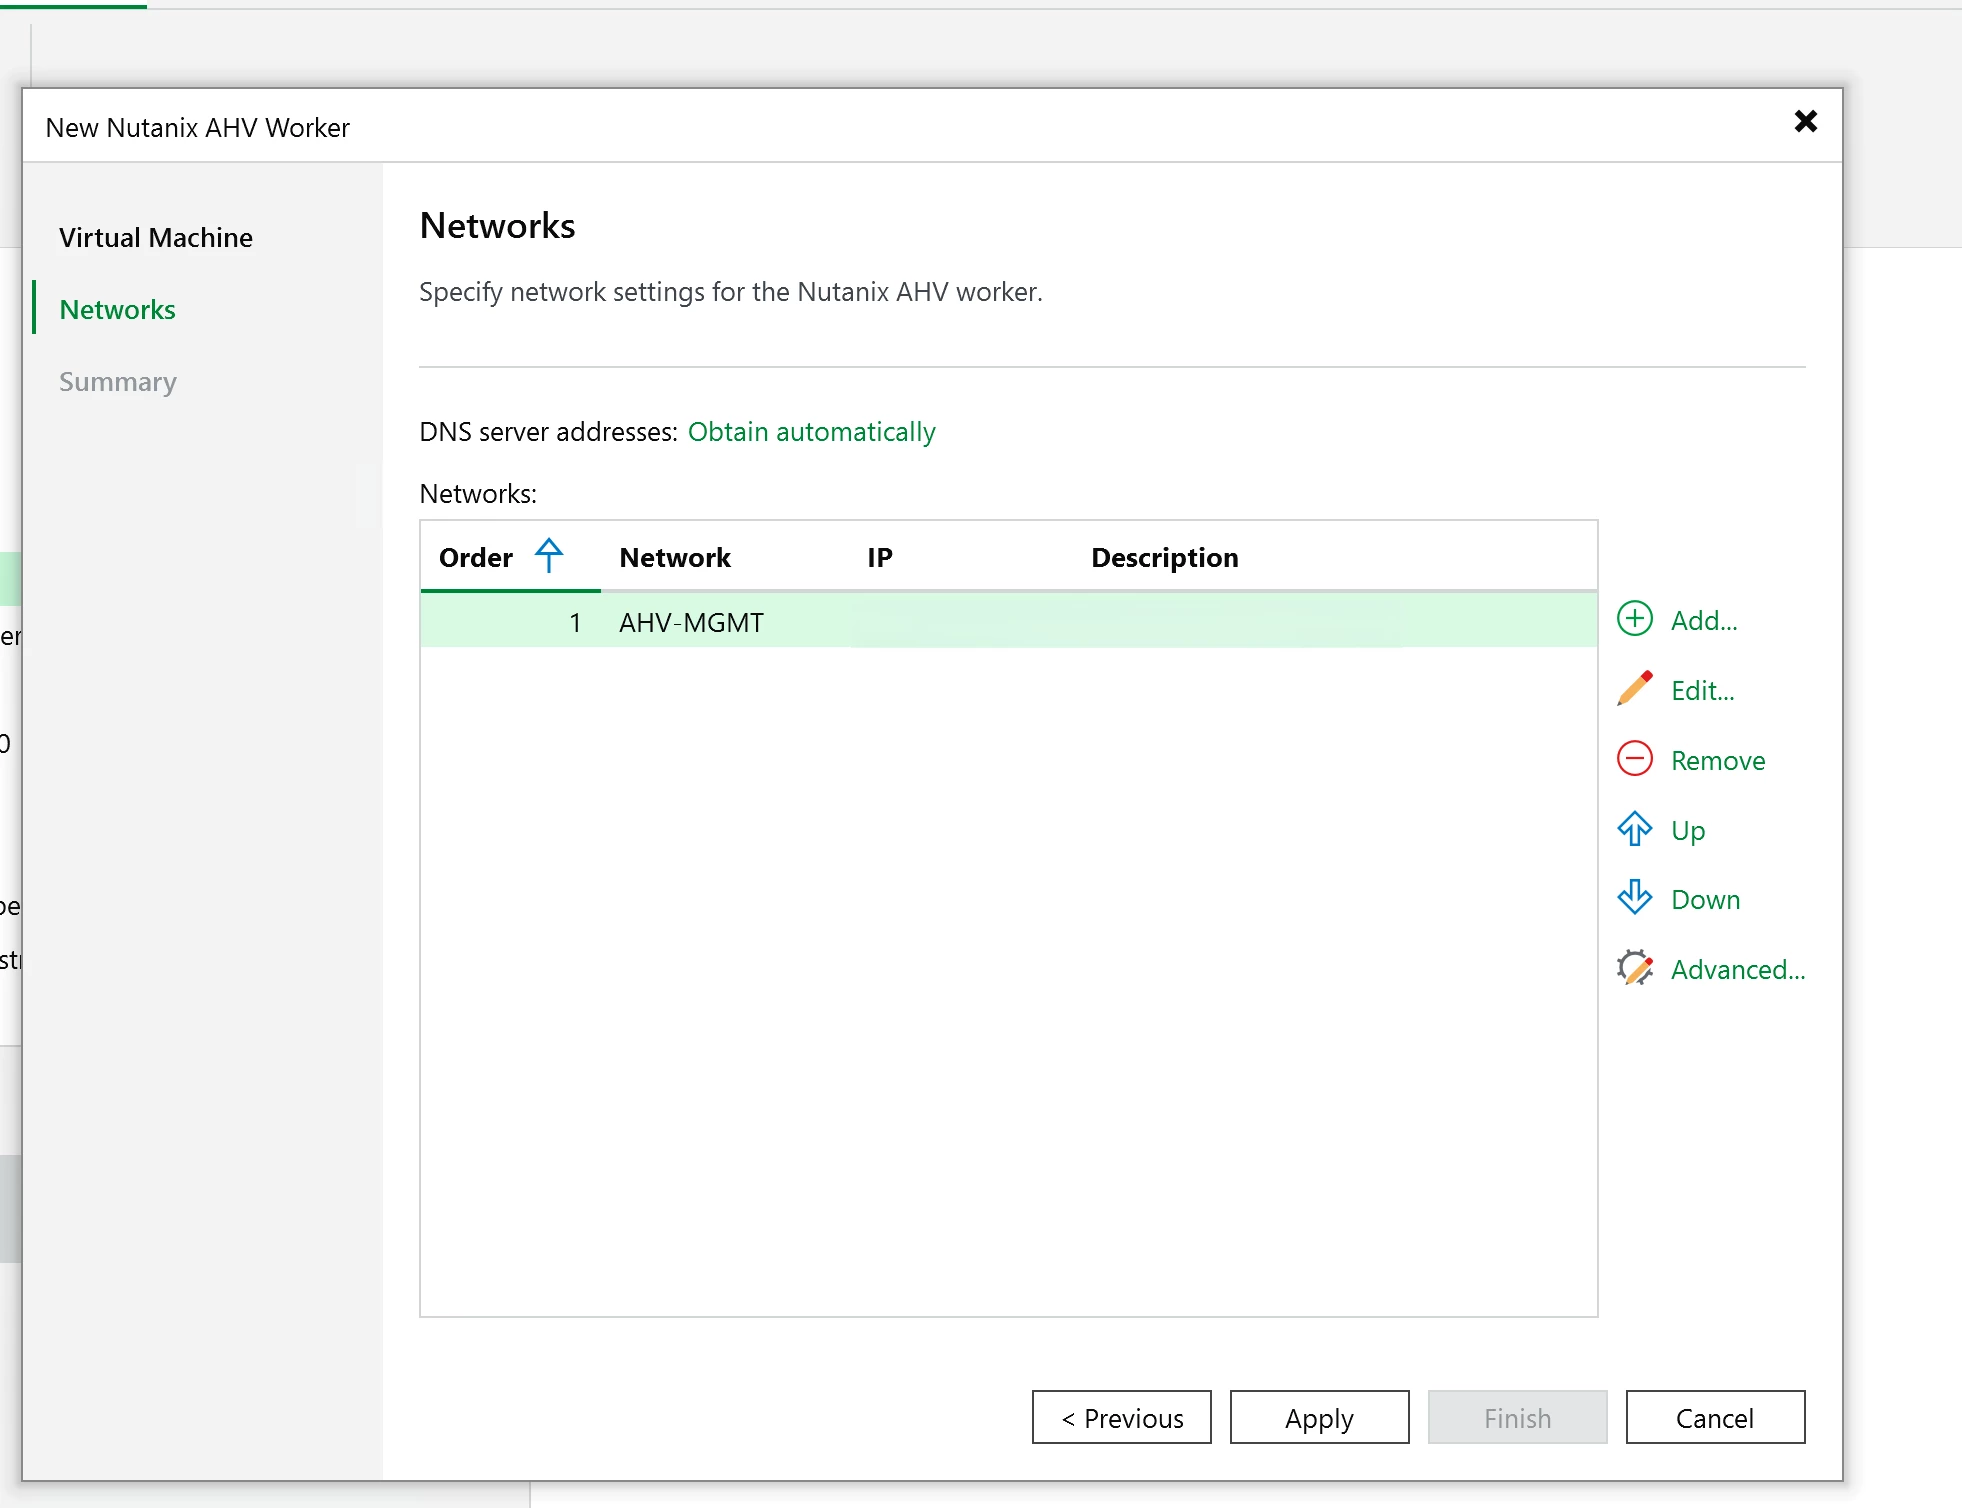
Click Apply and let VBR create the VM, boot it, config networking, and register it to the backup server. Expect this to take a few minutes..
Worker planning note: size and place workers per AHV cluster. Veeam recommends deploying workers in each Nutanix AHV cluster you protect. If no worker exists in a cluster, VBR can use a worker from another cluster, but the backup performance can be affected by doing this.
Leave workers alone after deployment. Do not install software on them or change their config.
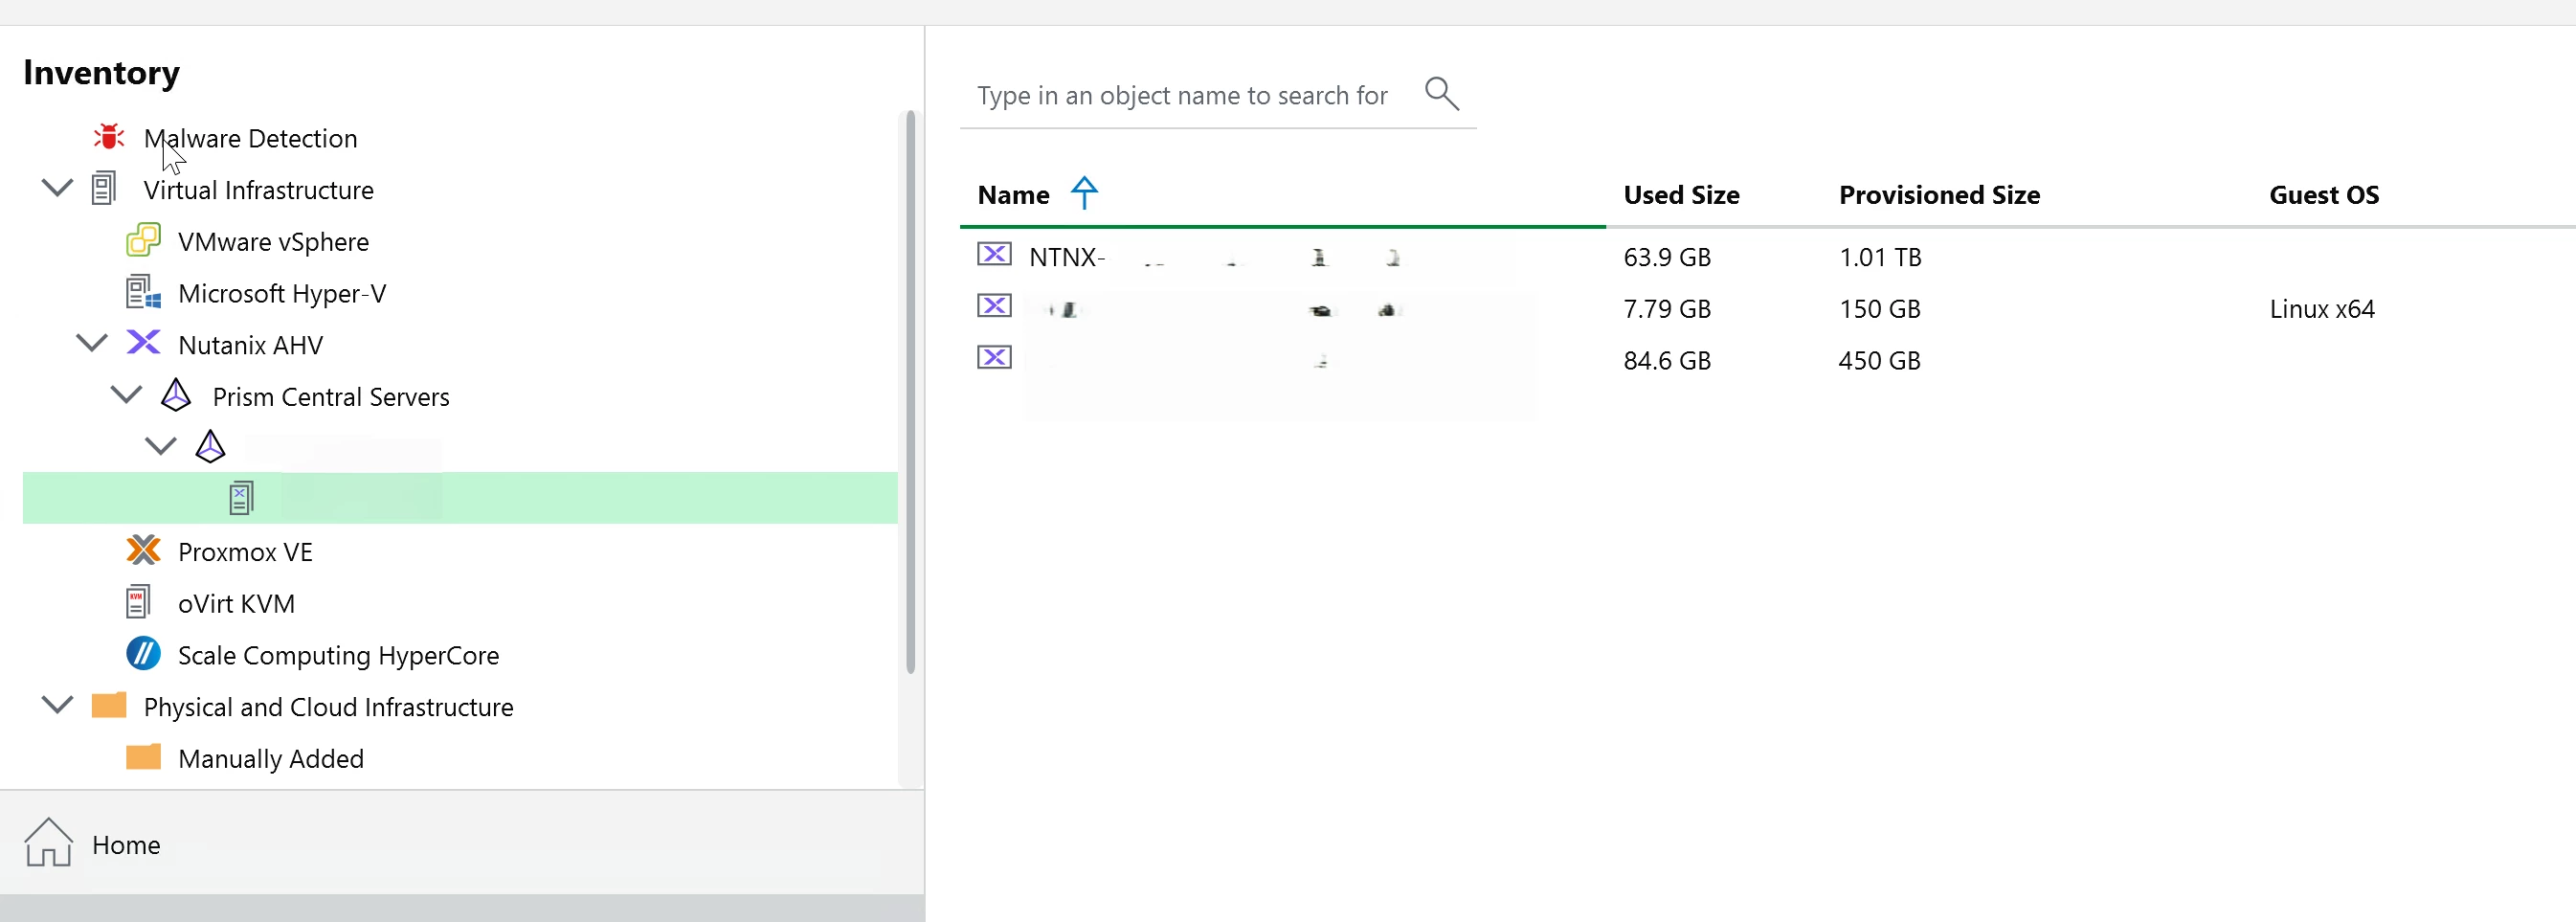
Verifying the infrastructure
Check Backup Infrastructure after the Nutanix environment is added. Your Nutanix server should show up in VBR, and the workers should be listed under Backup Proxies. That is where you can check status, connection health, and concurrent task settings.
Need more throughput? Add more workers through Backup Infrastructure, then Backup Proxies. Pick the Nutanix environment, name the worker, choose the storage container, set networking, and configure host affinity if needed.
The first worker setup is enough for a basic test, but busier environments will need more capacity. Watch the job sessions, check the bottleneck stats, and scale workers based on what the environment is actually doing.
The worker model is the main thing to remember in v13. Do not look for the old AHV proxy appliance workflow. Configure workers in VBR, make sure they have the right network path to Nutanix and the repository, and keep the setup simple unless the environment needs more scale.
Need more workers? Go to backup infrastructure, then backup proxies, and run the add proxy wizard. Pick the Nutanix cluster, name the worker, choose the storage container, set networking, and configure host affinity if needed. VBR saves the worker configuration to its database. The worker VM is not necessarily deployed until testing or a backup/restore session needs it. At job start, VBR launches or deploys the worker. When the session finishes, VBR shuts it down.
The embedded worker is enough for a first test. When you need more throughput, add dedicated workers. Veeam’s sizing guidance is to allocate 1 vCPU and 1 GB RAM for each additional task, and to keep the total concurrent tasks across workers within the physical disk count of the cluster.
Creating the backup job
Go to home. Right click backup job, then choose Nutanix AHV. If you have built VMware backup jobs before, the wizard will feel familiar. Pick the VMs you want to protect.
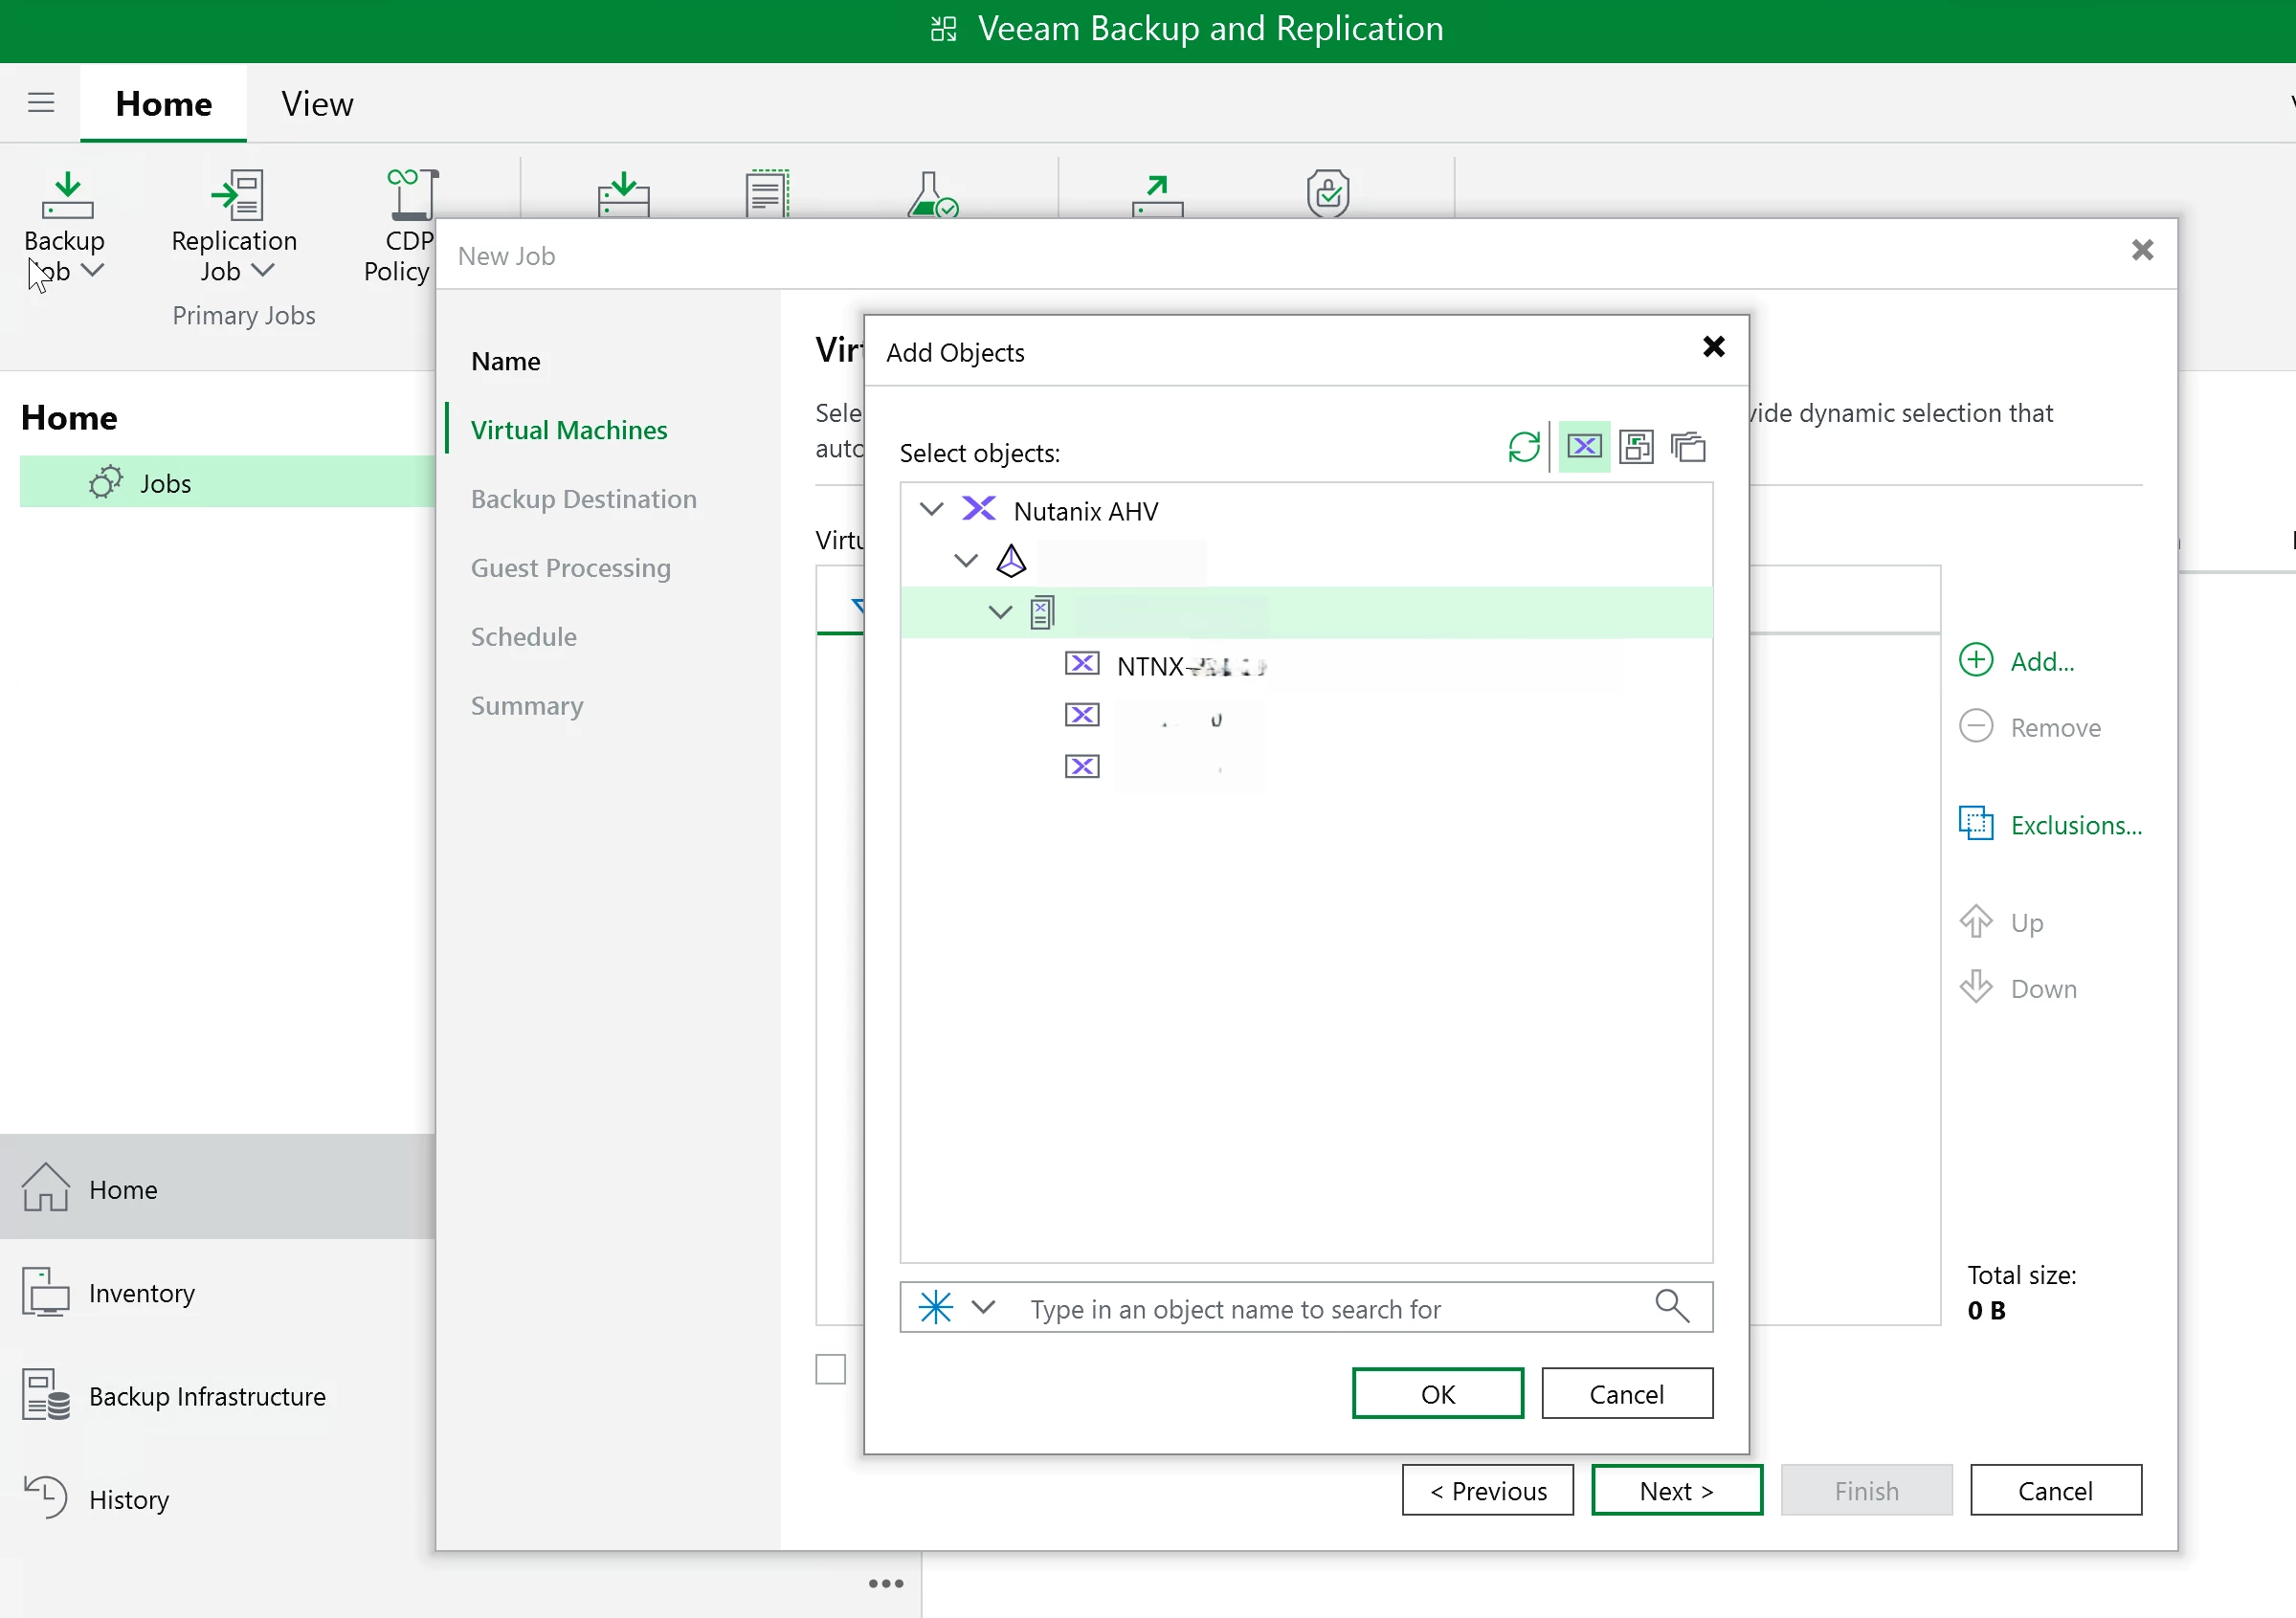
For the first run, I set the schedule to manual so I could trigger it myself and watch the session log. Finish the wizard.
Running the First Backup
Right-click the job and start it.
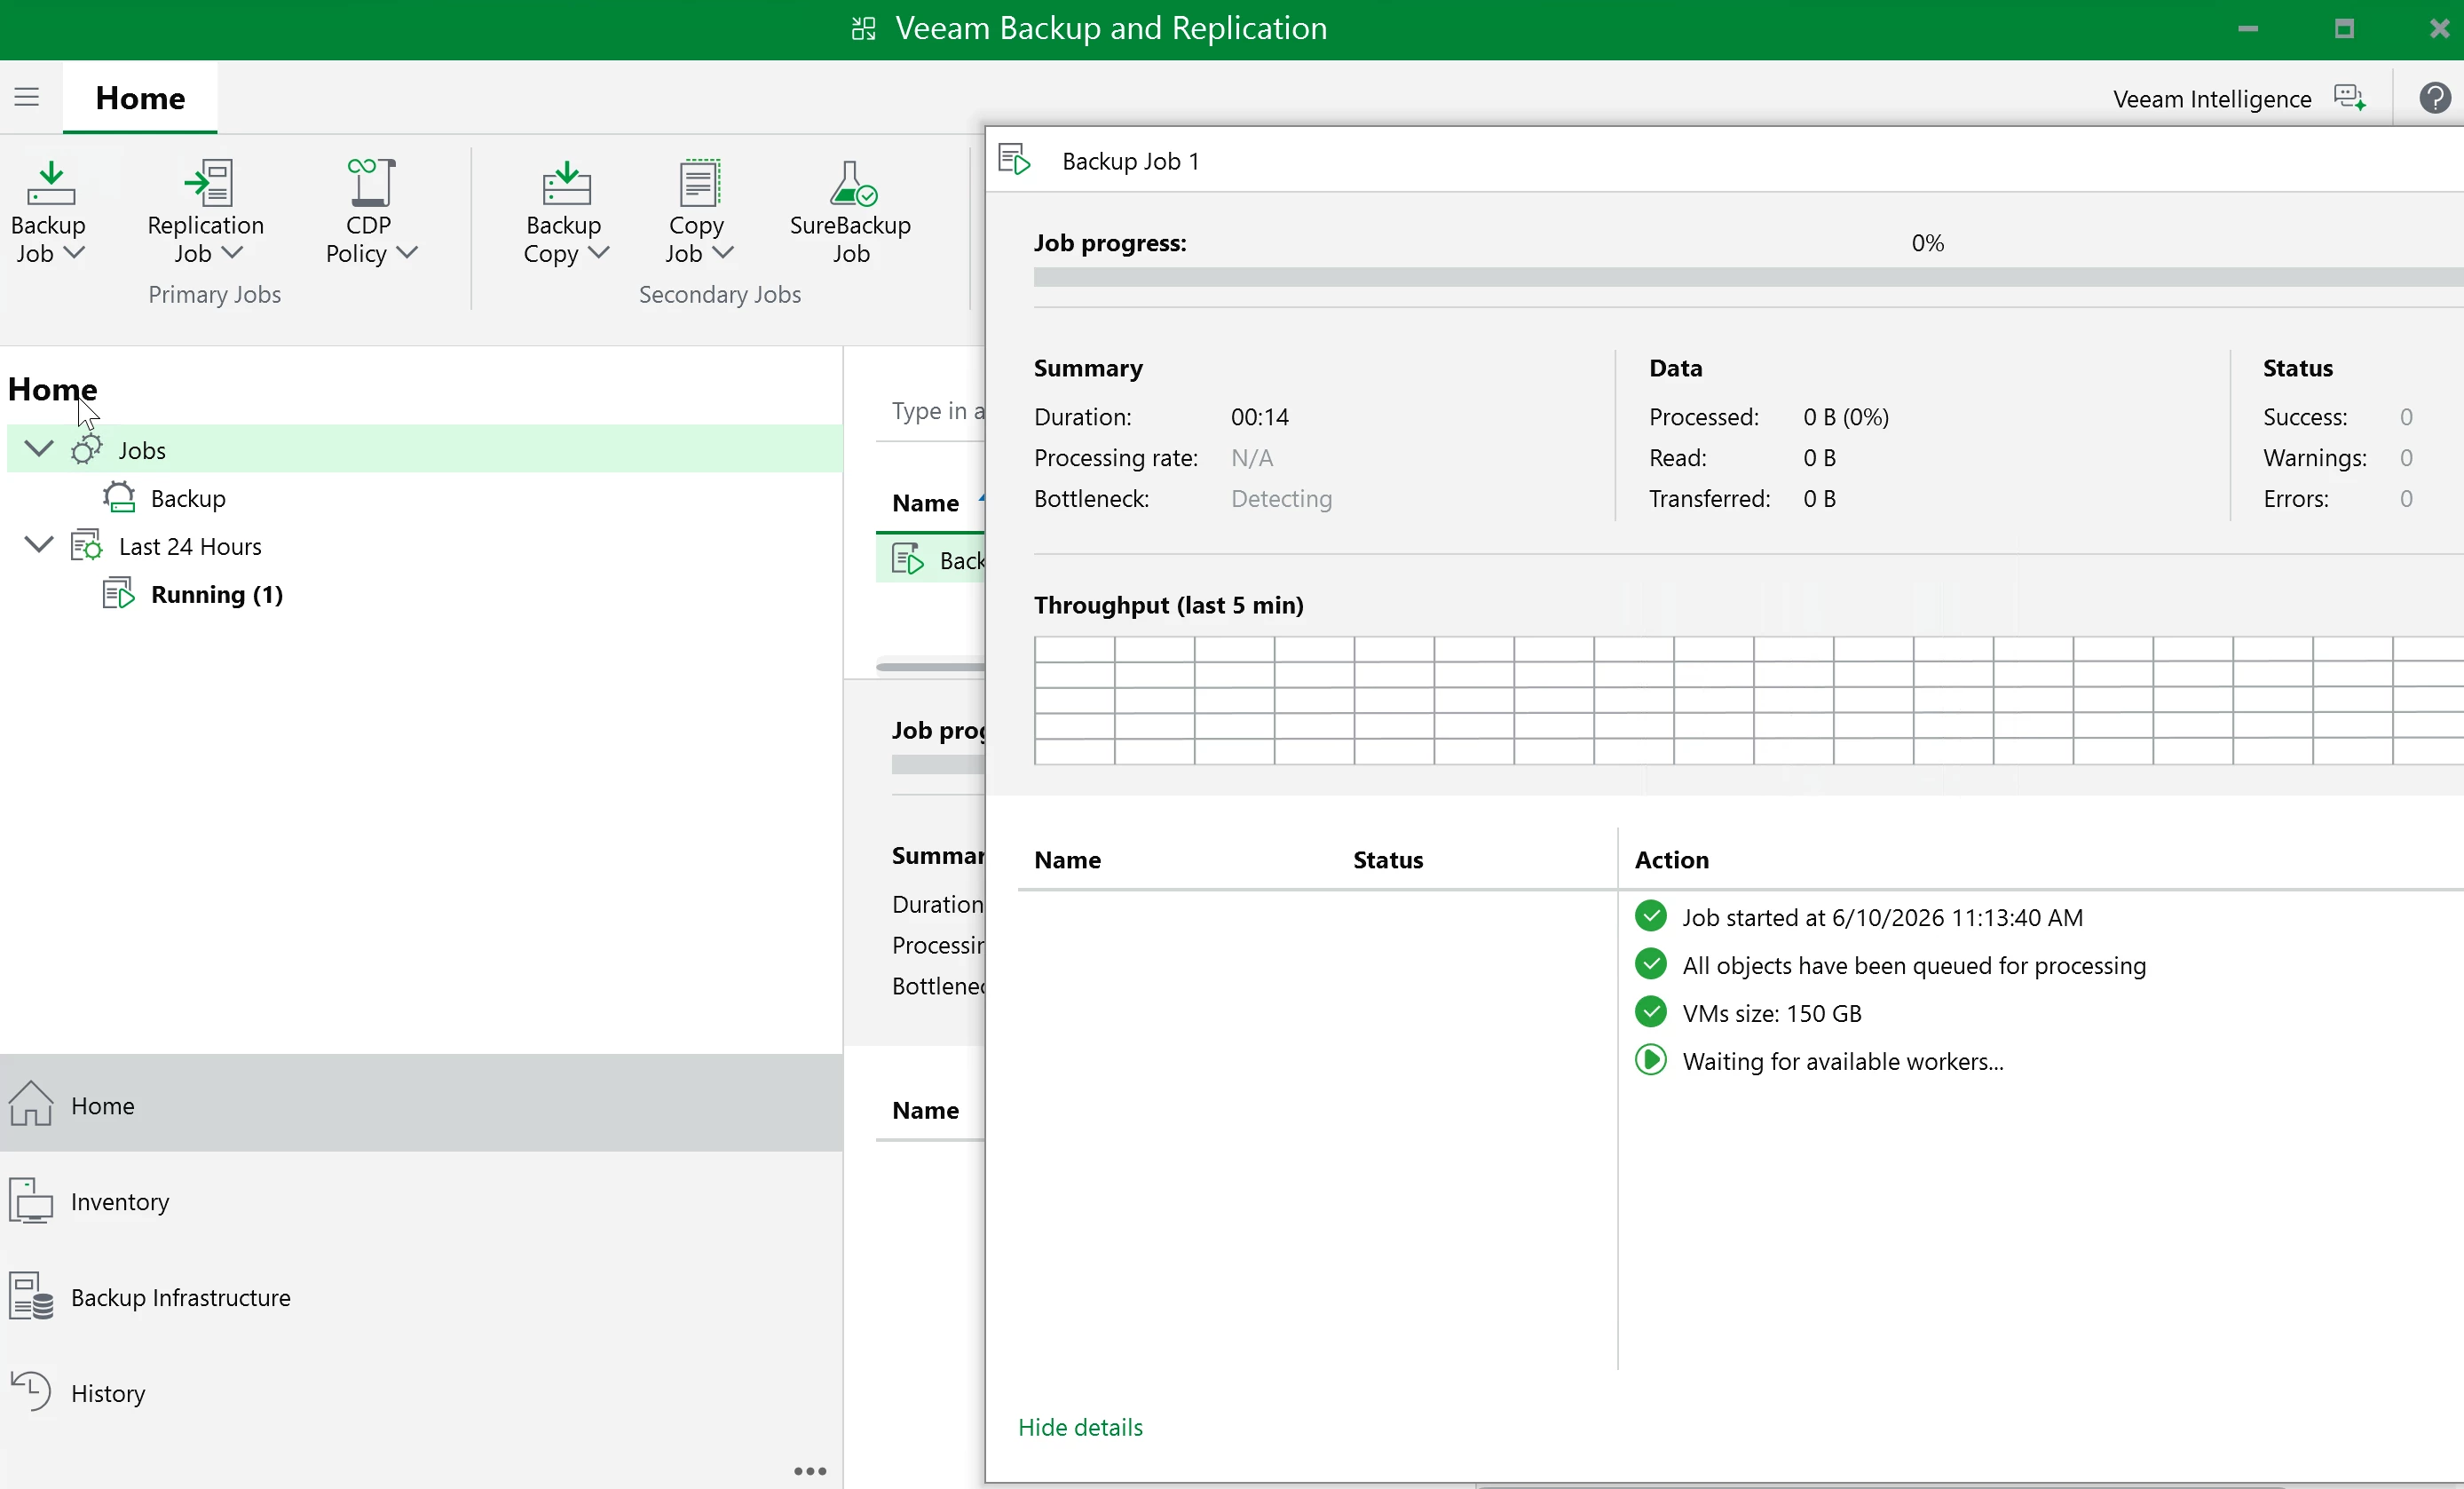
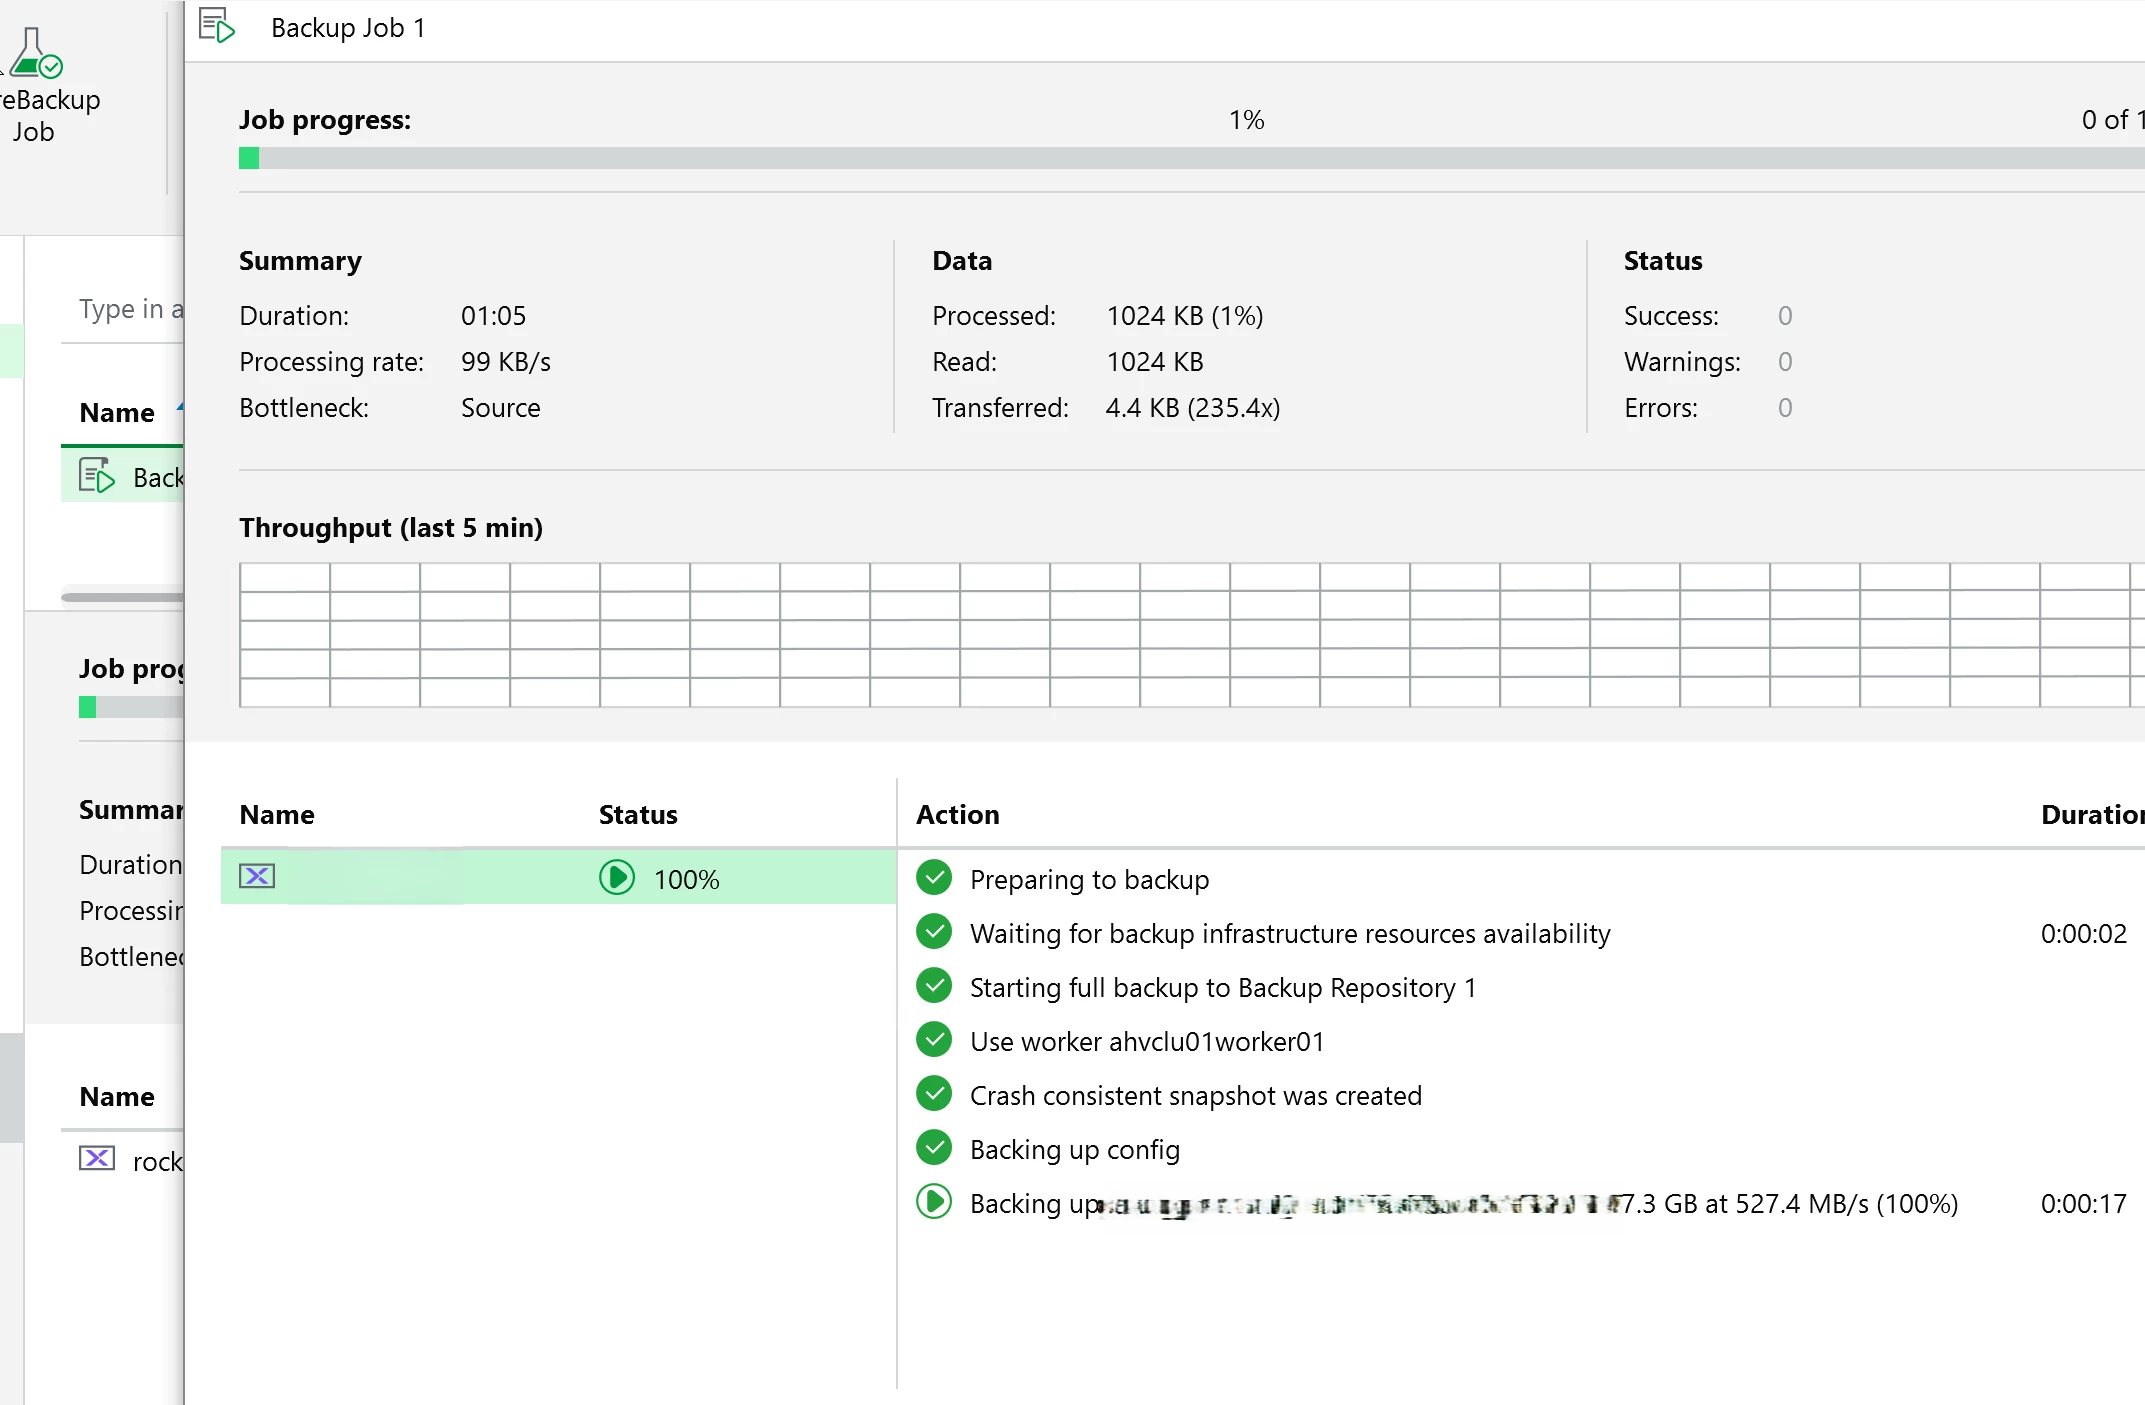
Behind the scenes, the worker talks to Prism and uses Nutanix snapshots. On the first run, Veeam reads written blocks while filtering out unallocated blocks. On later runs, Veeam compares the current snapshot with the previous backup snapshot so it can read only the changed blocks through Nutanix CBT.
After the job finishes, review the session log. Check throughput, data transferred, bottlenecks, and warnings. Be aware that Veeam managed backup snapshots are part of the AHV backup workflow and CBT behavior. Do not manually remove Veeam-managed recovery points unless you are doing it intentionally.
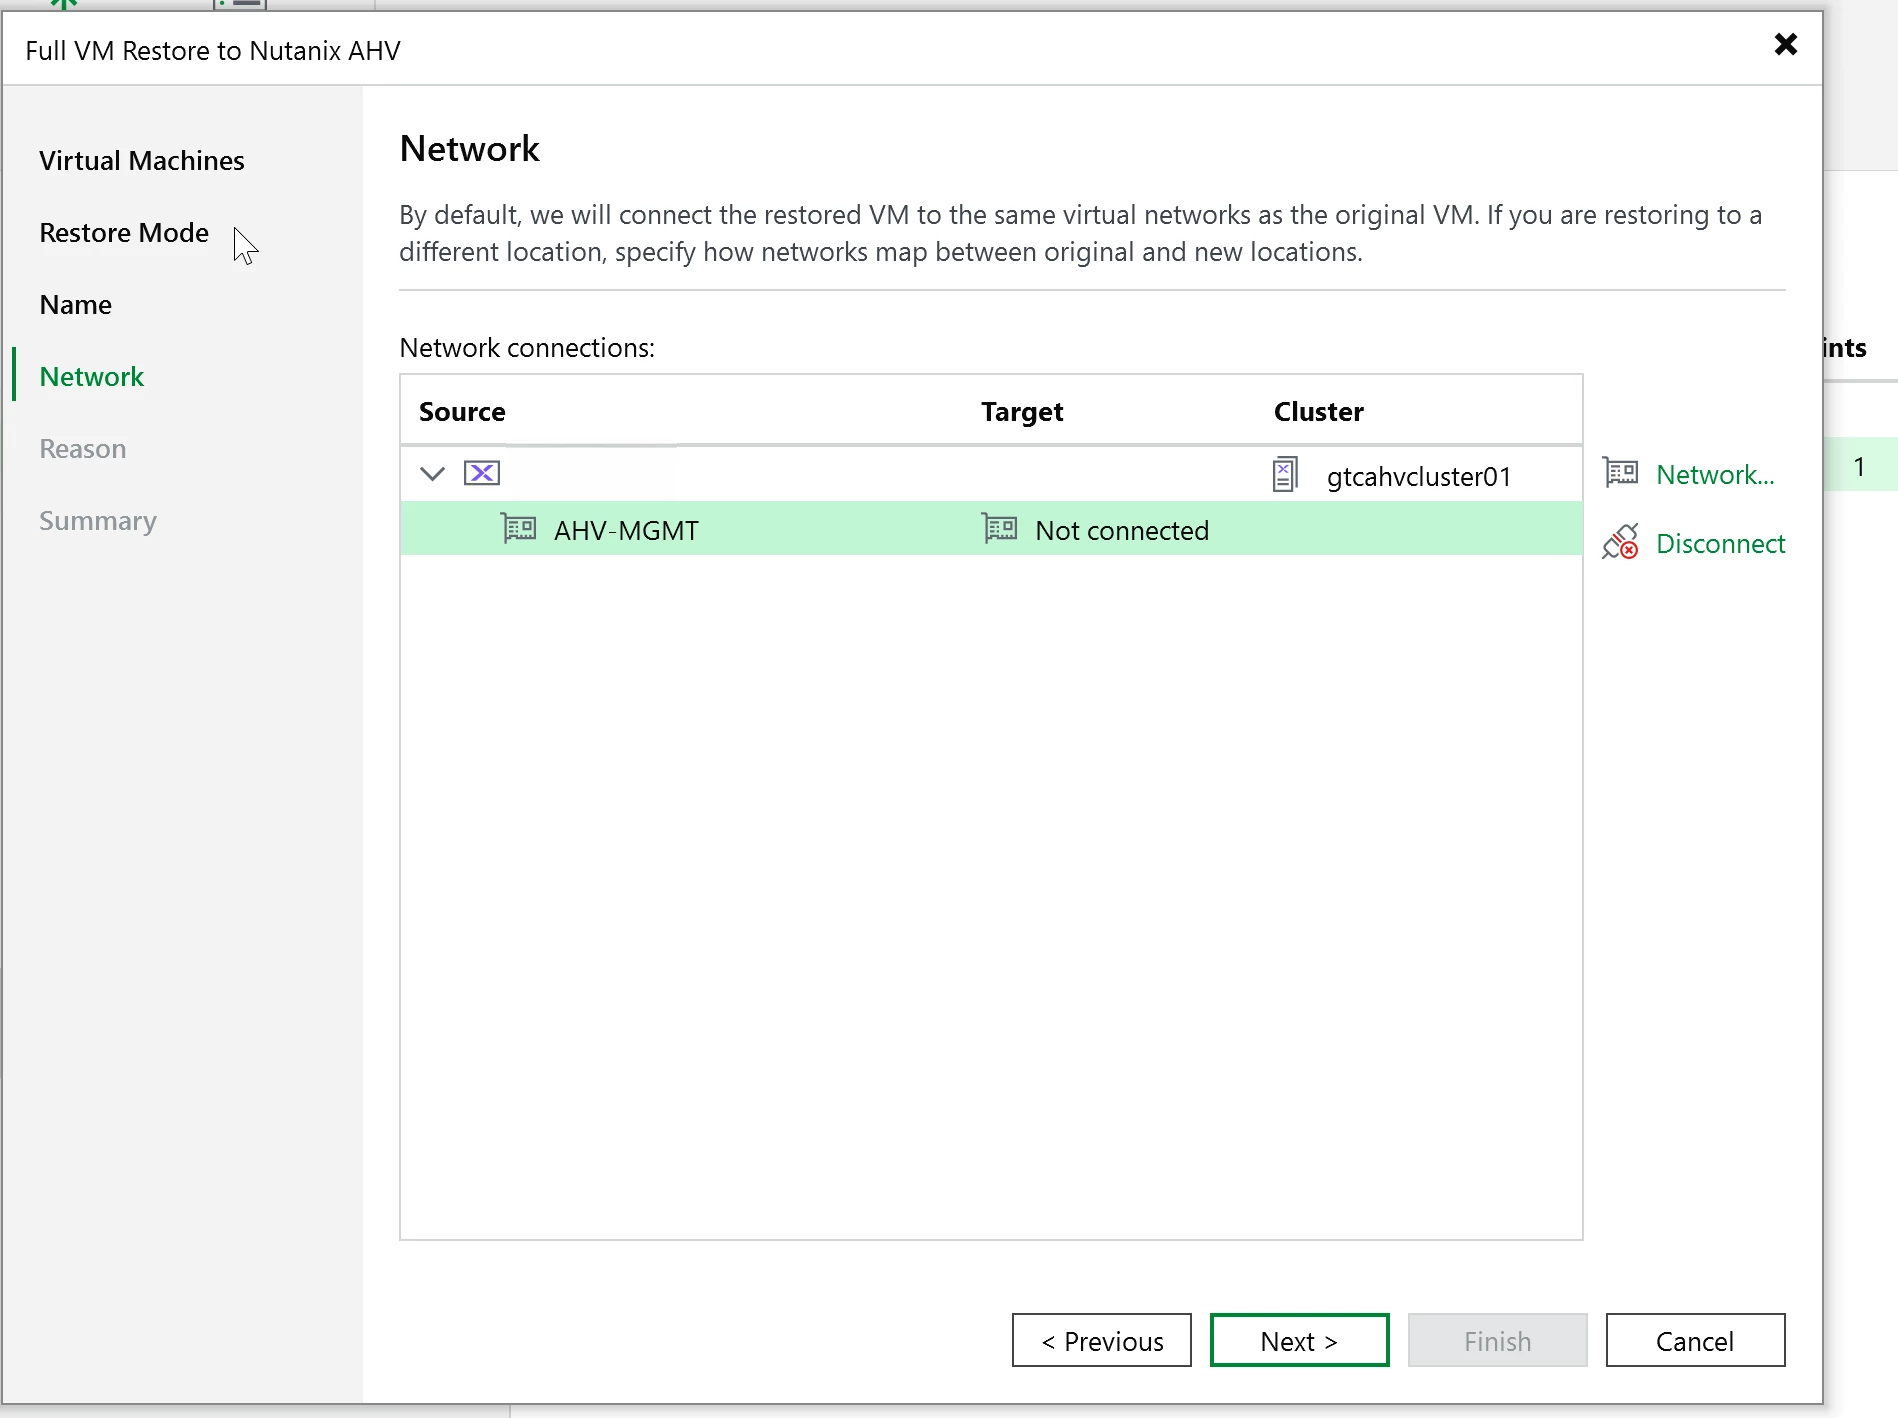
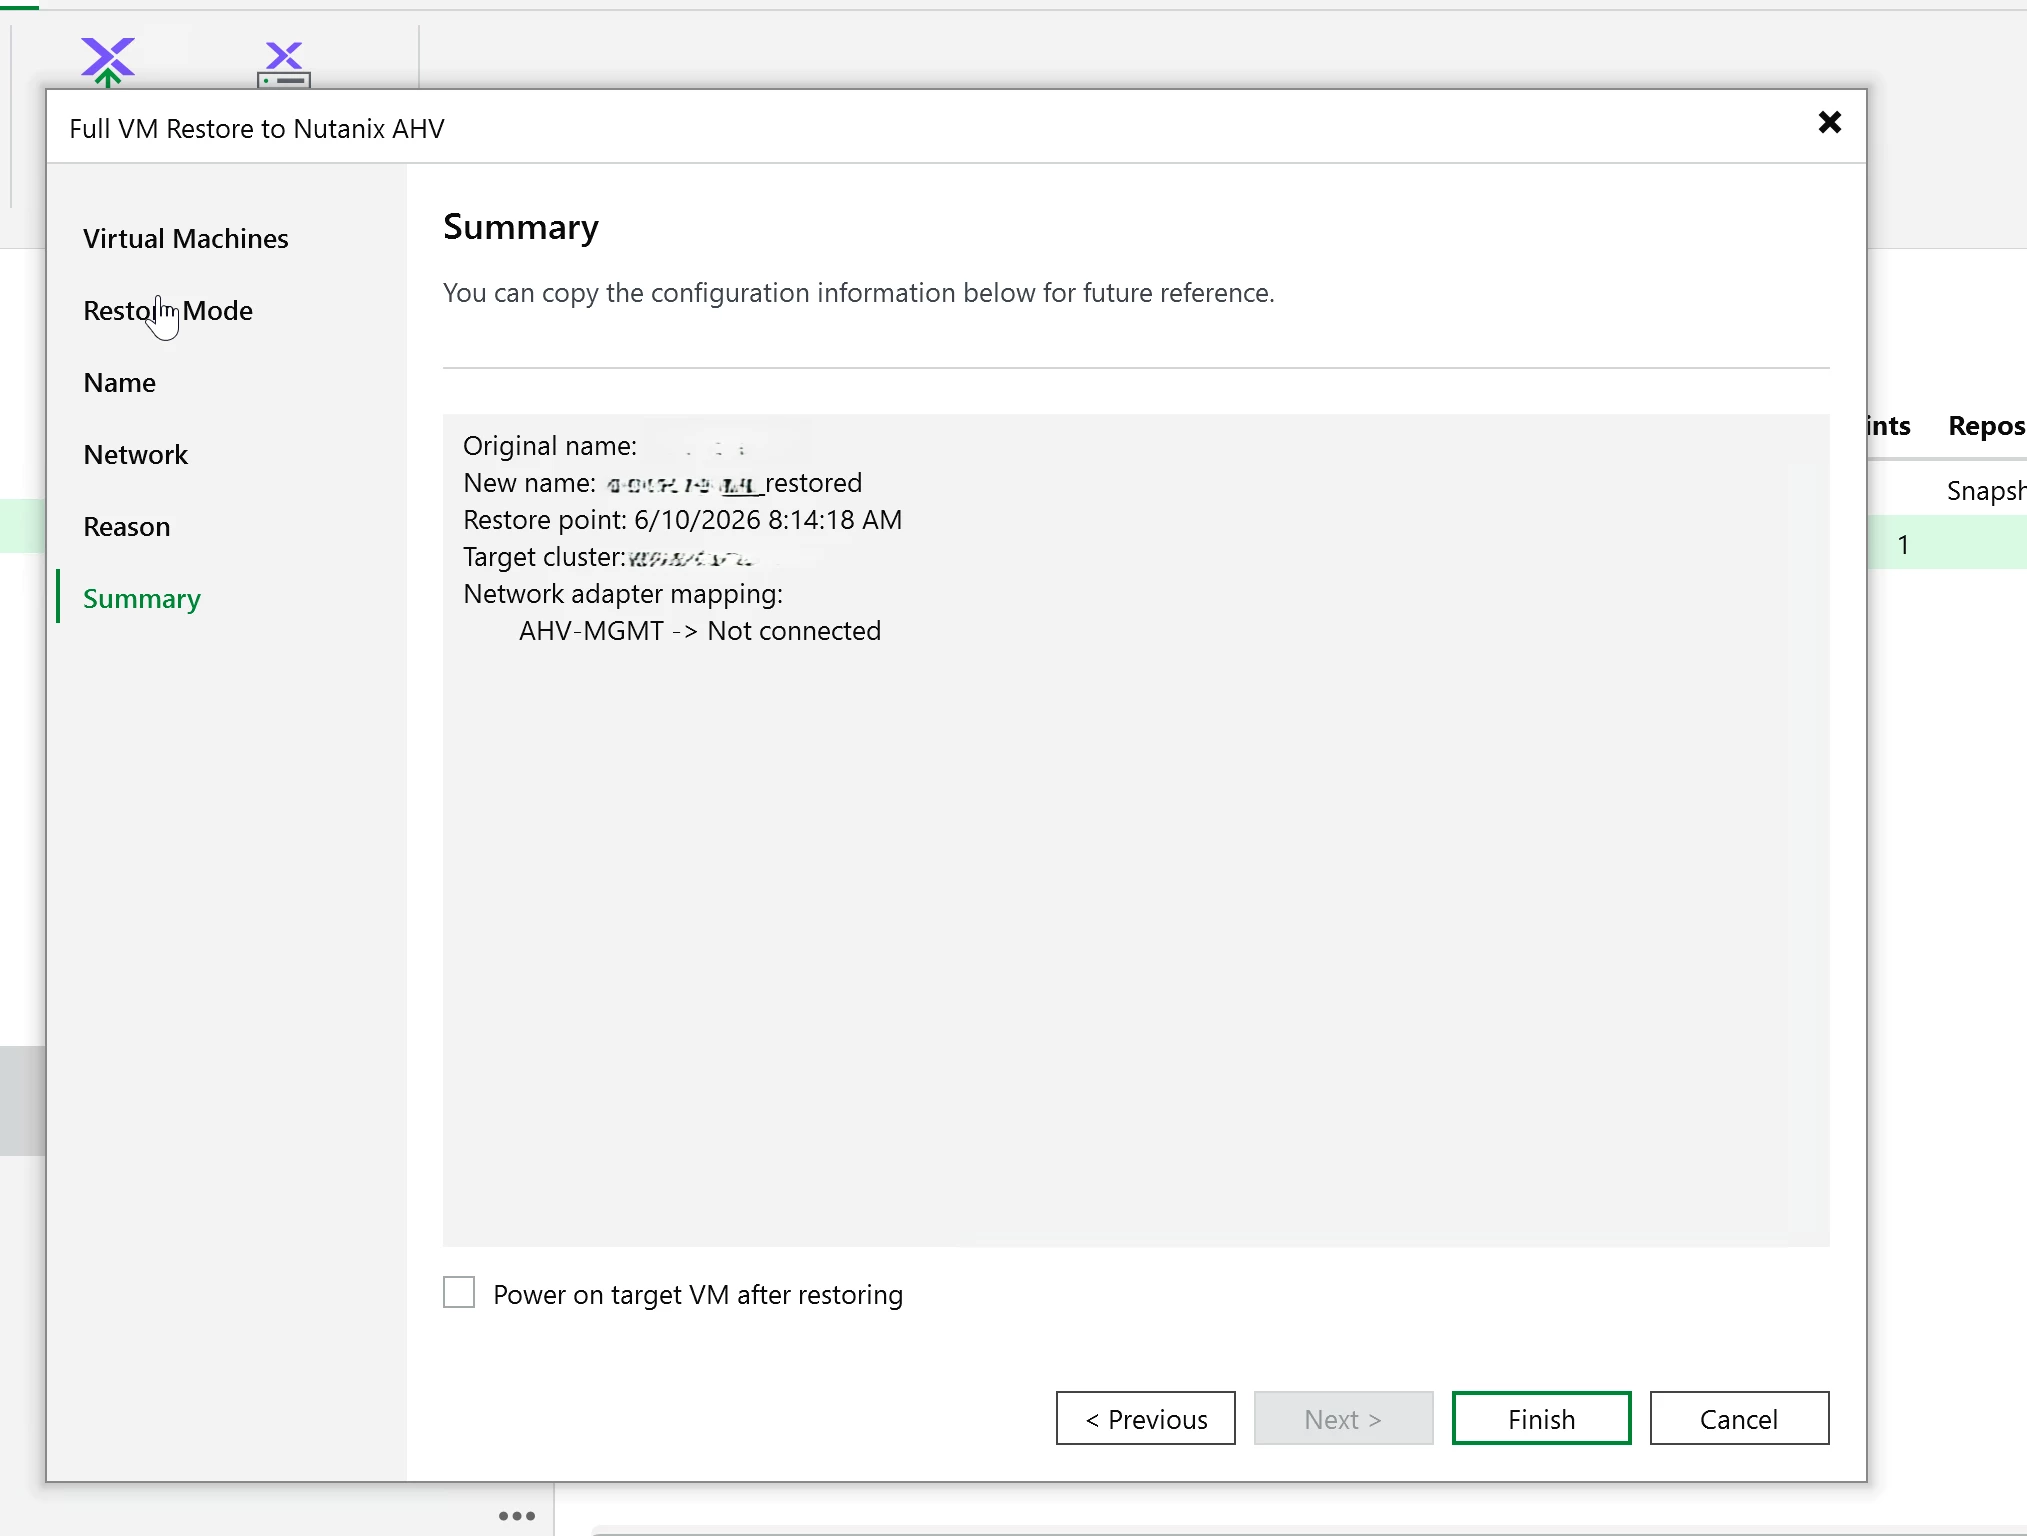
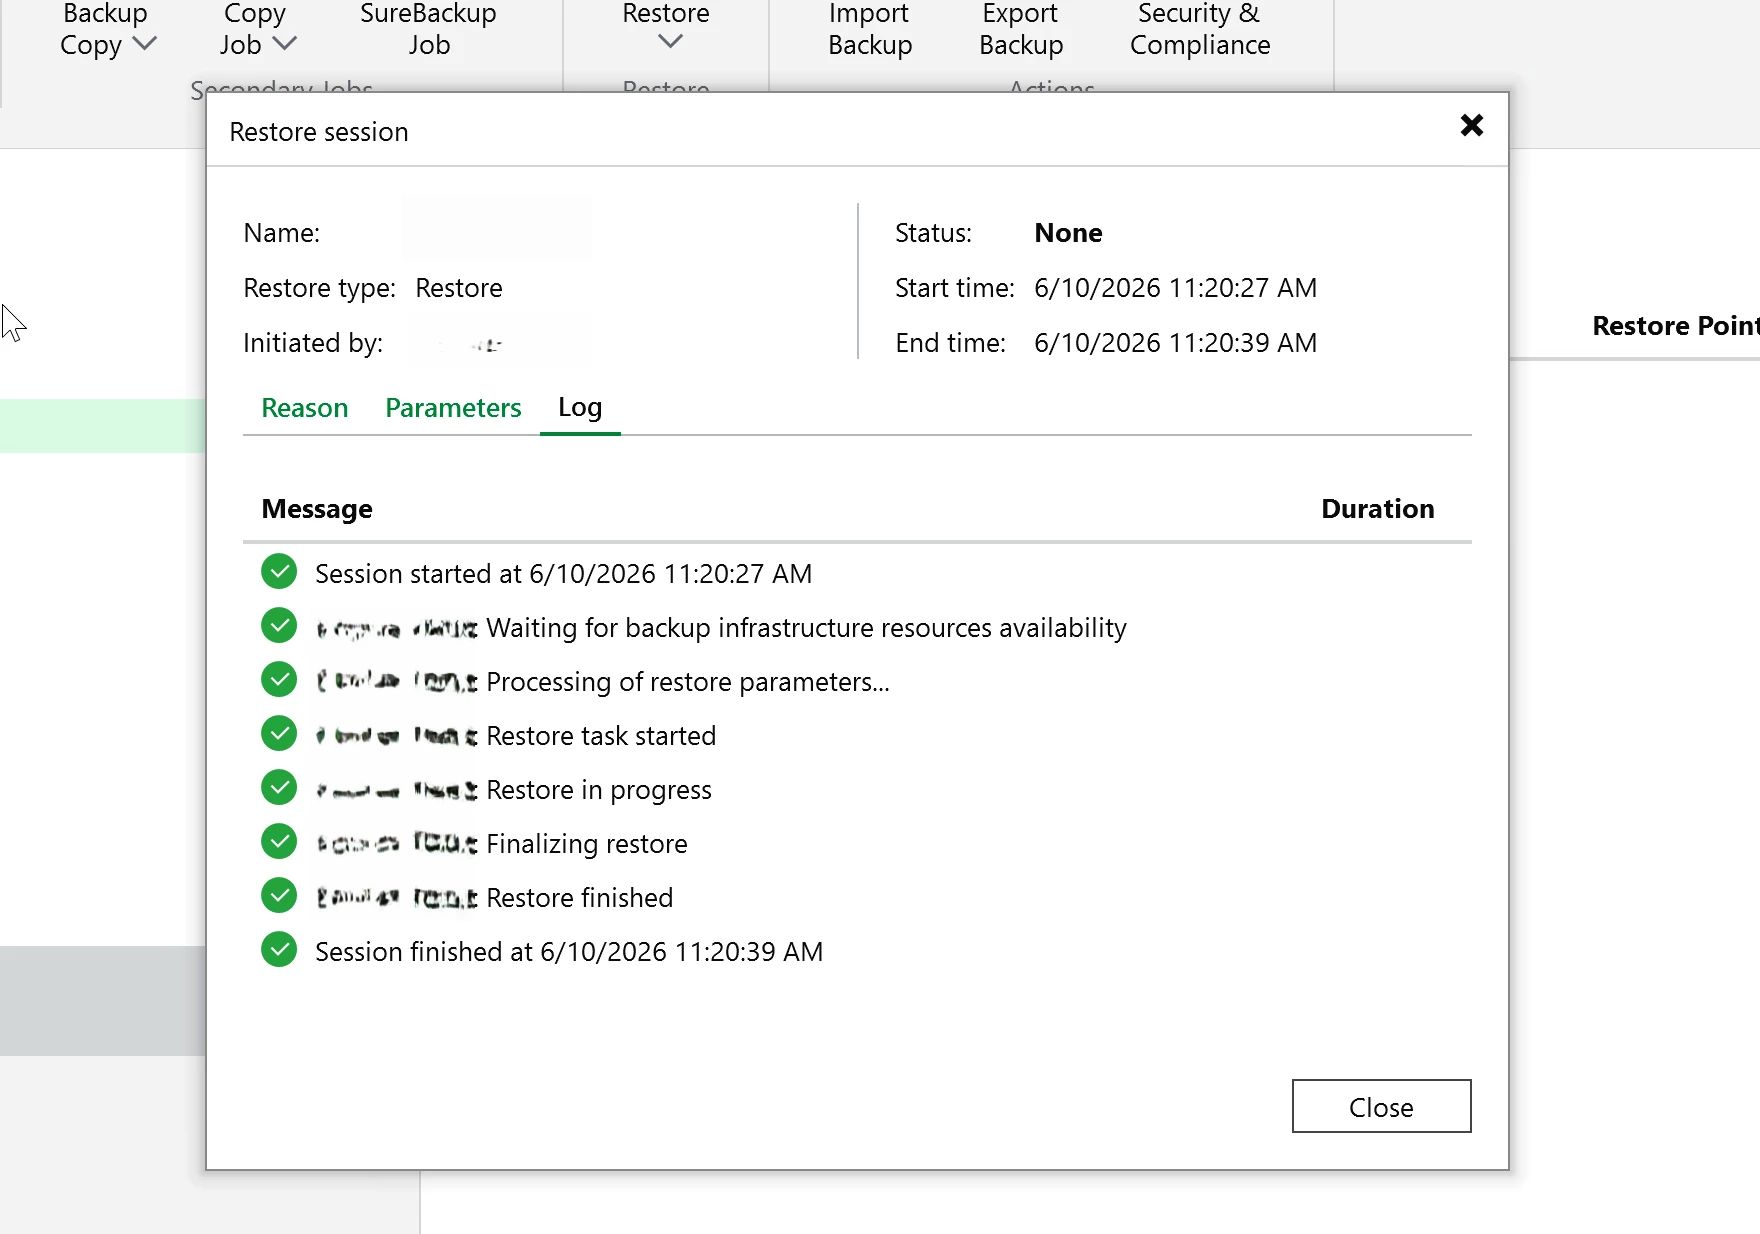
Performing a restore
I ran a restore after the backup. No point protecting something if you have not proven you can get it back right?
Go to backups in the VBR console. Right click the VM and select the restore type.
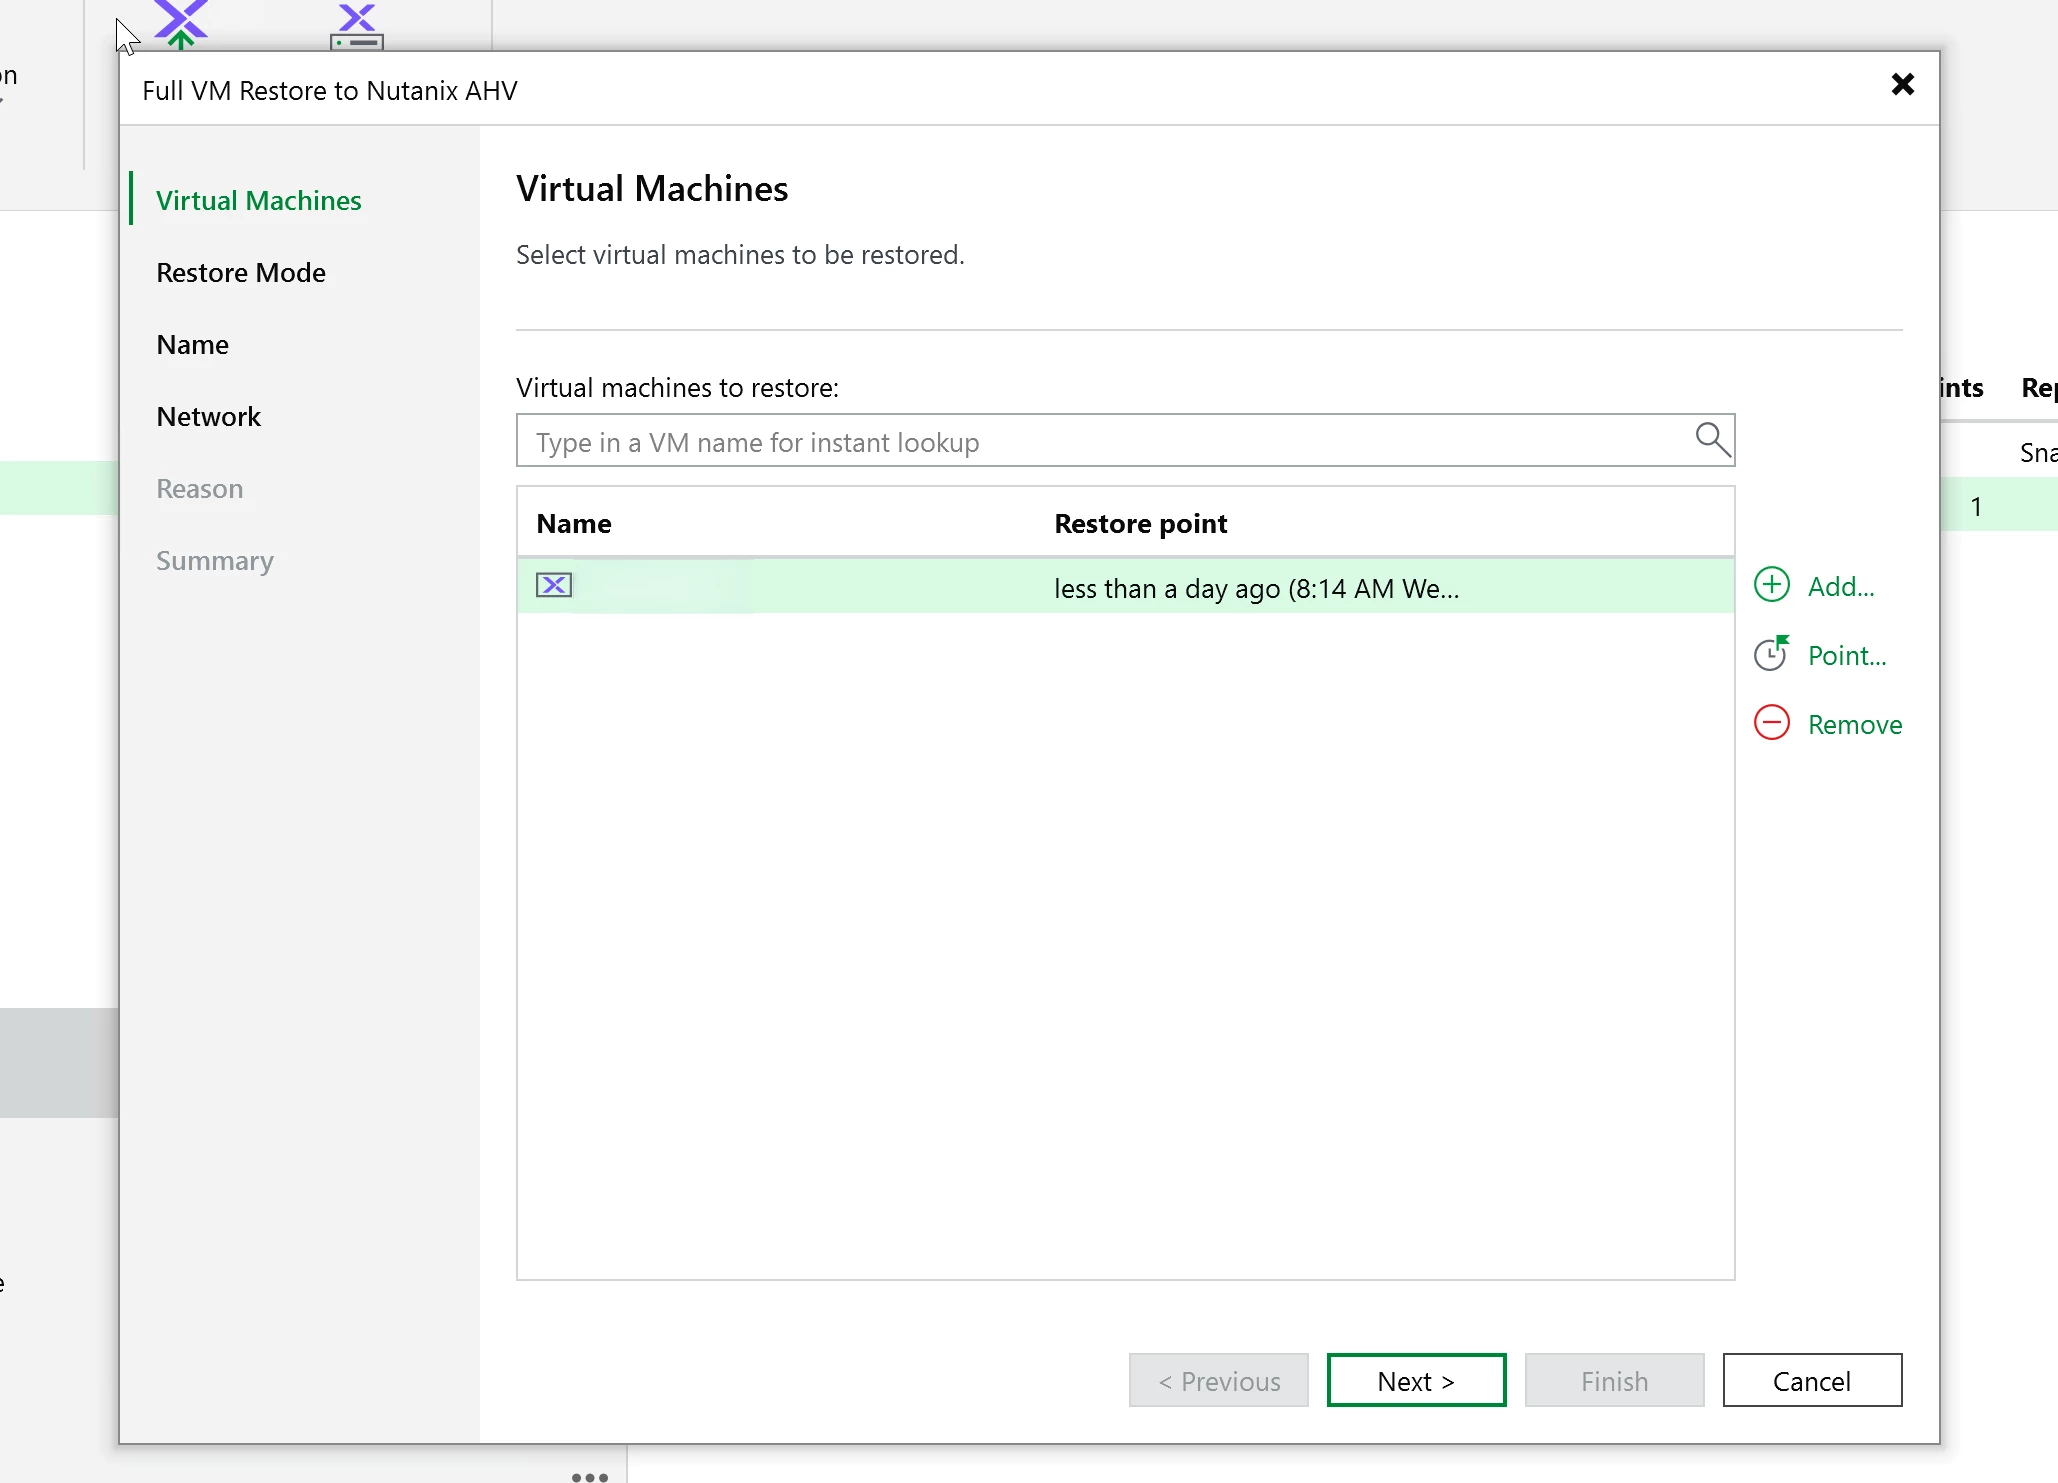
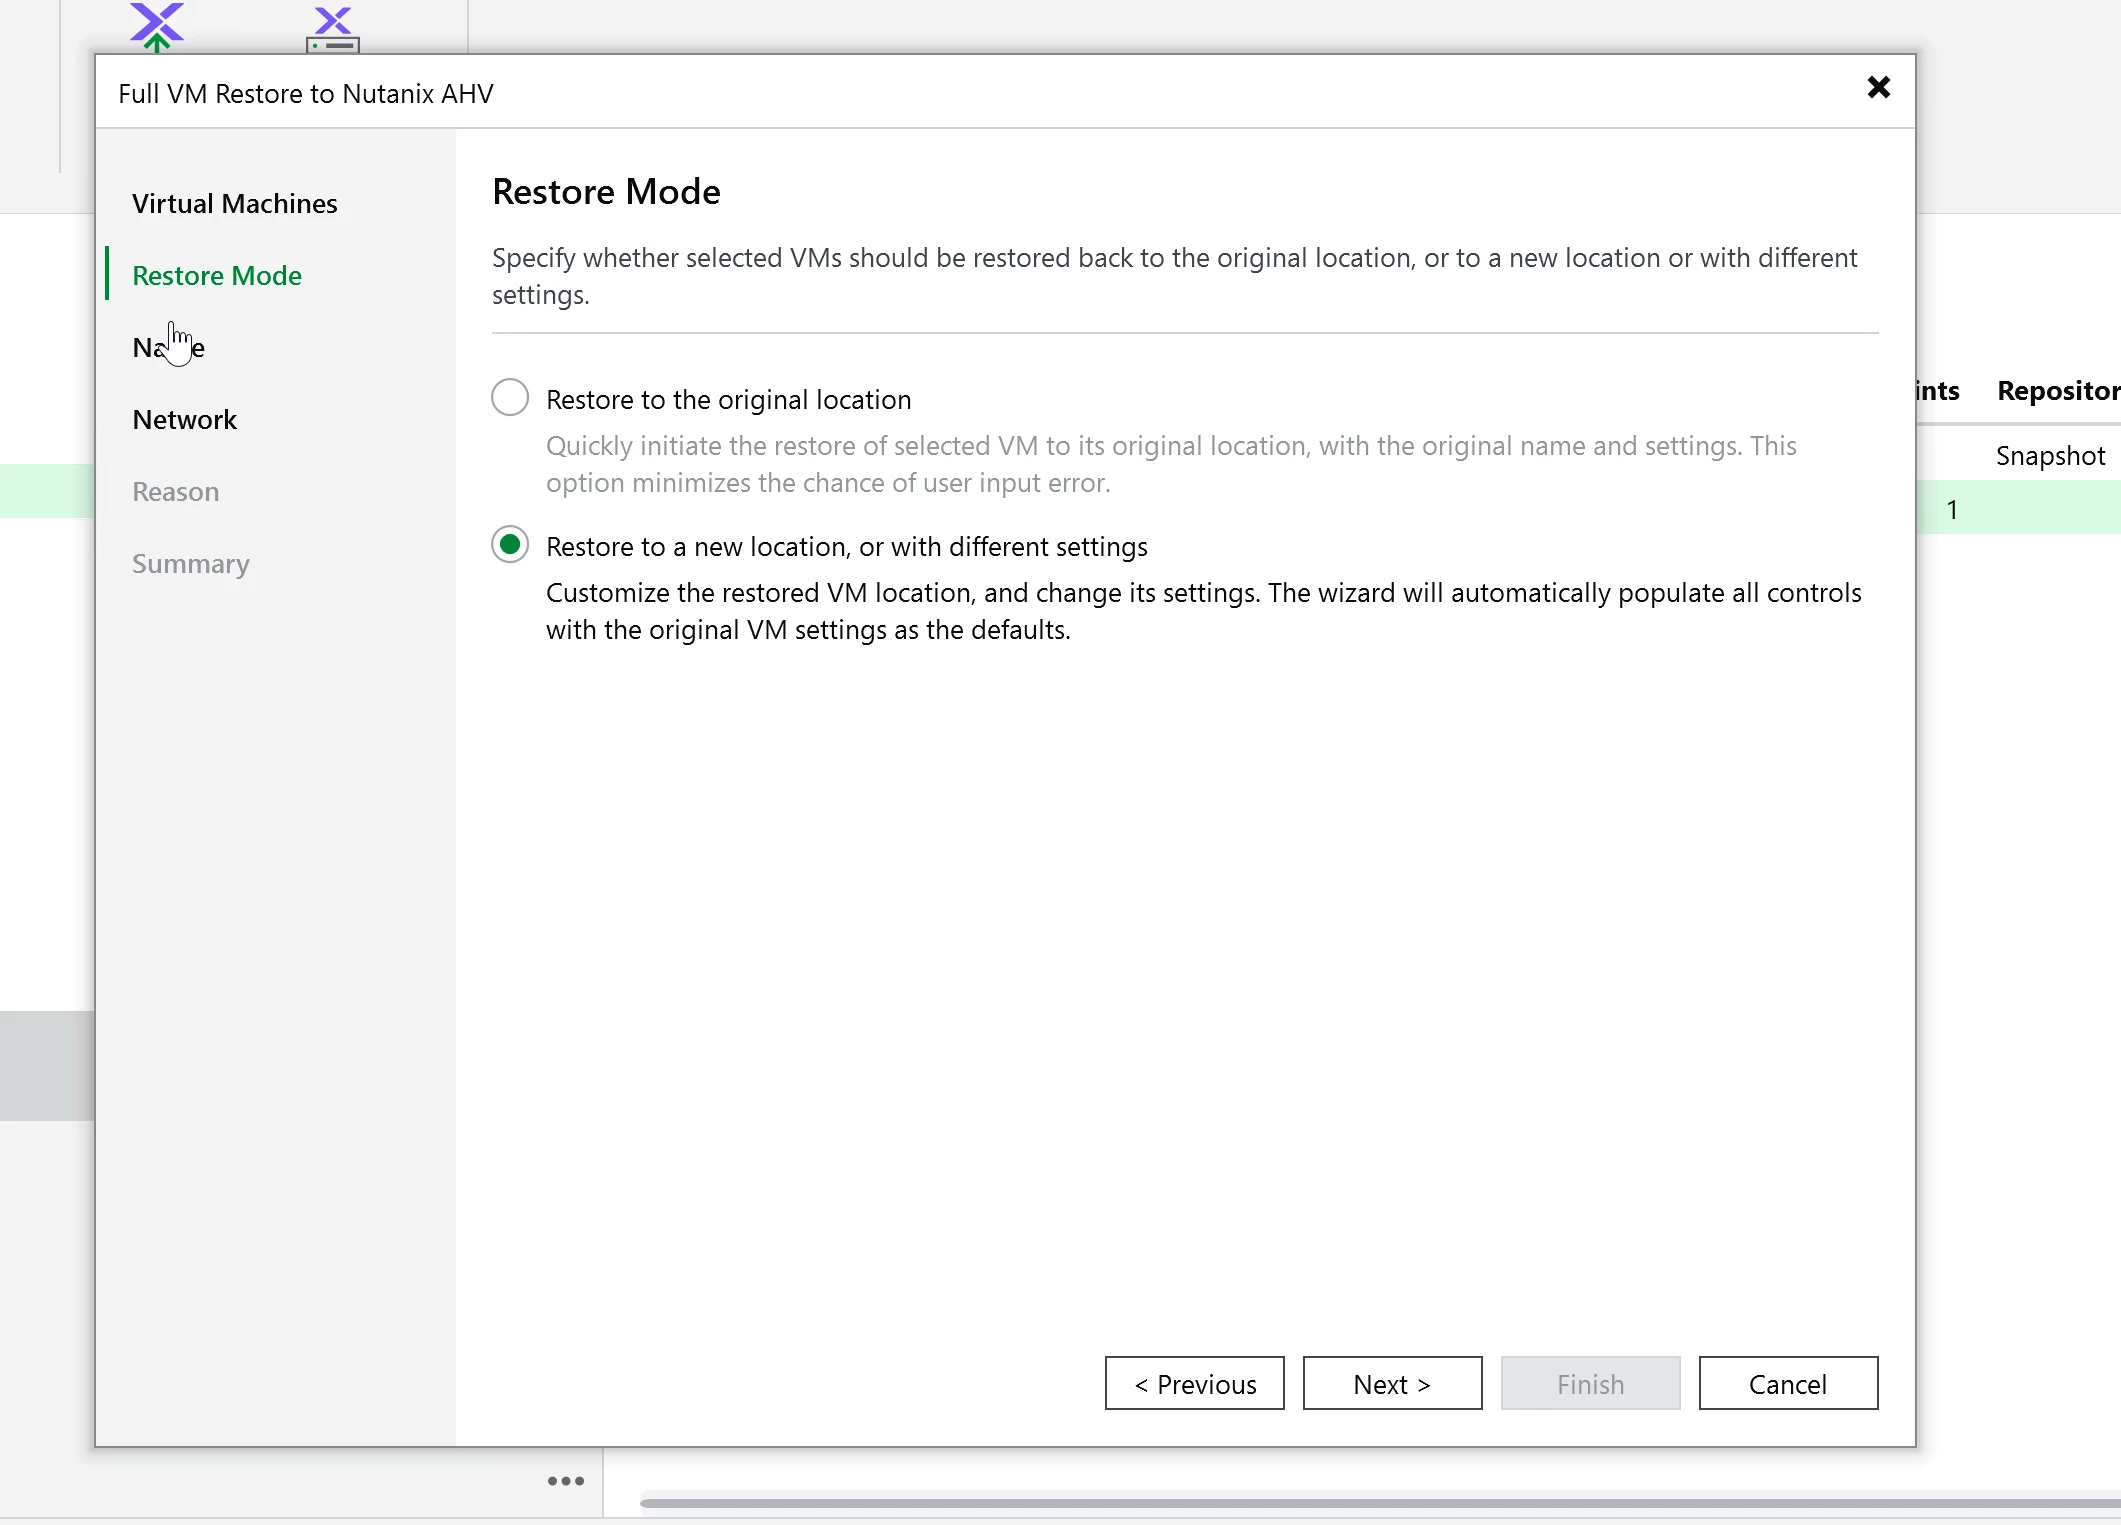
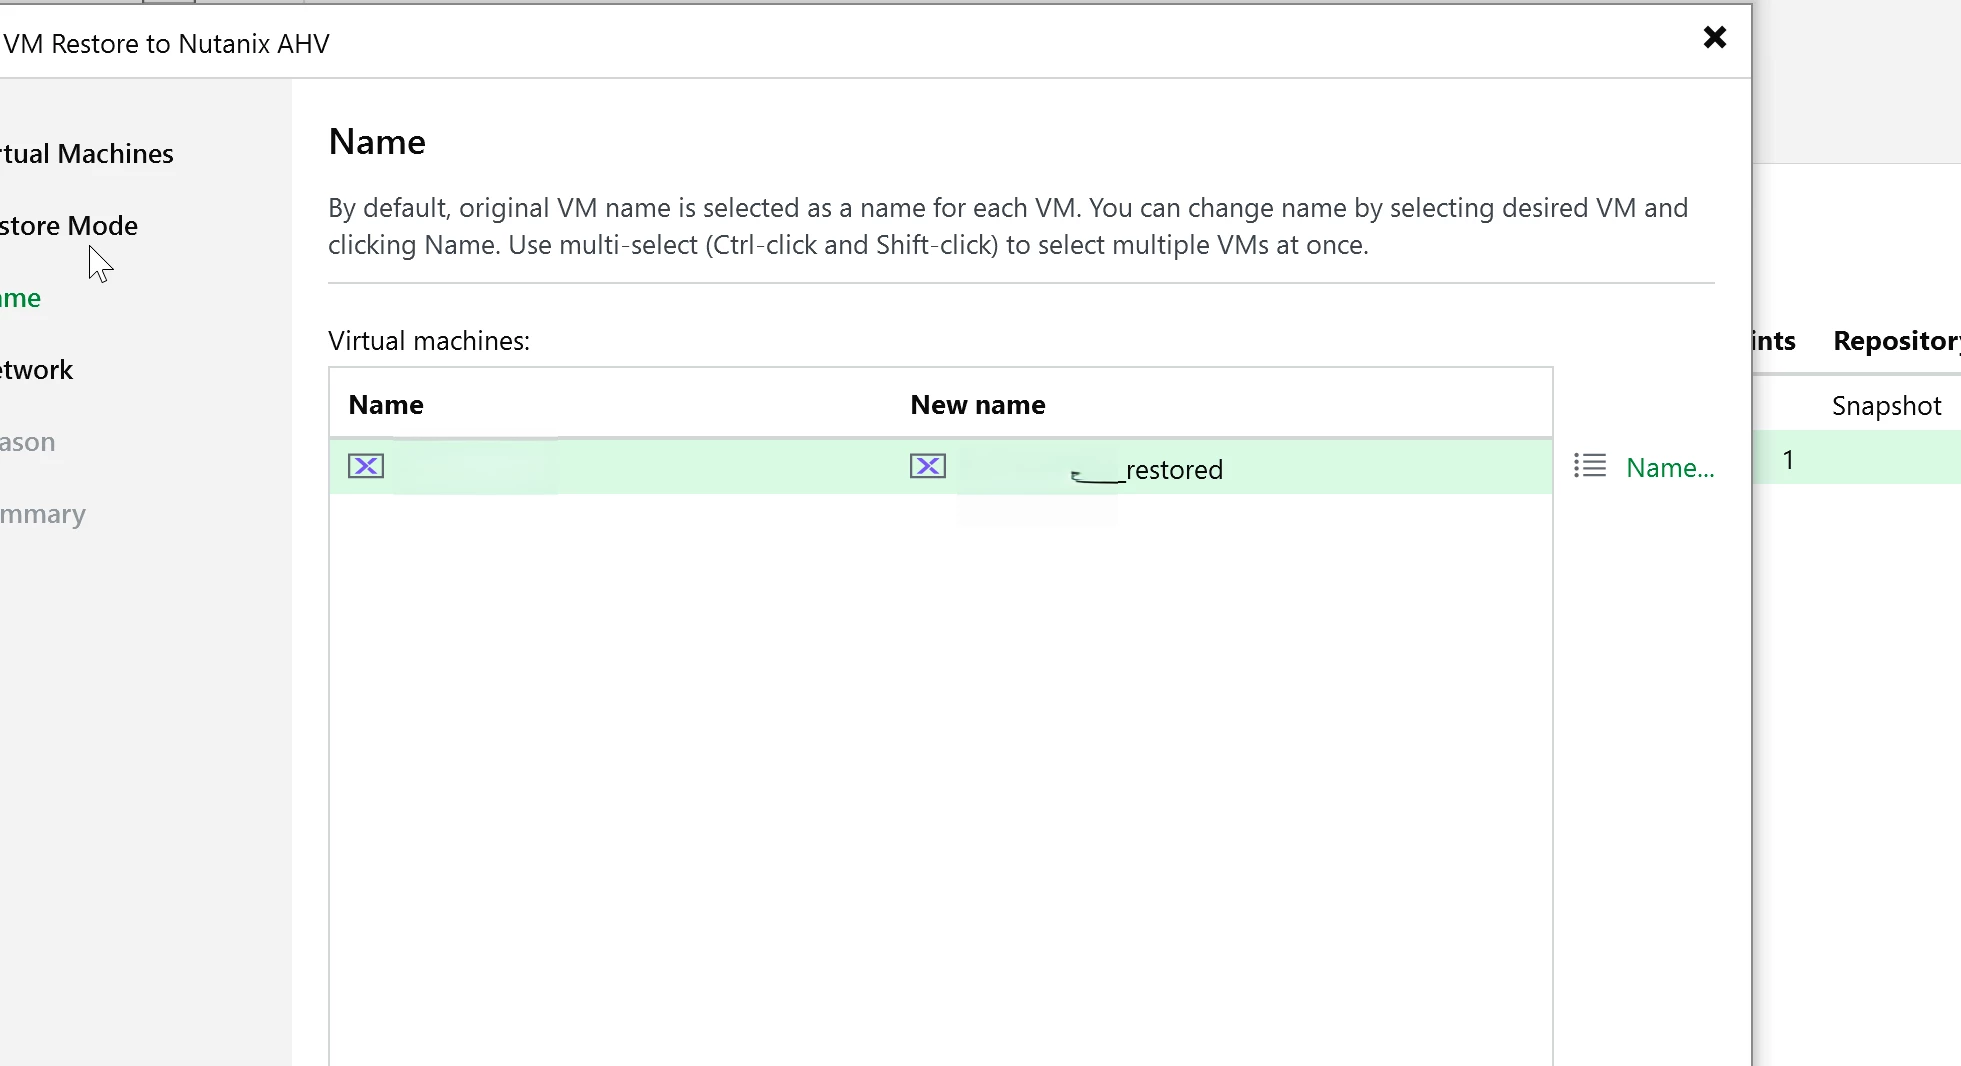
For this test, I used a full VM restore back to the same cluster. It completed cleanly and the VM came back online without issue. This cluster is on external storage (Pure NVME over IP.) It’s blazing fast with R/W.
What I bumped into along the way
The iSCSI Data Service IP is easy to miss. You can get surprisingly far in the configuration before it becomes obvious, but backup jobs can fail when workers try to access VM disks. Configure it in Prism Element under cluster settings before you add the cluster to VBR.
A single worker is fine for getting started, but busier environments will need additional workers. Add them through the VBR console and size them around the amount of parallelism you actually need. Workers run only when needed, so you are not leaving extra VMs using resources between sessions.
Snapshots and recovery points are worth watching. Veeam uses Nutanix snapshots for backup and CBT. Treat Veeam managed backup snapshots as part of the data protection workflow, not as random cleanup targets (Talk to your Nutanix admins). If you remove the wrong recovery point, expect the next incremental behavior to change, and not in a positive way usually.
If you have done this setup, I would like to hear how you sized your workers.

