Veeam Backup & Replication utilises a NAS-Based Repository to store backup files, VM copies, and metadata for replicated VMs. File-sharing protocols like SMB or NFS enable users to access files and directories on a computer, server, or virtual machine via the network by configuring a directory as a file share. Any operating system supporting these protocols can host a file share.
The DS923+ serves as an ideal solution for storing backups on your Synology system, particularly for organisations utilising third-party backup software like Veeam Backup and Replication. It provides a perfect repository for business/mission-critical data and backups in both company environments and home labs.
You may want to learn how to Step-by-step guide on how to set up the Synology DS923+ NAS, and How to Protect Synology DS923+ NAS, and then proceed in setting up Synology NAS as a Backup Repo.
DS923+ as a Backup Target
The Synology 923+ NAS systems as mentioned above are a reliable storage destinations for backups
The easiest way to connect storage solutions with any backup software is through file protocols such as SMB or NFS. These enable easy storage and folder management. The second method is to set up designated LUNs, or block storage essentially providing blank virtual drives to be formatted and managed directly by backup software servers.
Synology NAS/SAN Protocols
I will be utilising SMB protocol in this section. If you plan also to utilise Synology NAS as a backup Repository. Please take a look at the table below for more information.
| SMB | NFS | iSCSI | FC | |
| Type | File Protocol (NAS) | File Protocol (NAS) | Block (SAN) | Block (SAN) |
| Performance | Baseline | Baseline+ | Faster | Fastest |
| Administrator Management | Easiest | Easy | Medium | Medium |
| Snapshots | Yes | |||
| Remote Backups | Yes | Yes | ||
| Compression | Yes | – | ||
| Deduplication | Yes | |||
| Scalability | Up to 200 TB or 1PB per folder | Up to 200 TB or 1PB per folder | Up to 200 TB per LUN | Up to 200 TB per LUN |
| Storage protocol support per solution | ||||
| Veeam Backup & Replication | V | V | V | V |
| Veeam Backup for Microsoft 365 | V | X | V | V |
Where “V” denotes “Virtualization and X represents Expansion of the Storage Capacity
Note: A backup repository is a storage location where Veeam keeps backup files, VM copies and metadata for replicated VMs. To configure a backup repository, you can use the following storage types. You may also want to see how to “Create local Backup Repository and Add HyperV to VBR Inventory”. This utilizes physical disks as backup repositories
| Direct attached storage | Network attached storage | Deduplicating storage appliances | Object storage |
| Hardened Repository | SMB (CIFS) share | ExaGrid | From v12.1, you can use the cloud storage services |
| Microsoft Windows Server | NFS share | Dell Data Domain | In the past, this was done using SOBR, and can still be utilized. |
| Linux Server | HPE StoreOnce etc |
Another interesting solution you might wnt to look out is Object First OOTBI (Out-of-the-box immutability). OOTBI an enterprise-grade object storage appliance designed specifically for Veeam Backup and Replication. It provides a fast, ransomware-proof storage that is easy to deploy and manage.
Calculate my Repository need
Kindly employ the Veeam Size Estimator (VSE) or Veeam Capacity Calculator to estimate your storage capacity requirements. The Veeam Sizing Calculator and the Veeam Sizing Estimator capacity was recently extended by the Veeam Team. This quick wizard allows you to discover all of its functionality using the quick wizard functionality in the Help menu.
Here is the newest article on this topic below at the time of writing this guide
Note: Note: iSCSI gives you the option of using a Windows repository with ReFS or a Linux repository with correctly configured XFS storage to use FastClone. Therefore, see this the below
iSCSI is preferred to using SMB. This is because iSCSI LUN is connected directly to the Veeam server (no additional data transformation layers like VMDK). Do not forget to format the volume with ReFS in order to leverage Fast Clone as discussed in the above guide.
Create an SMB Share
To proceed, create an SMB share as a backup repository. To do this, access the Synology NAS Management Interface. Click on the Control Panel on the Desktop or navigate to the main menu and Select Control Panel. Then Select Shared Folder
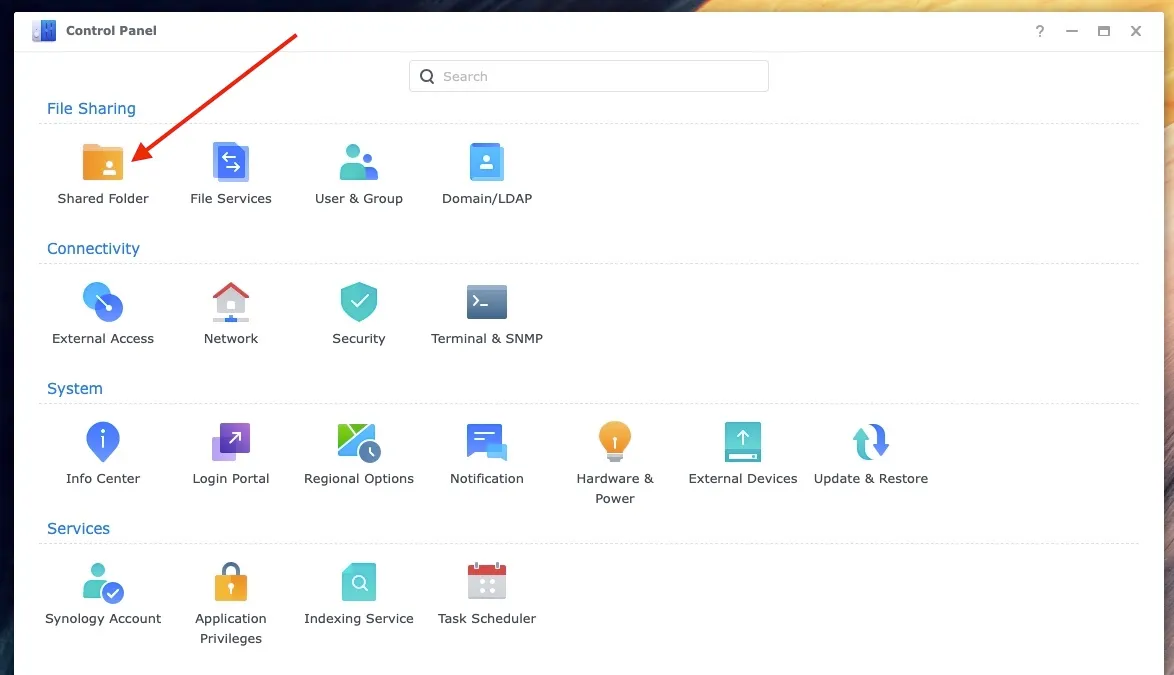
Select “Create Shared Folder”. You can choose to create a Mount Hybrid Share Folder if you wish. Please follow through the prompts to have your shared folder created.

Add SMB (CIFS) as Backup Repositories on VBR
Note: An SMB share cannot accommodate Veeam Data Movers. Therefore, deploying a gateway server is necessary for communication with the SMB share. Veeam Backup & Replication will automatically deploy a Veeam Data Mover on the gateway server.
Open the Veeam Backup & Replication Console. Select Backup Infrastructure on the bottom left menu, and Right click Backup Repositories and choose Add Backup Repository. Below are other options to Add a backup repository.
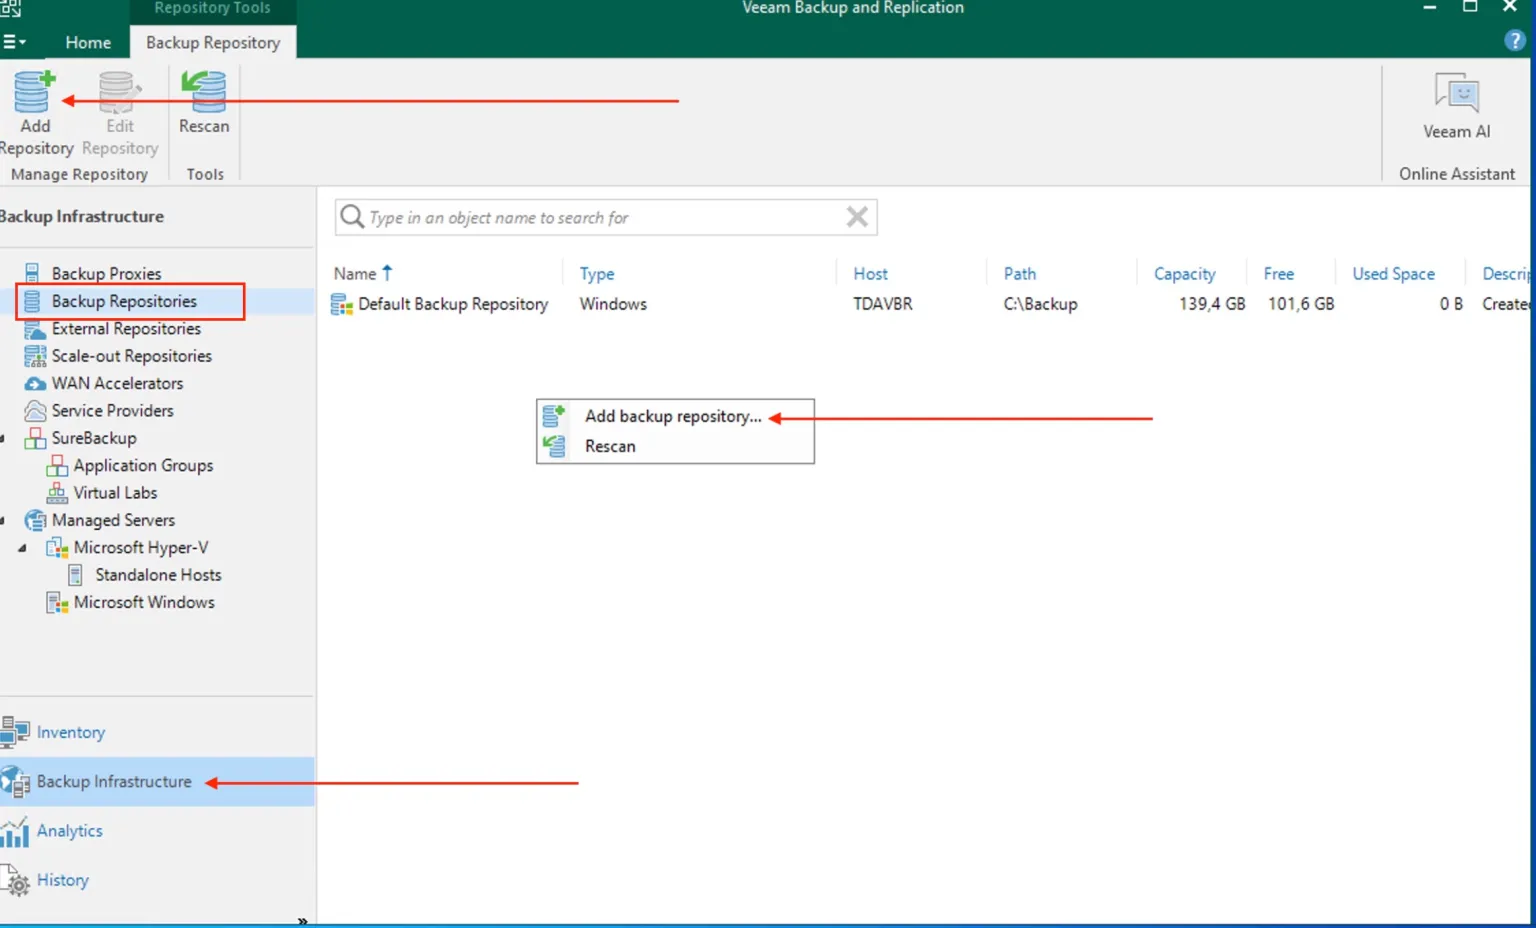
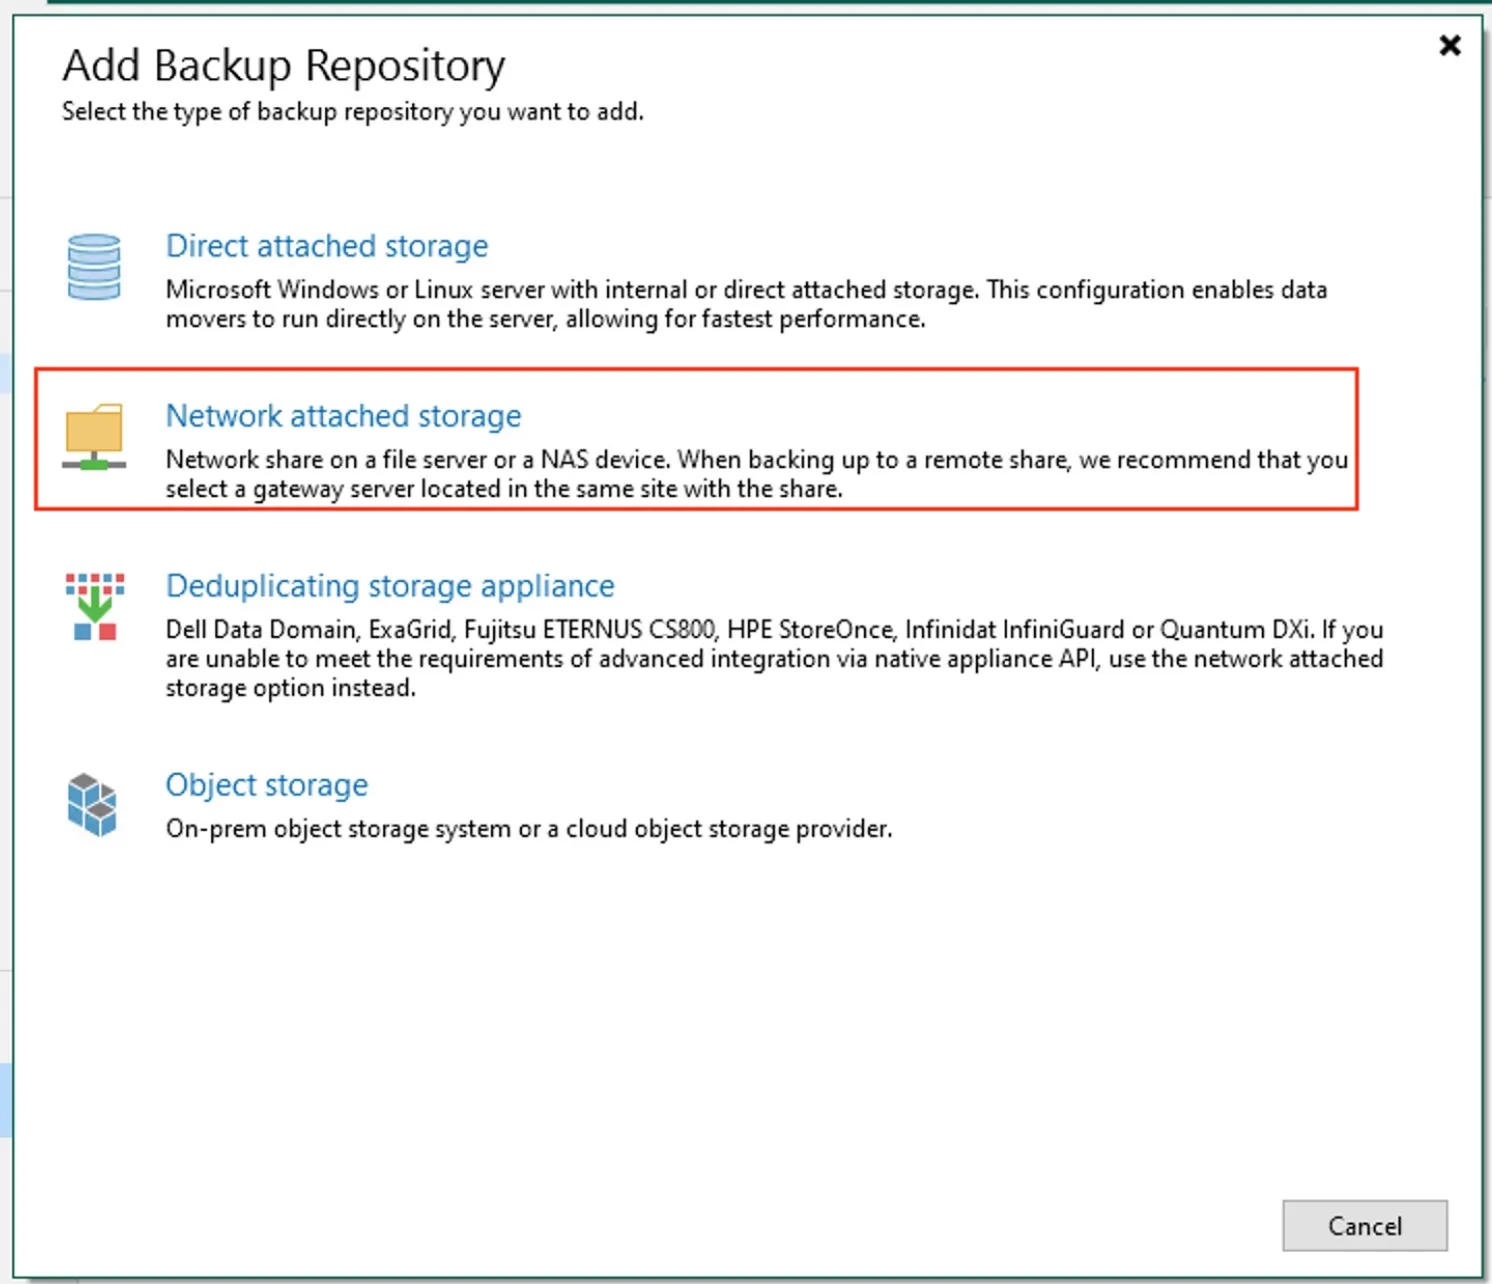
Select Network attached storage. On the NAS system, you also have to enabled the SMB Service
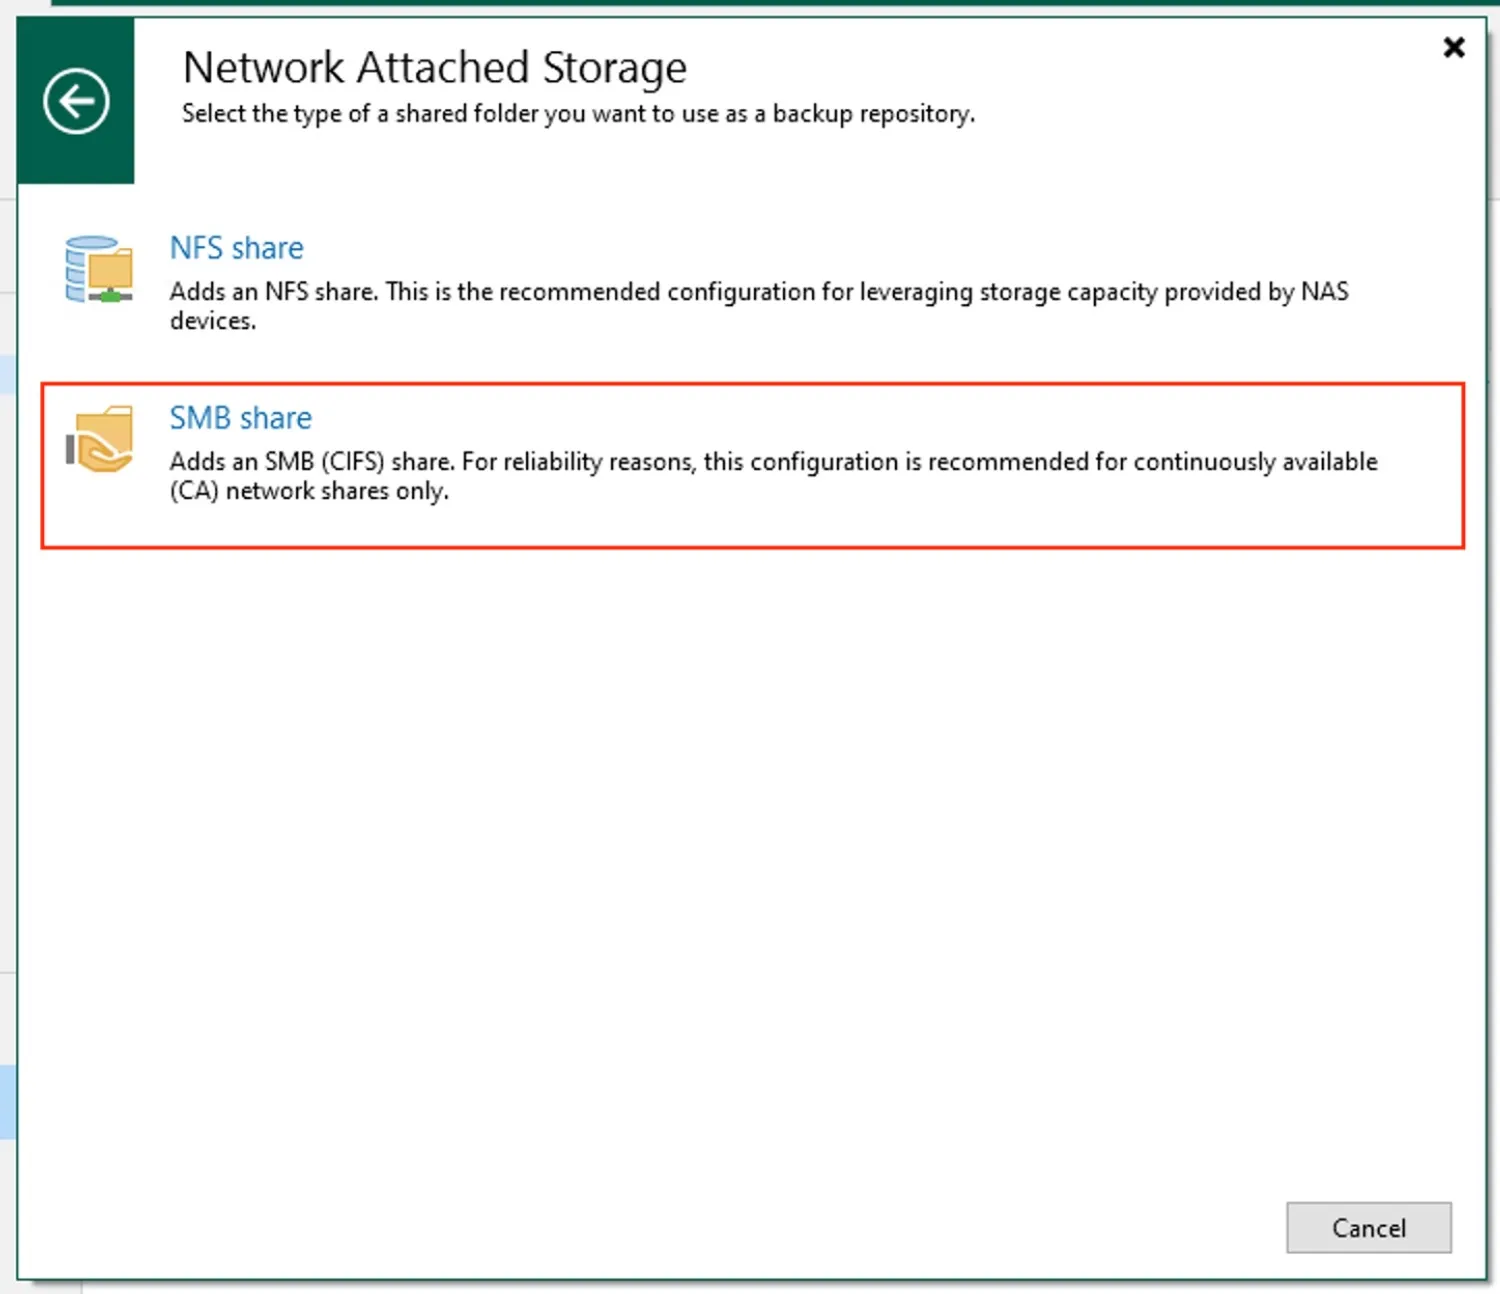
Select SMB share. Here is the link to the original blog post.
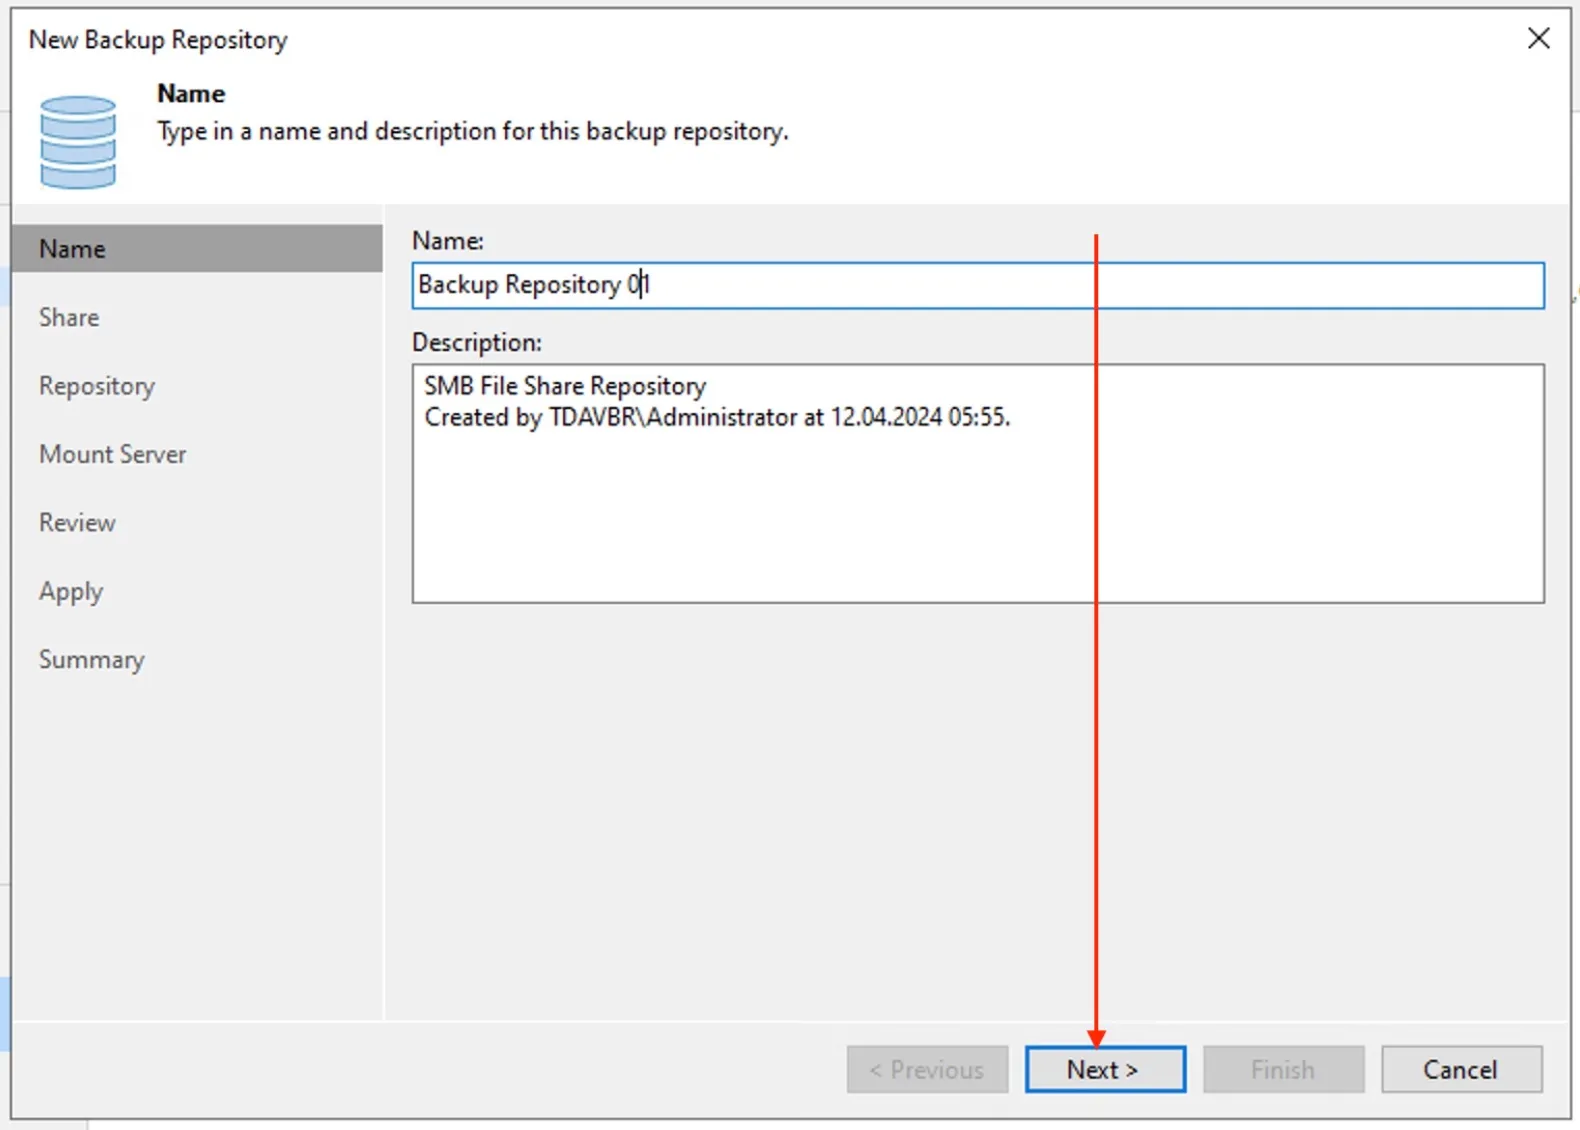
Enter the Repository Name and click Next
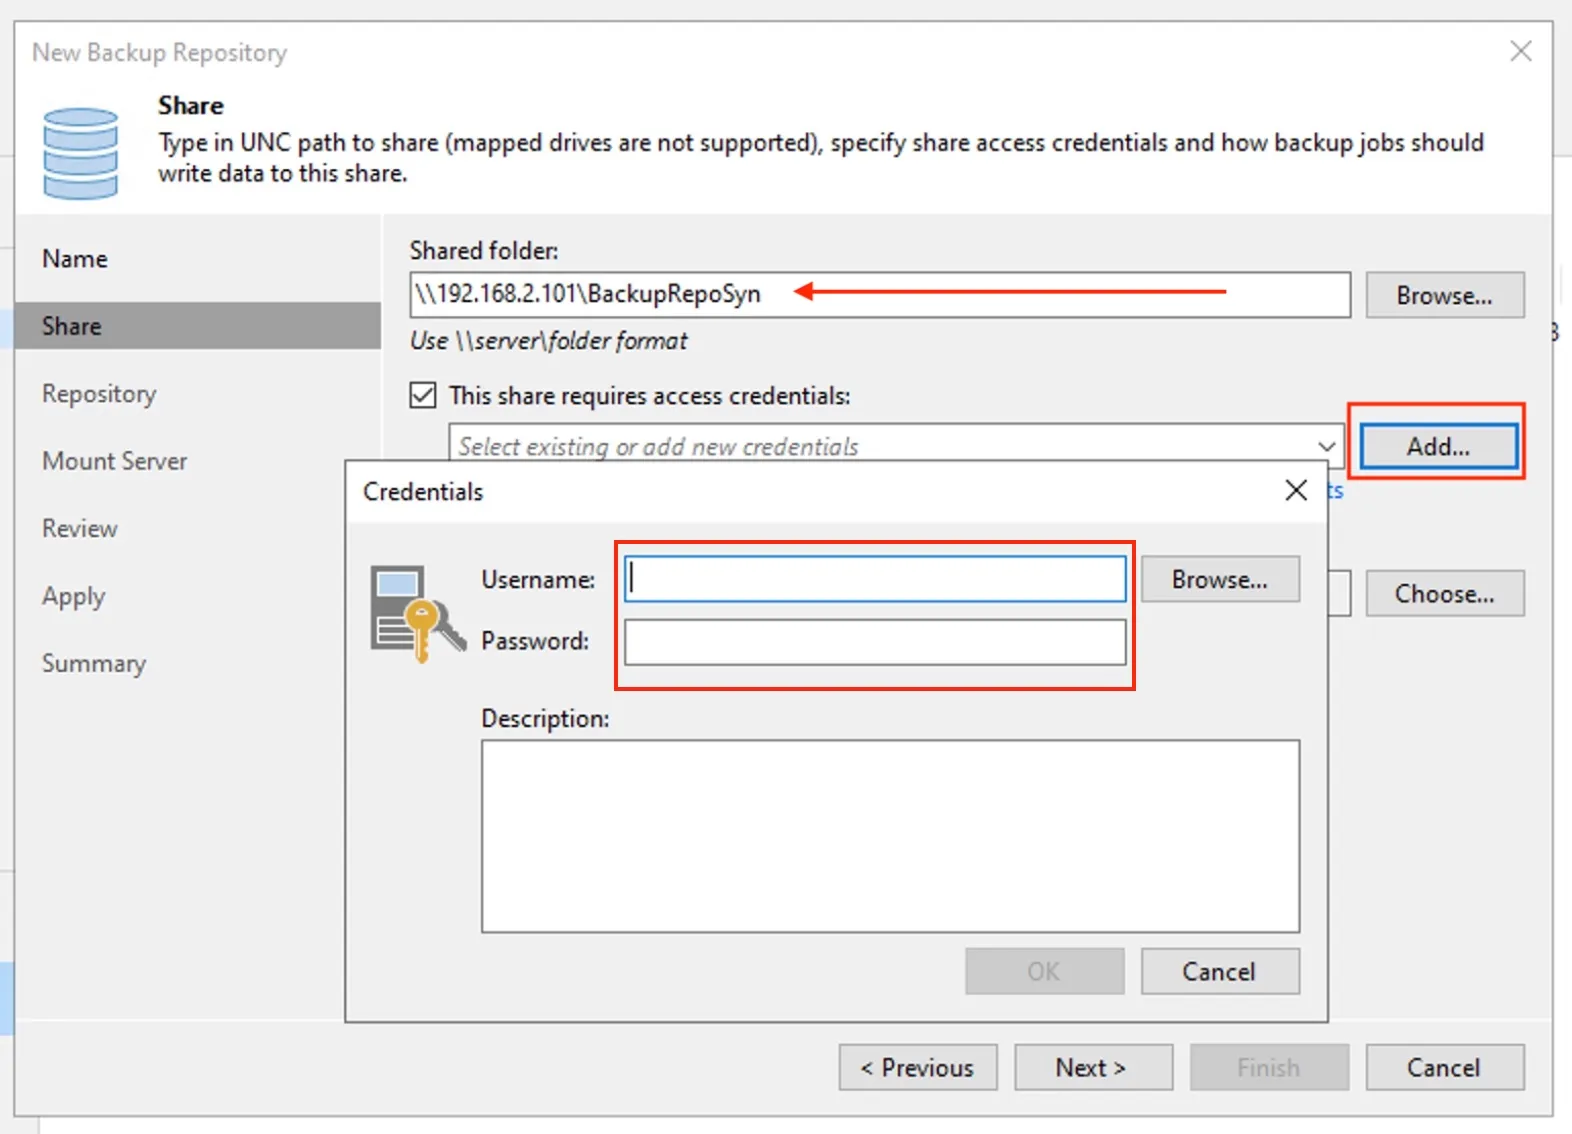
Enter the path and shared folder and specify the the access credentials.
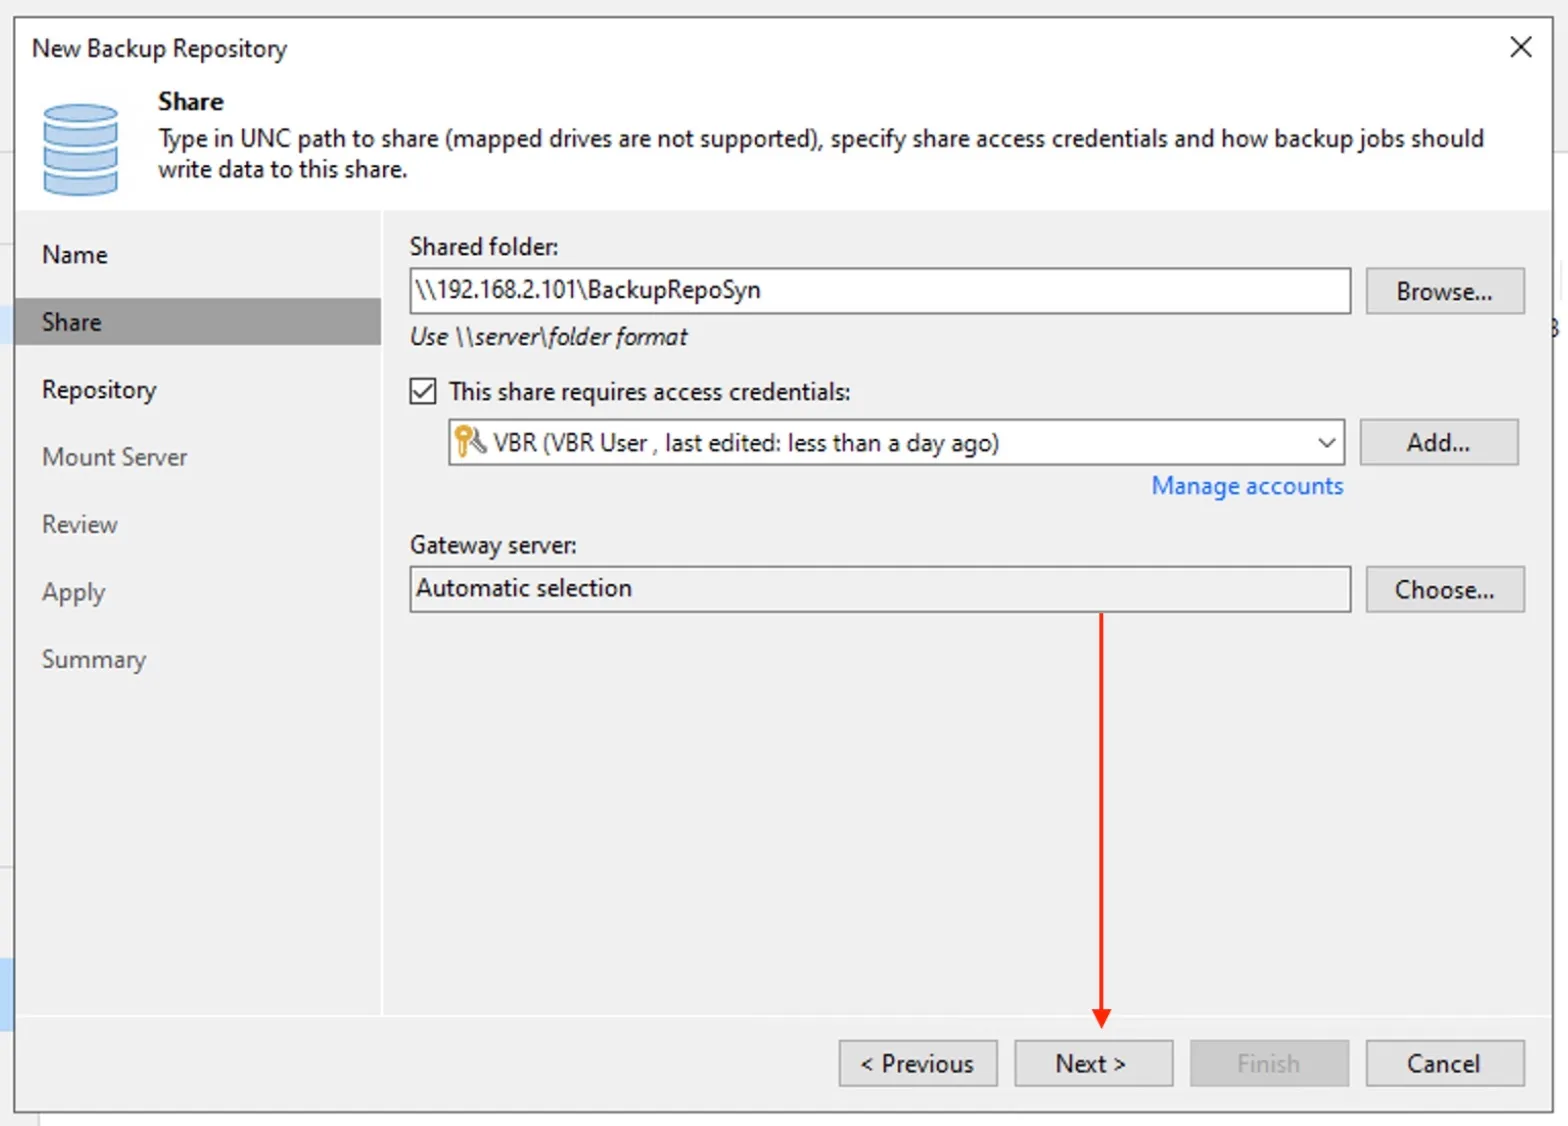
If the access right are sufficient, you should be able to proceed. Click Next to continue.
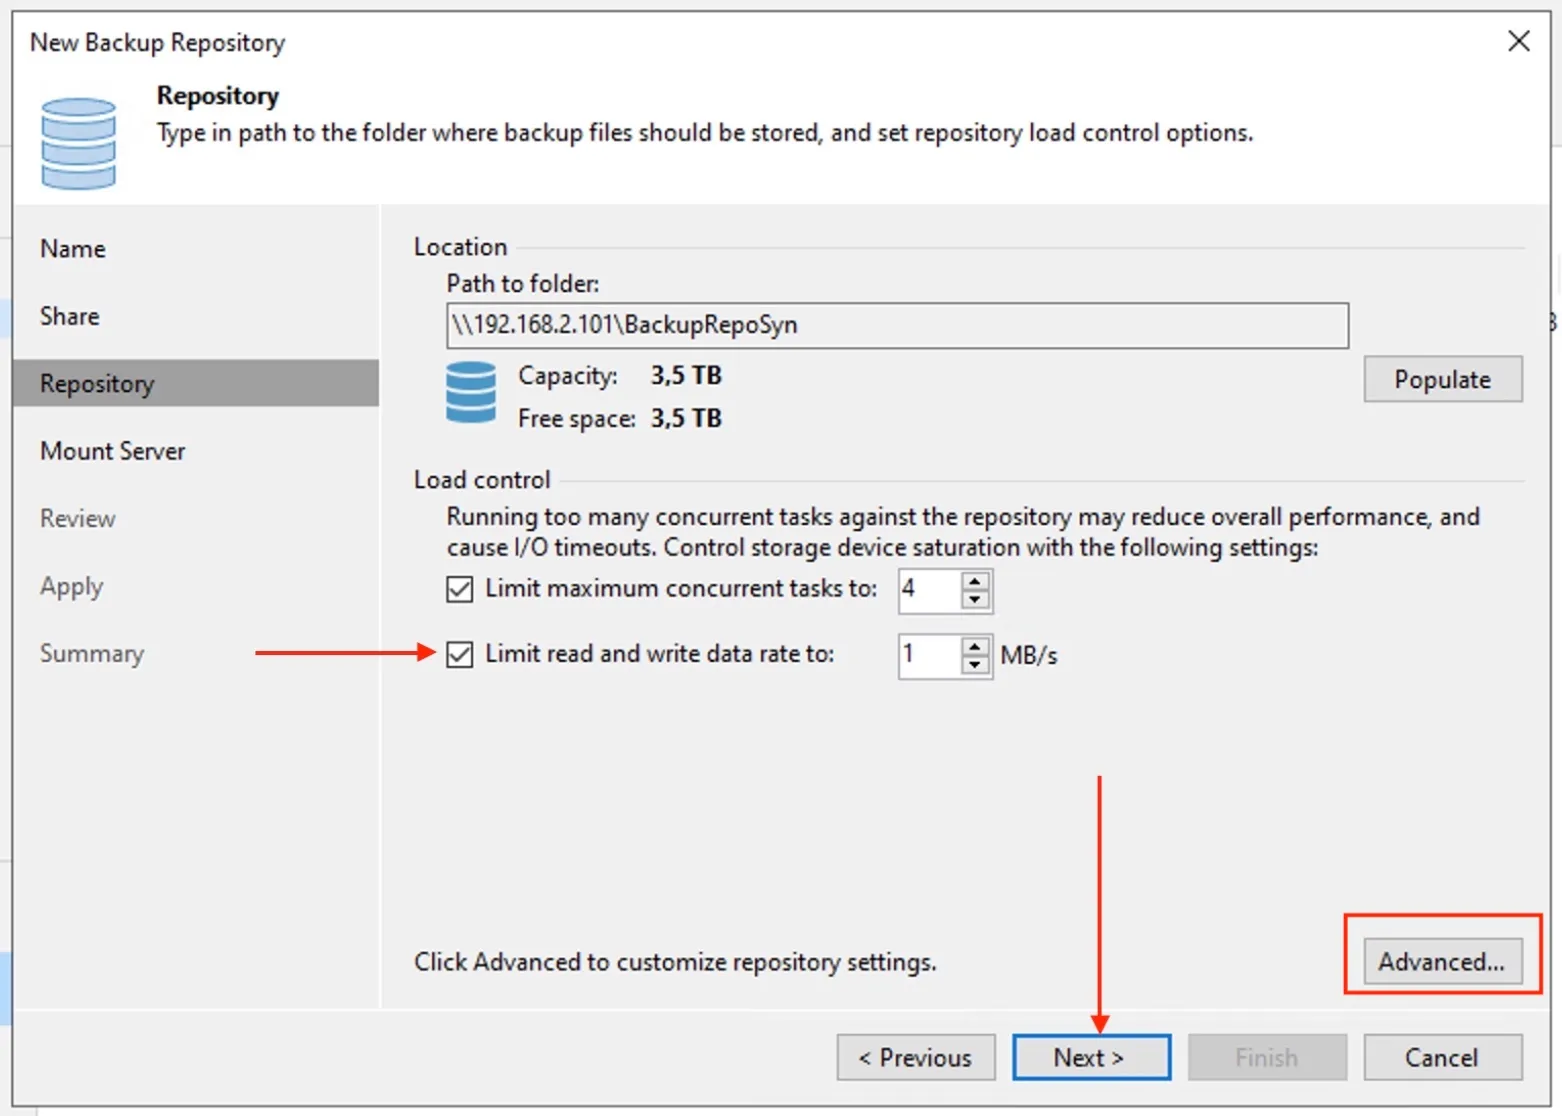
Change the number of concurrent tasks or limit the data rate if necessary. Click Next to continue or Click on Advanced to see the following option on storage capability settings below.
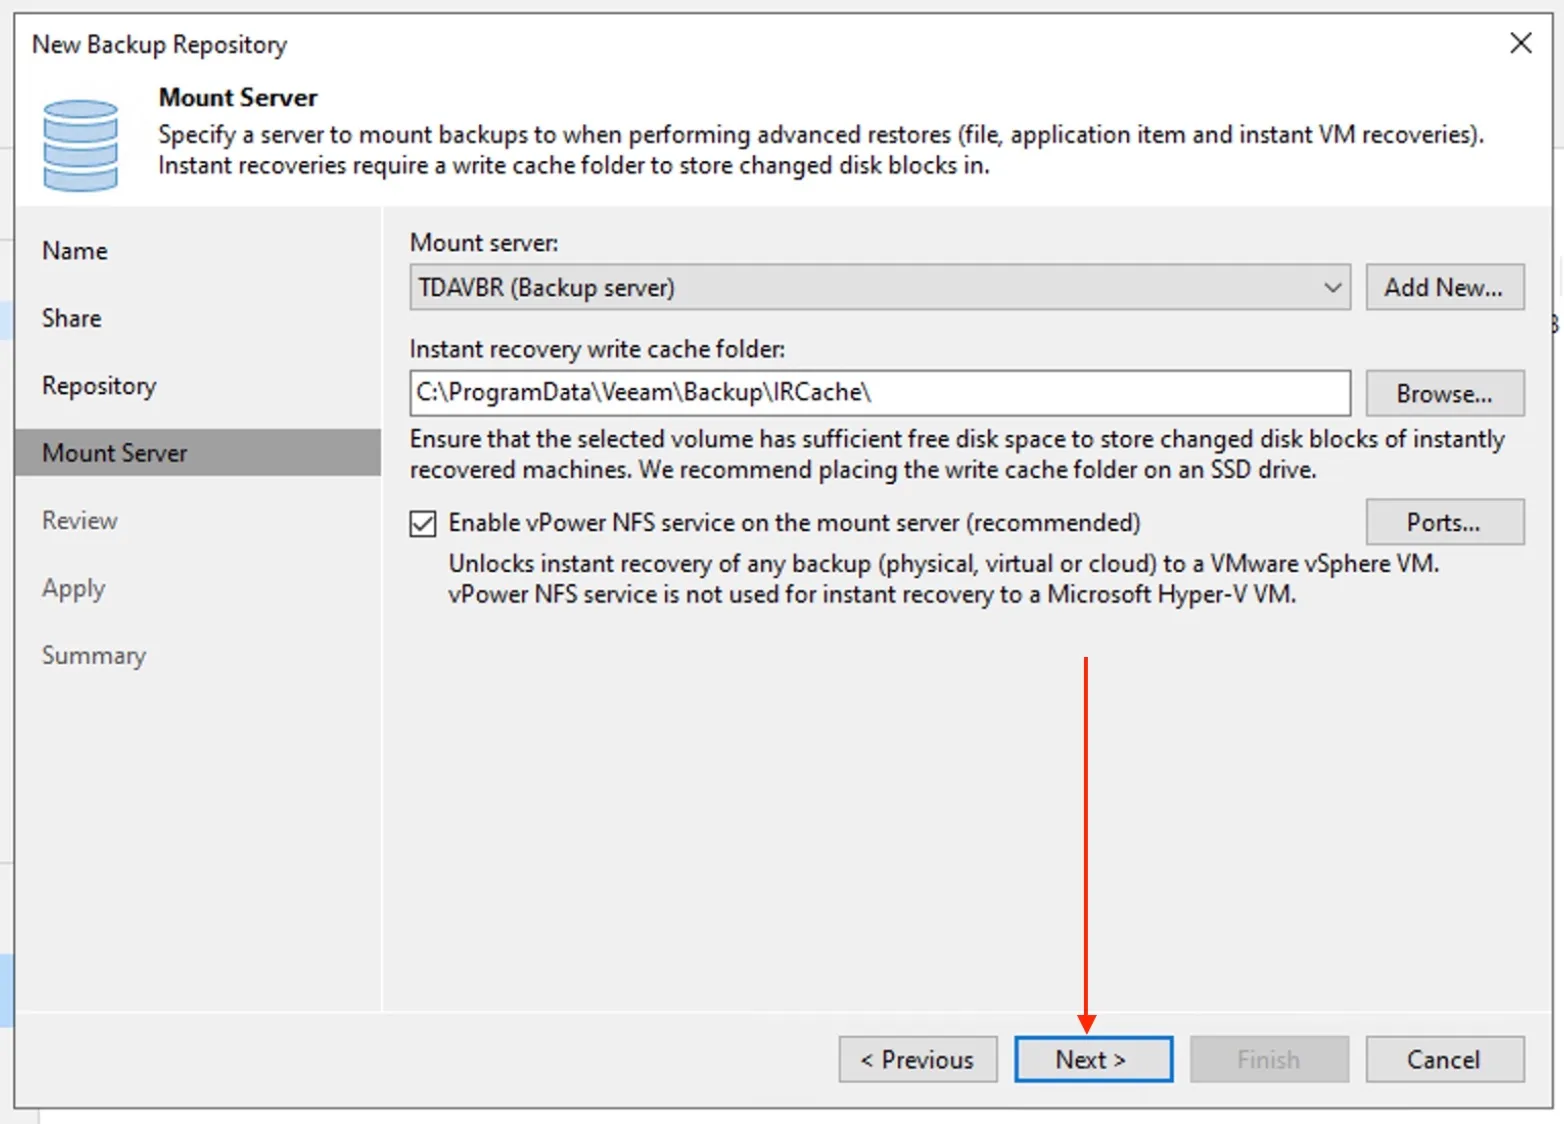
On the mount server wizard, click Next.
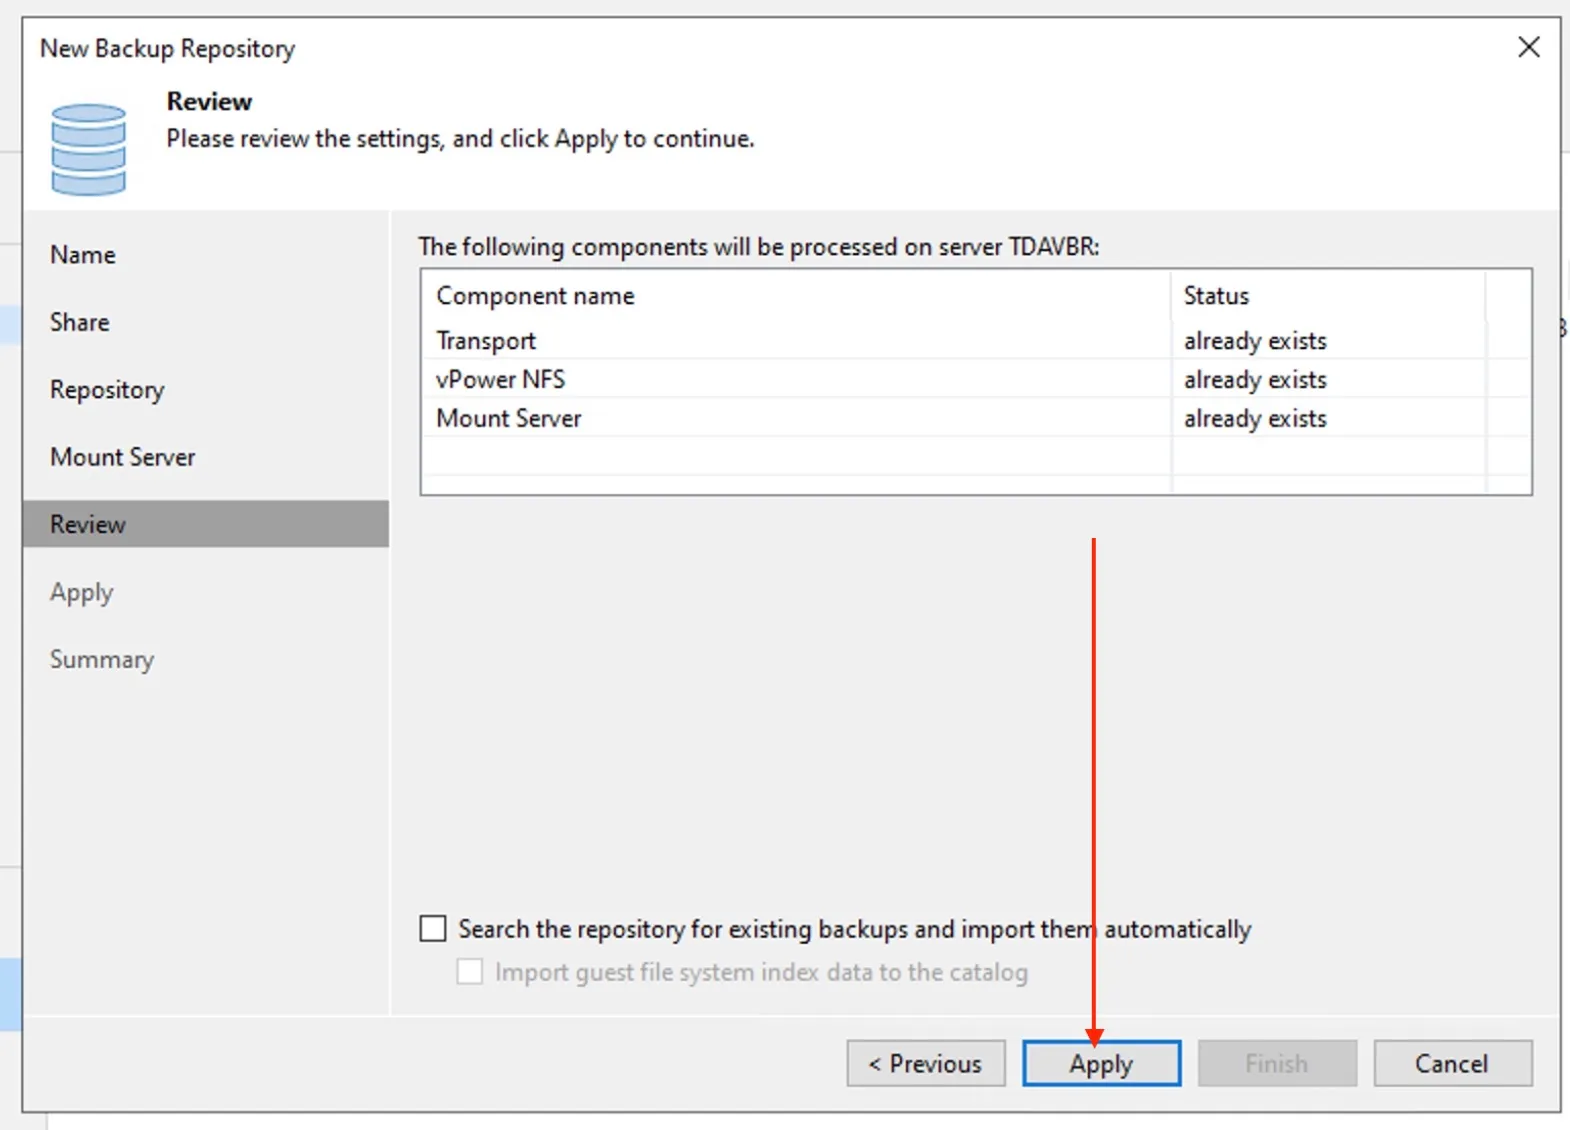
Review the settings and confirm by clicking Apply. If you’re adding a repository with existing backups, flag the setting to import them automatically.
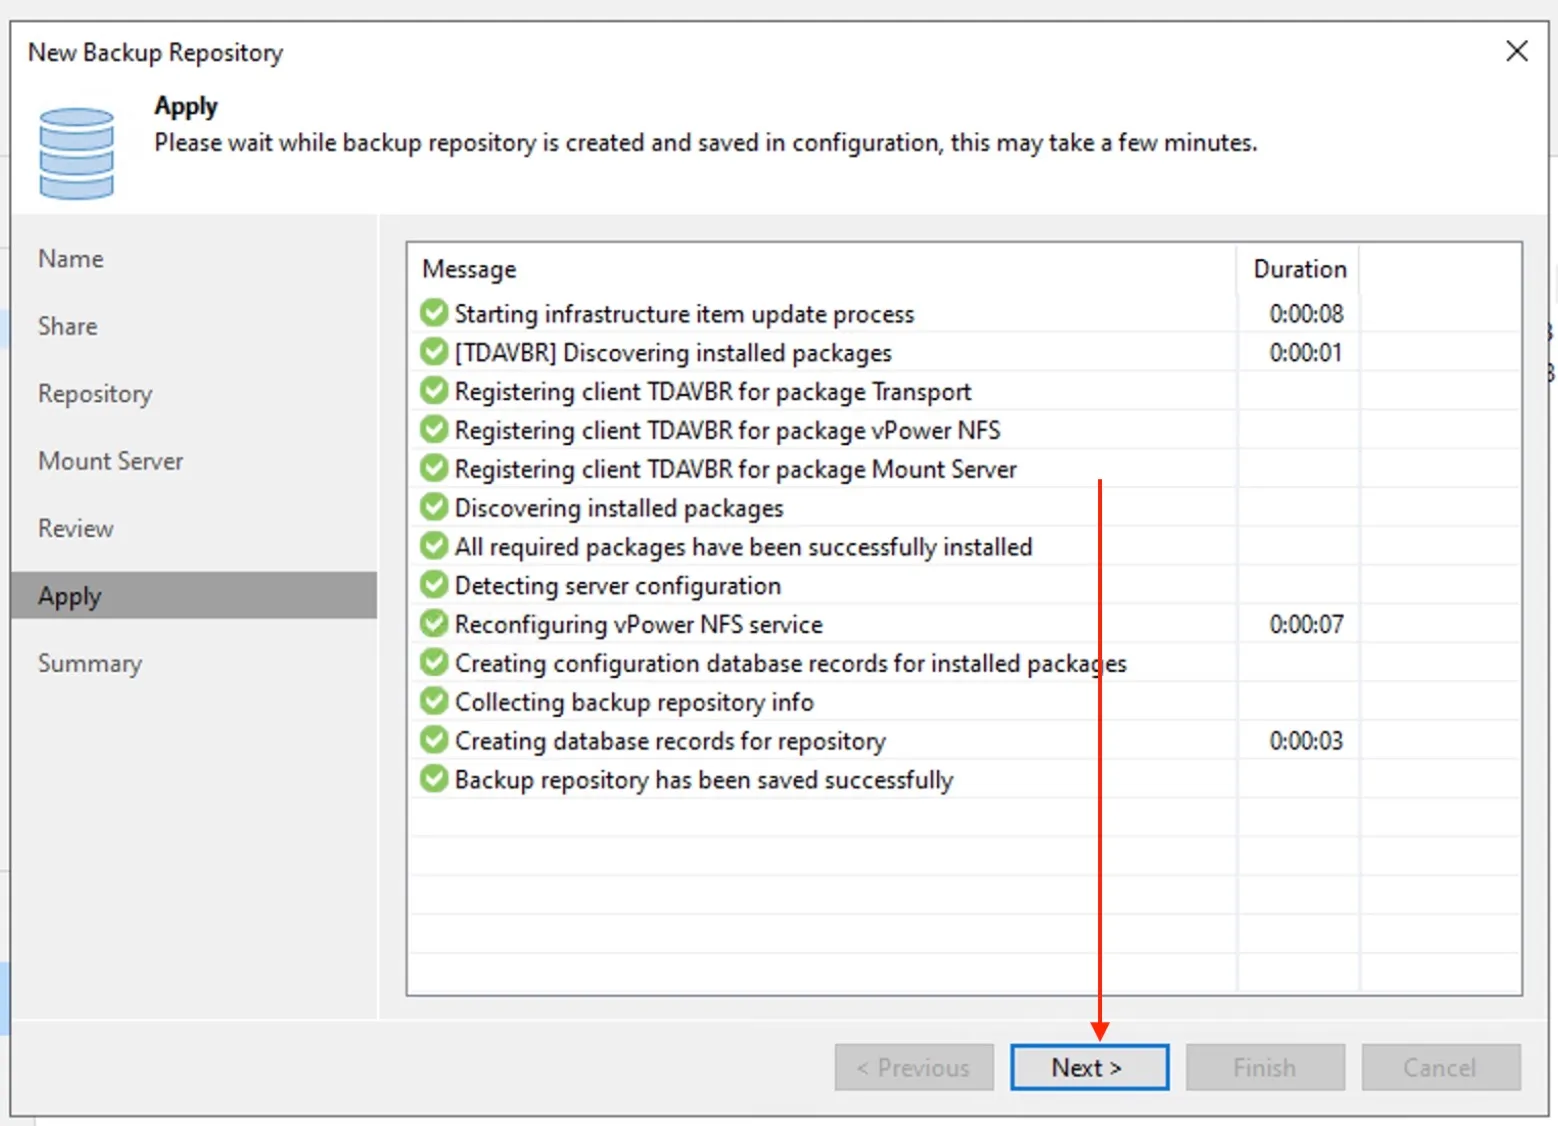
Click Next to proceed
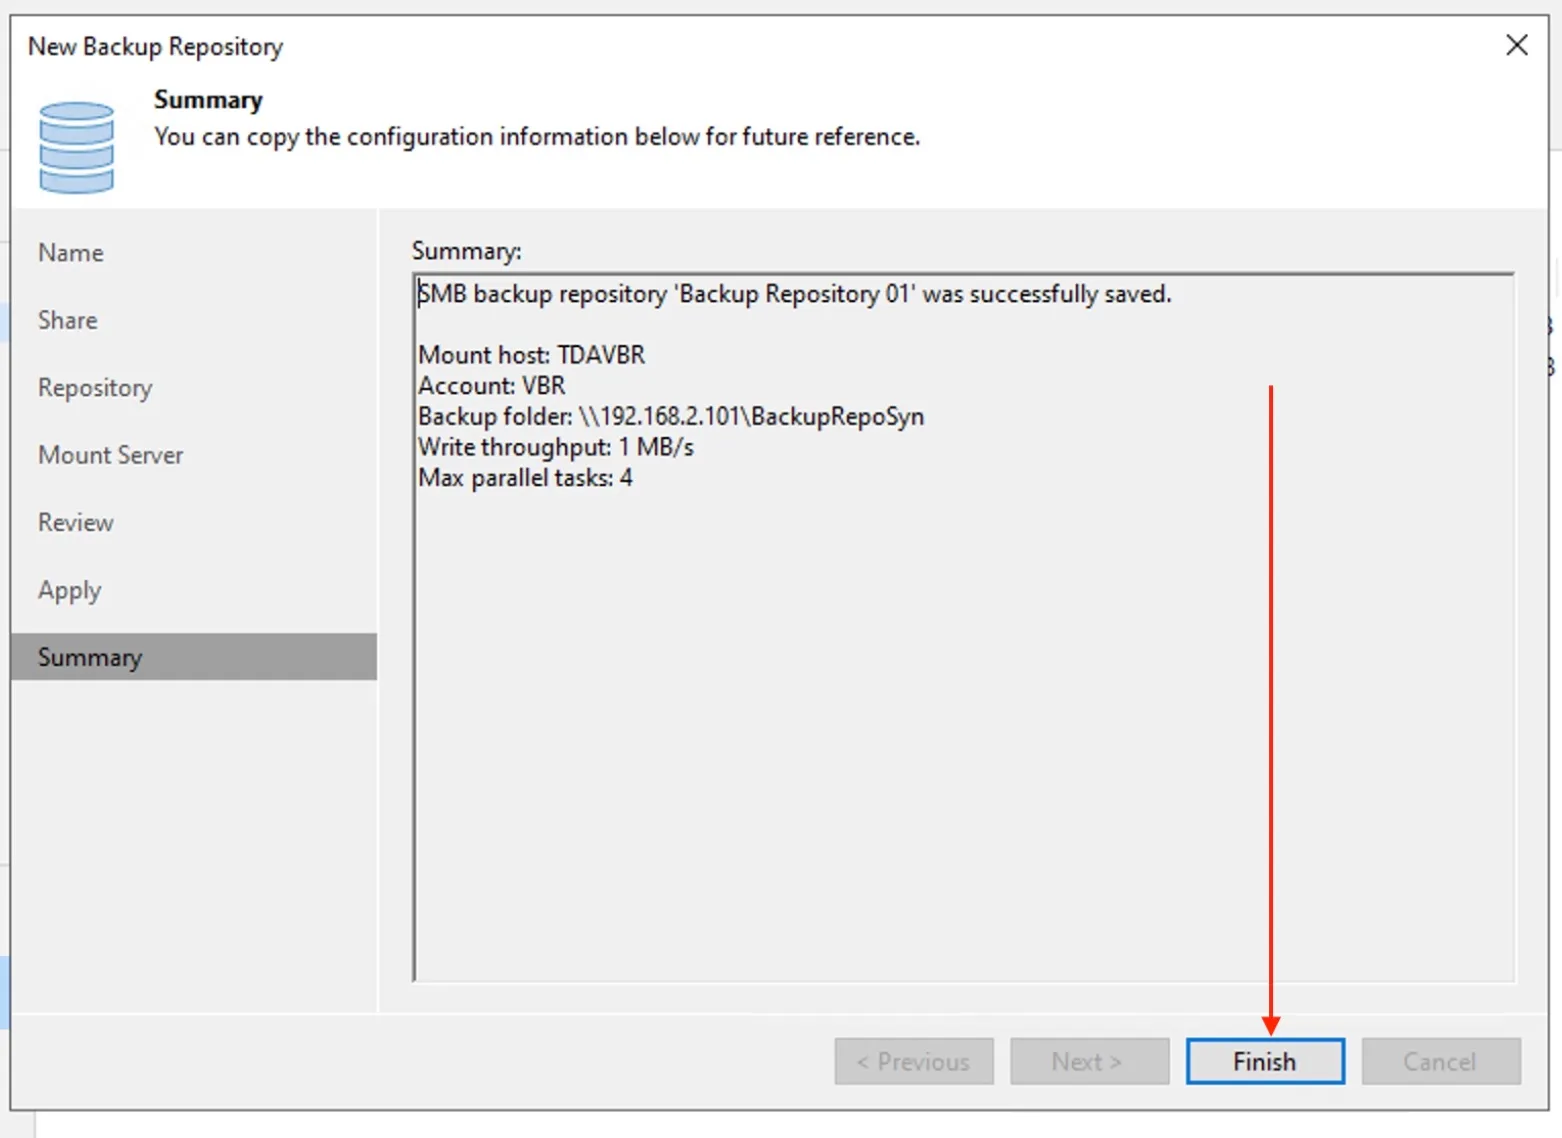
On the summary window, click on the Finish button. The SMB/NFS repository is ready to use
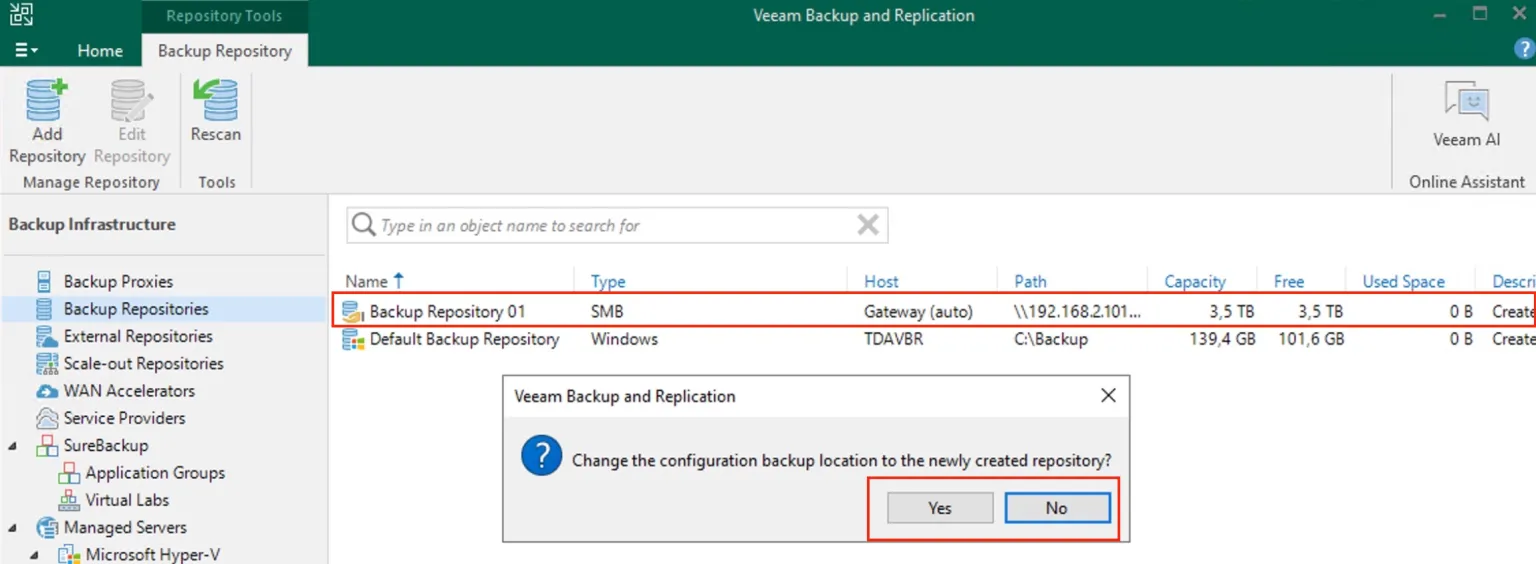
You will get a prompt suggesting you to move the “Configuration Backup” to the newly created repository. Click No. If you click Yes, this will be moved to the newly created repo. But this can be changed as you wish to the default Repo or any other repository created in the future.
Perform VM Backup
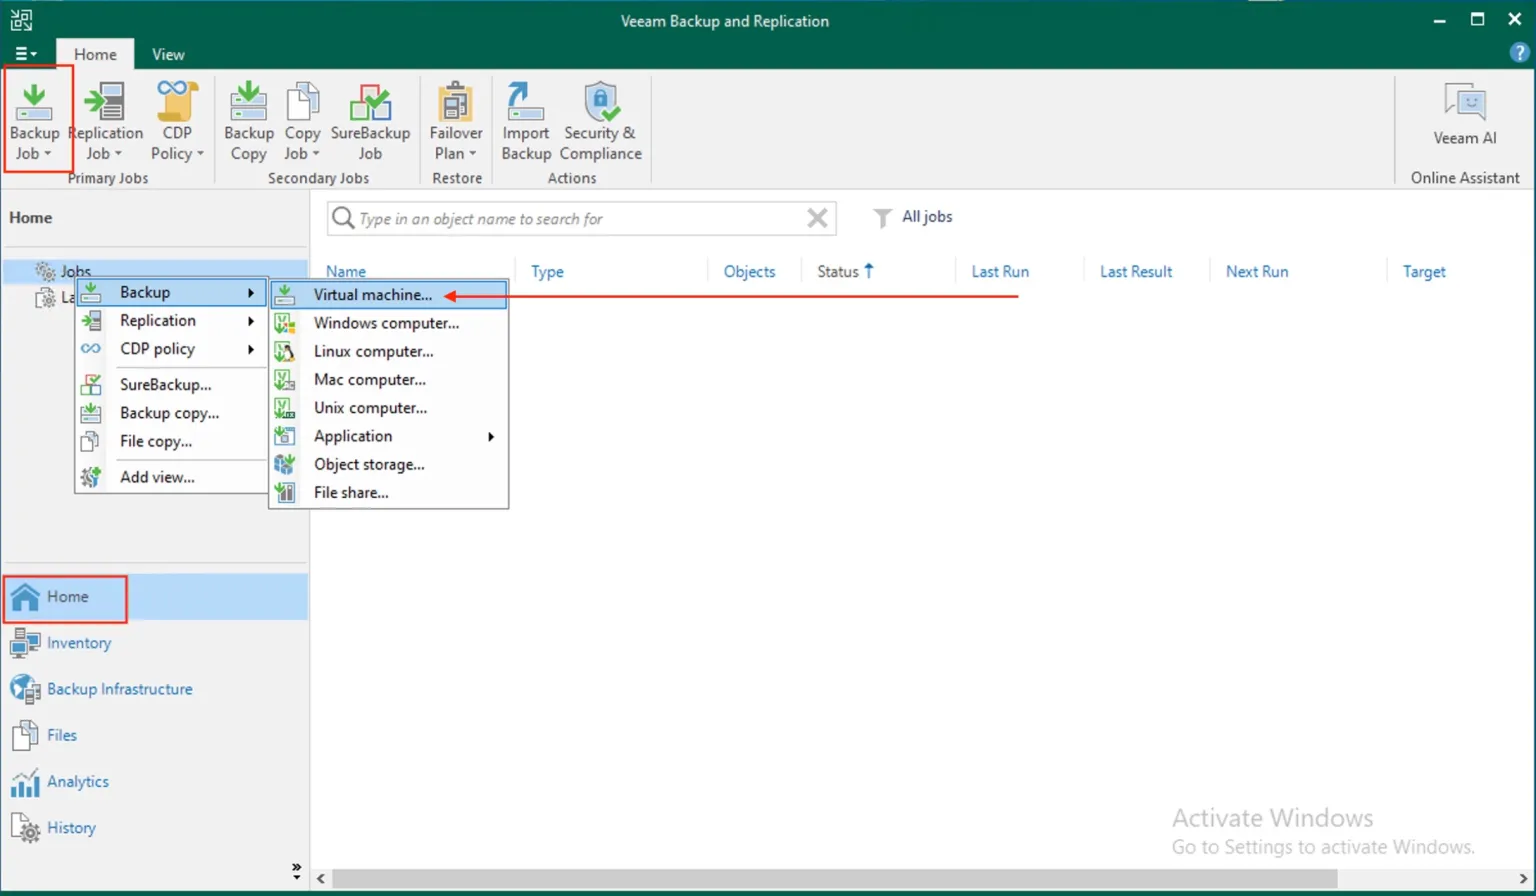
You can create a Hyper-V Backup Job with or without Guest Processing. To do this, launch the Veeam Backup & Replication Console. On the Home tab, click Backup Job > Virtual machine > Microsoft Hyper-V. See how to resolve issues when adding HyperV as Inventory “Invalid Credentials “Fix Failed to Connect a Hyper-V Standalone to Veeam Backup”.
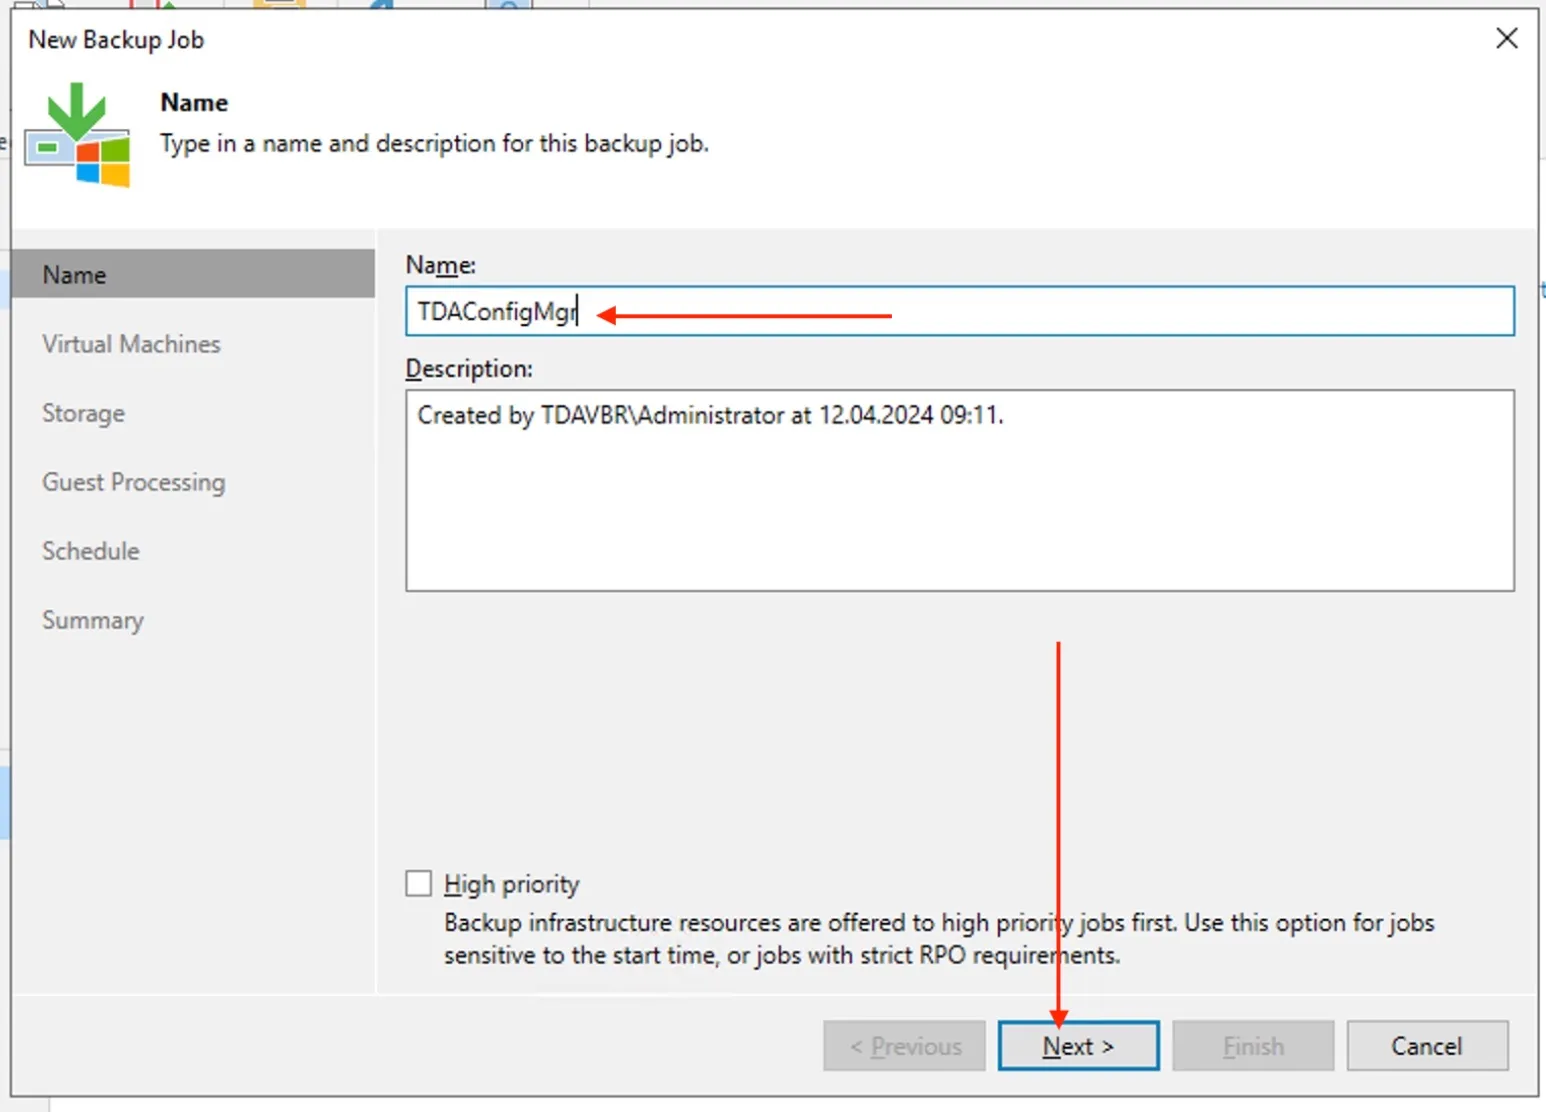
Enter the job name and description and click Next
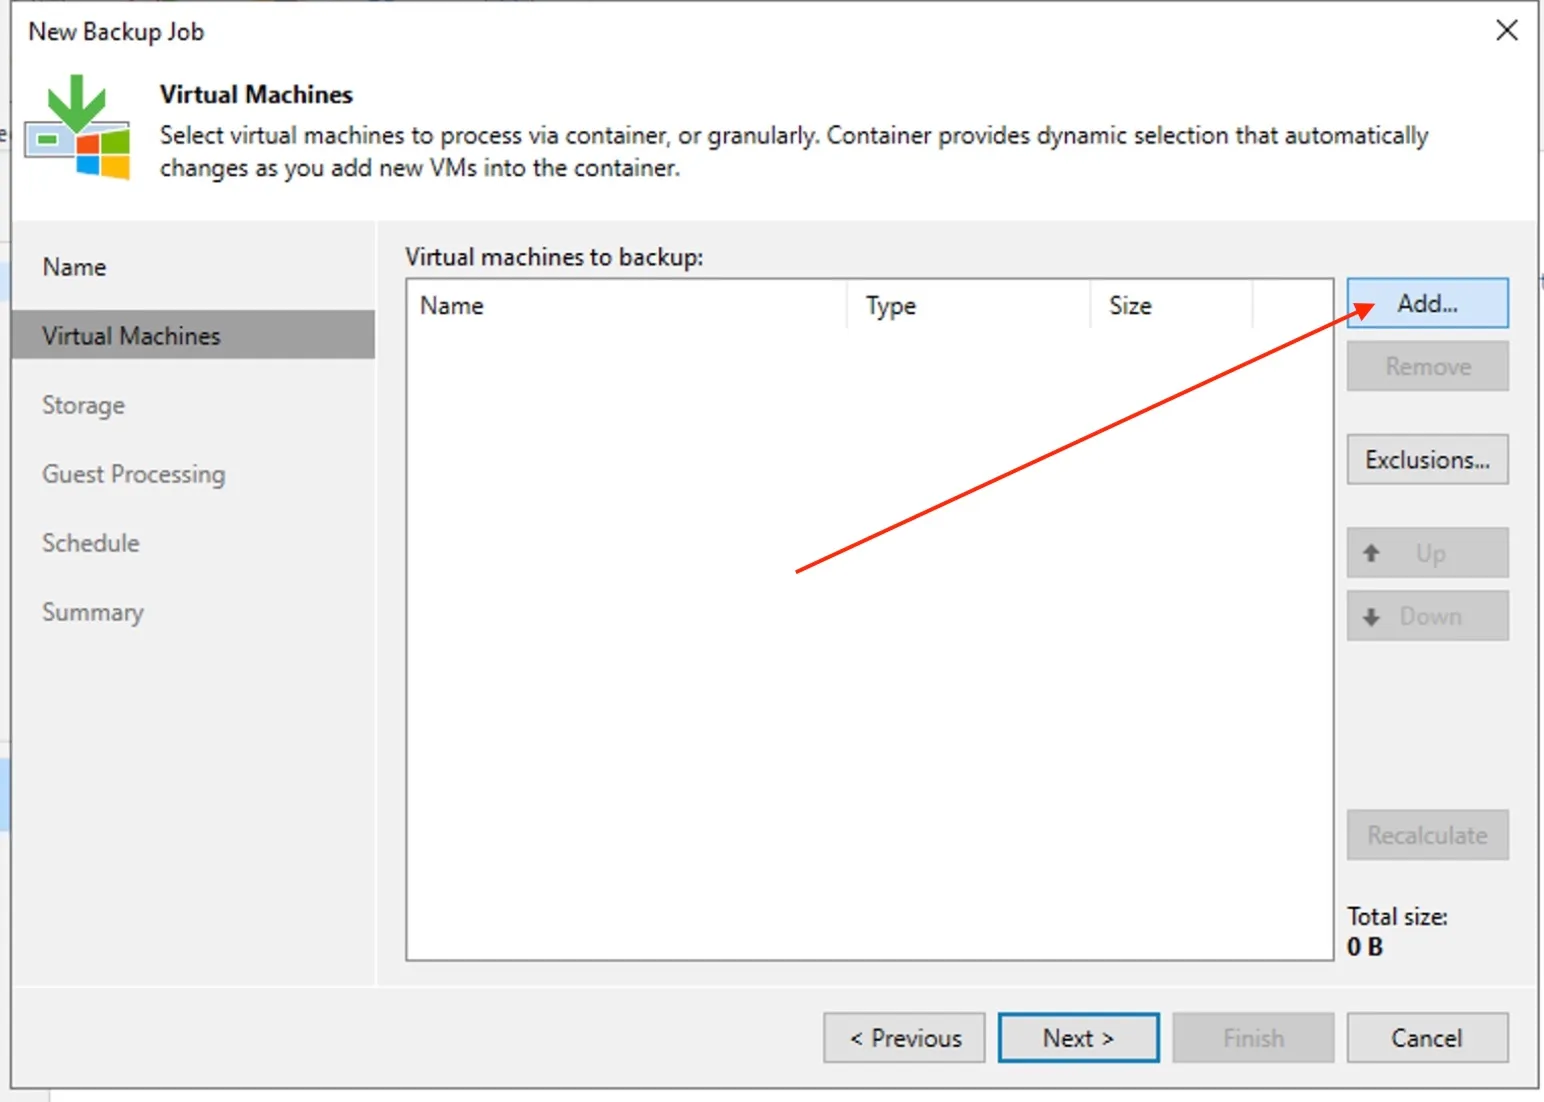
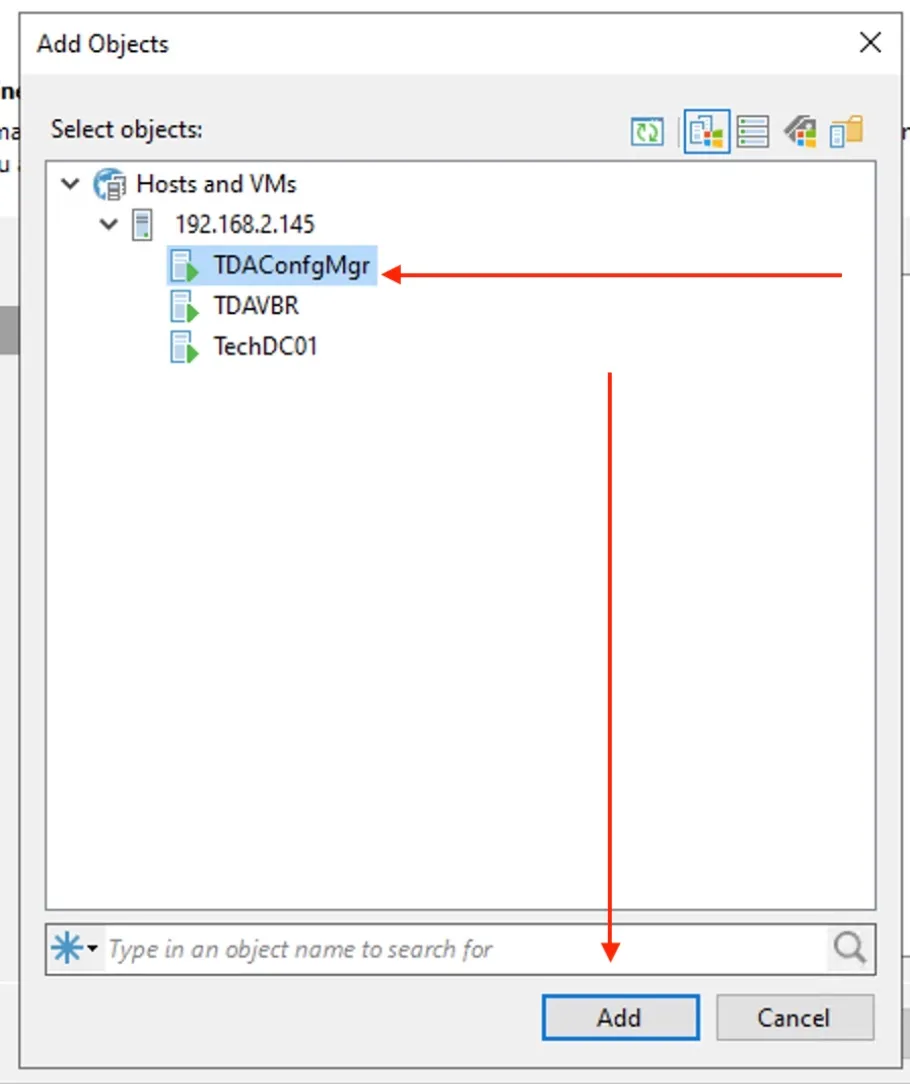
At the Virtual Machines step, select VMs that you want to back up. To do this, click on the Add button
On the Add Object window, select the necessary VMs and click Add. Click Next.
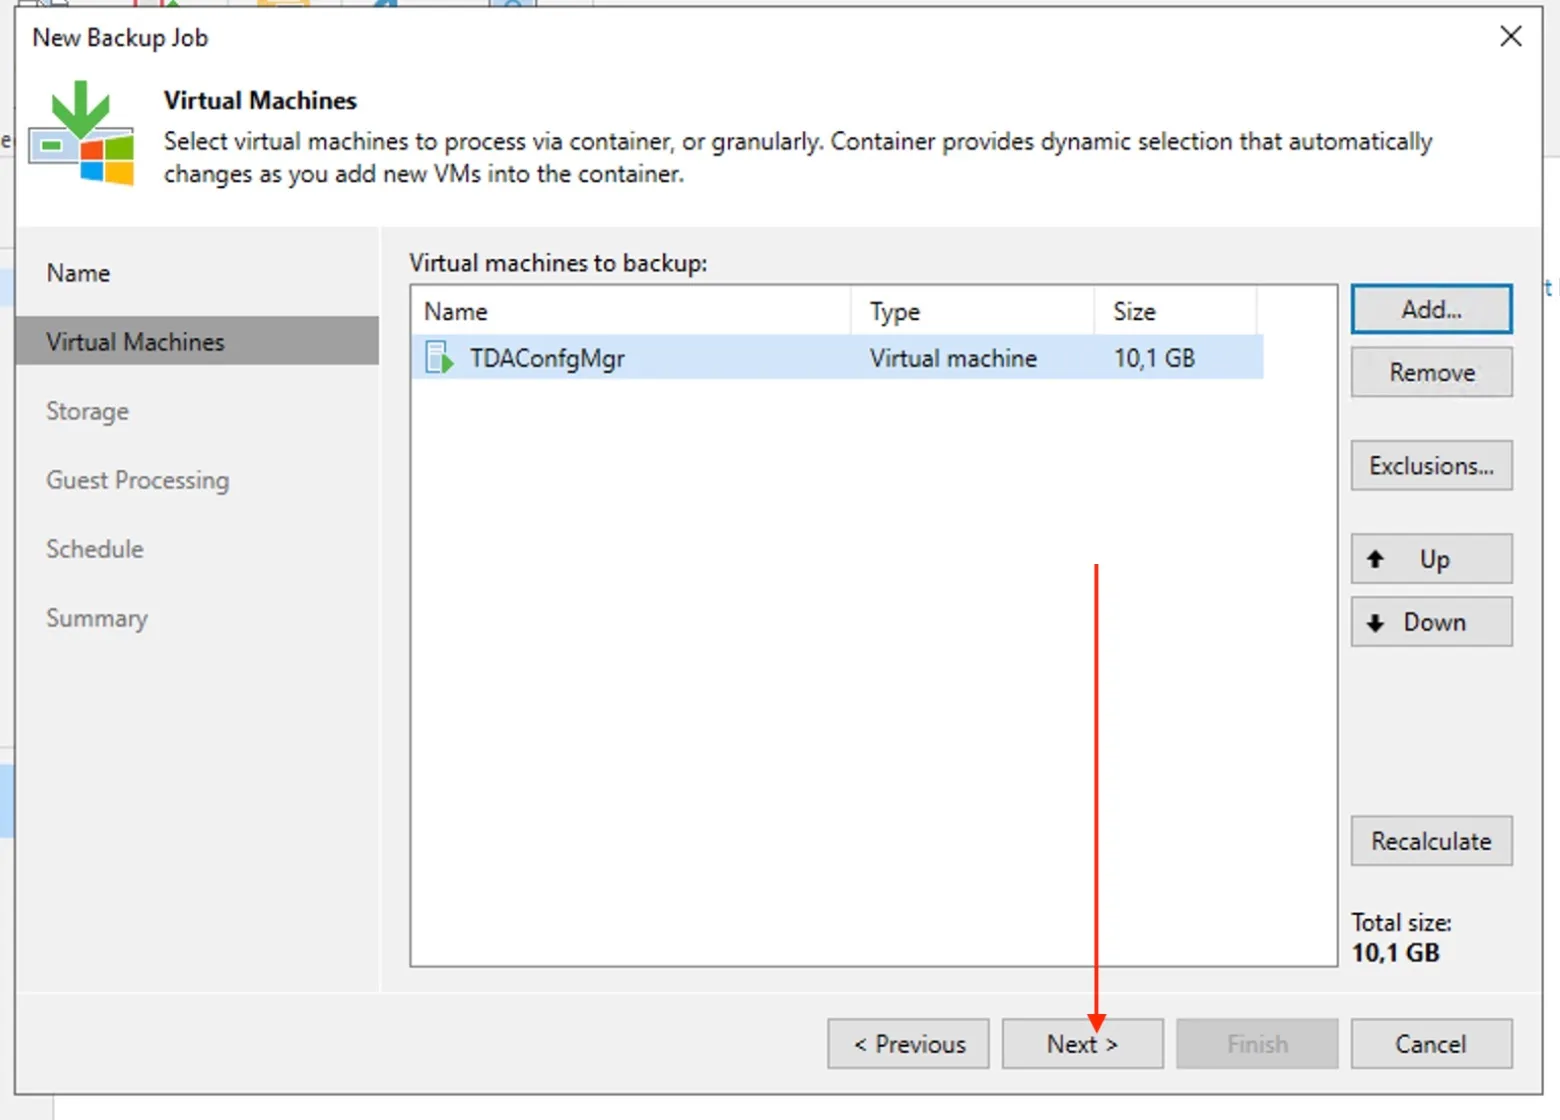
Click Next to proceed to the next section.
From the Backup repository list, select a backup repository where the created backup files will be stored. On this wizard, you have the possibility to configure the Retention period, configure the GFS for Long-Term retention
Note: Be careful with the default repository. But do not worry, when you select a wrong repo. You will be able to move the backup to a new repo by editing the backup job. Thereby continuing the chain if you want or create a new full backup.
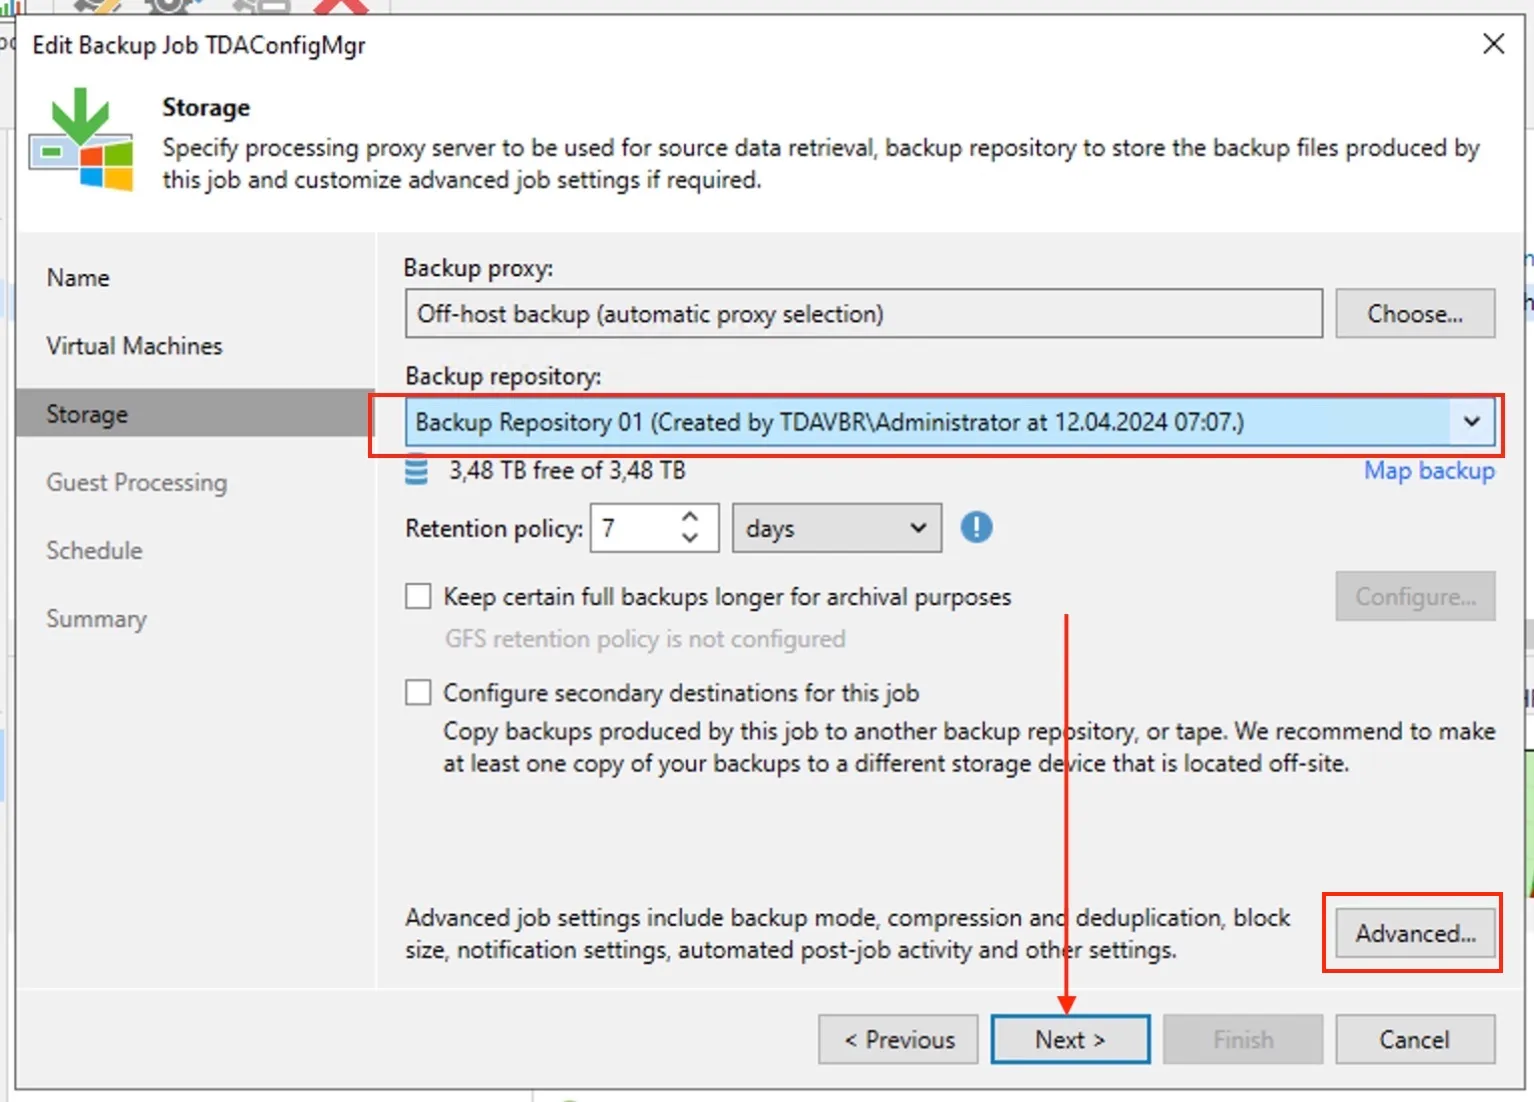
By default, Backup mode is Incremental with weekly Synthetic full backup. If you want a different backup mode, click in Advanced Settings and use the desired settings. Below are te settings avaible.
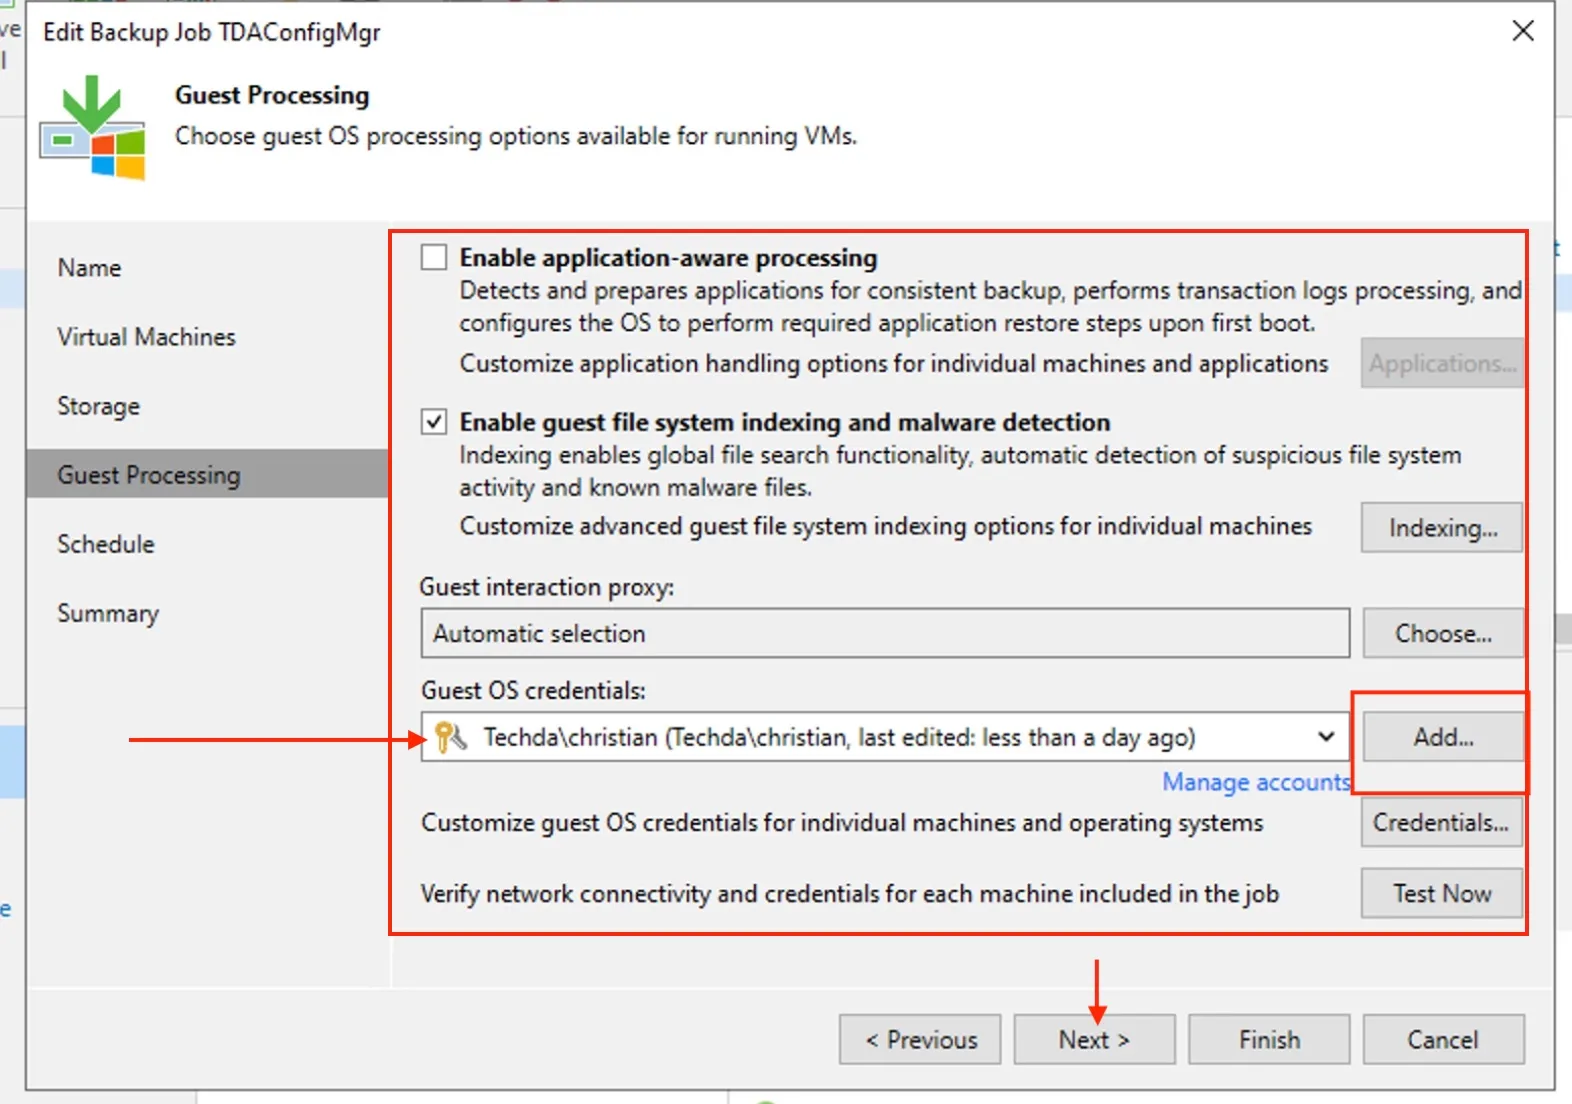
Note: You can instruct Veeam Backup & Replication to create an index of files and folders on the VM guest OS during backup. VM guest OS file indexing allows you to search for VM guest OS files inside VM backups and perform a 1-click restore in Veeam Backup Enterprise Manager.
Note: If you do not set an account that has permission on the VM. you will get the following error “ Unable to perform guest file system indexing: Failed to install via Deployment Svc“. To mitigate this issue, select a user account that has enough permissions on the VM. If you have not set up credentials beforehand. Click the Manage accounts link or click the Add button to add credentials. Afterwars, click Next to proceed.
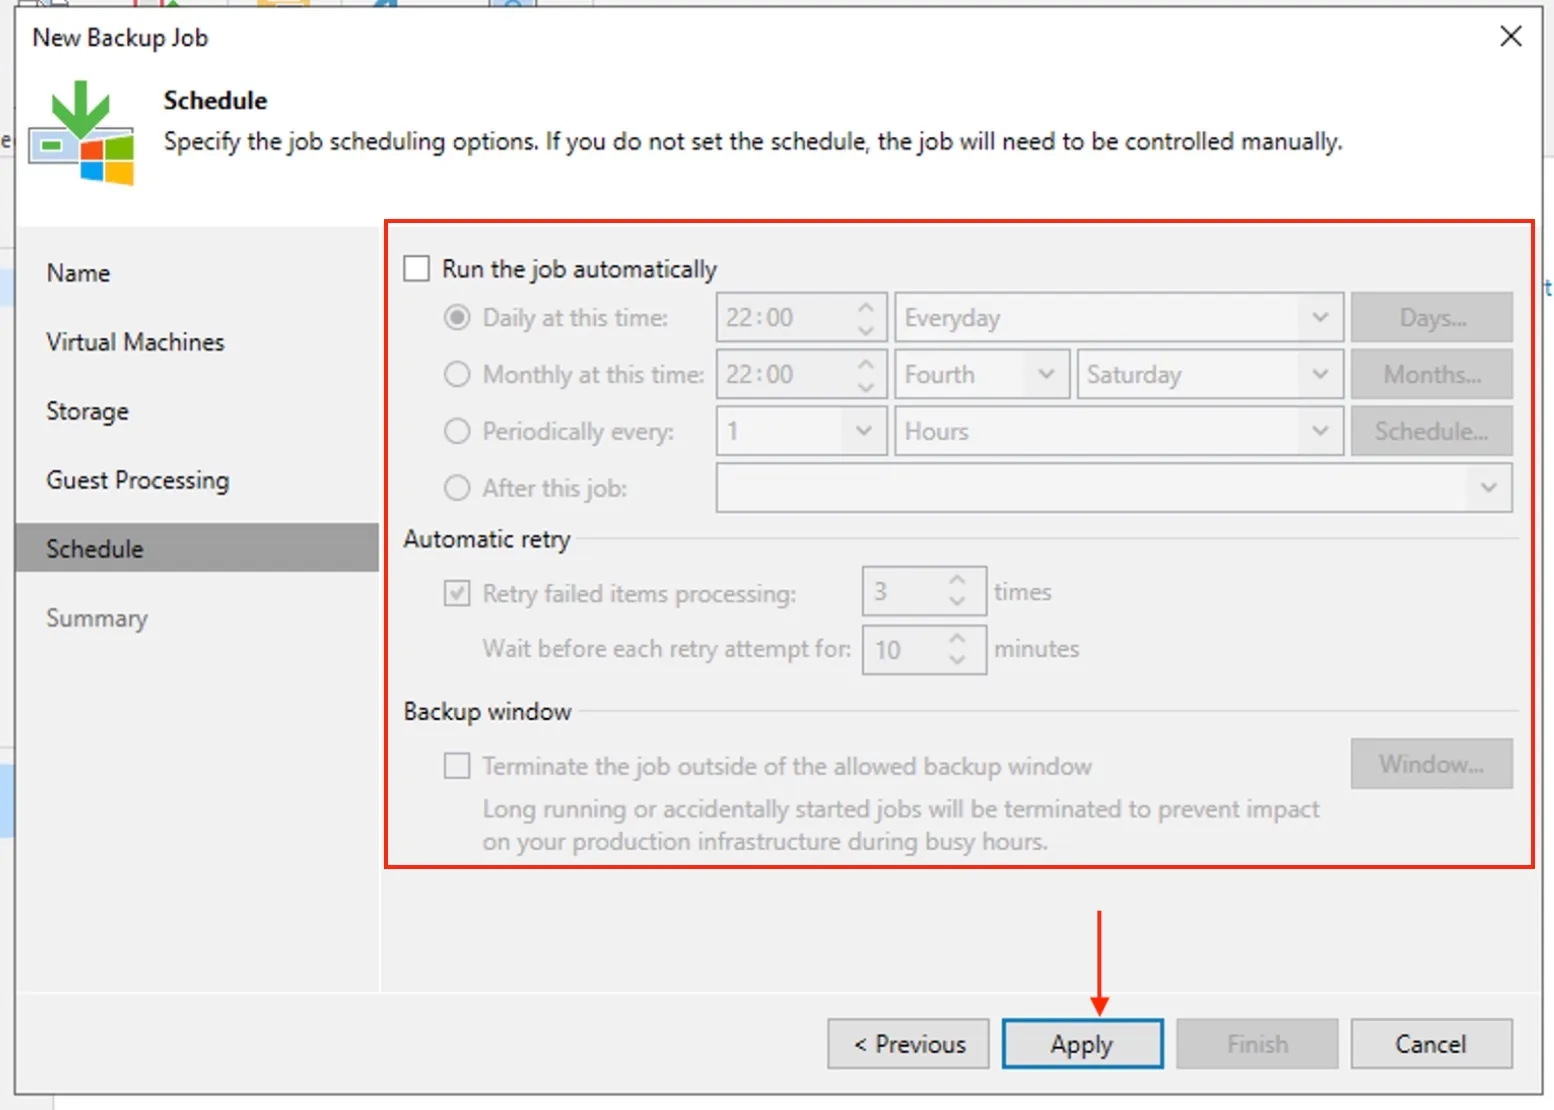
Next, select to run the backup job manually or schedule the job to run on a regular basis. Click Apply. For me at this moment, I will click on Apply only.
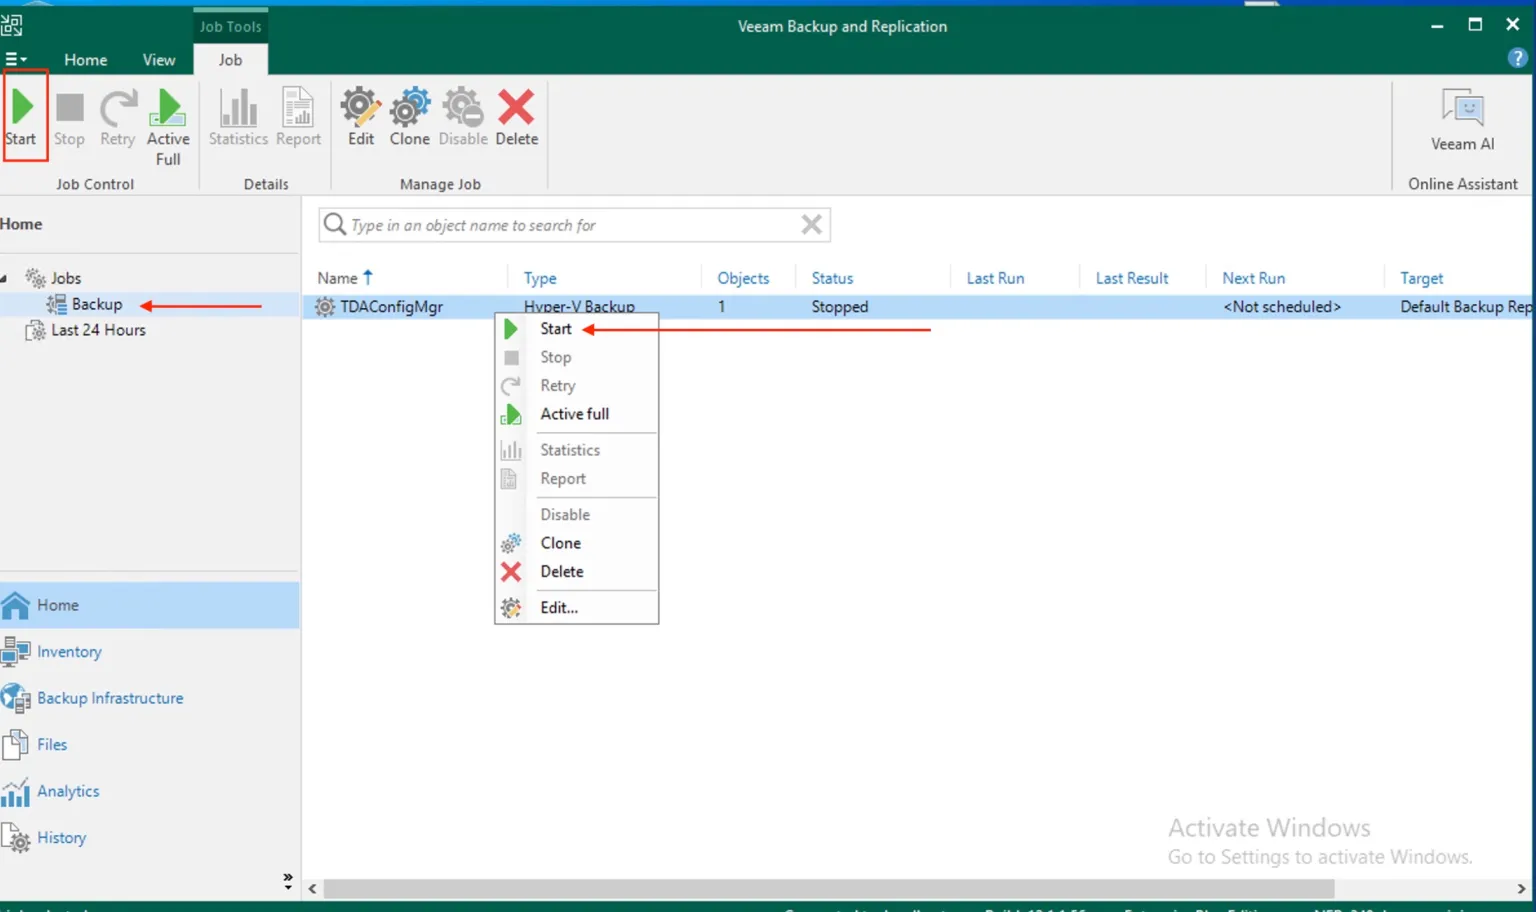
Run the backup Job Manually
Locate the backup job you want to run manually from the list of jobs displayed in the main window. Right-click on the selected backup job and choose “Start Job” from the context menu. Alternatively, you can click on the “Run” button in the toolbar.
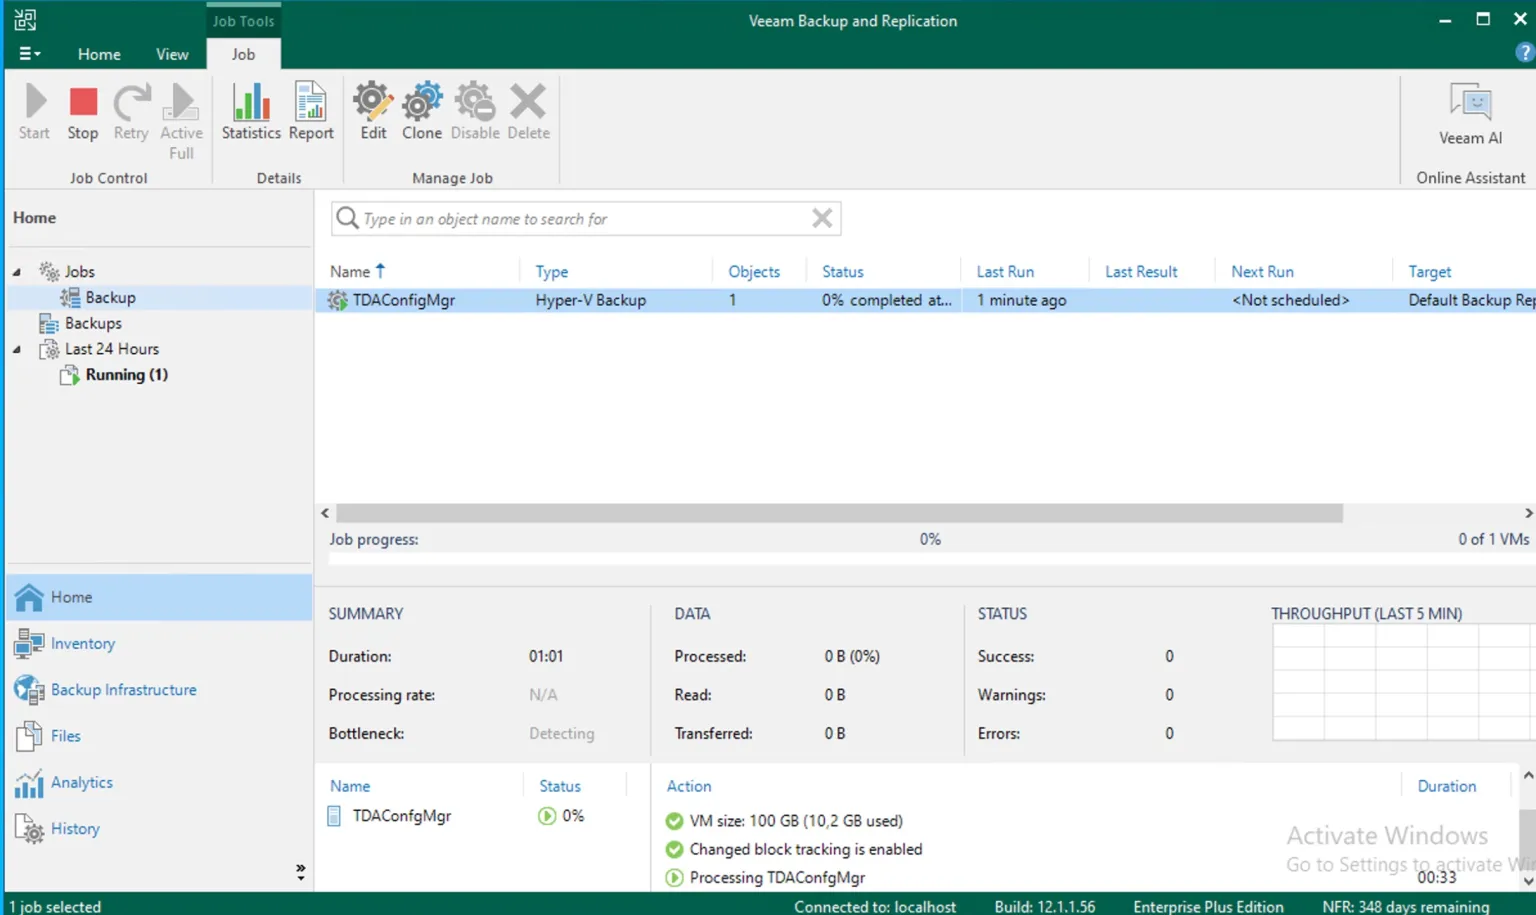
Once the job has been initiated, you can monitor its progress in the “Job” tab. The status of the job will be displayed, along with any relevant information about the backup process.
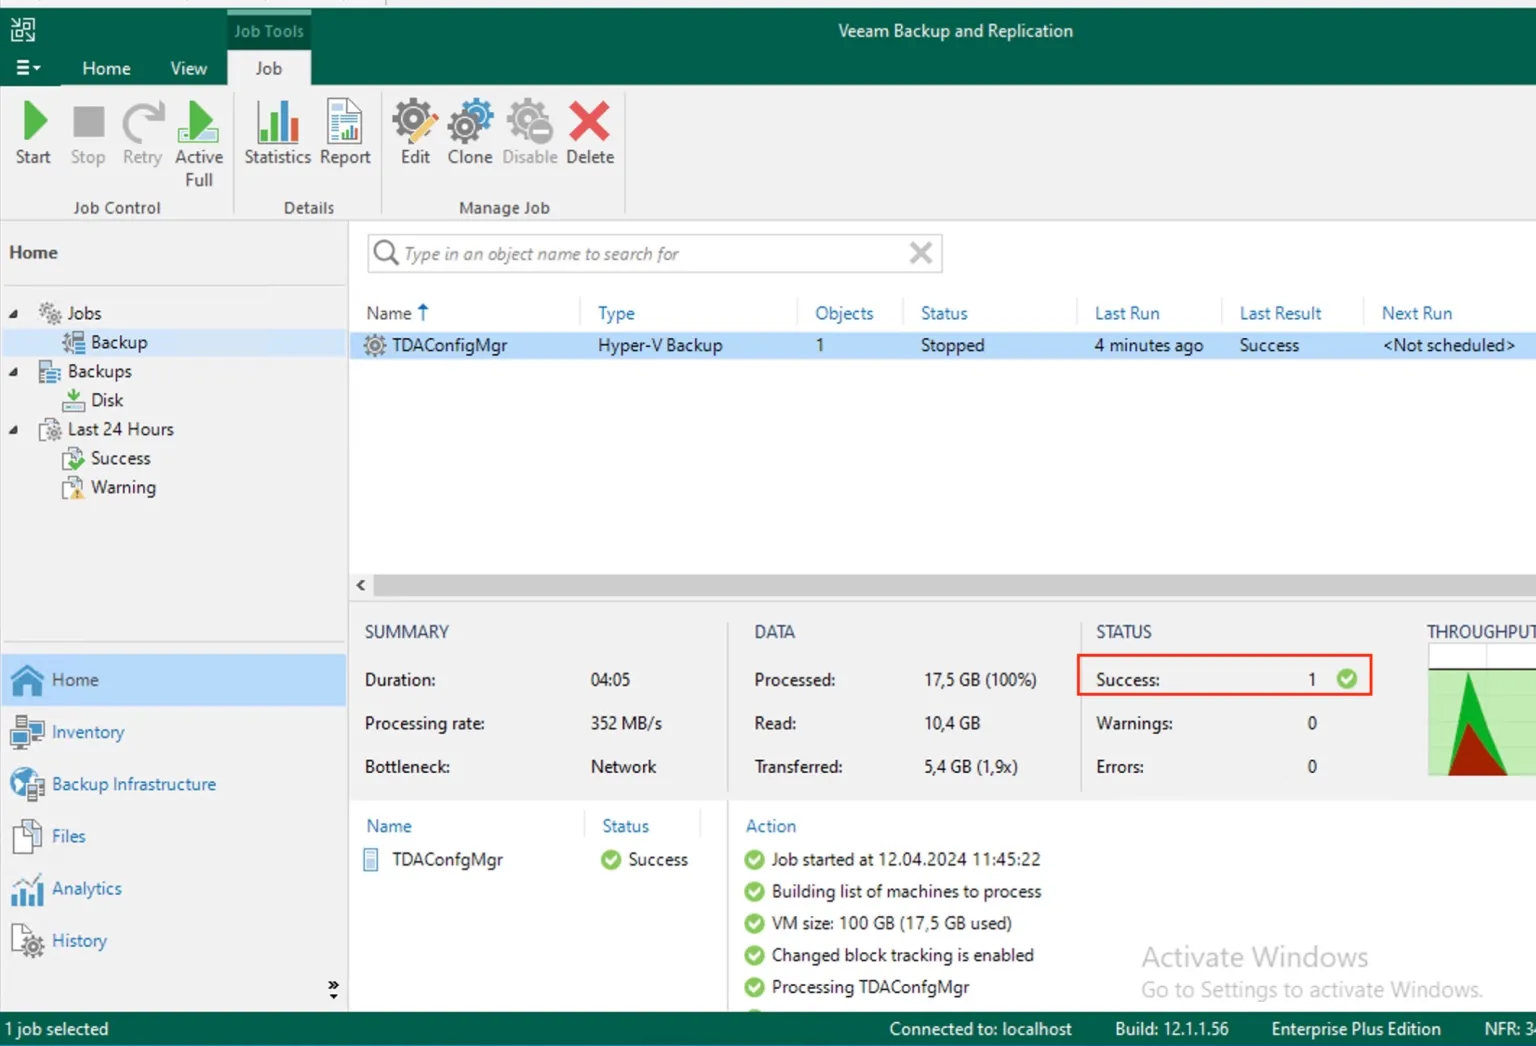
After the job completes, review the job summary to ensure that it ran successfully and to check for any warnings or errors.
Perform VM Restoration
We have successfully performed the VM backup, now let’s restore the VM.
Note: If you restore a workload to the production network. Make sure that the original workload is powered off to avoid conflicts. The restored VM will have the same MAC address as the original VM. Therefore, if you restore the VM to the same Hyper-V host where the original VM is running. A MAC address conflict may occur. To overcome this situation, power off the original VM before you start the restore process. This is a new lab environment, so I do not care about this as the VM will be deleted regardless.
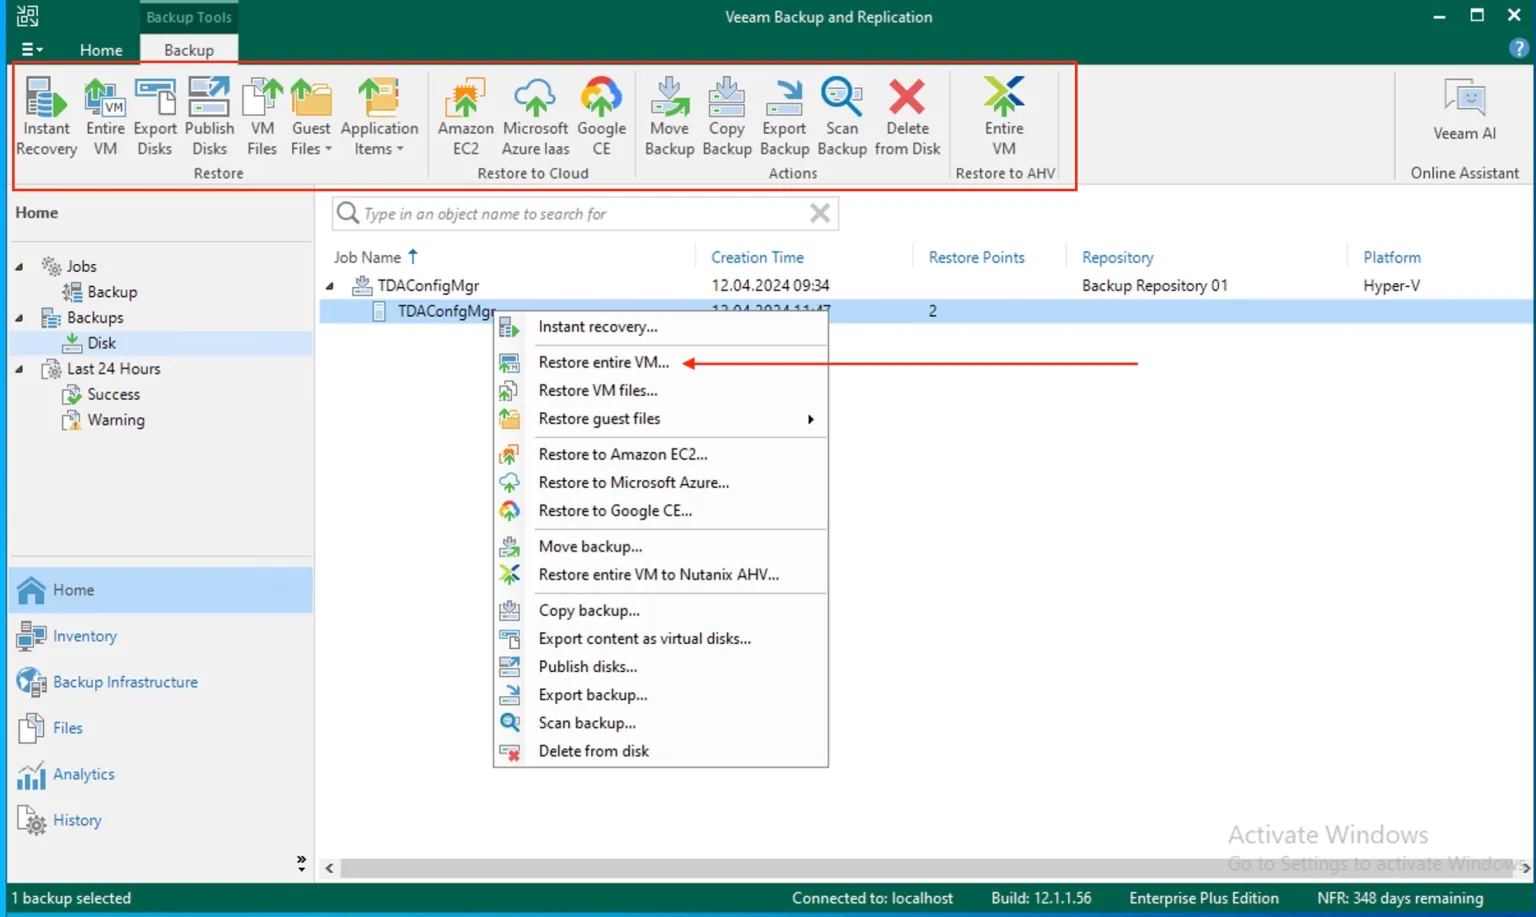
Launch the Veeam Backup & Replication Console and select Home on the bottom left menu. Navigate to the “Backups” section located in the left-hand menu. Right-click on the selected backup and choose “Restore entire VM.”
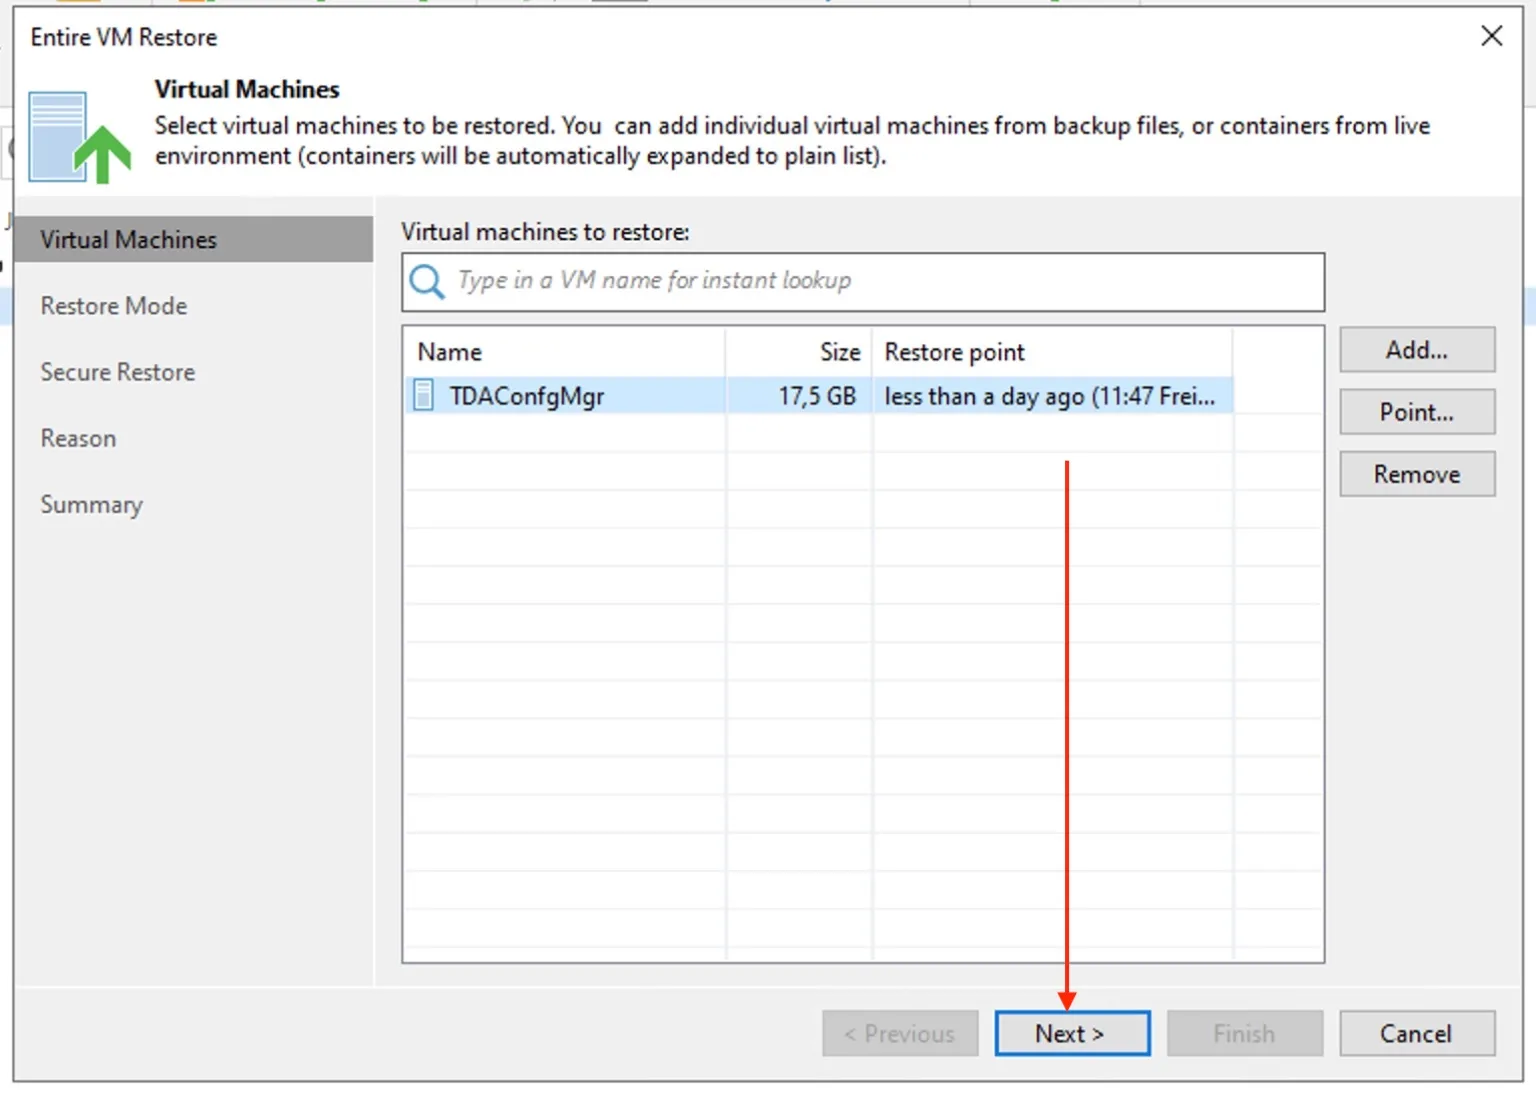
At the Virtual Machines step, click the Add button to open the selection of available backups. Choose the desired VM from one of the backups and click Add.
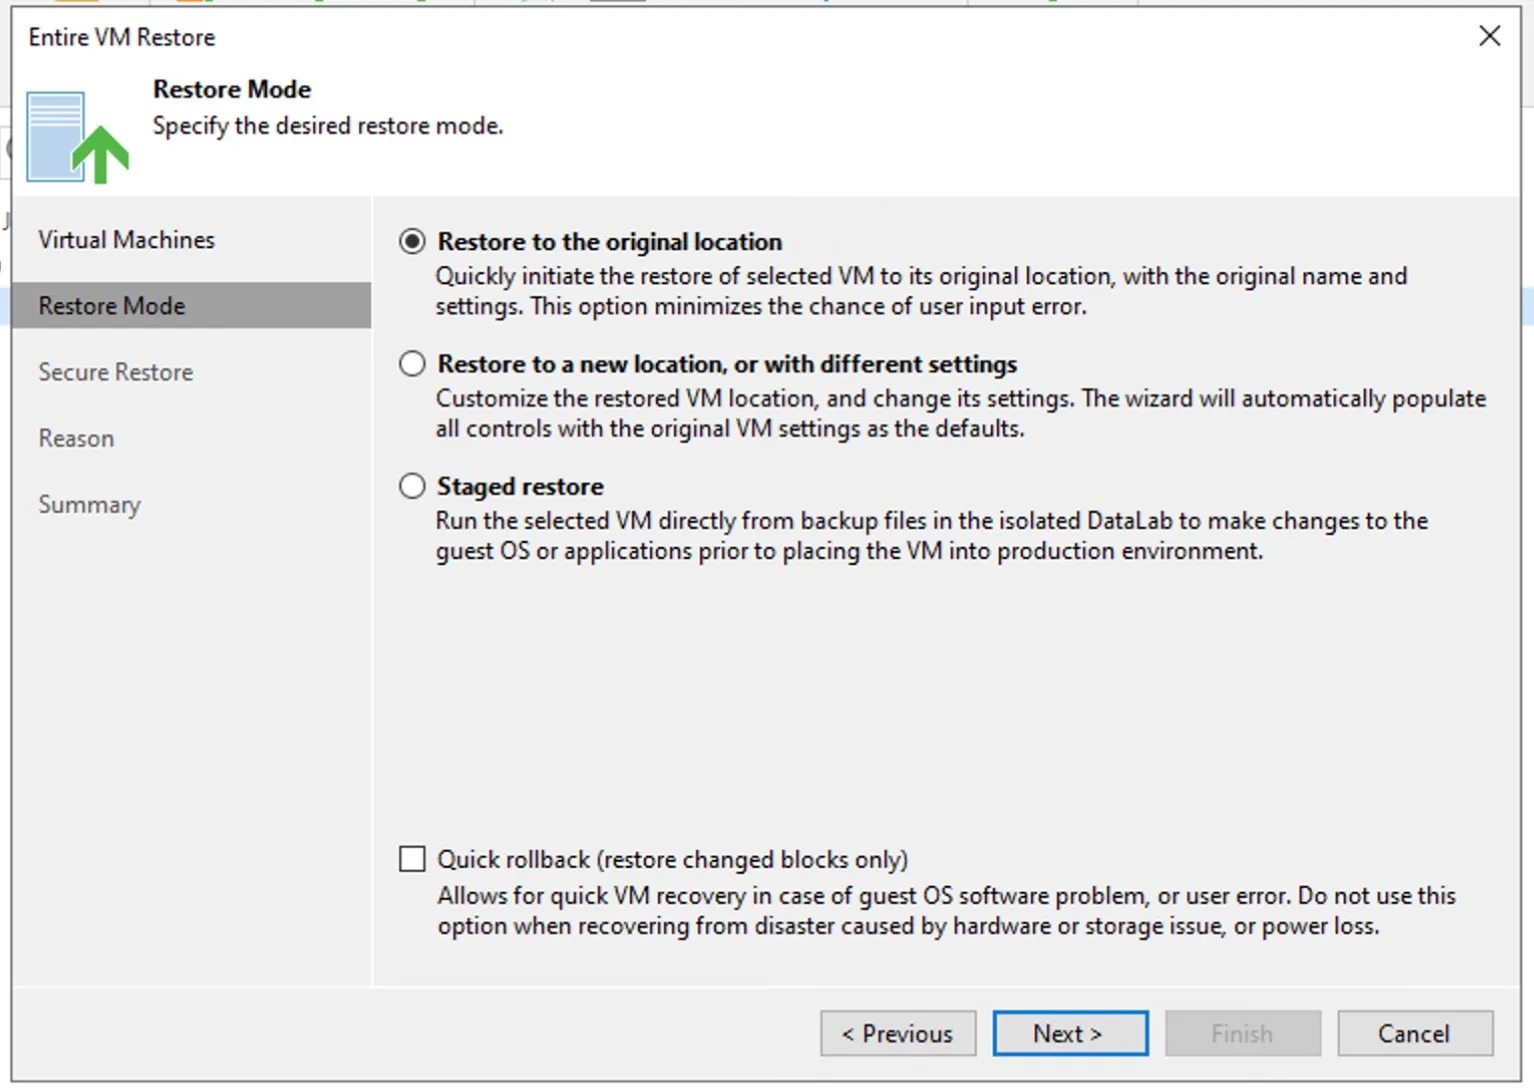
At the Restore Mode step, select Restore to the original location and click Next.
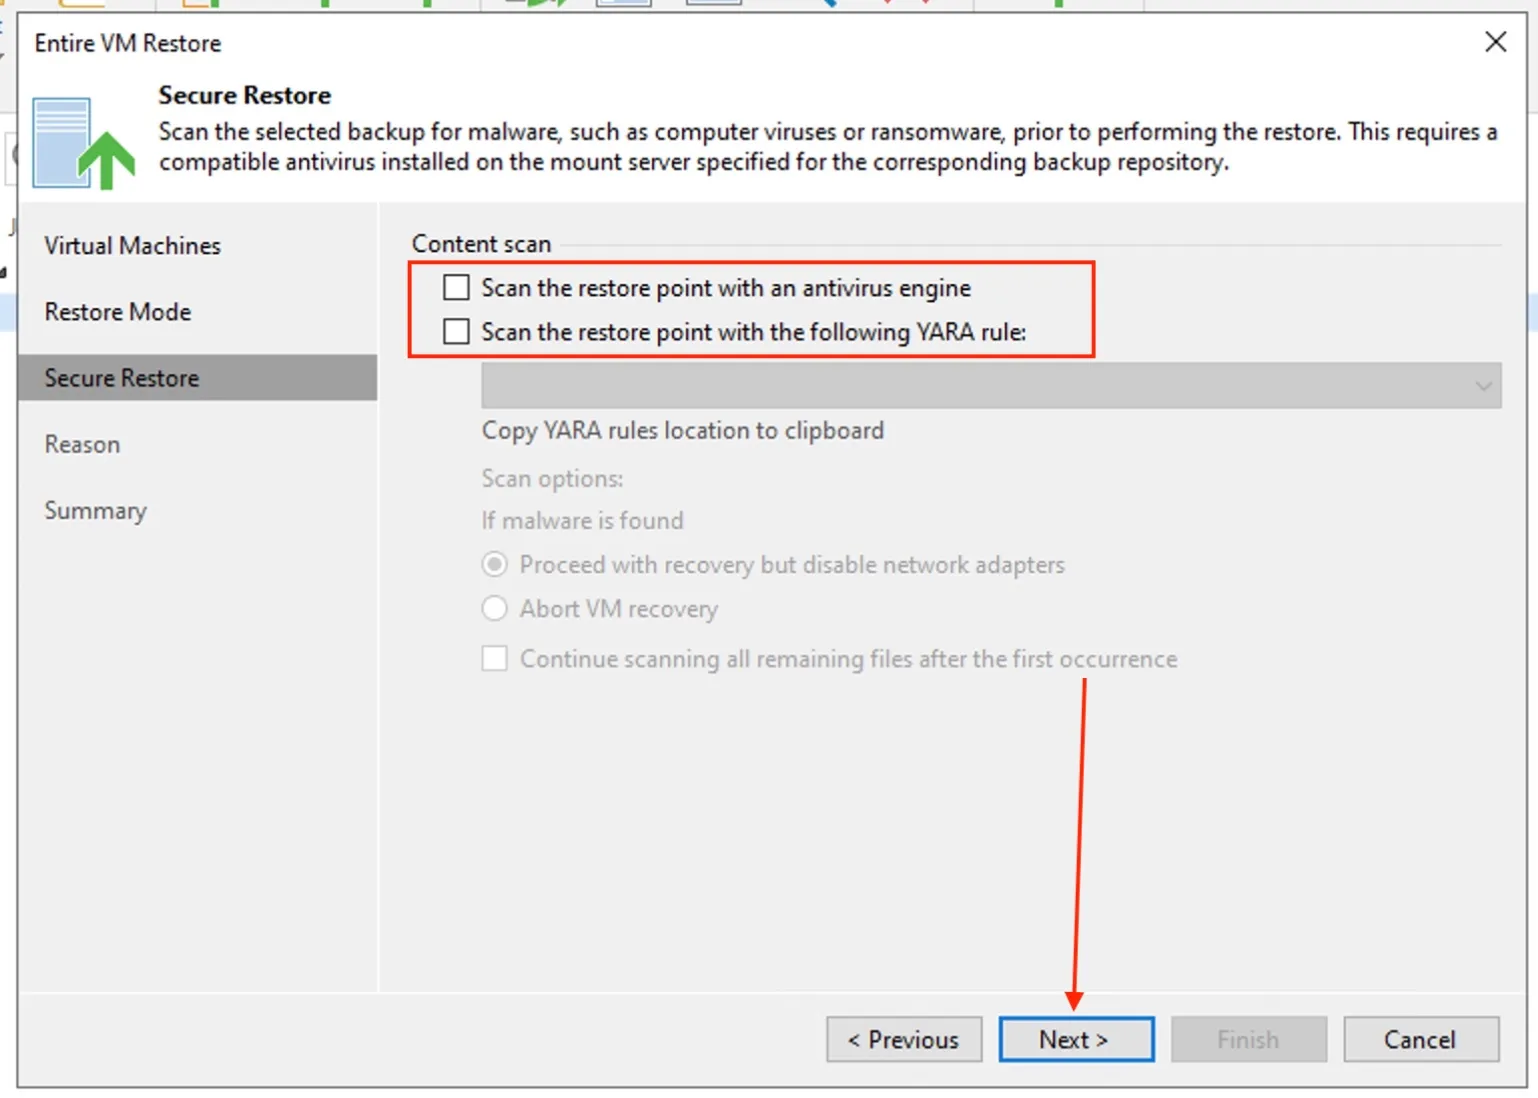
At the Secure Restore step, you have the option to perform these content scan and next.
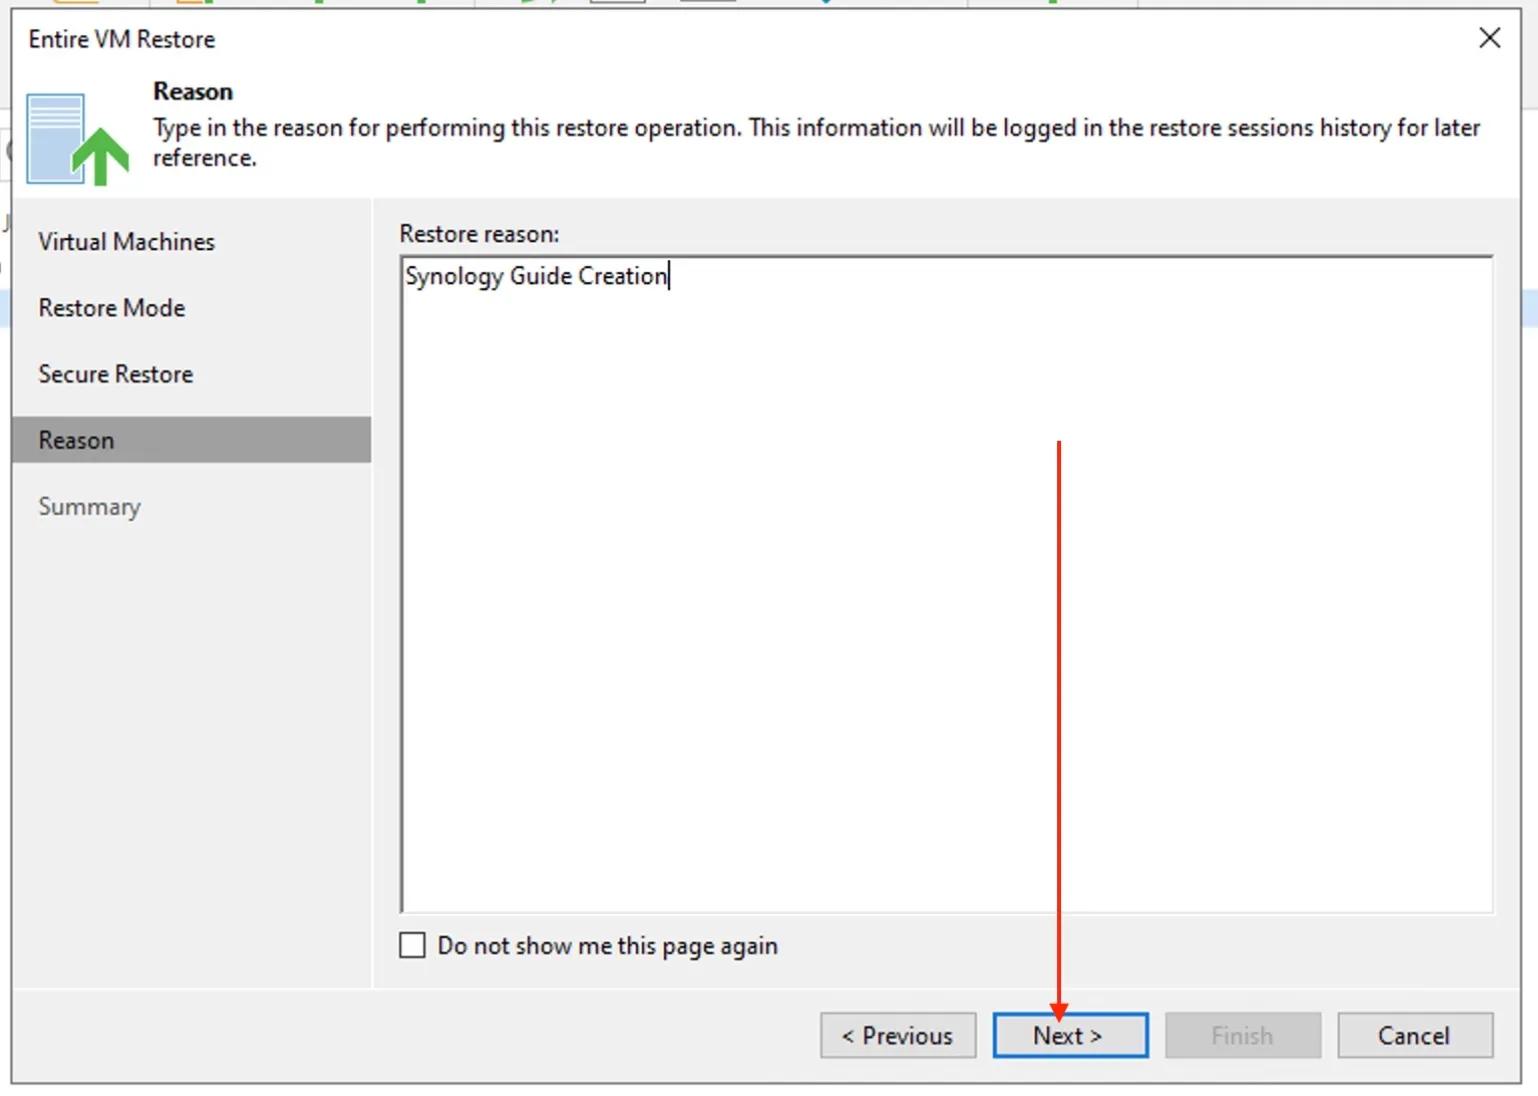
Enter a reason and click next.
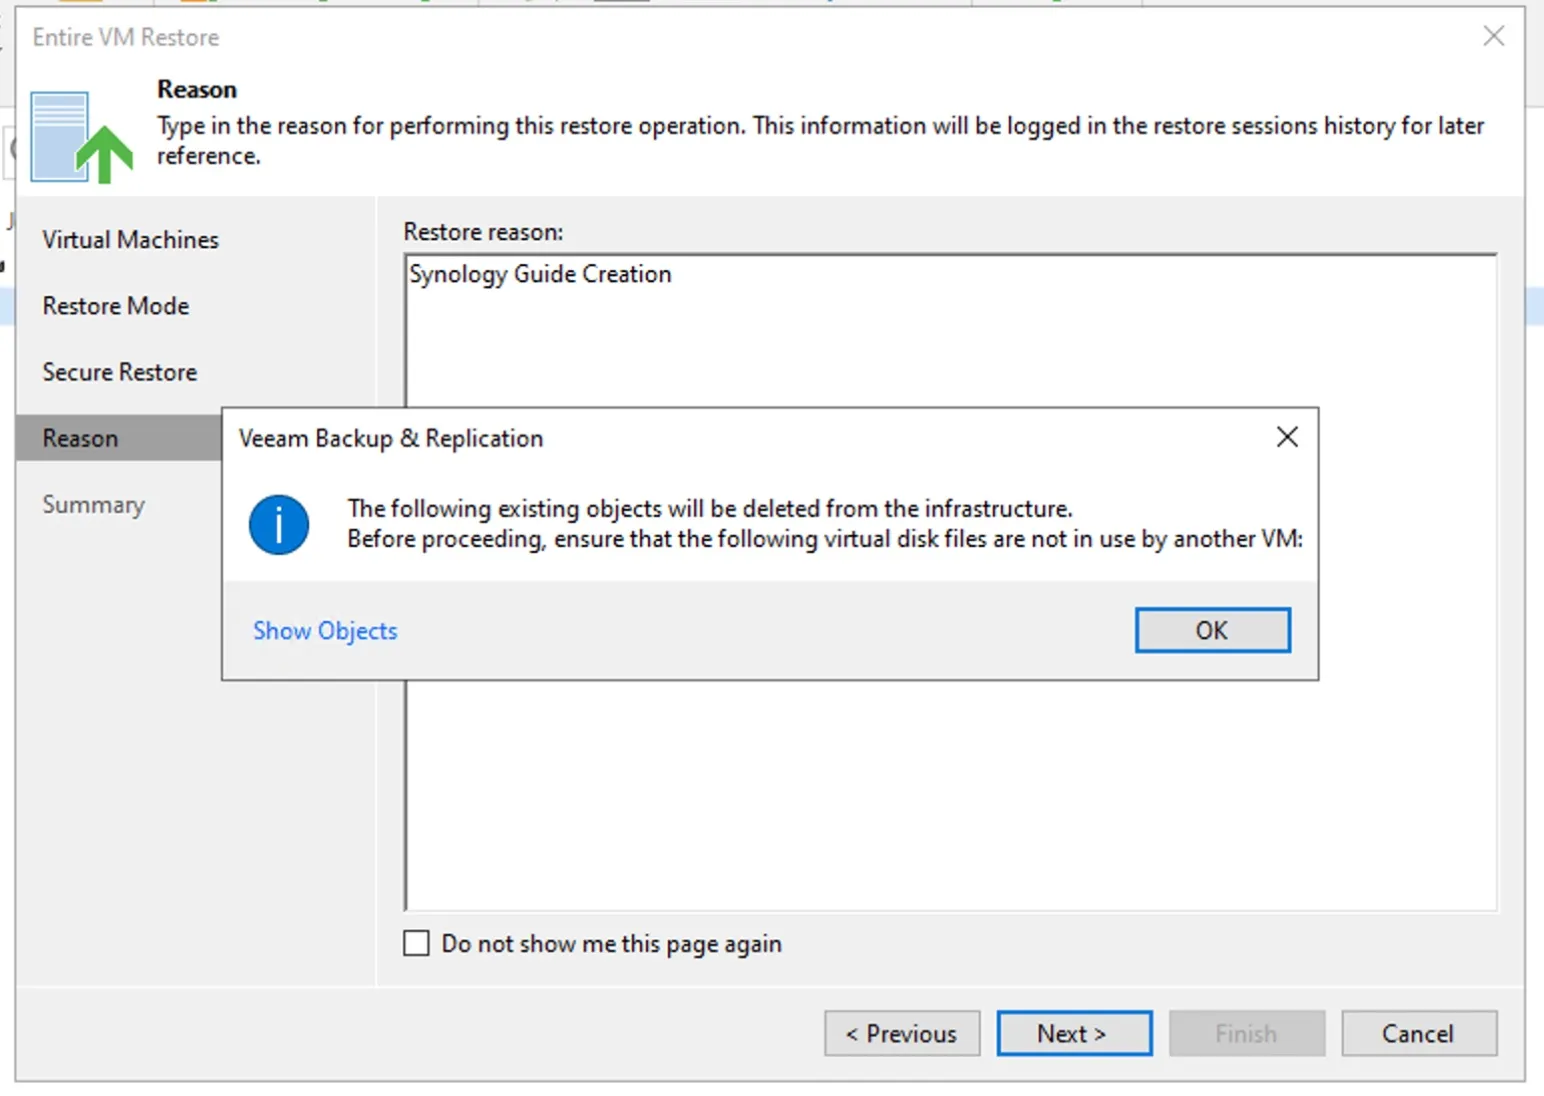
You will be prompted with a message that the existing object will be deleted. Click Ok.
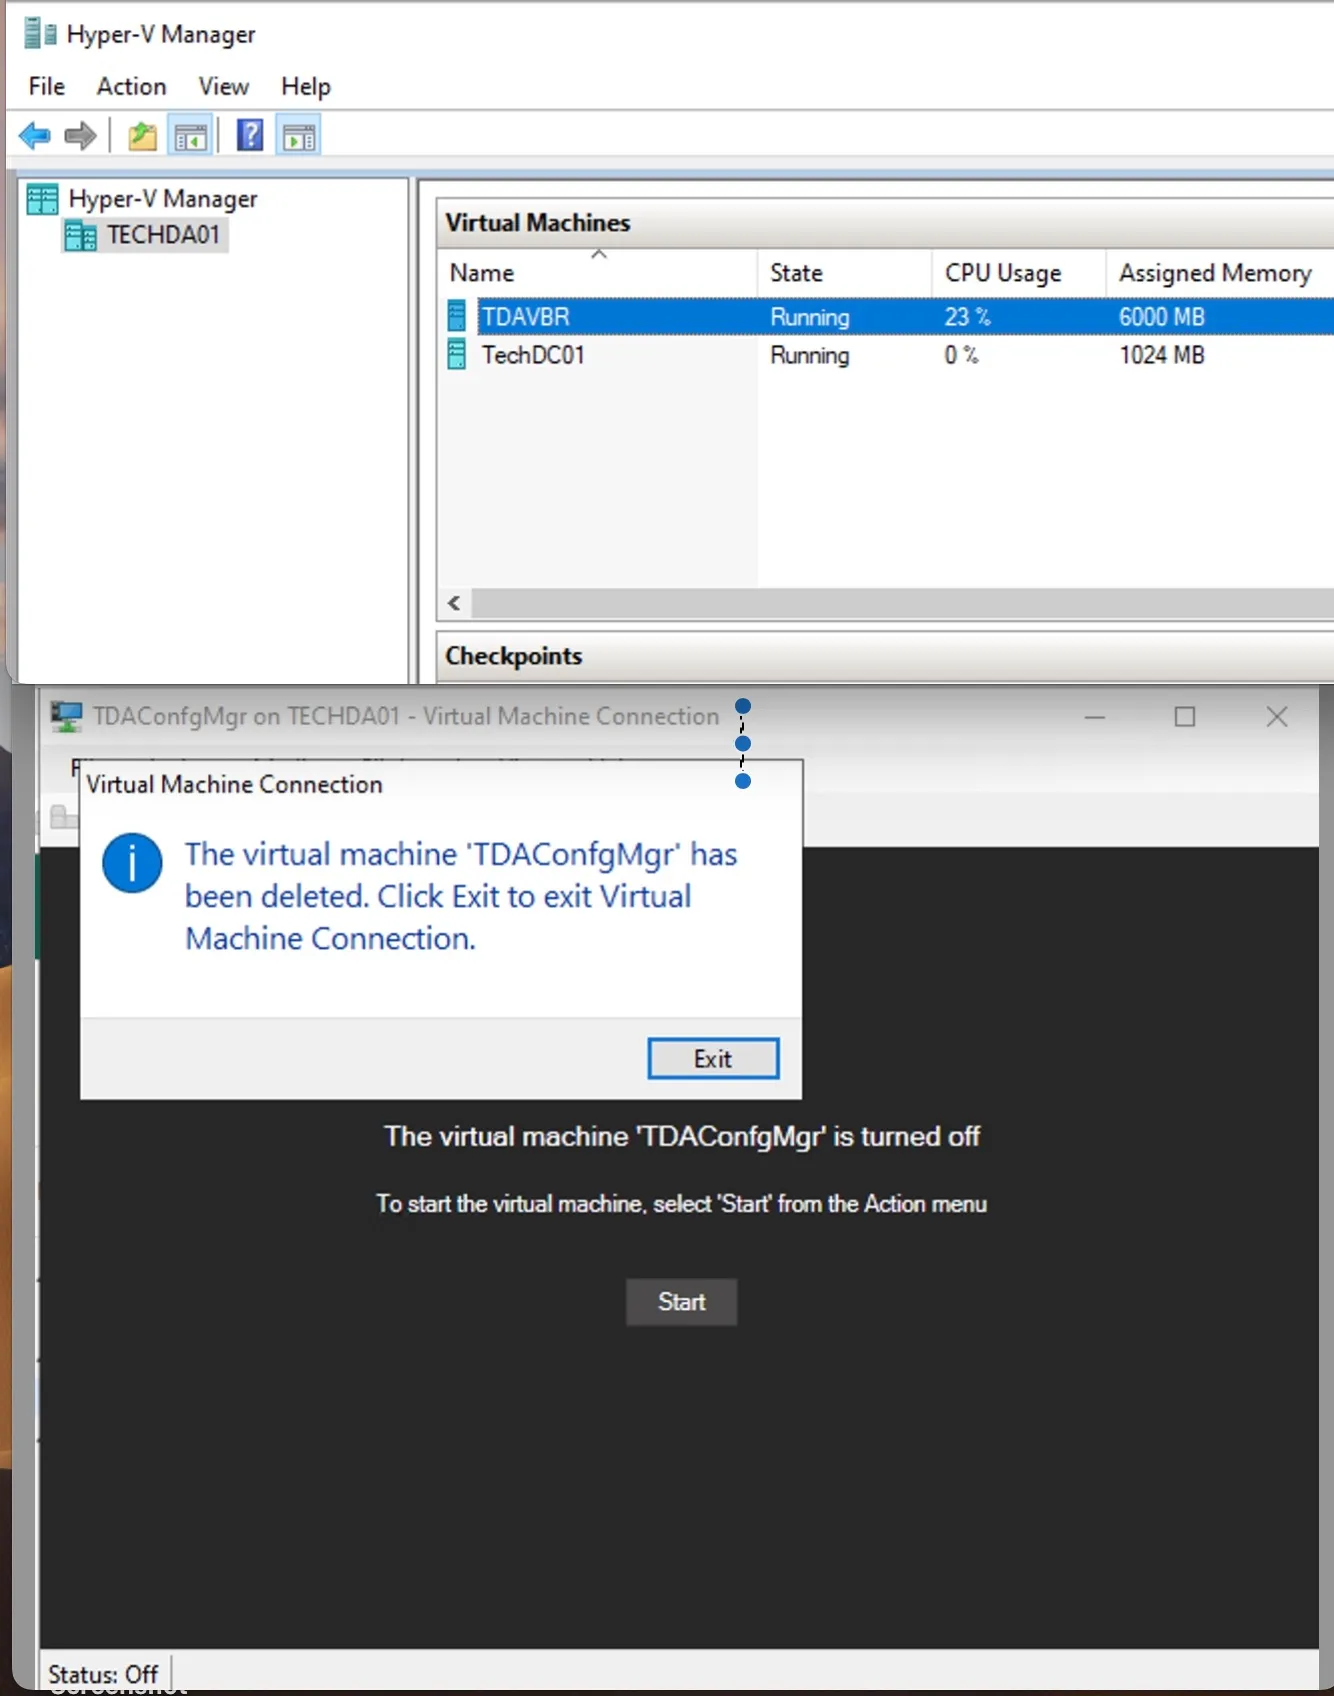
As you can see, the VM has been deleted.
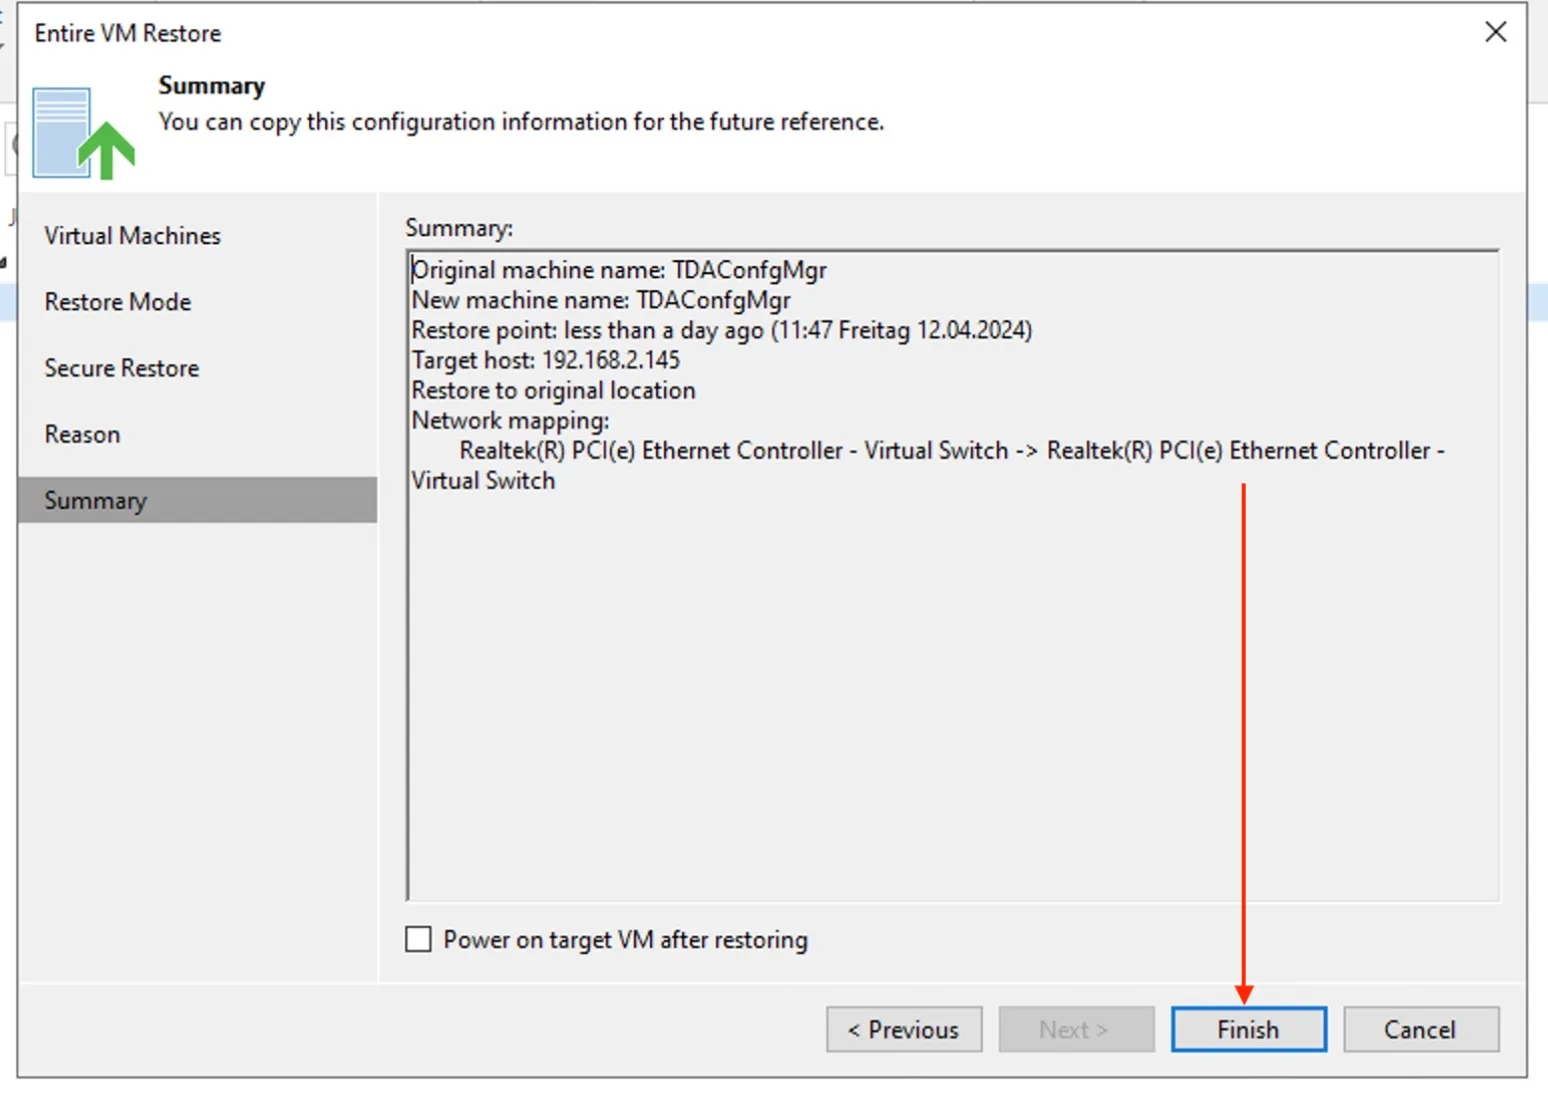
Choose if the target VMs should be powered on and connected to the network. Click Finish as shown below.
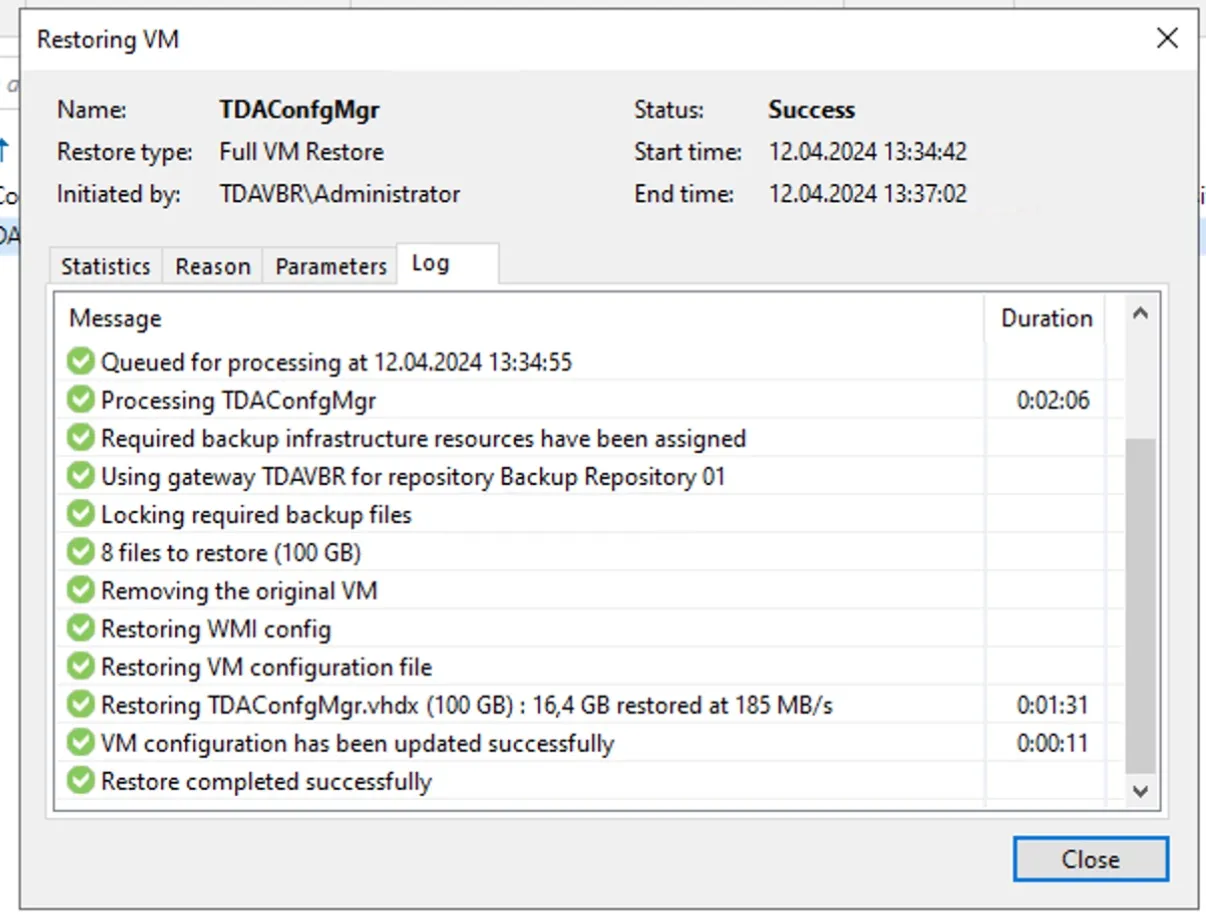
As you can see from the log, the VM restore has completed successfully. Click the close button to close button as as shown below.
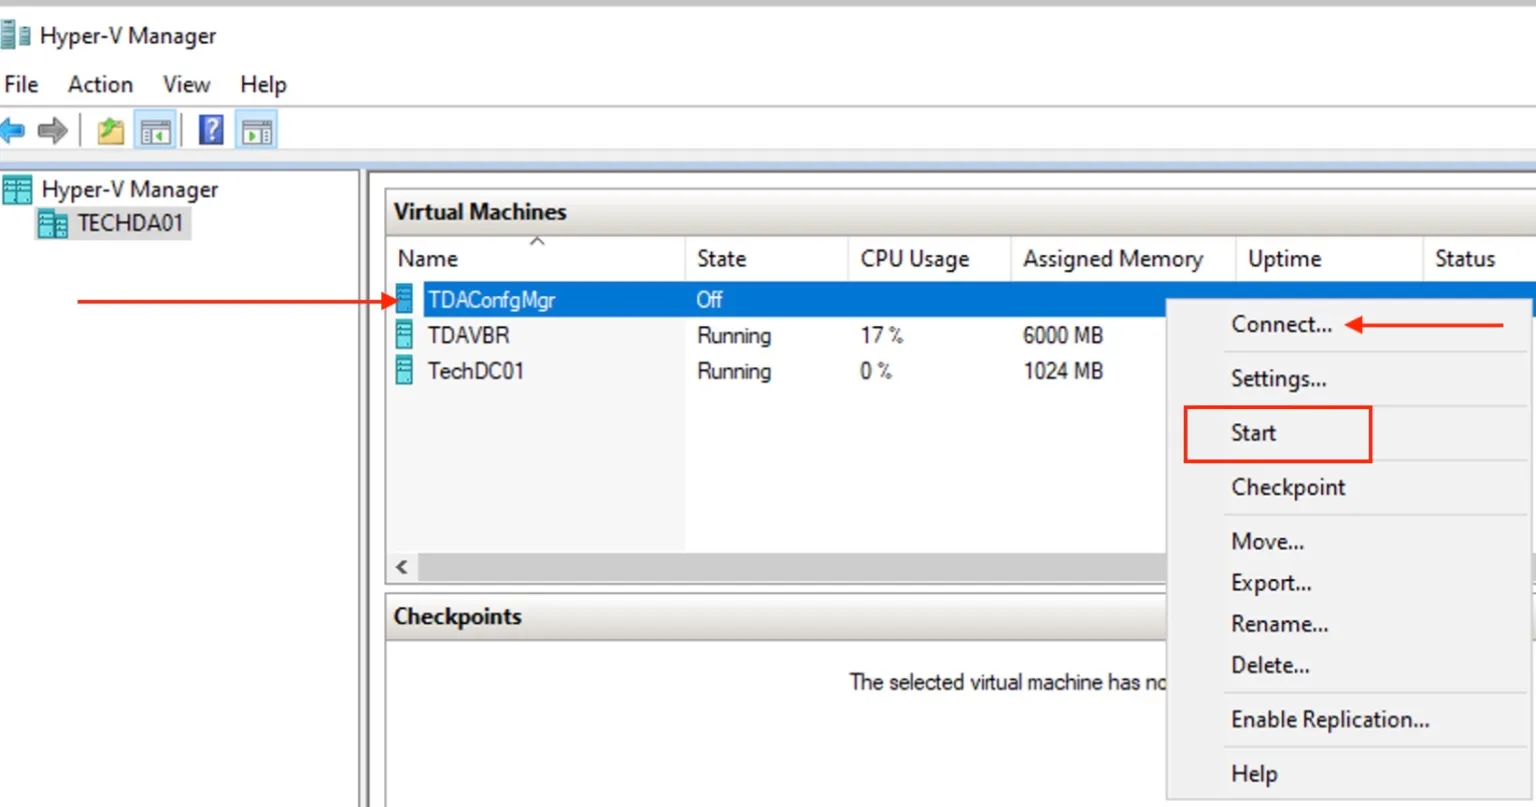
Since I decided not to have the VM restarted automatically, I would like to do this manually. Select the VM and click on Start.
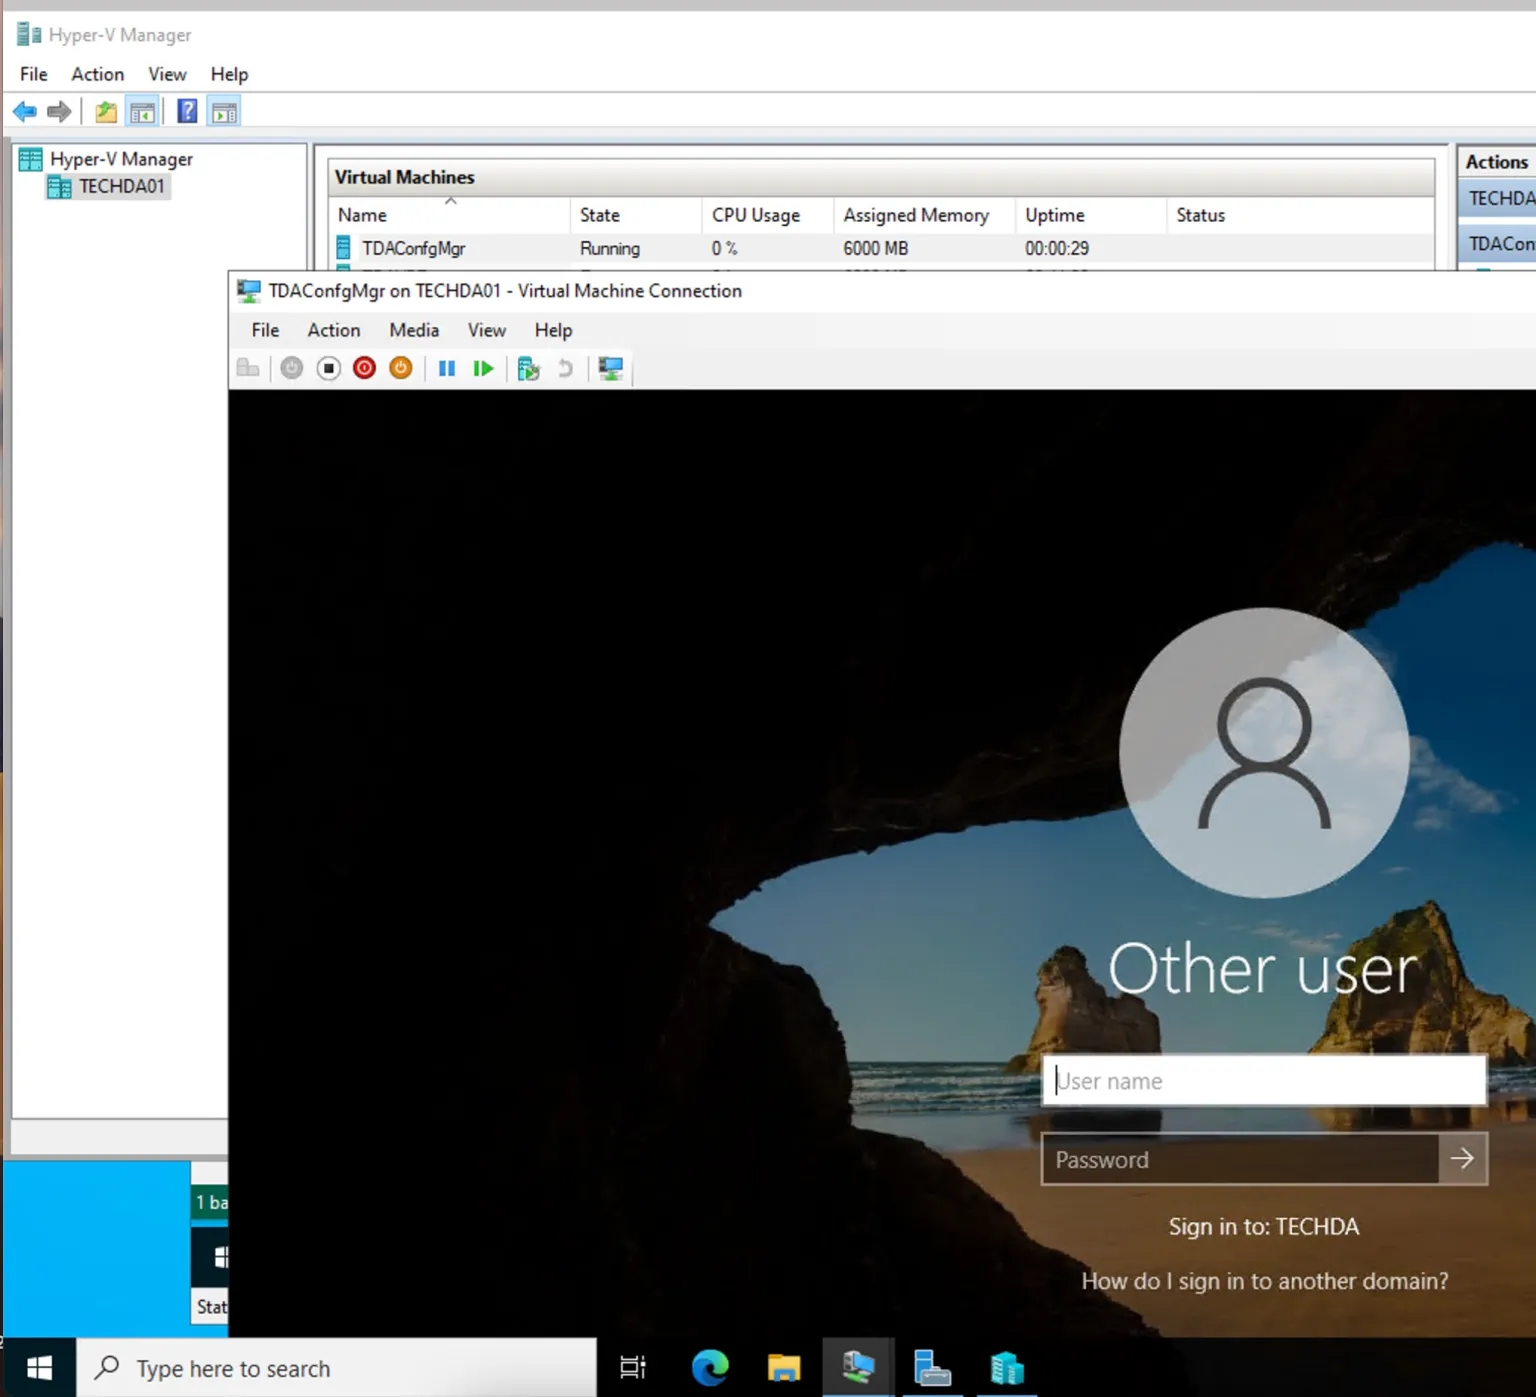
Now logon and start using the VM as if nothing ever happened.
Here is an article on “Cybersecurity Tips to Secure Synology NAS against Ransomware”, an article suggesting and showing the steps to protect your Synology NAS.


