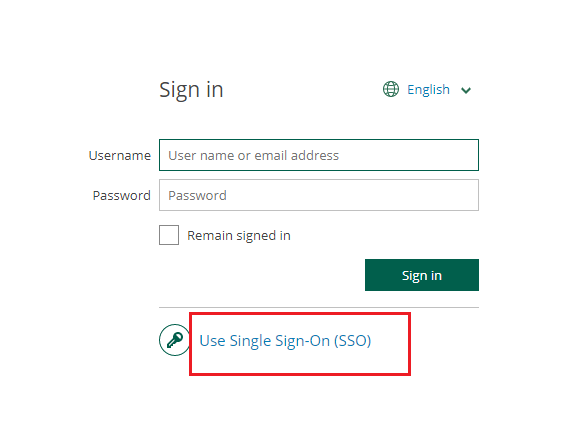
This document provides step by step instructions to configure Azure Active Directory for SAML authentication in Veeam Enterprise Manager.
There are four editions of Azure AD (AAD): Free, Office 365 (which comes together with O365), and two Premium editions P1 and P2. Comparison for all of them can be found at https://azure.microsoft.com/en-us/pricing/details/active-directory/
Below you can find steps to setup Veeam Enterprise Manager and Azure AD integration based on AAD from Office 365.
Let’s start with the Azure side. Go to Azure portal then go to Azure Active Directory.
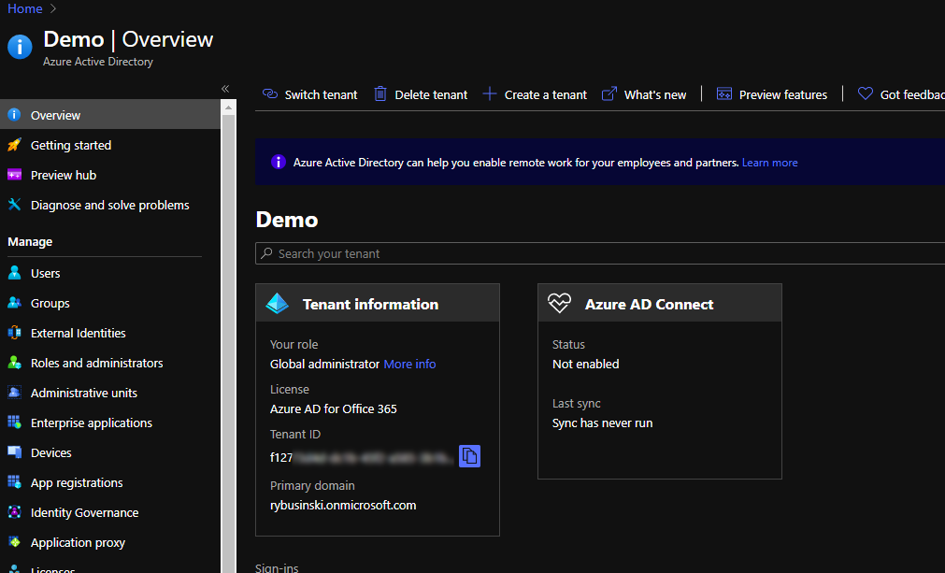
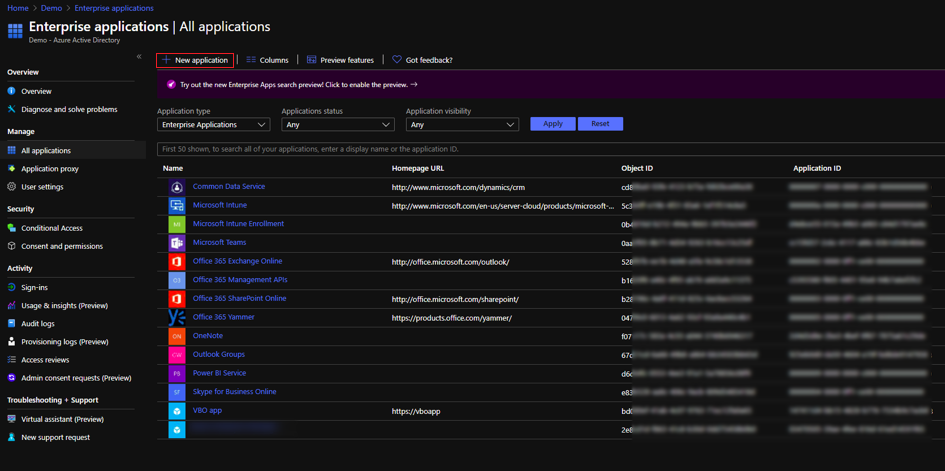
Go to Enterprise applications → New application →
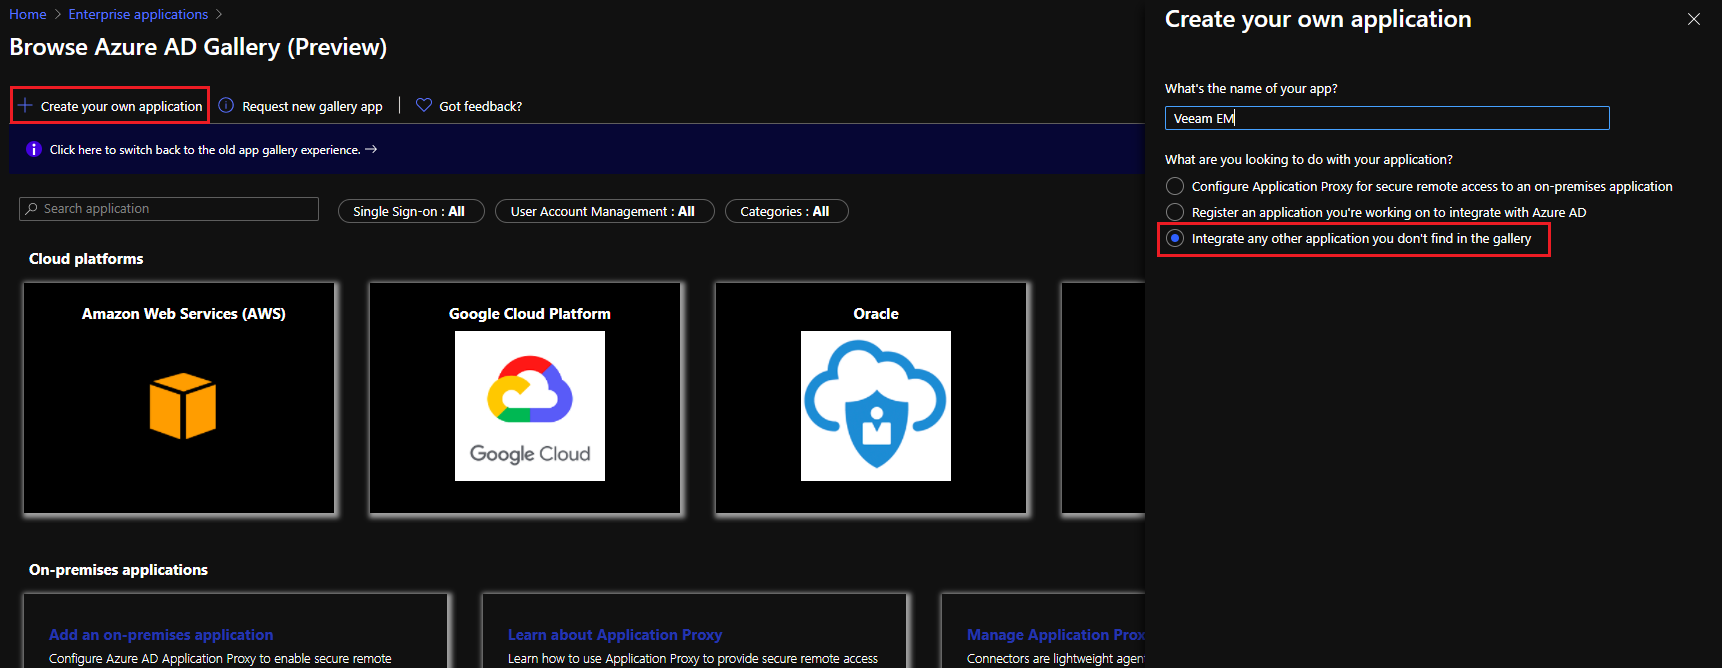
→ “Create your own application” → then provide a name for our application i.e. Veeam EM, and select “Integrate any other application you don’t find in the gallery” → Create
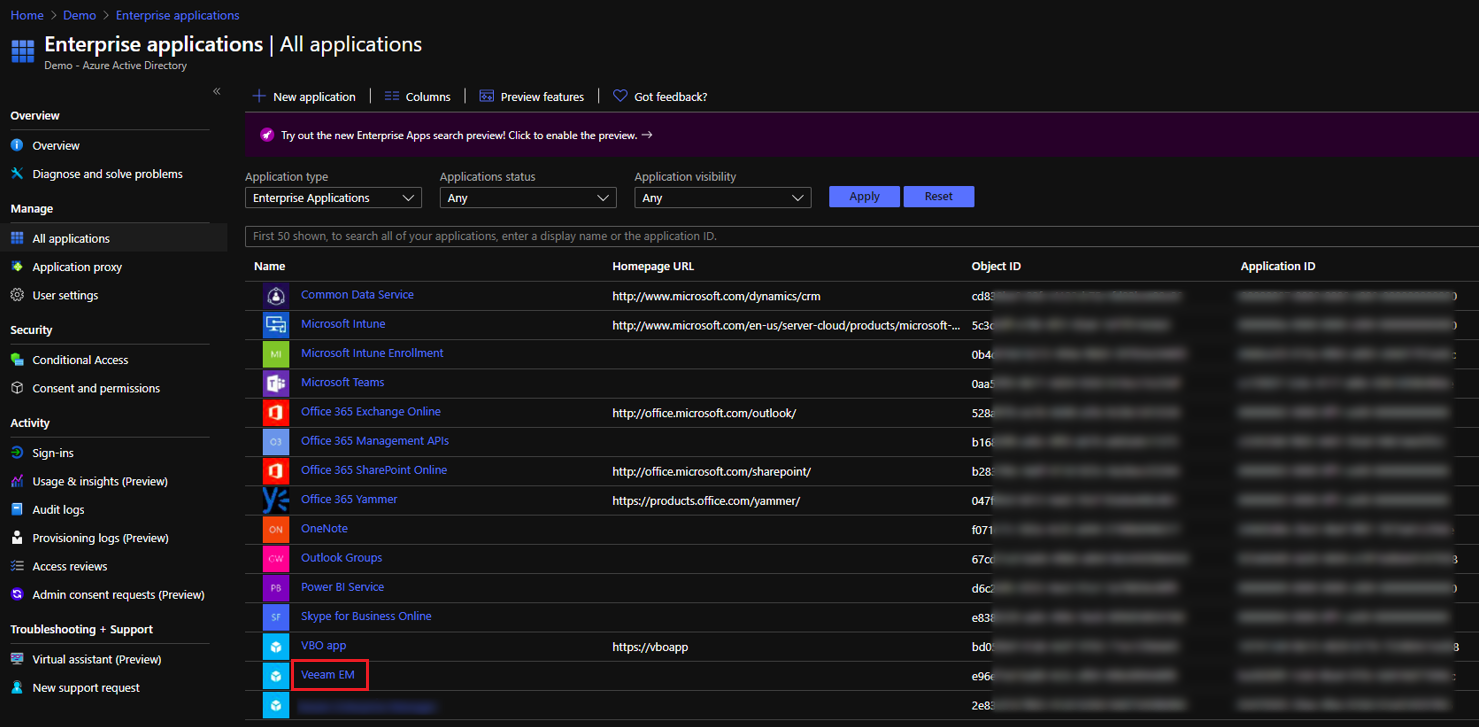
Within a few moments’ applications will be created and visible under Enterprise Application view. Open it.
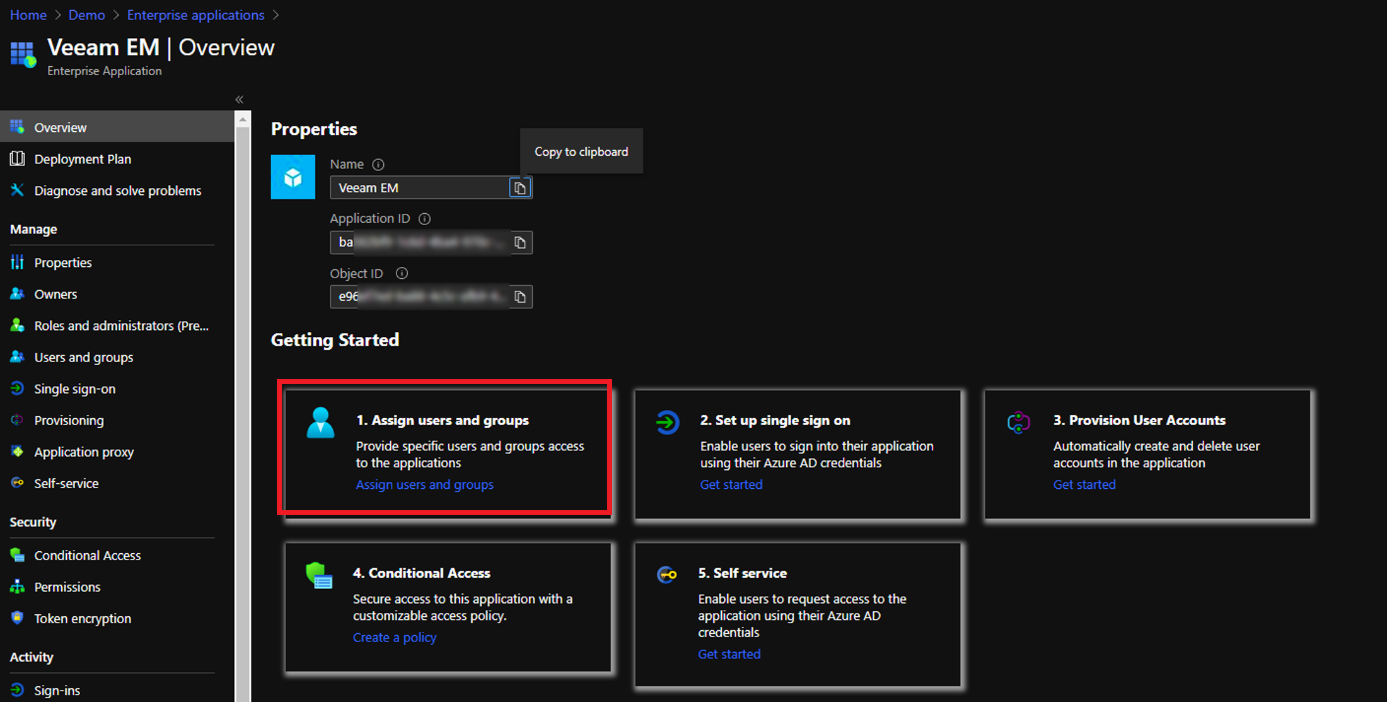
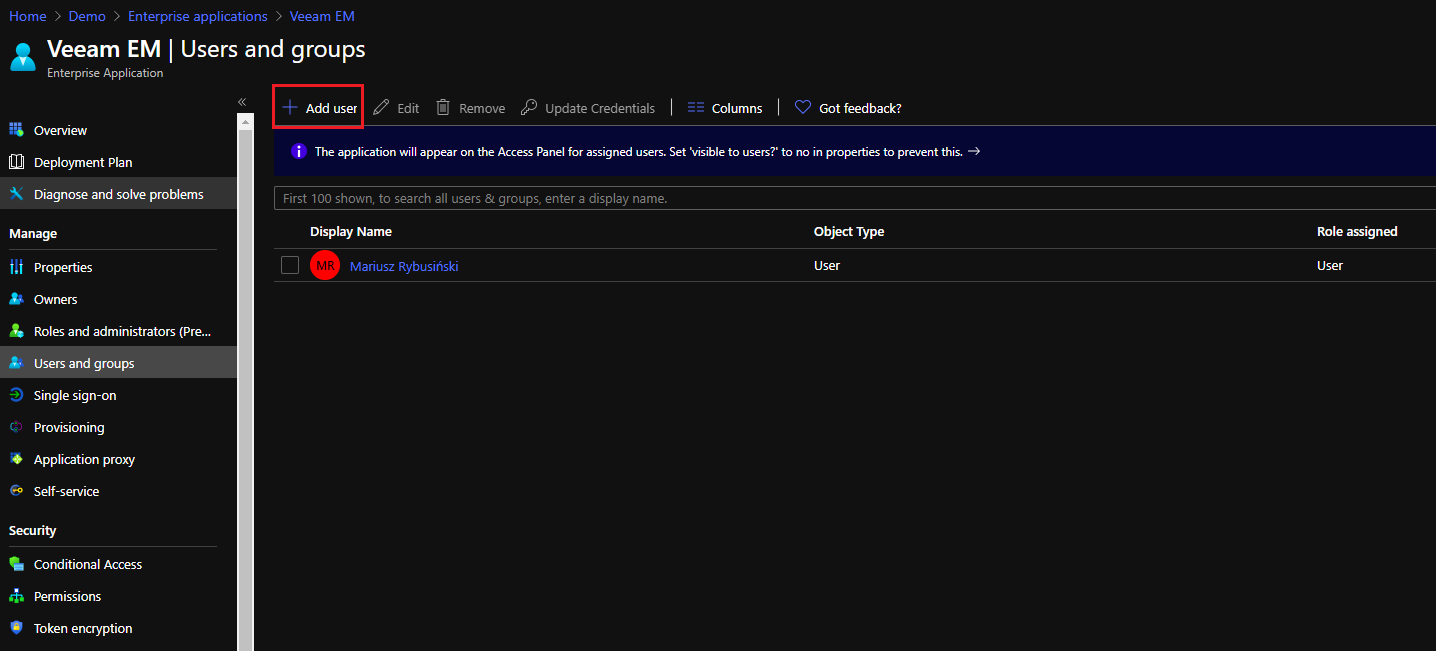
Now let’s add some users (Step 1). In this version of AAD, only users can be added. In Premium P1 or P2 plan, you can also add groups.
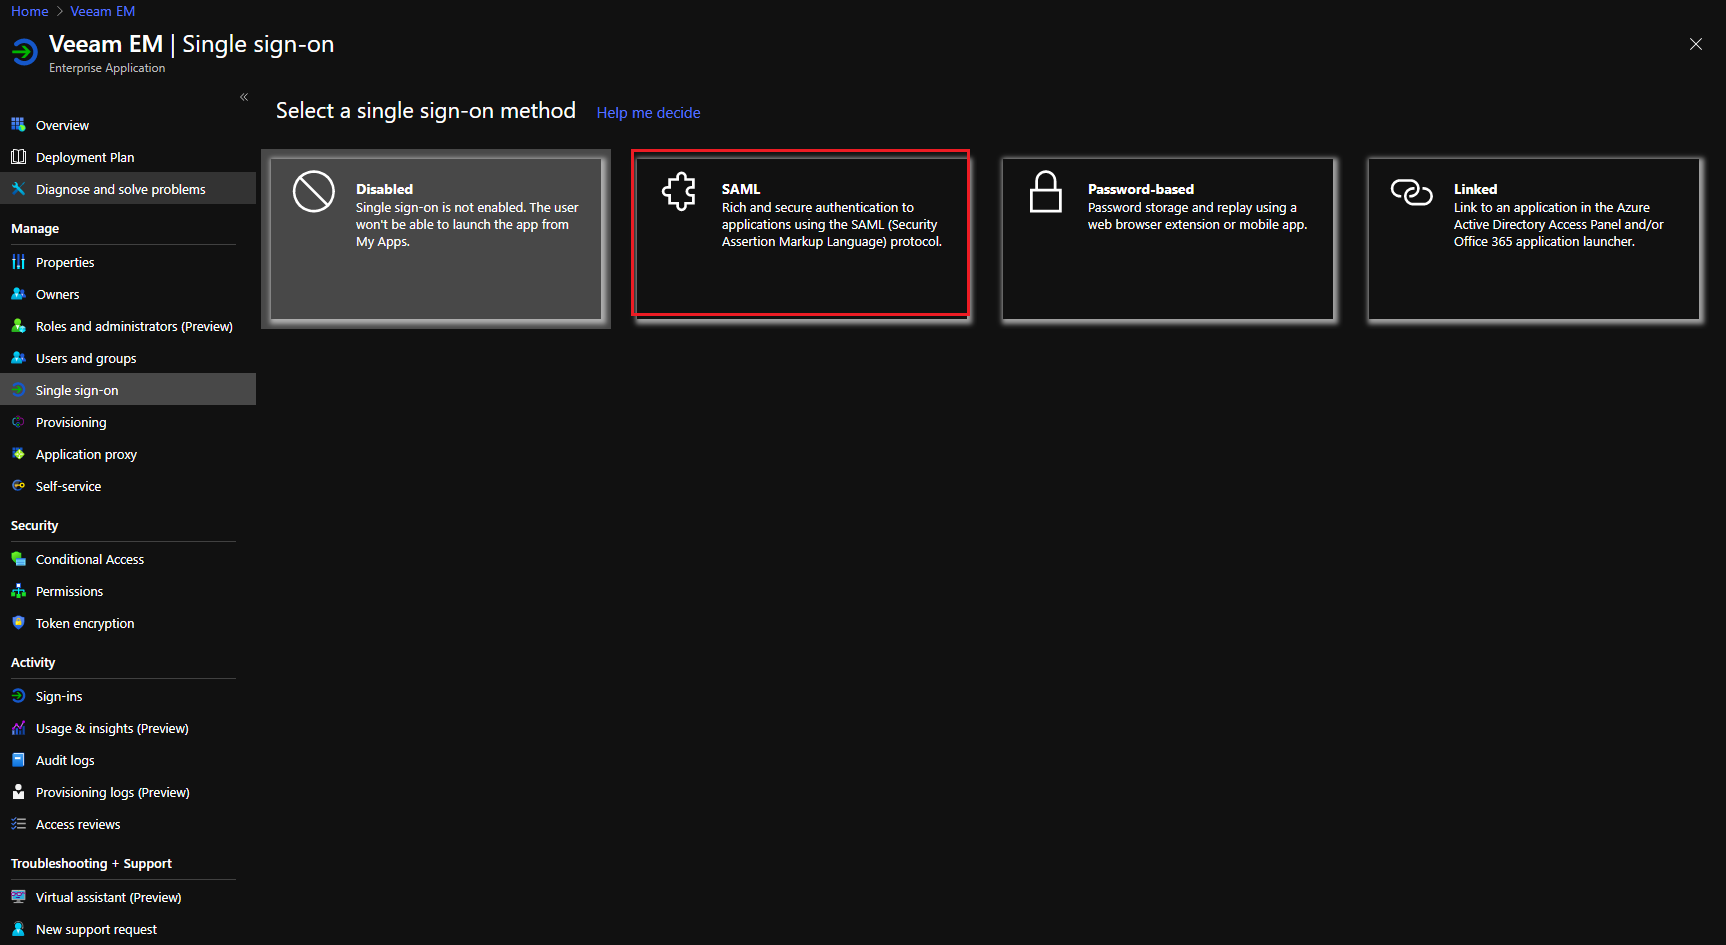
Now time to setup Single sign-on (step 2) → SAML
Regarding the certificate we have 2 options:
- use some certificate that already exists on the Enterprise Manager server and import it to Azure AD.
- we can download the certificate from Azure AD – from our prepared application – and import it locally on our server.
Below are the steps for the first option. We need a certificate exported with a private key (.pfx), password protected – we can do this in the MMC console. This certificate should be already under local computer certificates. We will need it in the Azure portal. Note: there is an option to download a certificate on the Enterprise Manager (SAML) site, but it is in CER format (contains only a public key).
Now, we need some preparation from the Enterprise Manager's side. Please login to the EM, go to the configuration → settings → SAML Authentication. Enable SAML.
Scroll down to choose certificate → select → choose some certificate – you can use one of the already existing certificates for Veeam Enterprise Manager.
Additionally to the certificate please download the metadata file for Veeam EM.
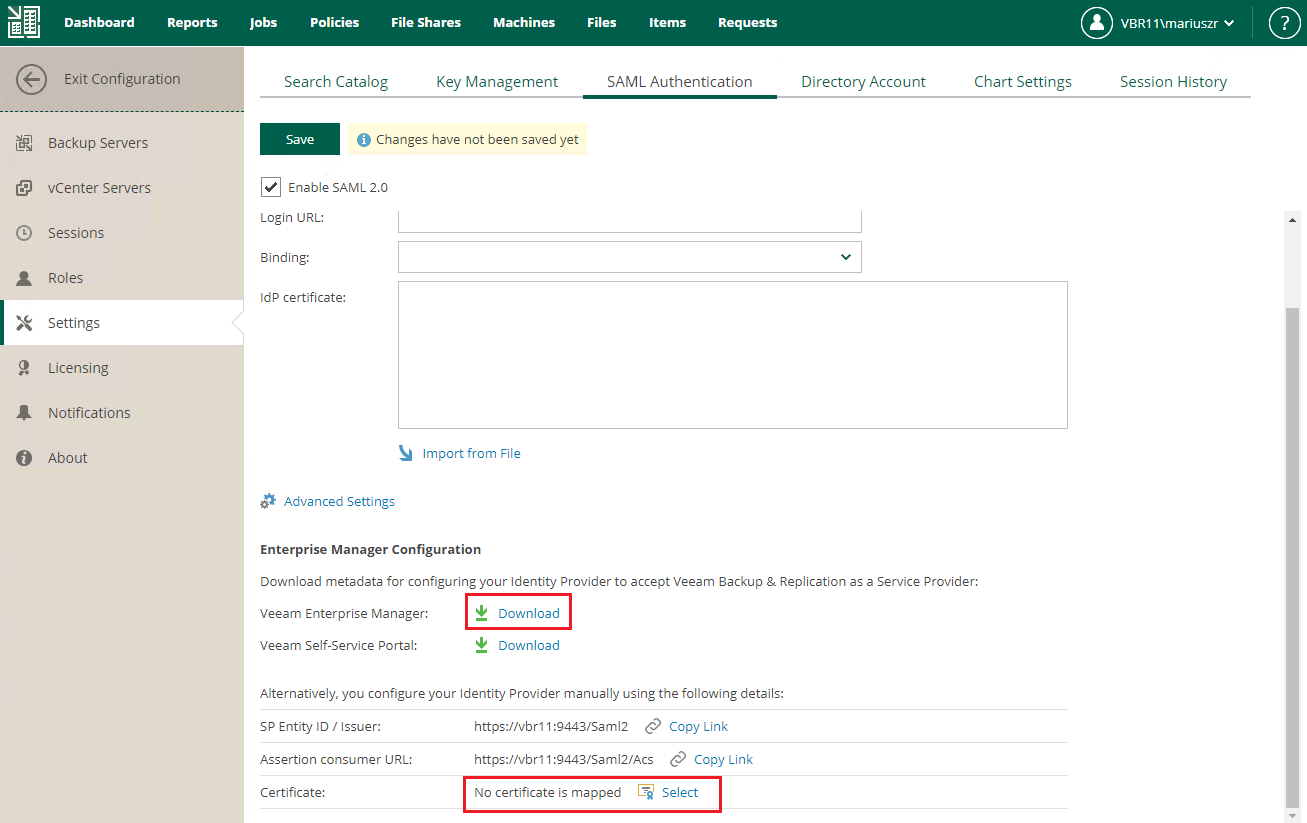
Now let’s go back to the Azure portal and finish the configuration steps:
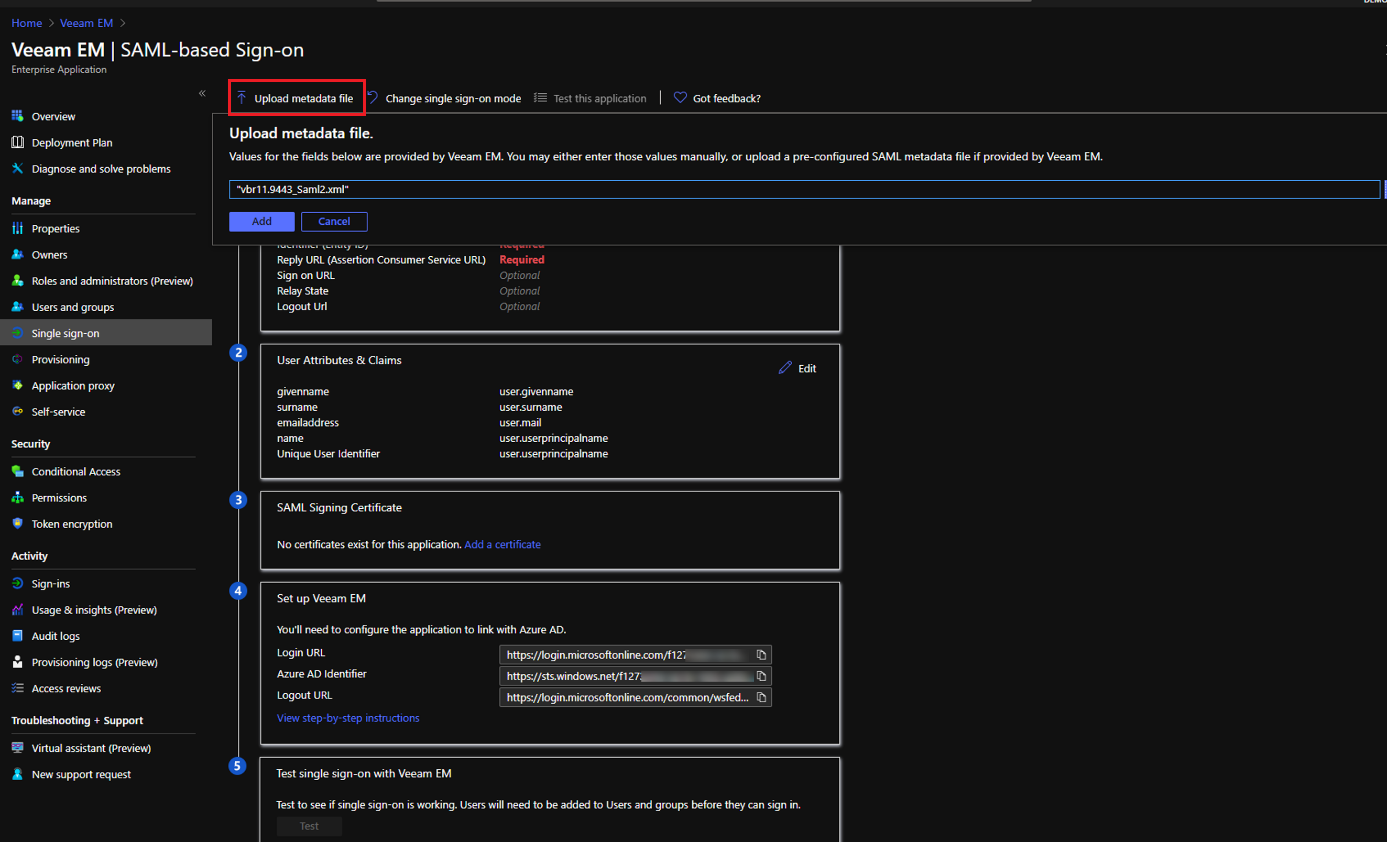
We need to upload an XML file generated on Enterprise Manager
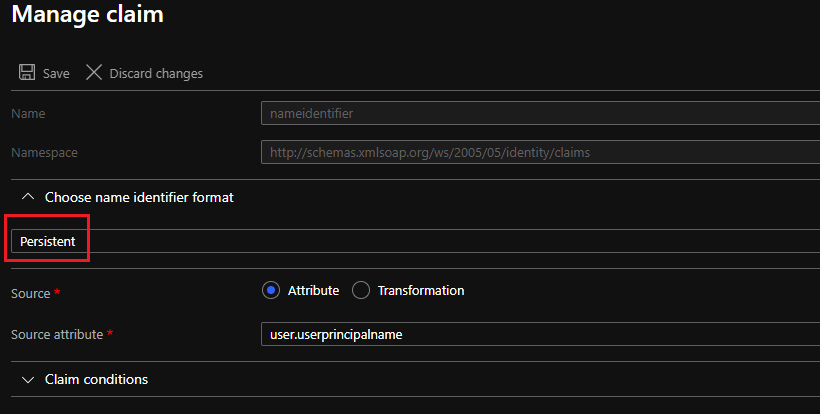
Under step 2 (User Attributes & Claims) – click Edit and modify name identifier format for “Unique User Identifier”. Change it to “Persistent”.
If we have AAD in P1 or P2 we can add a claim for a “group” with value: user.group
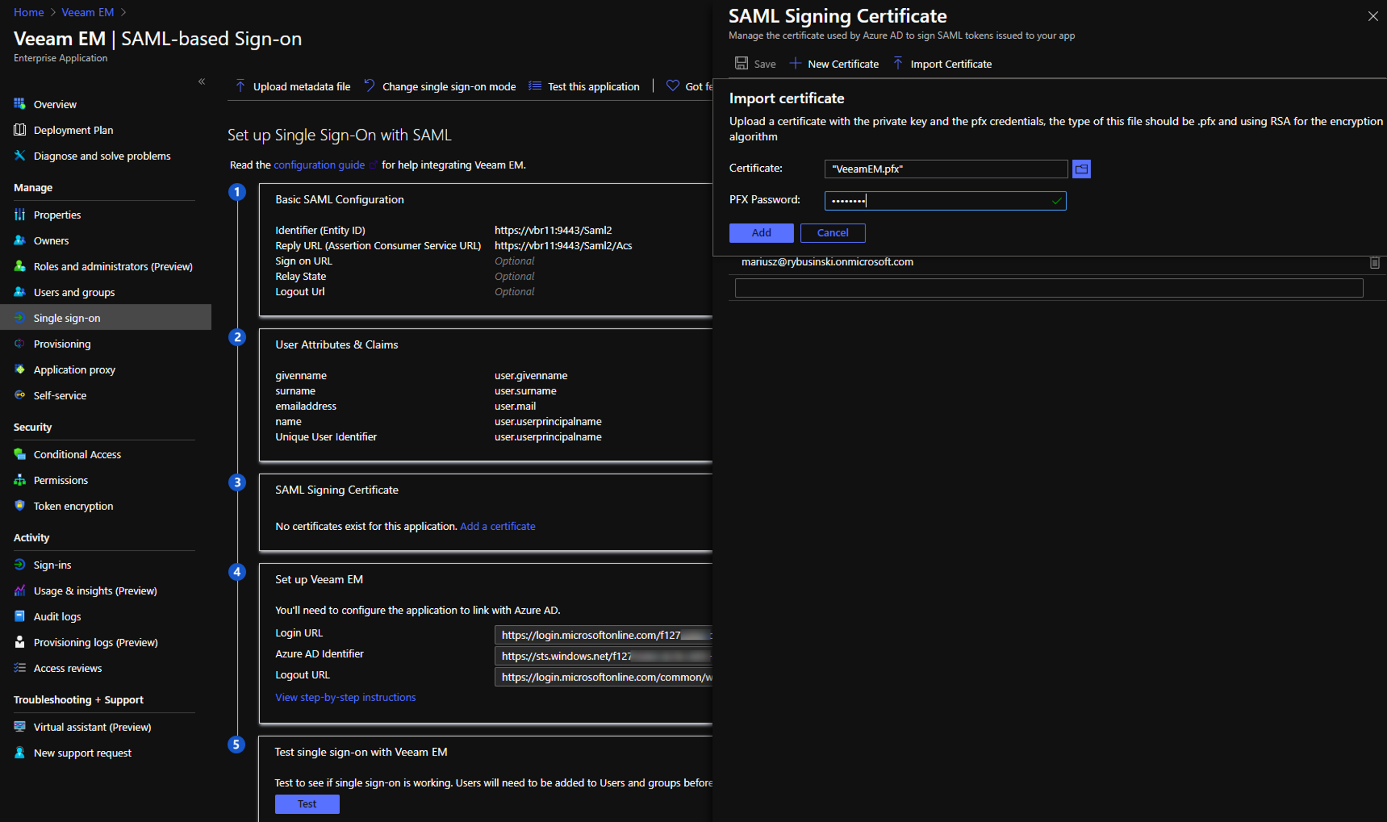
In step 3 we need to add (import) a certificate.
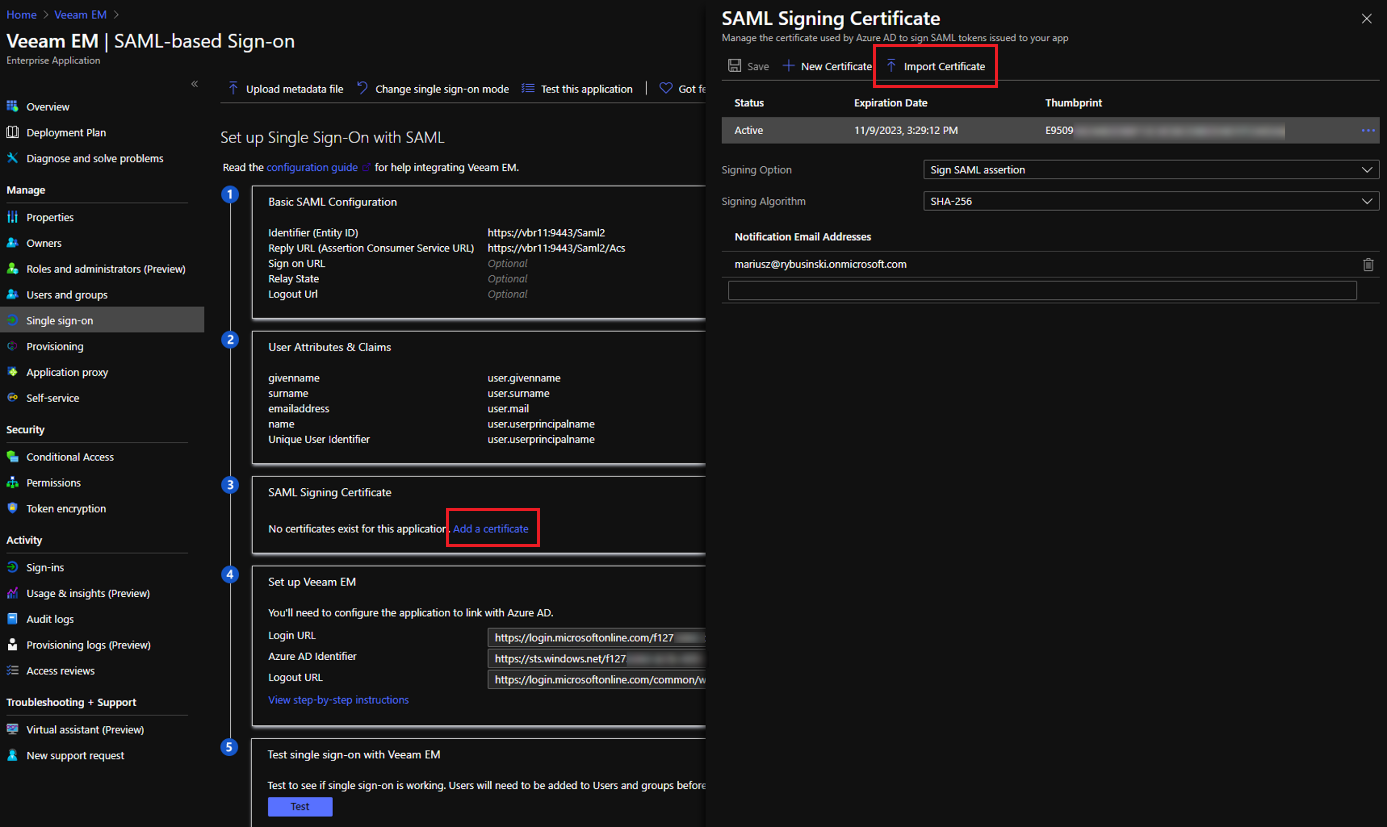
Import certificate and activate it.
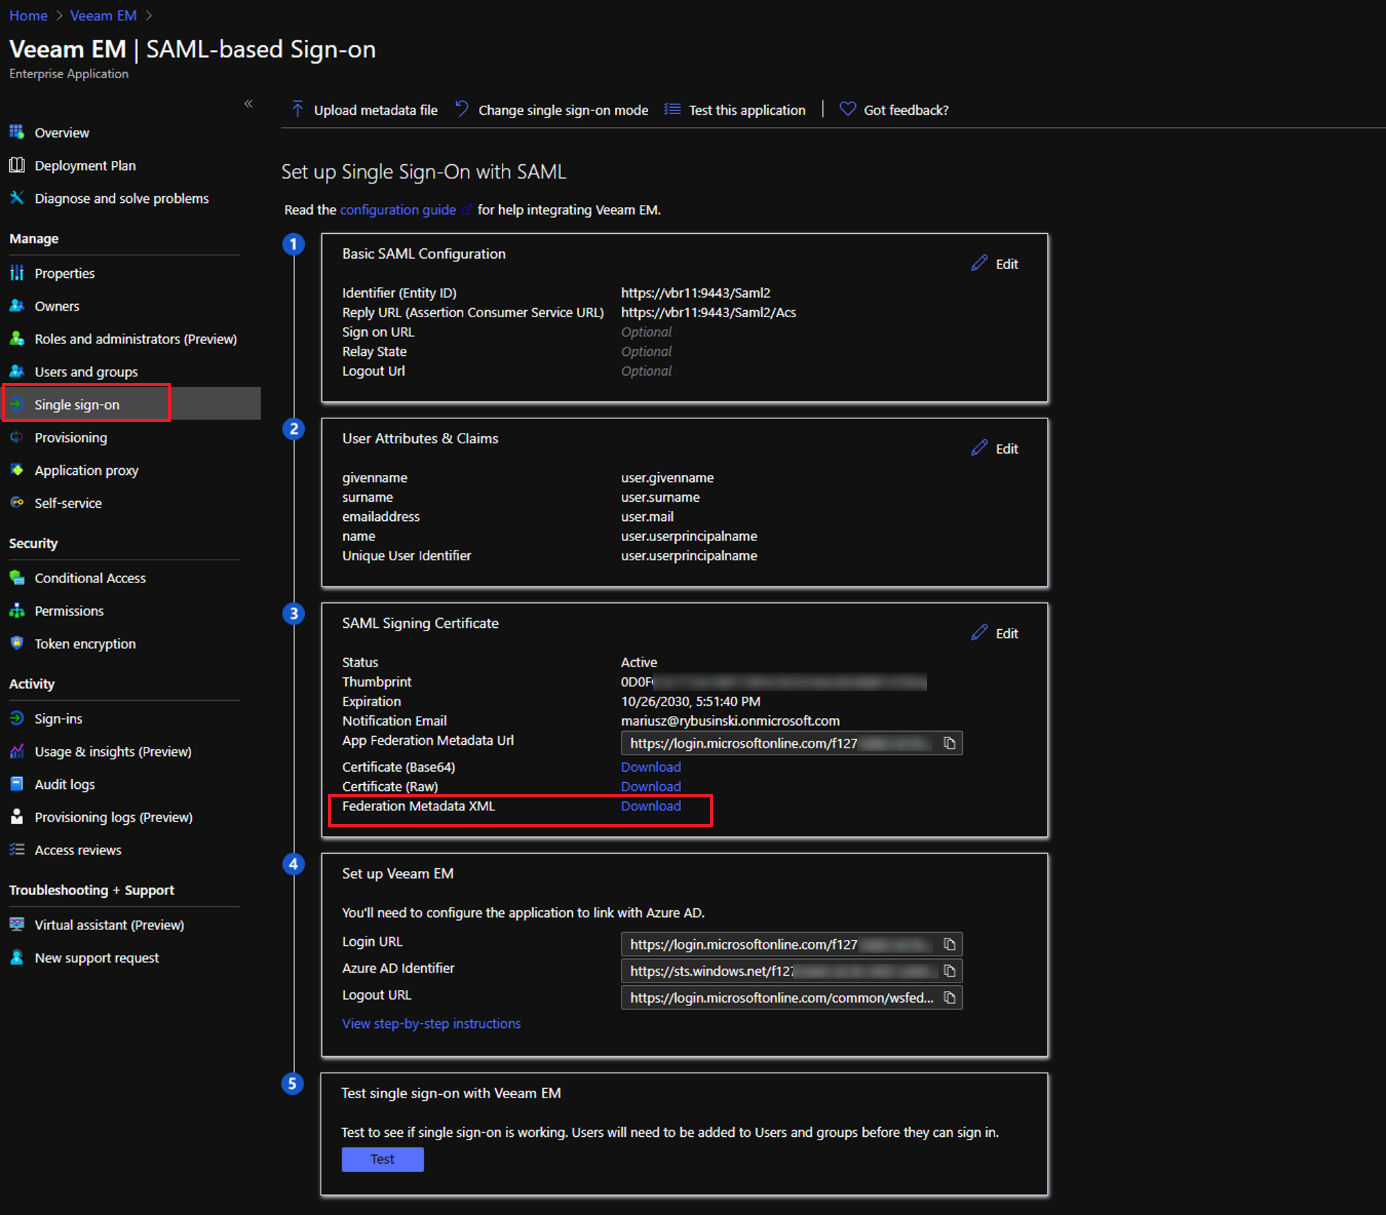
Now under step 3, we should be able to download federation metadata XML file. If you can’t see it – refresh page.
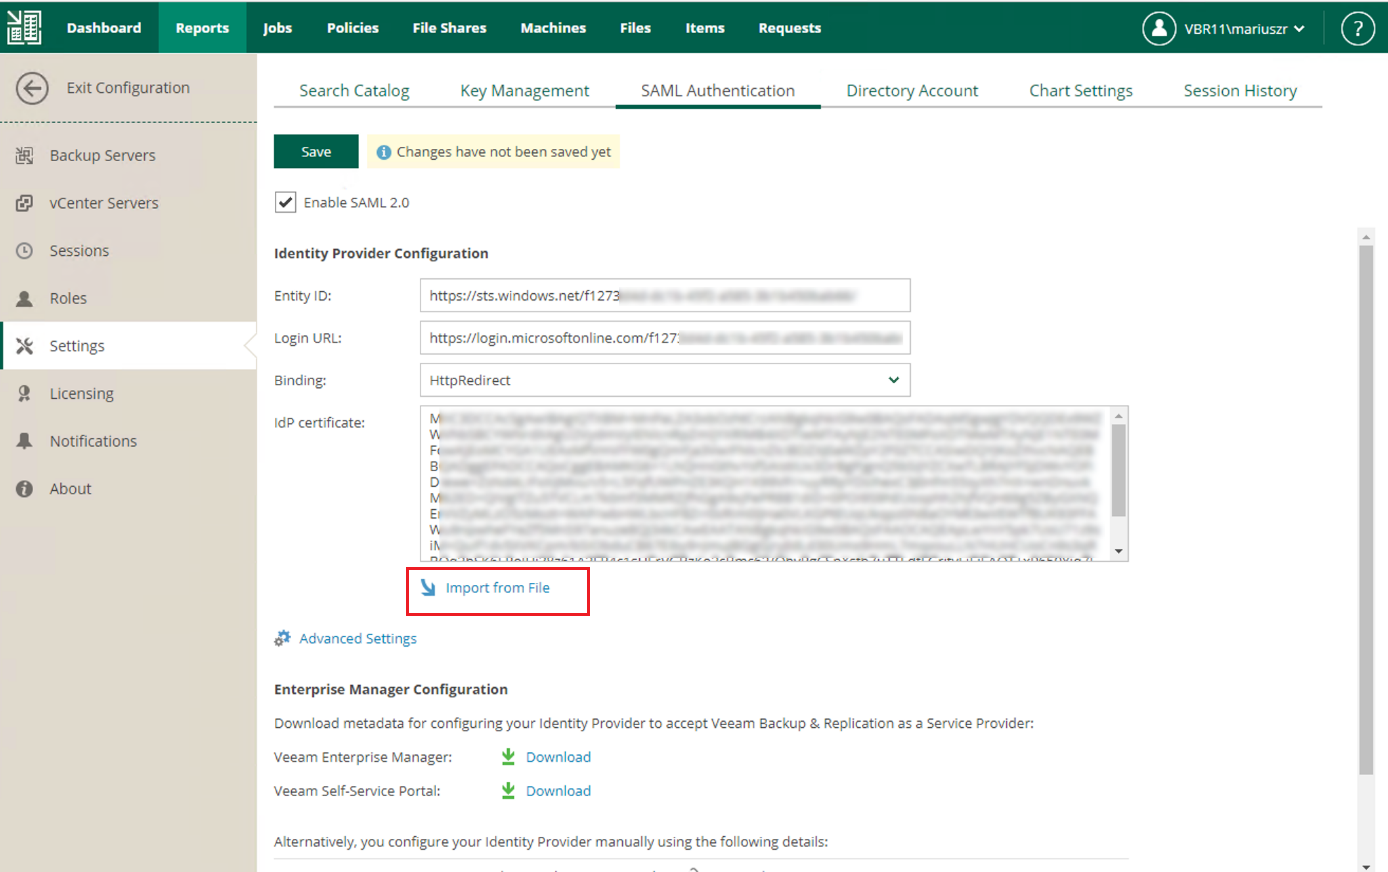
We are done with the Azure portal. Let’s go back to the EM console and we have to select “Import from file“ (here we need to point to our federation metadata XML file) and save.
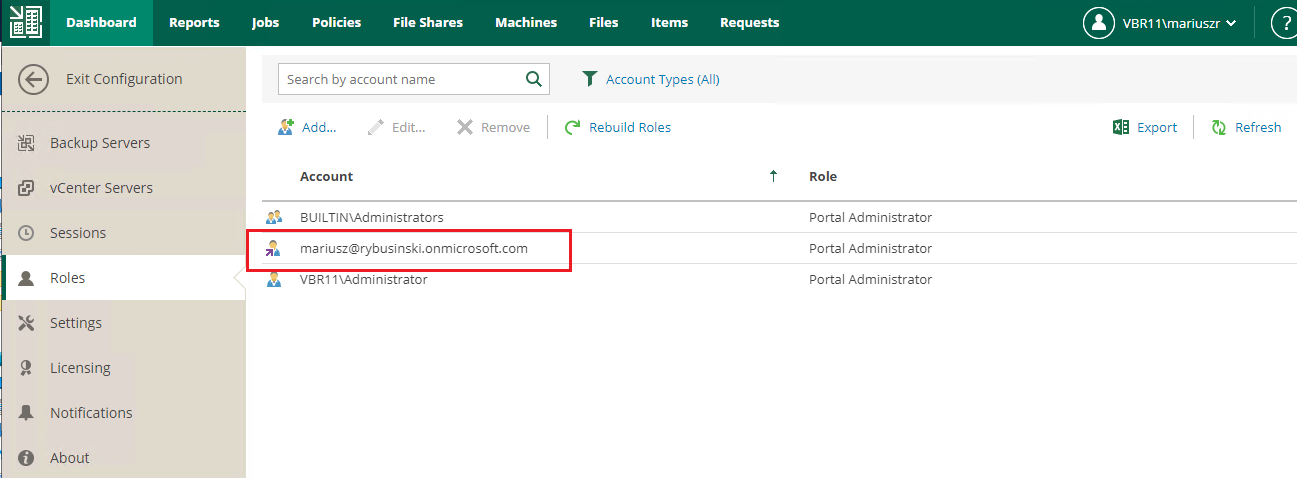
Now we can go to Roles and add some external user (or external group if you have one of the Premium plans for AAD).
And finally, we can log in to the Enterprise Manager with Azure AD credentials.
