

The previous guide in this series got SAML SSO working between a Veeam Backup & Replication 13.1 appliance and Active Directory Federation Services. This guide adds a second factor to that login: a time-based one-time (TOTP) code from any MFA/2FA authenticator app, and optionally a passkey.
The appliance does not need to know that MFA exists. It receives the same SAML assertion as before, from the same identity provider, with the same claims. Everything the previous guide configured on the appliance stays exactly as it was: the same relying party trusts, the same three claim rules, the same external users and groups. All the work happens at AD FS, and that is the right place for it, because authentication is what AD FS is for.
Unfortunately native Microsoft AD FS cannot do this on its own. That is why all kinds of services exists, to name a few Okta, EntraID or CISCO DUO.
Out of the box ADFS supports Azure MFA (EntraID) and certificate authentication as additional factors, but our goal is on-premises TOTP with no cloud dependency.
Luckily, AD FS does have an external authentication providers support built-in, and there is an amazing open source provider exists: adfsmfa by redhook62, published under the MIT license. It supports authenticator apps, email and SMS codes, and WebAuthn security keys and platform authenticators. This guide uses version 3.1.2608.0 on Windows Server 2025.
One disclaimer before anything else: adfsmfa is a third-party community project. It is not a Veeam product, it is not shipped or supported by Veeam, and nothing here is an endorsement for production use. Evaluate it the way you would evaluate any component that sits in your authentication path. This guide shows that the integration works, and where the sharp edges are, specifically with a confusing configuration way, confusing UI and extremely customizable options, which I barely touch in this guide.
Names carry over from the previous guide. The domain is still justadomain.win, the federation service is fs.justadomain.win, the AD FS server is changed to vn-fs-jad, and the appliance is a two-node HA cluster at vn-vsa-cluster.justadomain.win. Two pieces are new: an AD group GG_MFA-Users holding everyone who will be required to use MFA, and a demo user jdoe inside it.
What you need before starting
You need working SAML SSO from the previous guide, an AD FS farm on Windows Server 2019 or later, domain administrator rights, and an AD group whose members will be subject to MFA.
Take a snapshot or a checkpoint of the AD FS server before you begin. You are about to register a new authentication provider into the AD FS pipeline, and a provider that fails to initialize takes the sign-in page down for every relying party on the farm, not just the Veeam trusts. It happens some time, and I know as a fact, recovery is much faster from a snapshot than from event logs at two in the morning.
Step 1 - Install adfsmfa on the AD FS server
Download the MSI from the project's releases page and copy it to the AD FS server. Verify the download before you run it. Compare the hash against the one published with the release:
Get-FileHash C:\Temp\adfsmfa.msi -Algorithm SHA256Then install it. A silent install is fine and skips a wizard that offers nothing you would change:
msiexec /i C:\Temp\adfsmfa.msi /qnThis drops the runtime into C:\Program Files\MFA, registers an MMC snap-in, and installs a PowerShell administration module into the GAC. The snap-in, mfa.msc, gets a section of its own further down, because nothing advertises its existence. The module does not auto-load by name, so every administration session starts by importing it explicitly:
Import-Module ("C:\Windows\Microsoft.NET\assembly\GAC_MSIL\" +
  "Neos.IdentityServer.MultiFactor.Administration\" +
  "v4.0_3.0.0.0__175aa5ee756d2aa2\" +
  "Neos.IdentityServer.MultiFactor.Administration.dll")
Every command from here on has to run in a PowerShell session that is both elevated and running as a domain administrator. The MFA cmdlets check for AD FS administration rights and refuse to work without them. Elevation alone is not enough, and neither is domain admin membership without elevation.
Step 2 - Register the provider with AD FS
Registration is four commands and a service restart, in this order:
Register-MFASystem            -Confirm:$false
Register-MFASystemMasterKey   -Confirm:$false
Register-MFASystemAESCngKey   -Confirm:$false
Enable-MFASystem              -Confirm:$false
Restart-Service adfssrv -Force
Register-MFASystem writes the initial configuration and registers the provider with AD FS. The two key commands create the cryptographic material that protects user secrets at rest, so run them as part of registration. Enable-MFASystem adds the provider to the global additional authentication policy.
Verify that AD FS now sees the provider:
Get-AdfsAuthenticationProvider | Where-Object Name -eq 'MultiFactorAuthenticationProvider'
(Get-AdfsGlobalAuthenticationPolicy).AdditionalAuthenticationProvider
The second command should list MultiFactorAuthenticationProvider. Registering the provider globally does not enforce anything on its own, and at this stage that is what you want: the provider is available, and step 6 decides who has to use it.
Step 3 - Give the AD FS service account write access to the MFA folder
Do this right after installing, before you touch anything else. Skipping it costs an evening, and none of the symptoms point at the cause.
The adfsmfa installer sets permissions on C:\Program Files\MFA the conventional way: full control for TrustedInstaller, SYSTEM, and the local Administrators group, and read and execute for everyone else. The AD FS service runs as its service account, and if you followed the previous guide that account is a Group Managed Service Account, gmsa-adfs$. A gMSA is not a local administrator. It lands in the everyone-else bucket and gets read-only access.
The runtime provider needs to write to that folder, because it keeps its configuration cache in C:\Program Files\MFA\Config\config.db. When the write is denied, the provider initializes with an empty configuration and then fails in ways that have nothing visibly to do with file permissions:
- The enrollment page renders its instructions and the authenticator app logos, but no QR code.
- Almost any operation returns "Input string was not in a correct format", because the code parses numeric settings that came back empty.
- The AD FS admin log records KeysManager.NewKey throwing a NullReferenceException.
- AD FS event 105 reports that the provider could not be initialized.
None of those messages mention a path or a permission. The one that does is in the Application log, under the source "ADFS MFA Service":
Error loading Configuration File : System.UnauthorizedAccessException:
Access to the path 'C:\Program Files\MFA\Config\config.db' is denied.
   at CFGUtilities.WriteConfigurationToCache
   at AuthenticationProvider.OnAuthenticationPipelineLoad
The fix is one line. Apply it right after installation rather than waiting for the symptoms:
$acct = (Get-CimInstance Win32_Service | Where-Object Name -eq 'adfssrv').StartName
icacls "C:\Program Files\MFA" /grant "${acct}:(OI)(CI)M" /T
Restart-Service adfssrv -Force
If your AD FS runs under a plain domain user account rather than a gMSA, the same applies, and the same command handles it, because it reads the account from the service rather than assuming one. If your AD FS runs as a local administrator, you never see this at all, and that is probably why it survives in the installer.
Step 4 - Choose where user secrets are stored
adfsmfa keeps registrations either in a SQL database or in Active Directory. Active Directory is the simpler choice: nothing extra to install, nothing to back up separately, and the default configuration requires no schema extension. It stores everything in attributes that already exist on every user object:
Get-MFAStore -Store ADDSThe default mapping uses msDS-cloudExtensionAttribute10 through 18 for the secret key, mail address, phone number, preferred method, method override, PIN, client certificate, RSA certificate, and the enabled flag, plus otherMailBox for WebAuthn public key credentials. Those attributes exist in any modern AD schema, and nothing else uses them in a typical environment.
⚠ IMPORTANT Check that last part against your own directory before committing, because "nothing else uses them" is an assumption, not a fact.
The AD FS service account has no reason to write user attributes, and by default it cannot. Delegate write access on exactly those attributes, scoped to the OU that holds the users who will enroll, rather than granting broad write access at the domain root. Scoping to an OU keeps the blast radius small and makes the change easy to reverse.
The delegation is ten access control entries, one per attribute, each allowing read and write on descendant user objects and nothing else. The script below resolves each attribute's schema GUID by name and grants all ten to the gMSA in one pass. Run it as a domain administrator, and change the OU and the account name to match your environment:
$ou        = "OU=MFA-Demo,DC=justadomain,DC=win"
$sid       = (Get-ADServiceAccount gmsa-adfs).SID
$userClass = [Guid]"bf967aba-0de6-11d0-a285-00aa003049e2"
$schemaNC  = (Get-ADRootDSE).schemaNamingContext
$attrs     = @(10..18 | ForEach-Object { "msDS-cloudExtensionAttribute$_" }) + "otherMailbox"

$acl = Get-Acl "AD:\$ou"
foreach ($name in $attrs) {
    $guid = [Guid](Get-ADObject -SearchBase $schemaNC `
        -LDAPFilter "(lDAPDisplayName=$name)" -Properties schemaIDGUID).schemaIDGUID
    $acl.AddAccessRule([System.DirectoryServices.ActiveDirectoryAccessRule]::new(
        $sid, "ReadProperty, WriteProperty", "Allow", $guid, "Descendents", $userClass))
}
Set-Acl "AD:\$ou" $acl
The fixed GUID is the schema class user, and it is what limits every entry to descendant user objects. Descendents (is how the .NET enumeration spells it), so correcting the spelling produces an error. The script is also safe to re-run: identical entries merge rather than stack, so running it twice still leaves ten entries, not twenty.
Read the result back and check what landed:
(Get-Acl "AD:\$ou").Access |
  Where-Object { $_.IdentityReference -like "*gmsa-adfs*" } |
  Format-Table ActiveDirectoryRights, AccessControlType, ObjectType, InheritanceType
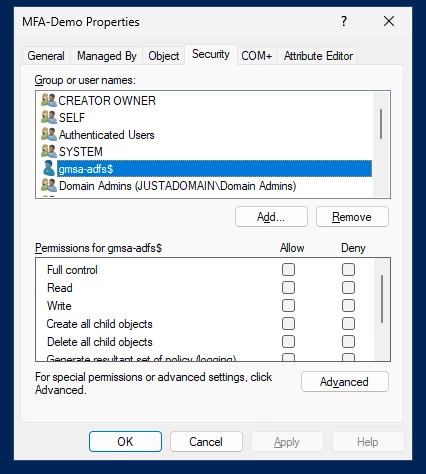
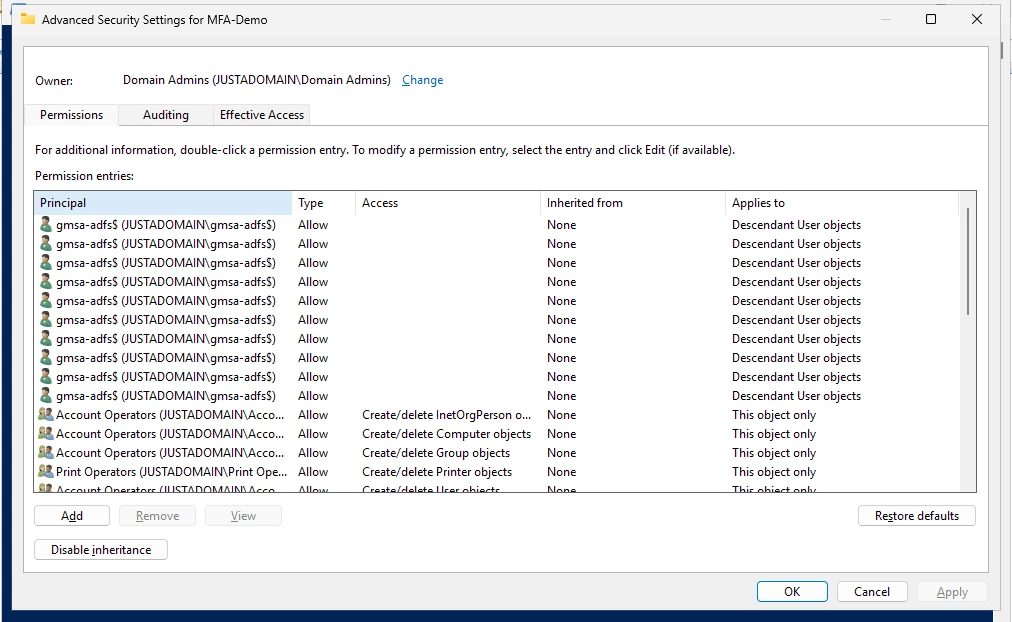
The same delegation is visible in Active Directory Users and Computers, which is the easier place to audit it later. Enable View > Advanced Features, open the OU's properties, and the Security tab lists the service account among the group and user names. Select it and every checkbox below stays empty, which is not a sign that something failed: attribute-level rights have no equivalent among those coarse permissions.
The Advanced button is where they show up: ten Allow entries for the service account, each applying to descendant user objects only, above the entries the OU came with.
Step 5 - Configure the provider
Now set the parameters users will see. These cmdlets do not take a switch per setting the way most PowerShell modules do. Set-MFAConfig and Set-MFAProvider each take a configuration object, so the pattern is always the same: fetch the current object, change what you want, write it back.
The issuer is the label that appears in the authenticator app next to the account, so make it recognizable:
$cfg = Get-MFAConfig
$cfg.Issuer                = "JustADomain Lab"
$cfg.DefaultProviderMethod = "Code"
Set-MFAConfig -Config $cfg -Confirm:$false
Then the code provider itself:
$code = Get-MFAProvider -ProviderType Code
$code.Enabled      = $true
$code.EnrollWizard = $true
$code.Algorithm    = "SHA1"
$code.Digits       = 6
$code.Duration     = 30
Set-MFAProvider -ProviderType Code -Config $code -Confirm:$false
SHA1 with six digits over a thirty-second window is the profile every authenticator app supports. It is tempting to raise it to SHA256, and adfsmfa lets you, but app support is uneven and the failure mode is a user whose codes are silently always wrong.
Turn off the providers you are not using. The valid provider types are Code, Email, External, Azure, and Biometrics. The email provider is enabled by default, and when an account has no mail address it rejects otherwise valid operations with "invalid mail address for user" :
$mail = Get-MFAProvider -ProviderType Email
$mail.Enabled = $false
Set-MFAProvider -ProviderType Email -Config $mail -Confirm:$false
If you intend to offer WebAuthn, its defaults need attention too. The provider ships with placeholder values still pointing at Contoso:
$bio = Get-MFAProvider -ProviderType Biometrics
$bio.Enabled      = $true
$bio.ServerDomain = "fs.justadomain.win"
$bio.ServerName   = "JustADomain Lab"
$bio.Origin       = "https://fs.justadomain.win"
Set-MFAProvider -ProviderType Biometrics -Config $bio -Confirm:$false
The origin has to match the URL the browser sees, because WebAuthn binds credentials to it. A mismatch produces a registration that fails in the browser with no server-side error handling.
Finally, export the working configuration. It is a single XML file, and it is what you would use in case server needs to be recovered:
Export-MFASystemConfiguration -ExportFilePath C:\Temp\mfa-config.xmlStep 6 - Require MFA for a group, not for everyone
Enforcement happens here, and we apply it per OU in this example.
AD FS ships with a parametrized access control policy called "Permit everyone and require MFA for specific group". Apply it to a trust, supply a group, and MFA turns on for that group's members on that application while everyone else stays on password-only. Apply it with the group's SID:
$sid = (Get-ADGroup -LDAPFilter "(name=GG_MFA-Users)").SID.Value

Set-AdfsRelyingPartyTrust `
  -TargetName "VSA https://vn-vsa-1.justadomain.win/oauth/Saml2" `
  -AccessControlPolicyName "Permit everyone and require MFA for specific group" `
  -AccessControlPolicyParameters @{ GroupParameter = @($sid) }
HA cluster callout. Two nodes means two relying party trusts, and the access control policy is a property of the trust. So change the trust name (Target Name) accordingly to match the second node of the HA cluster and apply it there too, or MFA holds only while the cluster serves from the node you configured.
Confirm the result before moving on:
Get-AdfsRelyingPartyTrust | Select-Object Name, AccessControlPolicyNameStep 7 - First login and enrollment
You have not touched the appliance, and you do not need to. Open the appliance web UI, click "Sign in with SSO" exactly as before, and sign in with the password of a user who is in GG_MFA-Users.
Instead of landing in the appliance, the user is stopped at AD FS and told that this application requires additional authentication, with a Registration button to continue. Every in-scope user meets this page on their first login after you enable the policy:
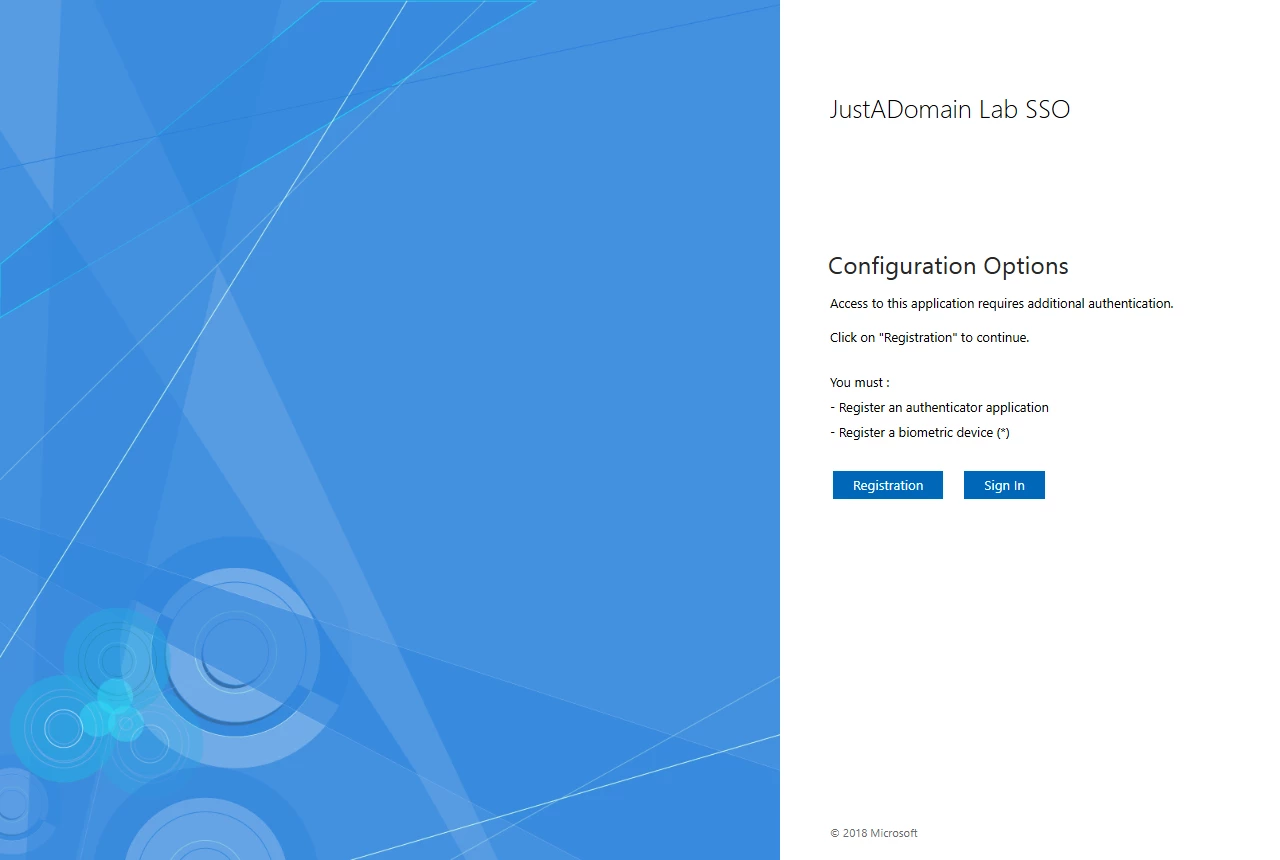
Clicking Registration starts the enrollment wizard, which opens by offering to register an authenticator application.
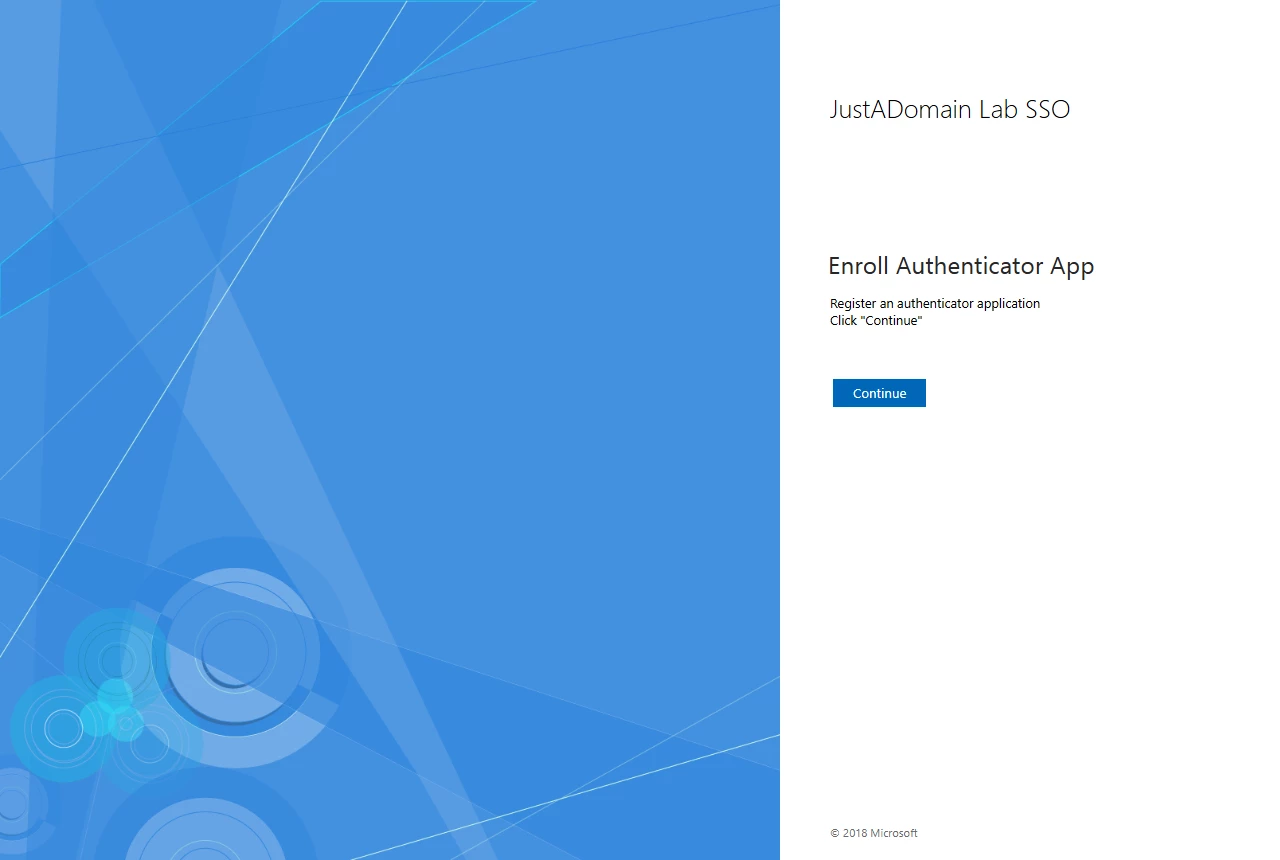
Continue, and the wizard presents the QR code along with links to the common authenticator apps. Scanning it with any TOTP app adds the account.
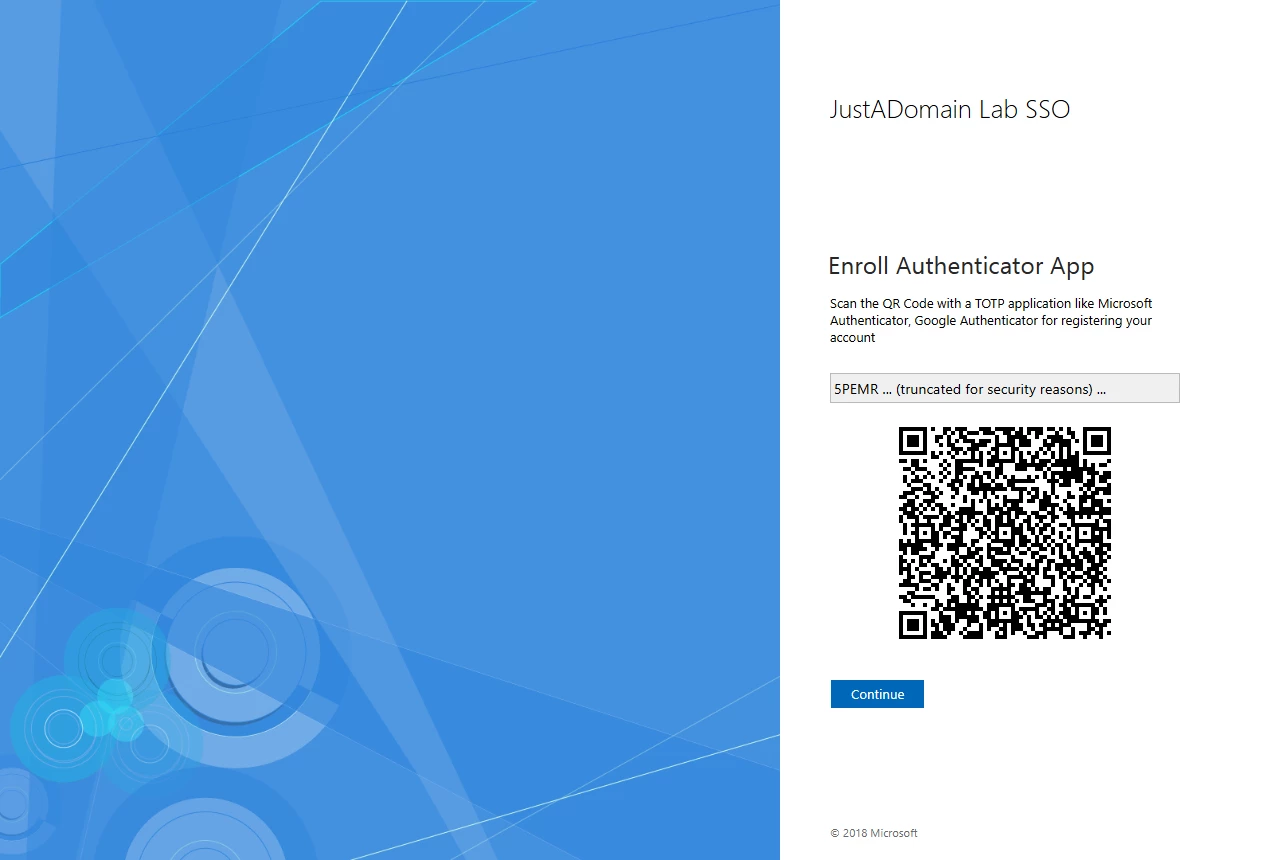
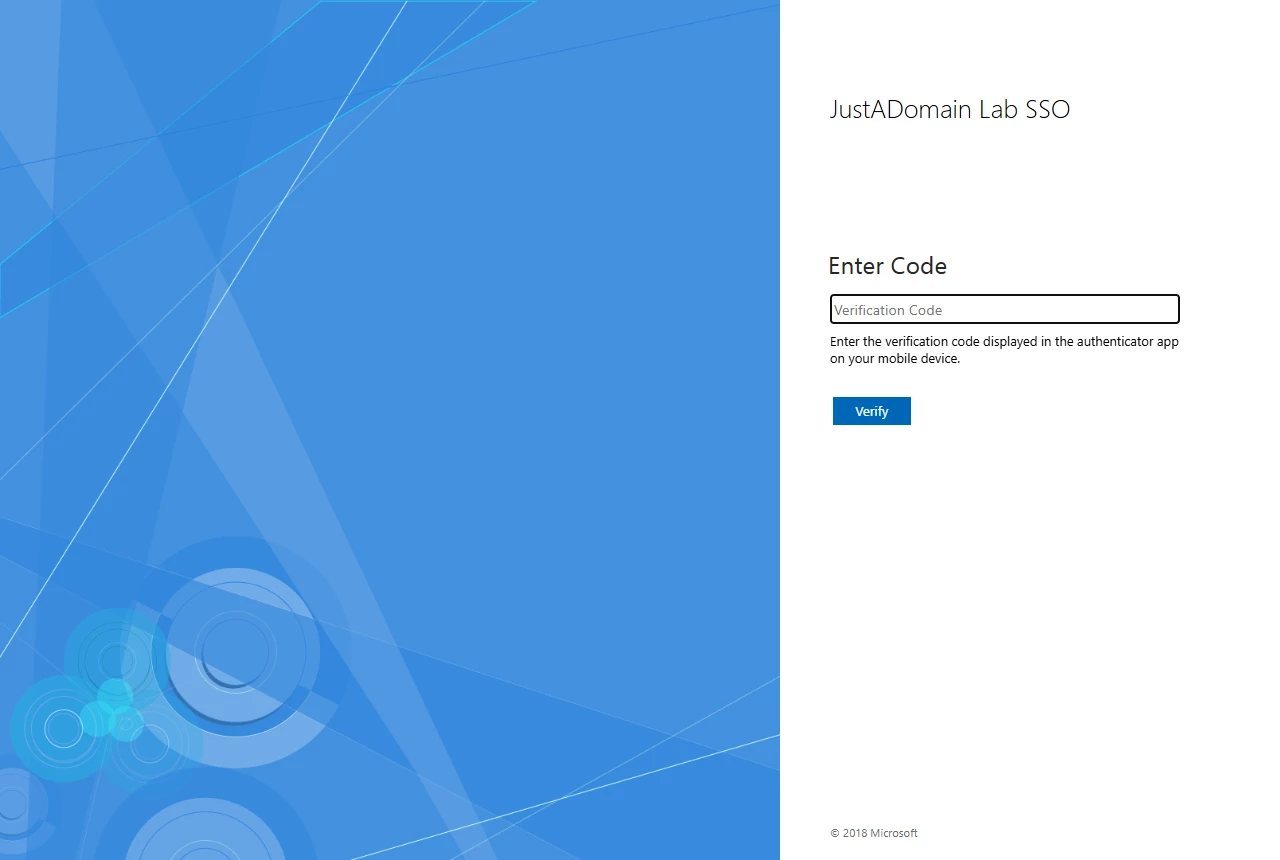
The next page asks for a code from the app. That is how the wizard confirms the enrollment worked:
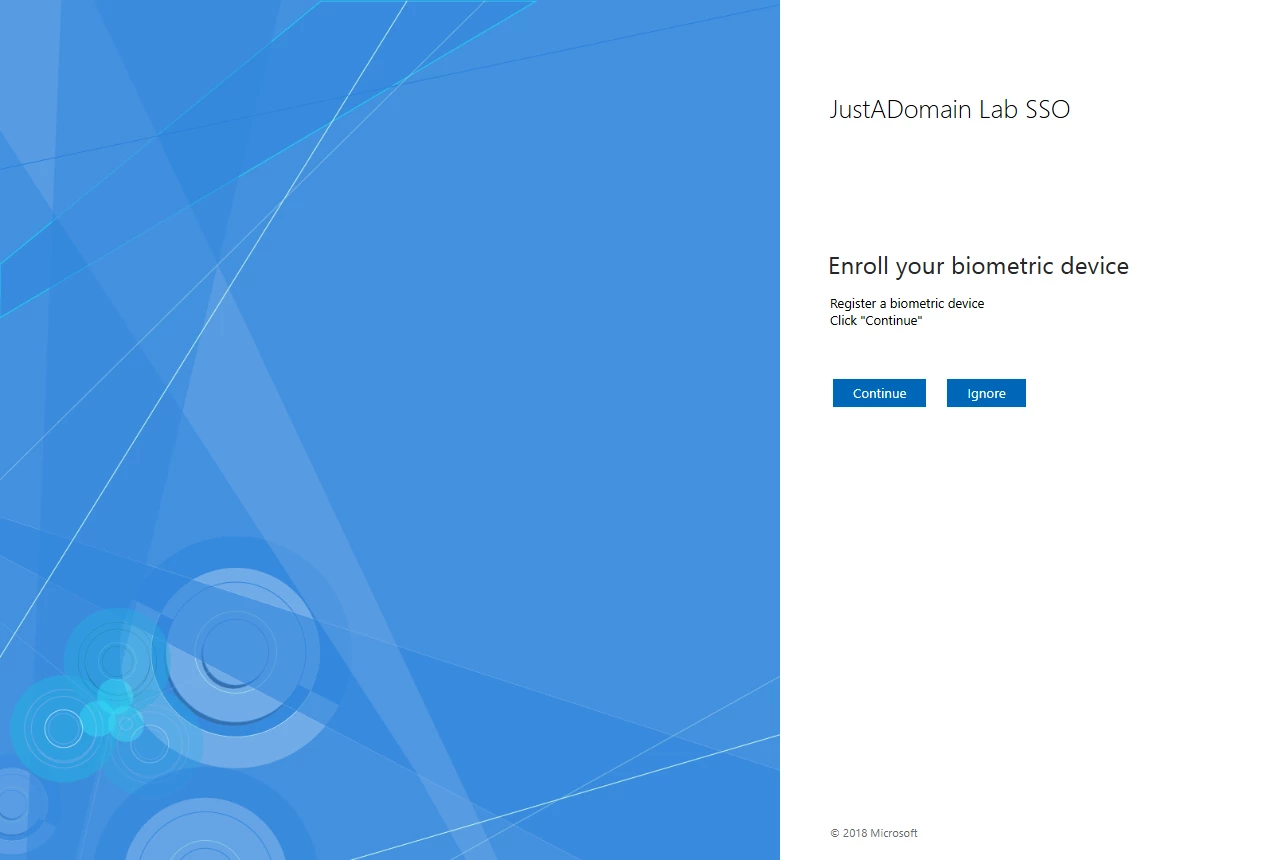
If you enabled the WebAuthn provider, the wizard then offers to enroll a biometric device as well. Choosing Ignore skips it and leaves the user on codes only. The offer comes back at the next login, and the user can add a key later without redoing anything.
The wizard finishes with a summary of what was registered.
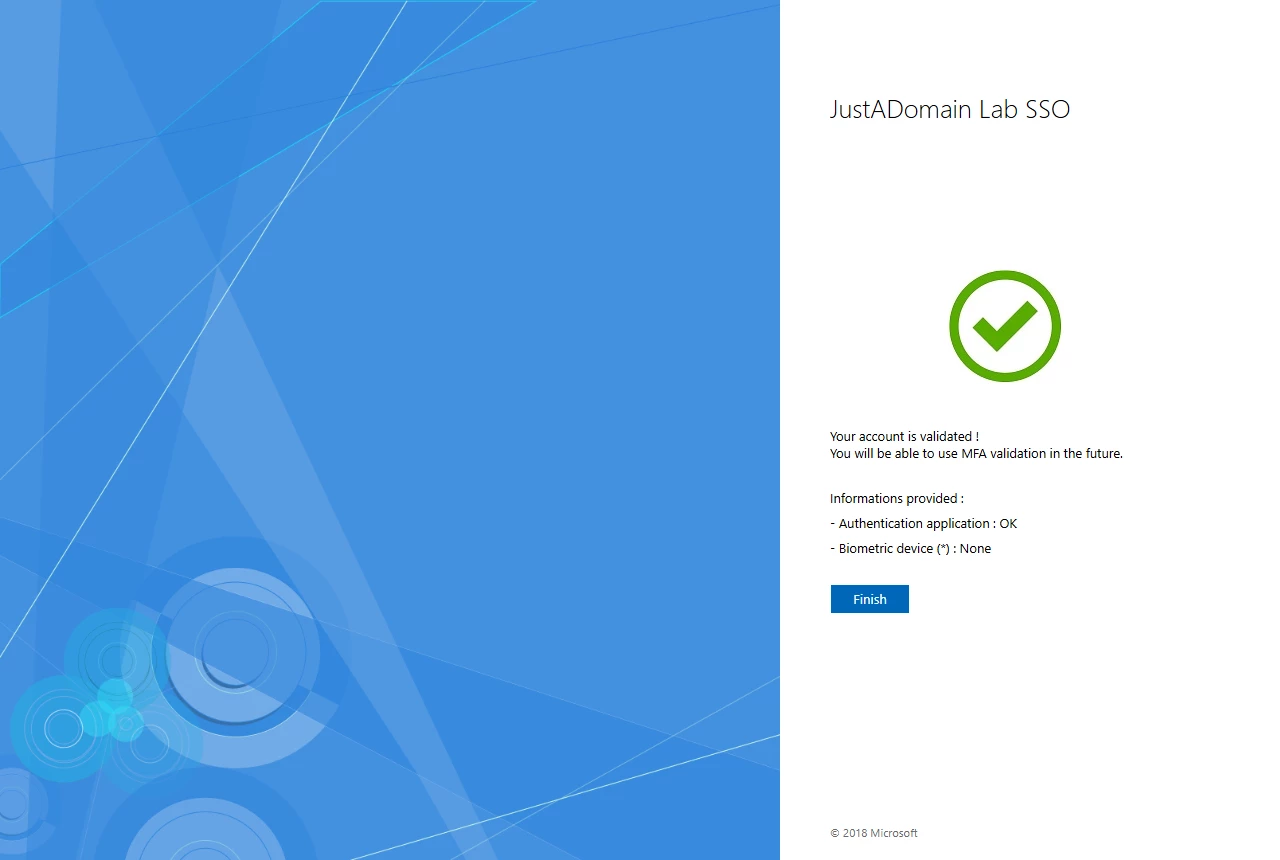
One detail here is invisible until it bites: the wizard commits the registration only when it reaches this final page and the user clicks Finish. A user who closes the browser after entering the verification code but before finishing has enrolled nothing. Their authenticator app keeps showing codes for an account that no longer exists on the server, and their next login sends them back to the start of the wizard with no explanation. When someone reports that their newly added authenticator entry does not work, check this first.
Click Finish and the browser continues to the appliance, authenticated, with the same authorization the user had before.
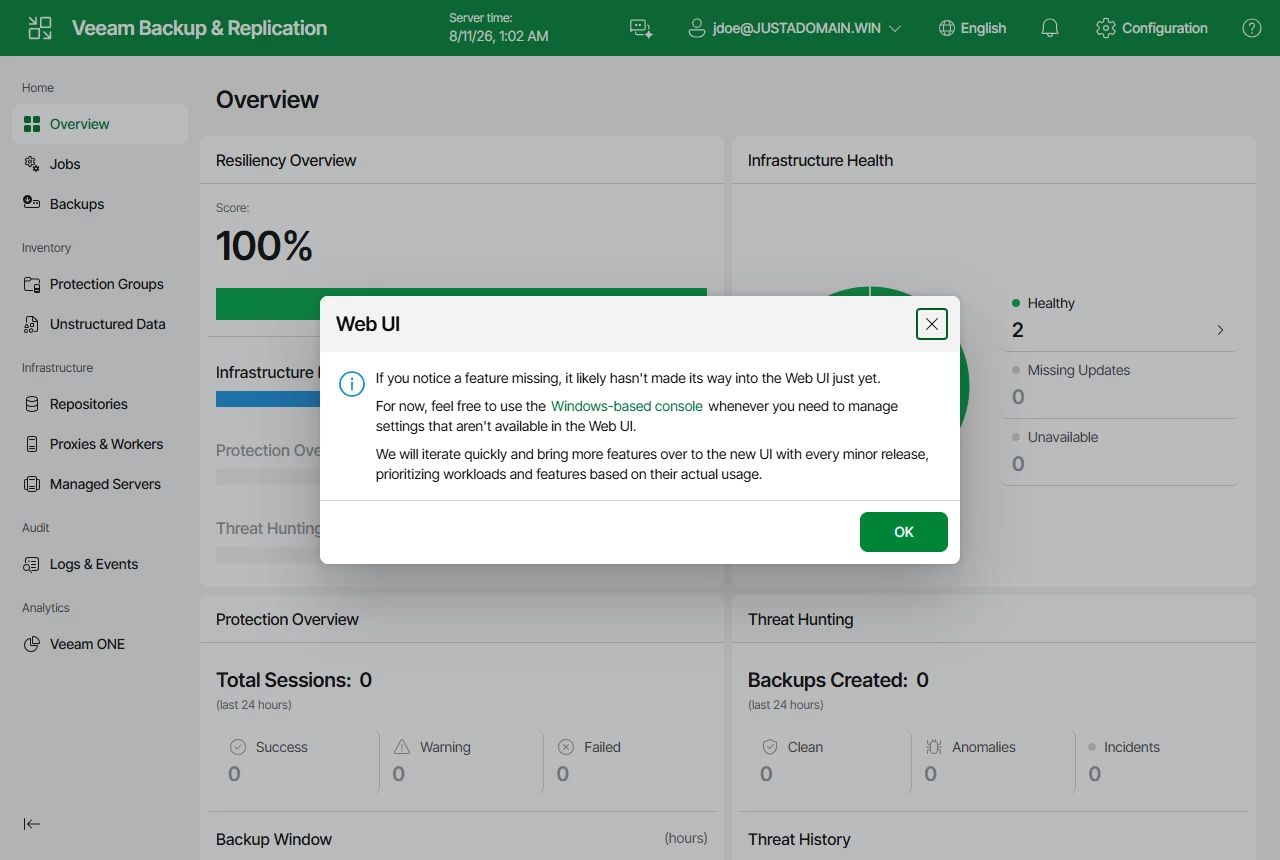
Every subsequent login is one extra page: password, then code.
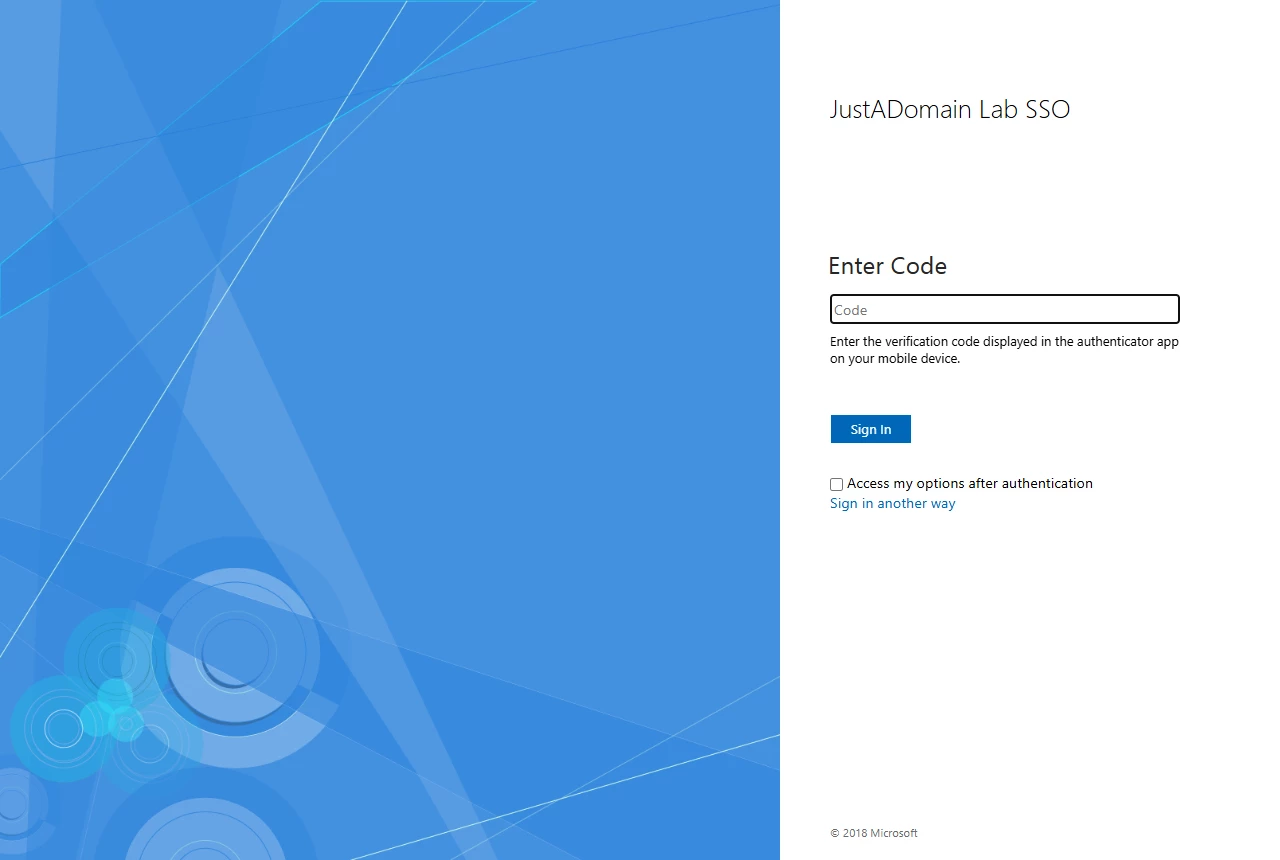
Step 8 - Prove that the scoping works
First, sign in as a user who is not in the MFA group. They should reach the appliance with no second factor at all. The do the same with the user who is in the MFA group and you must be prompted for TOTP code.
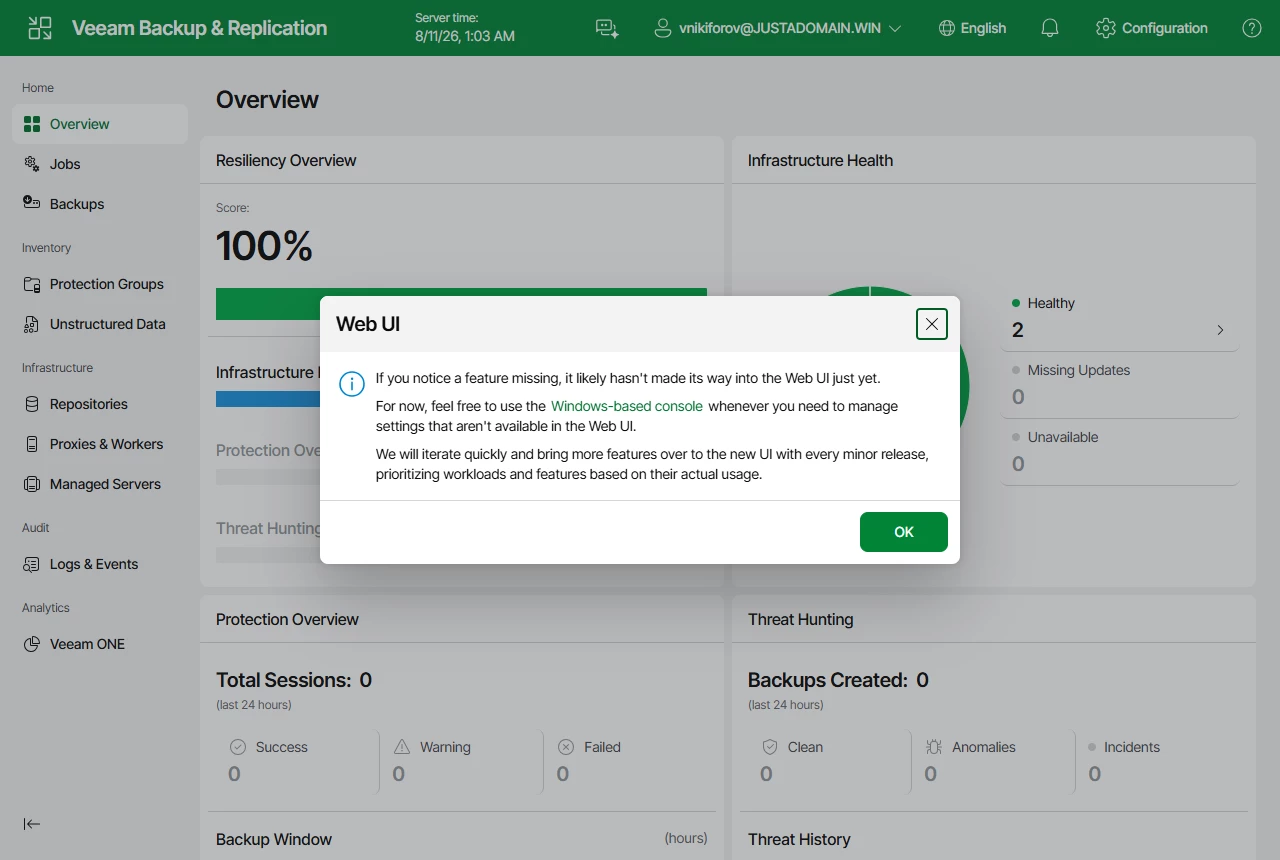
One more check is worth running if you have the IdP-initiated sign-on page enabled, because it looks like a way around all of this. Signing in there gets a group member an AD FS session on a password alone, with no challenge. The page belongs to no relying party, and the MFA policy lives on the trusts. So adjust the configuration accordingly.
Step 9 - Passkeys instead of codes
Codes work everywhere and need nothing but a phone. WebAuthn (or PassKeys) credentials are bound to the origin that created them. That is why the Origin setting in step 5 has to be exactly right.
adfsmfa registers WebAuthn authenticators alongside codes, and a user can hold both. Adding one does not remove the code option, so a lost security key is an inconvenience rather than a lockout.
A note on names before the screenshots: WebAuthn is the protocol, "biometric device" is what the adfsmfa interface calls that, and the credential the user ends up holding is a passkey. All three describe the same registration.
Decide which authenticators you allow, before anyone enrolls. Out of the box, adfsmfa ships AuthenticatorAttachment set to Platform, and that single value decides what your users are physically able to register. Platform means the browser offers only an authenticator built into the machine, so on Windows, everyone gets a Windows Hello prompt and nothing else: no phone, no USB security key. The page gives no hint that anything has been withheld, so the natural conclusion is that adfsmfa does not support those at all.
Clear it and the browser offers everything it can reach:
$b = Get-MFASecurity -Kind Biometric
$b.AuthenticatorAttachment = "Empty"
Set-MFASecurity -Kind Biometric -Config $b -Confirm:$false
Restart-Service adfssrv -Force
Empty is the enum's "no restriction" value, not "no authenticator". After the change, the Windows Security dialog also lists "iPhone, iPad, or Android device" and a security key alongside the fingerprint reader.
Clearing the setting does not retrofit existing registrations, so everyone who enrolled under Platform stays tied to the machine they enrolled on until they register again.
The setting is easy to miss because it is not where you would look. Get-MFAProvider -ProviderType Biometrics does not show it. It lives in Get-MFASecurity -Kind Biometric, next to the attestation and user-verification preferences. Restart the service after that change.
Enrolling a device. An enrolled user reaches this from a normal login. On the code page, tick "Access my options after authentication" before entering the code, and instead of returning to the appliance the user arrives at a small self-service hub.
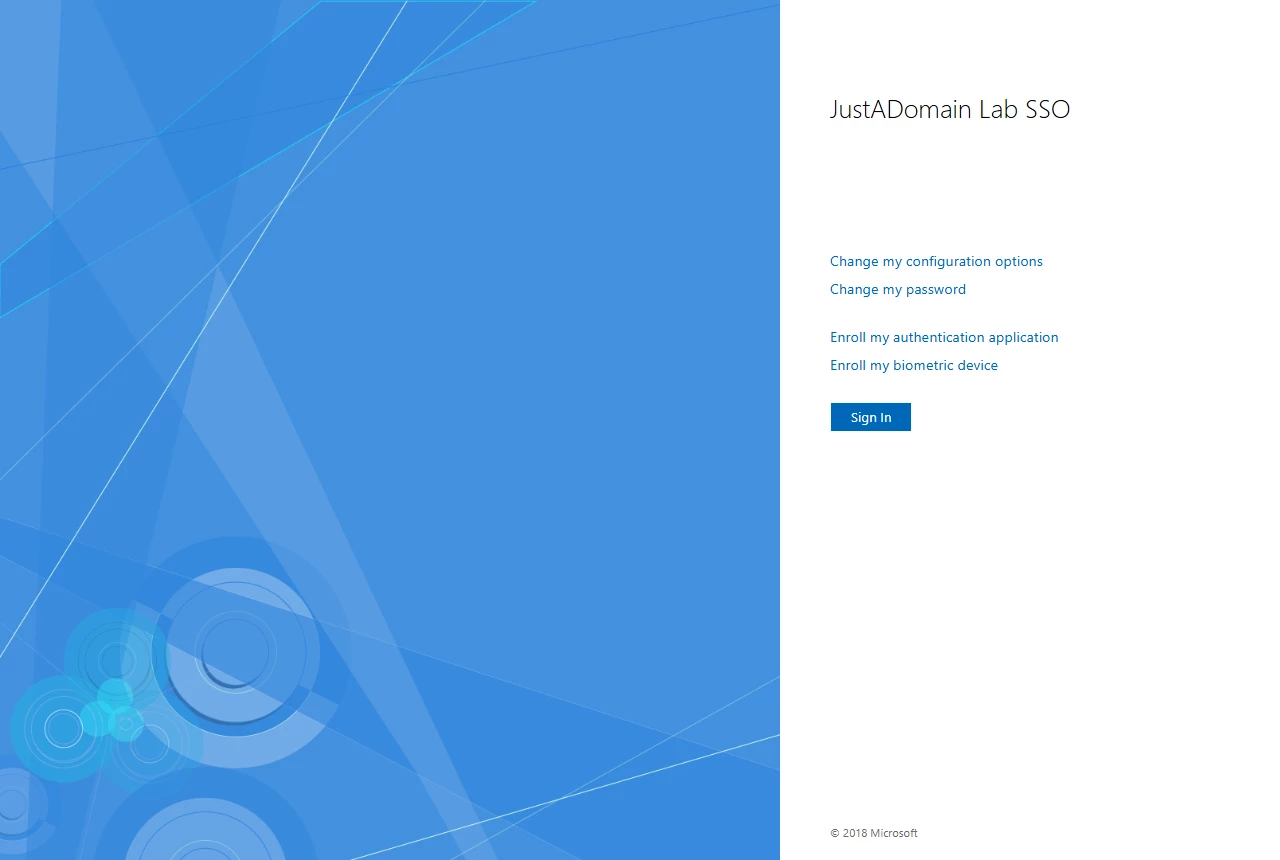
That checkbox is the only way in, which makes self-service surprisingly hard to find: adfsmfa installs no separate management URL, and nothing in the appliance links to it.
As you can see on the screenshot above you also are able to reset your own Active Directory password there - a bonus.
Choose "Enroll my biometric device". The device management page lists what is already registered and offers to add one.
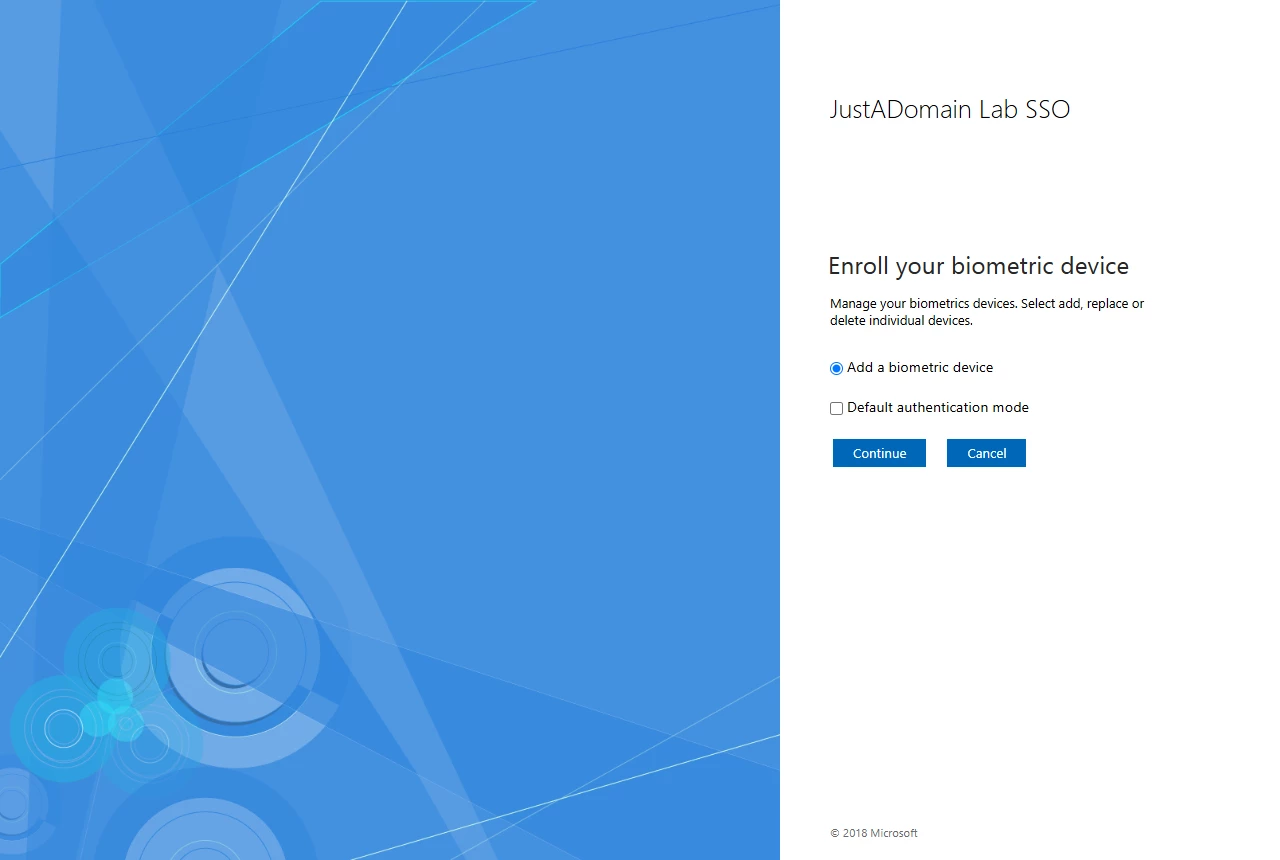
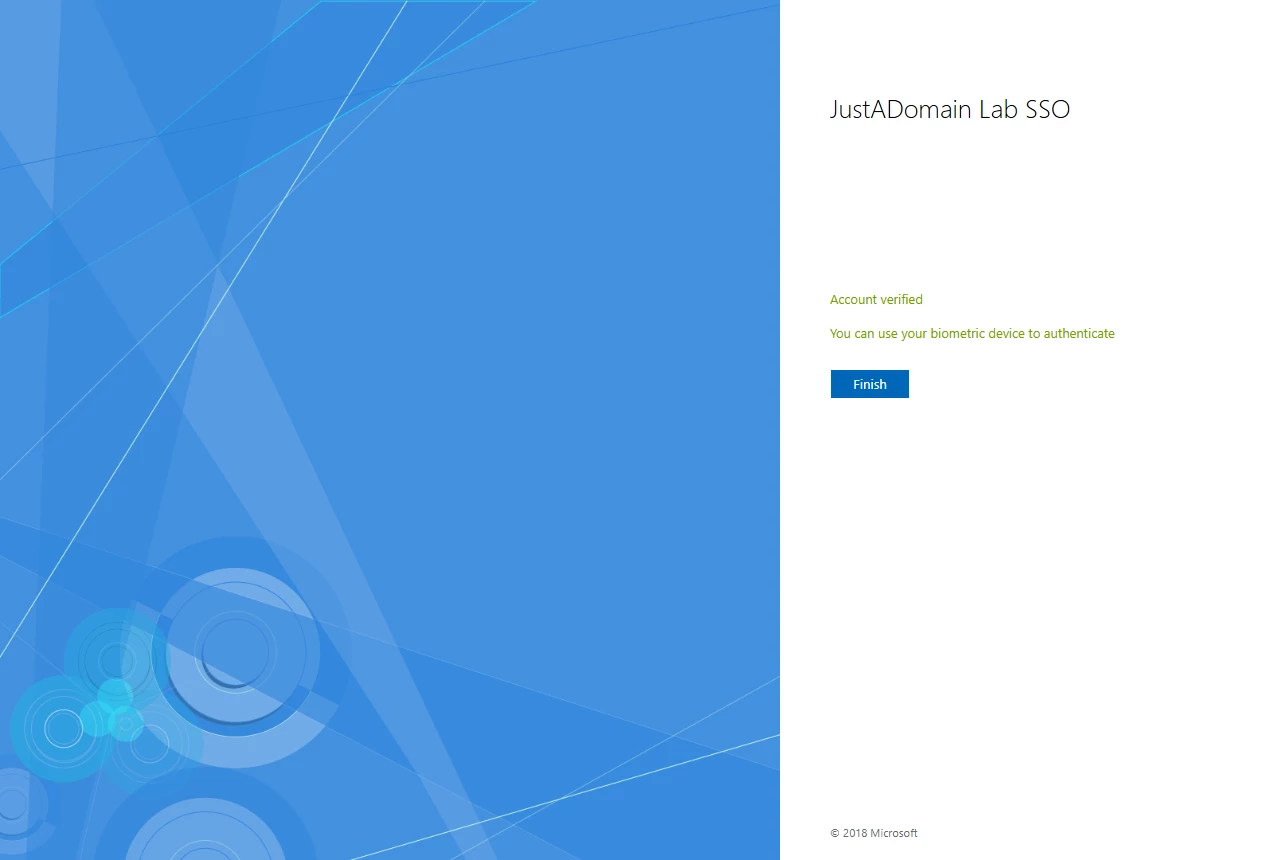
Continue, give the authenticator a name, and the browser runs the enrollment procedure. Once complete, the server stores the credential's public key on the user object in Active Directory and confirms it.
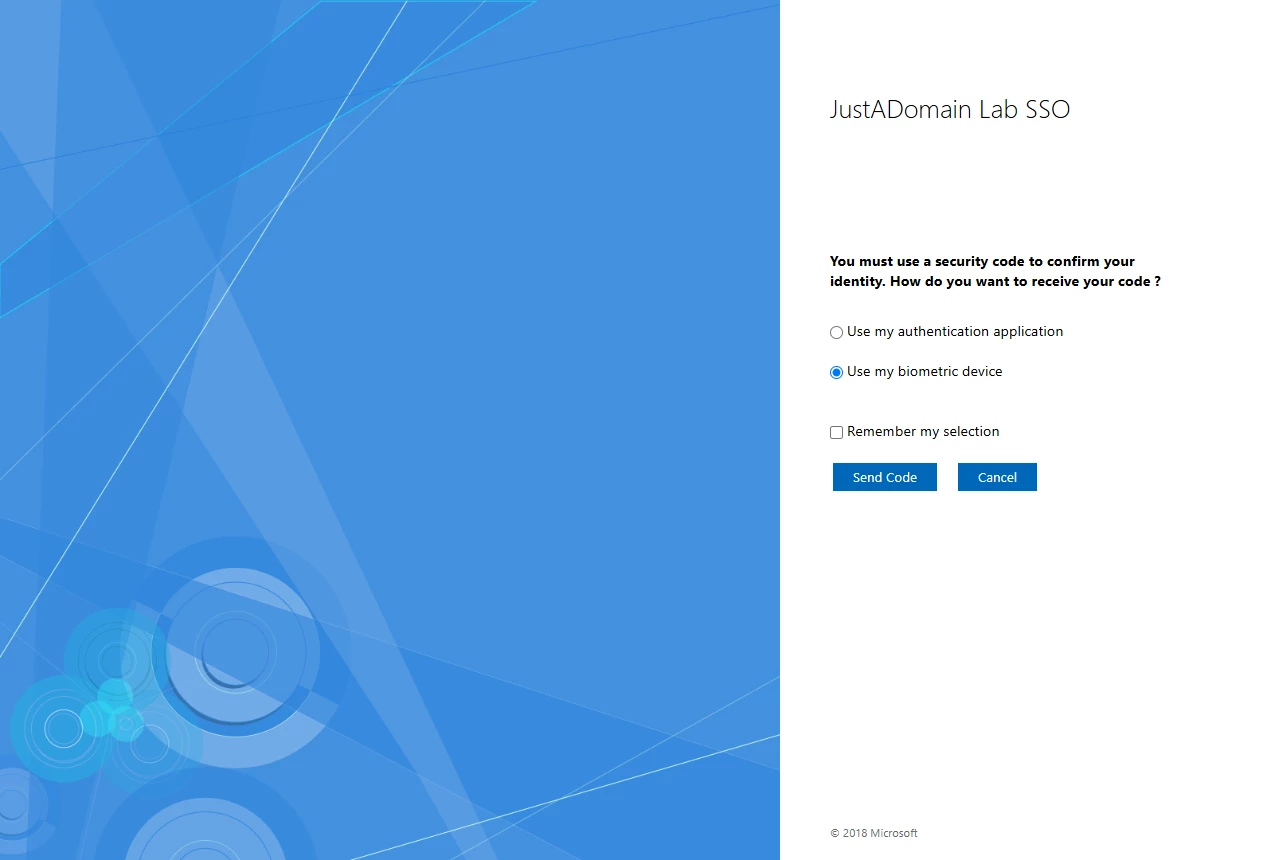
At the next login, the code page carries a "Sign in another way" link, which opens the method chooser. This is also where a user with several enrolled factors picks between them.
Choosing the biometric device leads to one more page with a single Sign In button
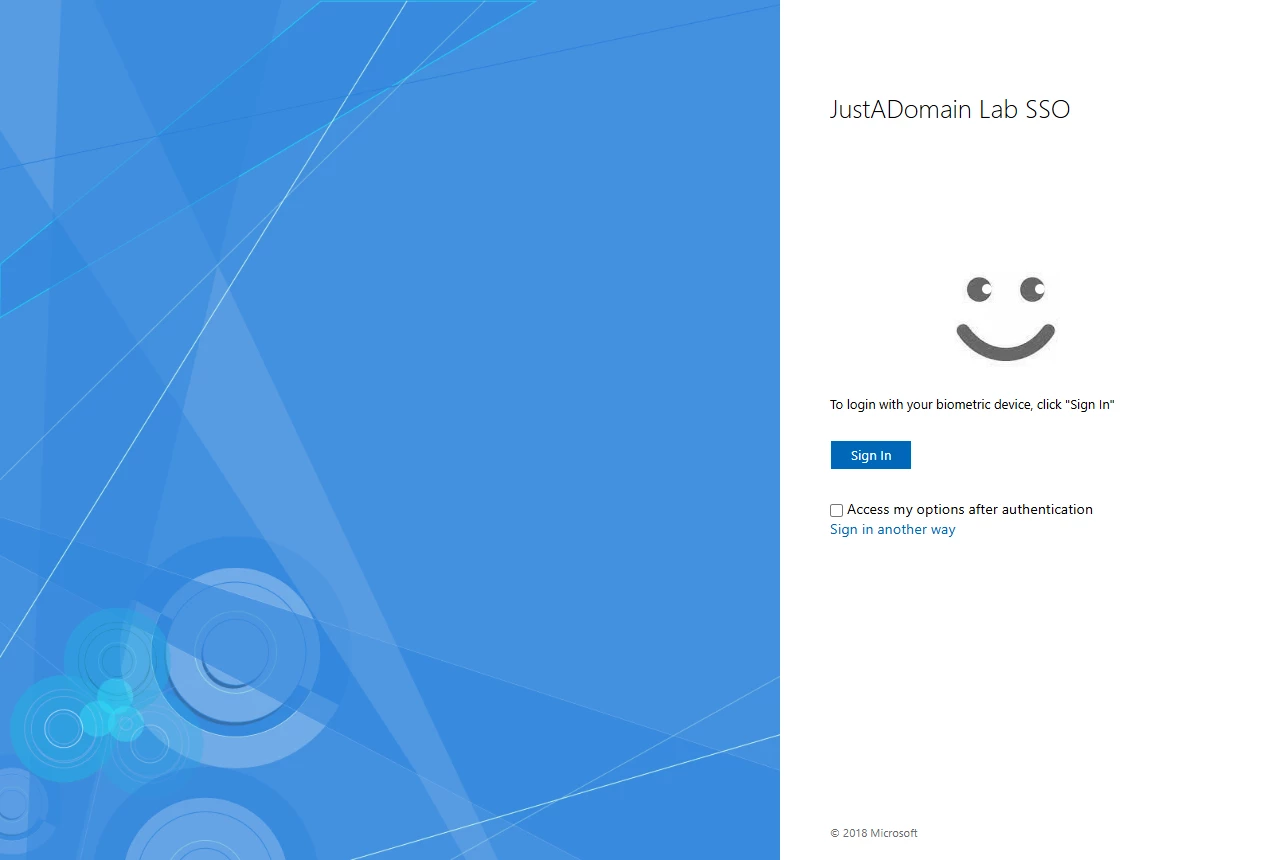
After the authenticator responds, the browser returns to the appliance, authenticated with no code involved at any point.
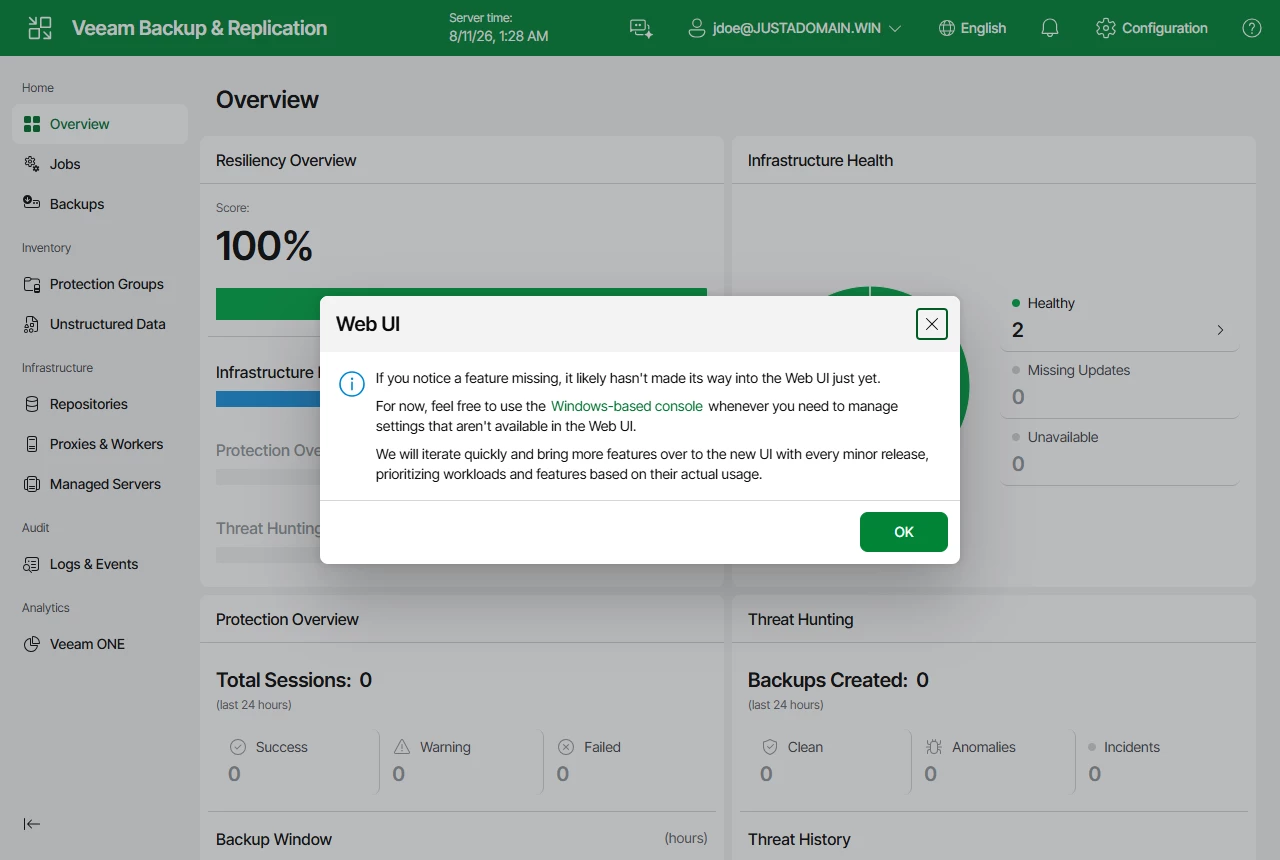
NOTE: In testing, a self-signed lab certificate the client had been told to accept still counted as a secure context. The certificate rule from the previous guide still applies. Every machine running the console must trust the AD FS TLS certificate.
Which factor a user gets first, and how they change it
This deserves its own section, because the behavior confused me at first.
The second-factor page a user lands on is whichever method is their preferred one. Register a passkey, and the passkey prompt becomes the landing page. The other methods sit behind a "Sign in another way" link, and that link is easy to miss.
The preferred method is per user, and you can read or set via cli:
Get-MFAUsers -Identity user@domain.tld | Select-Object UPN, Enabled, PreferredMethod
Set-MFAUsers -Identity user@domain.tld -Method Code -Enabled -Confirm:$false
Do not omit -Enabled. It is a switch, so leaving it off writes the value false rather than leaving it alone, and the user's next login greets them with "Activation required" instead of a code prompt.
Users can retarget themselves too, there is a checkbox a "Remember my selection", and ticking it rewrites the account's preferred method. The same could be done in a user's configuration UI when the respective checkbox is set during login.
The MFA administration console
Everything so far has been PowerShell, and there is a graphical alternative that is easy to miss entirely. The installer registers an MMC snap-in but creates no Start Menu entry, and nothing anywhere points at it, so you have to know it exists. It sits at C:\Program Files\MFA\mfa.msc on the AD FS server, and it wants the same rights as the cmdlets, so launch it from a prompt that is already elevated rather than from Run:
& "C:\Program Files\MFA\mfa.msc"
If the file itself gives trouble, the snap-in is registered independently under the name MFA, so mmc.exe with Add/Remove Snap-in reaches the same tool.
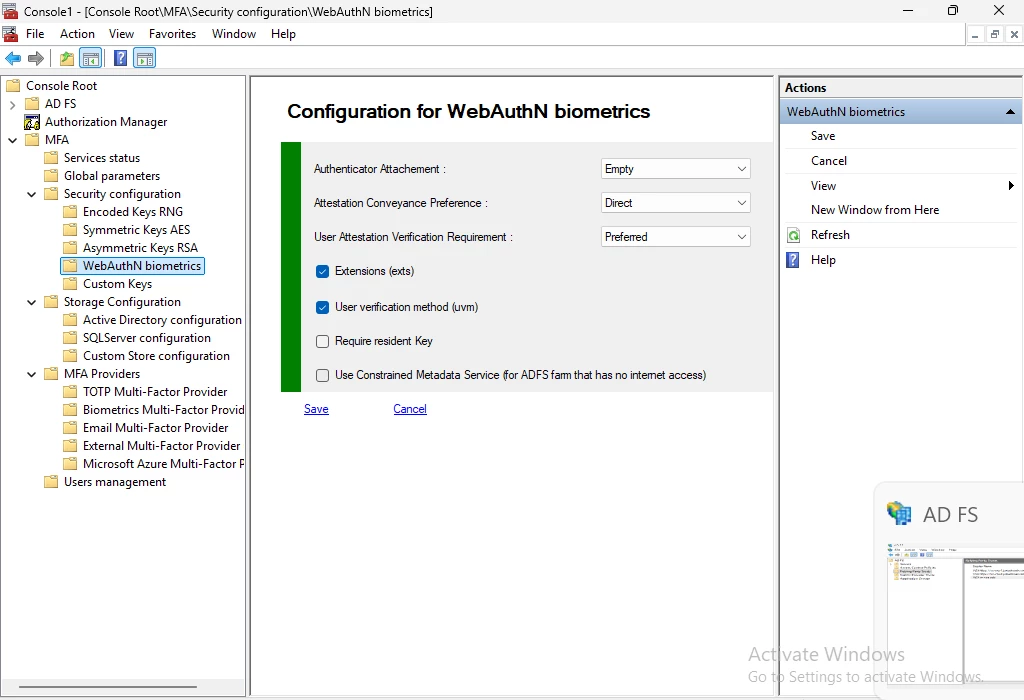
What you get is a normal MMC tree covering everything this guide did in PowerShell. Services status and Global parameters sit at the top, followed by Security configuration with the key stores and the WebAuthN settings, and Storage Configuration where you pick between Active Directory and SQL Server. Below those, MFA Providers holds one node per provider, with Users management at the bottom.
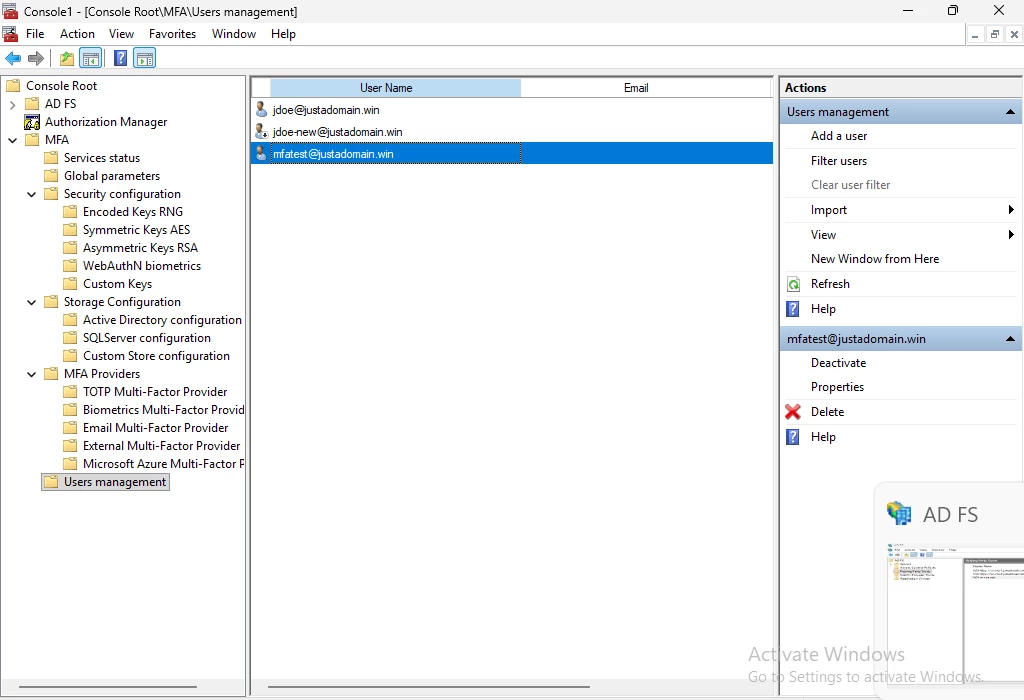
Users management is the day-to-day page. It lists everyone registered, with actions to add, activate, deactivate, delete, or open a user's properties.
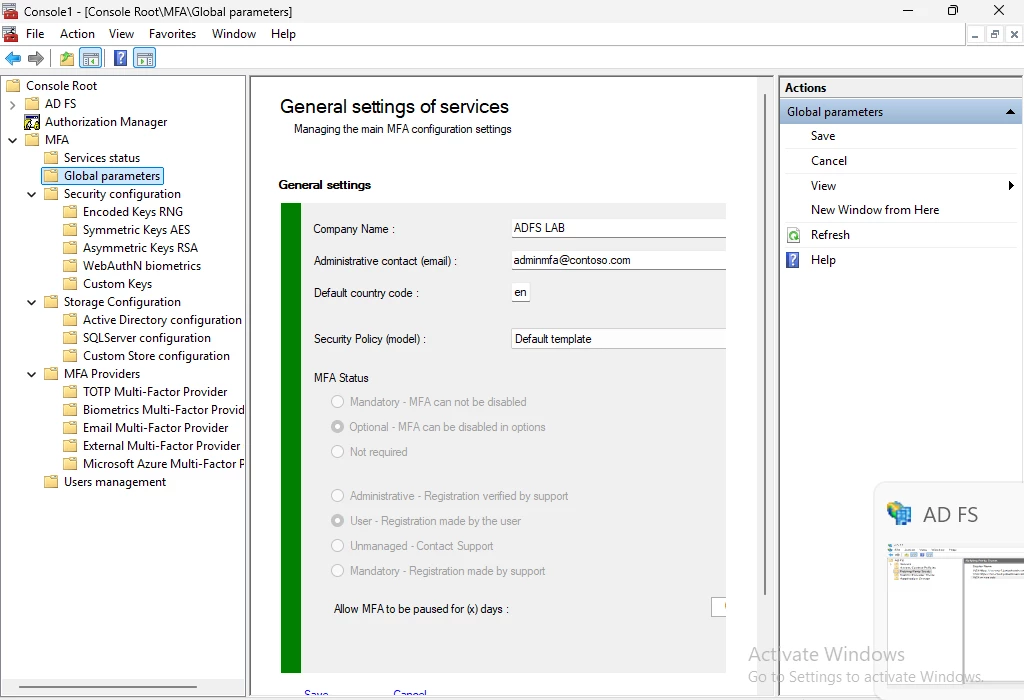
Global parameters is where the tenant-wide behavior lives. Two settings there matter more than the rest. MFA Status decides whether MFA is mandatory, optional, or not required at all. The registration mode underneath it decides who may enroll a user: the user themselves, an administrator, or support only. If users are to self-enroll the way step 7 describes, set the registration mode to user registration.
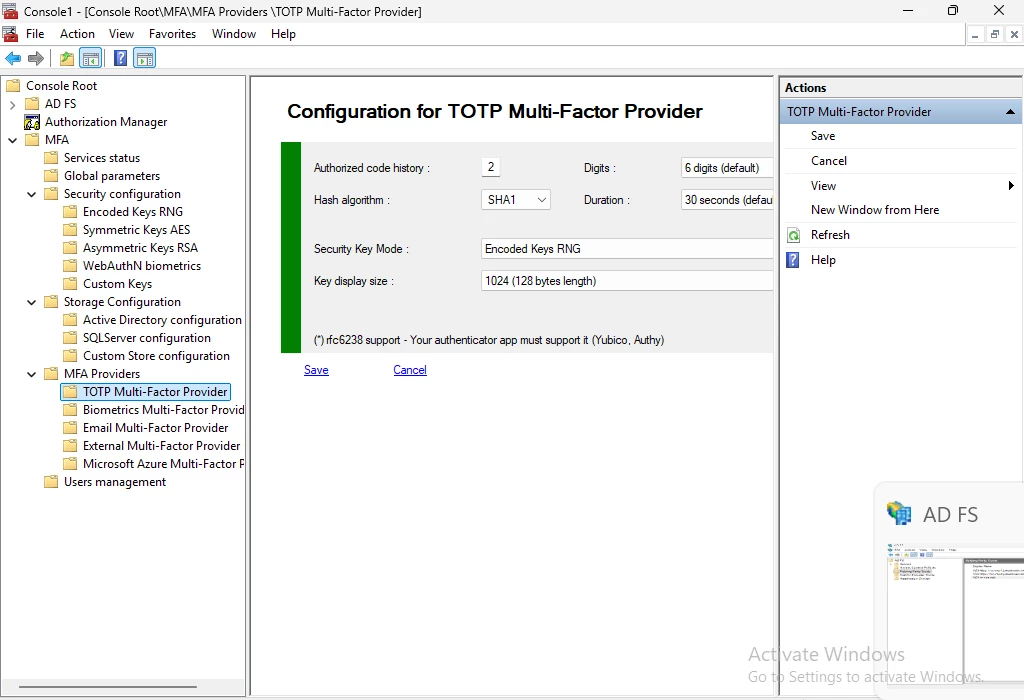
The TOTP provider node is the graphical equivalent of the Set-MFAProvider work in step 5, and it is easier to read than the cmdlet output. Hash algorithm, digit count, and period are all here, along with the authorized code history, which is how many previous windows the server still accepts.
The WebAuthN node under Security configuration is the graphical home of the AuthenticatorAttachment setting from the passkey section. If you would rather not touch PowerShell, this dropdown is the same switch. Note the spelling: the label reads "Authenticator Attachement"
Finally, the thing the cmdlets genuinely cannot do. Open any user's properties, and the Key tab shows their TOTP secret in full, as text, with a QR code above it and buttons to clear the key, issue a new one, or mail it to the user.
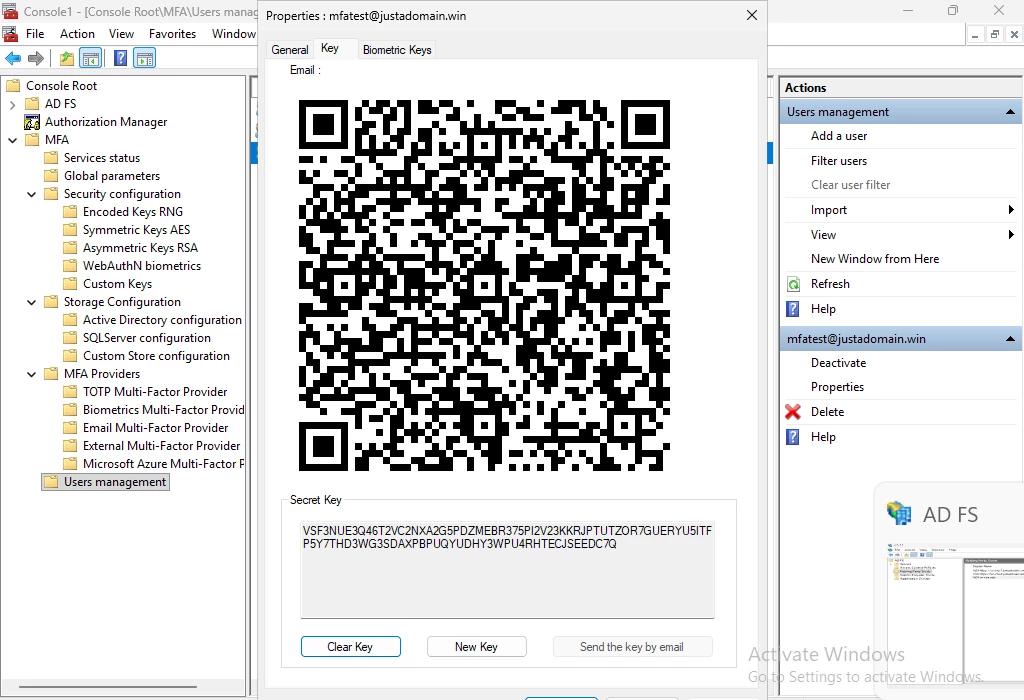
That is the supported way to get a key when you provision an account. I rotated the secret shown above before publishing this guide.
Troubleshooting
The enrollment page shows the instructions and the app logos but no QR code. The provider could not read or write its configuration cache. Check the Application log for the source "ADFS MFA Service" and an access denied on C:\Program Files\MFA\Config\config.db, then apply the permission fix from step 3. The same root cause produces "Input string was not in a correct format" from the enrollment wizard and from the administration cmdlets, and a KeysManager.NewKey null reference in the AD FS admin log. They all resolve together.
Every MFA cmdlet reports that it must be executed with AD FS administration rights, even as an elevated domain administrator. Before Register-MFASystem has ever run, this message is misleading rather than true. The rights check tries to read a configuration that does not exist yet and reports the failure as a rights problem. Run Register-MFASystem first. It does not need the configuration it is about to create. After registration, the message means what it says, and the usual cause is a session that is domain admin but not elevated.
A cmdlet hangs instead of returning. Several of these cmdlets prompt for confirmation, and one uses a custom prompt that survives -Confirm:$false. A cmdlet missing a mandatory parameter also sits waiting for it. Supply every parameter explicitly.
A valid-looking operation fails with "invalid mail address for user". The email provider is enabled by default. Disable it, or give the account a mail address.
A user's authenticator app produces codes that are always rejected. Most likely the enrollment was never committed, because the wizard did not reach Finish. Have them enroll again and complete the wizard. If the problem persists, check clock skew on the AD FS server. TOTP has a thirty-second window and adfsmfa allows two windows of drift by default, so the server clock has to be roughly right.
You need to undo enforcement quickly. Put the two node trusts back to permit everyone. This leaves the provider installed and every enrollment intact, so you can re-enable later without anyone re-enrolling:
"VSA https://vn-vsa-1.justadomain.win/oauth/Saml2",
"VSA https://vn-vsa-2.justadomain.win/oauth/Saml2" | ForEach-Object {
    Set-AdfsRelyingPartyTrust -TargetName $_ -AccessControlPolicyName "Permit everyone" -AccessControlPolicyParameters $null
}
Keep -AccessControlPolicyParameters $null. Without it the command fails with "ADMIN0063: Parameter interface mis-match", because the group parameter left over from the old policy does not fit the policy you are moving to, and the trust stays on the MFA policy.
Vladimir Nikiforov
Product Management Analyst
Veeam Software
AI disclosure
Parts of this text were produced with an AI assistant working under the author's direction. The output was reorganized and edited by the author, who holds editorial responsibility for what is published here. The model's residual contribution is wording and structure.
Under Regulation (EU) 2024/1689 (the AI Act), applicable from 2 August 2026, Article 50(2) requires providers to mark AI-generated output in a machine-readable format, so this text may carry a provider watermark and be flagged by a detector. Article 50(4) exempts text that has undergone human review and editorial control from the deployer disclosure requirement. This notice is therefore voluntary.