First, we download and install Veeam Agent for Windows on the Windows server where we will install the Agent. After the relevant installation is completed, we create the Job in the following steps.
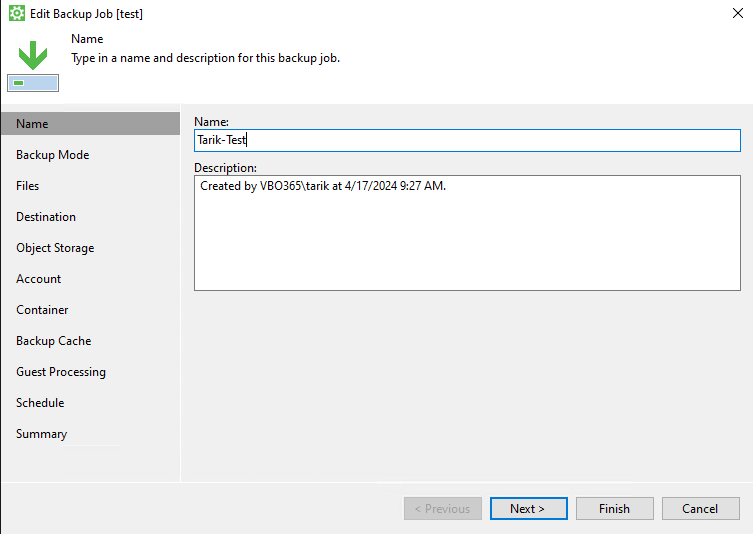
Step 1 - First of all, we enter a name for the Job.
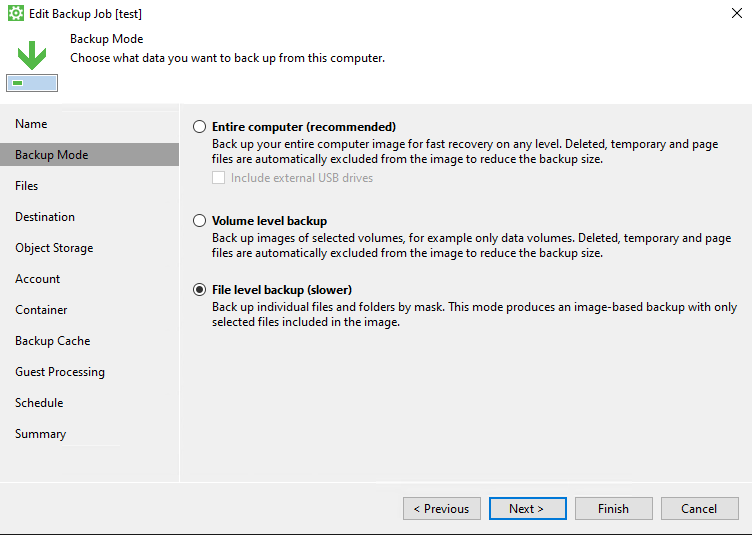
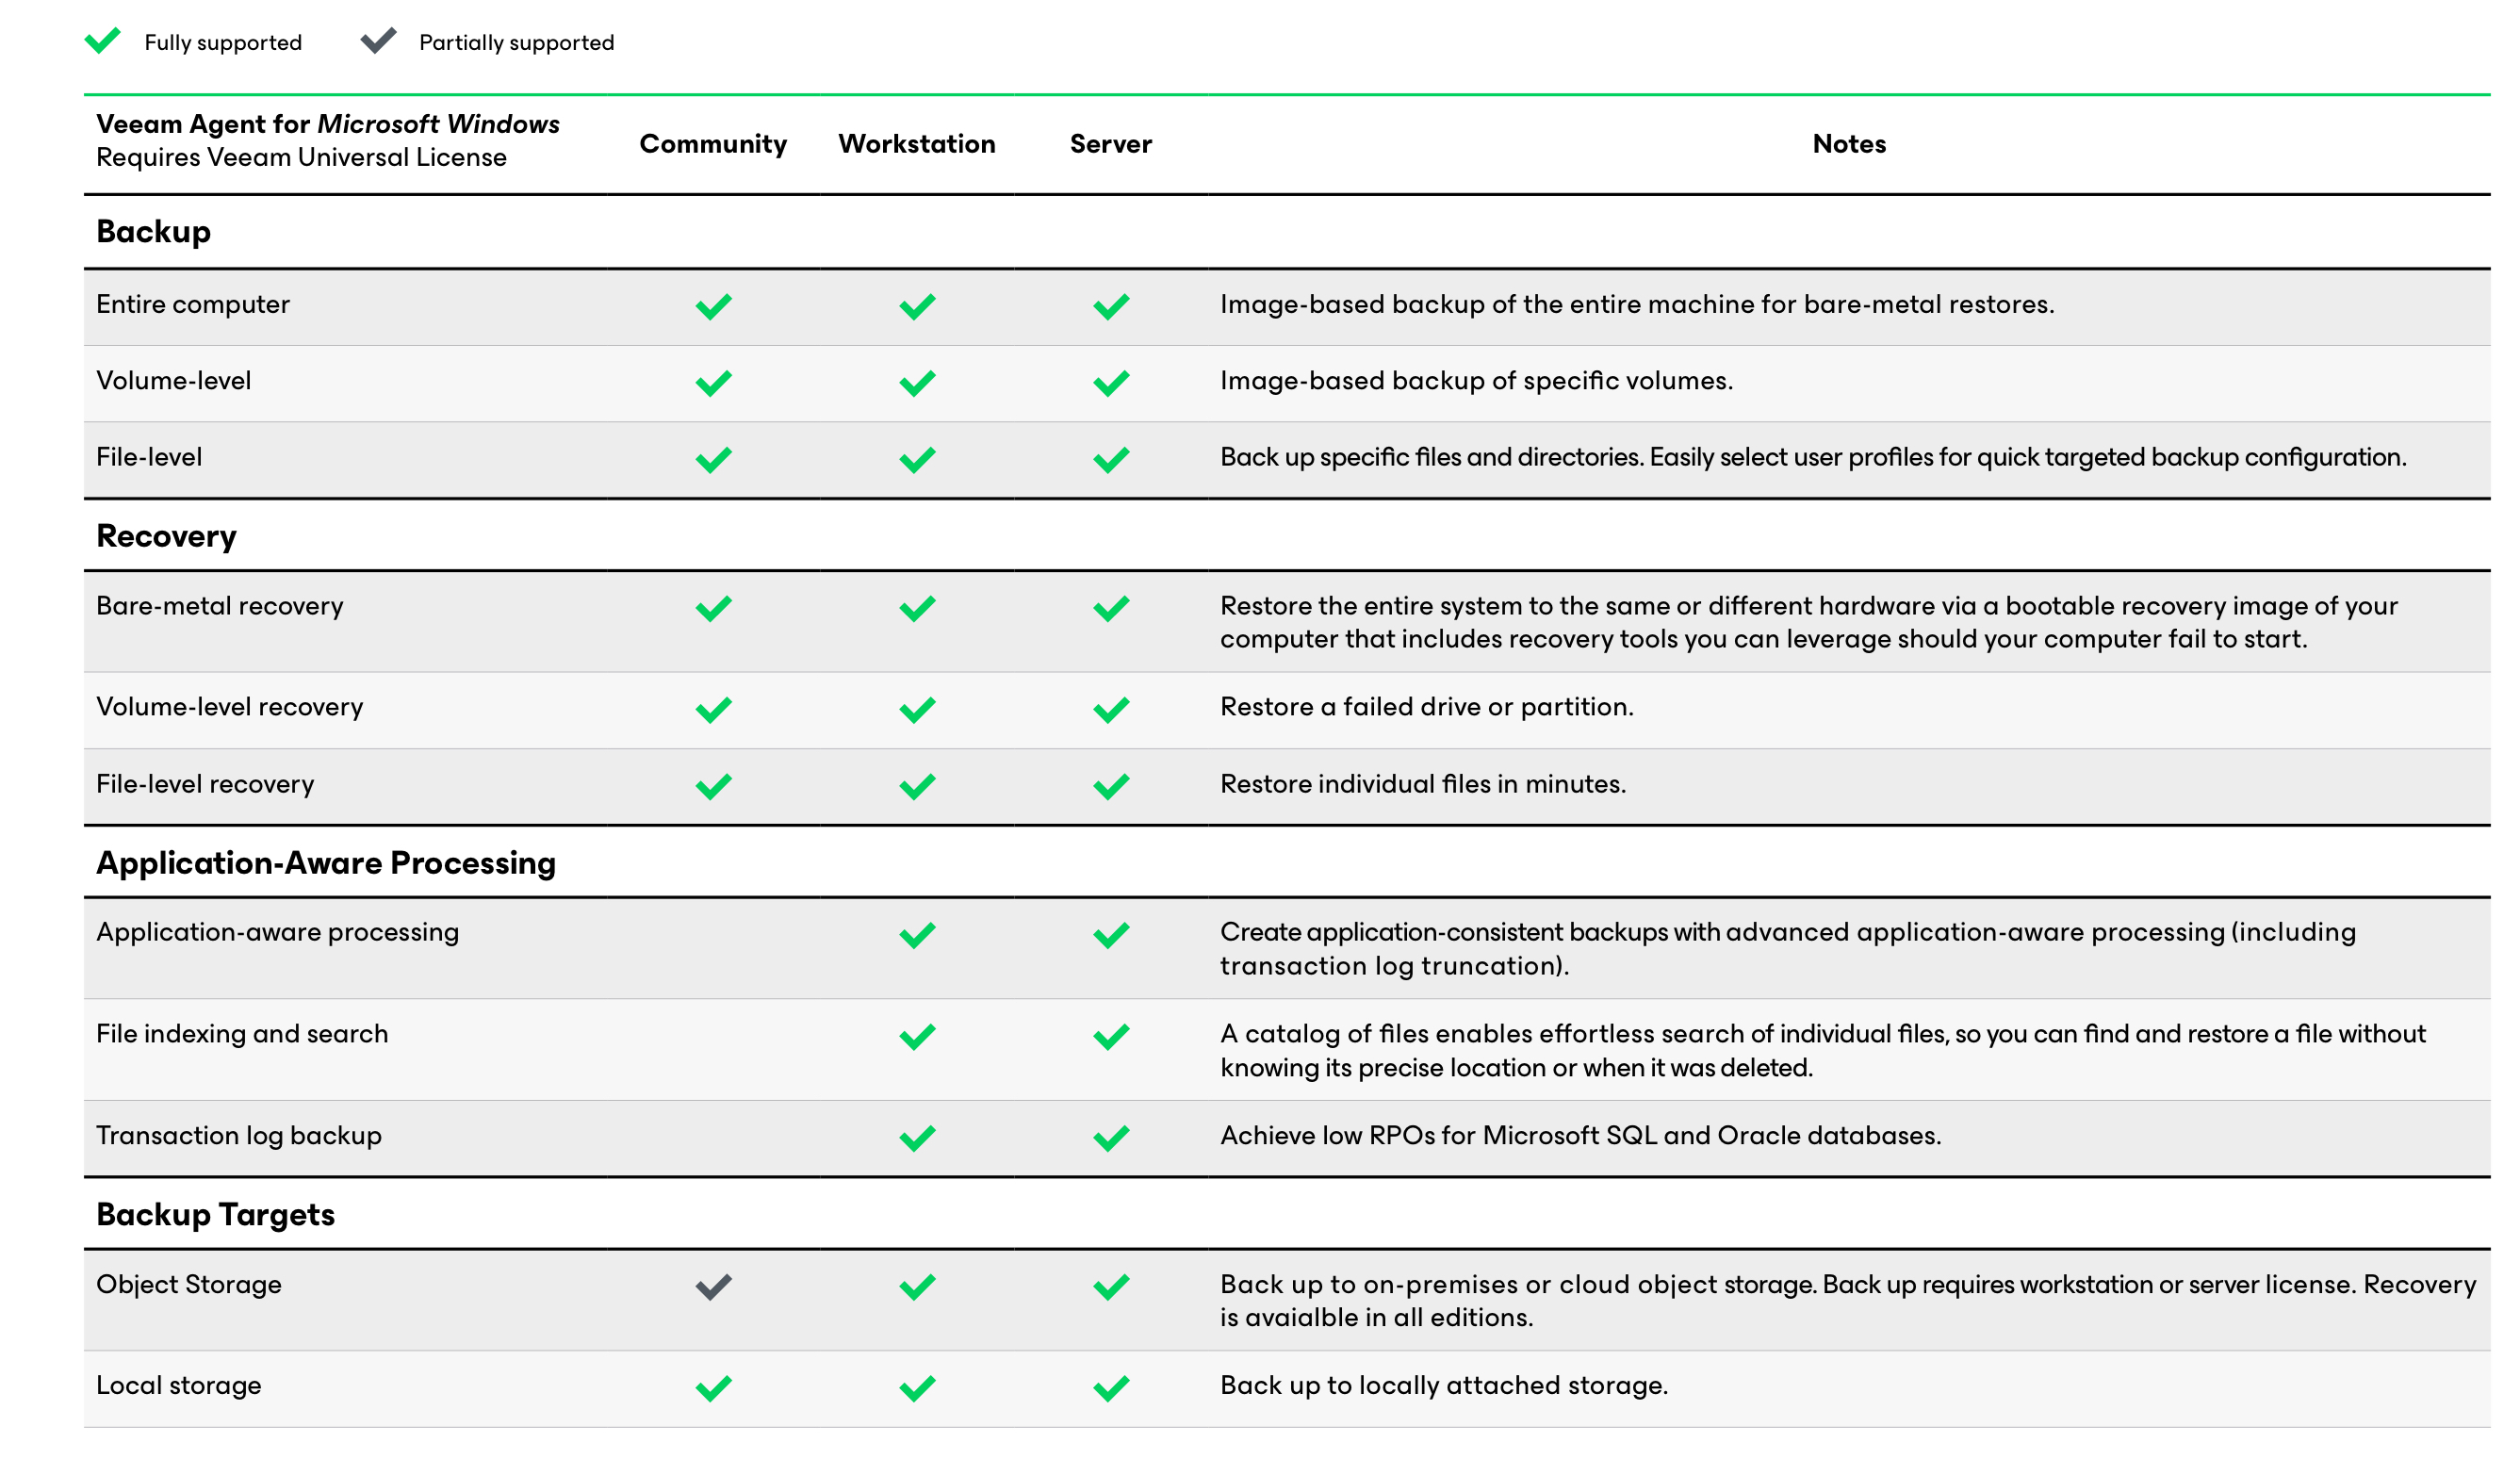
Step 2 - In this step, we can take a file backup at the Image level with Entire Computer, or a volume on the server with Volume level backup, or at the File level backup level.
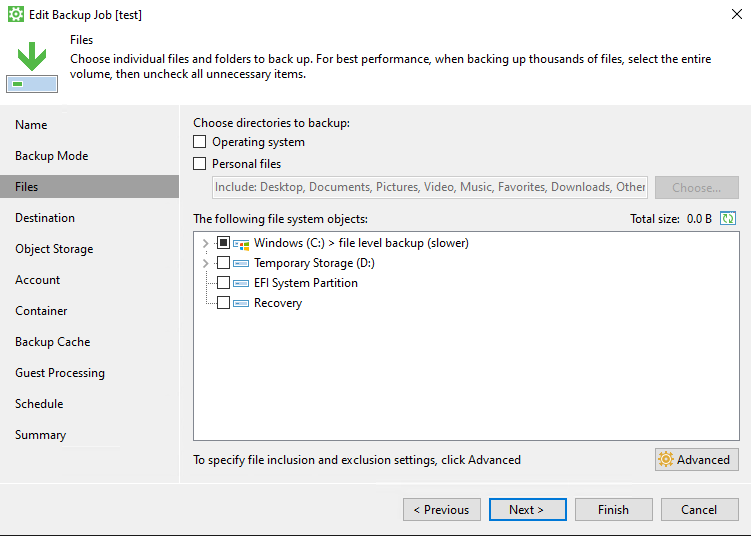
Step 3 - Since I chose file backup, I chose an empty file since it was a test.
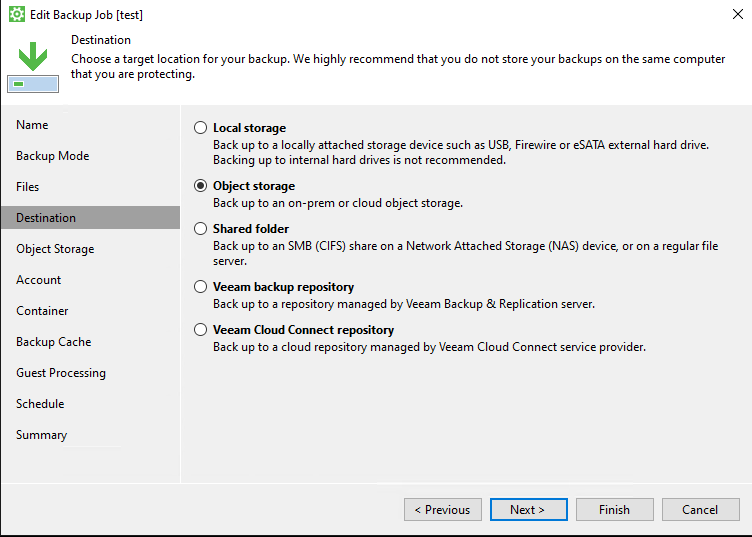
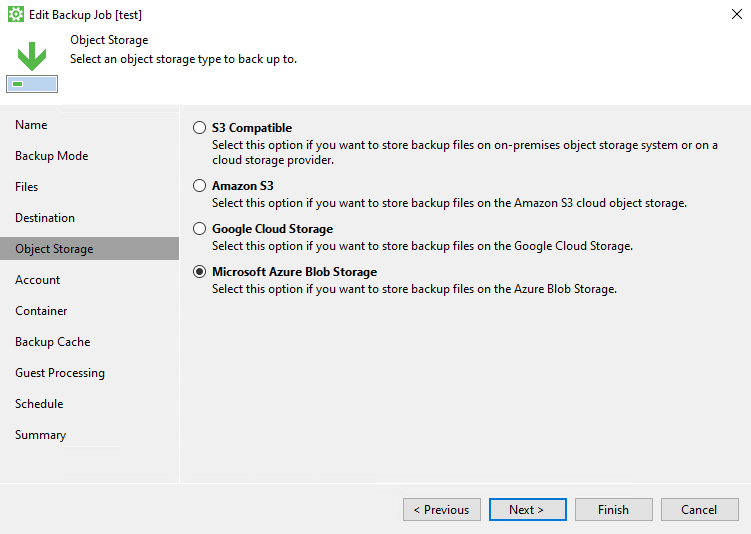
Step 4 - Since we will be backing up to Azure Blob Storage, we select Object storage and continue.
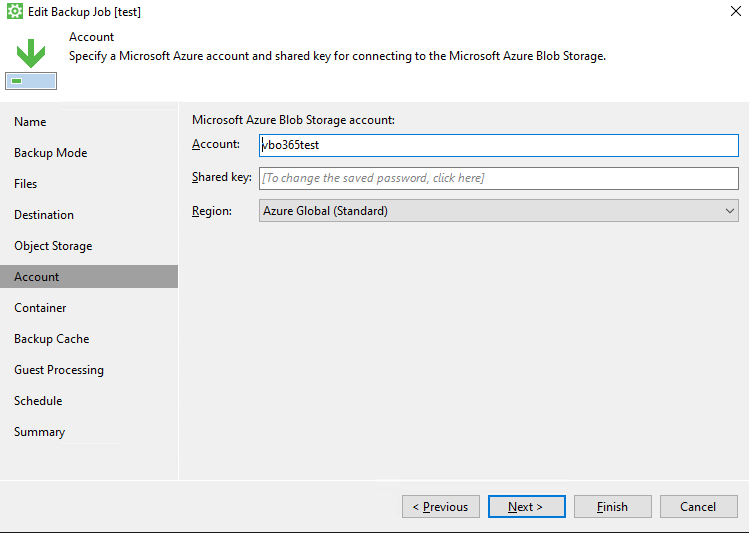
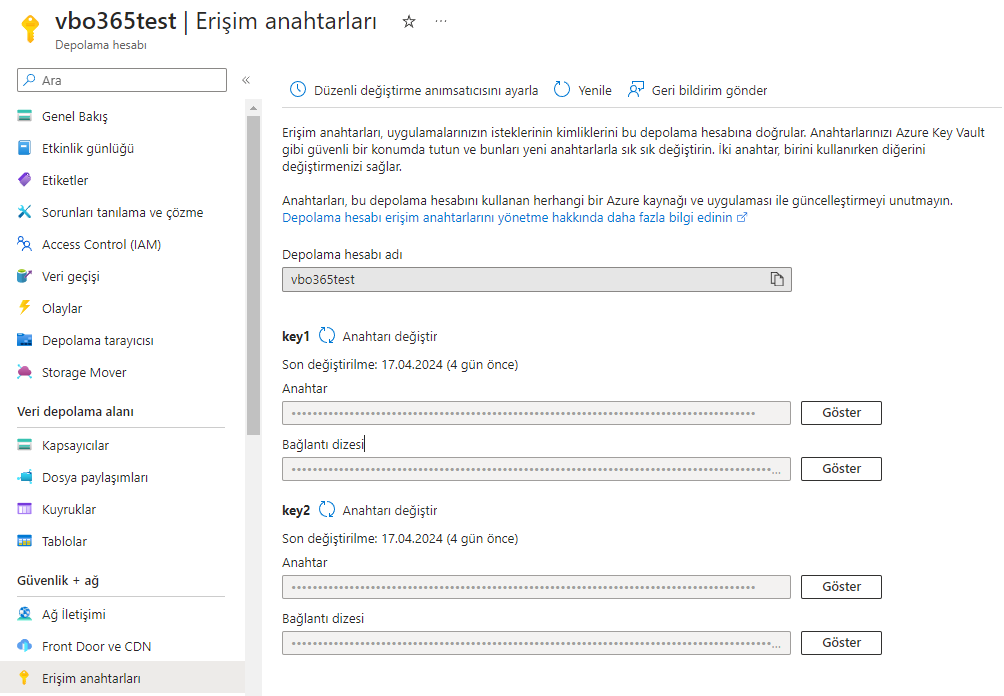
Step 5 - Here you can find the Account and Shared key information on the Access Key on the Storage Account you created in the Azure Portal, as shown in the image below.
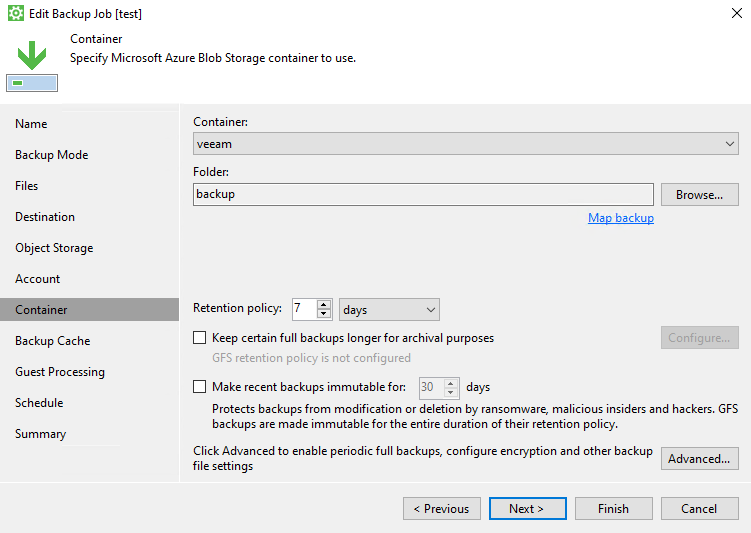
Step 6 - In this step, you need to select the Container you created in the blob storage you created on Azure and create a Folder inside it. If you activate Immutuble on Blob storage, you can also activate it on Veeam.
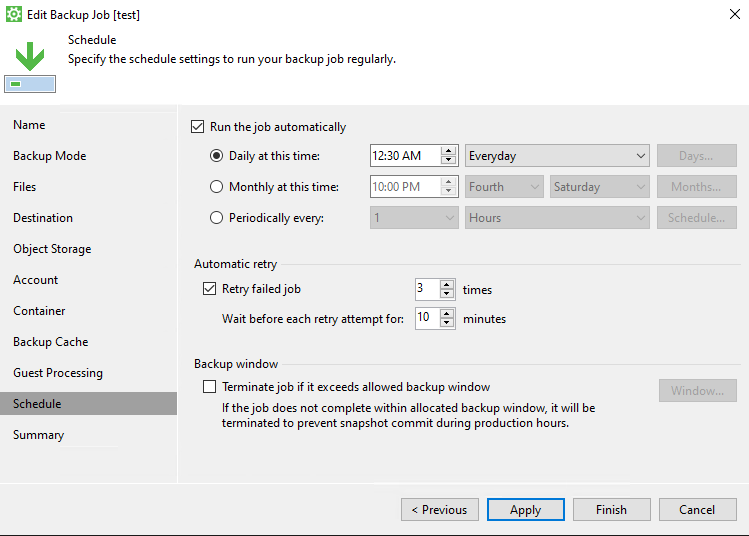
Step 7 - After setting the Schedule section, you can make a backup to Blob Storage. You can check the backups on Blob Storage from the Azure Portal, but you cannot see the details. Backups taken are kept encrypted.