



Why this guide? A while back, a customer asked me for a simple step-by-step guide for restoring the Veeam Backup & Replication configuration onto a newly deployed Veeam Software Appliance. This write-up is the result. It has been a little while since then (as you can tell from the version used, 13.0.1) - but since I haven't found a similar step-by-step guide here in the Community Hub yet, this one is for you.
I am well aware that most of the steps here are self-explanatory for all of us, and that most of you could get through this configuration blindfolded. My customer, however, asked for a truly foolproof guide - something to provide a rough direction in a worst-case scenario. That said, should it ever come to that, we will of course be supporting them anyway...
And finally, the customer also receives a checklist to document the individual steps - you will find it at the end of this guide.
VBR / Veeam Backup Server Configuration Restore
If the entire Veeam VBR intelligence is no longer available, the configuration can be restored in a few simple steps.
The individual steps can be looked up in the official Veeam User Guide at the following link:
Restoring Configuration Database using Veeam Host Management - Veeam Backup & Replication User Guide
Veeam Software Appliance – Deployment, Security Officer & Configuration Restore
This chapter describes the restore of the Veeam Backup & Replication configuration based on a newly deployed Veeam Software Appliance (VSA) using the Veeam Host Management Console. The individual steps are documented with the screenshots provided.
Step-by-Step / Configuration Restore
Providing the .BCO File
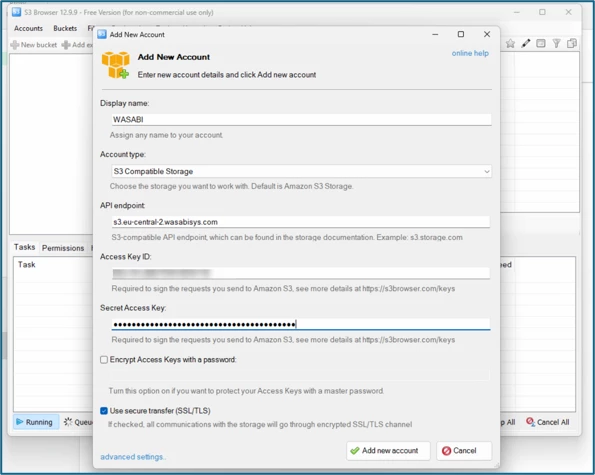
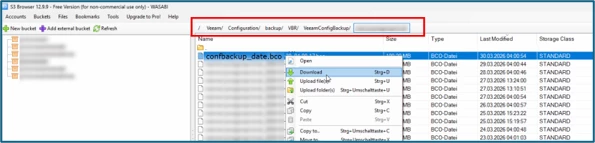
Download/provide the current configuration backup (.bco), in this scenario the BCO file is in an Object Bucket. Here we will download the file for example via S3 Browser from a Wasabi Bucket.
Providing the Binaries
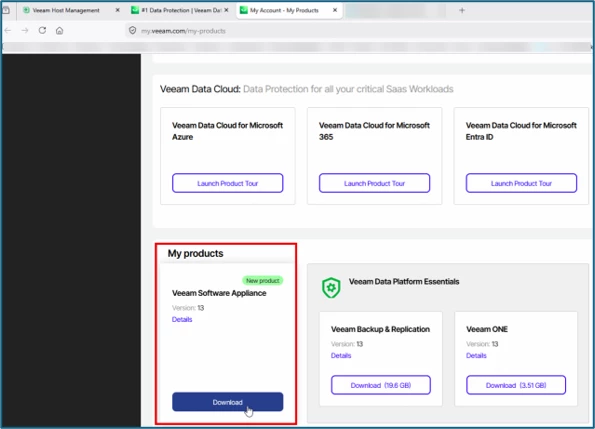
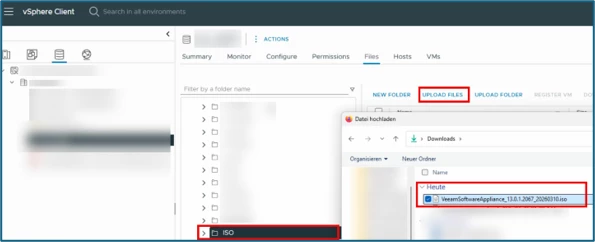
Download the Veeam Software Appliance ISO from https://my.veeam.com and upload it to the vSphere datastore.
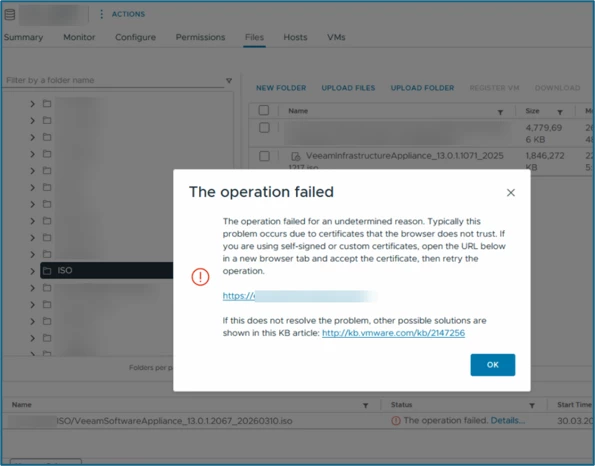
If a certificate error occurs during the upload, follow the link to the host shown and accept the certificate in the browser. The operation can then be repeated successfully.
Deploy the VM
The following steps show the deployment of the VSA in vSphere, including mounting the ISO and starting the installation.
In the vSphere Client, create a new virtual machine for the Veeam Software Appliance and start the deployment wizard.
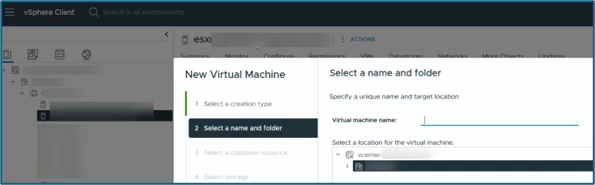
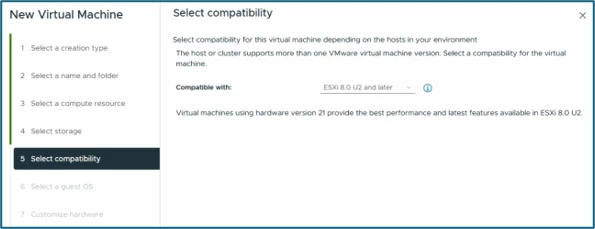
Select installation from the Veeam Software Appliance ISO as the deployment type and define the target resources according to the environment's specifications.
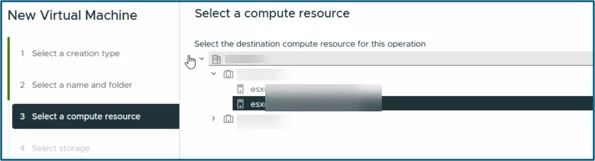
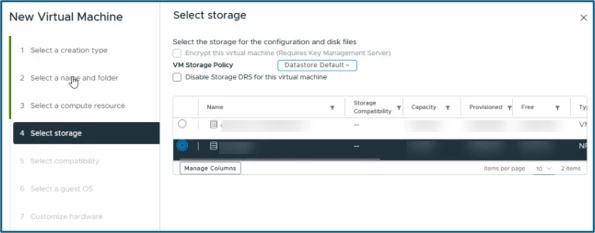
Select the designated datastore and make sure that sufficient storage is available for the system and data volumes.
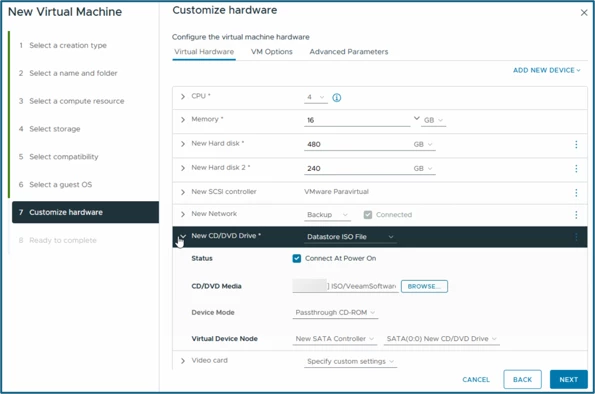
Review the virtual hardware against the documented target configuration and adjust CPU, RAM and disk sizes if necessary.
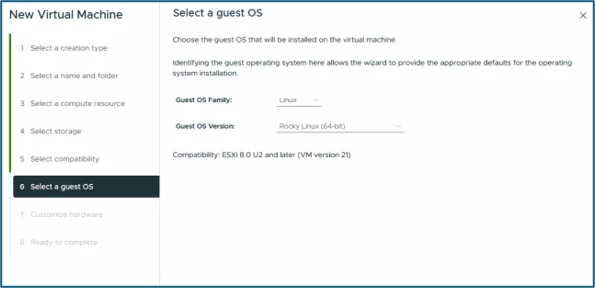
Select Linux as the guest operating system and Rocky Linux (64-bit).
Assign the appliance's network connection to the designated port group (here: Backup) and confirm the configuration.
Mount the installation media and configure the VM to boot directly from the Veeam Software Appliance ISO on first startup.
Review the deployment summary and start the creation of the virtual machine.
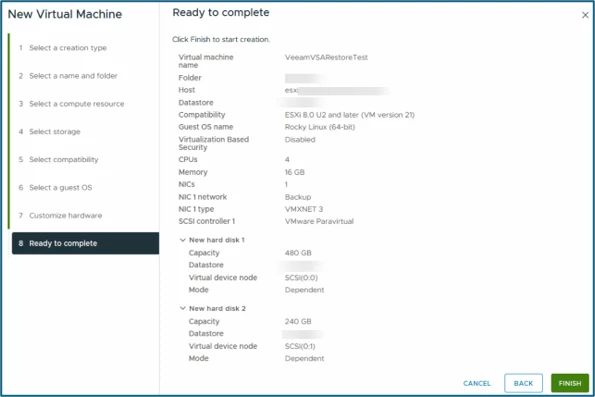
Start the VSA Deployment
After the VM has been created, power on the appliance and wait for the Veeam Software Appliance boot sequence.
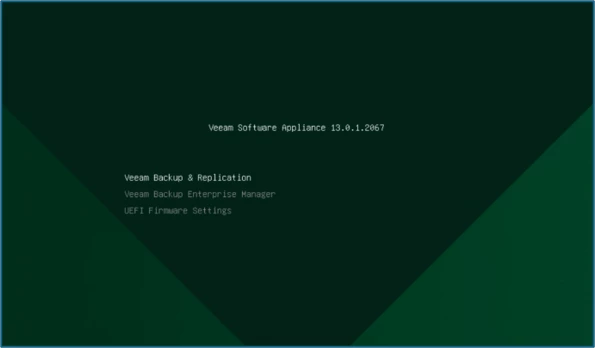
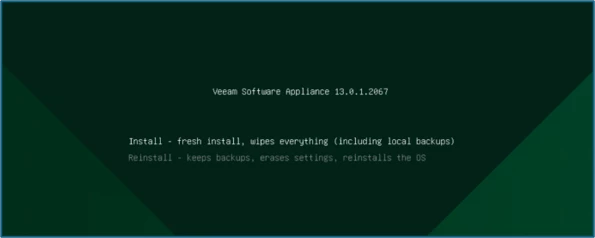
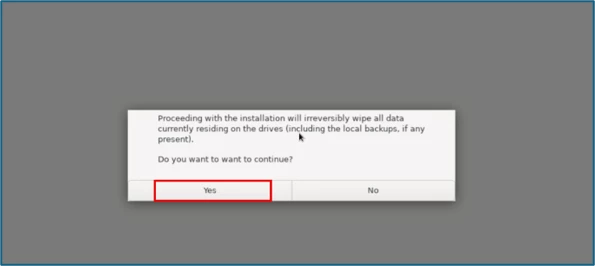
Confirm that all data on this system will be deleted or overwritten and continue with the installation.
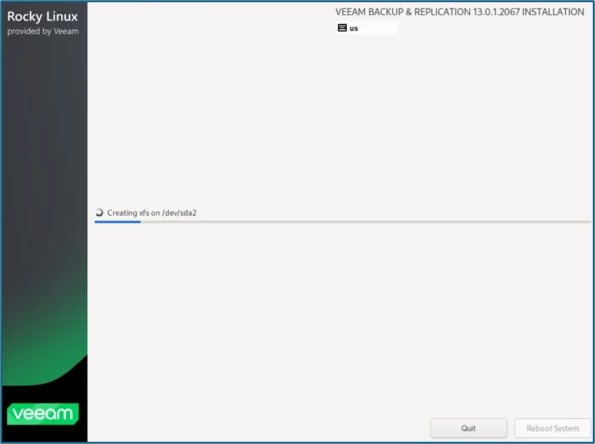
The automatic installation of the appliance starts; monitor the installation progress until it completes.
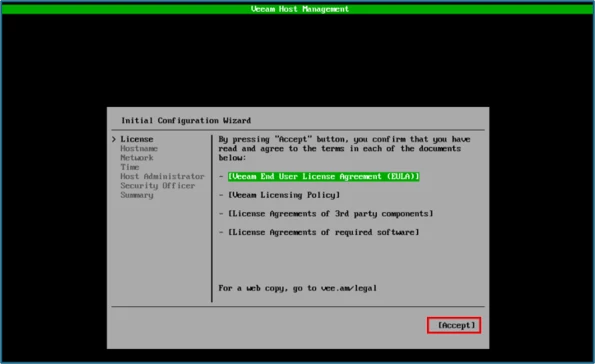
After the reboot, open the initial appliance configuration via the console, then read and accept the EULA.
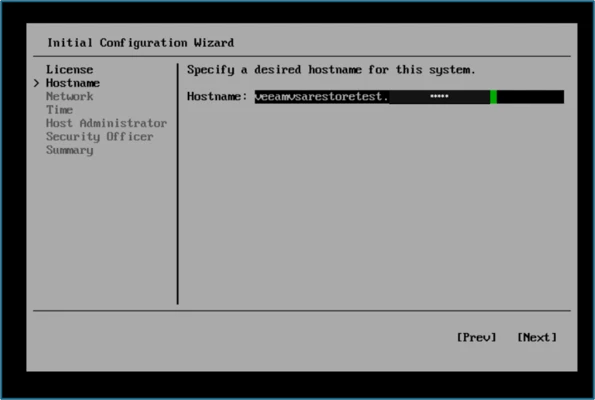
Enter the hostname of the new appliance according to the target system and ensure name resolution via DNS.
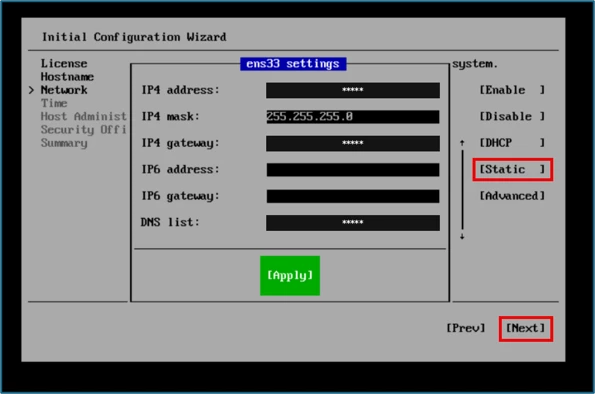
Configure the static IP settings and verify IP address, subnet mask, gateway and DNS servers against the documentation.
Configure time synchronization and make sure the appliance uses the designated NTP server.
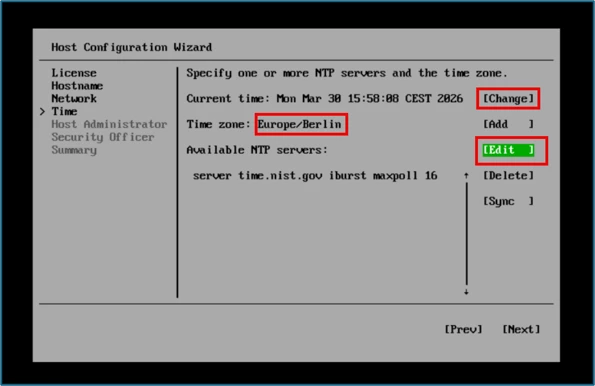
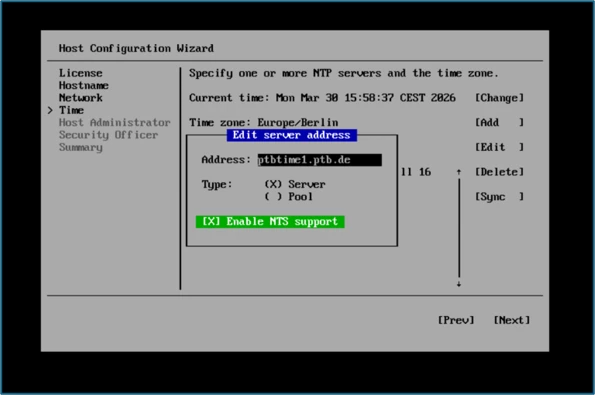
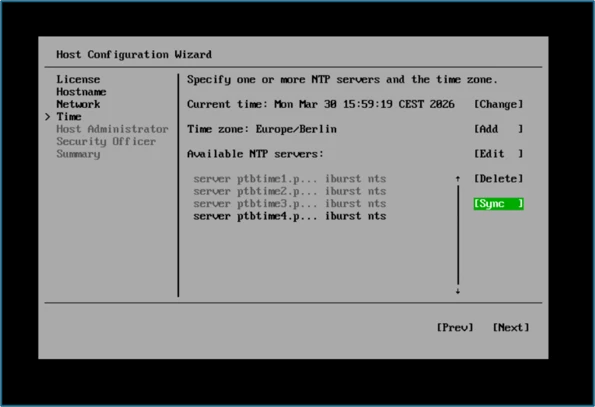
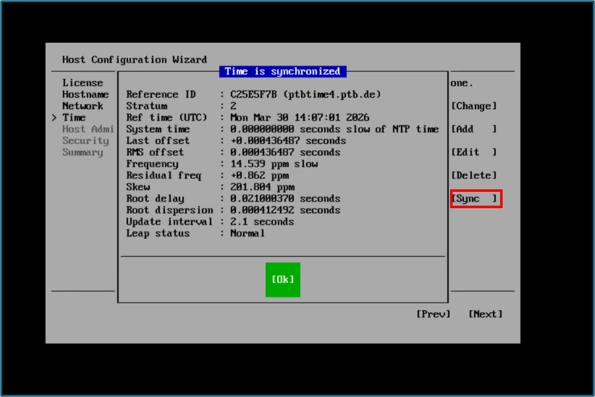
Check the time zone and NTP configuration, as deviating system times can affect authentication and restore approvals.
Set the password for the Host Administrator and document it according to the security policies.
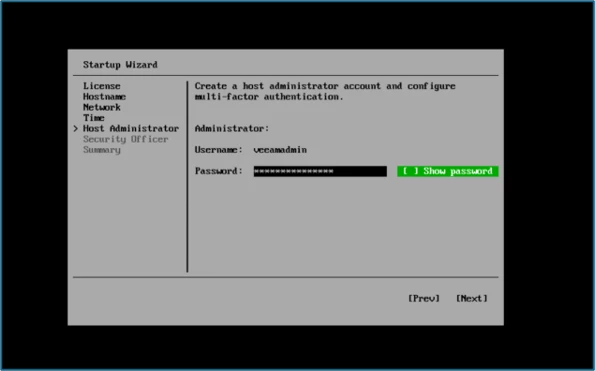
Complete the MFA registration for the Host Administrator and store the generated recovery code securely. Come on, scan me! :-p

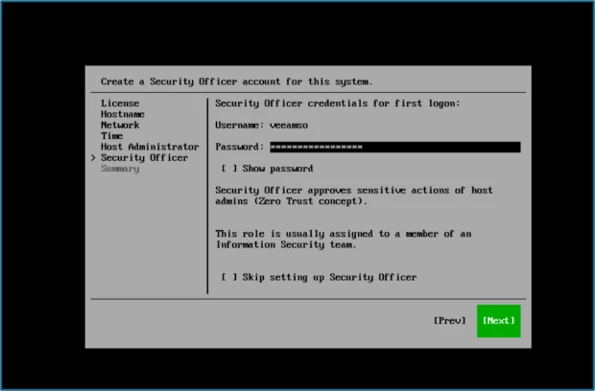
Configure the Veeam Security Officer account and assign a (temporary) password. It must be changed at the first login. Do not skip this step!
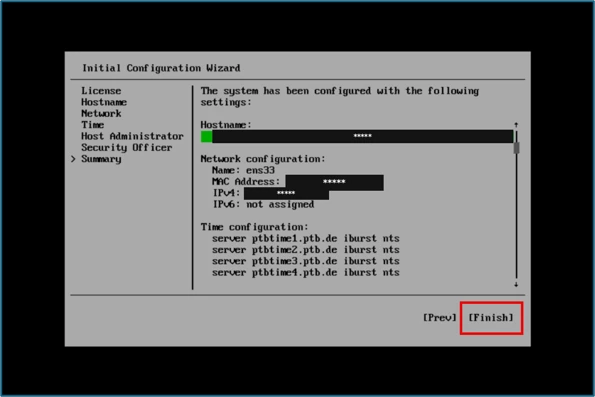
Review the configuration summary and confirm the initial setup of the appliance.
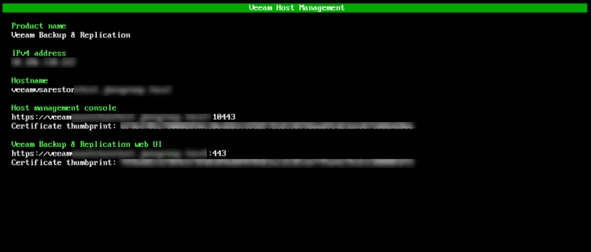
Open the Veeam Backup & Replication web interface and validate its accessibility via HTTPS.
Initiate Configuration Restore
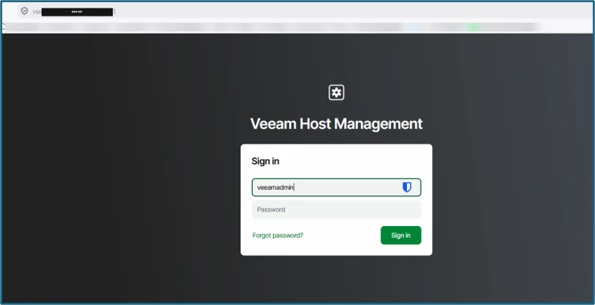
Open the Host Management Console on port 10443 and log in with the Host Administrator account.
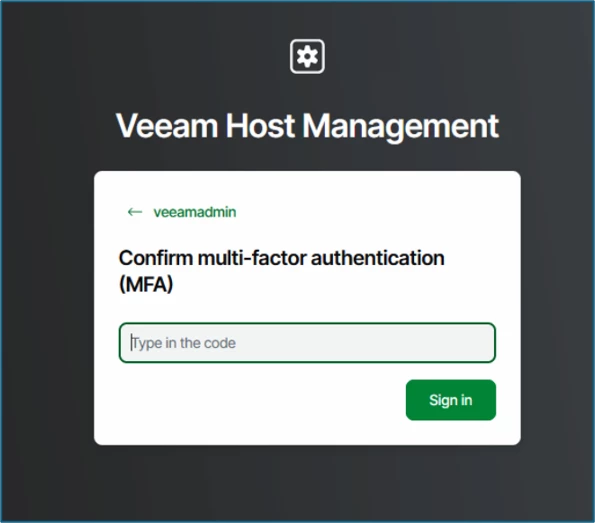
Then confirm the TOTP MFA prompt.
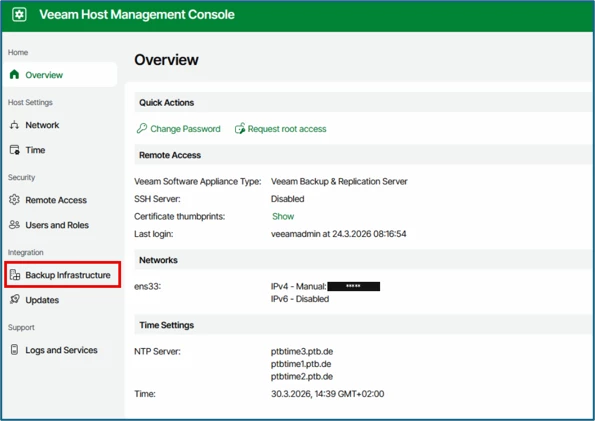
Check the status of the appliance services and make sure all relevant services have started without errors.
In the Host Management Console, open the Backup Infrastructure section and select the Configuration Restore function.
Submit the configuration restore request via Submit Request and prepare the required approval by the Security Officer.
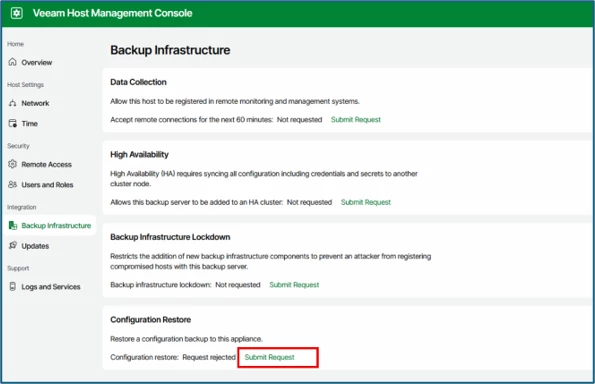
Since the Security Officer account has not been fully set up yet, this step still needs to be completed.
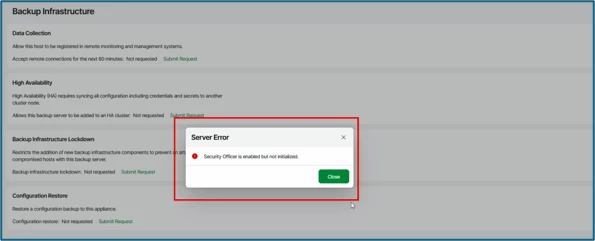
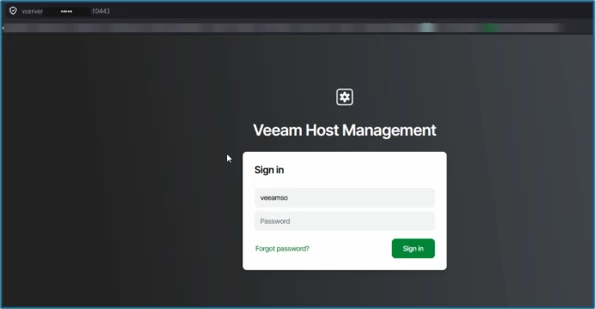
To do this, log out or open the website (port 10443) again in a new incognito tab. In this case, log in with the veeamso account.
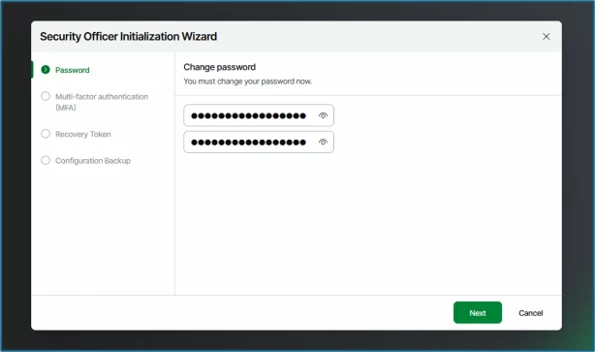
Initialize the Security Officer account and replace the initial password with a production password documented according to policy.
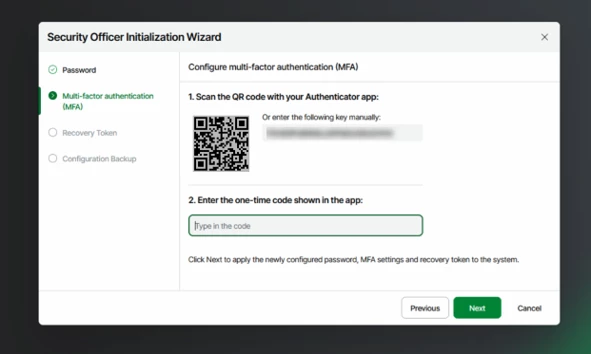
Complete the MFA setup for the Security Officer and successfully register the second factor.
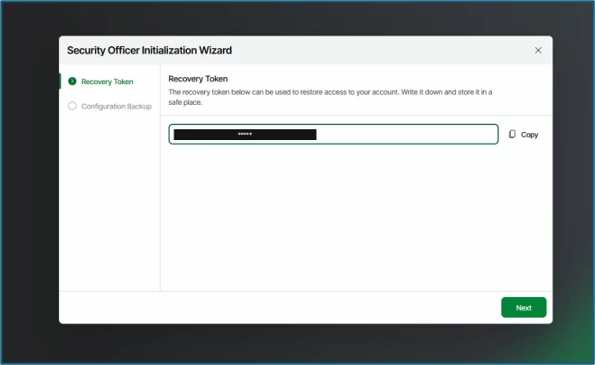
Display the recovery token and document it in a protected manner in accordance with the internal security process.
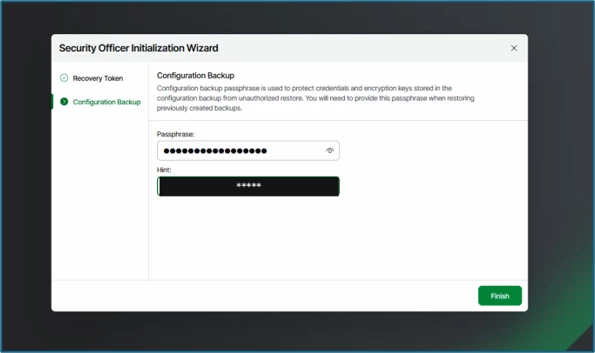
Set the configuration backup passphrase so that encrypted configuration backups can be restored.
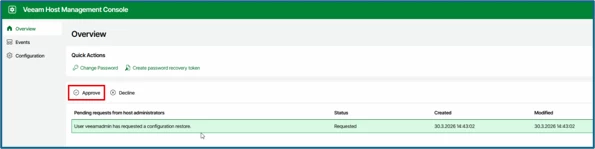
Afterwards, the restore request can be submitted again and then approved with the Veeam Security Officer account (veeamso).
Start Configuration Restore
Back in the Host Management interface (logged in as veeamadmin), the Configuration Restore can now be started.
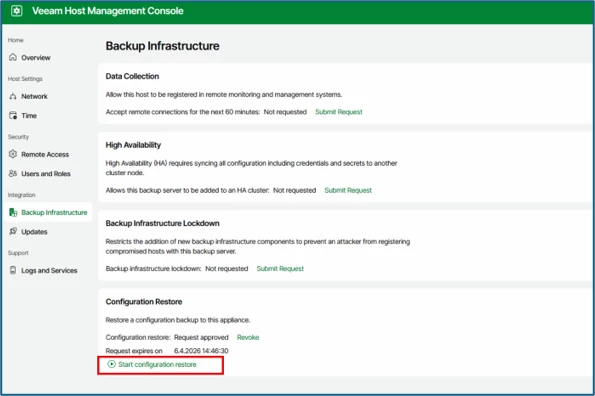
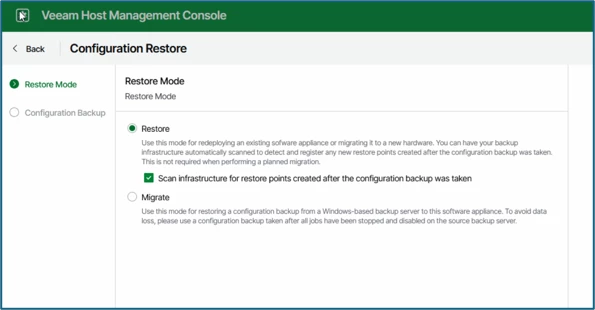
Set the Restore Mode to “Restore”, as the configuration database of the new appliance is to be restored.
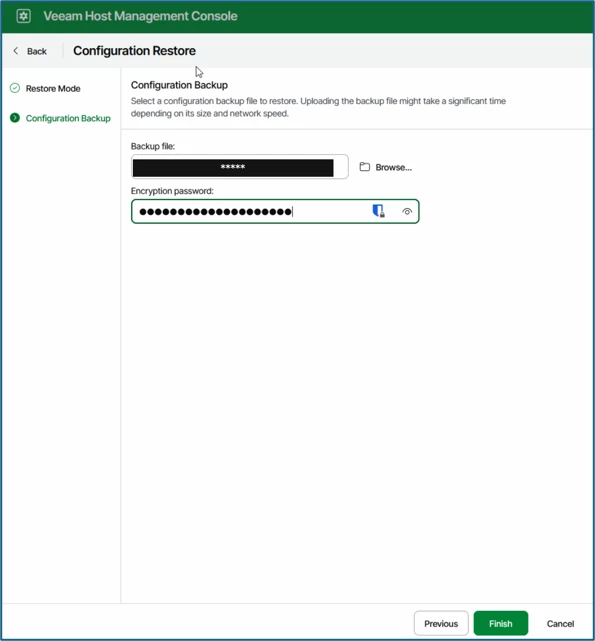
In the restore wizard, select the designated configuration backup file. Choose the current .bco file (previously downloaded via S3 Browser), enter the passphrase and start the restore wizard.
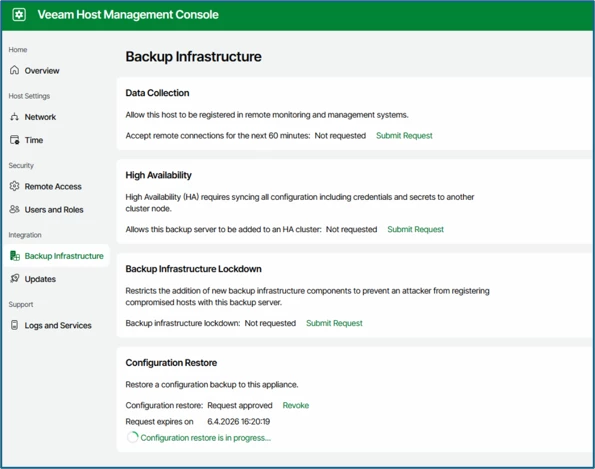
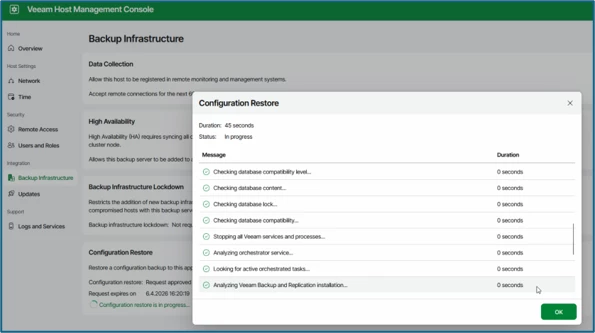
Start the restore and monitor the progress until it completes successfully.
After the restore has finished, log in to the appliance again and verify the restored Veeam configuration.
Finally, check the backup infrastructure, repositories, proxies, jobs and permissions, and document the successful restore.
Checklist – Configuration Restore
Preparation:
☐ Current configuration backup (.bco) available
☐ Backup passphrase known
☐ Veeam version of the appliance ≥ version of the configuration backup
☐ Veeam Software Appliance ISO available
☐ Appliance deployed: hostname (FQDN), IP, DNS/gateway correct
☐ Time & NTP configured correctly
☐ Access to the Host Management Console (port 10443) possible
Security Officer:
☐ Security Officer created and initialized during deployment
☐ Password changed
☐ MFA configured
☐ Recovery token documented
☐ Configuration backup passphrase set
Configuration Restore:
☐ Logged in to the Host Management Console
☐ Backup Infrastructure → Configuration Restore
☐ Restore request created
☐ Restore request approved (via veeamso)
☐ Restore Mode: Restore
☐ Current .bco file selected
☐ Passphrase entered
☐ Restore started
Completion / verification:
☐ Login to the VBR Web UI possible
☐ Backup infrastructure fully visible
☐ Repositories: Available
☐ Proxies/components correctly detected
☐ Documentation updated (version/history)