

This is part three of the blogpost. If you want to read it from the beginning, head here: SOBR Archive Tier – Explained and Configured – Part 1 of 4 | Veeam Community Resource Hub
In this part 3 of 4, I will walk you through all the things to set up for the archive tier in Azure.
How to setup the archive tier for your SOBR in Microsoft Azure
Let’s assume we already have a SOBR using a capacity tier to offload data to Azure in a specific schema. Could be either copy or move or even a combination of both to fulfill the 3-2-1 rule. A nice walkthrough of the capacity tier setup could be found e.g. here: https://jorgedelacruz.uk/2019/05/14/veeam-cloud-tier-capacity-tier-in-microsoft-azure-blob-how-to-configure-a-veeam-backup-replication-scale-out-backup-repository/
This would be our starting point to enable another shift of the already offloaded data into the cheaper archive tier.
Therefore, first of all we have to define another storage account in the correct tier level. In our example for Azure we head to Azure Portal (Home - Microsoft Azure) and there to “Storage accounts” to create a new one.
Create a storage account
Let us now walk through the recommended settings for the archive account.
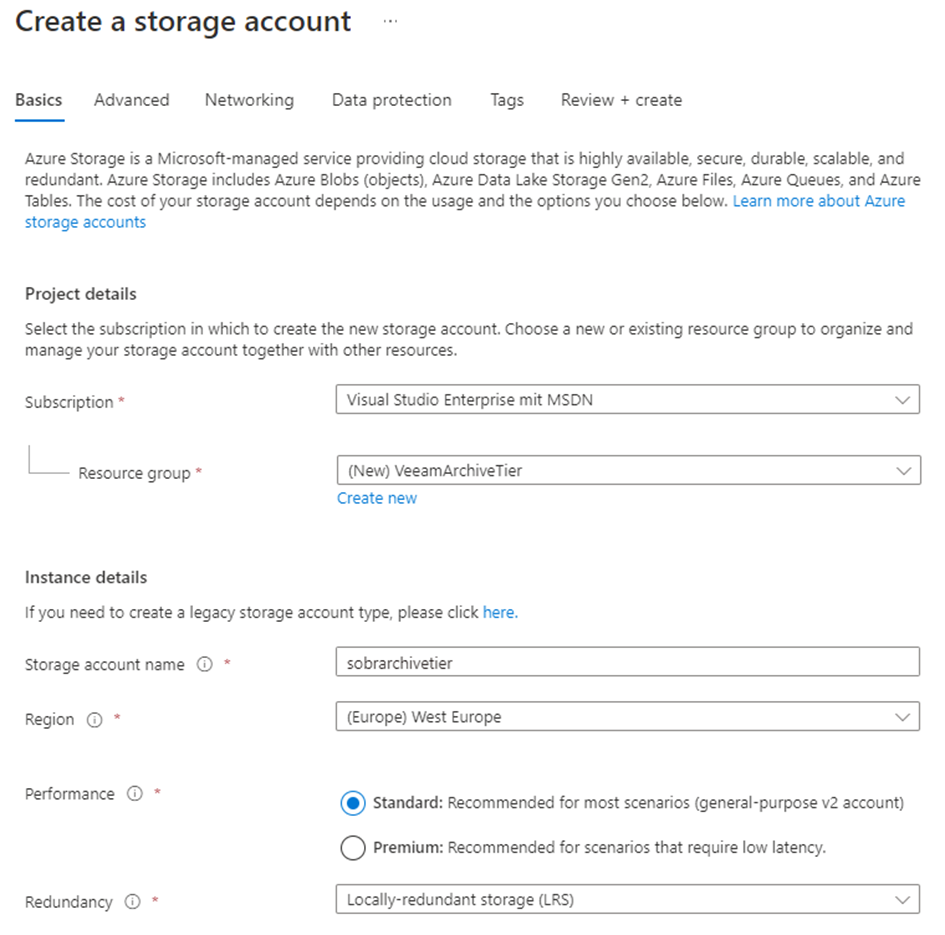
Basic settings
The account has to reside in your subscription and in an existing ressource group. You might also want to create a new ressource groupt from within the next dialog.
Then define a name for your storage account. I picked “sobrarchivetier” here. Choose the required region and your performance and redundancy level. To keep things cheap I’ve chosen “Standard” as my performance level and “LRS”. Low latency is usually not what you need for archival data and the latter setting will store the date in only a single Azure site. Usually we do not need additional redundancy here as we are already talking about at least a secondary backup.
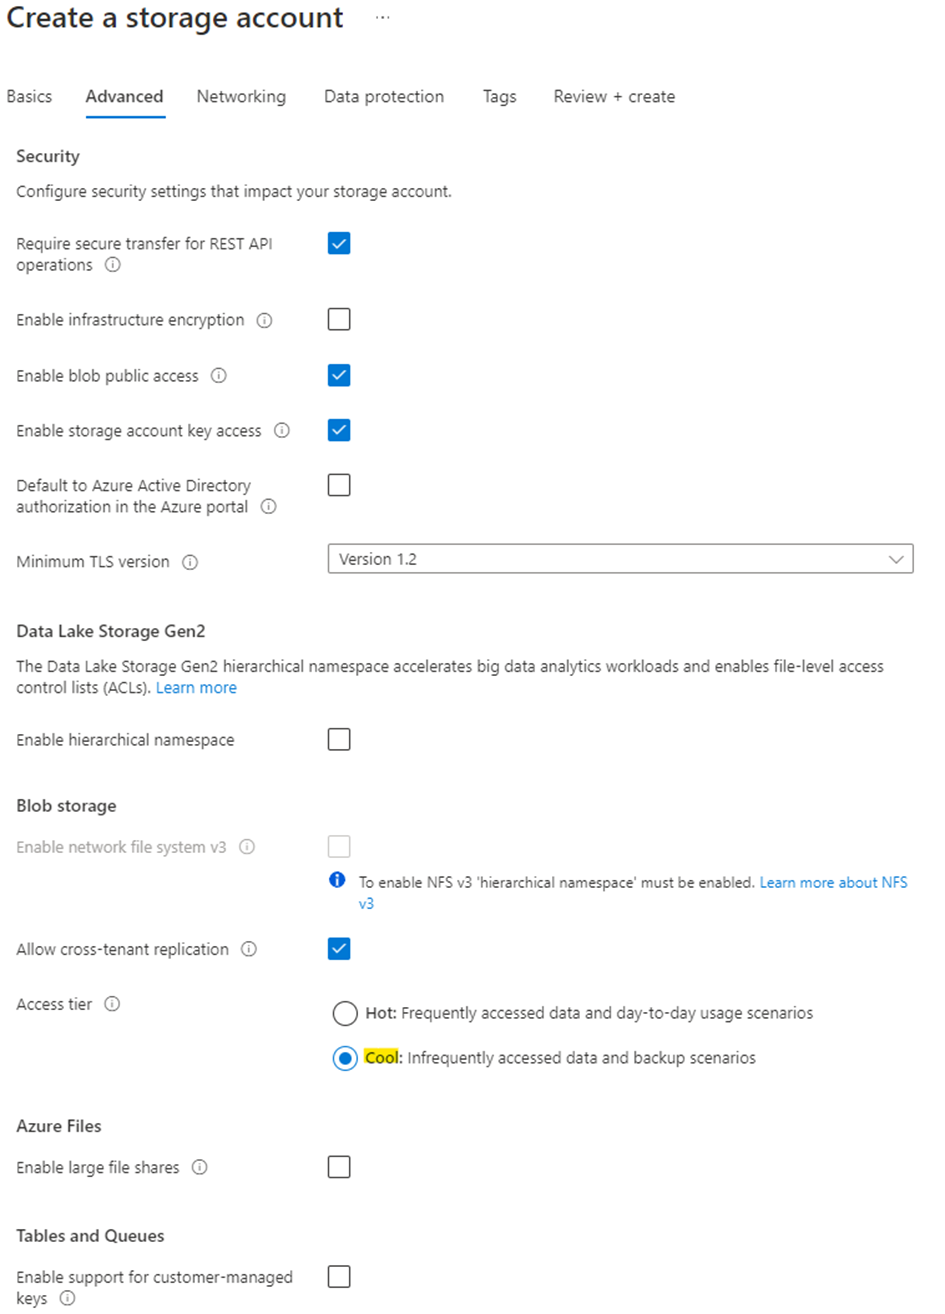
Advanced settings
Now define some additional settings for the account on the “Advanced” tab. See the screenshot for my settings. Take note that the access tier is set to “cool” here. Despite that the Veeam proxy being deployed to Azure when needed will put the data to the “archive” tier which can be classified below “cool”.
We have to enable “key access” as this is our method of authentication. As we will definitely encrypt the backup data already in our VBR environment before sending it to the cloud (AES-256), there is no further need to encrypt anything.
Networking settings
In the “Networking” tab, choose the appropriate settings for your archive account.
We have to allow for public endpoint access as we want to access the storage account from outside of Azure. Our VBR instance has to be able to login to it. You might want to restrict it to specific networks for security reasons here.

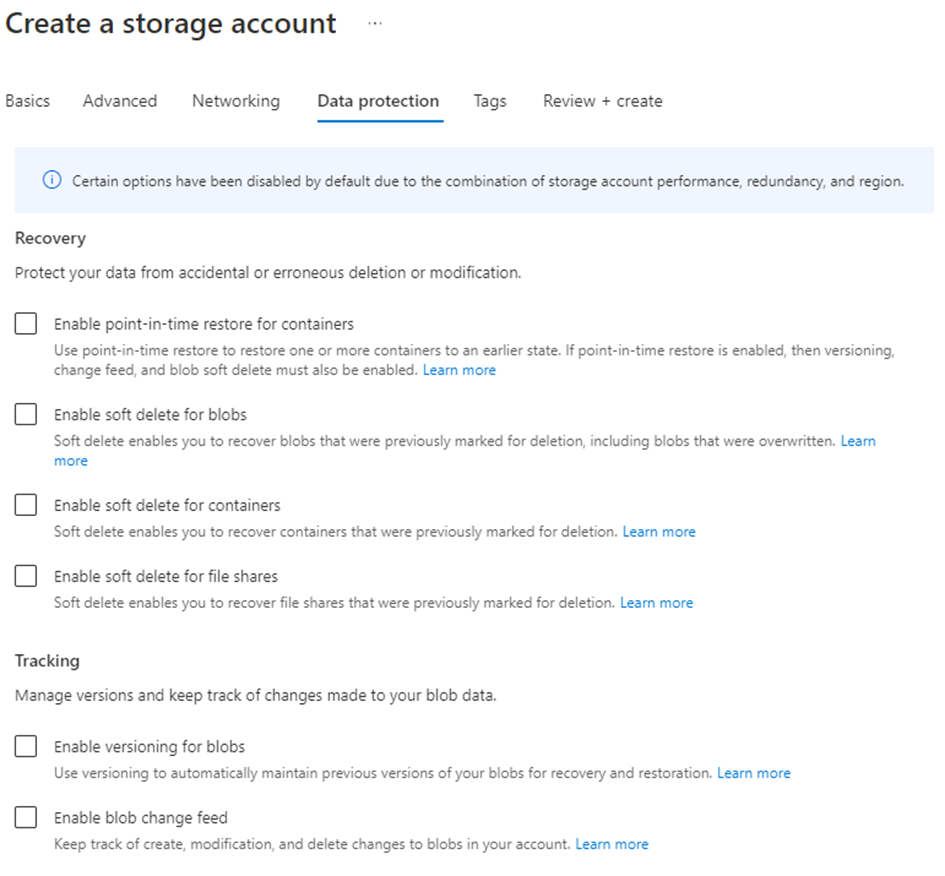
Data protection settings
No checkboxes are needed within the “Data protection” tab. Immutability options are currently not supported with Azure in Veeam V11a. This will change in V12.
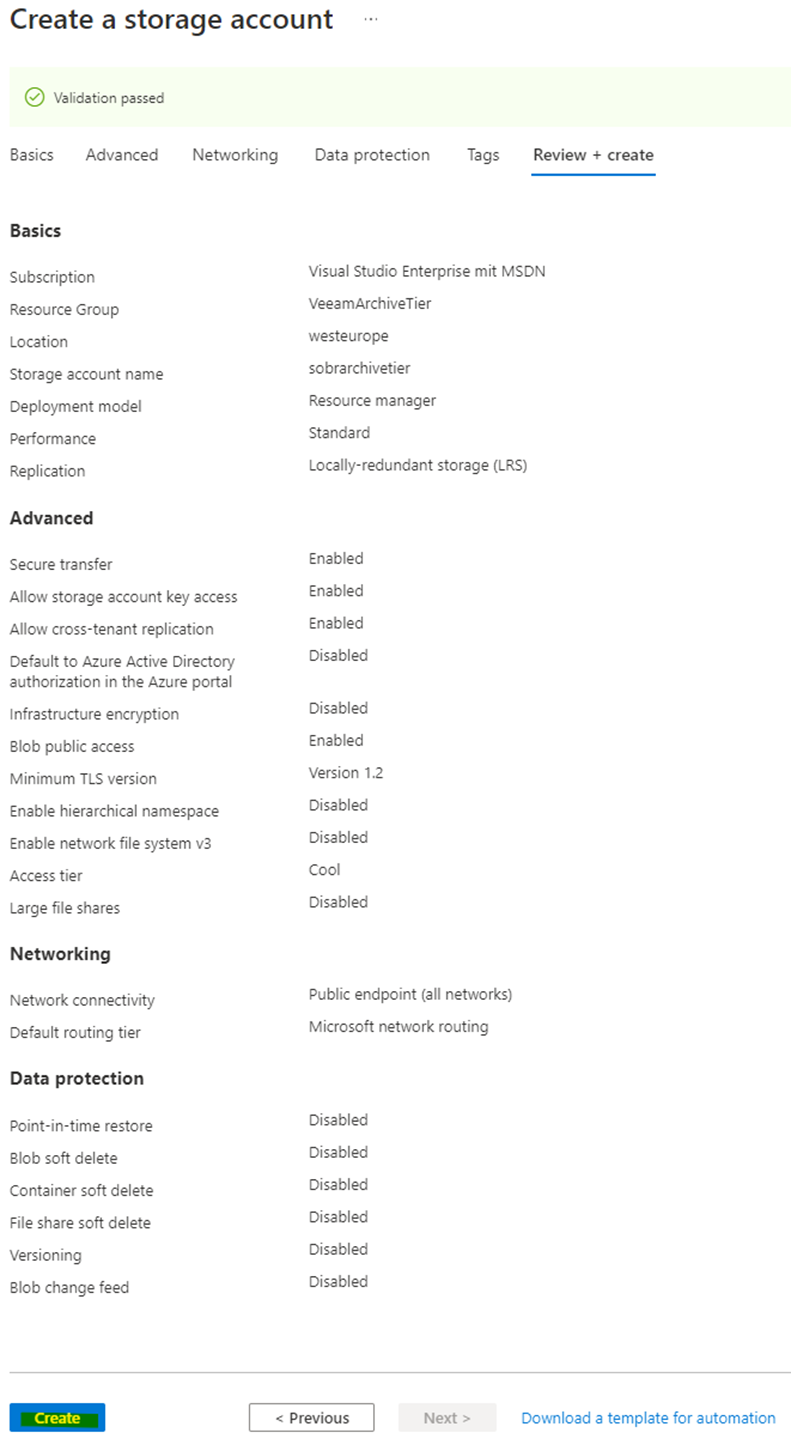
Review settings
On the next tab we can review our settings and finally create the account.
Create a container inside our new account
Once our storage account is ready, we have to generate a container for data storage inside.
Head to “Containers” and create a container.
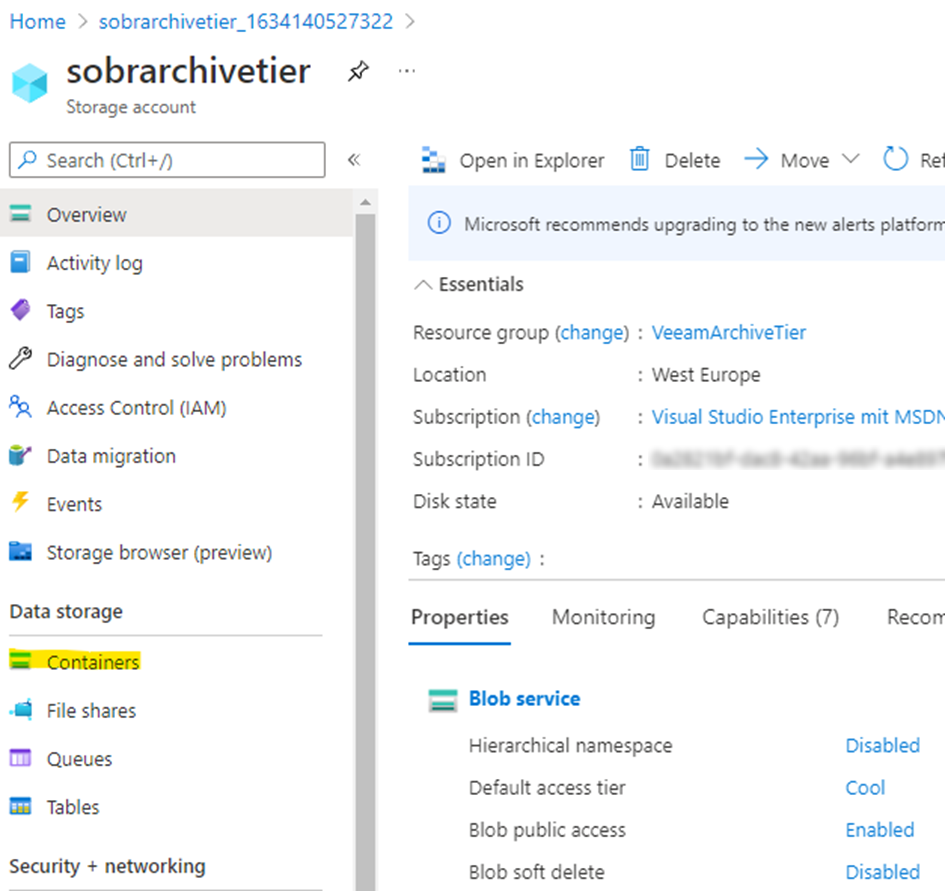
I named it “archivetier” in my example. Here make sure not to allow for anonymous access… 😉

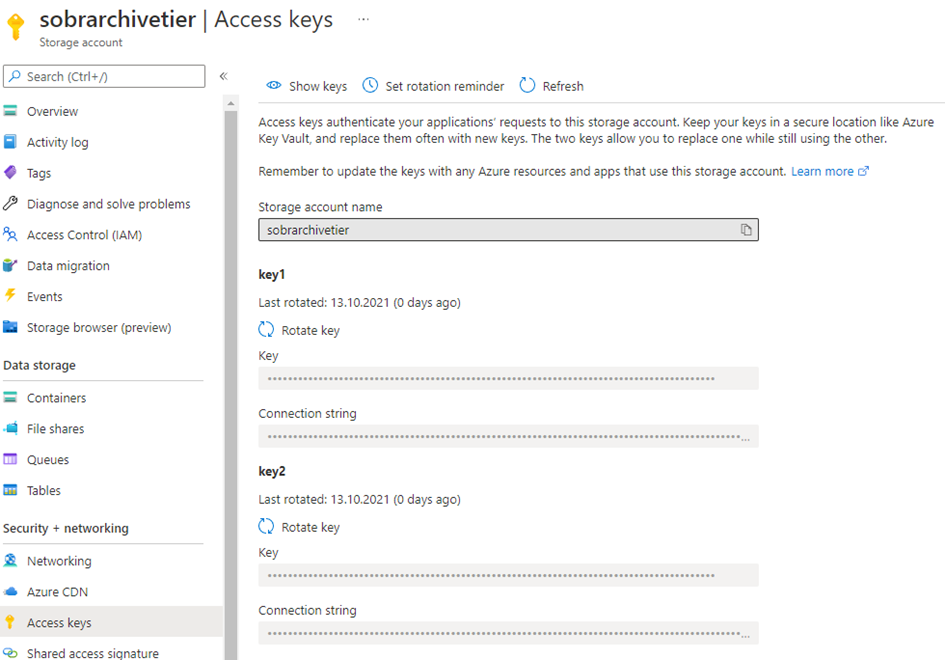
Fetch access keys for the account
As with the capacity tier, we need to grab access keys to enable Veeam to access the storage account. Head to access keys, show and copy key and connection string of either key 1 or key 2. We have two key sets here to be able to change a key without losing connection from the systems accessing concurrently. So, we can move dependent systems one by one when changing the key structure.
Now it’s time to create the new object storage inside your VBR console.
We will dig into this in the last part of my blog post. Stay tuned! 😎
