Background
With the recent release of Veeam Backup for Microsoft 365 (VB365) v8 there were several awesome additions to how VB365 proxies work. Scalable performance and high availability are now built in with the introduction of Proxy Pools and a the NATs queue that manages the processing of proxy tasks. We can now add or remove proxies from a proxy pool during backup processing and the queue will redistribute any remaining tasks among the active proxies. This opens the door for some dynamic proxy automation to either conserve resources while backups are not being processed or to reduce costs by setting systems to a deallocated state when unnecessary.
This lead to a discussion between Tyson Fewins and I about how we could potentially pave the way, or at least point in the right direction, for our customers to take advantage of this opportunity. We decided to start with a simple idea of automating proxy power state to have proxies come online when needed and take them offline when they are no longer needed. The ultimate goal for us is the cost reductions that could be found by deallocating the proxies used by VB365 when deployed in the Public Cloud (Azure or AWS).
To kick things off, Tyson built the underlying code for automation operations within a VMware environment. While he did this, I focused on building out a workable Azure implementation to then convert his code to an Azure environment that worked to specifically reduce the cost of proxy components necessary to protect VB365 at scale. Once Tyson was confident in his code, he and I worked together to retro fit it for an Azure environment. There were several things we had to do both within Azure as well as within the code in order to make things work, but we're now ready to share our Azure automation script.
You can find the Script referenced throughout this blog post at: https://github.com/VeeamHub/powershell/tree/master/VBO-ProxyAutomation/Azure
How the Proxy Automation works
Since there is no pre or post job options in VB365, the script is designed to run at intervals and check for running job sessions. If a running job session if identified, the proxy automation will launch and the script will then monitor the running session waiting for its completion. The proxy automation tasks are launched as background PowerShell jobs so that we can process multiple proxies in parallel. When the running job session is completed the script will run a check again for a timeout period to make sure that we do not stop the proxies if another job is running or starts within the timeout period. Then we will revert the proxy changes by applying maintenance mode and powering off any proxies that we designate for automation.
Since we are using Azure VMs as our proxies, the script uses Azure PowerShell to check and modify the VM power states.
Here is the high-level flow of the script logic:
- Start
- Initialize Parameters
- Define Azure Subscription to connect to, check time, buffer time, output file path, proxy pool name, and proxy VM information.
- Check for Running VBO Job Sessions
- Use GetVBOSession to check for running sessions within the specified CheckTime.
- If Running Job Found:
- Start VBO proxies if needed (using StartVBOProxies).
- Monitor the VBO job session until completion (using MonitorVBOSession).
- If No Running Job Found:
- Check VBO proxy states (using CheckVBOProxies).
- This will check proxy maintenance mode and power states and change as needed.
- Check VBO proxy states (using CheckVBOProxies).
- Stop Additional Proxies (if needed):
- If any "Auto" proxies were started, stop them (using StopVBOProxies).
- Initialize Parameters
- End
To run the script at intervals, we use a Windows scheduled task on the VB365 server to manage the script execution and to relaunch it daily in case of any errors or reboots, etc.
Configuration
Requirements
- Veeam Backup for Microsoft 365 v8.0 or higher
- Azure PowerShell must be installed on the VB365 server for the script to function & communicate with Azure
- We will be leveraging Managed Identities so we should only need the Subscription ID for authentication with Azure
- https://learn.microsoft.com/en-us/powershell/azure/new-azureps-module-az?view=azps-12.4.0
- The specific modules utilized:
- Az.Accounts
- Az.Compute
Preparation Work
In order for the script to function there is a bit of ground work that needs to be done as well as a few Azure concepts to consider.
- First, this script functions off of the use of Azure VMs that you will need to create within Azure all within the same resource group (we recommend a dedicated resource group)
- Create the VMs that will act as proxies within Azure
- We recommend one very small VM (this will be the primary) and then the other VMs to be the size/scale necessary to support your environment.
- This is specifically to reduce overhead/costs as a proxy must be powered on/running in order for the jobs to have a schedule or to run.
- Add the VMs to the VB365 Server as Proxies
- Add the Proxies to a Proxy pool (new feature of VB365 v8).
- Note The Script will leverage the use of the Deallocated state within Azure
- This means that you won't be charged for the compute resources of the proxies
- Azure does still charge for capacity of deallocated VMs though but proxies should be small
- The script does support both Windows and Linux proxies in VB365 as well! If you need help with these steps, please see the below:
- Backup Proxy Servers: https://helpcenter.veeam.com/docs/vbo365/guide/vbo_backup_proxy_servers.html?ver=80
- Backup Proxy Pools: https://helpcenter.veeam.com/docs/vbo365/guide/vbo_proxy_pools.html?ver=80
- Create the VMs that will act as proxies within Azure
- Second, we designed the script to run on the VB365 server
- That means for it to connect to Azure, and perform the different commands necessary on the proxy VMs, you will need to configure the VB365 server as a System-Assigned Managed Identity.
- The reason for this is that it provides a granular control on what the VB365 server can do and what it can do it against.
- This is why you need each proxy to be created in the same resource group within Azure.
- For more information on Managed Identities please see the below.
- What are managed Identities for Azure resources: https://learn.microsoft.com/en-us/entra/identity/managed-identities-azure-resources/overview
Configuring Azure Managed Identities
Lets run through how to set up a Managed Identity for your Veeam Backup for Microsoft 365 Server
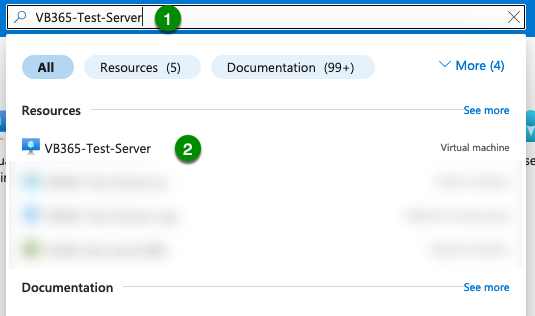
- From your Azure Subscription that you are running VB365 in, search for the VB365 Server:
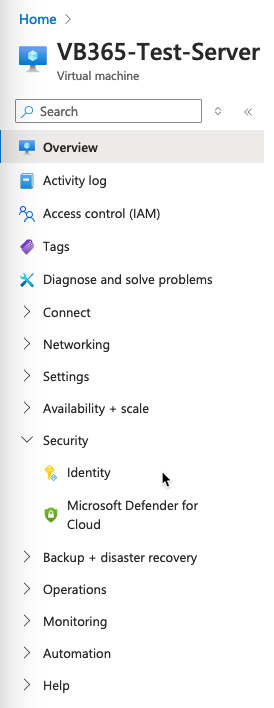
- Once Here, Navigate to the Security section and select Identity:
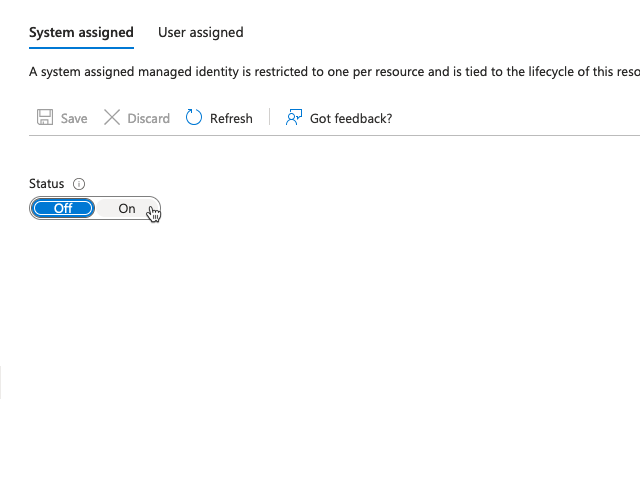
- Once here, toggle the status from off to On. Note that this will register the system within EntraID:
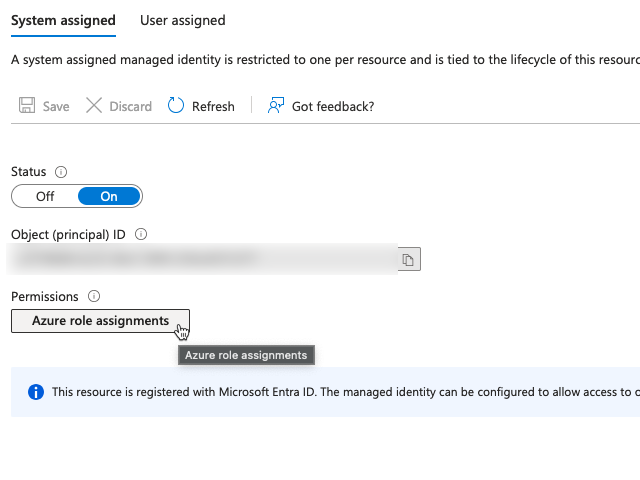
- Once enabled you will be able to define Azure Role Assignments which will dictate what resources the Managed Identity has access to, and what operations the Managed identity can perform against those objects.
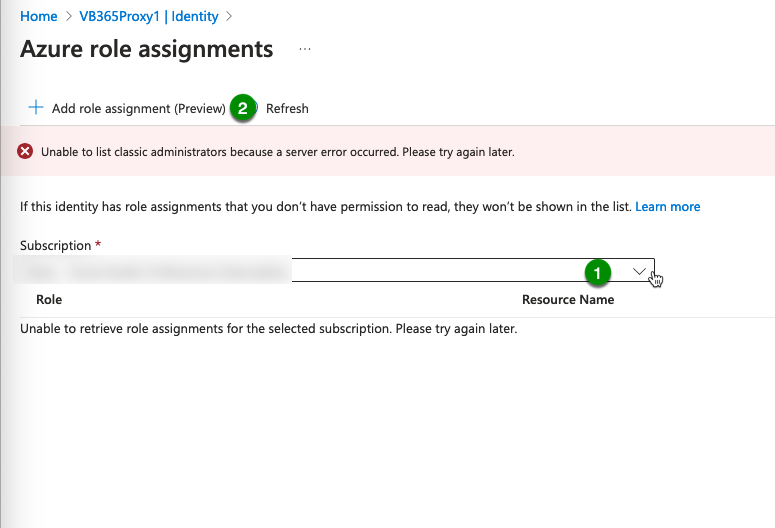
Select Azure Role Assignment:
- Make sure you’re operating within the correct Subscription, and then select the Add role assignment (preview) option:
- From here, you’re going to want to define the Scope, which we’ll be selecting Resource Group, followed by the specific resource group that your proxies were deployed into.
Finally we’ll be selecting the role Virtual Machine Contributor and then we’ll save that:
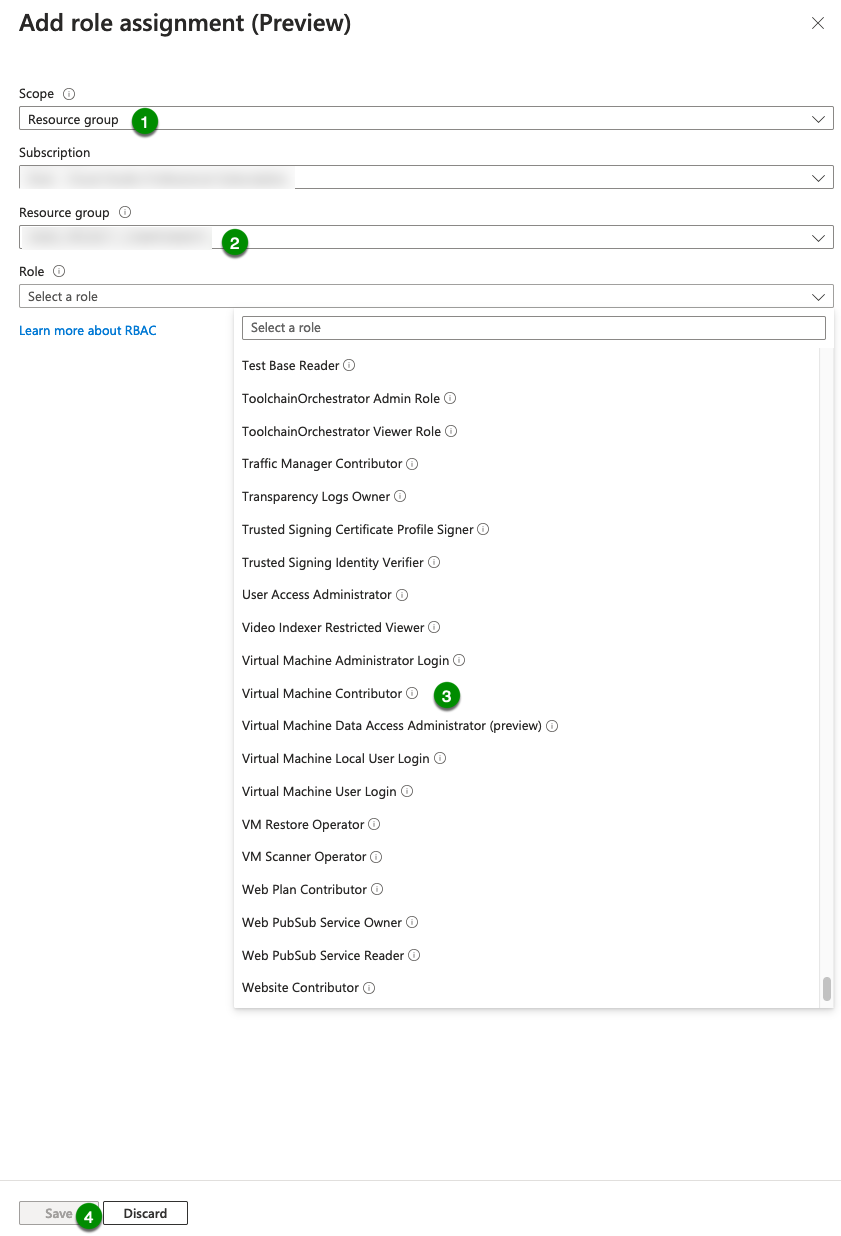
Note: If more granular control is required you can create a custom role that has only the Power On and Power Off permissions for those systems.
Modify the Script parameters
You will need to either download or copy the script and place it on the VB365 server.
- You can find the Azure Automation script here: https://github.com/VeeamHub/powershell/tree/master/VBO-ProxyAutomation/Azure
The script has several parameters that will need to be modified to work in your environment
- The required variables that will need to be configured are as follows:
- Azure Subscription ID
- Output (log) file location
- Proxy pool name
- Proxy Identification information found in $VBOAutomatedProxies array
- Note*: You will find these variables at the top of the script under the “** Parameters **” comment heading. Anything found below the “** Functions **” heading should not need to be modified
- Note**: The script is commented with explanations of each variable and property that needs to be added
- Note***: The $CheckTime and BufferTime variables can be left with the defaults or be modified as desired, however if you do modify these values, you will have different configuration parameters for the next step.
 #   ** Parameters **

# Time, in minutes, to run GetVBOSession (will check for running jobs every 30 seconds for the duration specified)
$CheckTime = 4

# Time, in minutes, to check for additional sessions before ending
$BufferTime = 1

# Filepath for logging - Valid path on the VB365 Server
$OutputFile = "<String>" # Ex. C:\Path\to\file.log

# Name of proxy pool to be automated
$ProxyPoolName = "<String>"


#Azure Subscription ID and Resource Group that the VB365 & Proxy Servers reside in
$Subscription = "<String>"

<#
List of Proxy VM attributes used to manage proxy power and maintenance mode operations
    ProxyVMName:
        Name of the VM in Azure
    ProxyVMIPv4:
        The local IPv4 address of the proxy (potentially used to add proxy to VBO)
    ProxyMode:
        Set which proxy is to stay online ('Primary') and which are to be stopped after jobs complete ('Auto')
    ProxyBootTime:
        Sets the wait time (in seconds) after starting the VM for the guest OS to be up before sending proxy commands
    PoxyUserName:
        Windows- Start a local account username with "`.\" The period must be escaped with a back tick character. Domain account can use "domain\username" format.
        Linux - no domain needed
    ProxyUserPass:
        Password string
    ProxyRootPass:
        Root password string which may be required for Linux proxies.
#>
$VBOAutomatedProxies = @(
    [PSCustomObject]@{
        ProxyVMName = "<String>";
        ProxyVMIPv4 = "<String>";
        ProxyMode = "Primay";
        ProxyOS = "<Windows/Linux>";
        ProxyBootTime = 120;
        ProxyUserName = '<String>';
        ProxyUserPass = '<String>';
        ProxyRootPass = '<String>'
    }
    [PSCustomObject]@{
        ProxyVMName = "<String>";
        ProxyVMIPv4 = "<String>";
        ProxyMode = "Auto";
        ProxyOS =  "<Windows/Linux>";
        ProxyBootTime = 120;
        ProxyUserName = '<String>';
        ProxyUserPass = '<String>';
        ProxyRootPass = '<String>'
    }
)
Create a Scheduled Task
There are multiple methods available to run this script but for this scenario Tyson and I landed on just leveraging a simple Windows Scheduled Task on the VB365 Server. To make sure this is implemented correctly for how we need it to function with the script parameters, the below guide will make sure you get it configured appropriately.
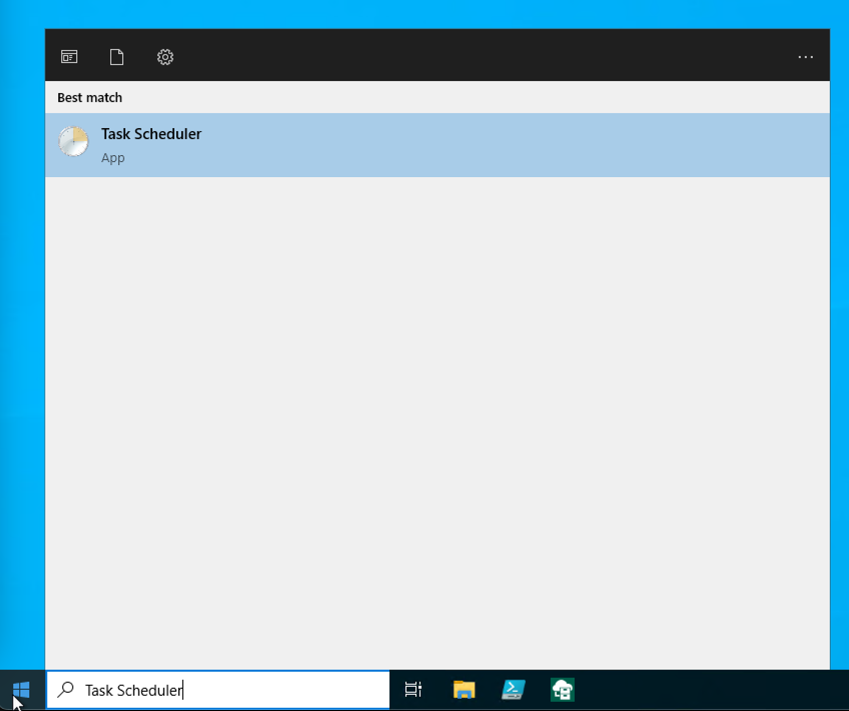
- Click on your start menu within your VB365 server and search for Task Scheduler:
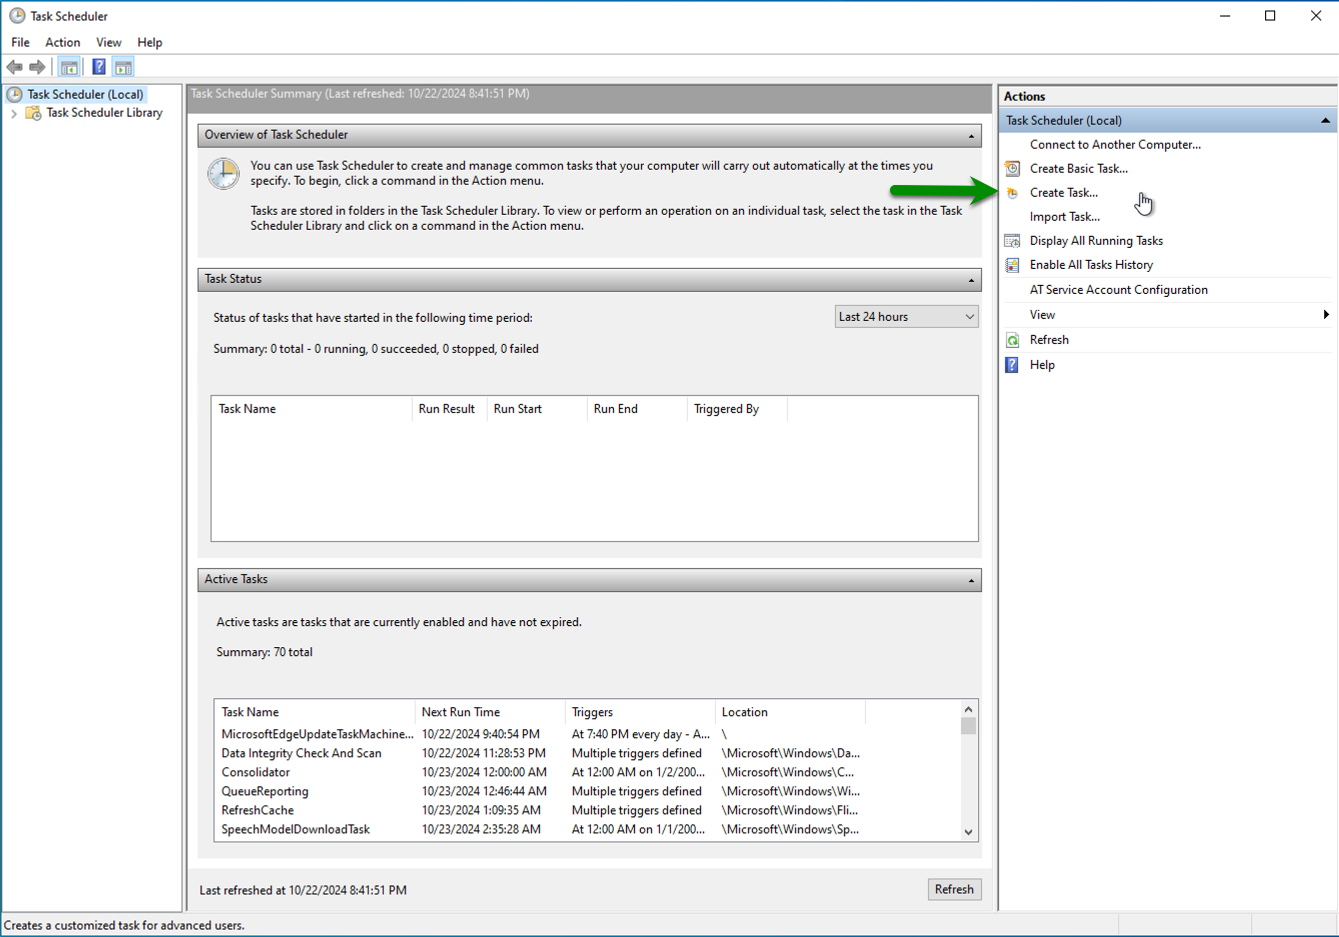
- Select Create Task:
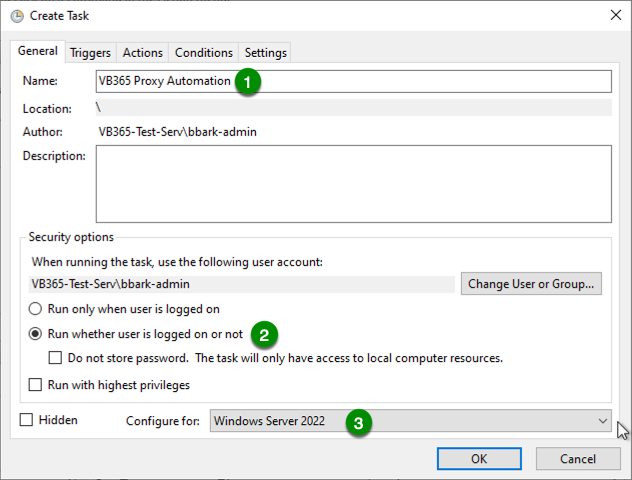
- Define the Name of the task and set the task to “Run whether user is logged on or not” and change Configure for: to your OS:
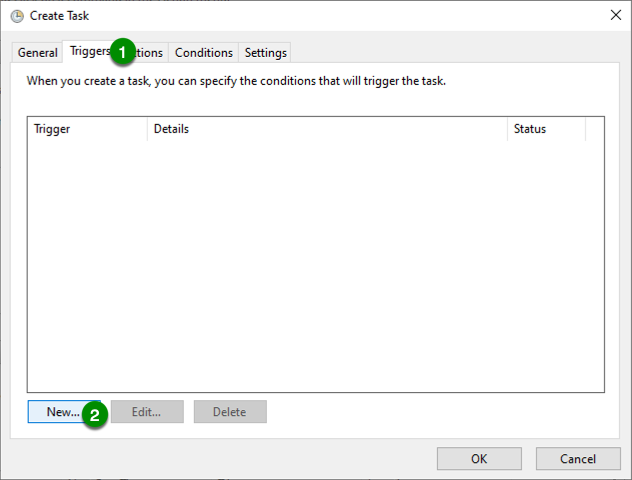
- After Setting these options, click on Triggers and then select New...:
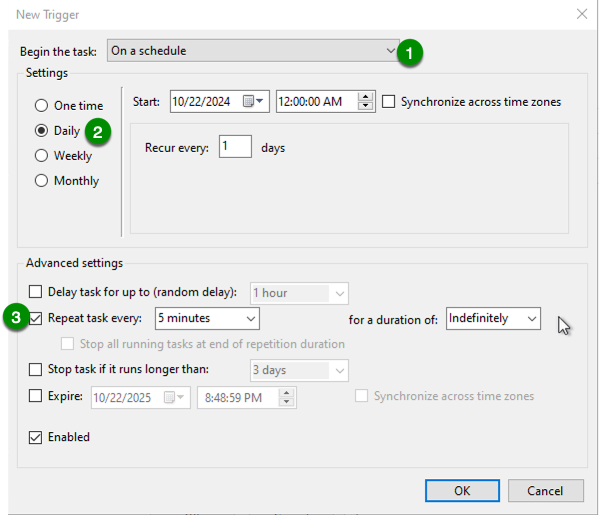
- For the new trigger, we will set it to run daily (I choose at midnight), and then have it repeat the task every 5 minutes for a duration of indefinitely:
Note: The frequency of repeating the task should be slightly higher than your $CheckTime parameter.
- With the Trigger created, we’ll now select Actions followed by New...:
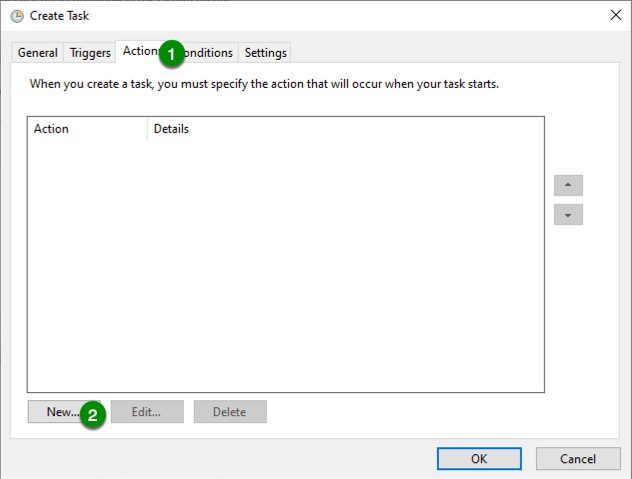
- For the New Action, we’ll be starting a program and running it with an argument.
You will need to specify your program and argument as the following:- Program/script: powershell.exe
- Argument: -ExecutionPolicy Bypass -File "<C:\Path\To\File.ps1>
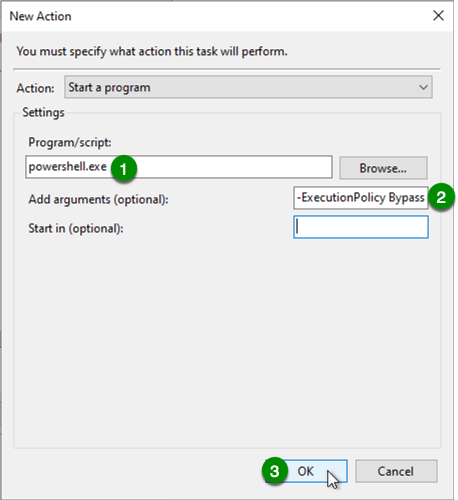
- Leave the remaining options as default, and click Ok:
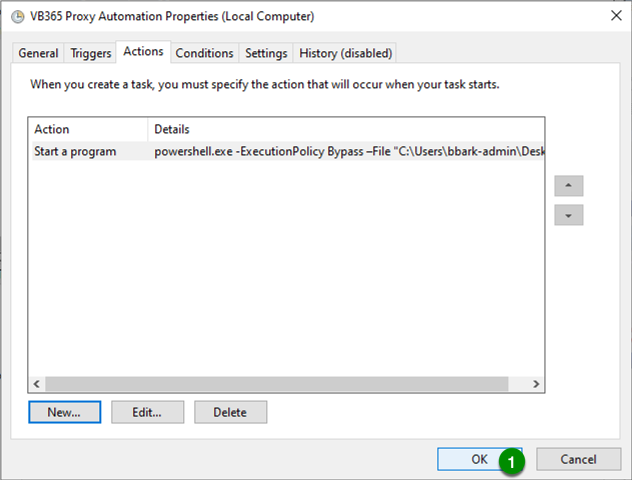
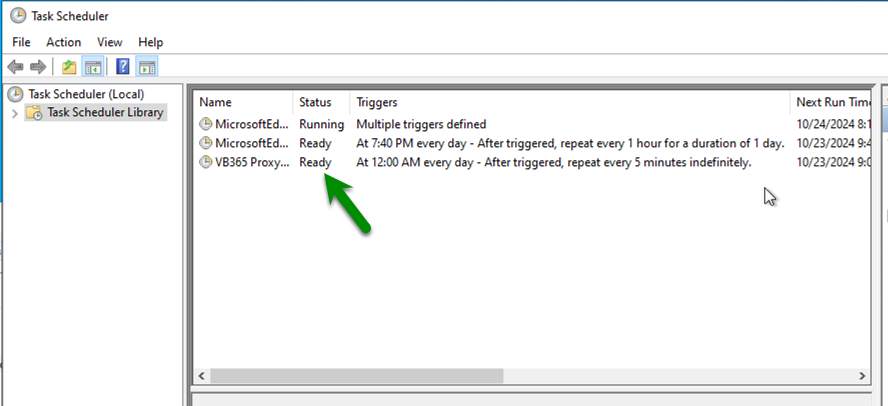
- Note: Verify that your scheduled task is set to enabled and listed as Ready you can then start the task manually or wait for it’s next scheduled start:
Monitoring
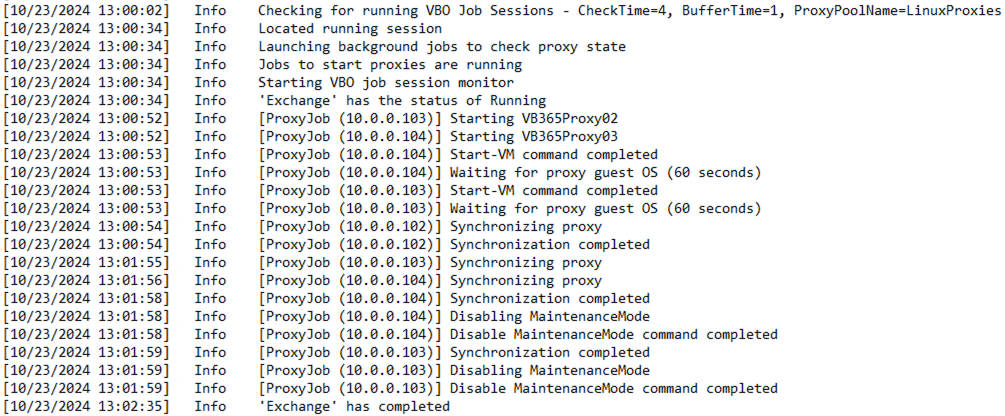
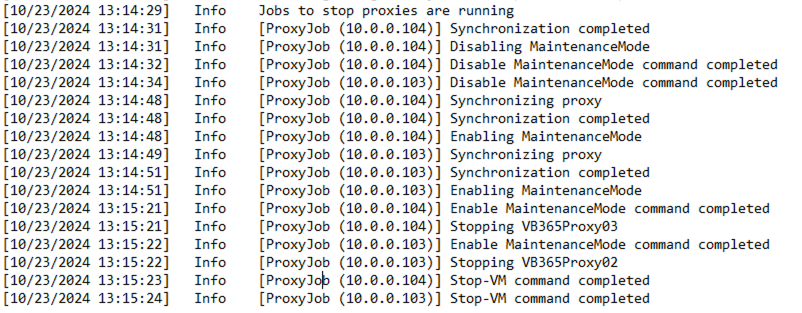
The script has been designed to log throughout it’s execution. It will write these logs to the log file that you designated in the script parameters. Here are some example excerpts from the script execution:
- Running job session found and automation launched:
- Rechecking for additional jobs:

- Once all jobs are completed automate proxy power states again:
Troubleshooting
There is some "Self-healing" built into the script to try and correct potential manual changes to the proxies or if a failure occurs during a previous run. So some errors or warnings encountered in the logging can be resolved without intervention. However, if some troubleshooting is needed the logs should show you where in the execution any failures occurred.
Conclusion
This concludes our “How To” guide on performing Azure proxy automation tasks with VB365. It’s worth noting that this script is, again, a proof of concept on what is possible at a baseline. As such you should now be able to incorporate some level of proxy automation into your VB365 implementation by using it, though you could always look into your own forms of proxy automation (Like with an auto-scale set for example). Below are just a few key considerations to keep in mind if you do chose to use this script or look into your won forms of automation:
- Veeam Backup for Microsoft 365 v8 introduces new scalability tools via Proxy Pools and through the NATs Queue handling proxy task scheduling
- Proxies that are added to Veeam Backup for Microsoft 365 can now be dynamically added to proxy pools
- Add proxy to a proxy pool without stopping/interrupting already running jobs
- Subscription to the NATs Queue is handled via maintenance status of Proxies
- Enable Maintenance mode on proxies before powering them off or removing them
- Proxies must be powered on to change the maintenance mode state
- A single proxy within a proxy pool must be powered on with maintenance mode disabled otherwise jobs will be in a disabled state
Please let Tyson and I know if you play with the script and your results! We might need to refine things further or add additional notes/disclaimers.


