With Microsoft releasing Windows Server 2022, Veeam have delivered support for this in Veeam B&R and Veeam ONE v11a. This includes support not just for protecting Hyper-V VMs on the OS, or guest OS support, but also running all the relevant Veeam Components and services on Windows Server 2022. This is truly a great milestone that Veeam have achieved so promptly after the release of this operating system.
There’s more to this story however, Veeam currently ships with SQL Server 2016 Express edition as its default database if you don’t choose to install your own first. This will leave you in an unsupported state with Microsoft as only SQL Server editions still within mainstream support are supported for Windows Server 2022, for SQL Server 2016, mainstream support ended in July 2021.
Now we know the danger, we’ve got two topics to discuss up again, firstly, how do we install a supported version of SQL Server for Veeam? And secondly, what do I do if I’m running SQL Server 2016 on Windows Server 2022 for my Veeam environment? In part one we’ll be looking at how to deploy a fresh instance of SQL Server for our new environment.
SQL Server 2019 Setup
I’ve chosen SQL Server 2019 as our preferred SQL Server edition purely because it is newer, and you’ll remain in support for longer which is a perfect pairing for your new operating system! As Veeam defaults with the Express edition, this is the edition I’ll be choosing to install, to help those without the requirement to utilise a high edition of SQL Server.
To begin, download the SQL Server 2019 Express Edition from here. You’ll want to pair this download with the latest update available for SQL Server from here.
Installing SQL Server 2019
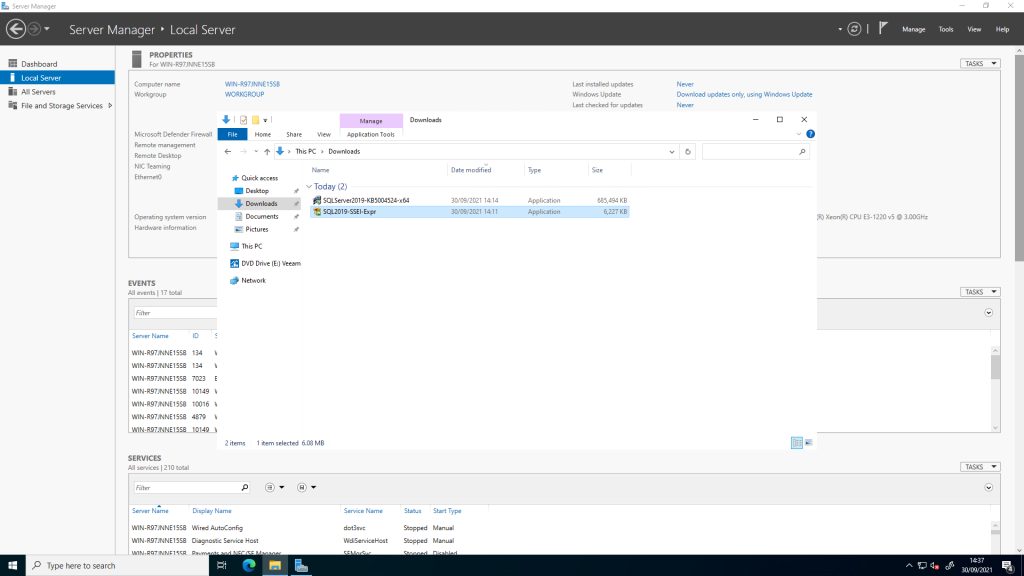
Lets start by running the SQL Server 2019 Express Edition Setup executable.

Make sure to use custom installation mode, basic mode will not allow you to name your database instance, choose where you wish to place the instance, nor will it let you specify the accounts that require sysadmin privileges to the database, forcing you to use tools such as SSMS or SQLCMD later to make the appropriate changes.
After selecting the “Custom” installation mode you’ll be asked where you want to download the SQL Express edition media.

Once downloaded we’ll be prompted to choose our required task, we want to deploy a new SQL Server instance, so we’ll choose “New SQL Server stand alone installation or add features to an existing installation”

We’ll then be prompted to accept to license terms (I’m sure I can trust you all to read these thoroughly).
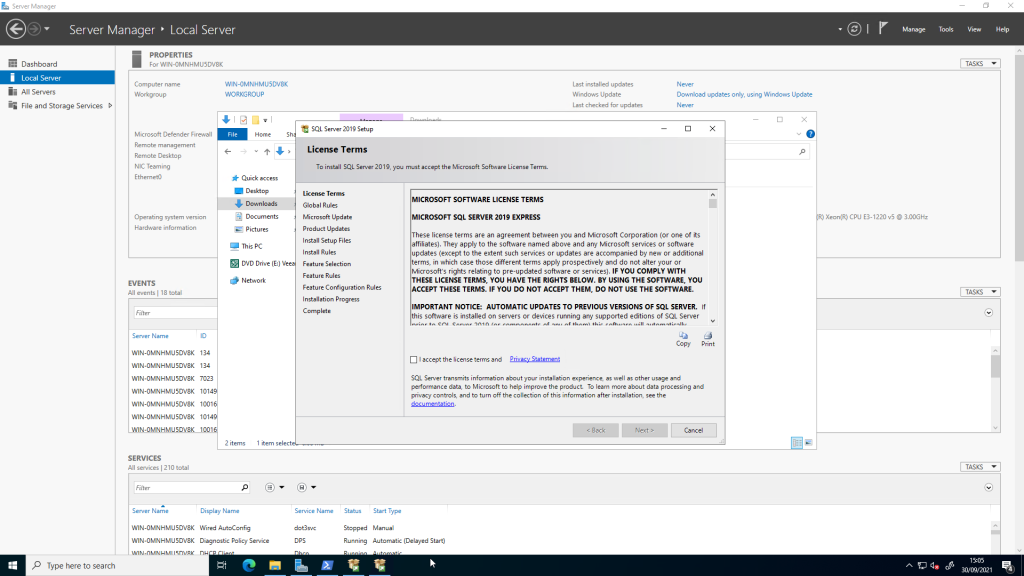
You’ll then be asked if you wish to enable Microsoft Update, this doesn’t circumvent our need to install the SQL Server CU, but it does sometimes help deliver SQL Server security updates.

Once you optionally agree to Microsoft Update you’ll then be able to see the core installation files being installed.
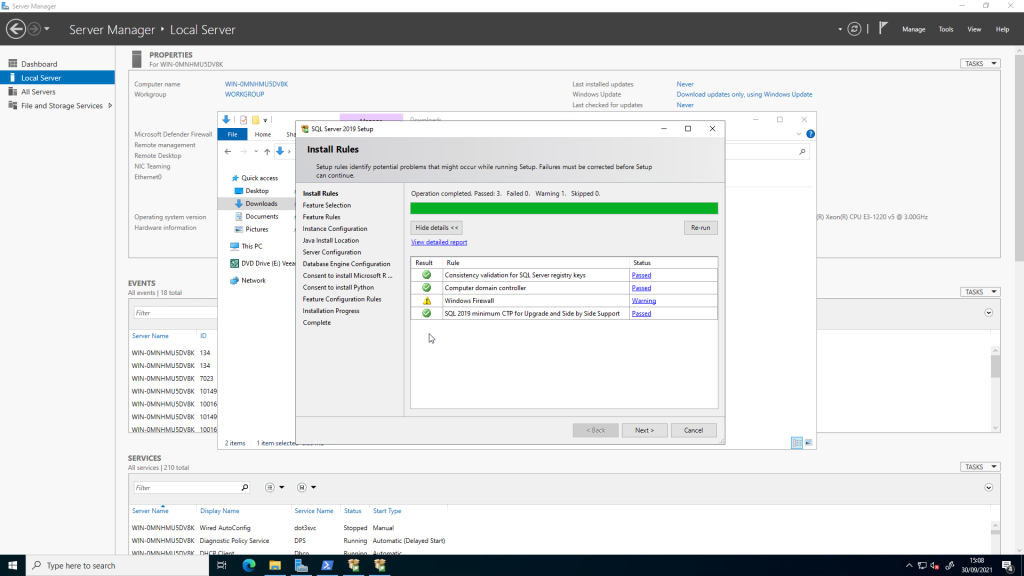
Afterwards you’ll see SQL Server performs an install rule check, to ensure that the SQL Server is being installed in a supported state without any known issues, I have a warning that I have Windows Firewall enabled, in my scenario I’m installing SQL Server Express edition onto the same VM, if you’re installing it elsewhere, be sure to enable connections to TCP port 1433 from the IP address(es) of your Veeam B&R or Veeam ONE servers.
We’ll then be asked what features to install, by default it wants to install a huge amount of features that aren’t required. You only require “Database Engine Services” itself, not the child options such as SQL Server Replication or the Machine Learning Services and Language Extensions. Leave the shared features as default.

At this point you can also choose to install the instance root or shared feature directories to different locations. It is generally recommended to deploy SQL Server databases to their own dedicated disks (with the database files and log files on separate drives to each other, but that’s configured later).
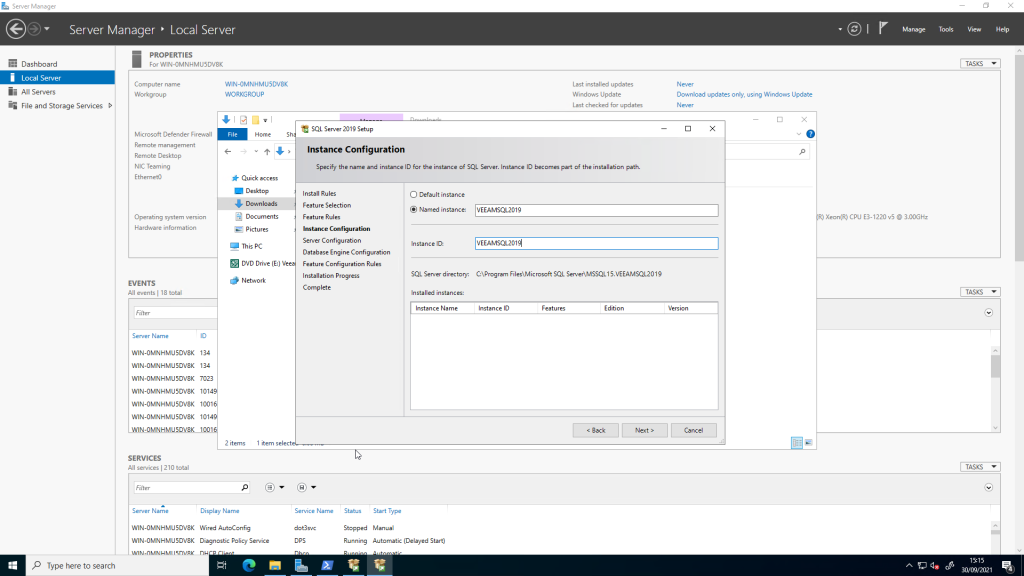
Now, the moment you’ve been waiting for, naming the instance! I’ve chosen “VEEAMSQL2019” to best match how Veeam name their instances by default, no ambiguous characters or funny business, it’s simple and to the point!
Under server configuration we can then define any service accounts we wish to run our services under, as this is a workgroup VM, I’ll leave this as NT Service.

Within the database engine configuration section, we can specify the accounts we wish to have SQL Server administrator access (sysadmin). We can also specify whether we want Windows Authentication mode only or mixed mode (whereby we can create SQL Server only accounts for database access).
You’ll typically require only Windows Authentication mode if you’re using dedicated service accounts, but if you’re using NT service accounts like me in this lab, you’ll want to use mixed mode. If you discover down the line you require mixed mode, it’s possible to change this at a later date, though this is out of the scope of this guide.
In this section you can also specify where to set your database, log and backup directories under the “Data Directories” tab and TempDB database and log directories within the TempDB tab.


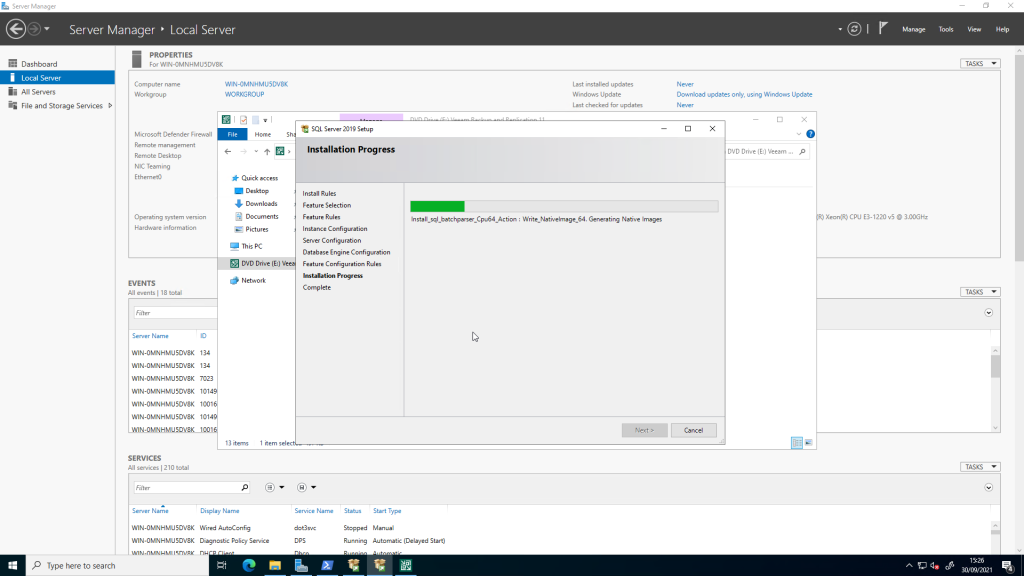
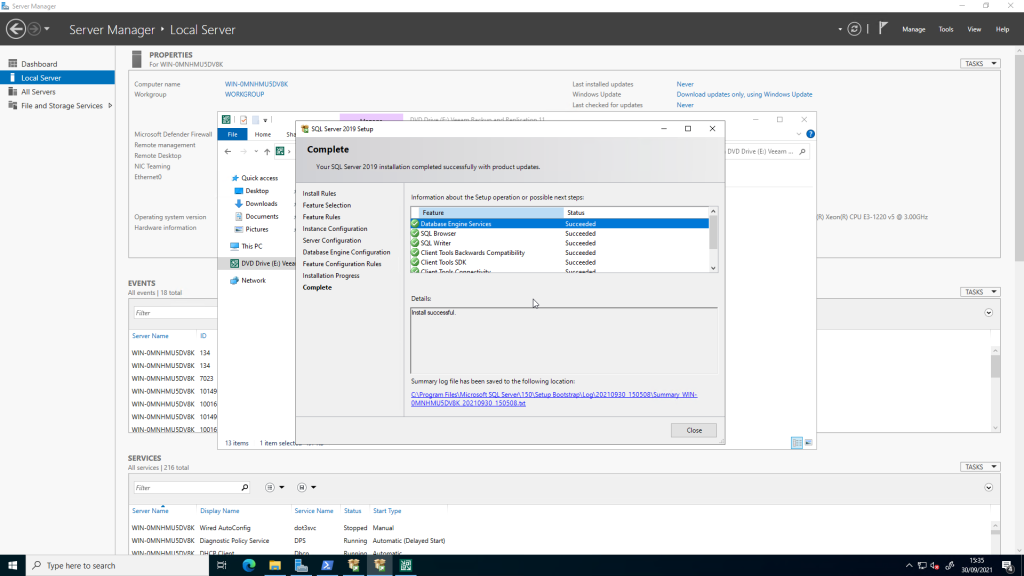
Finally unless you installed additional features that require configuration, the installer will skip over the “Feature Configuration Rules” section and jump straight into installation progress. Wait for this to finish and you have SQL Server 2019 installed!
Patching SQL Server 2019
Now we have SQL Server 2019 installed, we need to upgrade to the latest CU to fix some of the numerous patches that SQL Server 2019 shipped with. To begin we start the executable for the latest CU that we downloaded earlier.
Once it unpacks, we’ll need to accept the license terms once more.

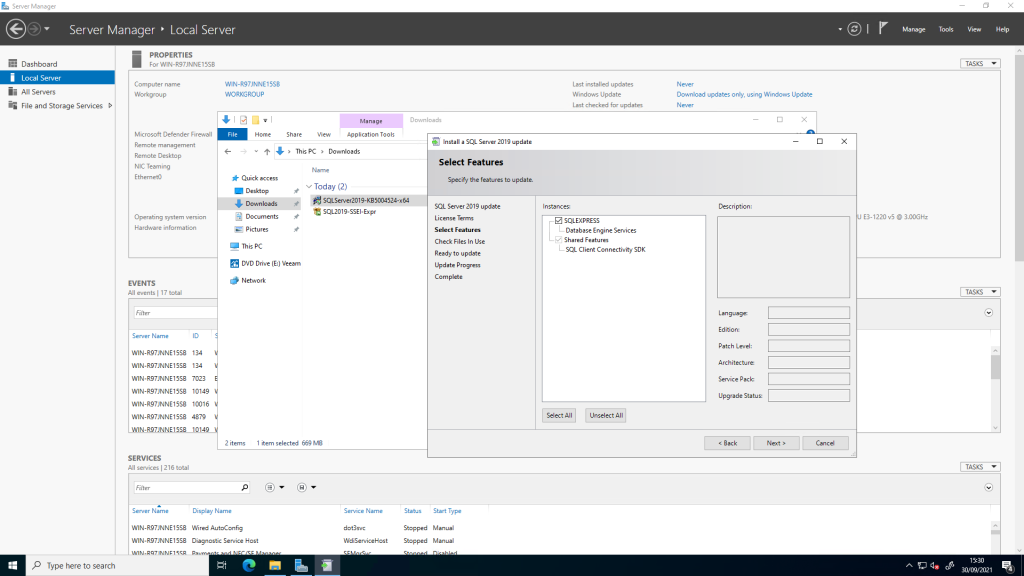
Under the “Select Features” section we’ll be shown our SQL Server instances and asked which ones we’d like to update, I only have a single instance and the shared features, so I’ll update it all at once.
SQL Server will then check to see if any files are in use, provided you haven’t started using your instance yet, you’ll pass this fine.

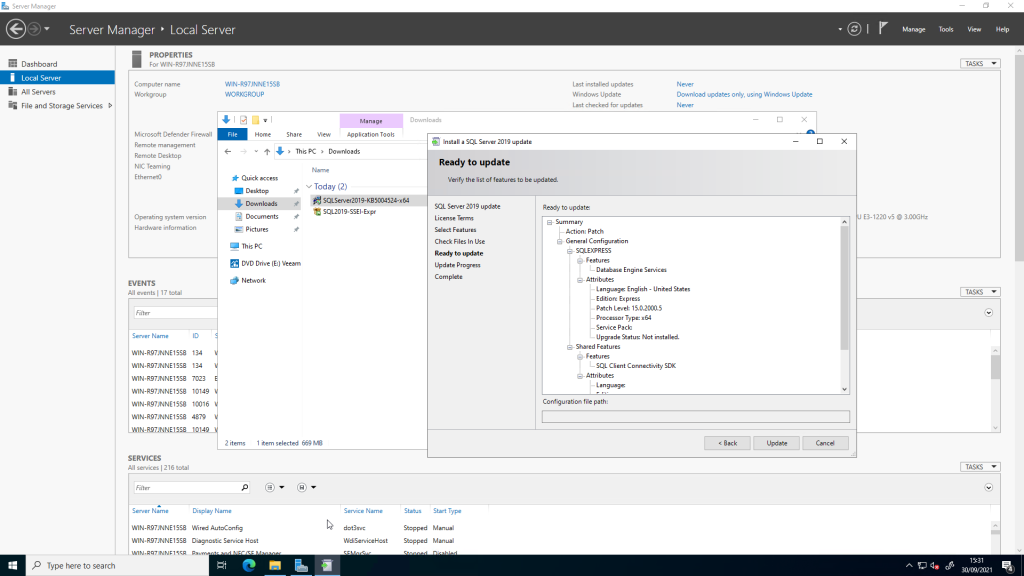
You’ll then be told you’re ready to update, click update and wait for it to finish installing!


Configuring Veeam to use our SQL Server instance
Veeam Backup & Replication
Start your installation as normal, installing any and all pre-requisites you’re currently missing.
When you get to the “Default Configuration” screen, you’ll need to check the box labelled “Let me specify different settings”.

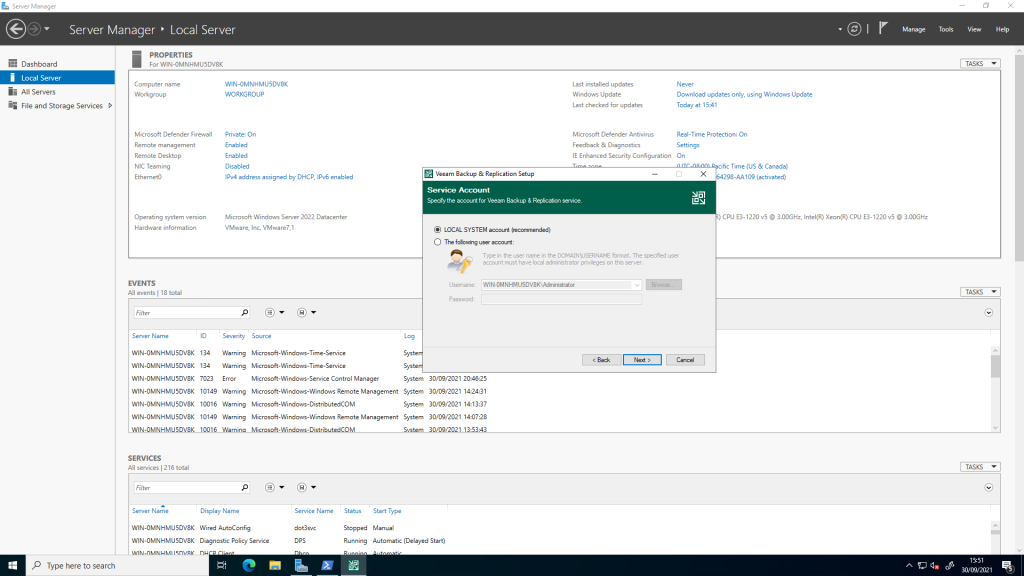
Now you can choose whether to install Veeam using a local system account or a specific service account.
Next we can specify to use an existing instance of SQL Server, select browse and find your SQL instance if it’s installed locally, or alternatively type in the FQDN of the server and the relevant instance name suffix.
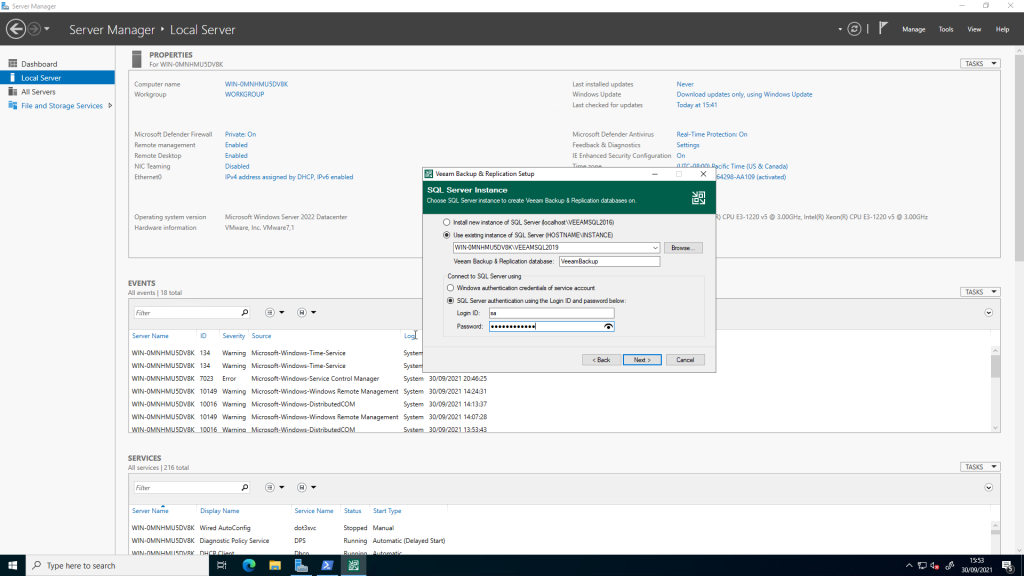
Once this is complete you can finalise the installation as normal with any other required changes.
Veeam ONE
Start your installation as normal, installing any and all pre-requisites you’re currently missing. You don’t need to worry about whether you choose Typical or Advanced installation, this won’t impact your ability to configure a SQL Server, this relates to your deployment topology and where you’d like to deploy the components of Veeam ONE.
Veeam ONE requires a service account, for the purposes of this demo, I’m just using the administrator account, this is not recommended for a production environment, use a dedicated service account!

We’ll then be asked if we wish to install a new instance of SQL or use our existing one and can specify the database name if we wish.

If using a service account you can continue using Windows authentication, provided you gave it permissions when we installed SQL Server or if you’ve added the relevant permissions afterwards. Alternatively you’ll need to use SQL Server authentication, as Veeam ONE requires a service account, it makes sense to keep this simple with Windows authentication only, unless you have specific needs for SQL Server authentication.
Afterwards you can continue your Veeam ONE deployment as normal, with your SQL Server configuration complete.
Thanks for reading, if you have any questions, comments or feedback, please drop them below!


