All-Demo Session & Installable ISO for Veeam Hardened Repository

All-Demo Session & Installable ISO for Veeam Hardened Repository
Userlevel 7
Badge +10


22-February 2024 Update:  GOOD NEWS! We are scheming a big update and overhaul of this page at or around VeeamON time. I can’t say more!


During the lead-up to VeeamON, it was amazing to see what content was leading the pre-registration information. We have the most data here than ever before. Constantly back and forth with the “Architecting Veeam Backup for Microsoft 365 at Scale” session, the session that @hannesk, Christoph Meyer and I are delivering was racing to the finish line as the leader. The “All Demo Session for Veeam Hardened Repository” was in the end the most popular pre-registered session, and as promised in the delivery in Miami, here is your everything you need to know guide.

Post Publish Updates:

  • 1-June 2023:  The installation requirements for the .ISO have been added.
  • 1-June 2023:  Video of installation of the .ISO has been added.
  • 2-June 2023:  Clarification on support, formatting of document.
  • 5-June 2023:  Updated .ISO with support banner and logon screen update, link updated. No changes to Ubuntu configuration or hardening script.
  • 29-June 2023: Updated .ISO with one enhancement, offline installation works.

Recording Resources

You can watch one of my practice runs of the session from Miami here:

At the VeeamON virtual event experience, we will have the replay from Miami session up very soon. 

Markdown File & Write Up

I have made a markdown file with a lot of the key information ready, you can download it here: rickvanover/VeeamHardenedRepoHub (github.com) Additionally - you can download the Markdown file at the QR code below:
 

This link goes to the VHR Markdown file that I’ve written up.

If you are not doing Markdown or GitHub you can download this as a PDF at the bottom of the page.

Overall advice

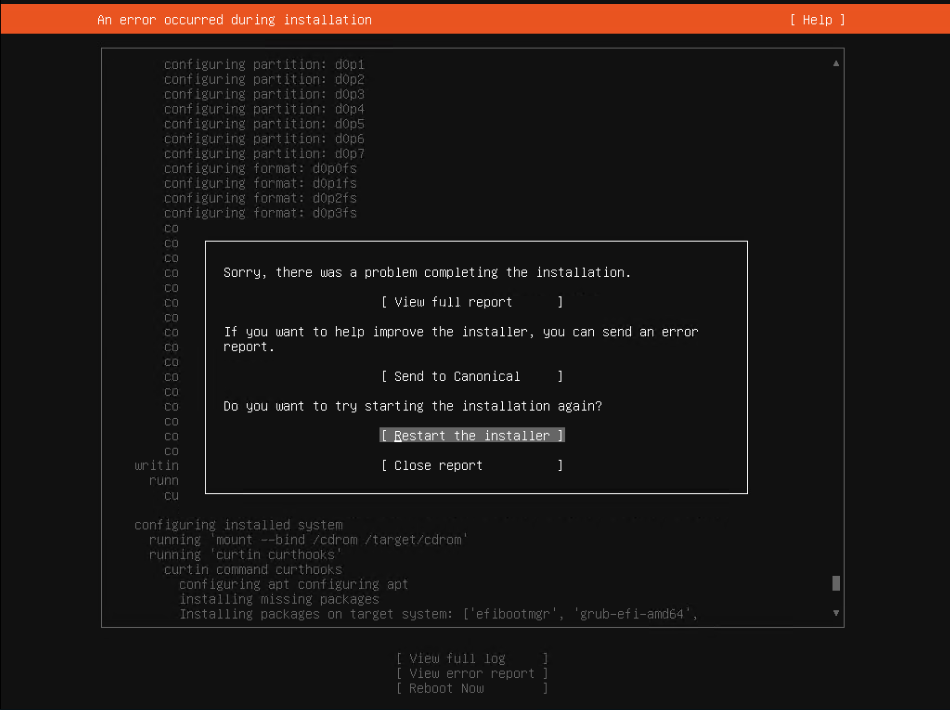
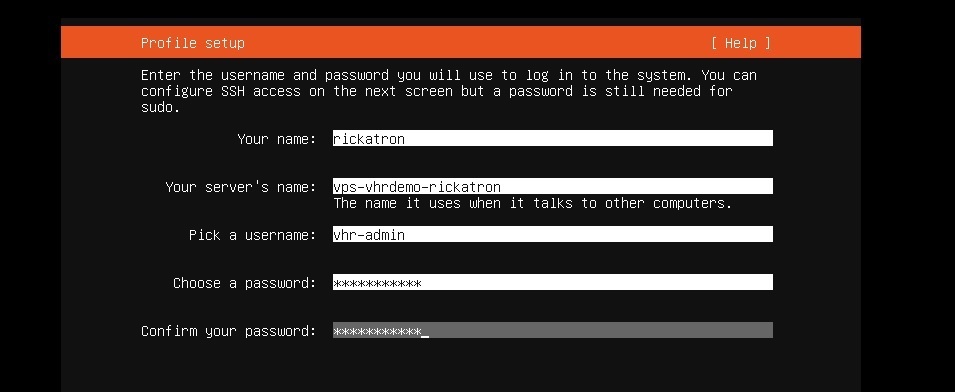
My overall advice on the Veeam Hardened Repository is to plan your deployment, this will greatly improve your experience with using the VHR. For example, I’m notorious for not documenting the options I put during the Ubuntu installation at this important stage:


Installable .ISO & Hardening Script

Key Update 18-December 2023: We have taken down the link for the .ISO, there will be a  new one coming “Soon” :)! 

One of the key parts of the Miami experience is the update we had from Product Management on new functionality for the Veeam hardened repository, which includes the Hardening Script and the installable .ISO. I recommend watching the replay to hear from Hannes and Christop directly before using the script and .ISO. We recommend at least 100 GB for storage. You can get both below:

  • Hardening Script: https://www.veeam.com/sys507
  • Installable .ISO: )18-December 2023 - We’ve removed this download and a new one is coming “soon”!)

About this installable .ISO…. The principal benefit of the installable .ISO is that it sets up much of the installation pre-defined *and* applies the above linked hardening script. 

Installable .ISO Requirements

For the installable .ISO, we recommend you follow these prerequisites (mainly relevant if you try to install it in a VM for lab purposes):

  • This is now optional from the 29-June update:  Internet connection (HTTP to the Ubuntu update servers for automatic security updates)
  • 2 CPUs, 6 GB RAM
  • UEFI boot is required (BIOS does not work) UEFI secure boot strongly recommended
  • 1 disk with at least 100GB for the operating system (plus cache files)
  • 100GB is a hard requirement. If that’s too high, please give feedback below.
  • Then there should be at least one second disk that is larger 100GB for backup data that would be the Veeam repository

During the installation, follow the wizard and reboot after the installation finished. Then install the hardened repository role. The VHR final layout will have all disks are mounted to /mnt/backup<n>

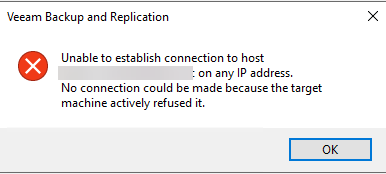
Important: Reboot again (this second reboot locks down the whole system and you can only reboot / shutdown with sudo. there is no root / sudo anymore at this stage) - this is the result of the hardening.  Think of this result as taking a massive green pill that tells this system its role in life forever on is to be a VHR.

After reading all of this, you are now ready to watch my video of installing the VHR with the .ISO:


Installable .ISO General Information & Support Statement

  • It's a community project. please don't call Veeam support for use of the .ISO. Once a VHR is deployed and configured in Veeam Backup & Replication, it would be subject to support. 
  • Automatic updates are enabled.
  • The user does not have permissions to update manually.
  • We plan to add a note to the banner message where to find more information about the ISO installer.

Get Started with the Veeam Hardened Repository 

Getting started with the VHR doesn’t have to be overwhelming. Give it a try - and let us know how it goes in the comments below.


This topic has been closed for comments

199 comments

Userlevel 5
Badge +2

@ThatsNASt : yes, single-user mode is the only way to get into the system after the first reboot. That’s by design. The blog post regnor mentioned is the correct one.

Userlevel 7
Badge +20

@Rick Vanover @HannesK -- Trying to do another deployment after two successful ones but this time I am seeing the following message after a complete setup of the VM with the ISO file but cannot connect to it from VCC server - get the below error.  Any suggestions?  The VCC server can reach the VM via ping.


Userlevel 7
Badge +10

@Rick Vanover @HannesK -- Trying to do another deployment after two successful ones but this time I am seeing the following message after a complete setup of the VM with the ISO file but cannot connect to it from VCC server - get the below error.  Any suggestions?  The VCC server can reach the VM via ping.


Are any ports blocked, @Chris.Childerhose - as the transport service would need to communicate. Also - I had something like this happen in DHCP labs where on next book a new IP was taken in, so I started ensuring DNS names were used.

Userlevel 7
Badge +20

@Rick Vanover @HannesK -- Trying to do another deployment after two successful ones but this time I am seeing the following message after a complete setup of the VM with the ISO file but cannot connect to it from VCC server - get the below error.  Any suggestions?  The VCC server can reach the VM via ping.


Are any ports blocked, @Chris.Childerhose - as the transport service would need to communicate. Also - I had something like this happen in DHCP labs where on next book a new IP was taken in, so I started ensuring DNS names were used.

Yeah, no ports are blocked as this is in our MGMT stack of VMs and VLANs.  I am using Static IP addresses also not DHCP, so I specify the details.  I also ensured that the DNS is updated but going to try something else now that you mention that.

Userlevel 7
Badge +20

Well, my theory did not work so I am stuck on this one DC for deploying these.  Need to do some thinking but if anything, else comes to mind do share.

Userlevel 7
Badge +10

Well, my theory did not work so I am stuck on this one DC for deploying these.  Need to do some thinking but if anything, else comes to mind do share.

Interesting - one random idea Chris….  A) Reboot the VHR and B) do an infrastructure rescan after it is back online.

Userlevel 7
Badge +20

Well, my theory did not work so I am stuck on this one DC for deploying these.  Need to do some thinking but if anything, else comes to mind do share.

Interesting - one random idea Chris….  A) Reboot the VHR and B) do an infrastructure rescan after it is back online.

I will give that a try and see.  I even compared this DC and VMware settings to ones that have worked and they are identical. I even ensured EFI and Secure Boot turned on.  Let me see what this does and update here.

Userlevel 7
Badge +10

Duplicate MAC? If still on a VM...

Userlevel 7
Badge +20

Duplicate MAC? If still on a VM...

Shouldn't be as I even deleted the VM from disk to recreate it from scratch and use the previous June 5th ISO too.

Userlevel 7
Badge +10

Duplicate MAC? If still on a VM...

Shouldn't be as I even deleted the VM from disk to recreate it from scratch and use the previous June 5th ISO too.

OK makes sense. I am not sure why it can’t see it. Any VLAN stuff? That’s about only next thing to think of.

Userlevel 5
Badge +2

I have the feeling, that this has nothing to do with the ISO itself. So my suggestion would be to ask support, because it’s regular Ubuntu 20.04 which is supported.

Userlevel 7
Badge +20

Duplicate MAC? If still on a VM...

Shouldn't be as I even deleted the VM from disk to recreate it from scratch and use the previous June 5th ISO too.

OK makes sense. I am not sure why it can’t see it. Any VLAN stuff? That’s about only next thing to think of.

Yeah, the VDS that I am connected to the port group has a VLAN, so I add that to the network config when setting up the ISO VHR.  I did the same thing in other DCs where it worked so not sure about this one and why it is not working.

Userlevel 7
Badge +20

I have the feeling, that this has nothing to do with the ISO itself. So my suggestion would be to ask support, because it’s regular Ubuntu 20.04 which is supported.

Thanks @HannesK.  I will see what else I can come up with and go from there.  Will ask Support if needed.

Userlevel 7
Badge +10

Or something environmental/equipment-related.

Userlevel 7
Badge +20

Or something environmental/equipment-related.

That was my next thought as the storage is the same but the hosts are on Cisco UCS whereas the other DCs were HPE C7000 Blade chassis.  I will check everything over as there is something off and will find it.  😁

Userlevel 7
Badge +20

Seeing these messages fairly frequently and can eventually get the installer to work.


Userlevel 1
Badge

Trying to install to a Dell R7515 with Dual Broadcom 10Gb SFP+ connected to a Meraki switch.  I want to create a bond to use both 10Gb links.  I’ve tried a couple different bond types to no avail.  Sometimes, the link is active when I create the bond, but every time, when the deployment gets to the installation phase, it errors out.  I’ve ruled out incompatibility with the 10Gb NIC by deploying on a single 10Gb link (no bond).  Can anyone shed some light on which bond type and the specific settings for the bond and for the Meraki Link Aggregate?

Userlevel 7
Badge +10

Hey @David Tate BIG  → This is really good.

Can you try the bond with the ‘plain’ Ubuntu HWE 20.04 installation media, does it behave the same?

Userlevel 1
Badge

Hey @David Tate BIG  → This is really good.

Can you try the bond with the ‘plain’ Ubuntu HWE 20.04 installation media, does it behave the same?

I can certainly give that a try.

Userlevel 7
Badge +10

Hey @David Tate BIG  → This is really good.

Can you try the bond with the ‘plain’ Ubuntu HWE 20.04 installation media, does it behave the same?

I can certainly give that a try.

Appreciated - why I say that is the network configuration of the installable .ISO is for that part of the wizard basically unchanged from pure Ubuntu.

Userlevel 1
Badge

I just had one of those AHA! moments.  I tried the ‘plain’ Ubuntu install and still had issues, but then I remembered something about ESXi, which is essentially a very special Linux distribution.  It is recommended that when you Team NICs in ESXi and connect to a Meraki switch you leave the switchports as standard access or trunk ports as appropriate.  You don’t put the ports in an Aggregate.

I did that and the ‘plain’ Ubuntu install worked like a charm.  I ran ifconfig and saw basically equal traffic on the two NICs in the bond.

So, I deployed the Hardened Linux Repository from the ISO downloaded here and everything looks great so far.

The bond mode I used was balance-rr.

Userlevel 7
Badge +10

Thanks for letting us know @David Tate BIG 

Userlevel 1
Badge

So now that I have the Hardened Repository deployed I need to add it to the Veeam infrastructure, but I keep getting an error when Veeam tries to add the Transport Service on the new Hardened Repository service.  Can’t add the repository without the Data Mover.


Userlevel 7
Badge +14

What error did you get in the second task/line? @David Tate BIG 

Userlevel 1
Badge

The “Installing Transport service Error...” is quite lengthy.  It seems the general gist of it is a space issue, or so that error would indicate.

Installing Transport service Error: ExecCommand [tar] [xvzf /opt/veeam/deployment/Upload/VeeamTransport_12.0.0.1423.tar.gz/VeeamTransport_12.0.0.1423.tar.gz -C /root/tmp/VeeamBackupTemp/{3e490f44-43e5-426f-b8ea-a8260fbee88e}.5ba8.7fb256fb7740 --no-same-owner ] has exited with code: [2], message: [tar: ./vddk_6_0/lib64/libvim-types.so: Wrote only 7168 of 10240 bytes

That is followed by a bunch of “tar:./vddk...No space left on device” lines for various files it is trying to unpack/install.

The last two lines of errors are fairly non-descript.

“Failed to save Linux server: Single-use credentials require Veeam Data Mover service installed.”

“Infrastructure item save failed Error: Single-use credentials require Veeam Data Mover service installed.”