

本文详述了在Ubuntu 22.04.3 LTS上安装k8s v1.27.6 的详细步骤和截图
- 环境准备
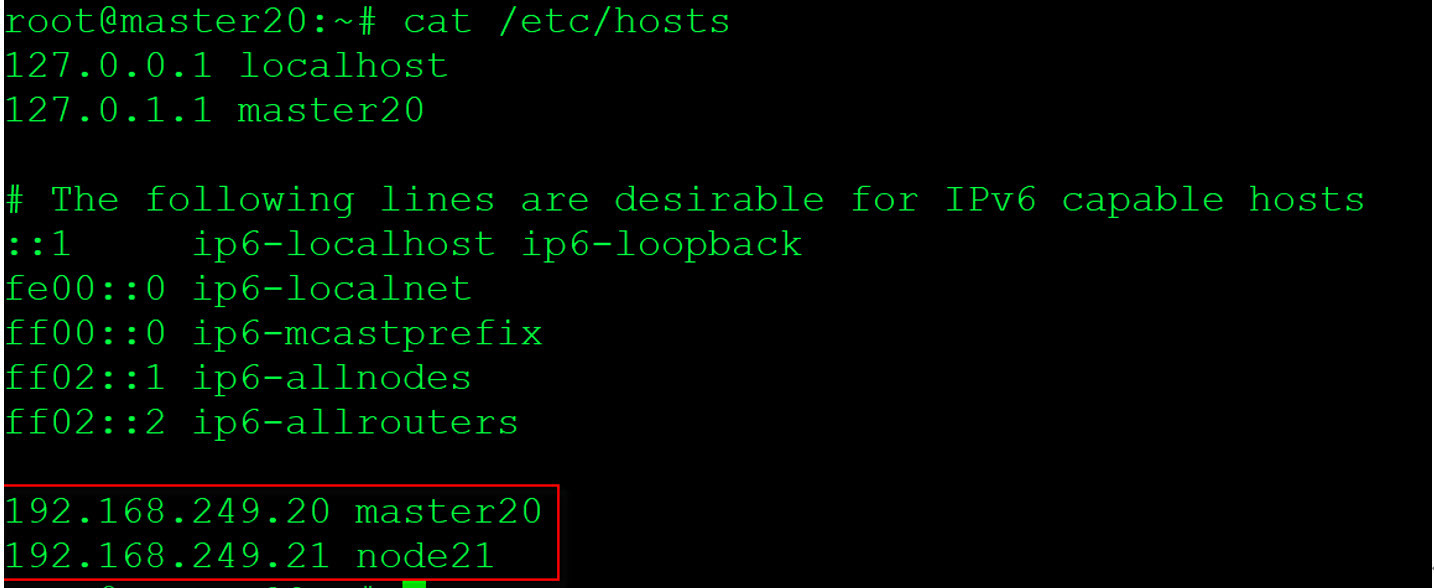
设置主机名解析
vi /etc/hosts
sudo swapoff -a
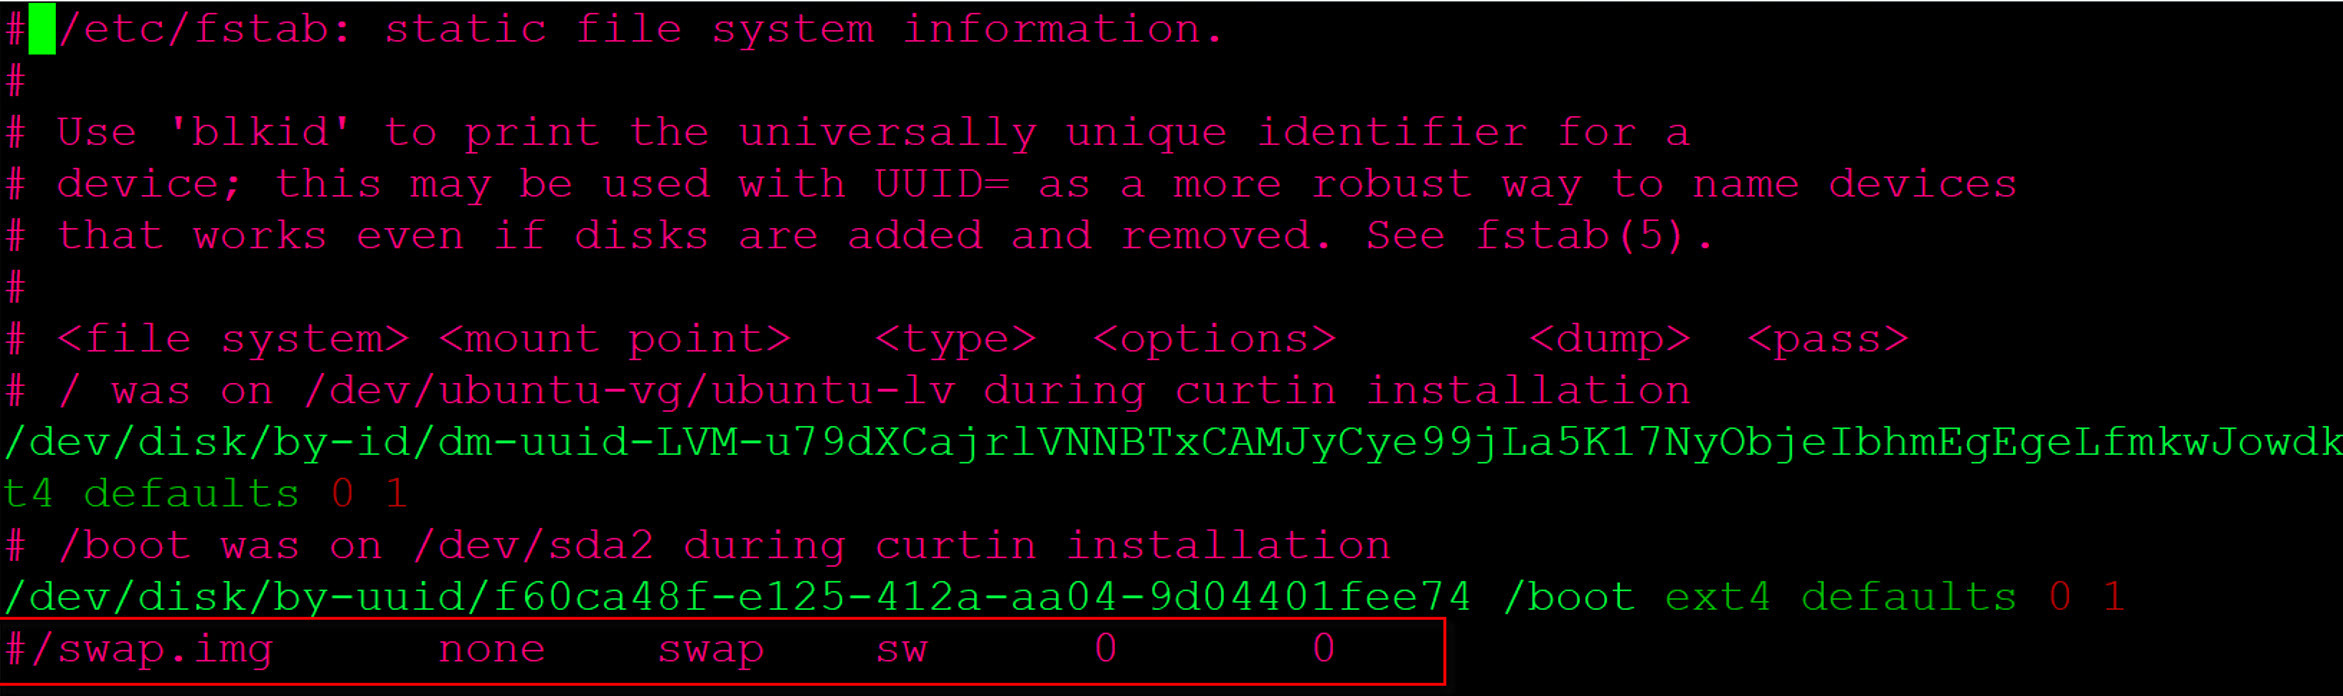
#修改/etc/fstab,在swap那行开头添加#注释掉,持久化生效
sudo vi /etc/fstab
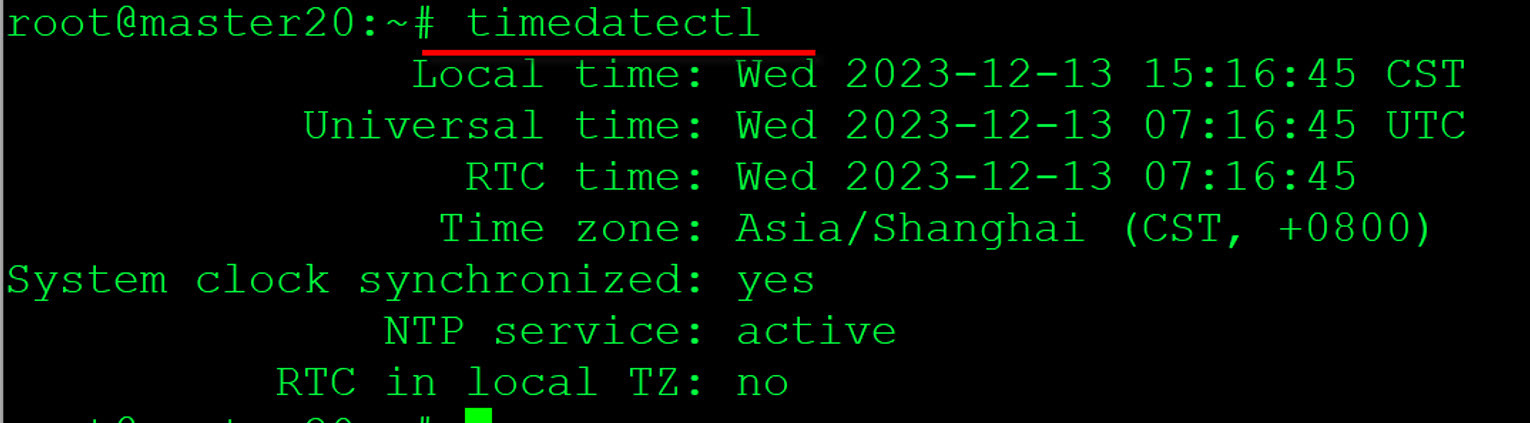
设置正确时区和时间:
timedatectl set-timezone Asia/Shanghai
systemctl restart rsyslog
timedatectl
确保服务器不会自动suspend(待机/休眠)
sudo systemctl mask sleep.target suspend.target hibernate.target hybrid-sleep.target
禁用防火墙:
ufw disable
ufw status
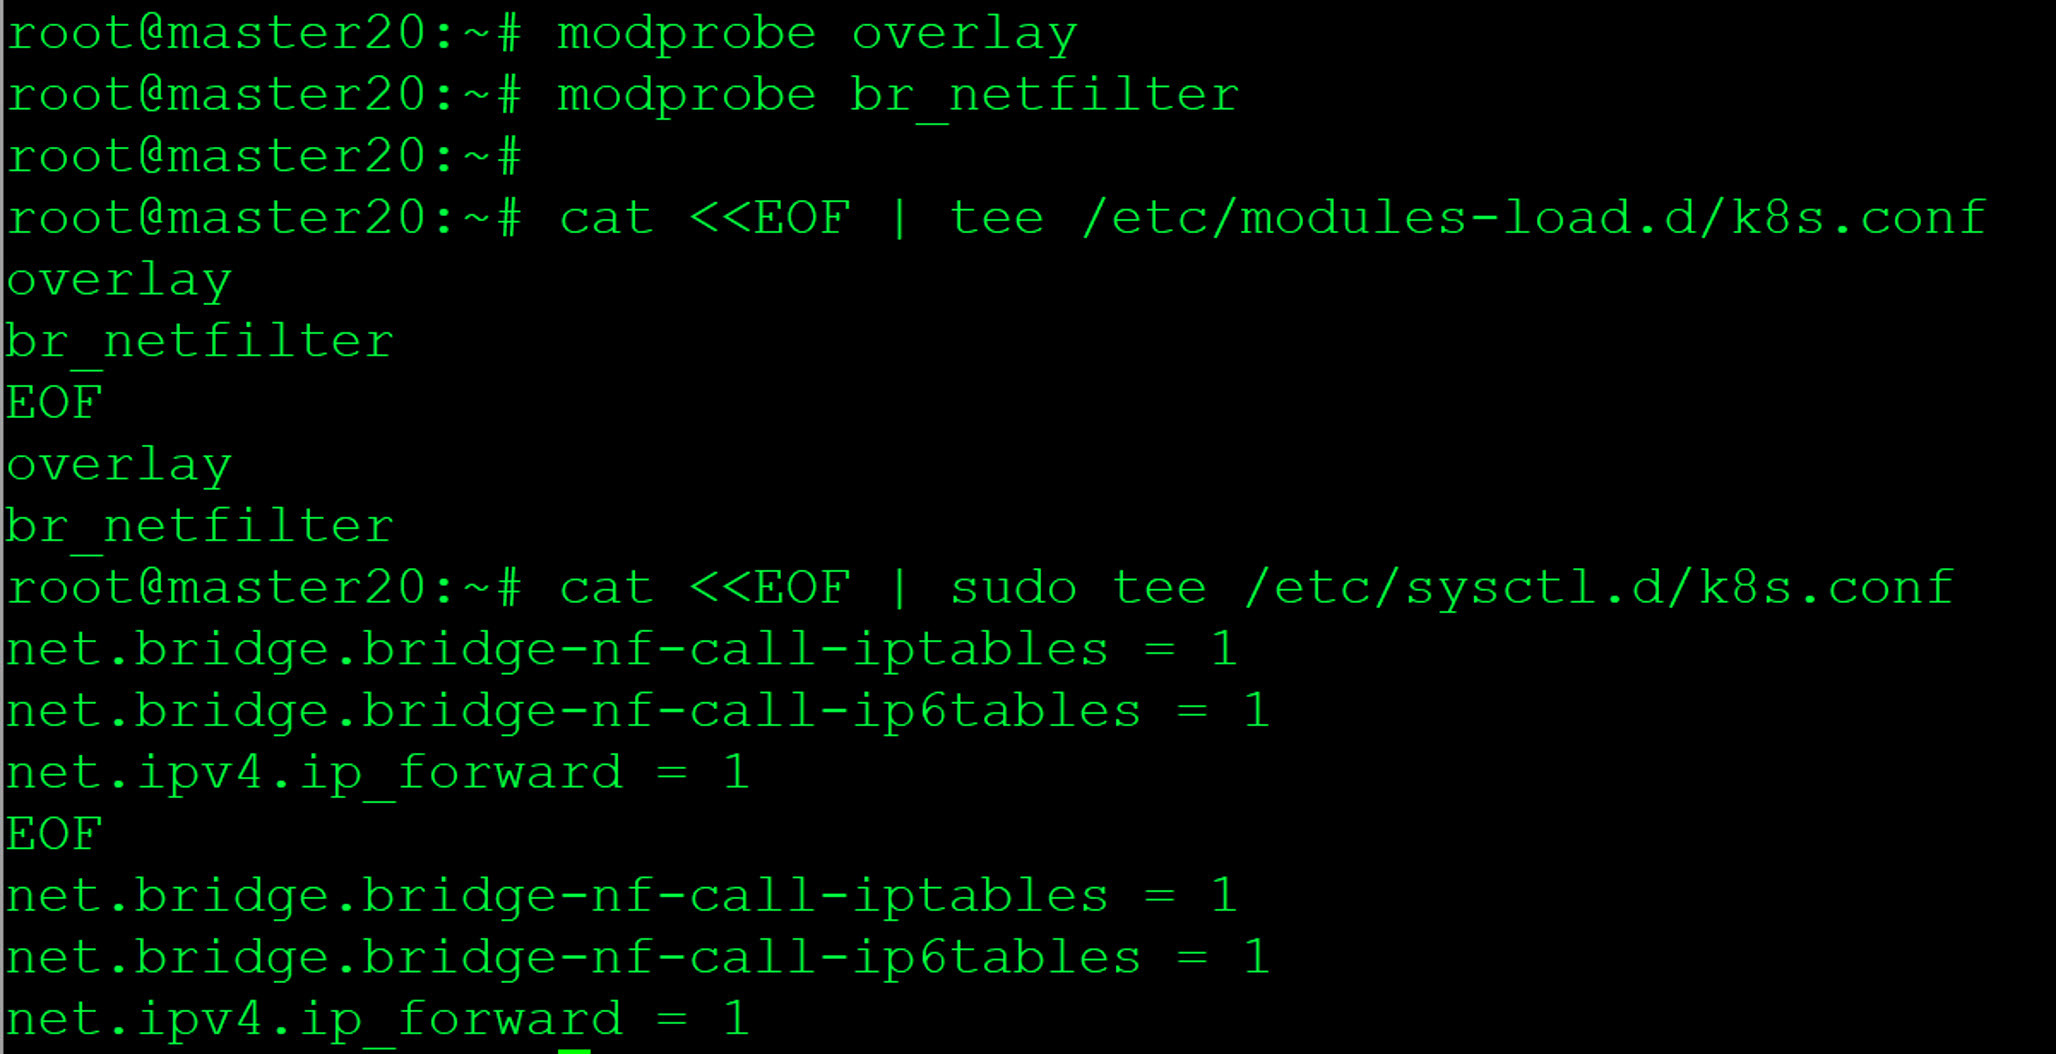
允许iptables检查桥接流量,若要显式加载此模块,需运行modprobe br_netfilter
modprobe overlay
modprobe br_netfilter
cat <<EOF | tee /etc/modules-load.d/k8s.conf
overlay
br_netfilter
EOF
为让linux节点的iptables能够正确查看桥接流量,还需要确认net.bridge.bridge-nf-call-iptables设置为1,设置所需的sysctl参数,参数在重新启动后保持不变。
cat <<EOF | sudo tee /etc/sysctl.d/k8s.conf
net.bridge.bridge-nf-call-iptables = 1
net.bridge.bridge-nf-call-ip6tables = 1
net.ipv4.ip_forward = 1
EOF
使配置生效:
sudo sysctl --system
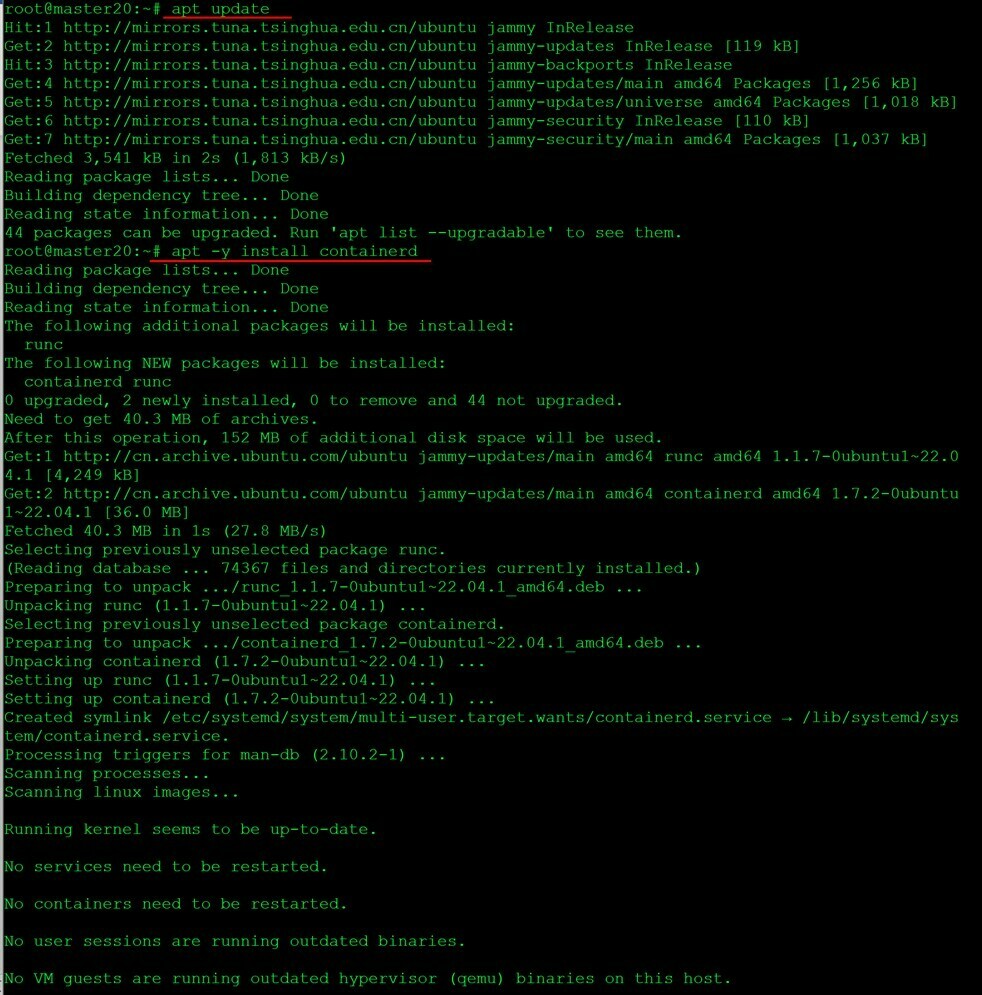
- 安装Containerd
apt update
apt -y install containerd
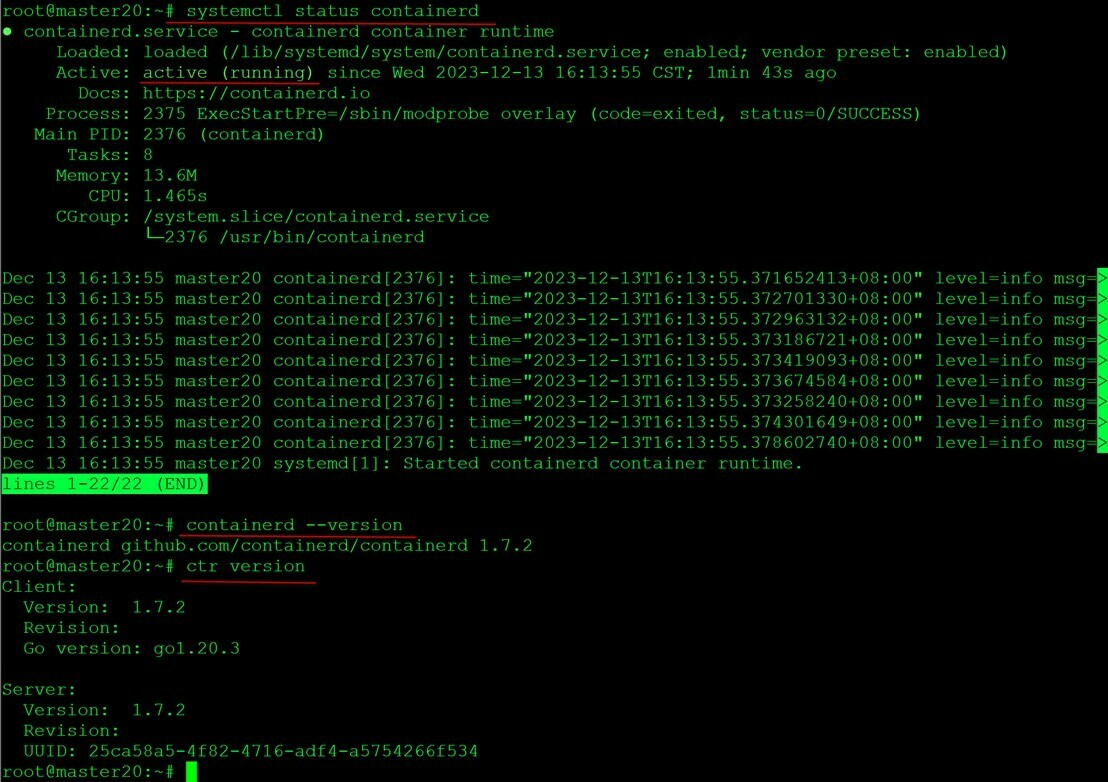
systemctl status containerd
利用containerd的客户端工具ctr验证修改是否成功
containerd --version
ctr version
修改containerd配置,
mkdir /etc/containerd/
产生containerd默认配置文件
containerd config default > /etc/containerd/config.toml
grep sandbox_image /etc/containerd/config.toml
将sanbox_image镜像源由k8s.io替换为阿里云google_containers镜像源
sed -i "s#registry.k8s.io/pause#registry.aliyuncs.com/google_containers/pause#g" /etc/containerd/config.toml

镜像加速:
阿里云参考链接:https://help.aliyun.com/zh/acr/user-guide/accelerate-the-pulls-of-docker-official-images
vim /etc/containerd/config.toml
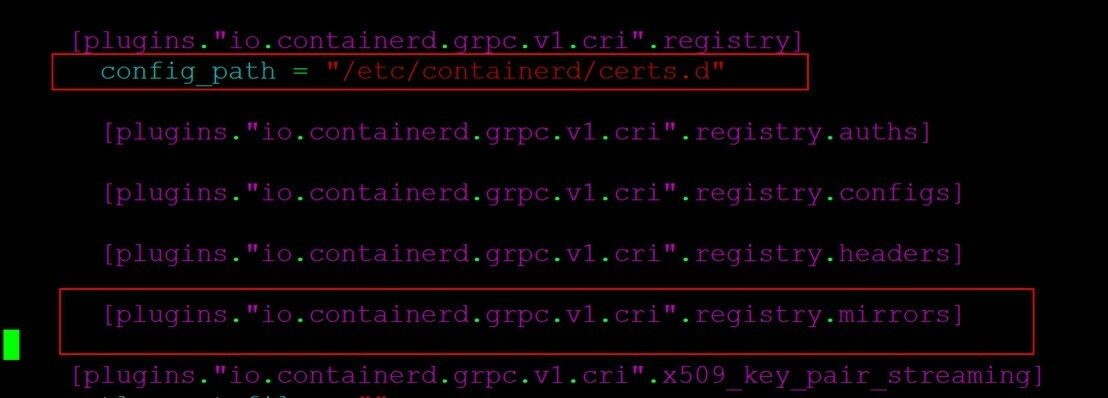
在“[plugins."io.containerd.grpc.v1.cri".registry]”行下面添加以下一行:
[plugins."io.containerd.grpc.v1.cri".registry]
config_path = "/etc/containerd/certs.d"
确认“[plugins."io.containerd.grpc.v1.cri".registry.mirrors]”里面的配置项已经清空:
[plugins."io.containerd.grpc.v1.cri".registry.mirrors]
配置containerd cgroup驱动程序systemd
替换
sed -i 's#SystemdCgroup = false#SystemdCgroup = true#g' /etc/containerd/config.toml
查看SystemdCgroup参数
grep SystemdCgroup /etc/containerd/config.toml
重启containerd
systemctl restart containerd

- 安装k8s组件
通过国内镜像站点阿里云安装的参考链接:
https://developer.aliyun.com/mirror/kubernetes
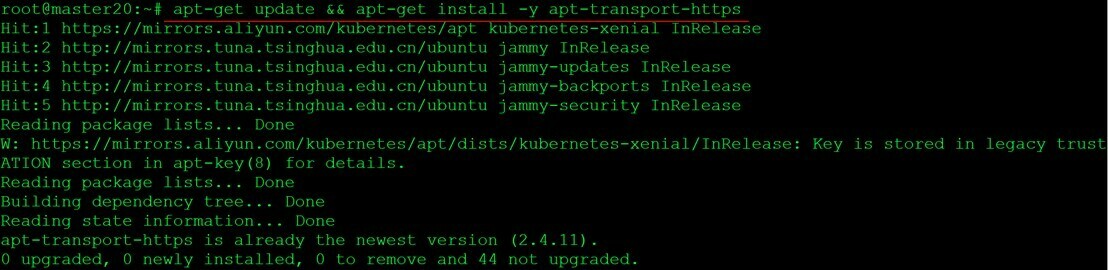
添加阿里云镜像源:
apt-get update && apt-get install -y apt-transport-https
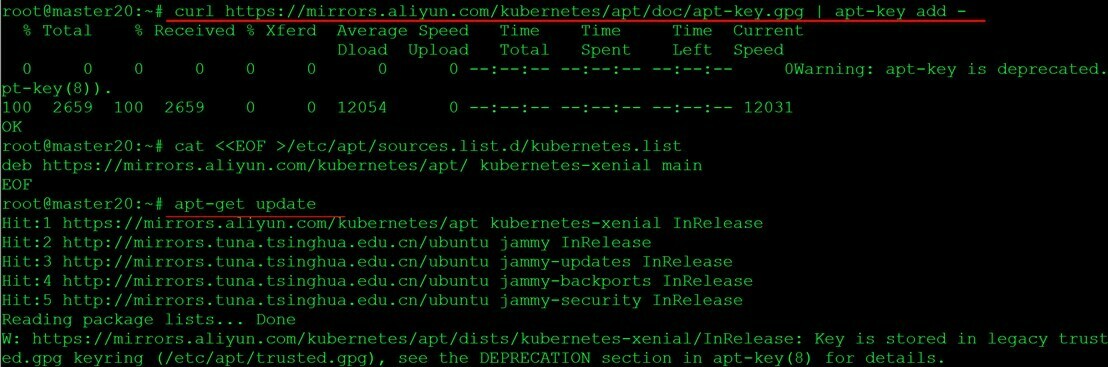
curl https://mirrors.aliyun.com/kubernetes/apt/doc/apt-key.gpg | apt-key add -
添加kubernetes镜像源:
cat <<EOF >/etc/apt/sources.list.d/kubernetes.list
deb https://mirrors.aliyun.com/kubernetes/apt/ kubernetes-xenial main
EOF
更新镜像源:
apt-get update
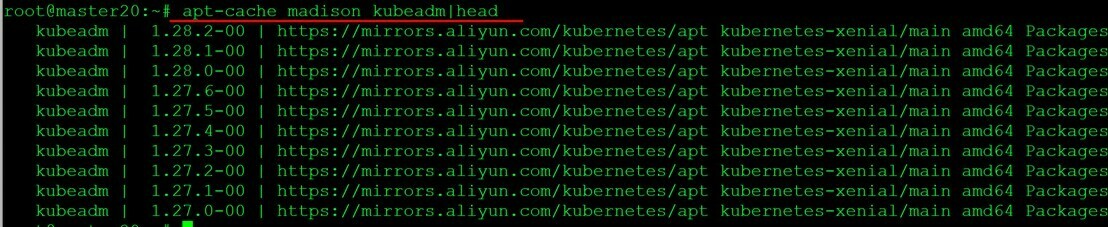
查看kubeadm可以安装的版本:
apt-cache madison kubeadm|head
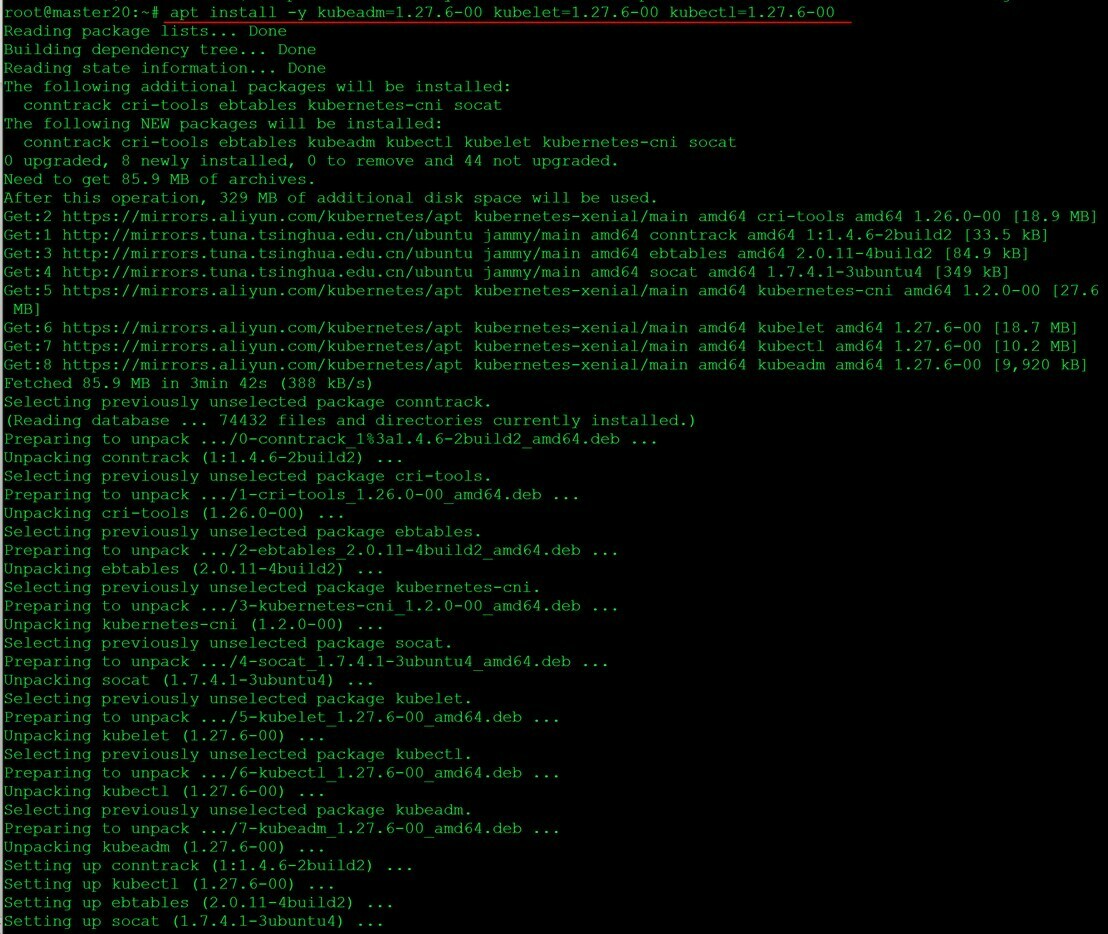
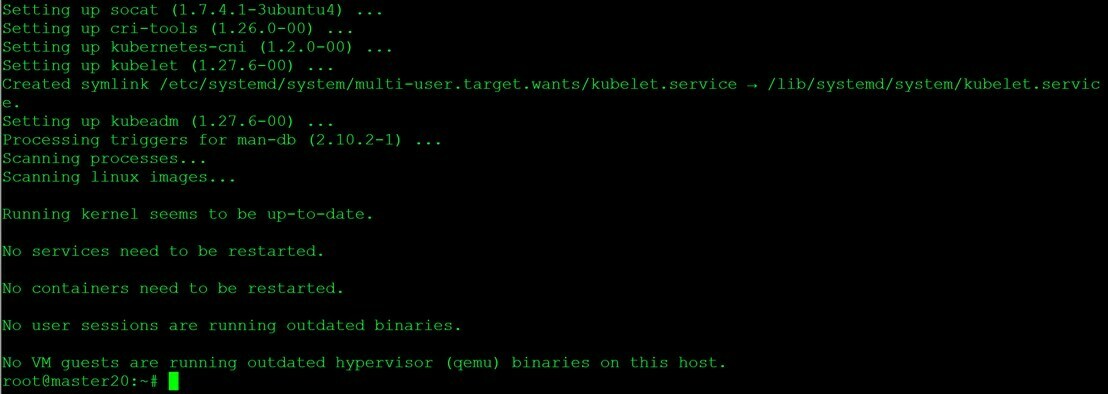
如果安装指定版本,使用以下命令,本文指定的版本是1.27.6:
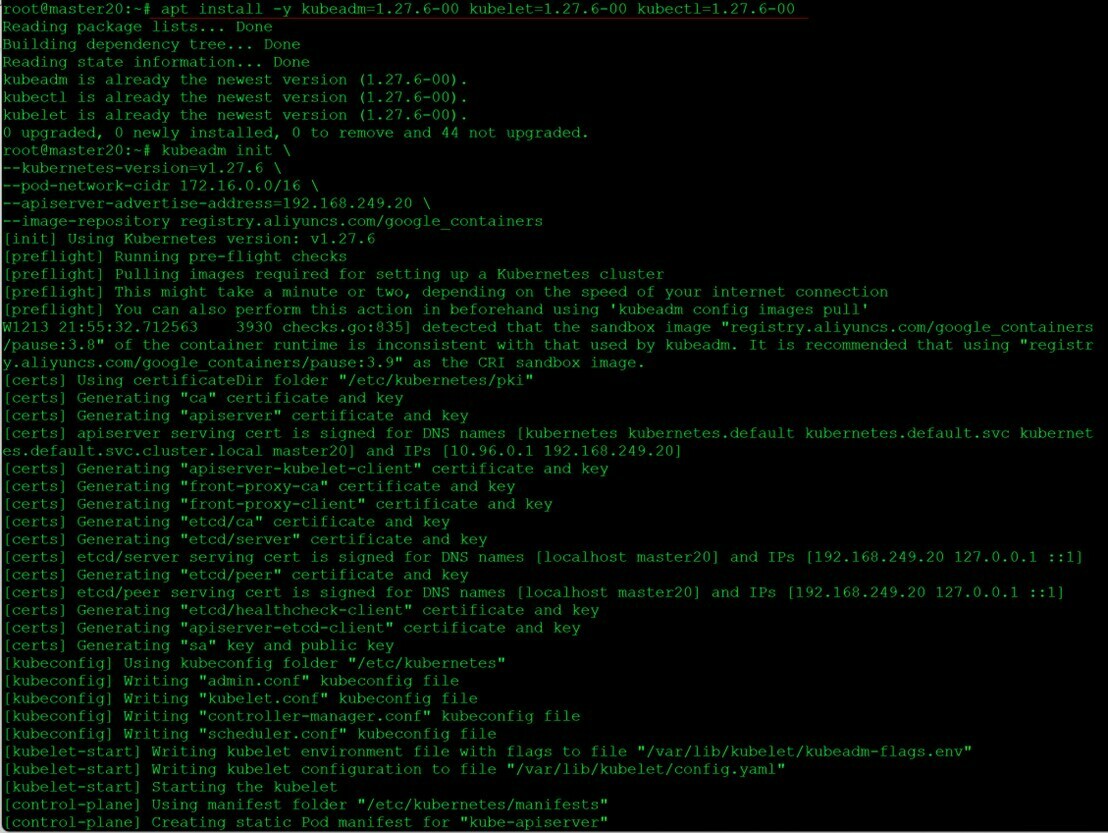
apt install -y kubeadm=1.27.6-00 kubelet=1.27.6-00 kubectl=1.27.6-00
(如果安装最新版本,使用以下命令: apt install -y kubeadm kubelet kubectl )
以上所有的操作步骤对于master节点和node1节点以及后续要加入到k8s cluster的节点都要执行。
- 初始化master节点
kubeadm init \
--kubernetes-version=v1.27.6 \
--pod-network-cidr 172.16.0.0/16 \
--apiserver-advertise-address=192.168.249.20 \
--image-repository registry.aliyuncs.com/google_containers
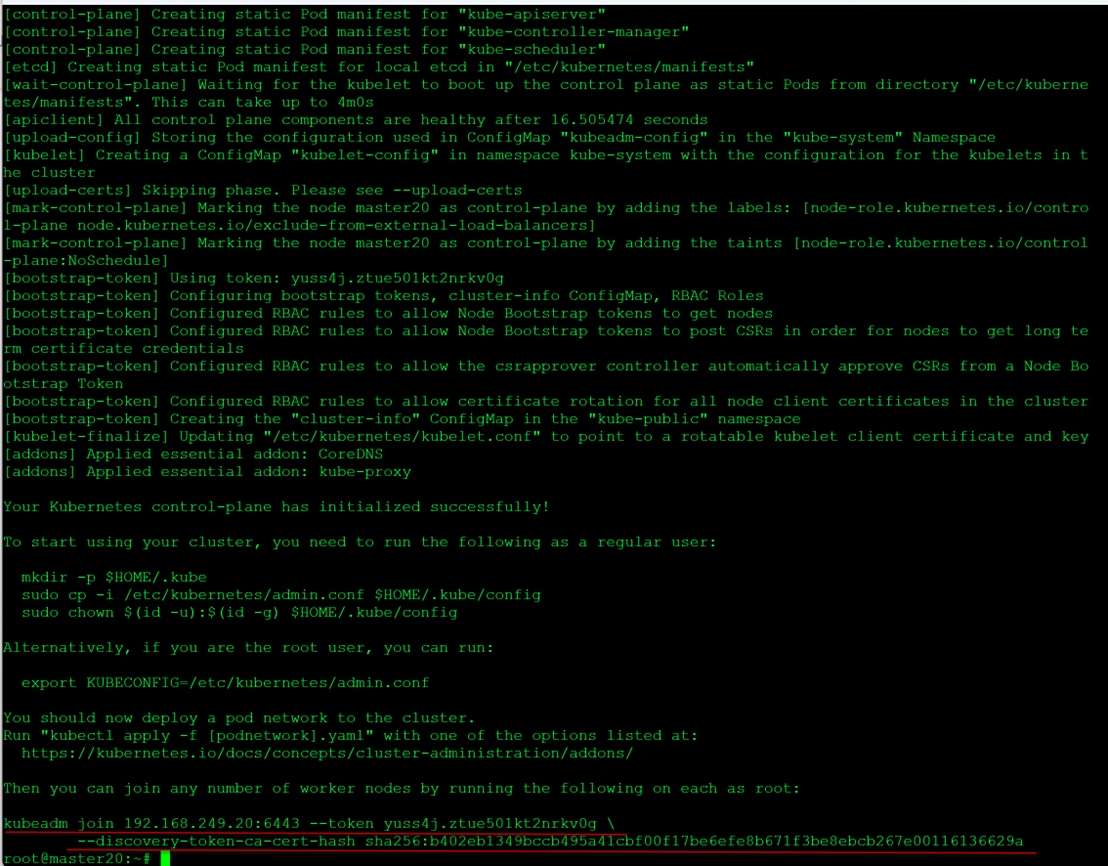
其它node以后要加入该k8s cluster,运行下列命令:
kubeadm join 192.168.249.20:6443 --token yuss4j.ztue501kt2nrkv0g \
--discovery-token-ca-cert-hash sha256:b402eb1349bccb495a41cbf00f17be6efe8b671f3be8ebcb267e00116136629a
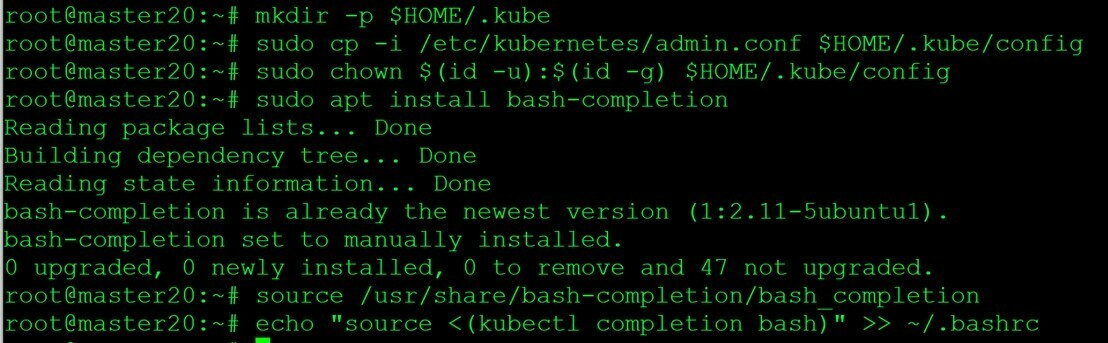
初始化后置动作:
mkdir -p $HOME/.kube
sudo cp -i /etc/kubernetes/admin.conf $HOME/.kube/config
sudo chown $(id -u):$(id -g) $HOME/.kube/config
实现kubectl命令补全
安装bash-completion工具
sudo apt install bash-completion
执行bash_completion
source /usr/share/bash-completion/bash_completion
#在bash shell 中永久的添加自动补全(永久有效,不受切换终端影响)
echo "source <(kubectl completion bash)" >> ~/.bashrc
- 启用Calico网络方案
curl https://raw.githubusercontent.com/projectcalico/calico/v3.26.1/manifests/calico.yaml -O

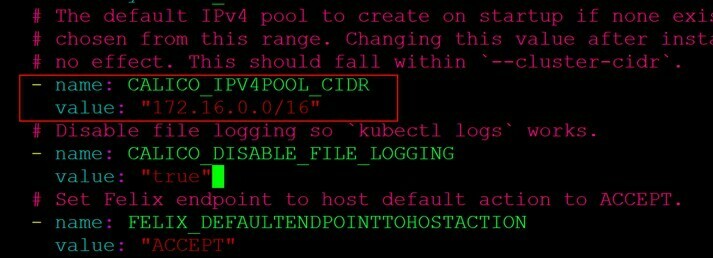
vi calico.yaml
缺省有#号,把#号去掉,修改CIDR,与初始化集群的--pod-network-cidr=172.16.0.0/16一致。
- name: CALICO_IPV4POOL_CIDR
value: "172.16.0.0/16"
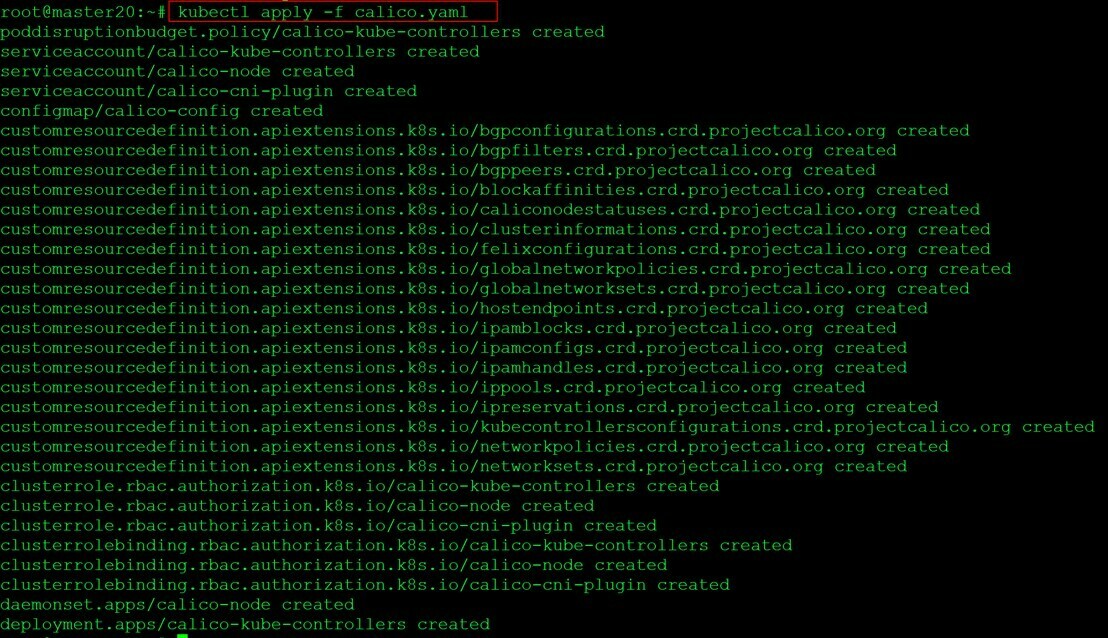
kubectl apply -f calico.yaml
kubectl get pod -A
kubectl get node
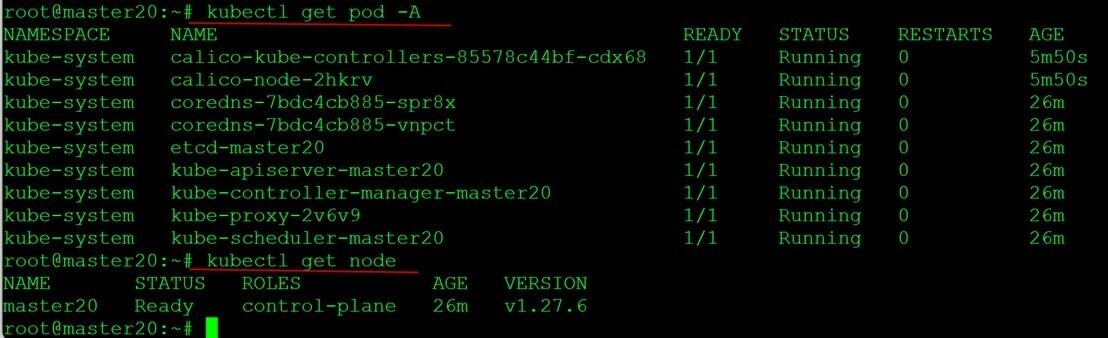
至此,整个部署工作取得了阶段性胜利,您已经完成了master节点的部署工作,下面继续部署worker节点。
- 添加worker节点
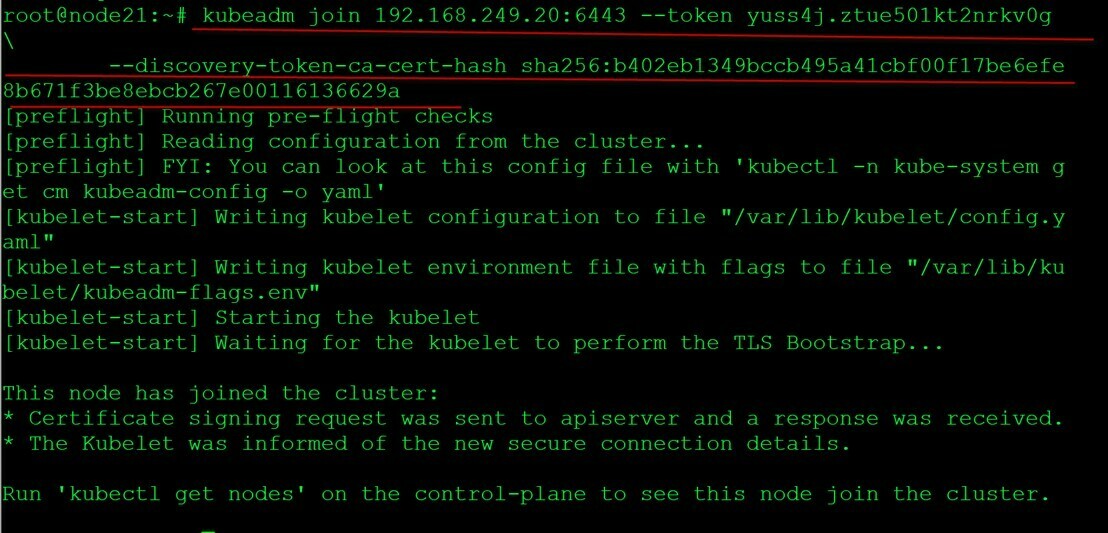
在每个worker节点上,执行初始化master成功后,最后输出的命令
kubeadm join 192.168.249.20:6443 --token yuss4j.ztue501kt2nrkv0g \
--discovery-token-ca-cert-hash sha256:b402eb1349bccb495a41cbf00f17be6efe 8b671f3be8ebcb267e00116136629a
如果忘记,可以在master节点上运行:
kubeadm token create --print-join-command

在master上执行:
kubectl get node

为修改节点ROLES从none为worker,在master上执行:
kubectl label node node21 node-role.kubernetes.io/worker=worker
查看:
Kubectl get node -o wide

为了让worker node上能显示node、node等信息的设置
在node21上运行:
mkdir -p $HOME/.kube
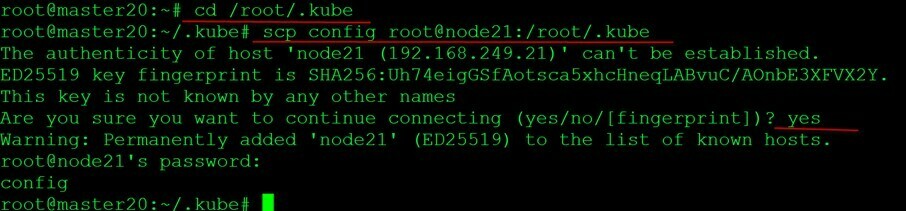
在master20上运行:
cd /root/.kube
scp config root@node21:/root/.kube
在node21上运行:
kubectl get node
发现已经可以显示node的信息了。
