
Understanding Veeam’s console and doing basic configurations such as email notifications and backing up Veeam’s database are important before you get started on your backup journey. Below, you’ll find a list of these configurations and a detailed video explaining how to do them.
- Veeam Backup & Replication configuration backup: this configuration backup takes a backup of your Veeam database. Your all-important Veeam Server configuration data is stored here, and backups let you restore to the same server or another server if that fails. Consider creating a repository that is offsite and not a part of your scale-out backup repository (SOBR) for your data destination.
- Configure email notifications to stay aware of your daily backup operations.
Additional component and console considerations
There are some important things you need to add to Veeam Console before you can start sourcing and placing data into your backup storage.
Below you will find a list of configurations and a video to walk you through these base requirements and how to create a backup job.
- Understanding permissions:
- As Veeam integrates with several other vendors, there are permission requirements.
- Make sure the servers you plan to use as backup infrastructure components meet these system requirements.
- Connect hypervisors:
- For Hyper-V and VMware virtualization backups, you must add (SCVMM or vCenter) to the Veeam server.
- Initial proxy and repository:
- By default, your Veeam Backup & Replication Server will be your initial backup proxy and repository unless you specify additional servers.
Add additional backup proxies
Remember that your Veeam Backup & Replication server is already a proxy server by default. At this point, you may not need to add an additional proxy.
Pro tip: You should consider checking that your Veeam Backup & Replication server has 8core and 16GB of memory or creating a dedicated Windows or Linux proxy server. When you start sizing Veeam for your entire environment, you can adjust these resources as needed.
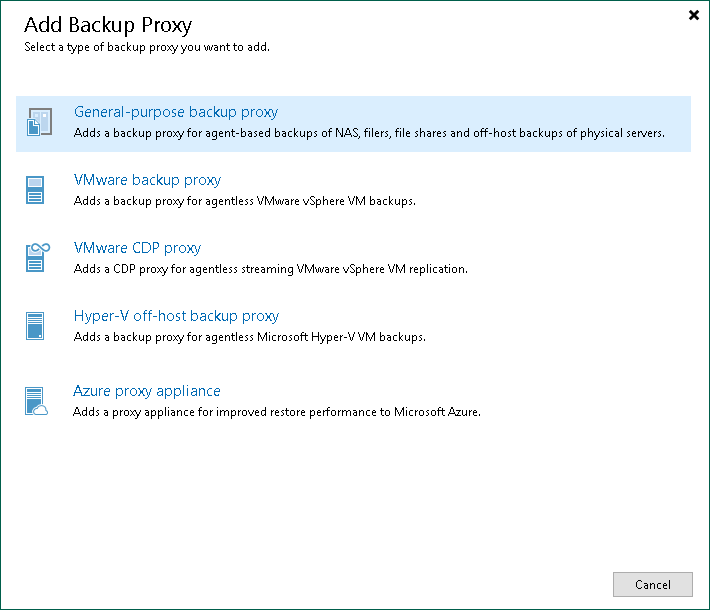
A specific VMware proxy is required to back up production data via (Network or HOTADD) Transport modes.
Continue by watching this quick demo to see how to add a new VMware Proxy Server:
Suggested resources:
Add additional backup repositories
By default, Veeam will have a local repository created on the OS drive, it’s important though to attach and create additional repositories.
- Make sure the storage has enough available space for your test backup jobs.
- Note: If you plan on creating a test job, you could use the Default Repository on the Veeam Server, just increase the size as needed.
Suggested resources:
Creating a Backup Job
In Veeam Backup & Replication, a backup is a job-driven process. To perform a backup, you need to configure backup jobs. Veeam provides solutions for different types of backups, including image-level, volume-level or file-level. Continue reading here.
For your first backup job, we recommend that you select a few non-critical virtual workloads for testing. Also, after viewing the video but before running your first job, you should take a look at the additional infrastructure considerations section.
Watch this how to video to learn how to create a Backup Job in Veeam Backup & Replication:
Pro tip: Before running full production jobs, you want to ensure your Veeam servers are sized correctly. This will ensure proper performance and capacity is available for backups jobs. Refer to this module for Infrastructure sizing.
Generate and review reports
Understanding the statistics and metrics of how a job is performing can be crucial in ensuring that you are using the right transport mode and performance.
Watch the video below for more detail on reviewing reports:
Suggested resources:
If you need more help getting started, you can post your question in the comments section below or contact us at any time and someone from the Customer Success team will be there to assist you.