

Hi Everyone,
For those of you with a Synology lying around the house or data centre you may not know that there is an open source CSI driver for Kubernetes out there. In this post I will create K3S cluster then install the driver. After that we can even test it out!
The github page can be found here: https://github.com/SynologyOpenSource/synology-csi
I have setup a small Ubuntu virtual machine for the post.
First off lets install K3S
curl -sfL https://get.k3s.io | sh –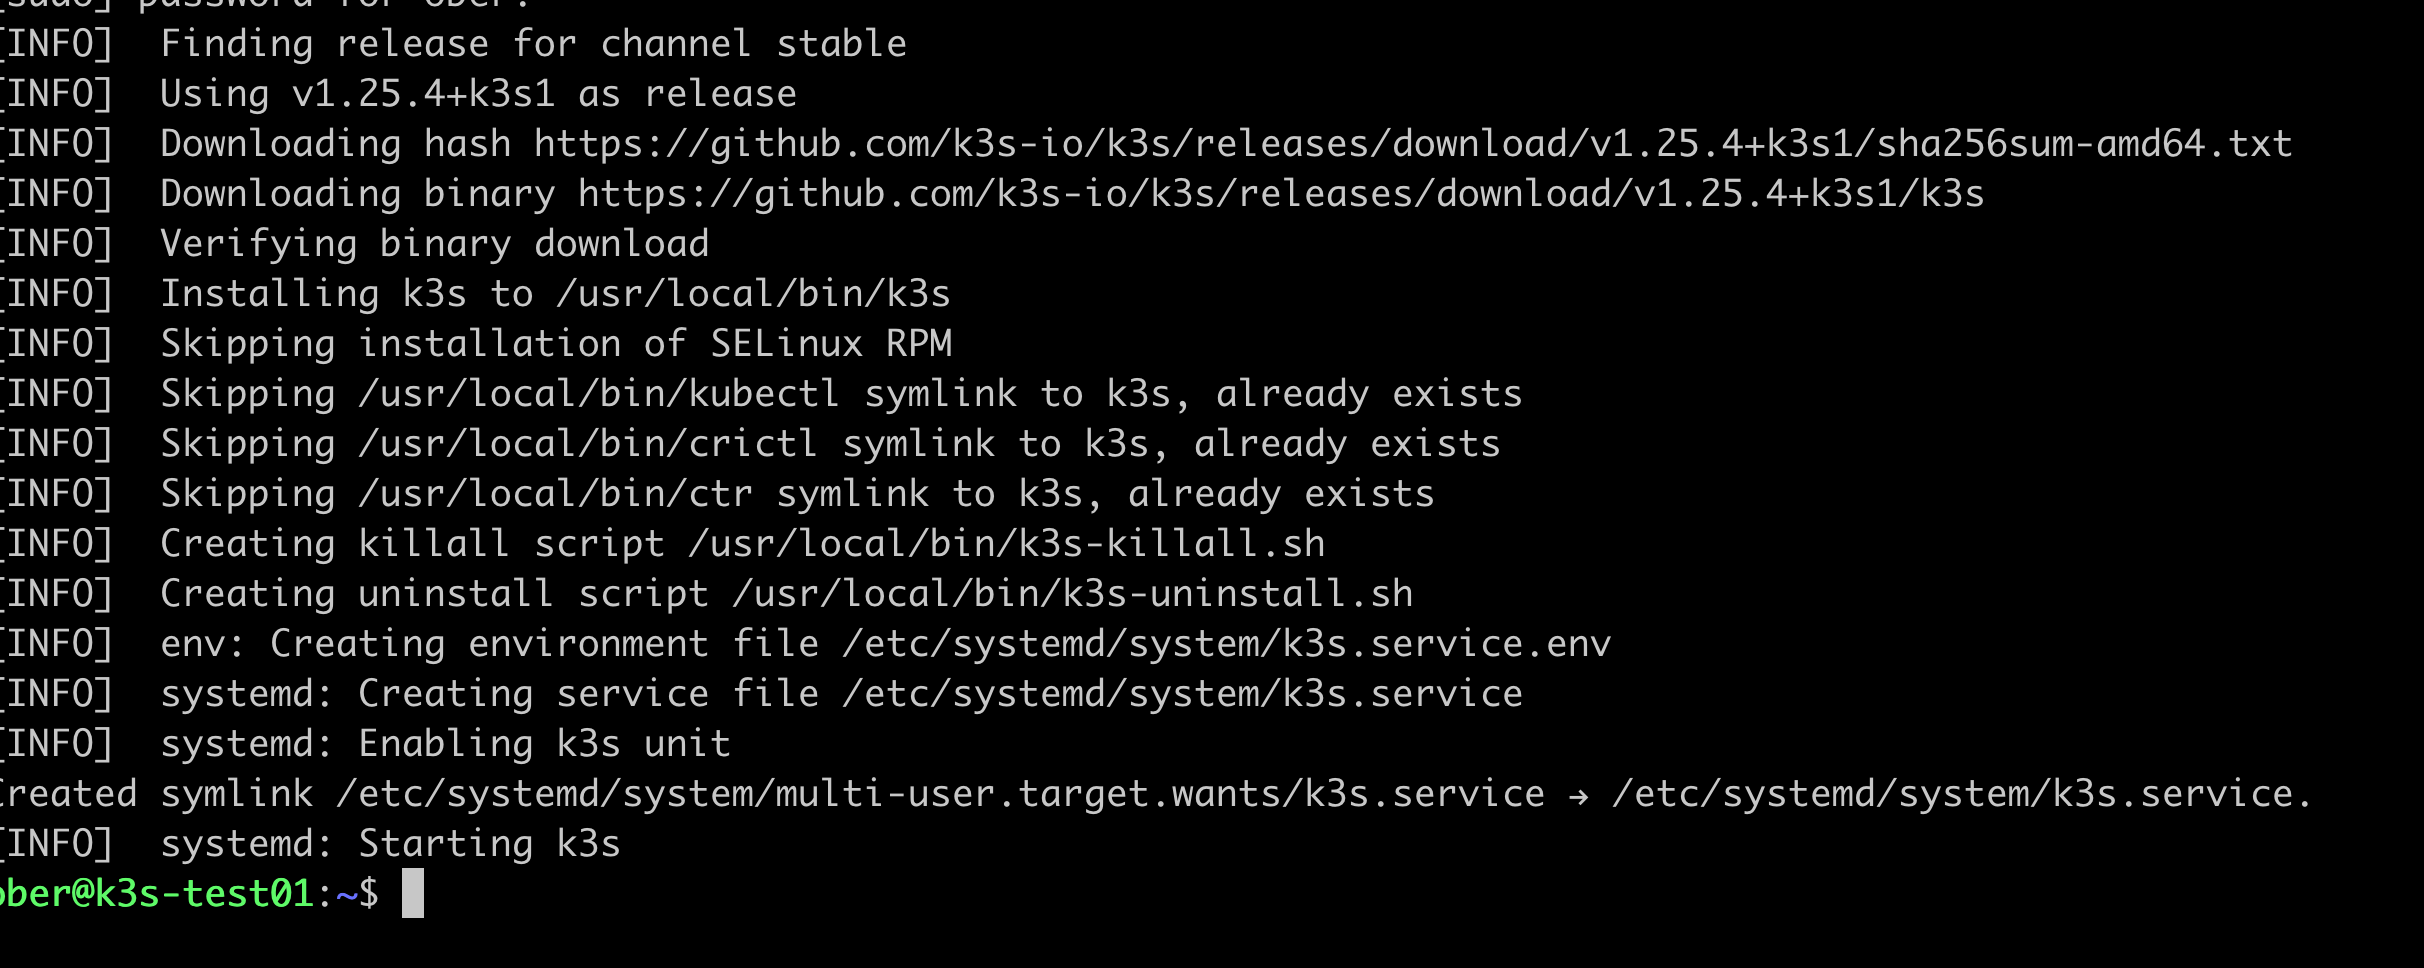
When I try to test out kubectl I get an error:

This is because kubectl can’t access the default kubernetes configuration file as a normal user. There are few fixes for this but the easiest one on our test system is to simply copy the one in our etc folder over to a local .kube folder in our user home folder.
mkdir .kube
sudo cp /etc/rancher/k3s/k3s.yaml ~/.kube/config
We will have to change the owner and permissions on the file so that our normal user account can leverage it:
sudo chown username:username ~/.kube/config

chmod 0400 ~/.kube/config
To avoid an annoying warning when logging into our shell we will run this command:
sudo chmod 644 /etc/rancher/k3s/k3s.yamlLastly we will tell our shell to use the kubeconfig file in our home directory:
echo export KUBECONFIG=~/.kube/config >>.bashrcYou can either logout and log back in or run:
exec bashNow we should be able run kubectl as a normal user:
kubectl get nodes
Now we can clone the Synology CSI drivers git repository:
git clone https://github.com/SynologyOpenSource/synology-csi.gitChange into the repo diretory
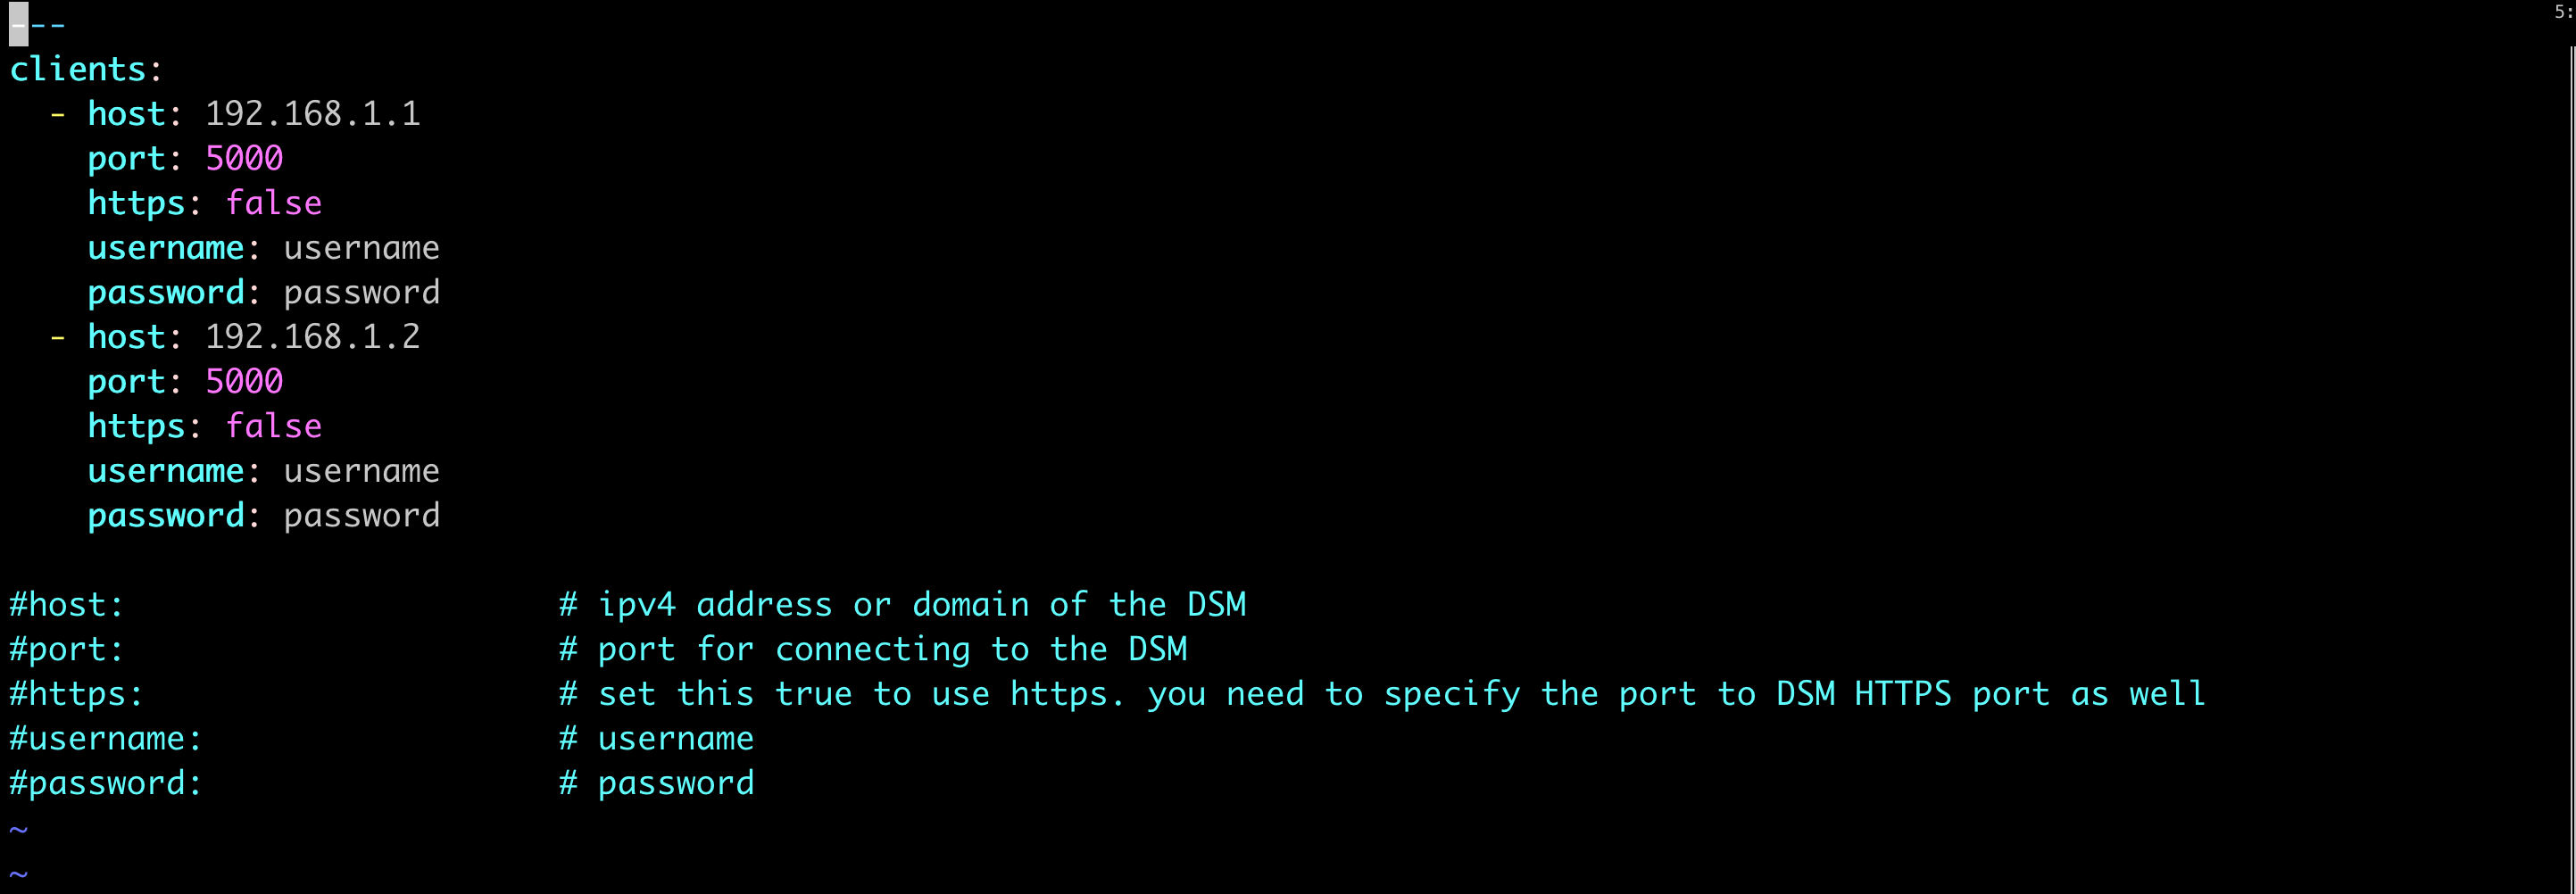
cd synology-csiAs per the instructions in the Git repo Readme we will copy the client-info template an then edit the copy for our environement:
cp config/client-info-template.yml config/client-info.ymlYou can edit the client-info.yml with any text editor and simply need to add your synology address, username and password.
Next we can run the full deployment script, check the git hub repository page instructions if you want to modify the installation from the default:
./scripts/deploy.sh runThe script runs successfully but there was one error about no volumesnapshotclass kind being matched.

This is because by default K3S does not come with the external snapshotter installed. We can easily solve this problem by installing the CRD from Github:
cd ..
git clone https://github.com/kubernetes-csi/external-snapshotter.git
Next cd into the external snapshotter repo and install the CRDs:
cd external-snapshotter

kubectl kustomize client/config/crd | kubectl create -f -

kubectl -n kube-system kustomize deploy/kubernetes/snapshot-controller | kubectl create -f -
Now go back to the synology repo and run the deploy script again:
cd ..
cd synology-csi
./scripts/deploy.sh run
Now that looks better:

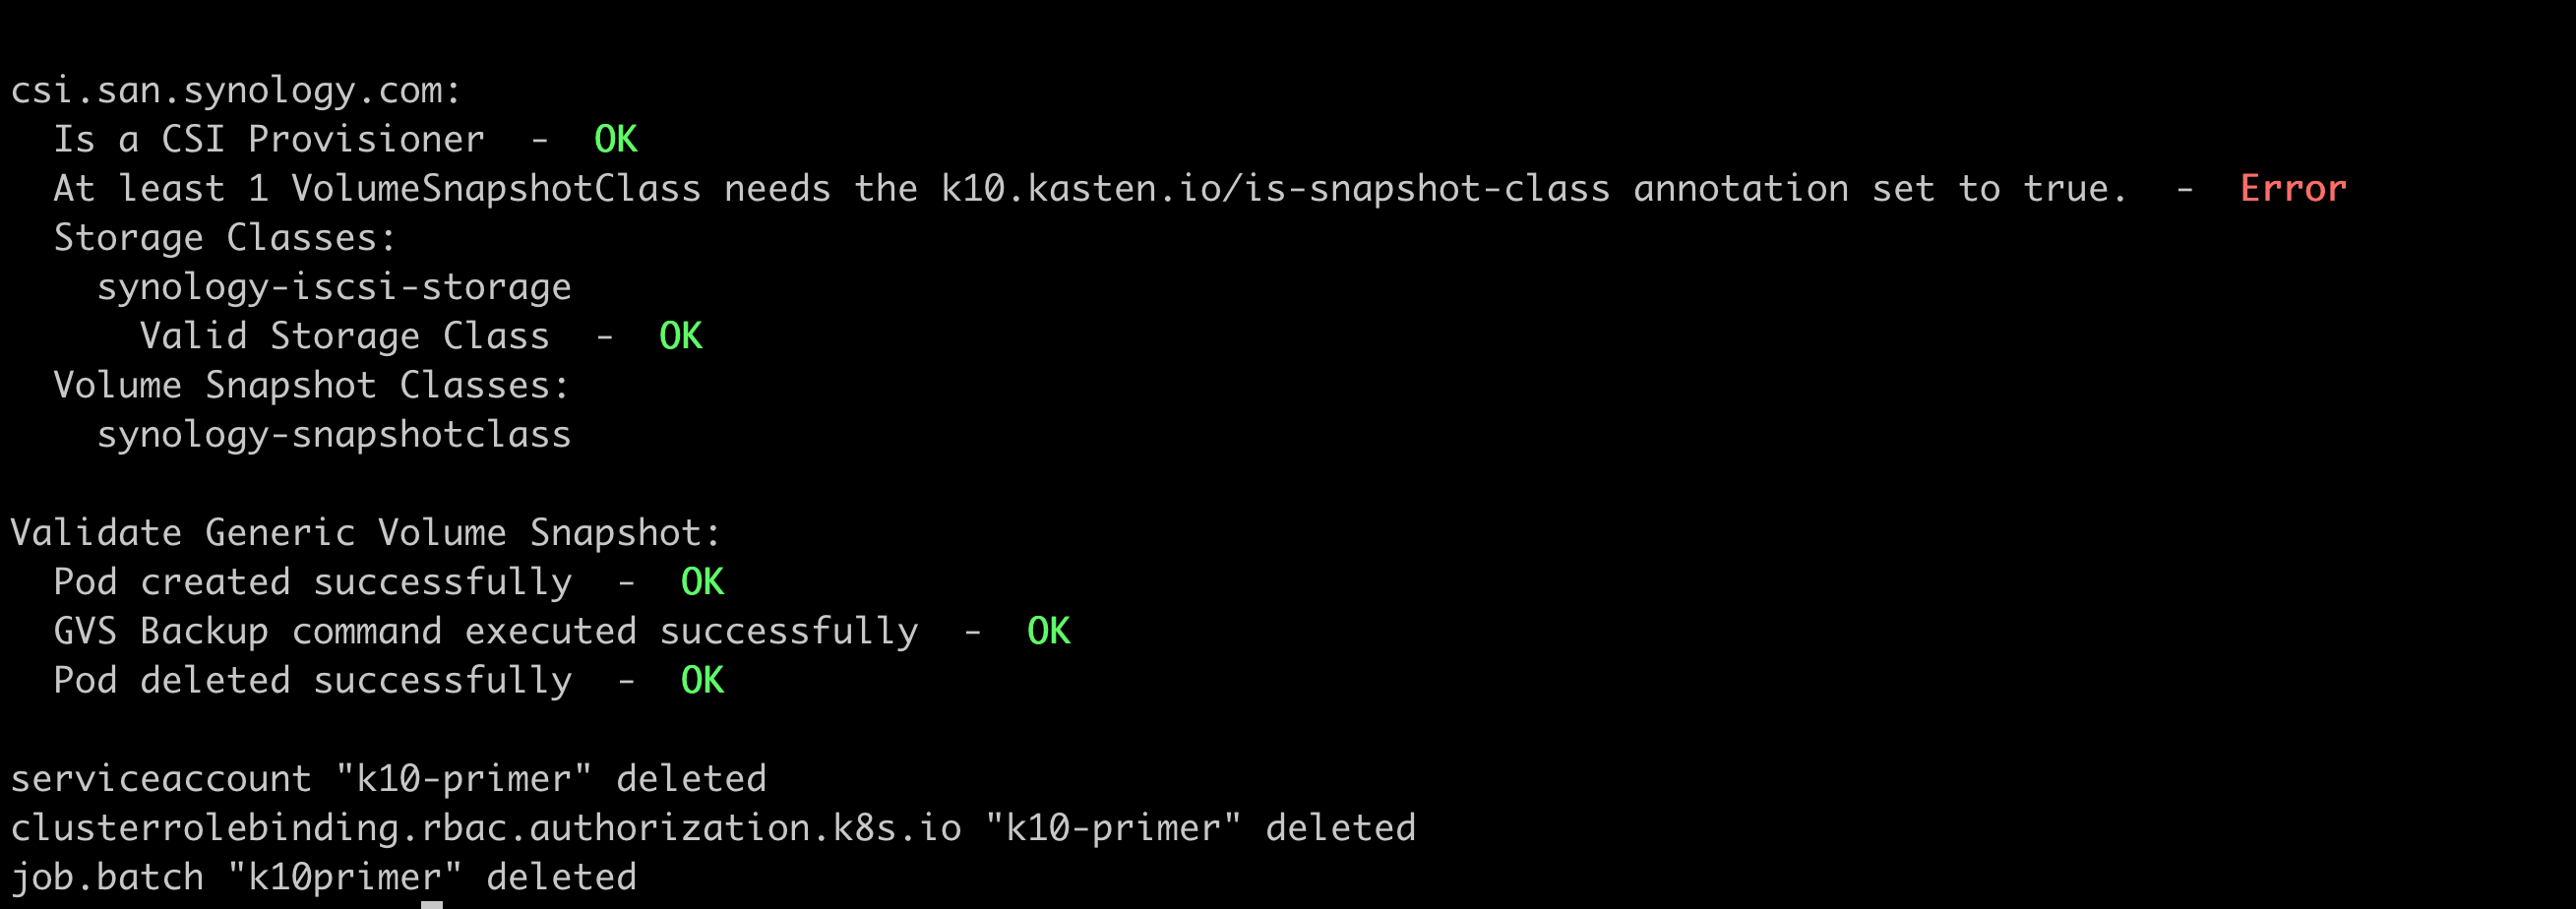
Now lets use the Kasten primer script to see if our system is ready to be backed up by Kasten.
As per the Kasten prerequisites here https://docs.kasten.io/latest/install/requirements.html#prerequisites we need add the Kasten helm repo, create a kasten-io namespace and annotate the volumesnapshotclass:
helm repo add kasten https://charts.kasten.io/

kubectl create ns kasten-io


kubectl annotate volumesnapshotclass csi-hostpath-snapclass k10.kasten.io/is-snapshot-class=true
Now lets run the script:
curl https://docs.kasten.io/tools/k10_primer.sh | bash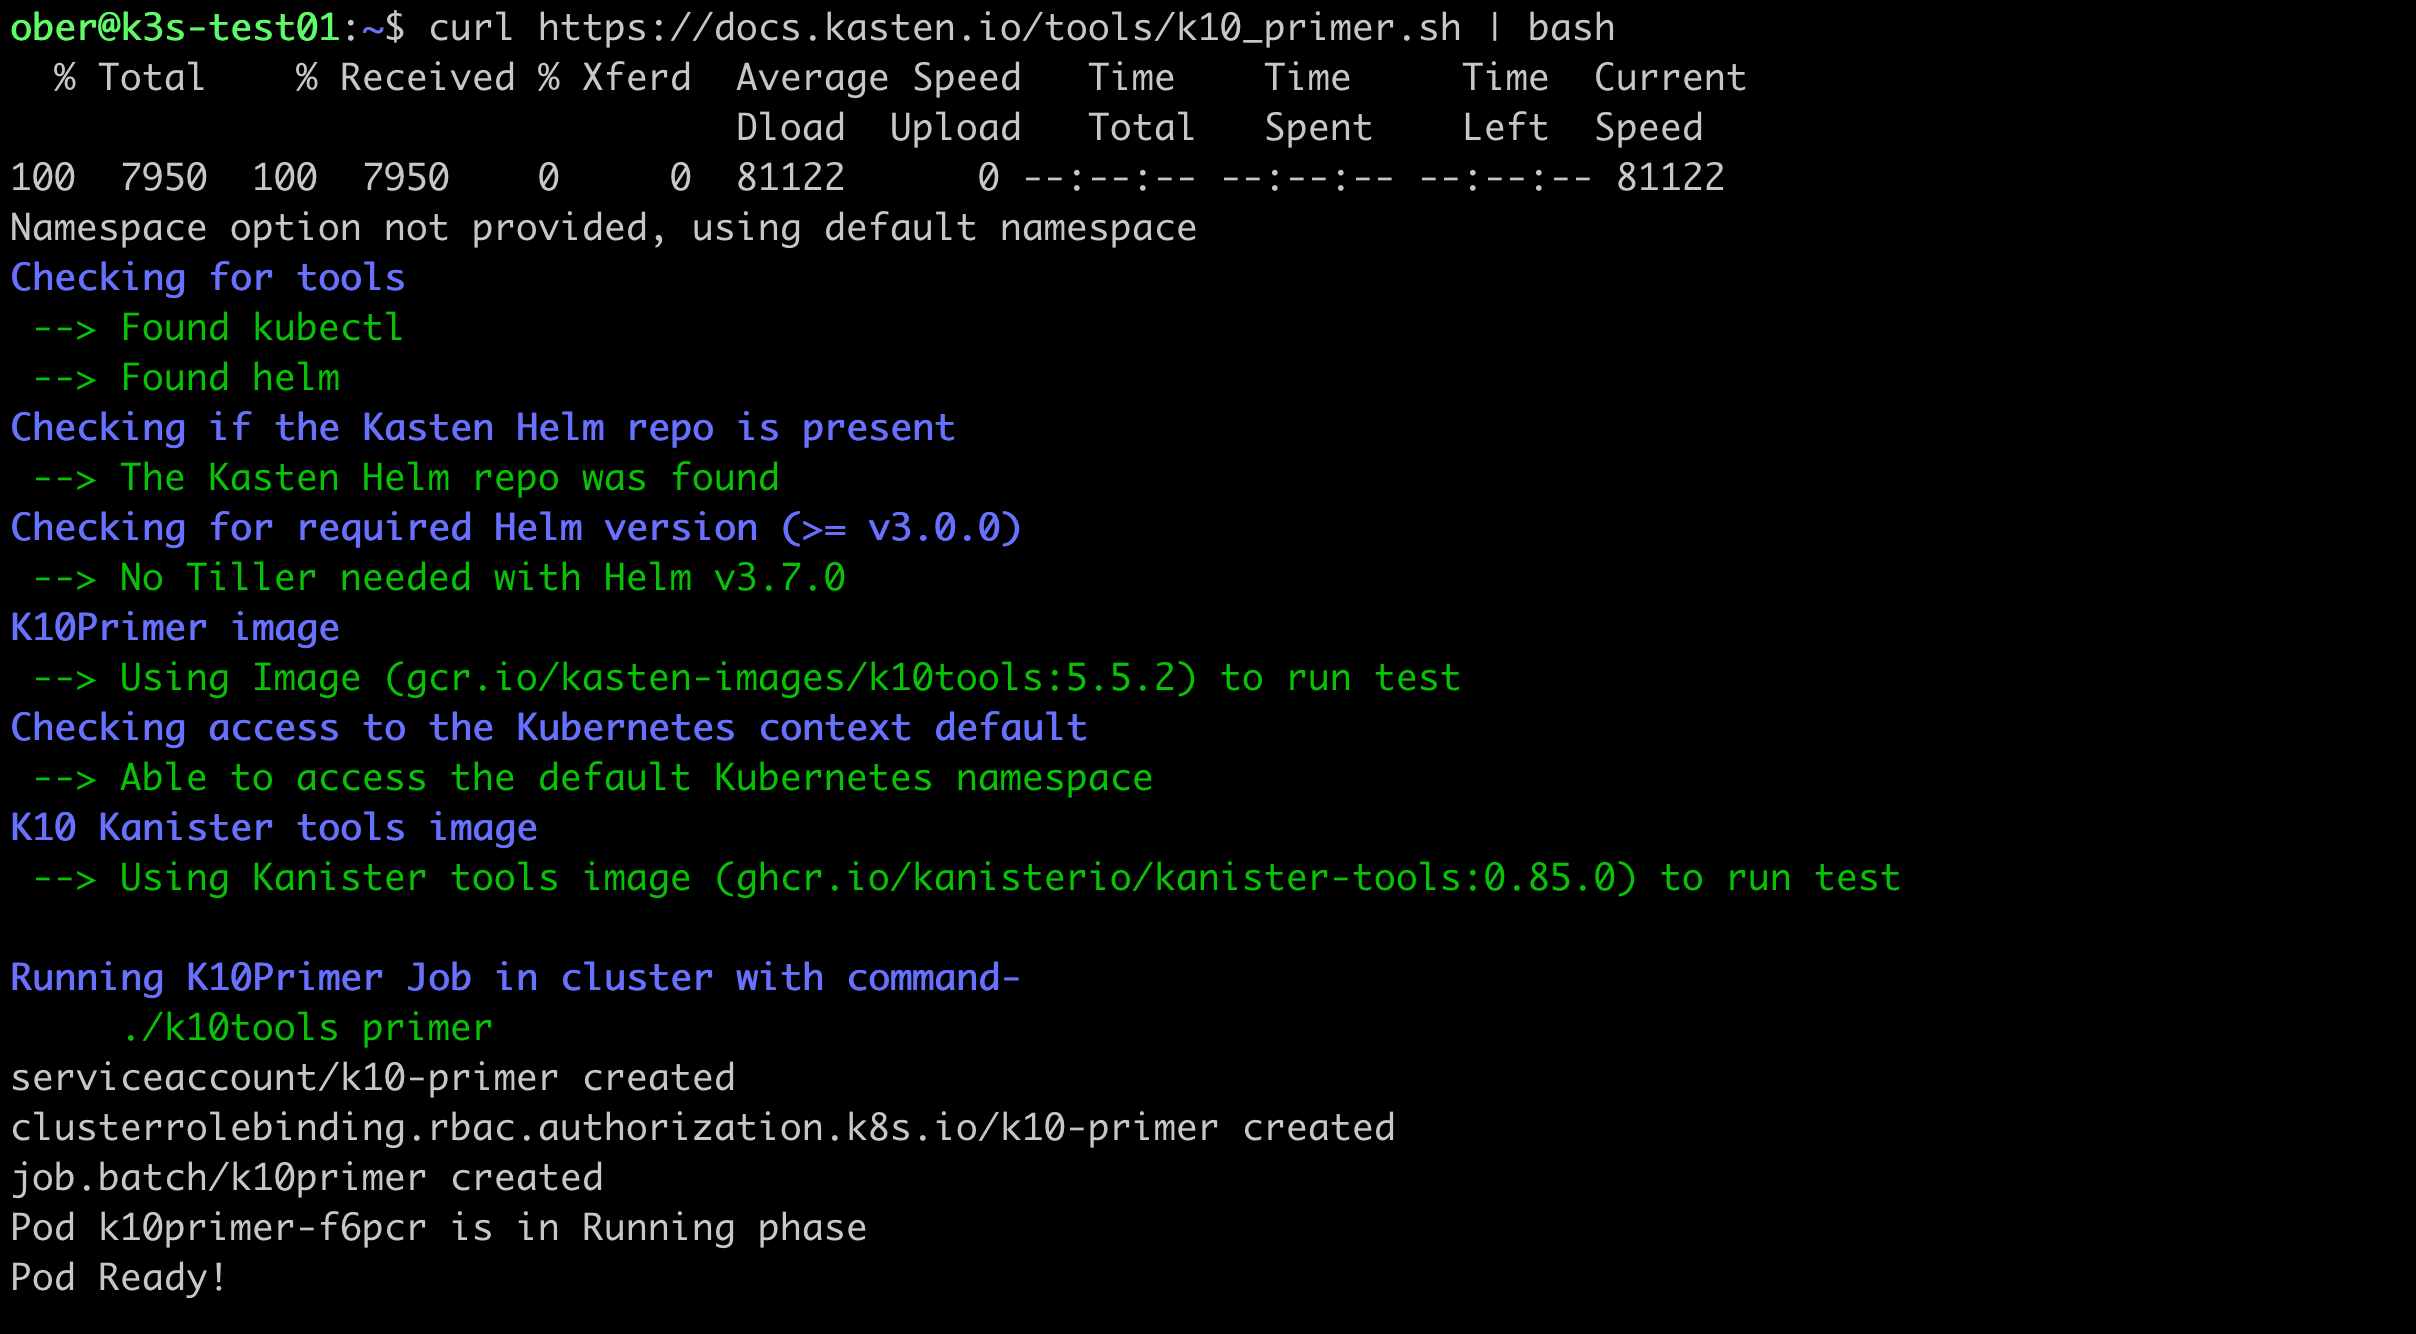
So there you have it. We have leveraged the Synology csi driver and can now deploy some applications and then install Kasten to back them up!


