

Today we are going to install the external snapshotter and a Loadbalancer. Not a Load Balander as stated in the title which I think has something to do with 19th Century Whaling.
The external snapshotter is required in order for us to take csi-snapshots and it is not included in K3S by default.
We disabled the default Loadbalancer in K3S, servicelb as we have a multinode cluster and mettalb is much more suited for this task. Keep in mind if you are leveraging a cloud Kubernetes distribution AKS, EKS or GKE then they will provide you with a load balancer
Review:
Check our cluster:
K get nodes

k get pods
External Snapshoters
First we will clone the github repository
git clone https://github.com/kubernetes-csi/external-snapshotter.gitnow change directory into the cloned folders
cd external-snapshotter/Run the following commands:
k kustomize client/config/crd | kubectl create -f -
k -n kube-system kustomize deploy/kubernetes/snapshot-controller | kubectl create -f -
We should now see the snapshot controller pods running in the kube-system namespace
Namespaces in Kubernetes are separate locations for pods. It is common to install applications in their own namespaces
k get po -n kube-system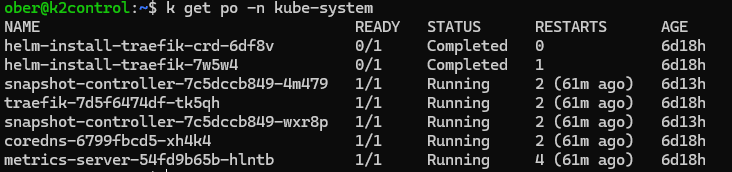
Next we will install the Metallb Loadbalancer
There are different ways to install this and we will leverage Helm for simplicity sakes.
You may need to install helm in which case on Ubuntu (or WSL Ubuntu) use the following command:
sudo snap install helm --classicNow to install MetalLB:
helm repo add metallb https://metallb.github.io/metallb

helm repo update
k create ns metallb-system
helm install metallb metallb/metallbWe will also have to perform a couple of extra steps in order to configure MetalLB
First create an IPaddress.yaml file, Use the free IP addresses is in your system and make sure to exclude them in DHCP.
My example file:
apiVersion: metallb.io/v1beta1
kind: IPAddressPool
metadata:
  name: first-pool
  namespace: metallb-system
spec:
  addresses:
  - 192.168.0.235-192.168.0.239
We also need to create an Advertisement.yaml file:
apiVersion: metallb.io/v1beta1
kind: L2Advertisement
metadata:
  name: example
  namespace: metallb-system
Finally lets apply both of these:
k apply -f Advertisement.yaml

k apply -f IPAddressPool.yaml
Now time to check the pods:
k get po -n metallb-system
Lets see if it works.
We should still have two pods running from Day 1 of our journey.
lets expose the nginx pod with a Load Balancer service:
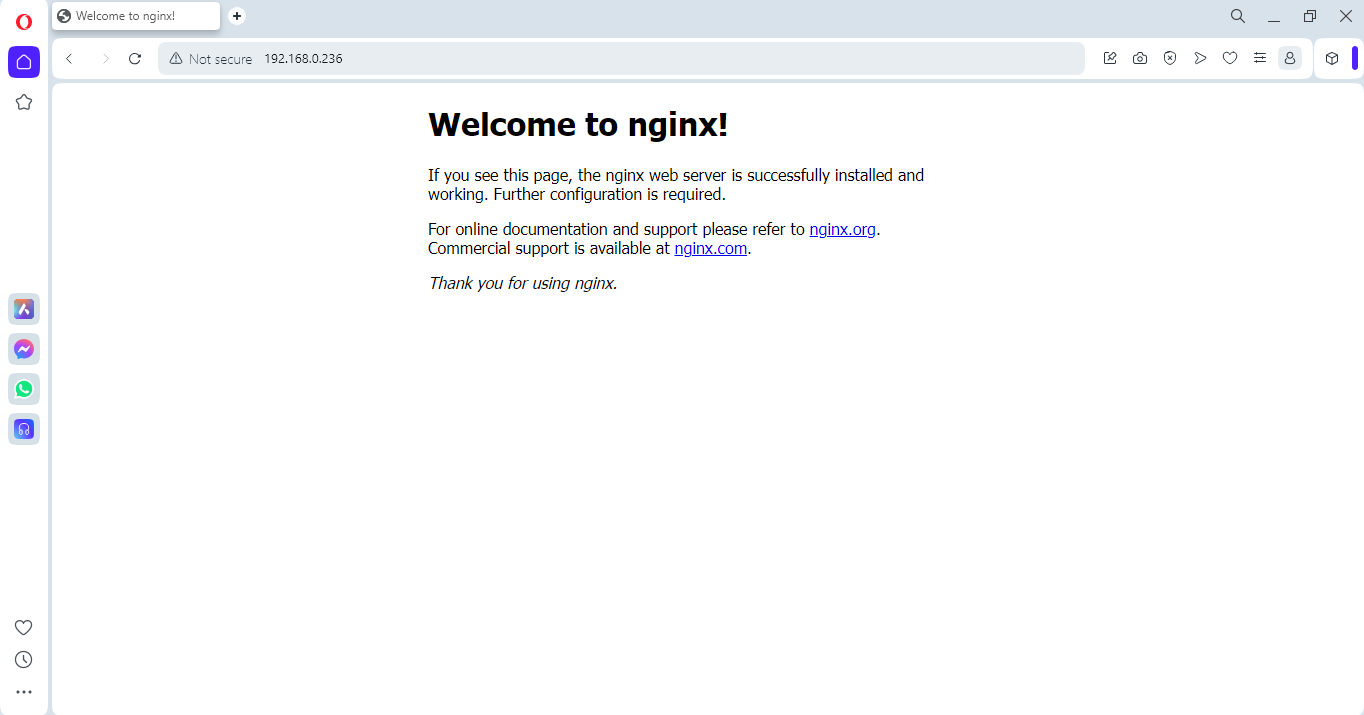
k expose po nginx --name=nginxservice --port=80 --target-port=80 --type=LoadBalancerk get svcAs we can see my service is up and running and it should be available on 192.168.0.236

Time to check in a web browser: http://192.168.0.236
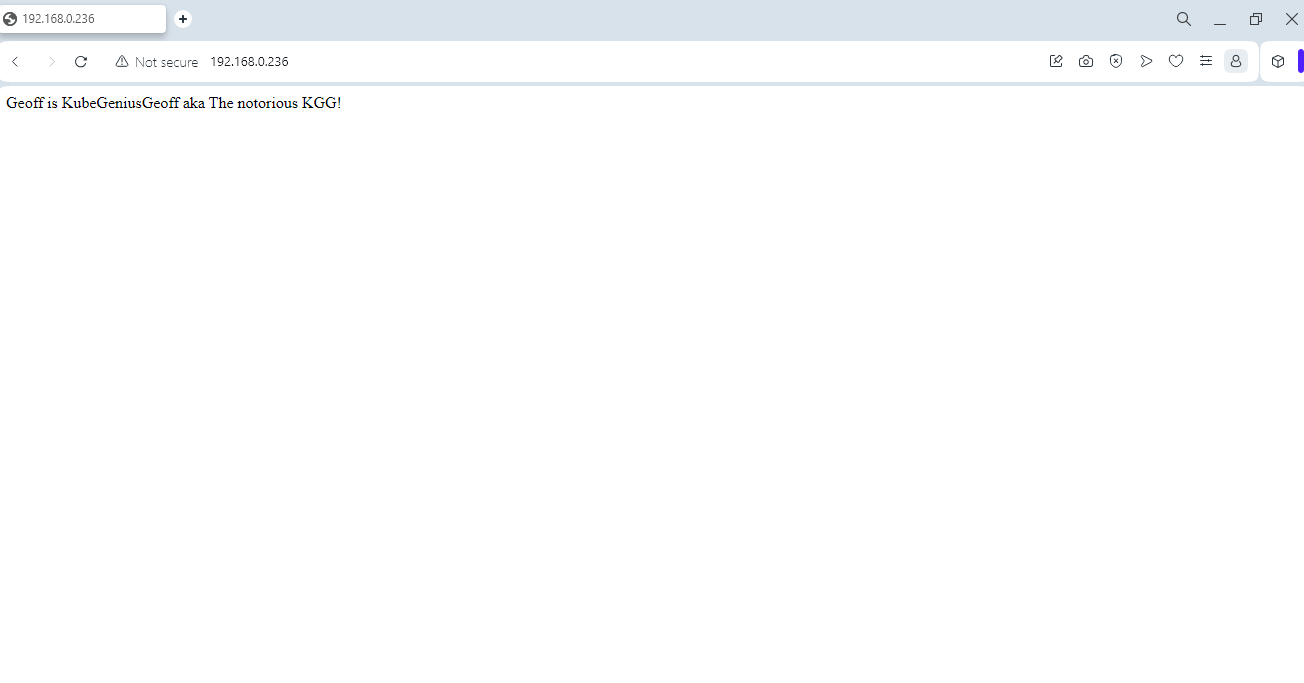
Its time to be naughty!!!
We can get inside of our container in the pod using this command:
k exec nginx -it -- bashLet’s go to the location where the index.html file and as good but naughty backup administrators back it up first before we hack the web server:
cd /usr/share/nginx/html/
mv index.html index.html.bak
Now for some defacing action:
echo "Geoff is KubeGeniusGeoff aka The notorious KGG!" > index.htmlExit out of the pod and go refresh your web browser page:
Thats it for Day 2
Next week we will install some storage by leveraging Longhorn!

