Hey guys!
Recently I write a blog post about restoring backups to AWS. I normally write in brazilian portuguese but I thought will be a good content to translate and send here too.
Like a say, I will detail all the pre-requisites and scenarios to restore backups to AWS using Veeam.
This can be useful in three scenarios:
- Restore your on-premises environment directly to EC2 machines on Amazon.
- Migrate your on-premises environment to AWS.
- Create a test environment of your on-premises infrastructure on AWS to validate patching, for example.
Pre-requisites
As always it is important that we understand the prerequisites of the solution. And in this case we are still involving a solution external to Veeam, which is AWS.
Supported backup types
First, we have the supported Veeam backup types for restoring to AWS. Are they:
- Backups of vSphere or vCoud Director VMs created by Veeam Backup & Replication.
- Hyper-V VM backups created by Veeam Backup & Replication.
- Backup VMs and physical machines created by Veeam Agent for Windows or Veeam Agent for Linux.
- Backups must have been created machine-wide or at least at the volume level.
- Backups of EC2 instances created by Veeam Backup for AWS.
- Azure VM backups created by Veeam Backup for Azure.
- Backups of Google Compute Engine instances created by Veeam Backup for Google Cloud Platform.
- Nutanix AHV VM backups created by Veeam Backup for Nutanix AHV.
- Backups of Red Hat Virtualization VMs created by Veeam Backup for RHV.
- Only as of Veeam Backup & Replication version 11th (build 11.0.1.1261).
Any other backup types created by Veeam that are not listed above cannot be restored to an EC2 on AWS.
Operating Systems Supported by AWS
We also have operating systems supported by AWS on EC2 as a prerequisite. During the restore process we will import the backup to EC2 and AWS has a list of supported operating systems.
The list is long, but it should be consulted before trying to start the restore, if it is not supported by AWS, there is no way for the process to end successfully.
Here is the link where all supported operating systems are listed: VM Import/Export Requirements .
Permissions Required on AWS
During the restore process, it will be necessary to inform the credential that will be used to connect to AWS. Veeam recommends that this credential have administrative permission on all resources. If it is not possible or wants to use a granular permission, Veeam makes the JSON available to be used in IAM and create a role just for that.
Here is a link with the necessary permissions: AWS IAM User Permissions.
Proxy Appliance
In the process of restoring a VM to AWS EC2, Veeam may or may not need a proxy appliance to assist during this process.
The Proxy Appliance in this case is an EC2 instance running Linux. It is used to upload the backup to the AWS infrastructure. Veeam deploys this Proxy Appliance automatically during the restore process and when finished this instance is removed immediately.
In some scenarios the use of the proxy appliance is mandatory, in others it is optional. It will always be mandatory in the following scenarios:
- When the backup to be restored is stored in an external repository. For example in the scenario where you are restoring Azure VMs created by Veeam Backup for Azure. Or for Google Cloud Platform backups created by Veeam Backup for GCP.
- When the backup is stored in an Object Storage Repository. For example an old backup that is only stored on S3, Azure or another object storage provider.
For all other scenarios the use of the Proxy Appliance is optional, but recommended to increase the performance of the data upload process.
We will have some specific prerequisites for the Proxy Appliance. Are they:
- If the backup is stored in an on-premises object storage repository (MinIO, for example), the proxy appliance must have access to the repository. A connection via VPN or using AWS Direct Connect is usually required,
- To upload a VM with ONE disk the proxy appliance needs at least 1GB of RAM. Make sure the proxy appliance has enough memory to upload all disks, otherwise the process will fail,
- The subnet and security group that the proxy appliance will use must meet the following prerequisites:
- The subnet must have automatic public IP assignment.
- The subnet must have a route table with a default route to an active AWS internet gateway.
- The subnet must not have ACLs. If it has any ACLs, it must allow inbound and outbound traffic as listed here: Proxy Appliance Connections .
The security group used must allow inbound and outbound traffic on the ports listed here: Proxy Appliance Connections .
How restore for Amazon EC2 works
Now that we have all the prerequisites defined and we know how the proxy appliance works, we need to know how the restore works in case of using the Proxy Appliance and without the Proxy Appliance.
Restore from a Backup to EC2 with Proxy Appliance
- First, Veeam creates the proxy appliance on Amazon EC2.
- During the restore process, the proxy appliance communicates with Veeam components via SSH.
- For each VM disk Veeam creates an empty EBS volume on EC2.
- Veeam adds the empty disks to the Proxy Appliance and restores the data to the EBS volumes.
- Veeam creates an instance that will receive the volumes on EC2.
- When the upload is complete, Veeam removes the EBS volumes from the Proxy Appliance and adds it to the newly created instance.
- After the restore process completes Veeam removes the EC2 proxy appliance.
Restore from a backup to EC2 without Proxy Appliance
- Veeam uploads the VM disks to Amazon S3.
- In S3 disks are stored in a temporary bucket in RAW format.
- Veeam imports the disk data from the temporary bucket to an EBS volume on EC2.
- Veeam creates an instance and adds the EBS volumes to that instance.
- After the import process is complete, Veeam removes the temporary S3 bucket.
Restoring a VM for Amazon EC2
Now that we know how the whole process works, I will demonstrate the process step by step.
In my example it is a backup of a Windows 10 Pro VM from vSphere to EC2 in a personal account. My backup is stored locally and I will use the Proxy Appliance.
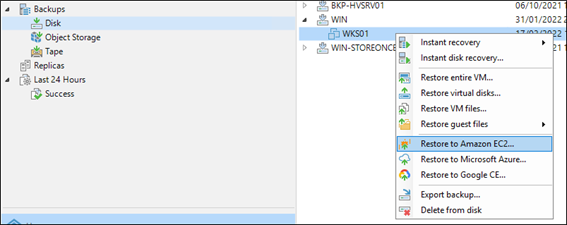
To start the restore, we must go to the backups in “Disk” and choose the option “Restore to Amazon EC2”:
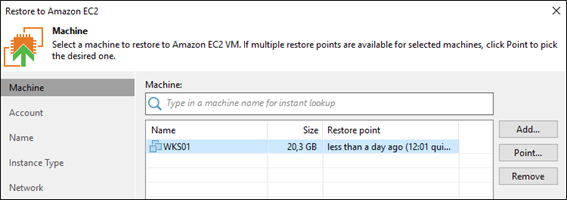
Choose the restore point you want to restore.
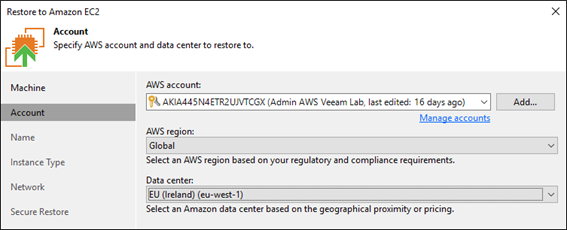
Choose the AWS account with the required permissions, region and Availability Zone. In my case I am using an account with full permission in AZ Ireland.
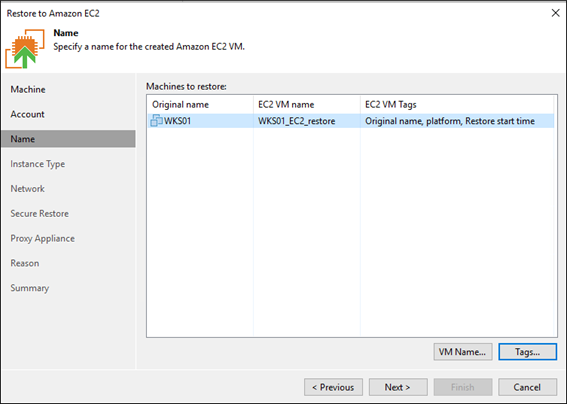
Set the EC2 name and tags.
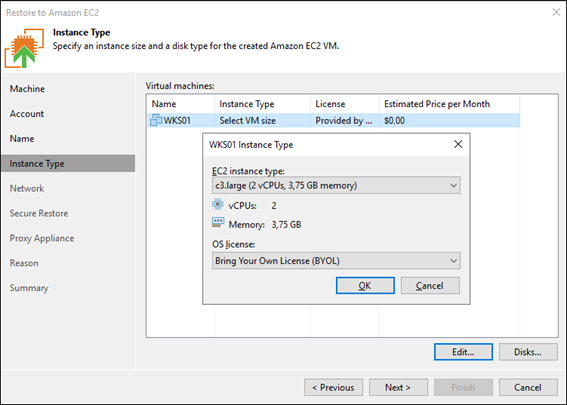
Choose the instance type. Be sure to choose an instance that is available in that AZ.
In my case, the VM has 2 vCPU and 3GB of memory, so I will choose an instance type that comes as close to this configuration as possible. In addition, also choose the type of license, if it will be licensed by AWS itself or if you will use your license.
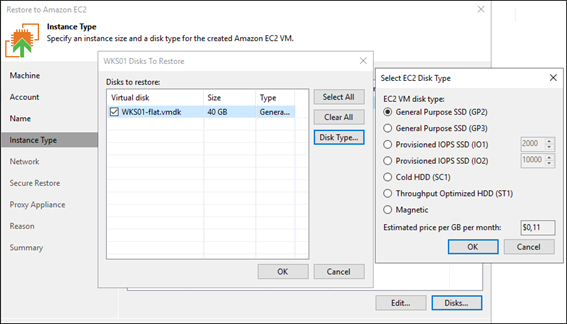
Also choose the disk type for each VM disk as per your need. In my case I will leave the General Purpose SSD (GP2).
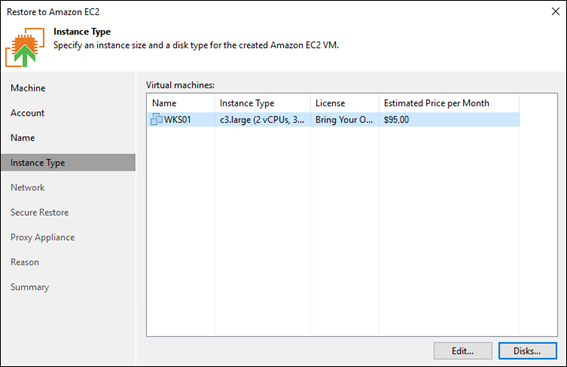
After choosing these options, Veeam will approximate the cost of the VM on AWS per month.
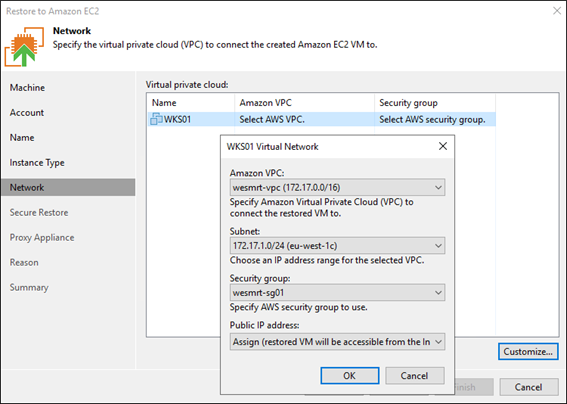
In Network we will define the VM's network options in AWS.
Choose VPC, Subnet, Security Group and whether the VM will have public IP.
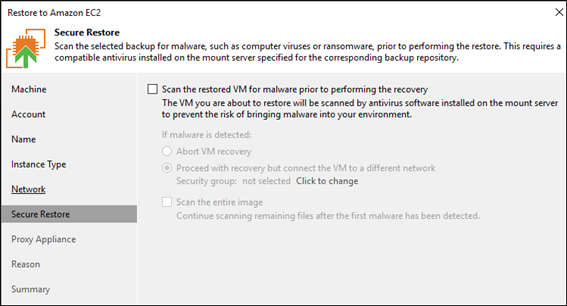
During the restore you can use the “Secure Restore” option to check for any malicious files in the backup before proceeding with the restore.
I will not use this option, but if it is interesting you can configure Veeam to use the Antivirus engine you have installed on Veeam.
For more details read the documentation on Secure Restore .
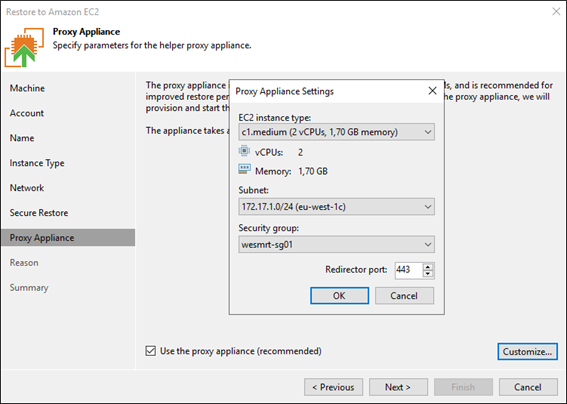
In this example I will use the Proxy Appliance, so we need to check the option to use it and choose the customization options.
You must choose the instance type according to the VM you are restoring. As I explained earlier, Veeam will use 1GB of memory for each disk that will be restored, as my VM only has one disk, the instance “c1.medium” is sufficient.
We must also choose the Subnet and Security Group of the Proxy Appliance. The "Redirector port" is the port that Veeam will use to communicate with the Proxy Appliance, by default it is always port 443. Remembering that for the restore to work, it is also necessary to release SSH port 22 between Veeam and the Proxy Appliance, as described in the Proxy Appliance Connections documentation .
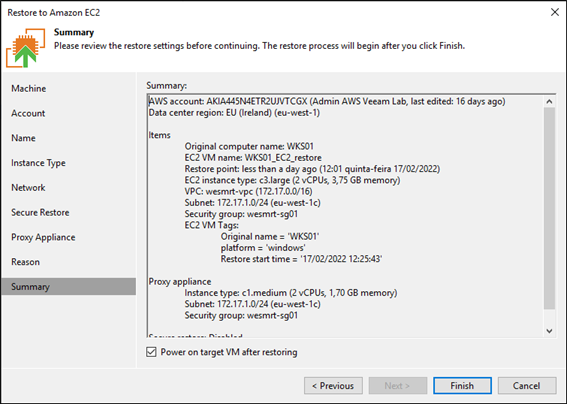
In Summary we will have a summary of all the configurations and the option to turn on the instance after the restore. Click “Finish” to start the process.
At first, Veeam will deploy the Proxy Appliance on AWS.
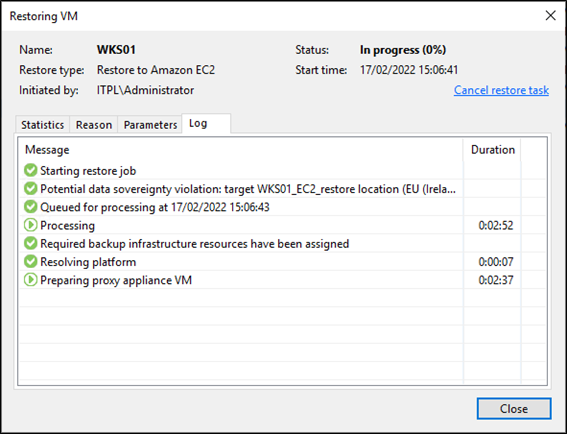
In the EC2 Dashboard on AWS we can see that a new instance has been created with the name “Proxy appliance WKS01_EC2_restore”.

After Veeam is able to communicate with the Proxy Appliance it starts scanning the disks. In case of Windows the GPT disks (if any) will be converted to MBR.
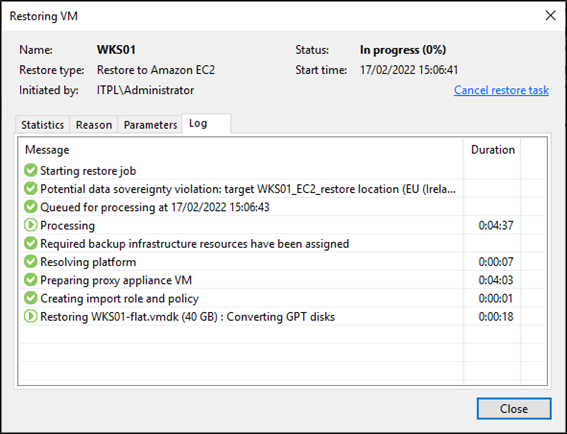
After the conversion, the upload will begin.
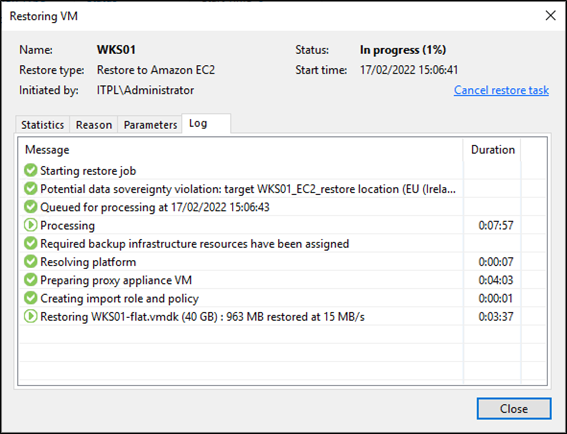
In the EBS Volumes Dashboard you can see that a new volume the size of the VM's disk has been created and associated with the Proxy Appliance to receive the data.

When the upload is complete, Veeam imports the VM and creates the instance on EC2.
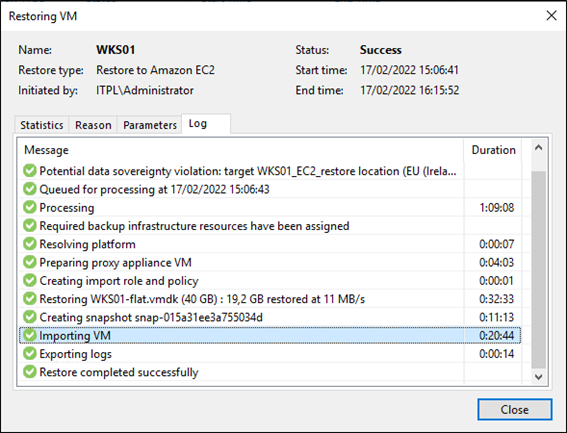
In EC2 we will already have the instance running.

After Veeam completes the entire process, the Proxy Appliance is shut down and removed from the AWS infrastructure.
And that is it. :)
I hope everyone likes this type of step by step where I try to explain every step.


