Hello Community,
I prepared an article to report my experience in backing up Oracle databases with FS agent and RMAN plug-in. I hope it can be useful.
Thanks to my colleagues
Keeping backup data from an Oracle-type database is always complex. The world of Oracle DBAs is strongly inclined to remain locked in the comfort zone shell, and getting through it is never too easy.
Meanwhile, they wonder why, if any backup tool uses RMAN commands, they have to rely on other people when they can do everything themselves.
Today I am going to present a real scenario of installations on Oracle Linux VMs.
But I start by showing the schematic of how Oracle backup works with the plugin
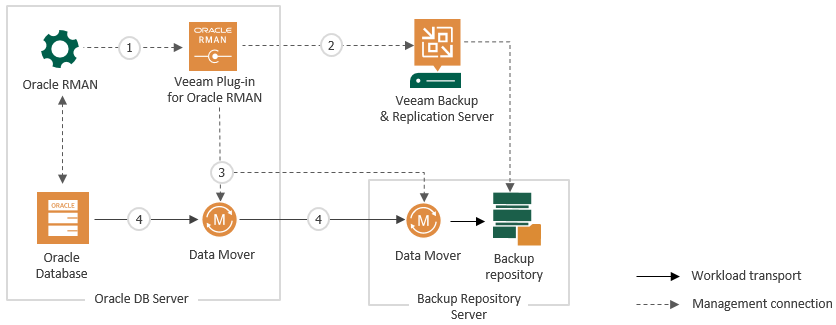
SCENARIO:
All the machines on which Oracle is present are Linux VMs on OLVM so it was necessary to provide for the installation of the File System type agents and Plug-ins for Oracle RMAN.
The databases were both RAC type and single databases.
A network card was added to all vms on a dedicated backup VLAN that connects directly to the VBR server.
The Plug-in can operate in two modes: standalone mode and managed mode.
In my case I used the managed mode with which it is possible to automate the installation and upgrade of the plug-in on multiple servers through Protection groups.
The key thing to keep in mind are the prerequisites that are necessary for the proper functioning of all steps namely:
1. Installation and configuration
2. Backup
3. Restore
Installation and configuration
All configurations are taken from the official documentation https://helpcenter.veeam.com/docs/backup/plugins/planning_and_preparation_oracle.html?ver=120
First of all considering that Veeam performs queries on the Oracle DB to collect statistical information about RMAN, Oracle may decide to use space in some temporary tables.
So the first step to be performed on the Oracle DB is to configure the Temp Tablespace to avoid the shortage of space on them.
You can check the space size of temporary tables with the following SQL query below:
SELECT * FROM DBA_TEMP_FREE_SPACE;
Or create a new Temp Tablespace with the command:
CREATE TEMPORARY TABLESPACE TEMP_NEW TEMPFILE '/DATA/database/ifsprod/temp_01.dbf' SIZE 500m autoextend on next 10m maxsize unlimited;
ALTER DATABASE DEFAULT TEMPORARY TABLESPACE TEMP_NEW;
To configure Veeam Plug-in on a Linux or Unix computer, you need to use a local user that is part of the OSDBA group (typically called "dba") and has SYSDBA privileges.
But this is not enough.
In fact, these OS-level permissions are also FUNDAMENTAL:
The /opt/veeam directory must be writable.
The NOEXEC mount option must be disabled for the /var and /tmp directories.
To install the plug-in, use the sudo command or a user with root privileges.
The above are the permissions for the installation of the plugin only.
It is then necessary to add other permissions for management, which can be found here: https://helpcenter.veeam.com/docs/backup/plugins/plan_and_manage_permissions.html?ver=120#computer-with-veeam-plug-in-for-oracle-rman
In particular:
Permissions for the $ORACLE_HOME folder must be set with the chmod command to 775.
The OS user account has the primary membership in the Oracle Inventory Group (oinstall) group.
NOTE: I have ascertained that even if oinstall is not the primary group 'often' everything works.
At this point we are ready to install the plugin.
I chose the easiest route for the installation, i.e. I created a Protection Group in which I entered the servers on which the operation was to be performed, and in the PG specification I set the installation of the Linux FS Agent and the RMAN plug-in to take place
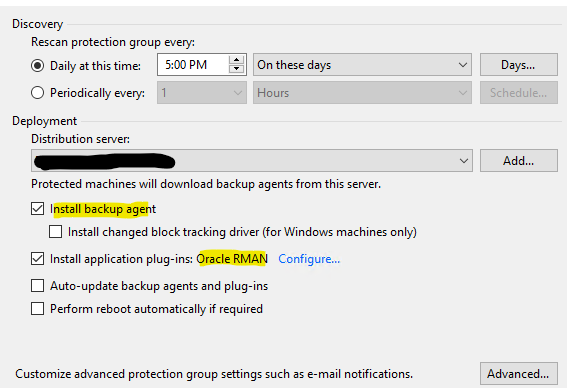
I voluntarily left auto-update and eventual reboot unchecked since these are machines in production.
The result, if all prerequisites are met, is as follows:
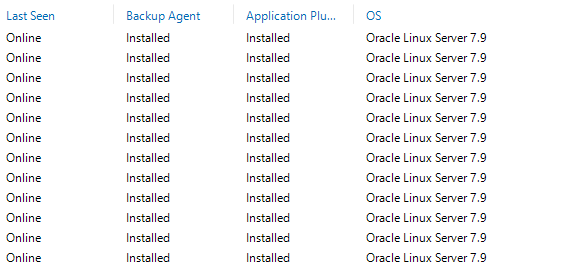
Immediately after installation, the rescan process of the machines in the PG starts, and in this phase the presence of an Oracle instance is checked.
Veeam scans the instances in two ways:
If an oratab file is present, its contents are scanned. To be correctly identified, the databases must be listed as ORACLE_SID:ORACLE_HOME.
If the database is listed as DB_UNIQUE_NAME:ORACLE_HOME or the oratab file is empty, the advice is to add the entry. This speeds up operations.
If the oratab file does not have any configuration lines, Oracle's srvctl command is used and its output captured.
Troubleshooting: If the 775 permissions on the $ORACLE_HOME were not present, this would result in the instances on the servers not being displayed.
ATTENTION: A specific note concerns Oracle RAC installations. It is necessary to install the Plugin for RMAN on all Oracle RAC nodes in order to guarantee backups from each individual node.
Once the installation phase is complete, it is necessary to set the access permissions to the repository for agents.
By default, the setting on the backup repository is set to Deny to everyone
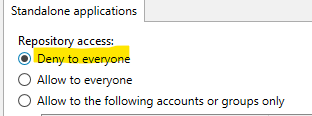
In the Access Permission window, it is important to specify who you wish to grant the correct permissions to the backup repository to, and you can choose between
Allow to everyone - select this option if you wish to grant access to the repository to any user. Honestly, for security reasons, this option is not recommended for production environments.
Allow to the following accounts or groups only - select this option if you want to allow only specific users to store backups in this repository.
Then add the users used for backups.
Network configurations
The network, also for the RMAN plug-in, is crucial for optimal backup performance.
Veeam recommends, where possible, configuring the following network settings:
| Item | Value | Comments |
| Jumbo Frames | Enable | Veeam Repository and Oracle Servers |
| Network Speed | Mutiple 10 Gbps cards | ideally dedicated layer 2 network for backup operation |
| IPV6 | Disable | IPv6 should be disabled on Oracle Database server when possible |
General Troubleshooting
On the server where the plugin is installed, the logs can be checked in the following folders: /tmp/veeam_plugin_logs/
/var/log/VeeamBackup/
/tmp/OracleProxyLogs/
The configurations of the plugin can be checked in the file /opt/veeam/VeeamPluginforOracleRMAN/veeam_config.xml
BACKUP
The backup job was created directly from the VBR Server interface. A backup job was created for each database by always adding the instance that was found
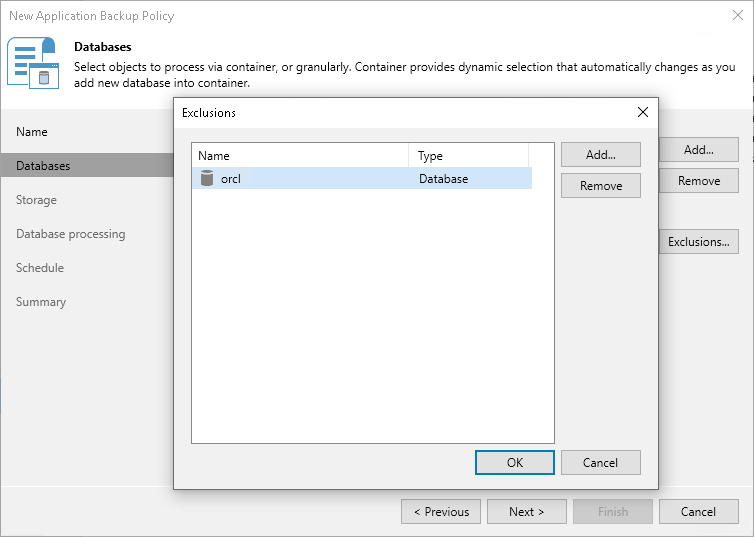
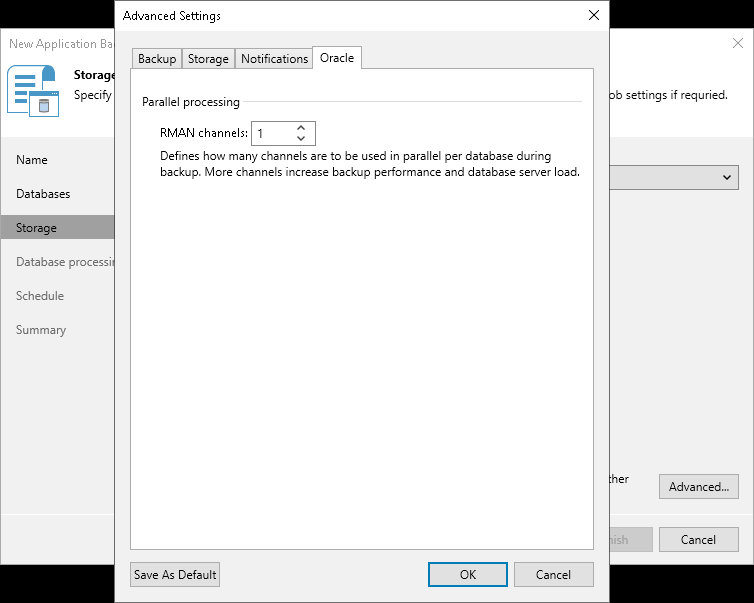
Attention: the number of RMAN channels must also be specified in the advanced settings in the Oracle tab (see image)
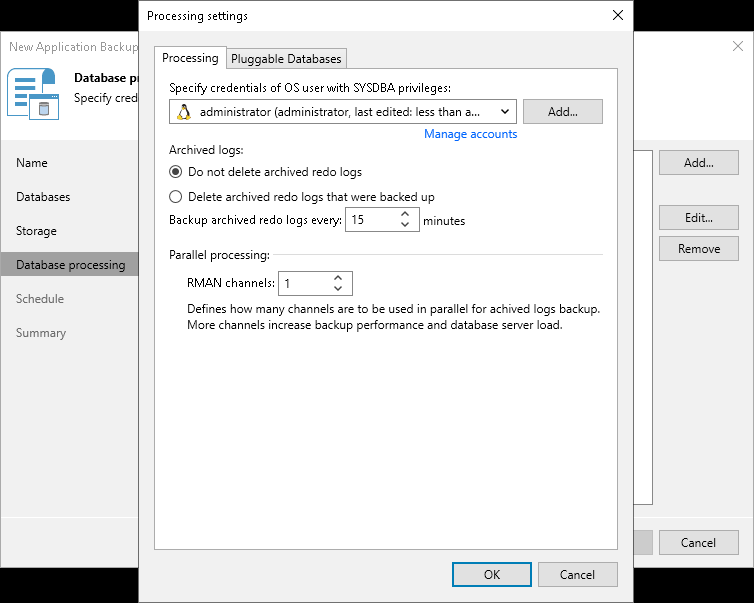
And also the most important configuration for the archive logs part.
RESTORE
We also relied on Veeam's interface for restore with the Explorer for Oracle. Since this is an agent backup, there is no instant publish or instant restore but only these options
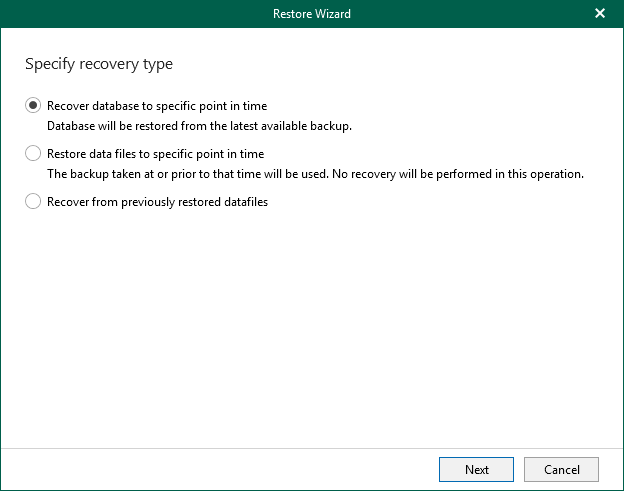
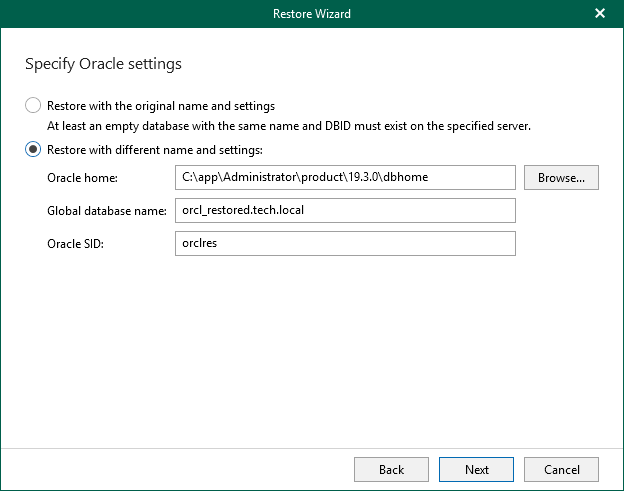
After choosing the type of restore to be performed and entering the target server on which to restore, the procedure asks you to specify certain settings for the instance.
Since the tests carried out envisaged restoring on another server, it was necessary to choose the second option by indicating a different name for the instance
Another important step is related to the time at which one wants to restore.
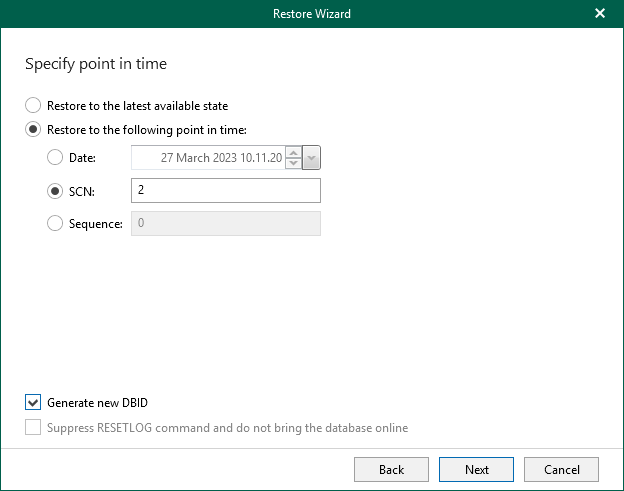
I tested the first two possibilities, namely restore to the last available backup and restore from an appropriate sequence.
In both cases, it was verified that the restore completed successfully by keeping the archive logs as requested (all of them in the first case, up to the indicated swquence in the second). Then the check started to see if the paths on the server exist or need to be created, and the last step is to indicate the number of channels to be used for the restore.
CAUTION: Before starting the restore on another server, it is necessary to specify the credentials of a user account under which the backup was created.
Run the following command:
OracleRMANConfigTool --set-auth-data-for-restore
You will be prompted to select an authentication method to access the backup.
Then to access the backup files using the appropriate credentials type 1:
Select authentication type or disable the functionality:
0. To disable the functionality
1. Credentials
2. Recovery token
Enter authentication type number: 1
Then you will be asked to enter the credentials:
Enter username:
Enter password for <username>:
From the verification tests it was found that everything is completed successfully
DB STATE:
SQL> SELECT INSTANCE_NAME, STATUS, DATABASE_STATUS FROM V$INSTANCE;
INSTANCE_NAME STATUS DATABASE_STATUS
---------------- ------------ -----------------
database OPEN ACTIVE
ARCHIVE LOG:
SQL> select trunc(COMPLETION_TIME) TIME, SUM(BLOCKS * BLOCK_SIZE)/1024/1024 SIZE_MB from V$ARCHIVED_LOG group by trunc (COMPLETION_TIME) order by 1;
TIME SIZE_MB
--------- ----------
15-MAY-24 172.806641
16-MAY-24 2035.29736
SIZE DATABASE:
SQL> select sum(bytes)/1024/1024/1024 GB from (
select bytes from dba_data_files
union all
select bytes from DBA_TEMP_FILES
union all
select bytes file_name from v$log
union all
SELECT (block_size * file_size_blks) bytes FROM v$controlfile
); 2 3 4 5 6 7 8 9
GB
----------
134.13028
Thanks for reading


