This article was birthed by the following article shared in the community which by
I see a lot of environments shared online with the .local suffix and this made me create a blog post on how to set up a Domain Controller as Recommended by Microsoft. There are numerous articles on this topic on the blog but I have decided to share the latest that was prompted by the above concern.
But then, this is a new Active Directory environment. The issue has not been solved for existing AD environments with the .local suffix. Hence, this guide was developed to tackle this problem. Please see “how to change Active Directory Domain name from dot local to dot com” for more information.
Note: I would recommend backing up your AD environment before making any changes to your domain controllers. I would recommend using Veeam Backup and Replication for AD protection. This ensures that you can recover in case of unexpected issues during the rename process.
Some reasons to change Rename Active Directory from .local to .com
Changing the Active Directory domain name from “.local” to “.com” is recommended to enhance compatibility and align with best practices when setting up a new AD environment.
The .local top-level domain (TLD) is not intended for global use in the Domain Name System (DNS). Instead, it is utilized by multicast DNS (mDNS) to facilitate the resolution of hostnames to IP addresses within small networks, eliminating the necessity for a dedicated DNS server etc.
Prerequisite to renaming Active Directory (AD)
Renaming an Active Directory (AD) domain is a complex process that requires careful planning and execution.
Before deciding to rename an AD domain, consider the following factors:
- Renaming the AD domain can have a significant impact on services and applications that rely on AD. Ensure that all systems and services are compatible with the new domain name.
- Some applications and services may have hard-coded references to the current domain name. Verify the compatibility of all applications and update configurations accordingly.
Before proceeding with these steps, endeavor to back up your AD environment before making any changes. I would recommend using Veeam Backup and Replication for AD protection. This ensures that you can recover in case of unexpected issues during the rename process.
Note: Before you begin the domain rename operation, ensure that the certificate revocation lists (CRLs) and the CA certificates will not expire soon. If you find that they are close to expiration, complete the following tasks as described in the Microsoft guide before the domain rename operation.
Active Directory Rename Process
Note: : While this renaming process is technically possible, it’s generally considered best practice to avoid renaming AD domains whenever possible due to the potential for disruption and data loss if not executed correctly. Therefore, evaluate the potential impact of renaming the domain name in a test environment before replicating it in your production environment.
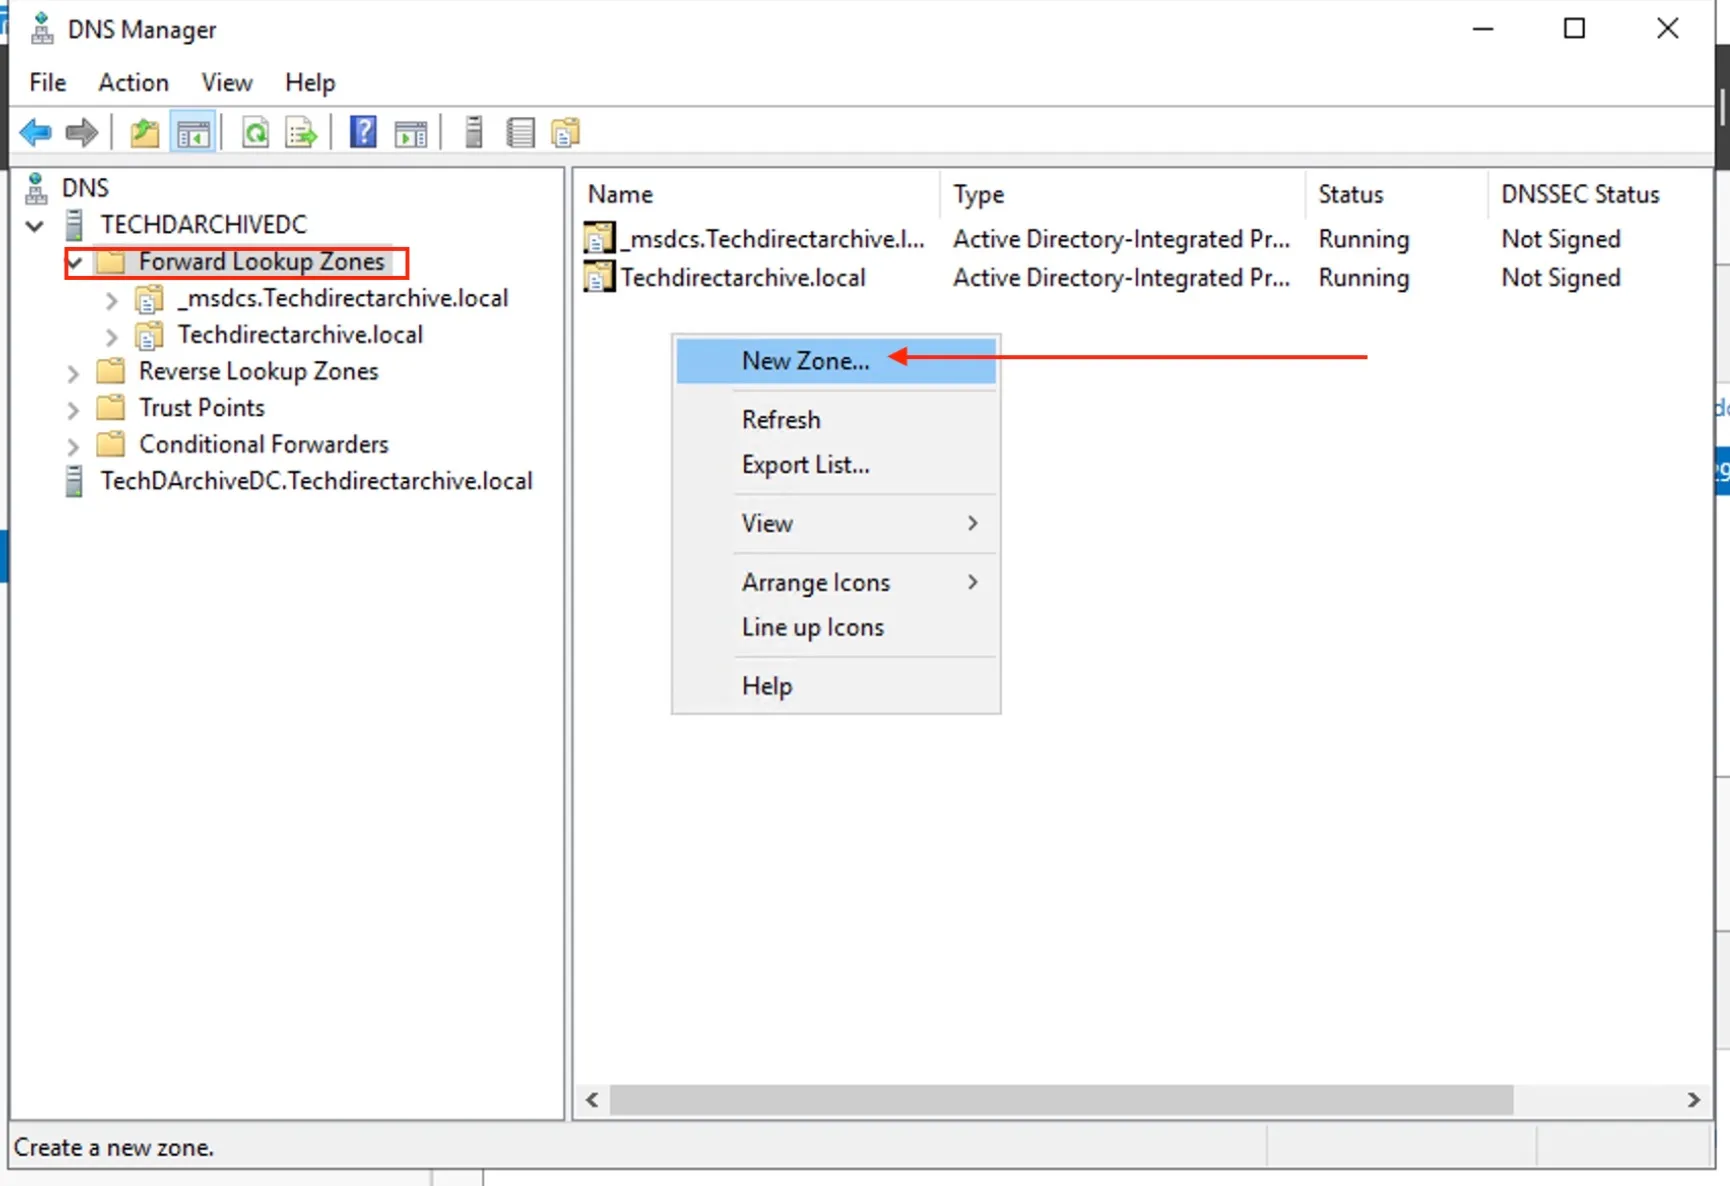
Create a New Forward Lookup Zone
To do this, you can right-click on the forward lookup zone or select it and right to select the New Zone on the right pane.
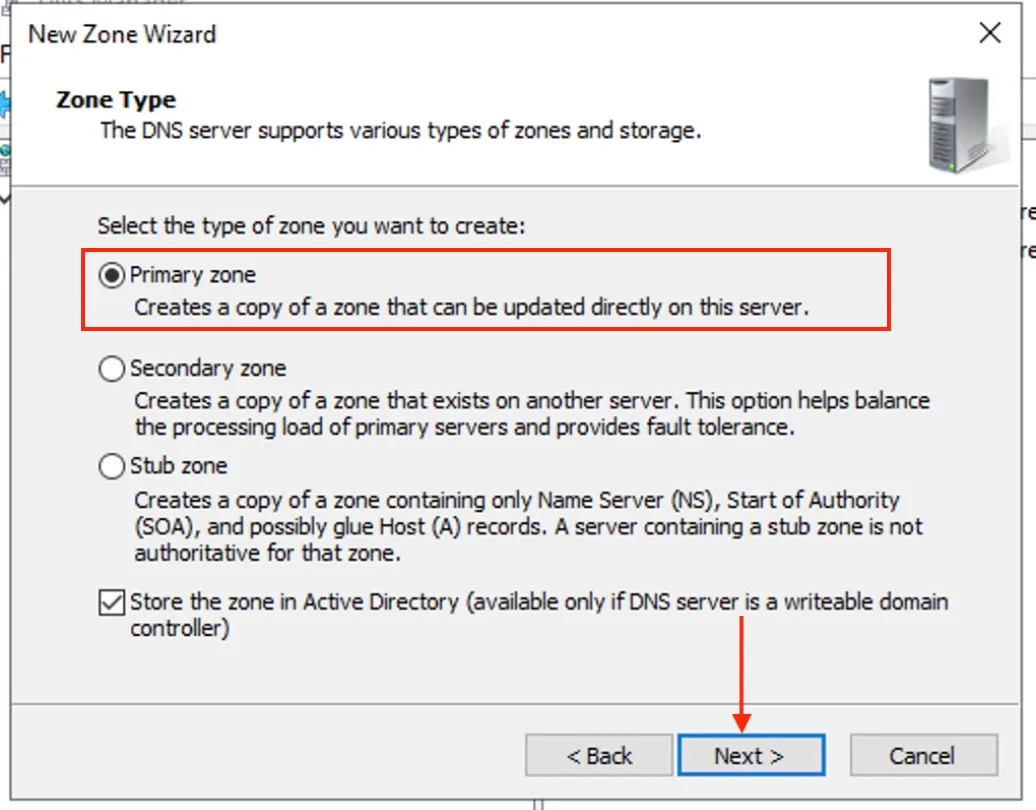
Select the “Primary Zone” since this going to be the first DC server. Click on Next after selecting.
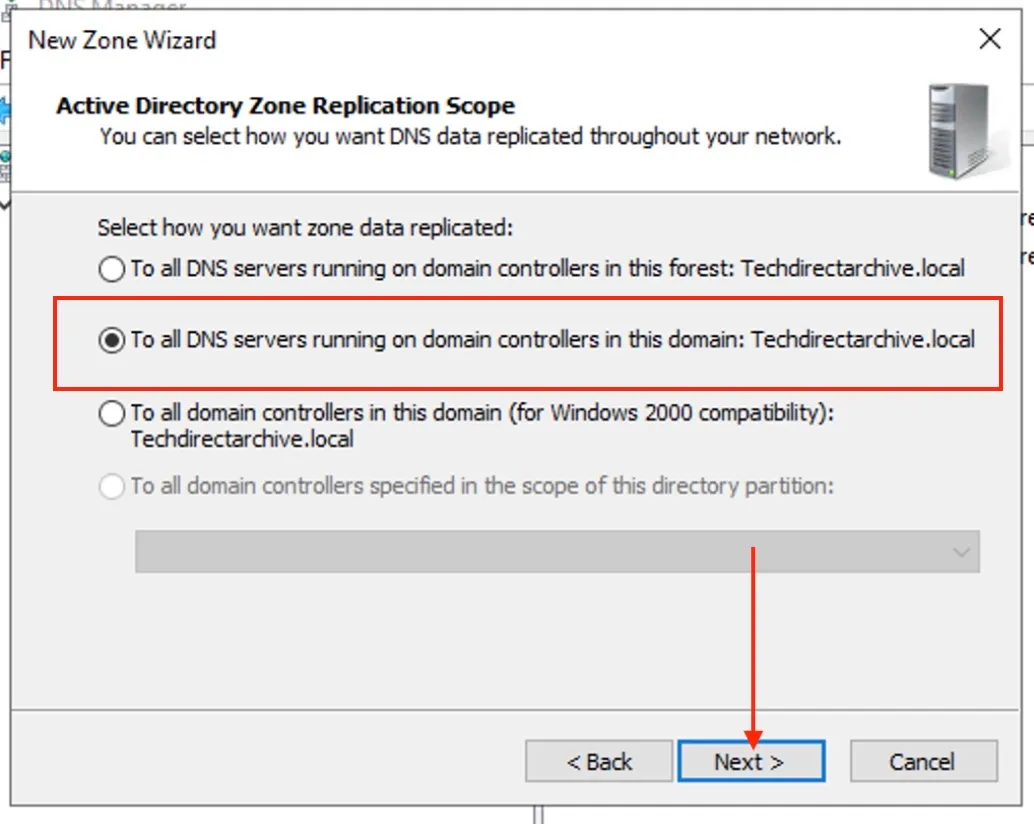
This option will replicate to all DNS servers running in this domain. Click Next to proceed.
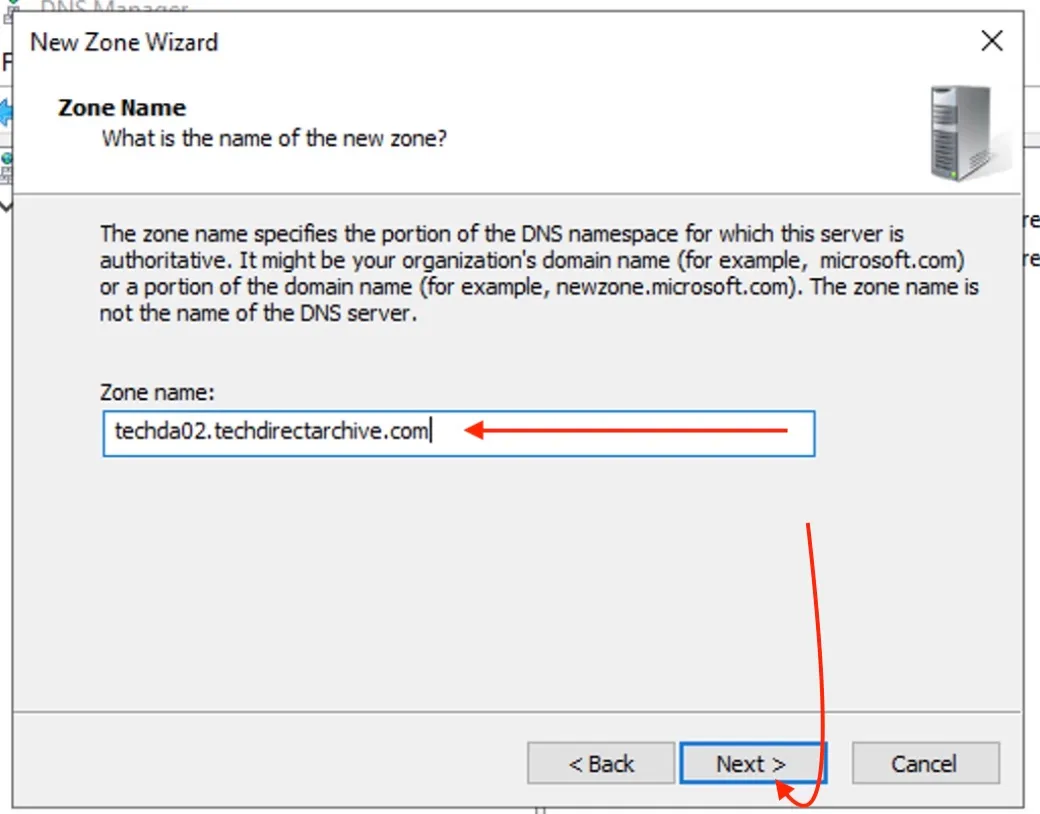
Enter the New Zone Name
Select allow only secure dynamic updates
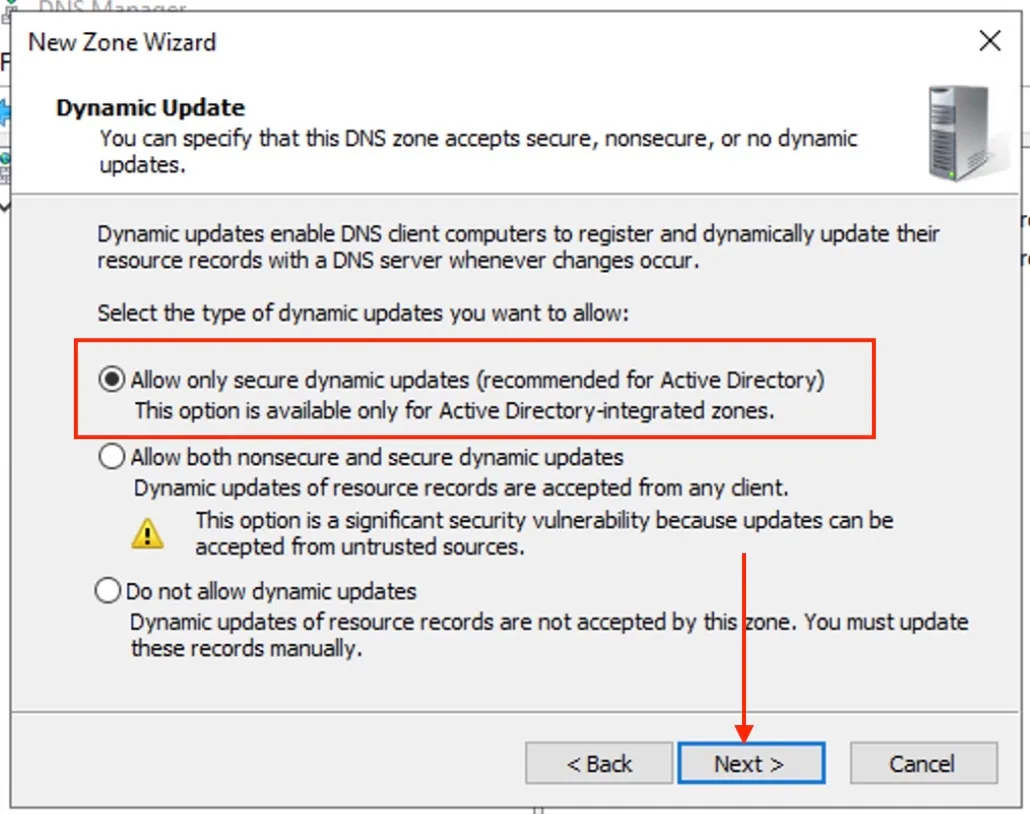
Complete forward zone creation
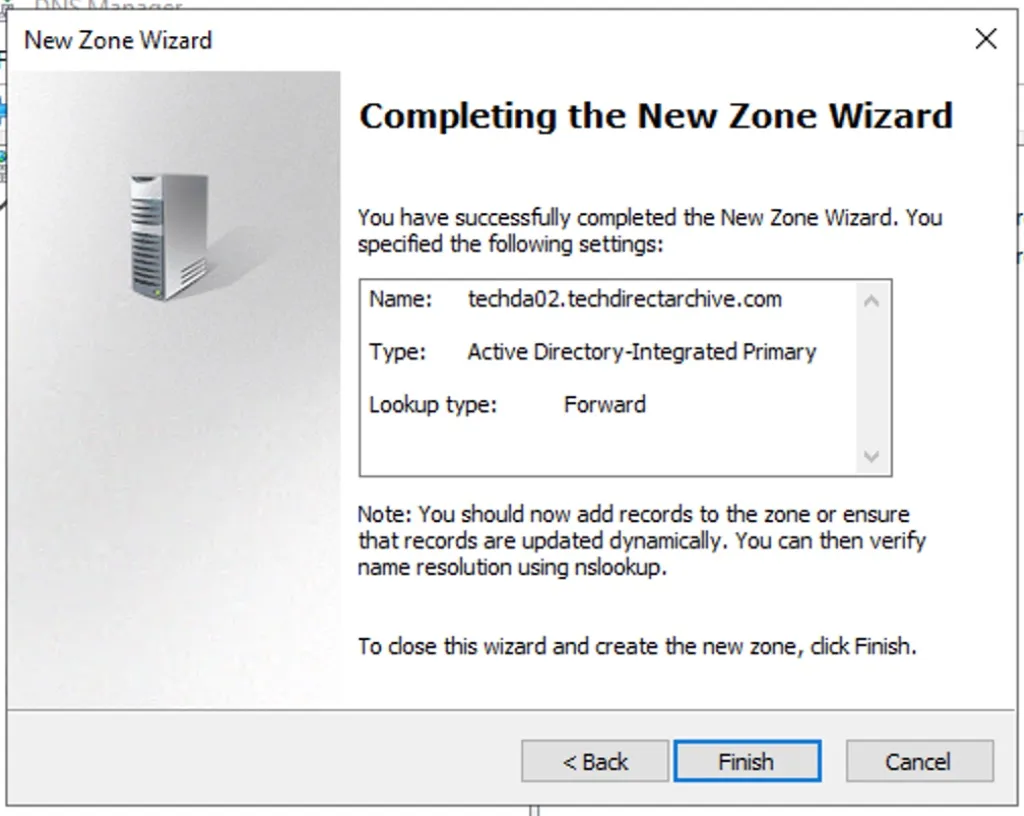
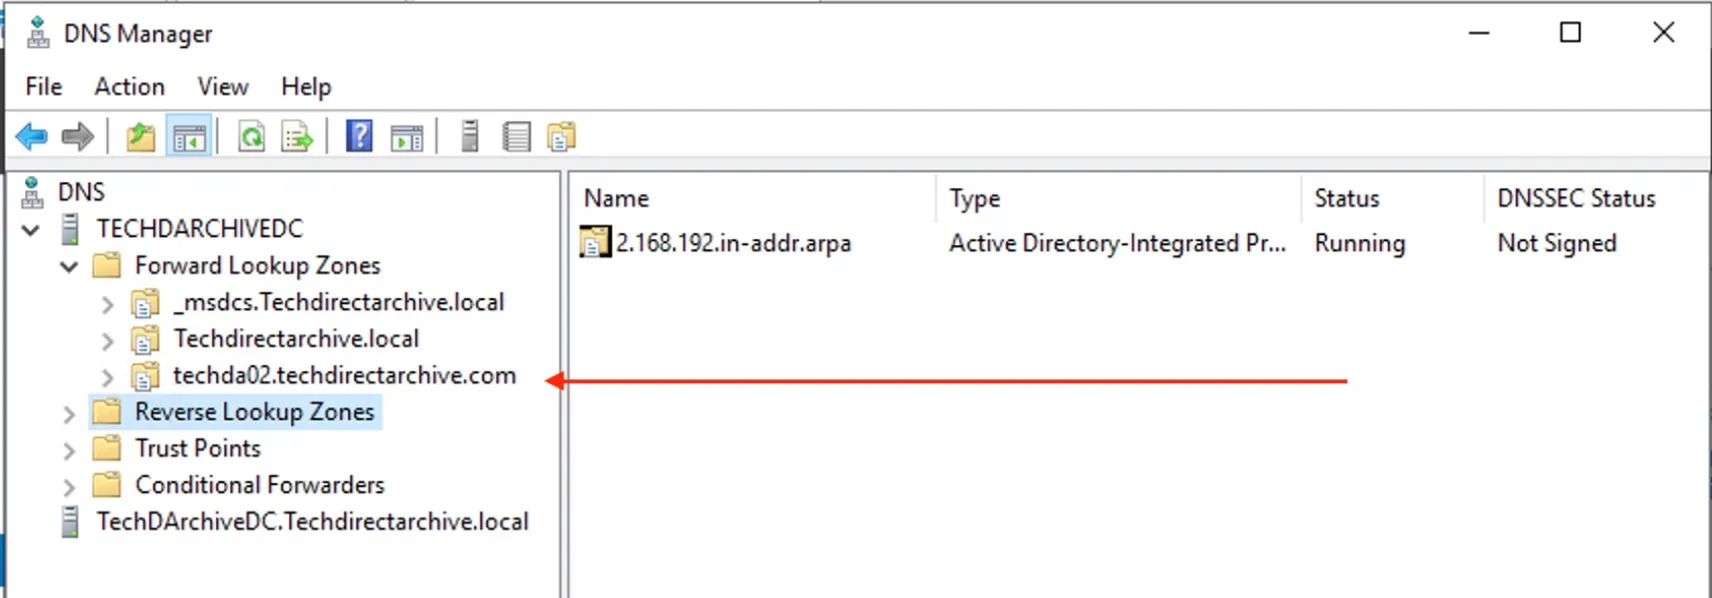
New Zone successfully created
Install Active Directory Domain Rename Tool
Note: It is recommended to install and run the Active Directory Domain Rename Tool on a member server rather than directly on a domain controller. This helps to minimize potential disruptions to Active Directory operations and avoids unnecessary risks associated with running administrative tools directly on DCs.
Note: Remote Server Administration Tools for Active Directory Domain Services (AD DS) and Active Directory Lightweight Directory Services (AD LDS) are installed by default on Windows Server. But let me show you the process if you were to have it installed.
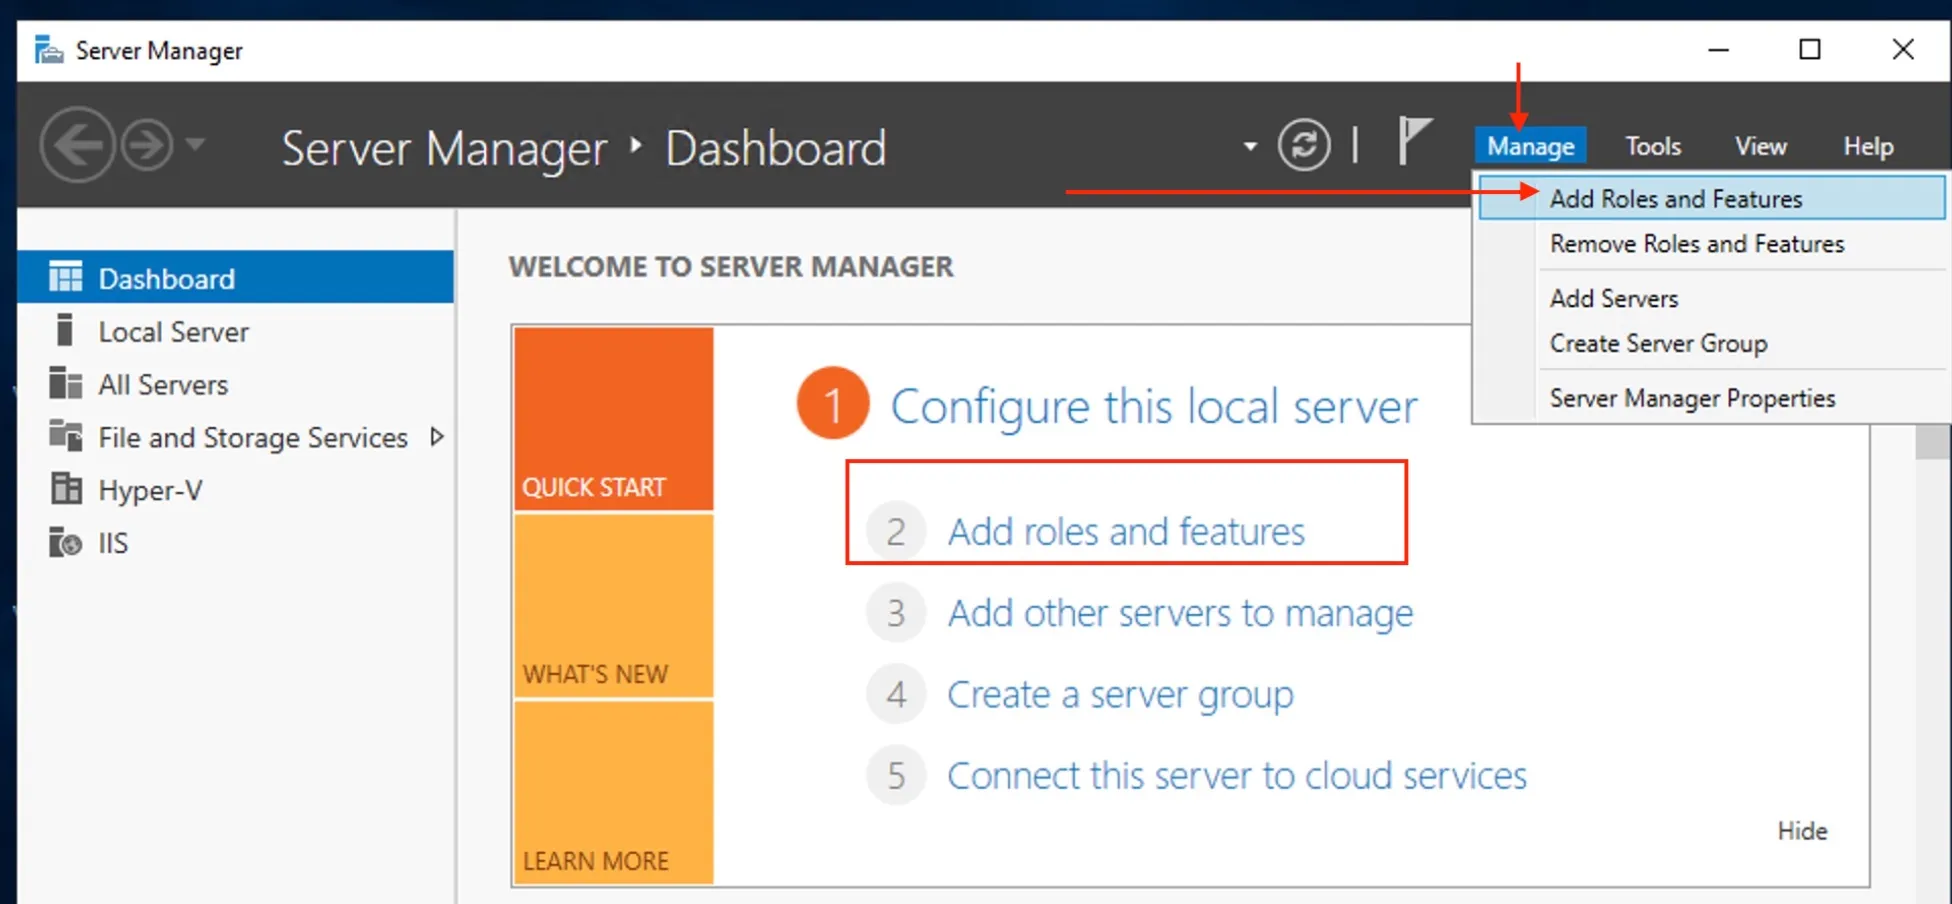
Login to a member server with my domain credentials. Launch Add Roles and Features
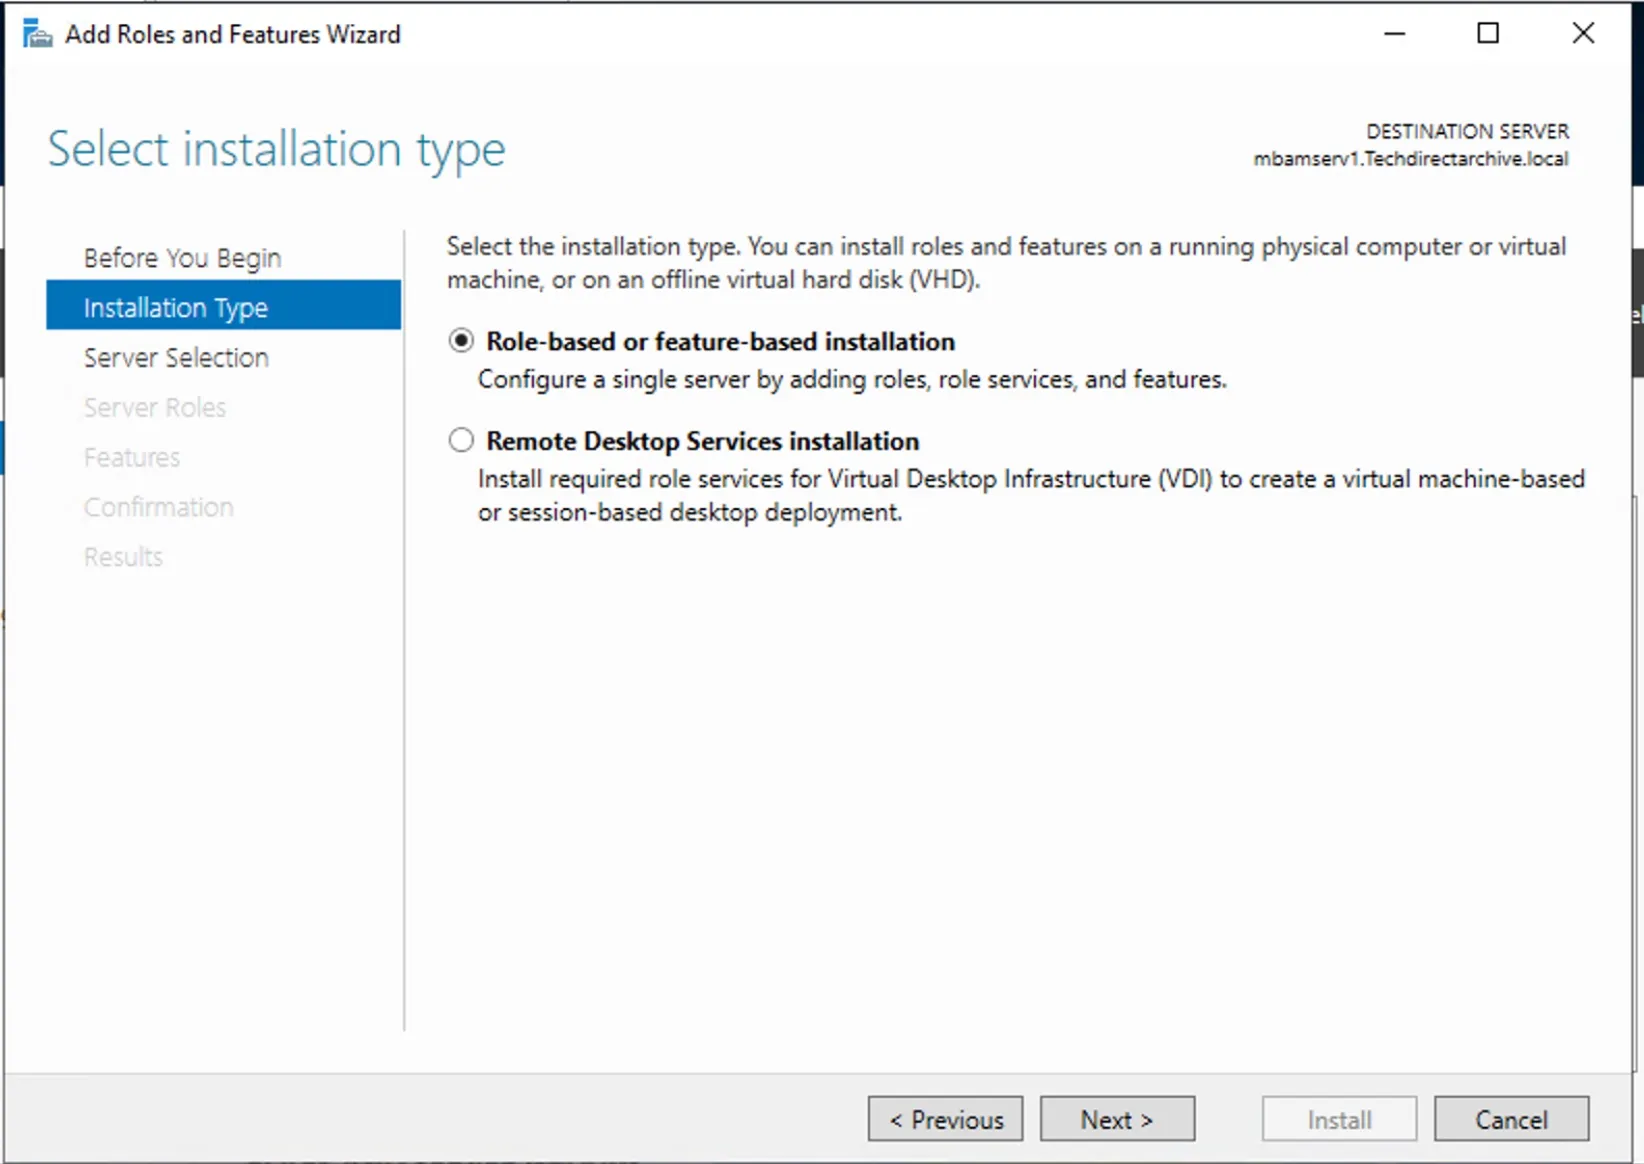
Select Role based installation
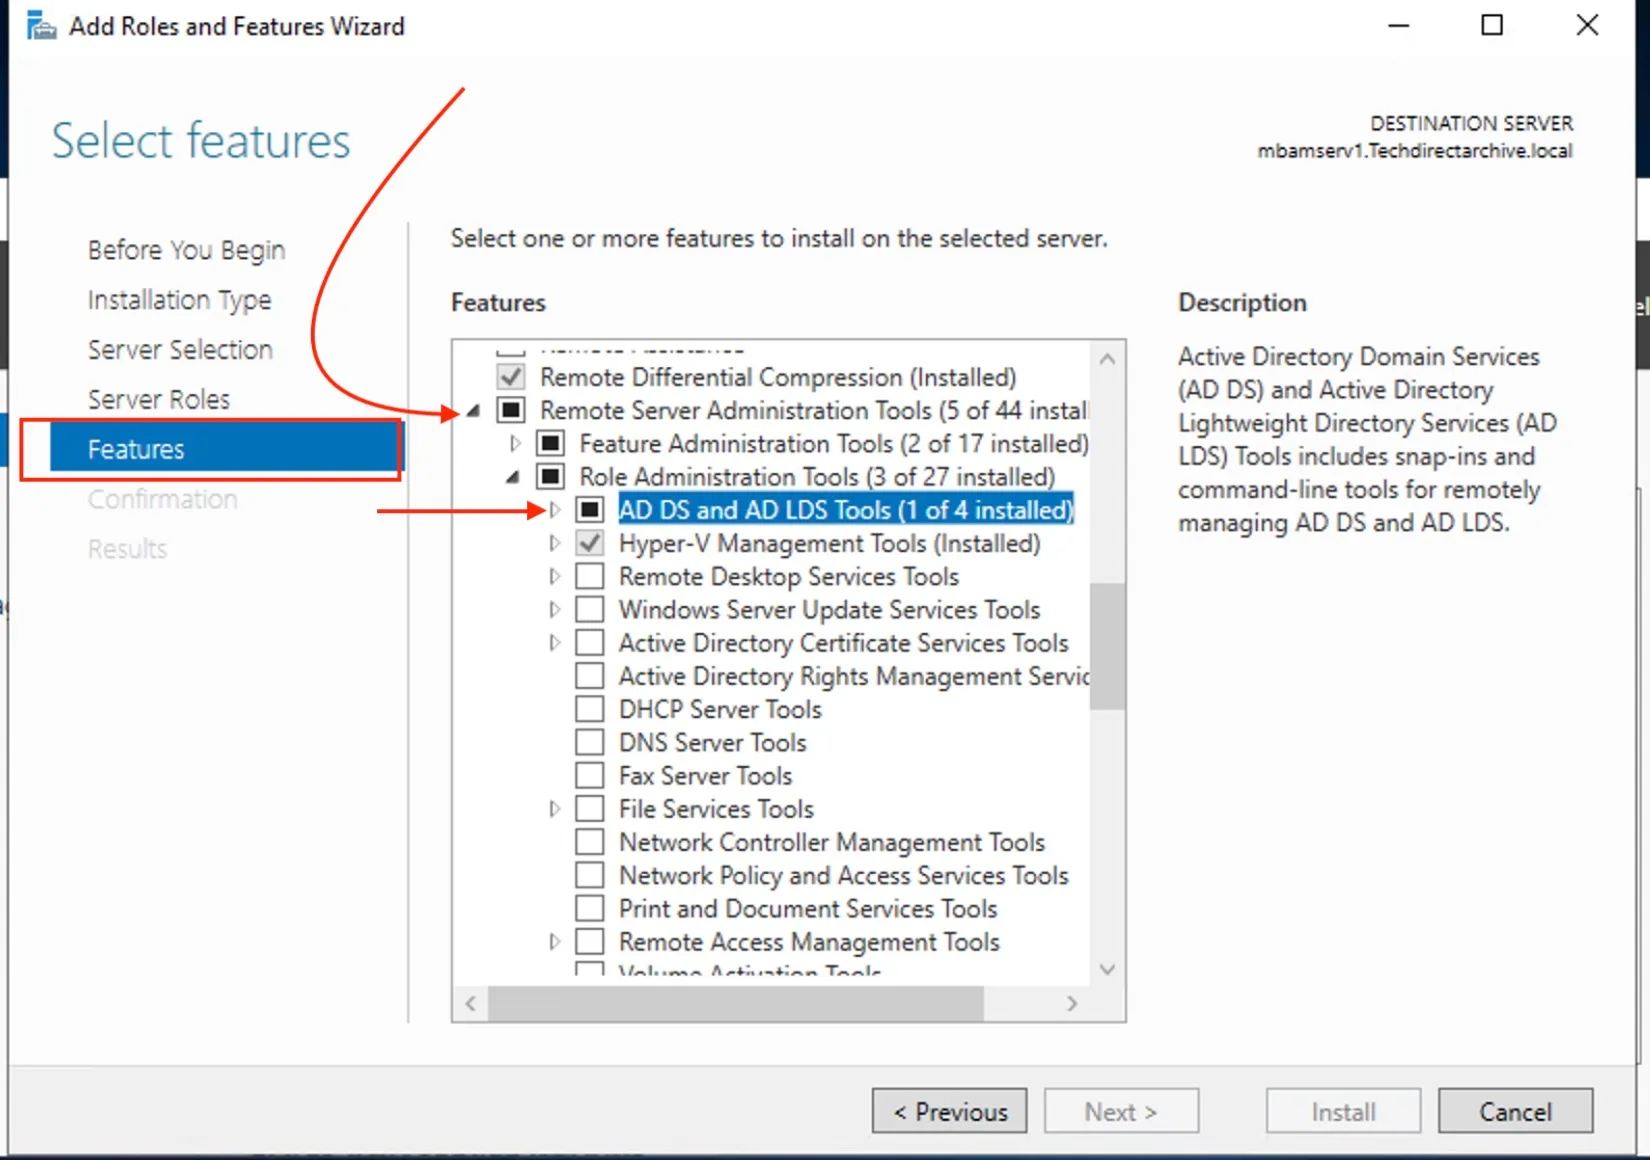
Skip the Server Roles and on the Features Window, ensure the remote Server Administration Tools by Server manager is selected. Ensure you you select AD DS and AD LDS tools under the RSAT. Since these requirements are met, I will stop here. Else, you should ensure they are installed.
Run Active Directory Domain Rename Tool
Microsoft provides the Active Directory Domain Rename Tool (rendom.exe) for renaming domains. First, we will create a report that explains the current forest setup. To do that type the below and press enter.
rendom /list
Open the Domainlist.xml file. In my case, I will be using Notepad++
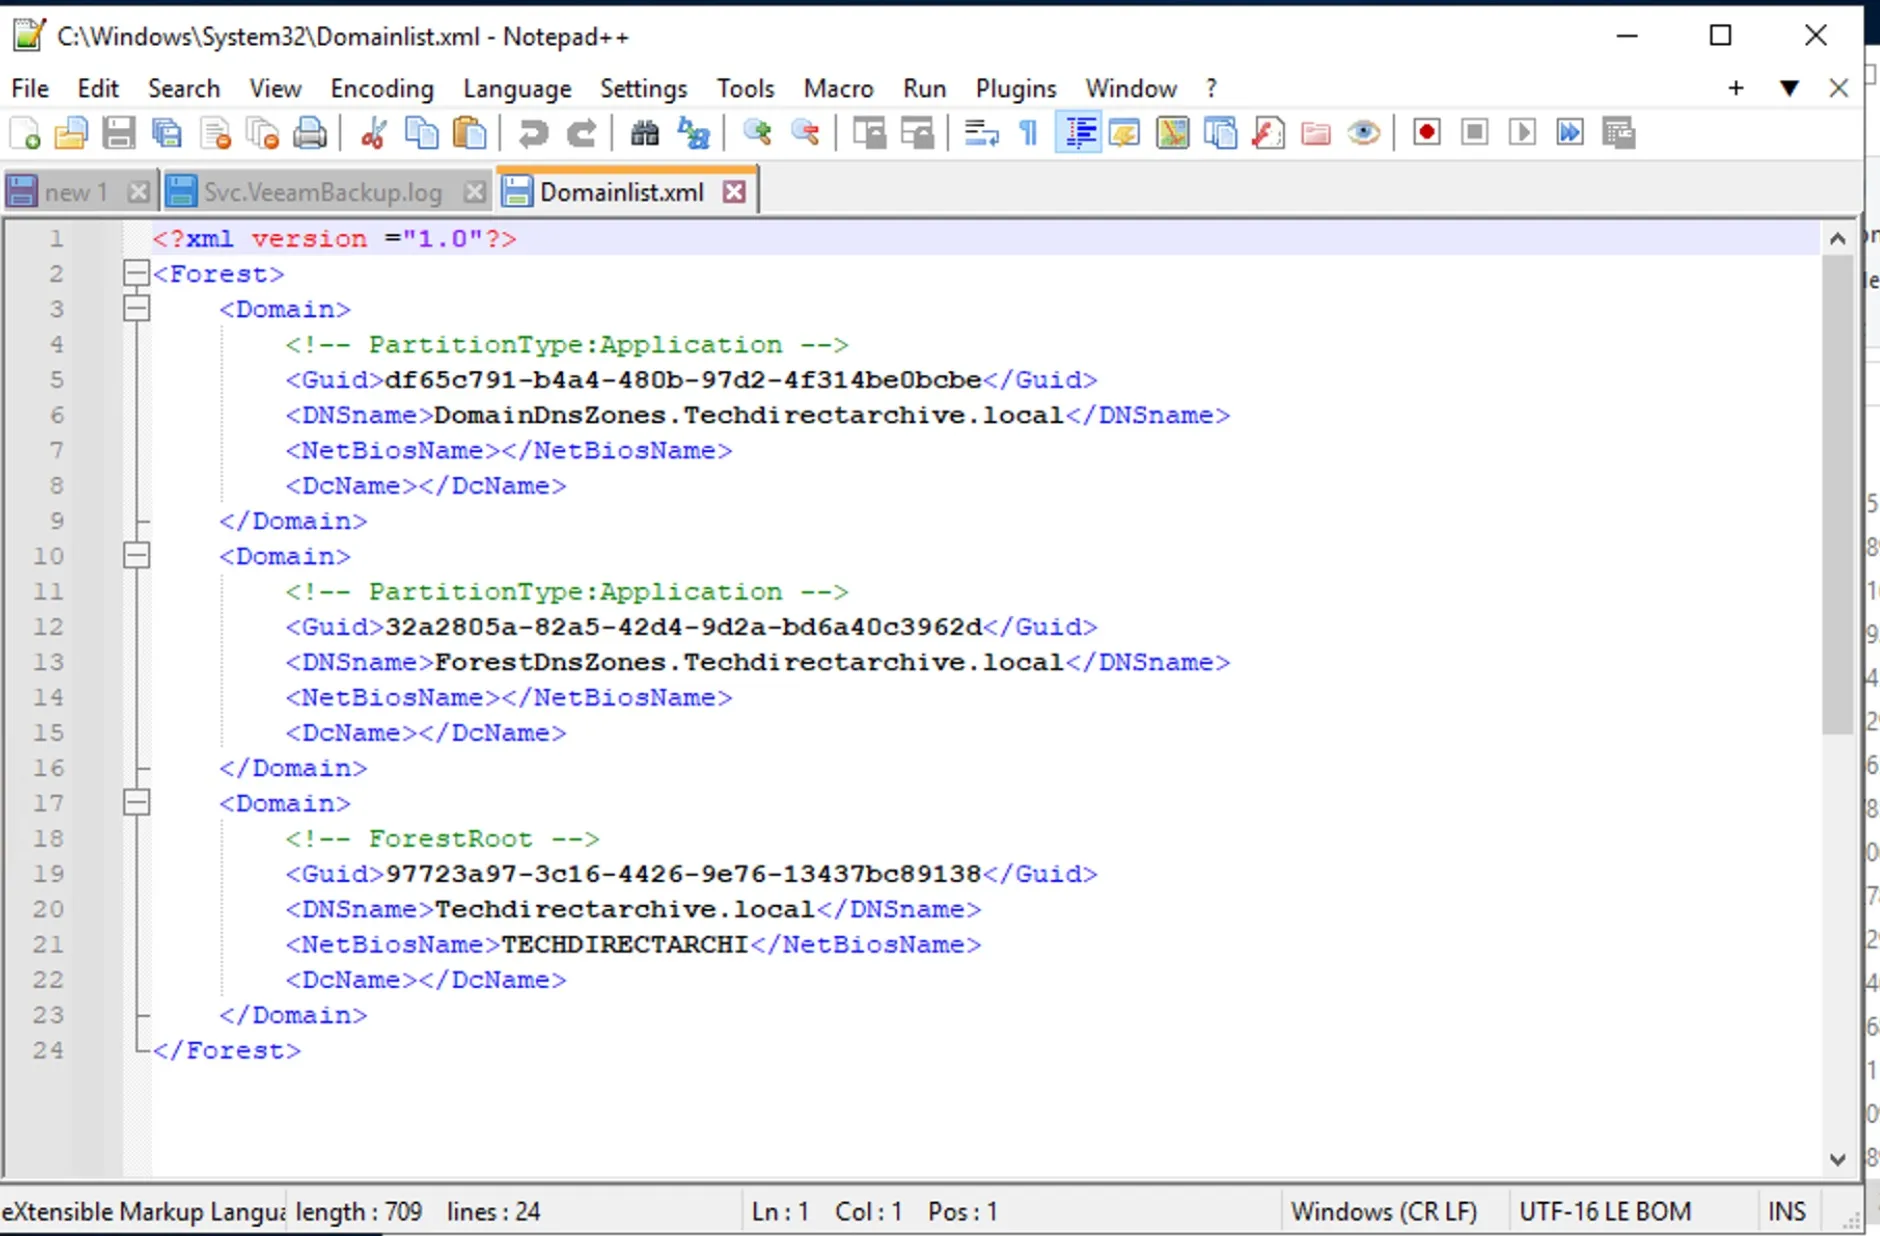
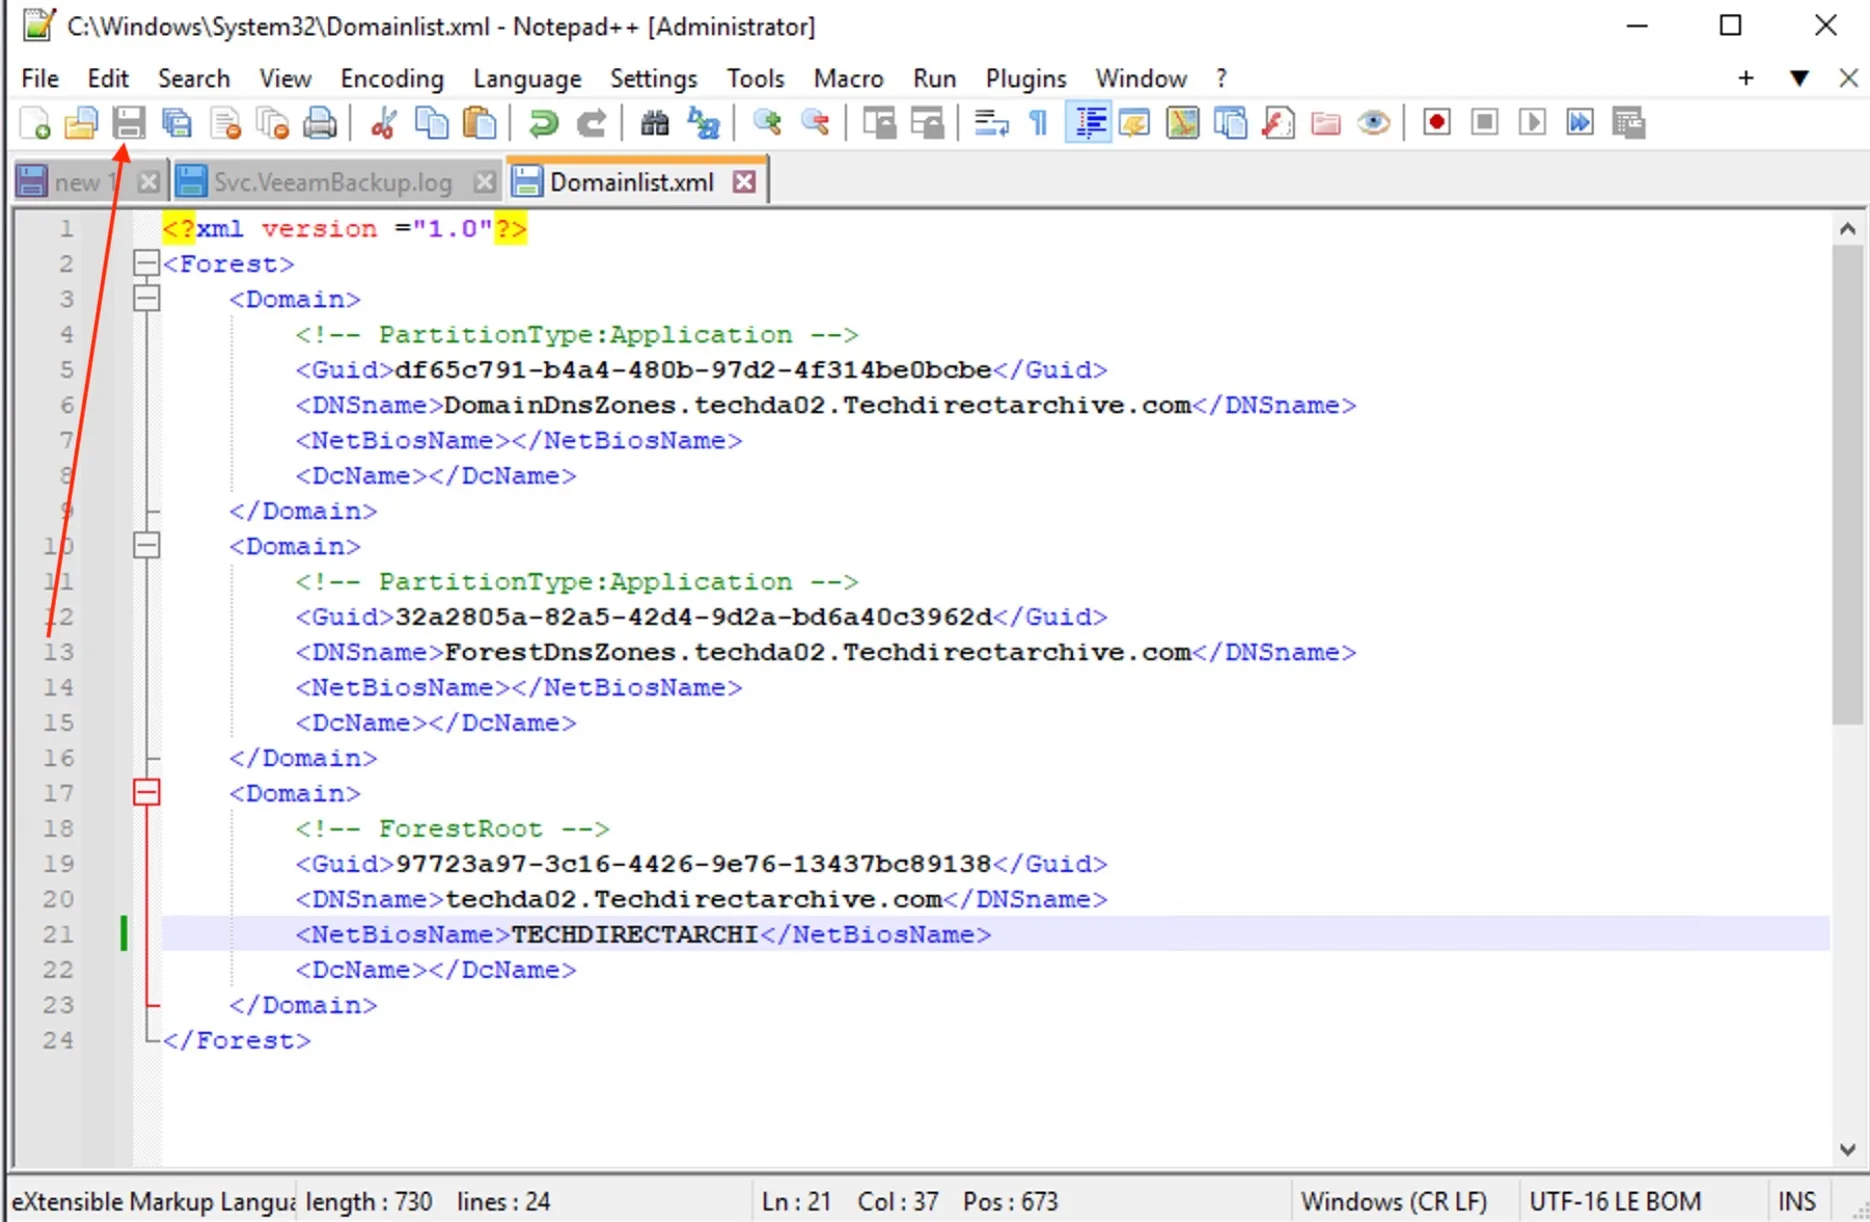
You will need to edit the file to match with the new domain name. Make sure you save the file after edits. I am done editing this file
Next, type the command below command from same folder path. This command will execute the rendom /upload command to upload the rename instructions to Active Directory.
rendom /upload
To check the domain readiness before the rename process type rendom /prepare

Once its pass with no errors, execute rendom /execute to proceed with rename. It will reboot the domain controller automatically.

Note: While we wait for the command to complete successfully. You can already take a look at the DC and some of the renaming has happened.
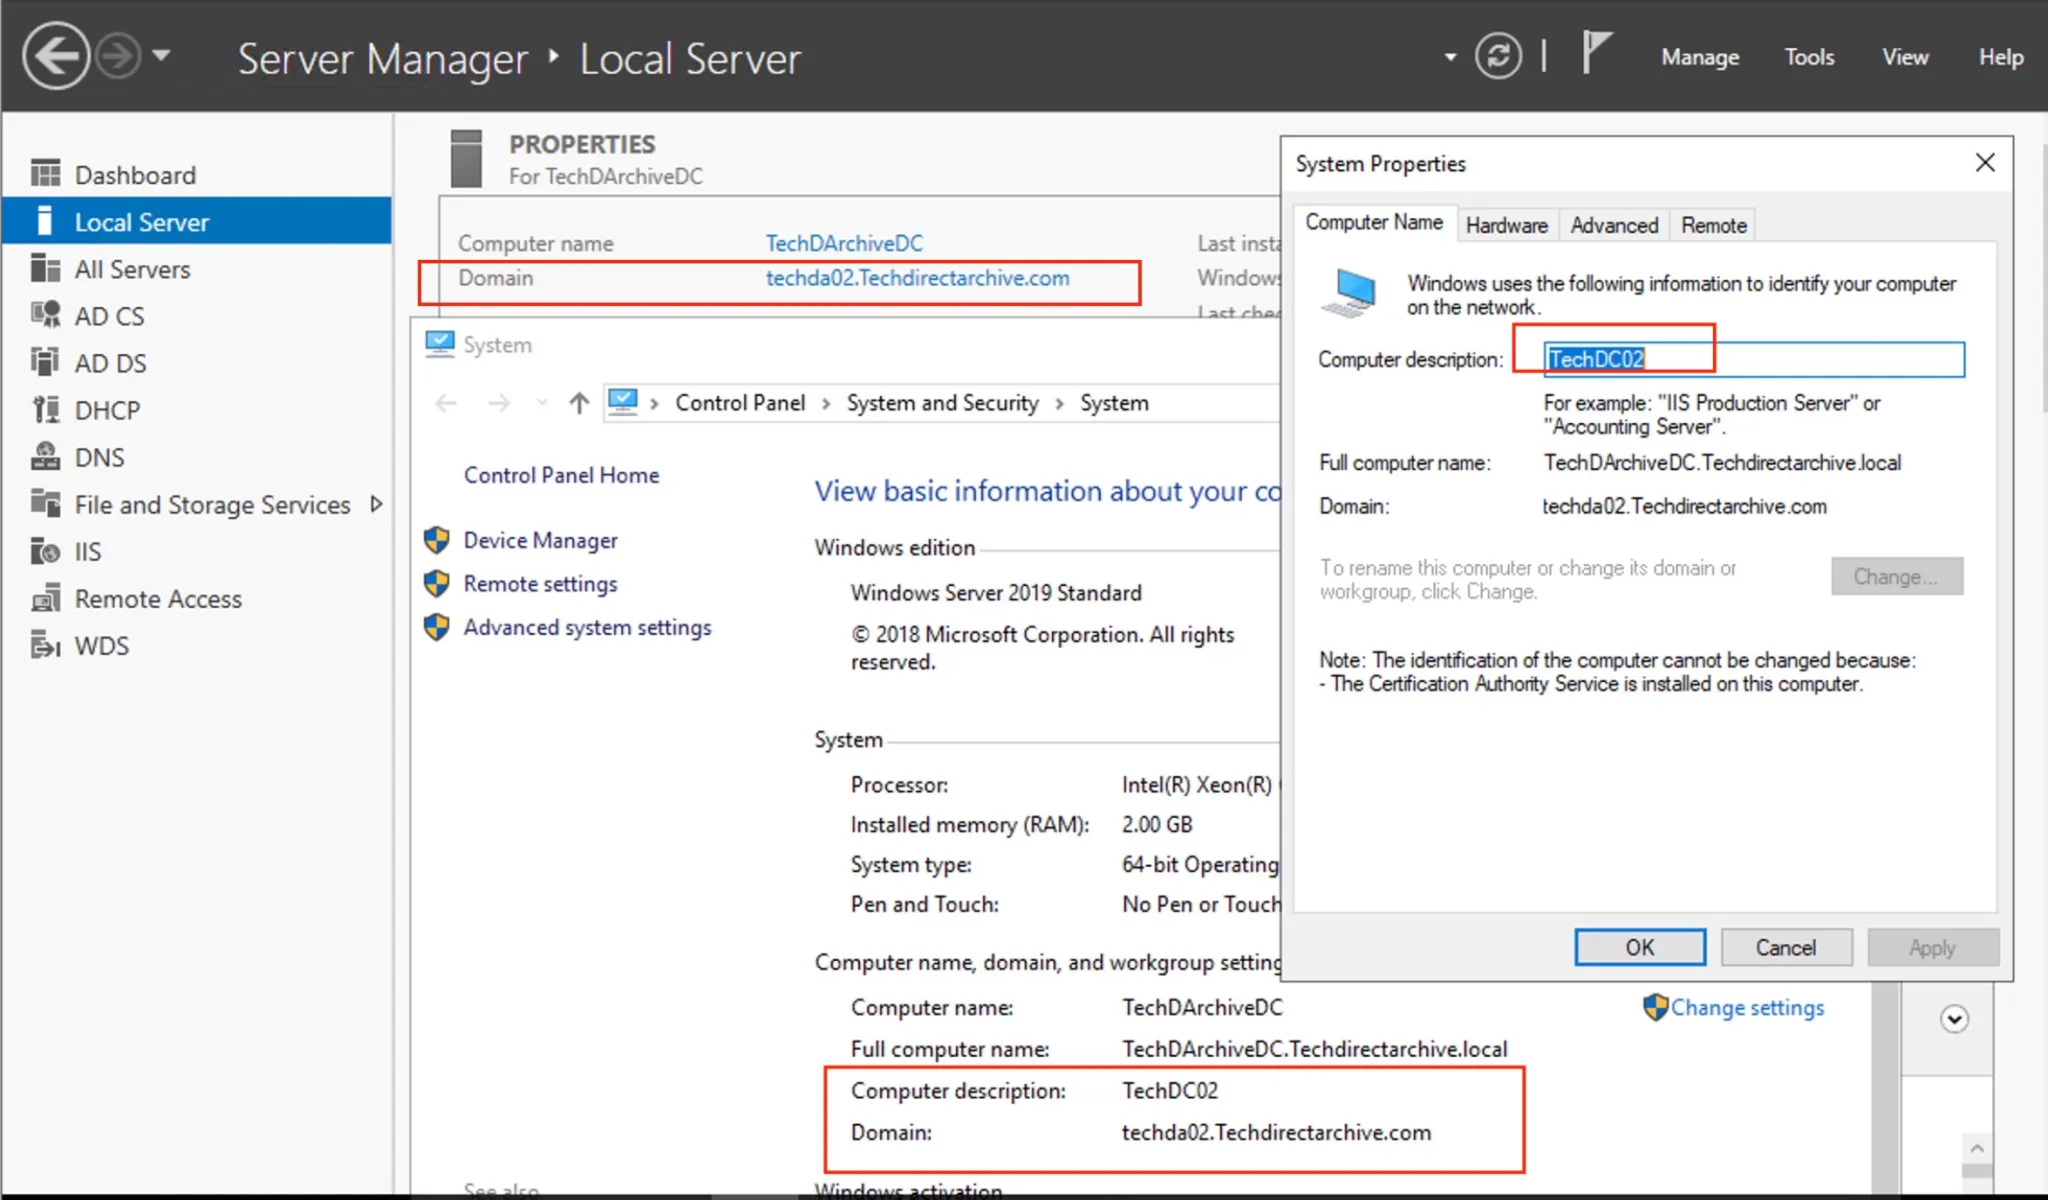
Our command have completed successfully without errors

You will have to reboot all devices in your environment to apply changes. Username and password will not change, but the domain name will as shown above.
Let’s verify member server. The image below is before the AD rename
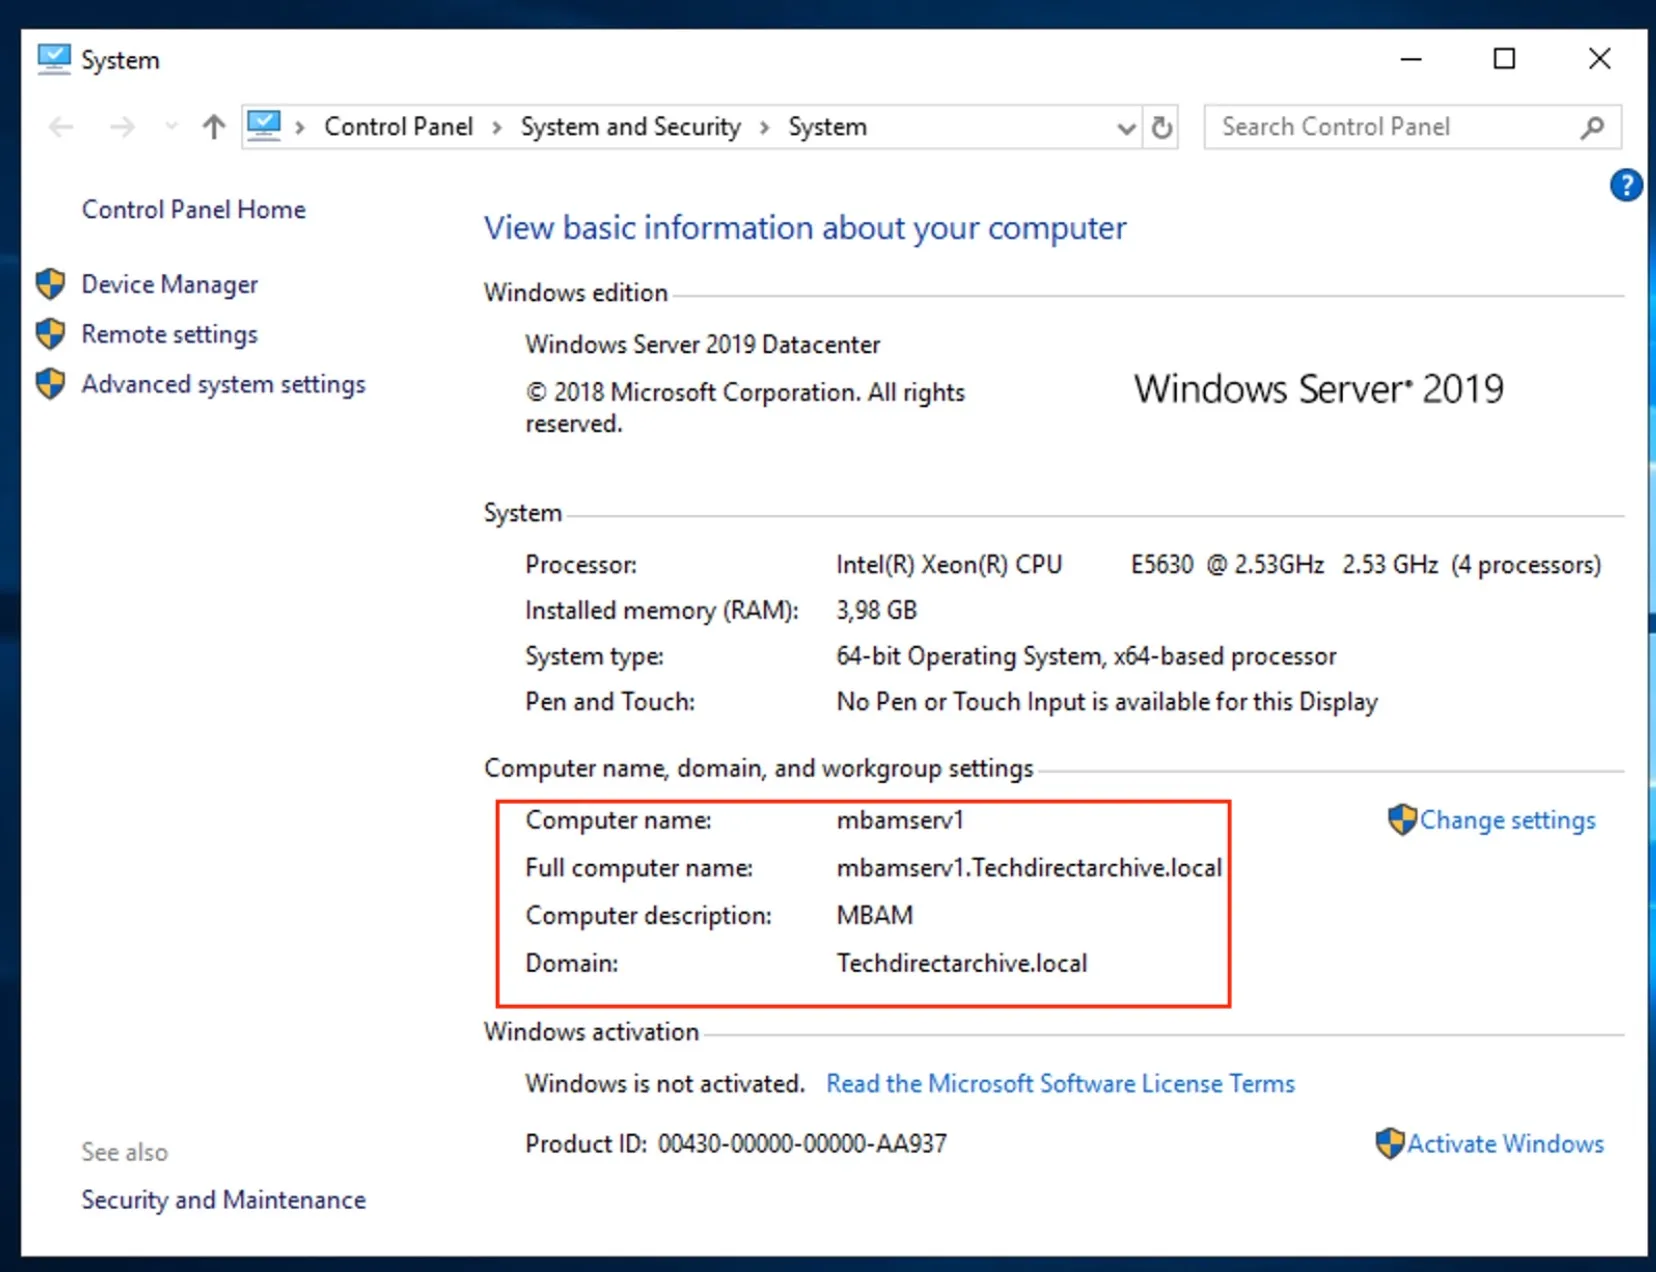
As you can see, the member server has been corrected updated.
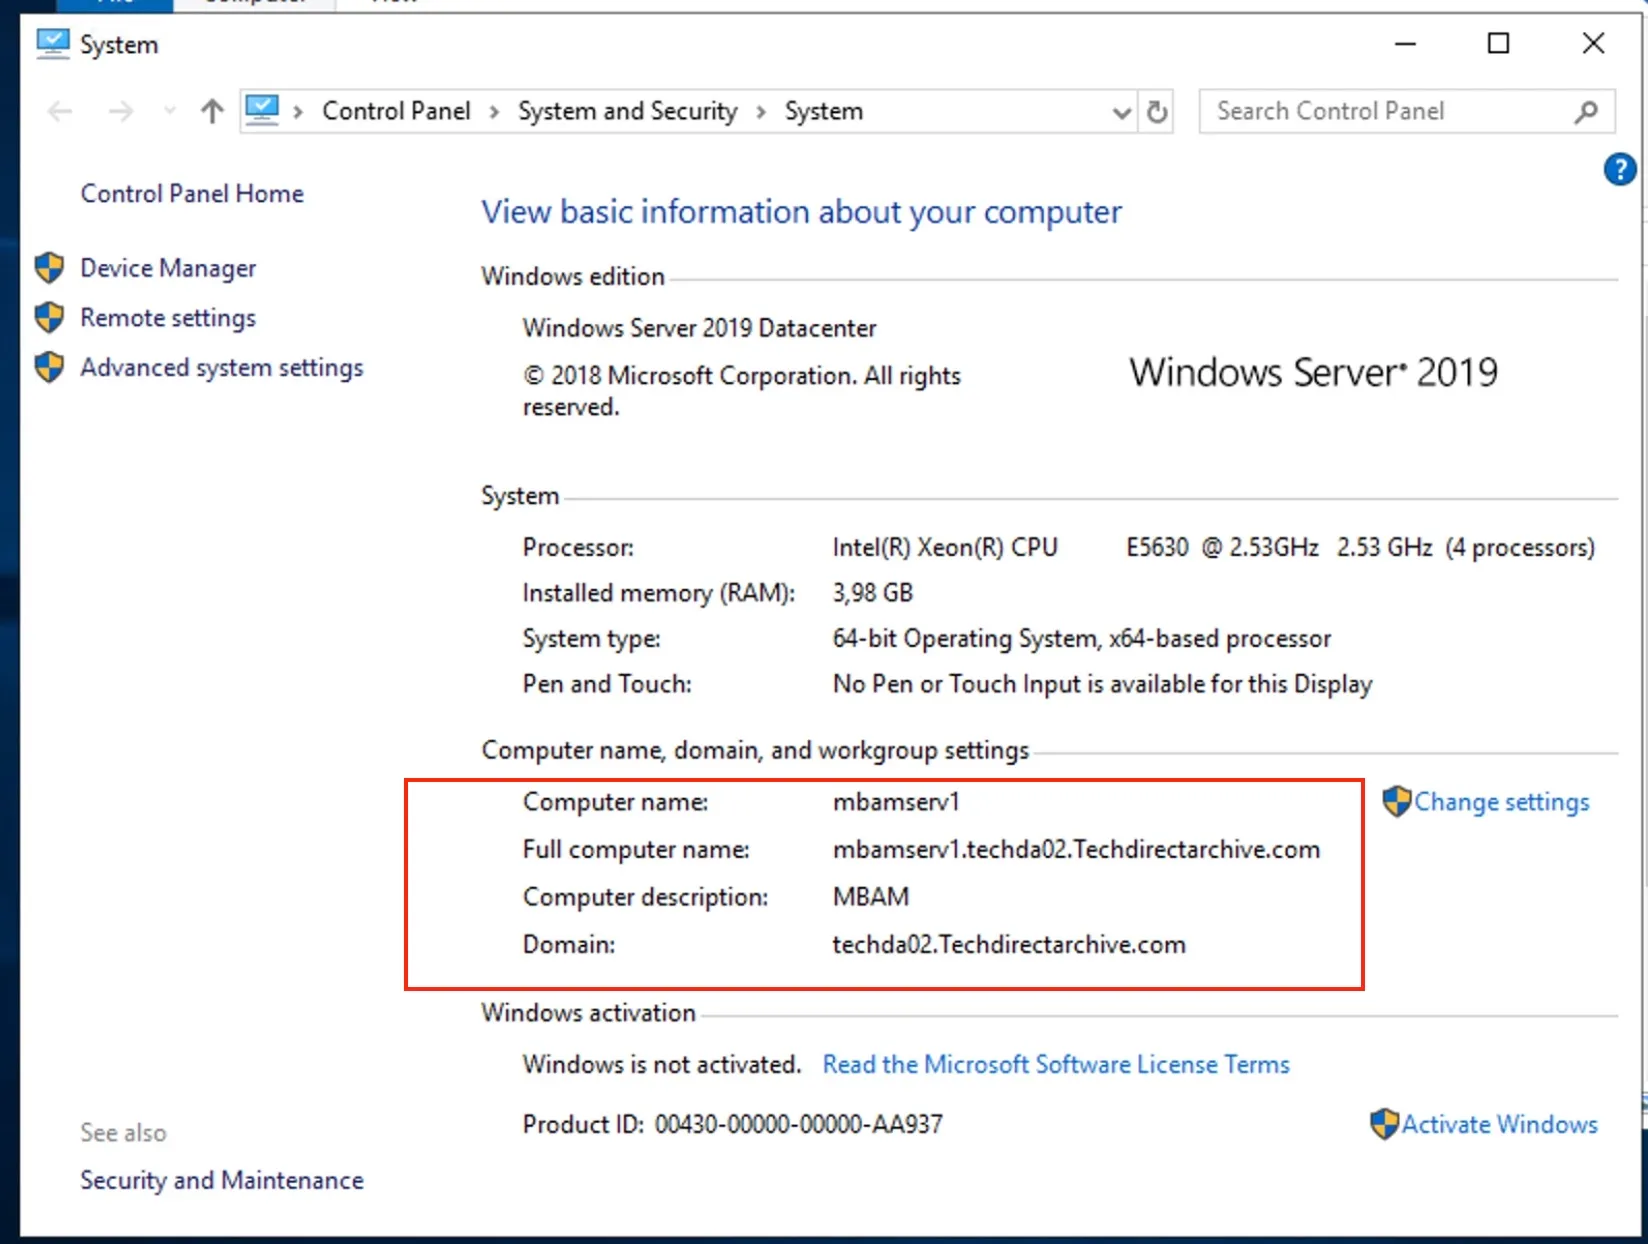
As you can see above, the rename process could not rename the domain controllers. This has to be done manually.
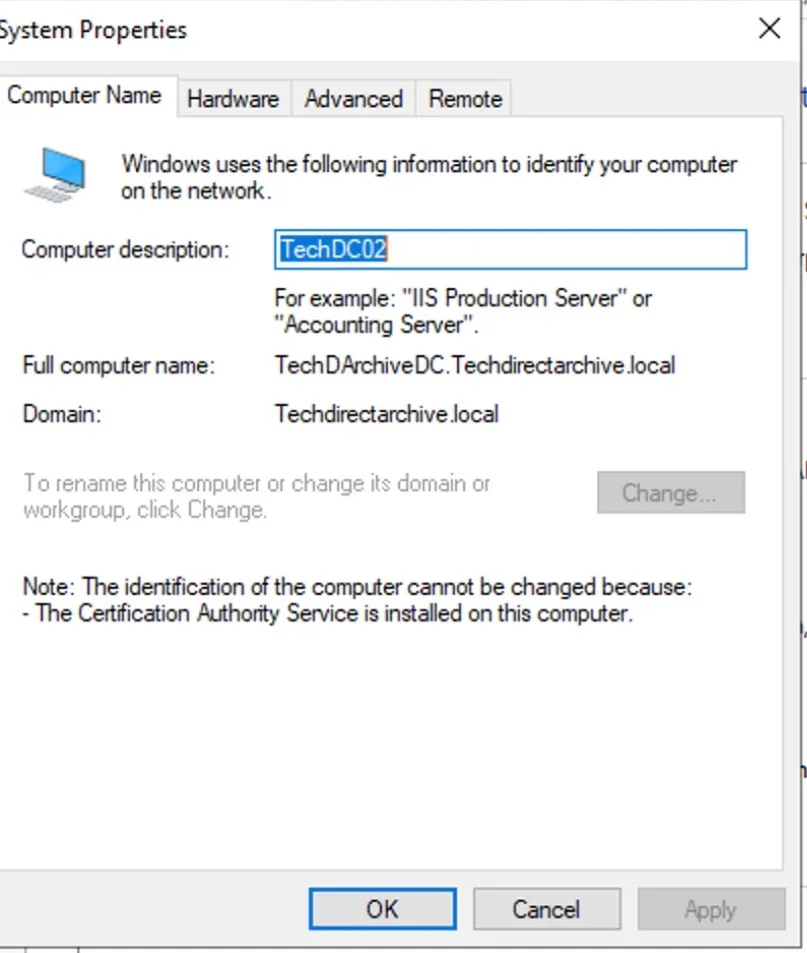
To do this, run the command below
netdom computername techdirectarchive.techdirectarchive.local /add:techda02.techdirectarchive.com
To make the “techda02.techdirectarchive.com” the primary name for this server. Please run the command below.
netdom computername techdirectarchive.techdirectarchive.local /makeprimary:techda02.techdirectarchive.com
Active Directory Rename Cleanup
Once you’re confident that the rename process was successful and all systems are functioning as expected, perform cleanup tasks such as removing the old domain name from DNS records and updating any external references to the domain name
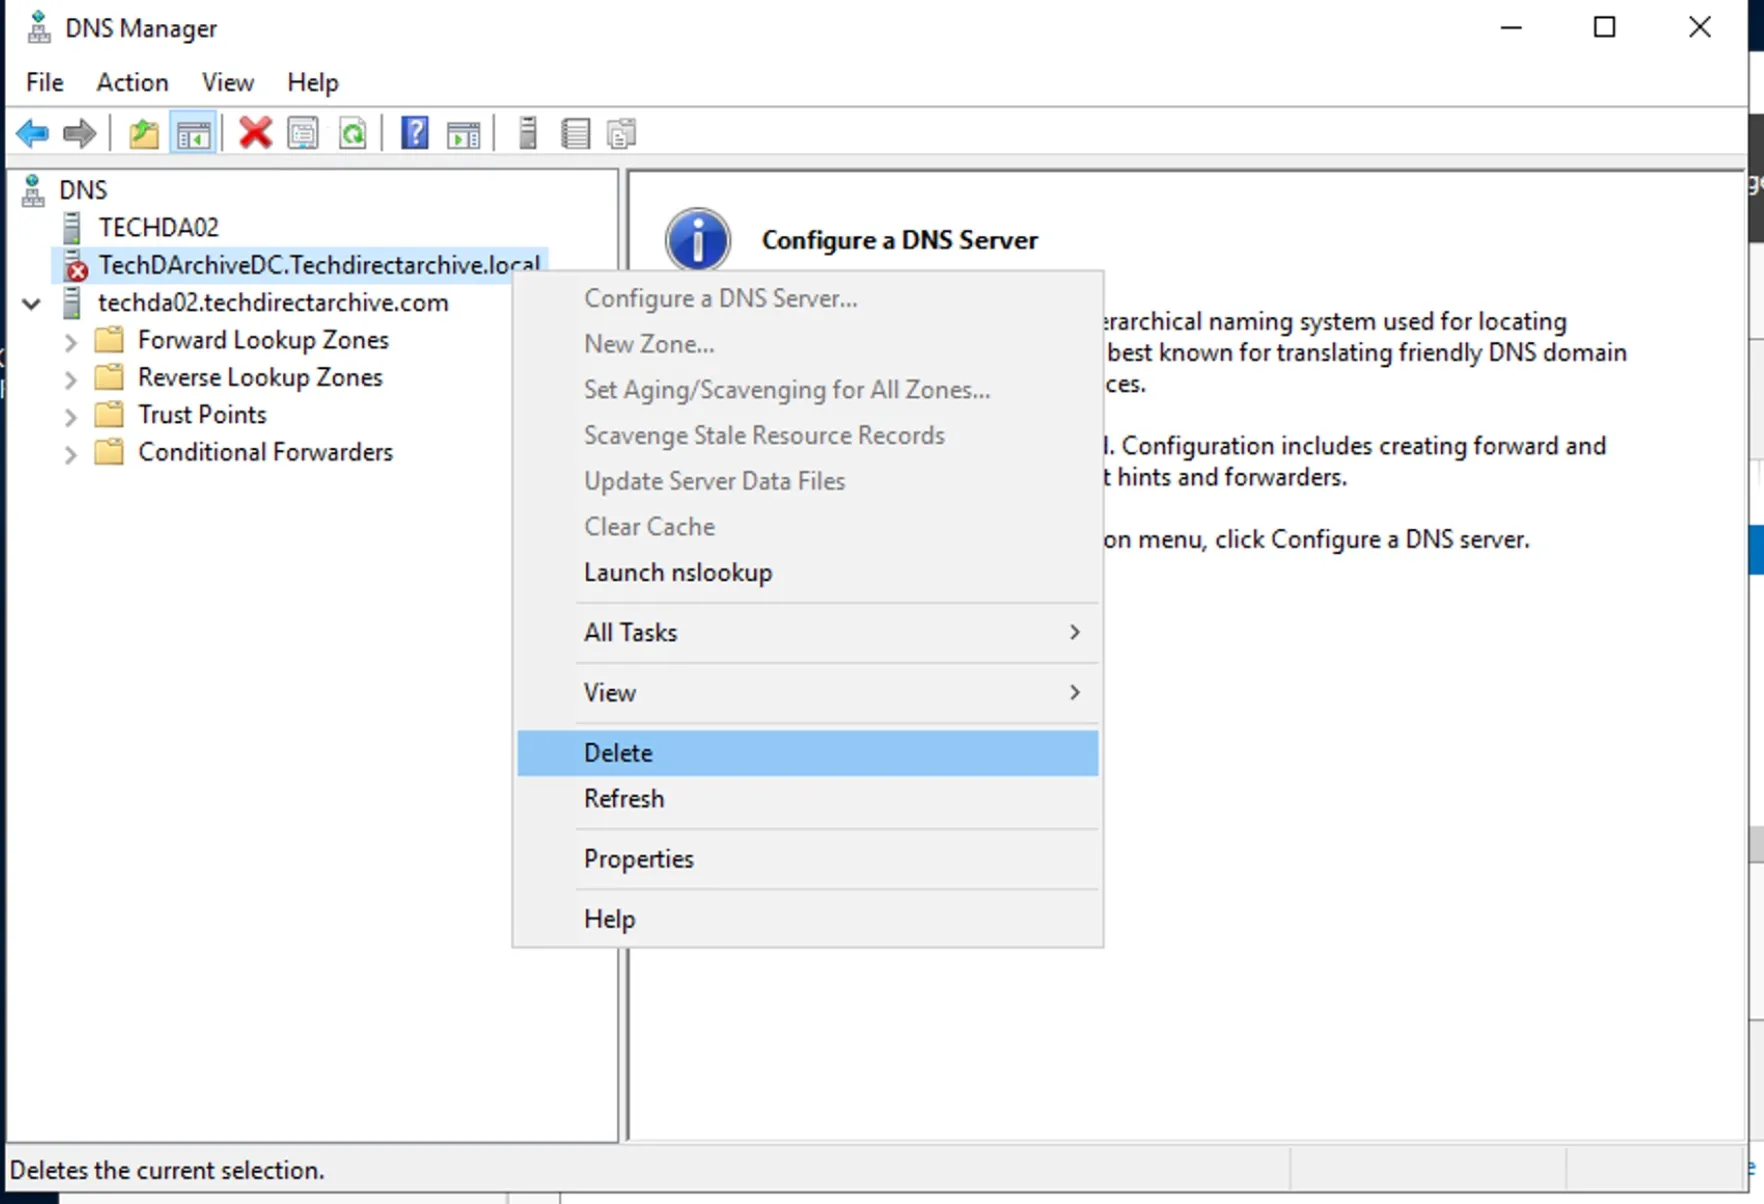
First, launch the DNS Manager and remove the following DNS Server
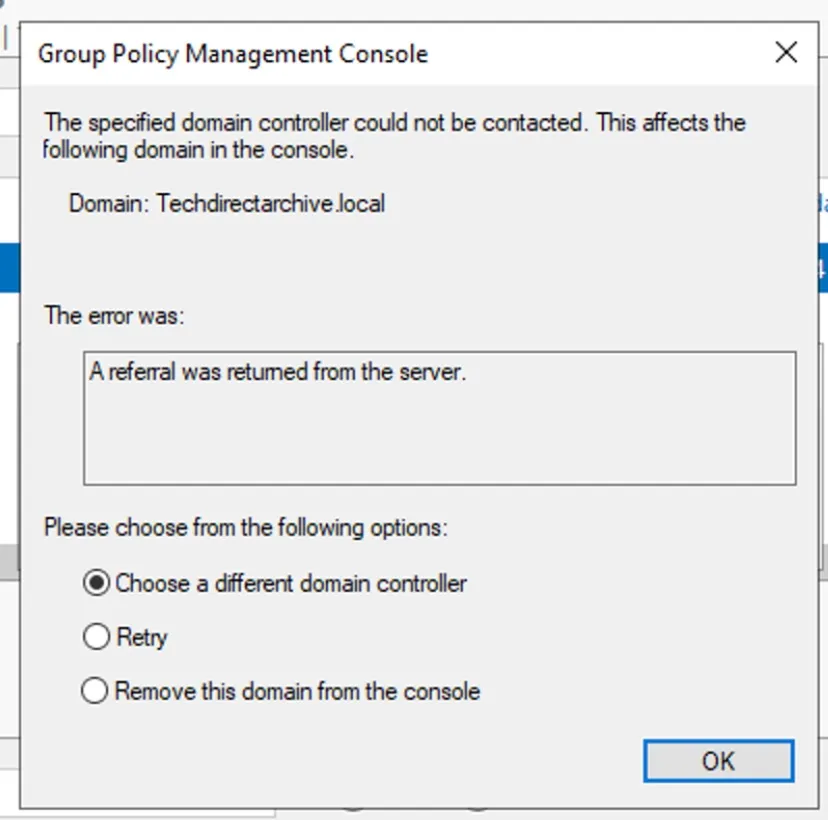
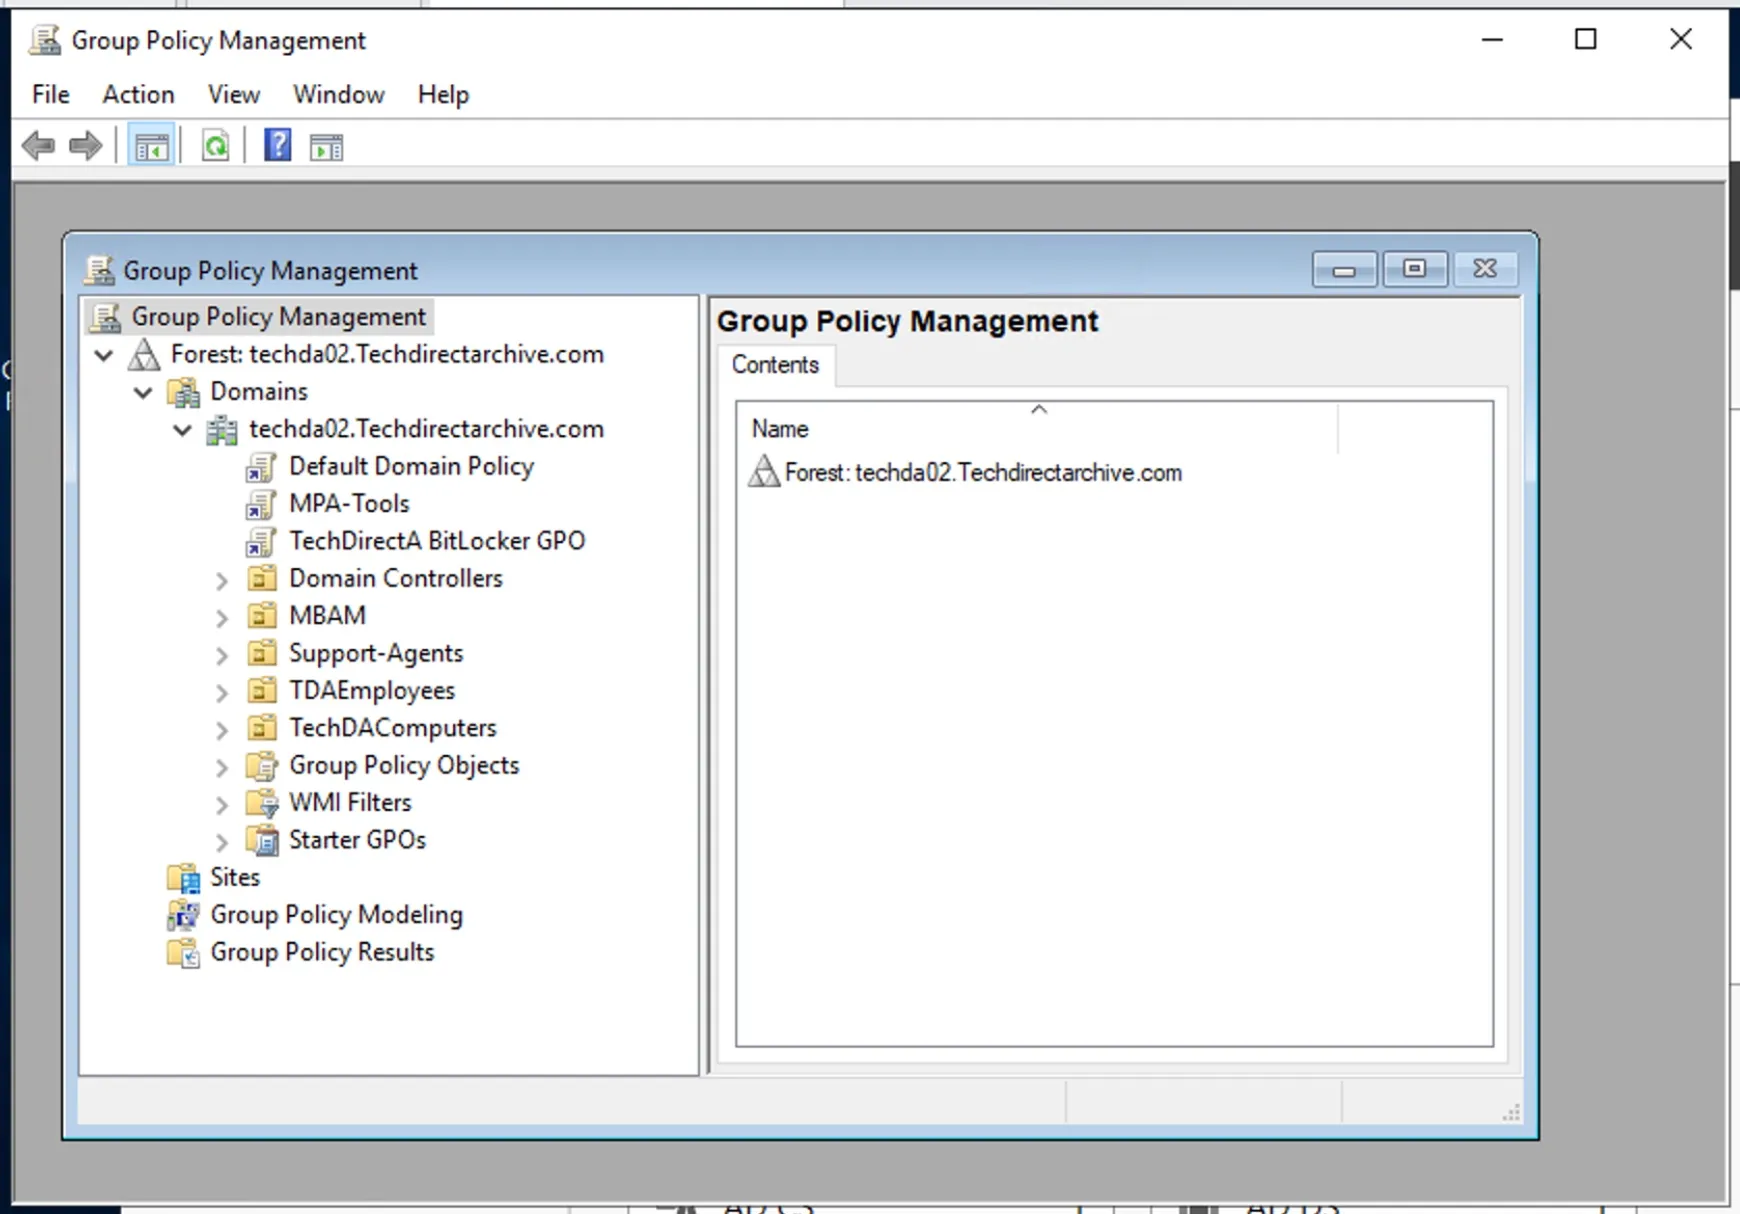
When you launch the Group Policy Management console, you would notice the following error “Group Policy: The specified Domain Controller could not be contacted. This affects the following console”.
Use the command below to initiate the Gpfixup new Group Policy link
gpfixup /olddns:techdirectarchive.local /newdns:techda02.techdirectarchive.com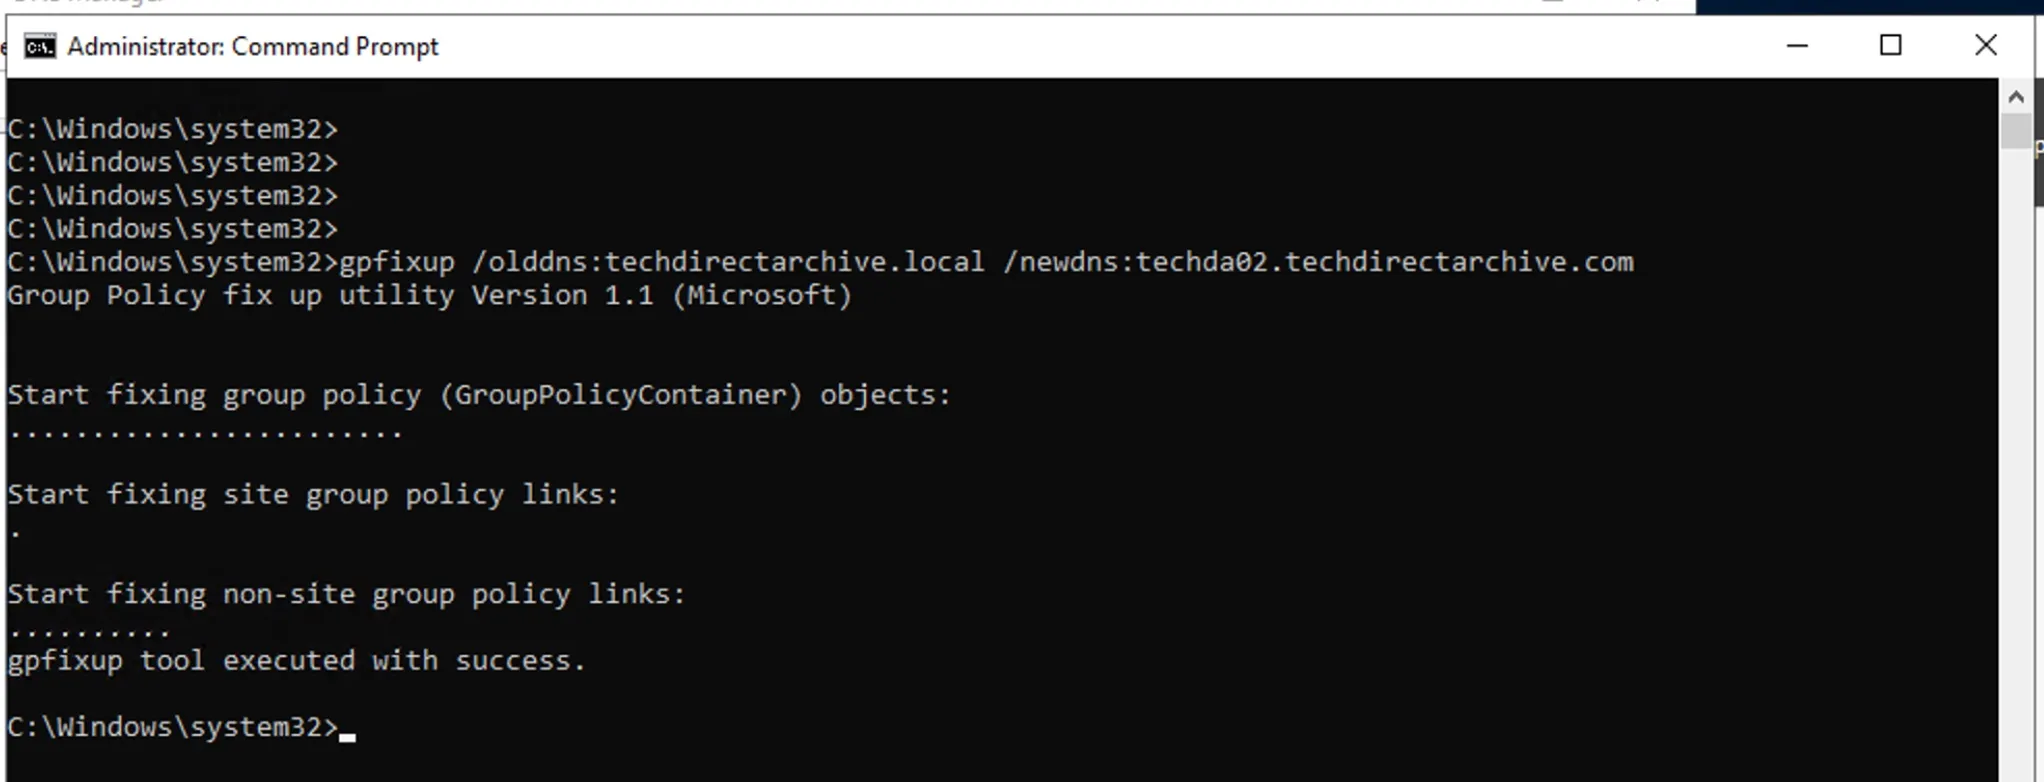
Execute the rendom /clean command to remove the rename metadata

Run is rendom /end to stop the rename process and unfreeze the DC activity

In order to start working with our Group Policy Management again, we need to add the new forest. To do this, click on Action and select Add Forest.
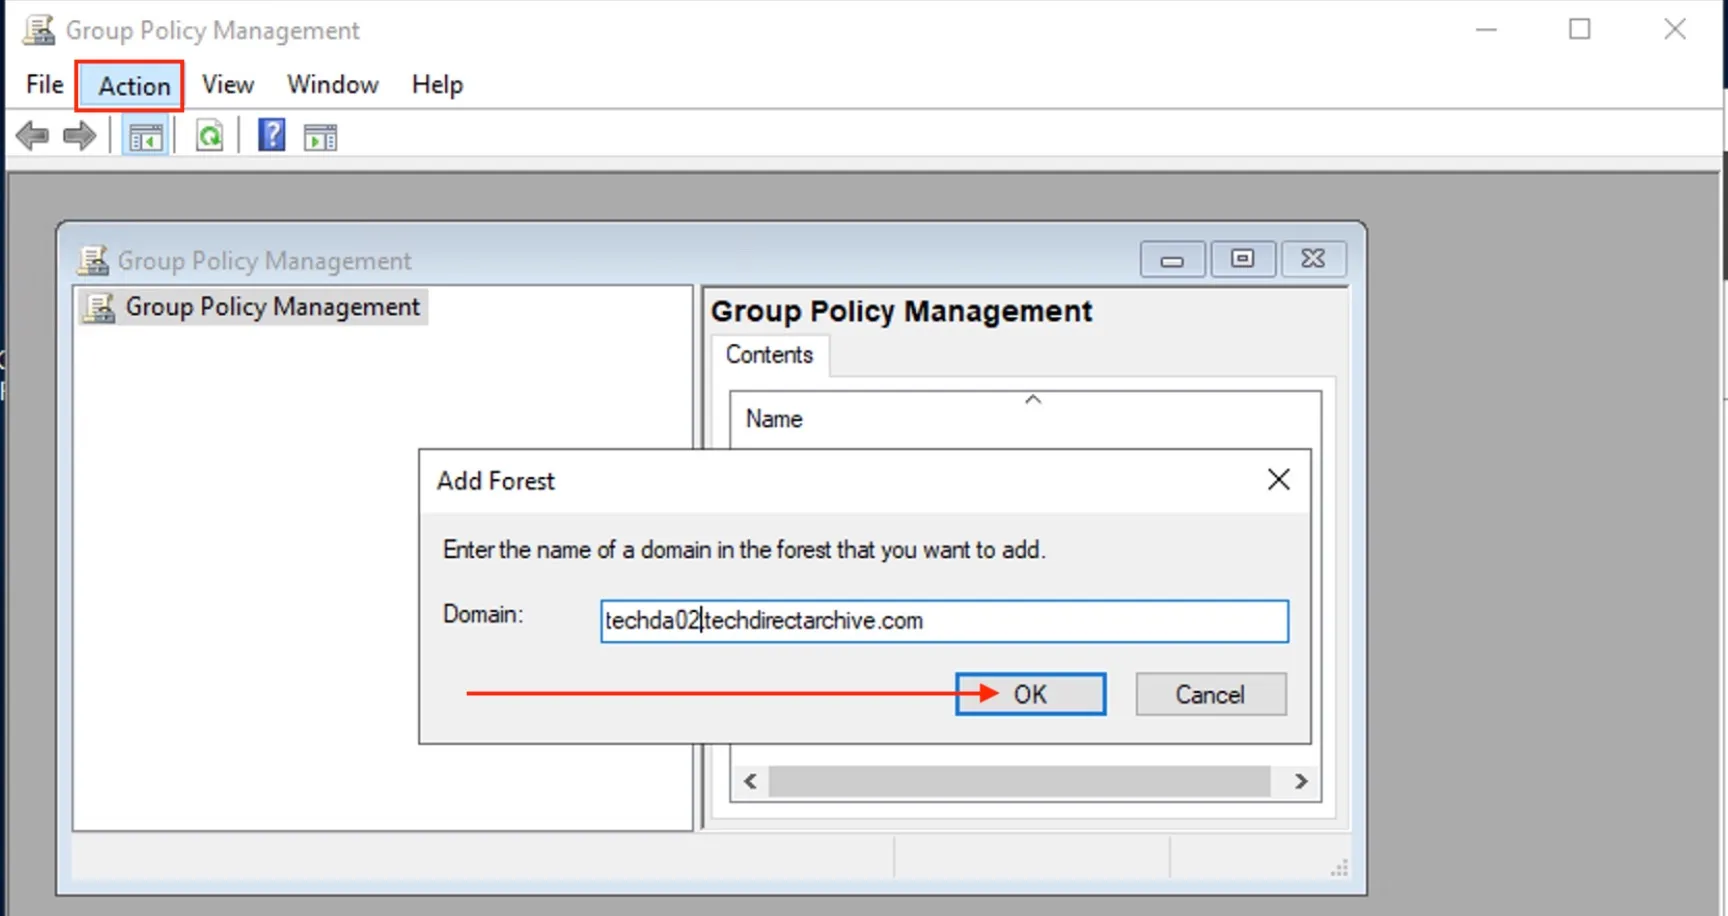
You should continue monitoring other services to ensure all errors associated with the rename process is eliminated.
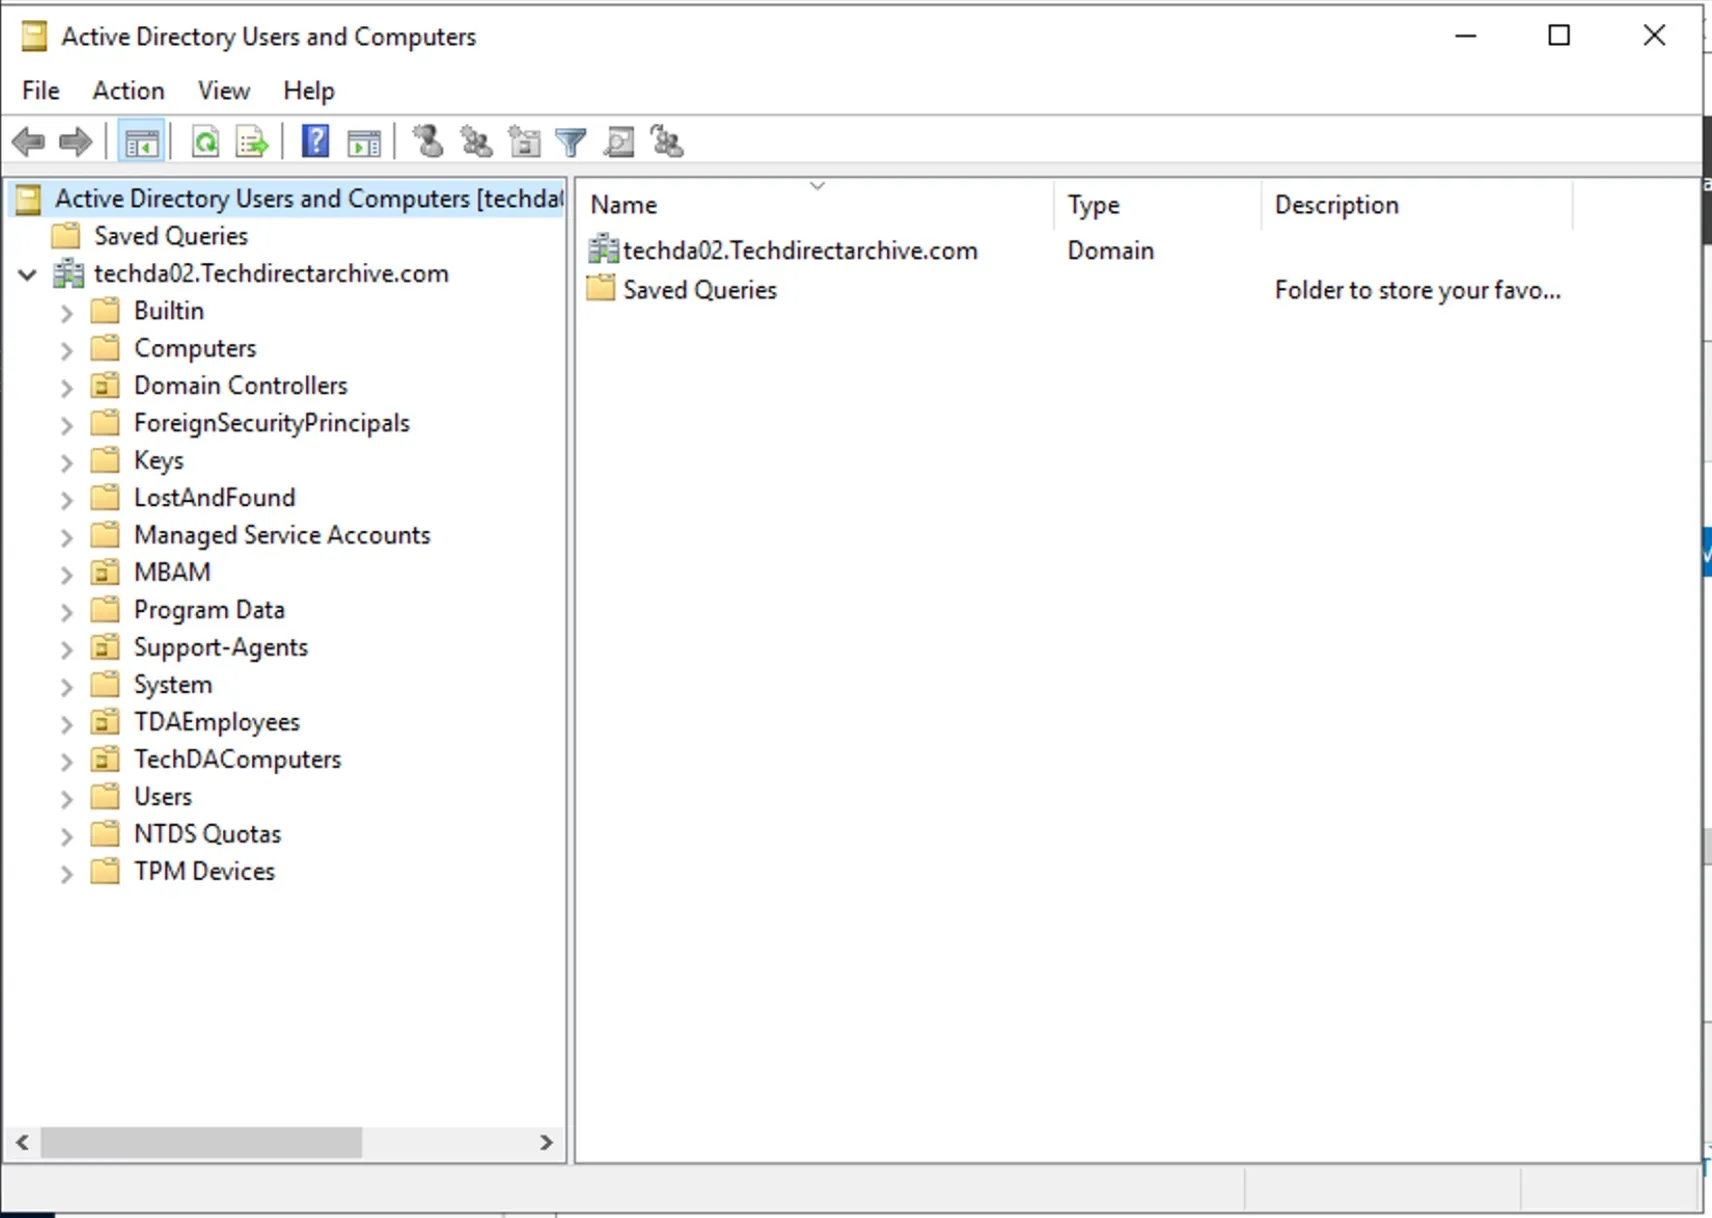
Let’s see if this name change is reflected in Active Directory Users and Computers console.
Lastly, If your domain has trusts with other domains or forests, update them as needed. Also, consider external dependencies such as firewalls, DNS, DHCP, etc. Update certificates and service principal names (SPNs) to match the new domain name.


