

One of the many features that Veeam Backup and Replication provide to ensure an organization can successfully recover their backups every day and in case of a malware emergency is the ability to scan your backup images for latent malware before they are restored. This goes beyond the ability to scan for possible entropic encryption of a server during backup by scanning for the malware that has caused the encryption. If an infection is detected then the restore can be aborted, or the server can be restored but not get connected to a network.
Secure Restore is the name of the Veeam Backup and Replication feature that does the malware scan before restoring.
Secure restore can restore Windows servers from
- VMs from any hypervisor
- Physical servers that are protected with Veeam Agent for Windows.
- From backups stored on immutable block storage.
- From backups stored on immutable object storage.
- From backups stored on NFS/SMB shares
Secure restore can be run before recovery is performed from the following operations:
- Instant Recovery
- Entire VM Restore
- Virtual Disks Restore
- Restore to Microsoft Azure
- Restore to Amazon EC2
- Restore to Google Compute Engine
- Disk Export
- SureBackup
How it works
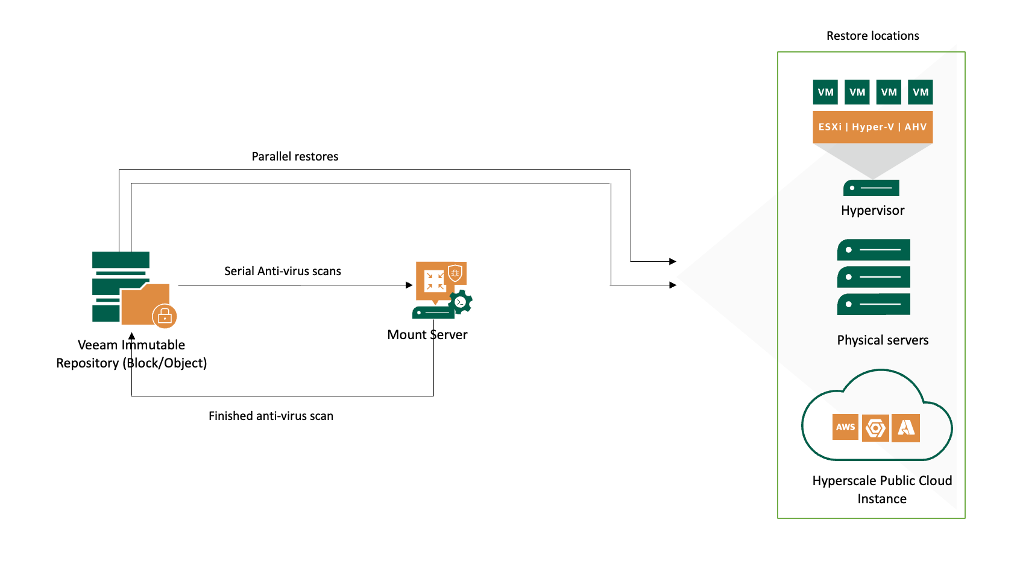
The diagram below is a high-level overview of the process.
My Environment
The anti-virus application of choice in my lab is Windows Defender.
I created a restore job to recover three servers. Each server needs to have a virus scan run against it before recovery to identify any undetected latent malware at the time of backup.
Before I created the job, I checked for updated signatures and applied them.
The steps:
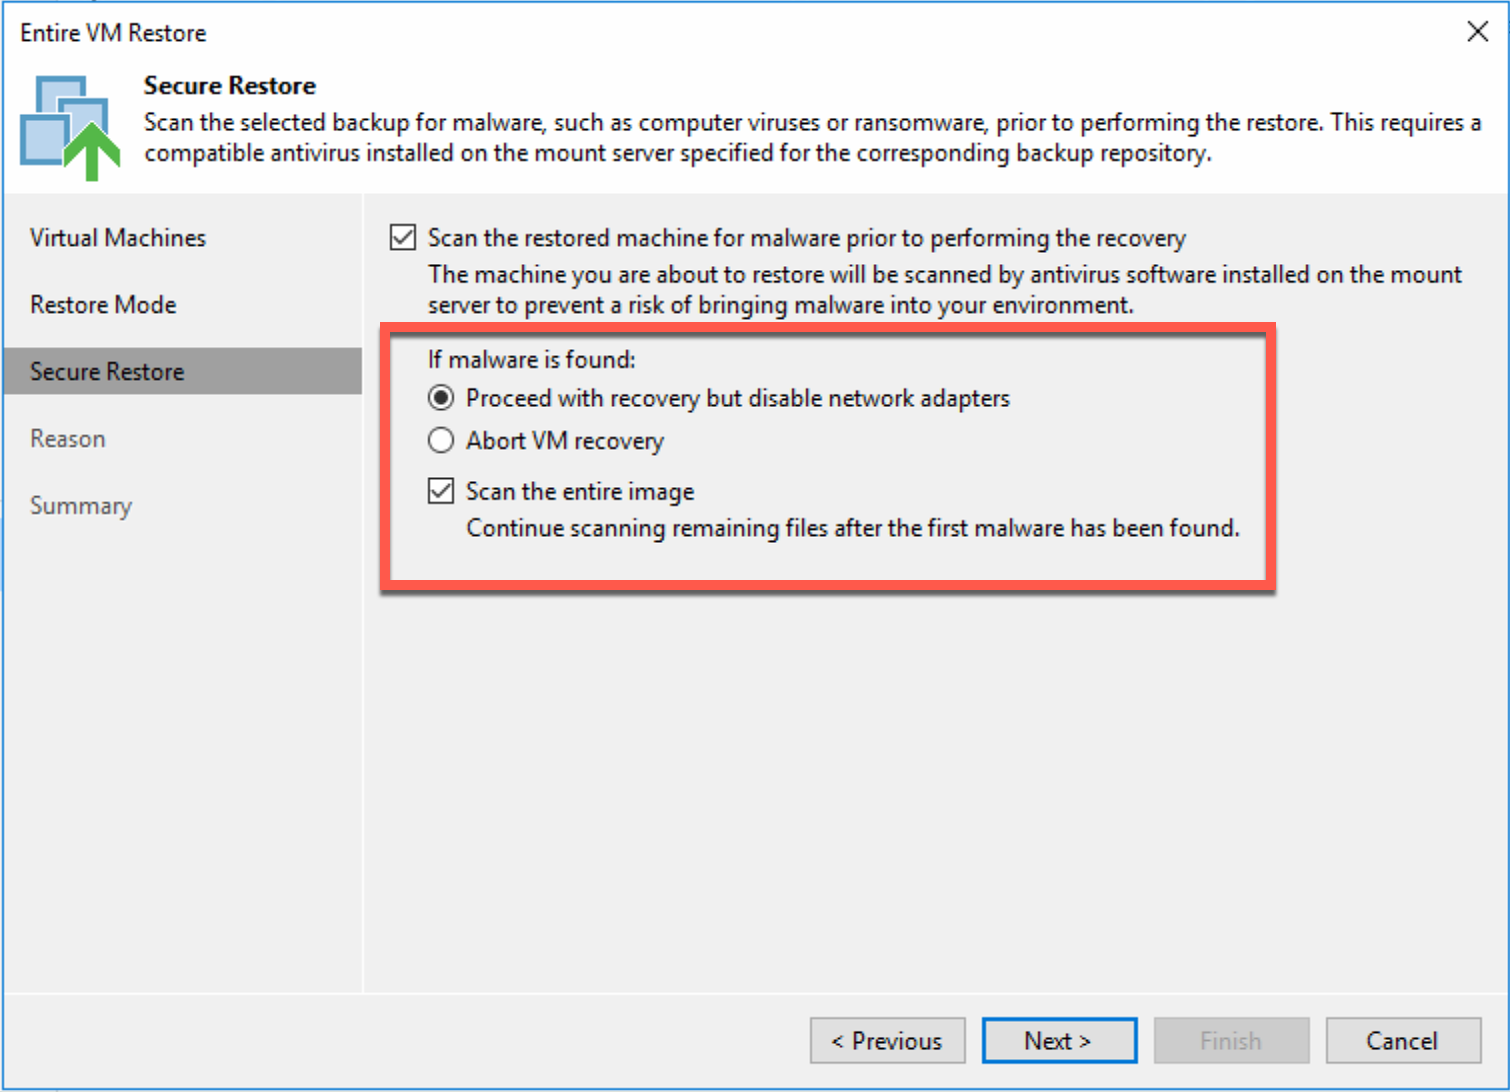
Step 1.
Select the option to run Secure Restore. You can then decide what you want to happen if malware is detected.
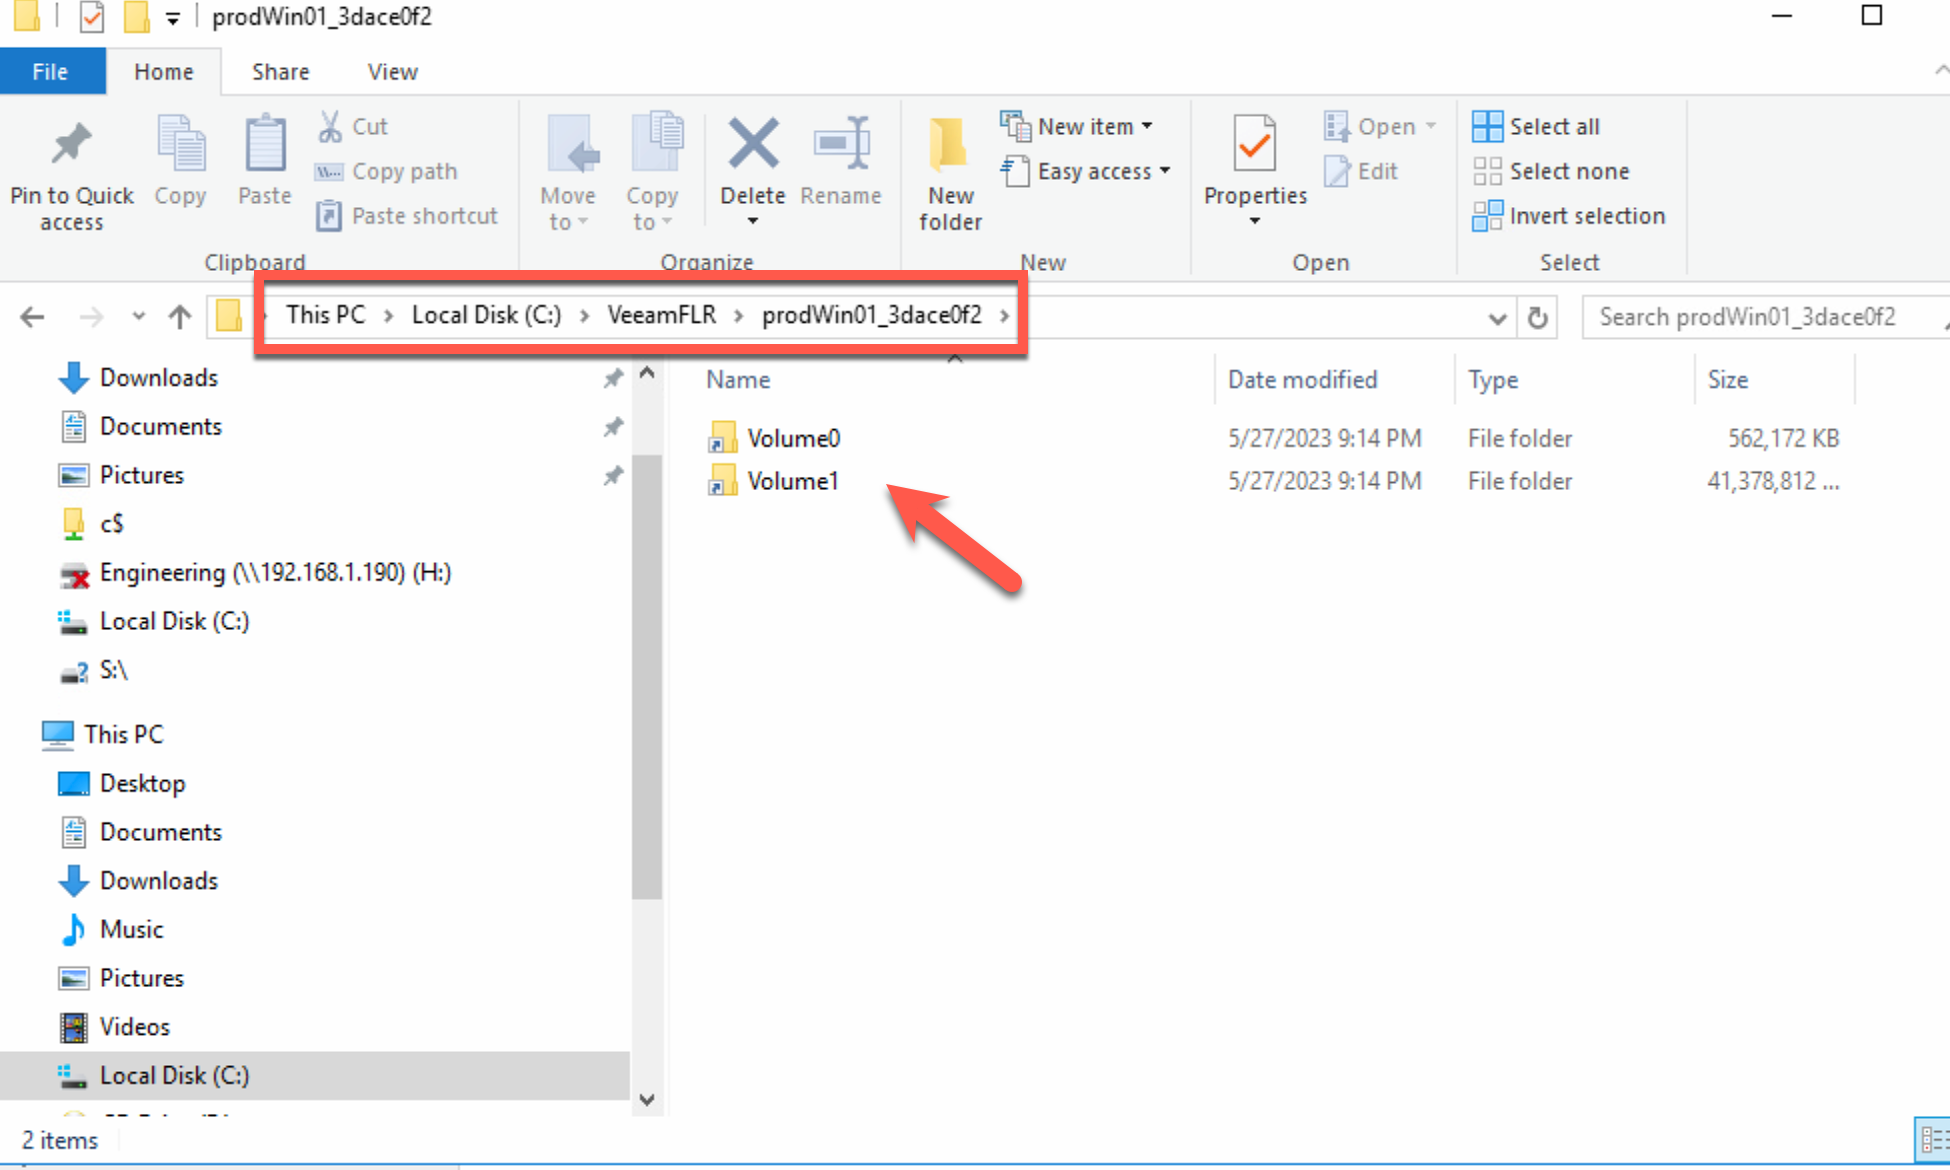
Step 2.
The backup image gets mounted to the repository mount server at c:\VeeamFLR.
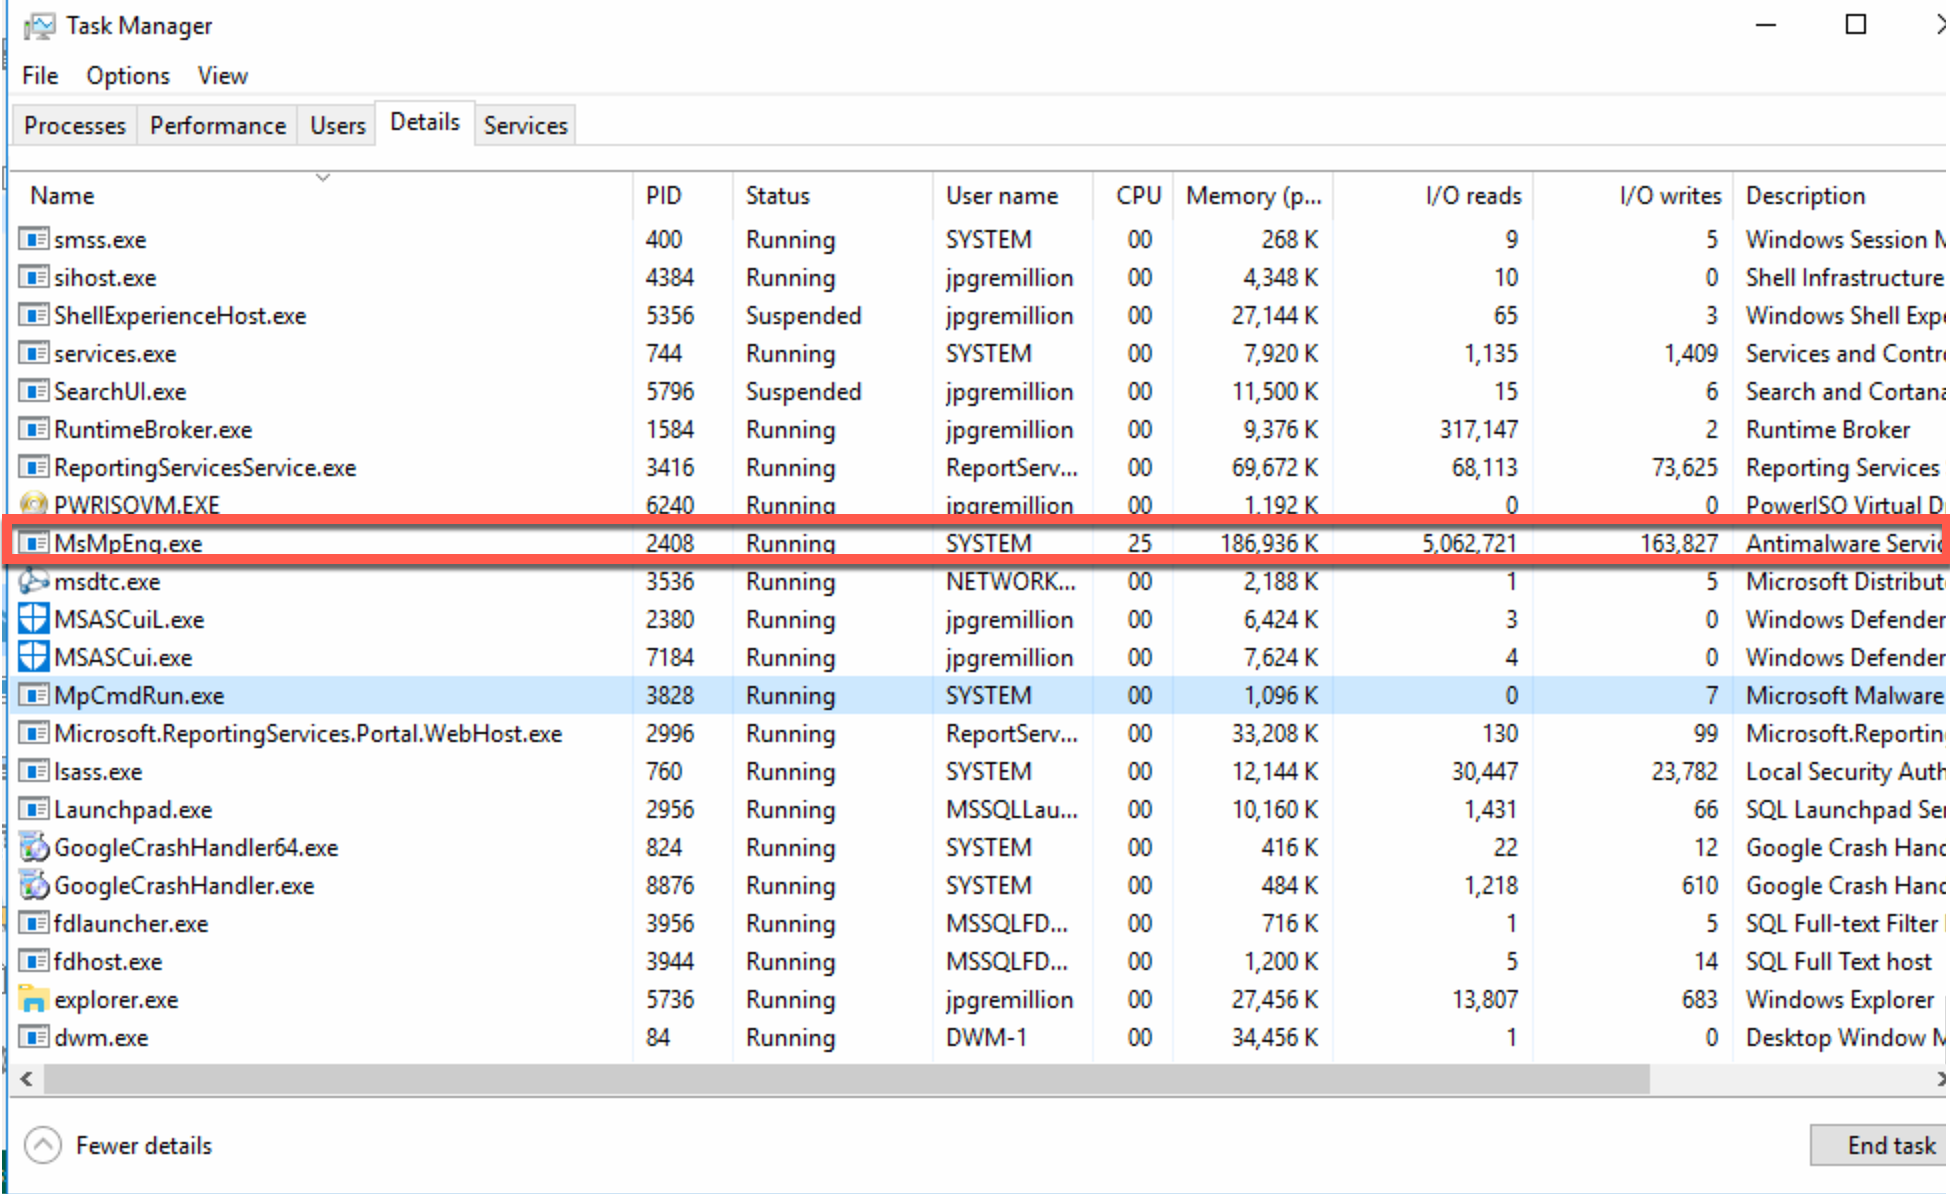
Step 3.
Veeam commands Windows Defender to run a full scan against the server volumes in the backup image.
Looking at the Veeam console, you can see that the servers are all queued up to run and will start after the virus scan of the server backup is complete.
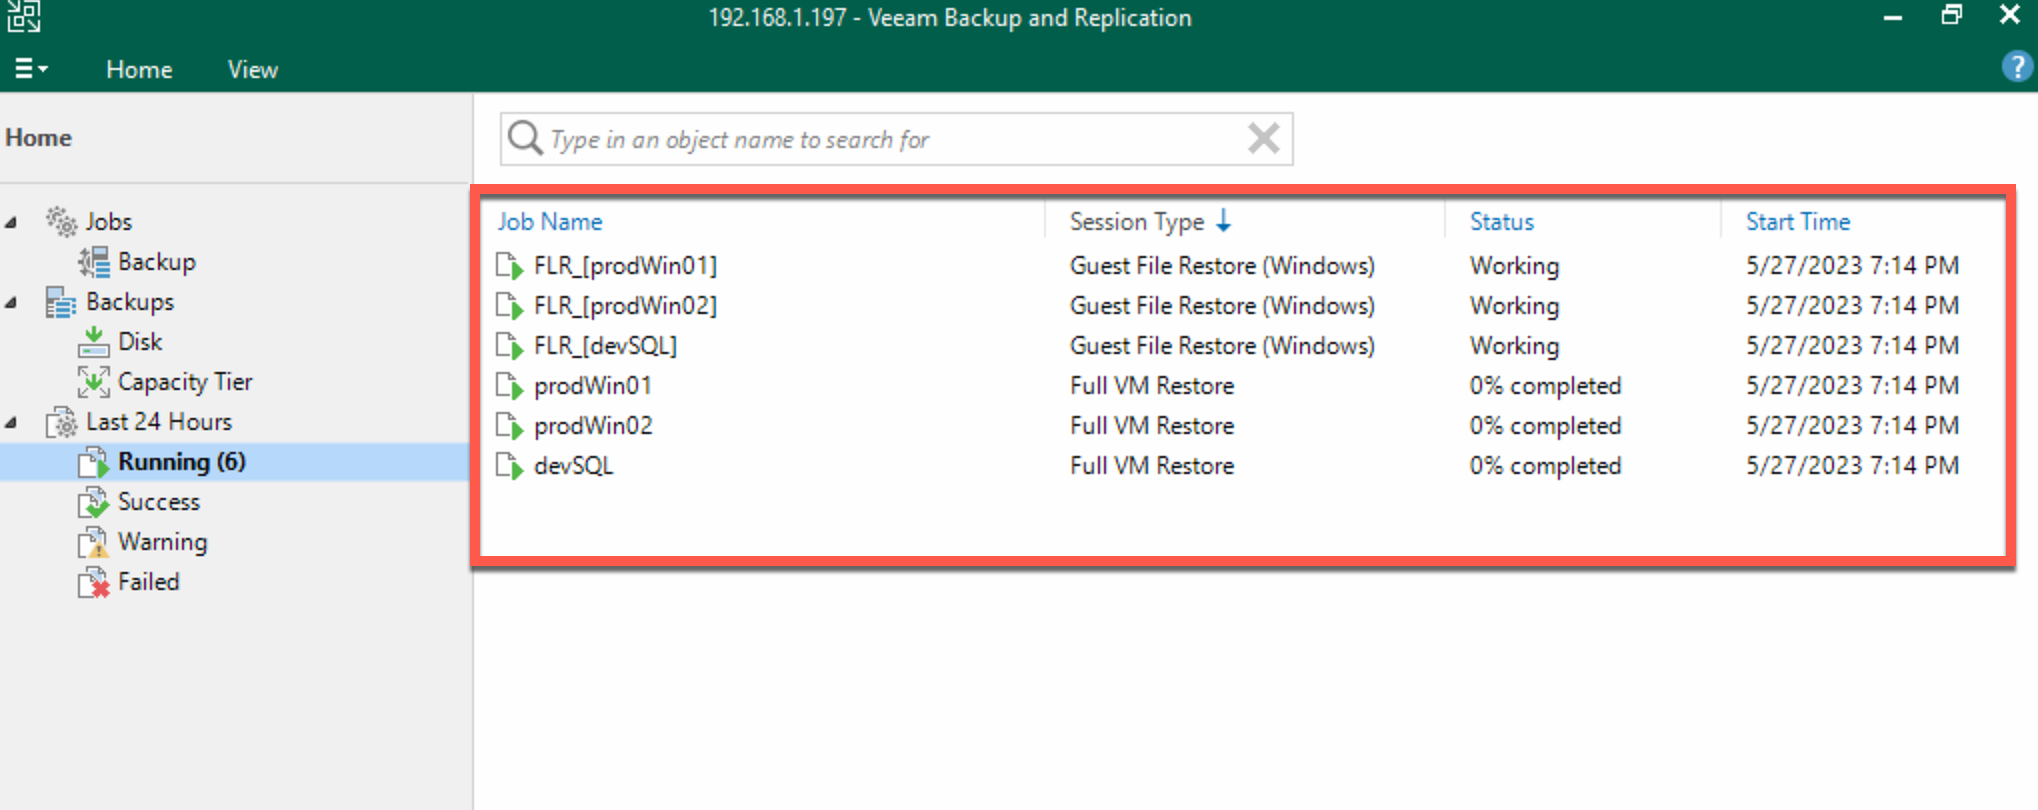
In the image above, the FLR is the mount of the backup image to the mount server. The Full restore will start after the mount server scans the restore point.
Step 4.
When the scan of a server restore point completes, the restore process starts if no malware is detected. If malware is detected, the restore process will follow the options chosen in step one.
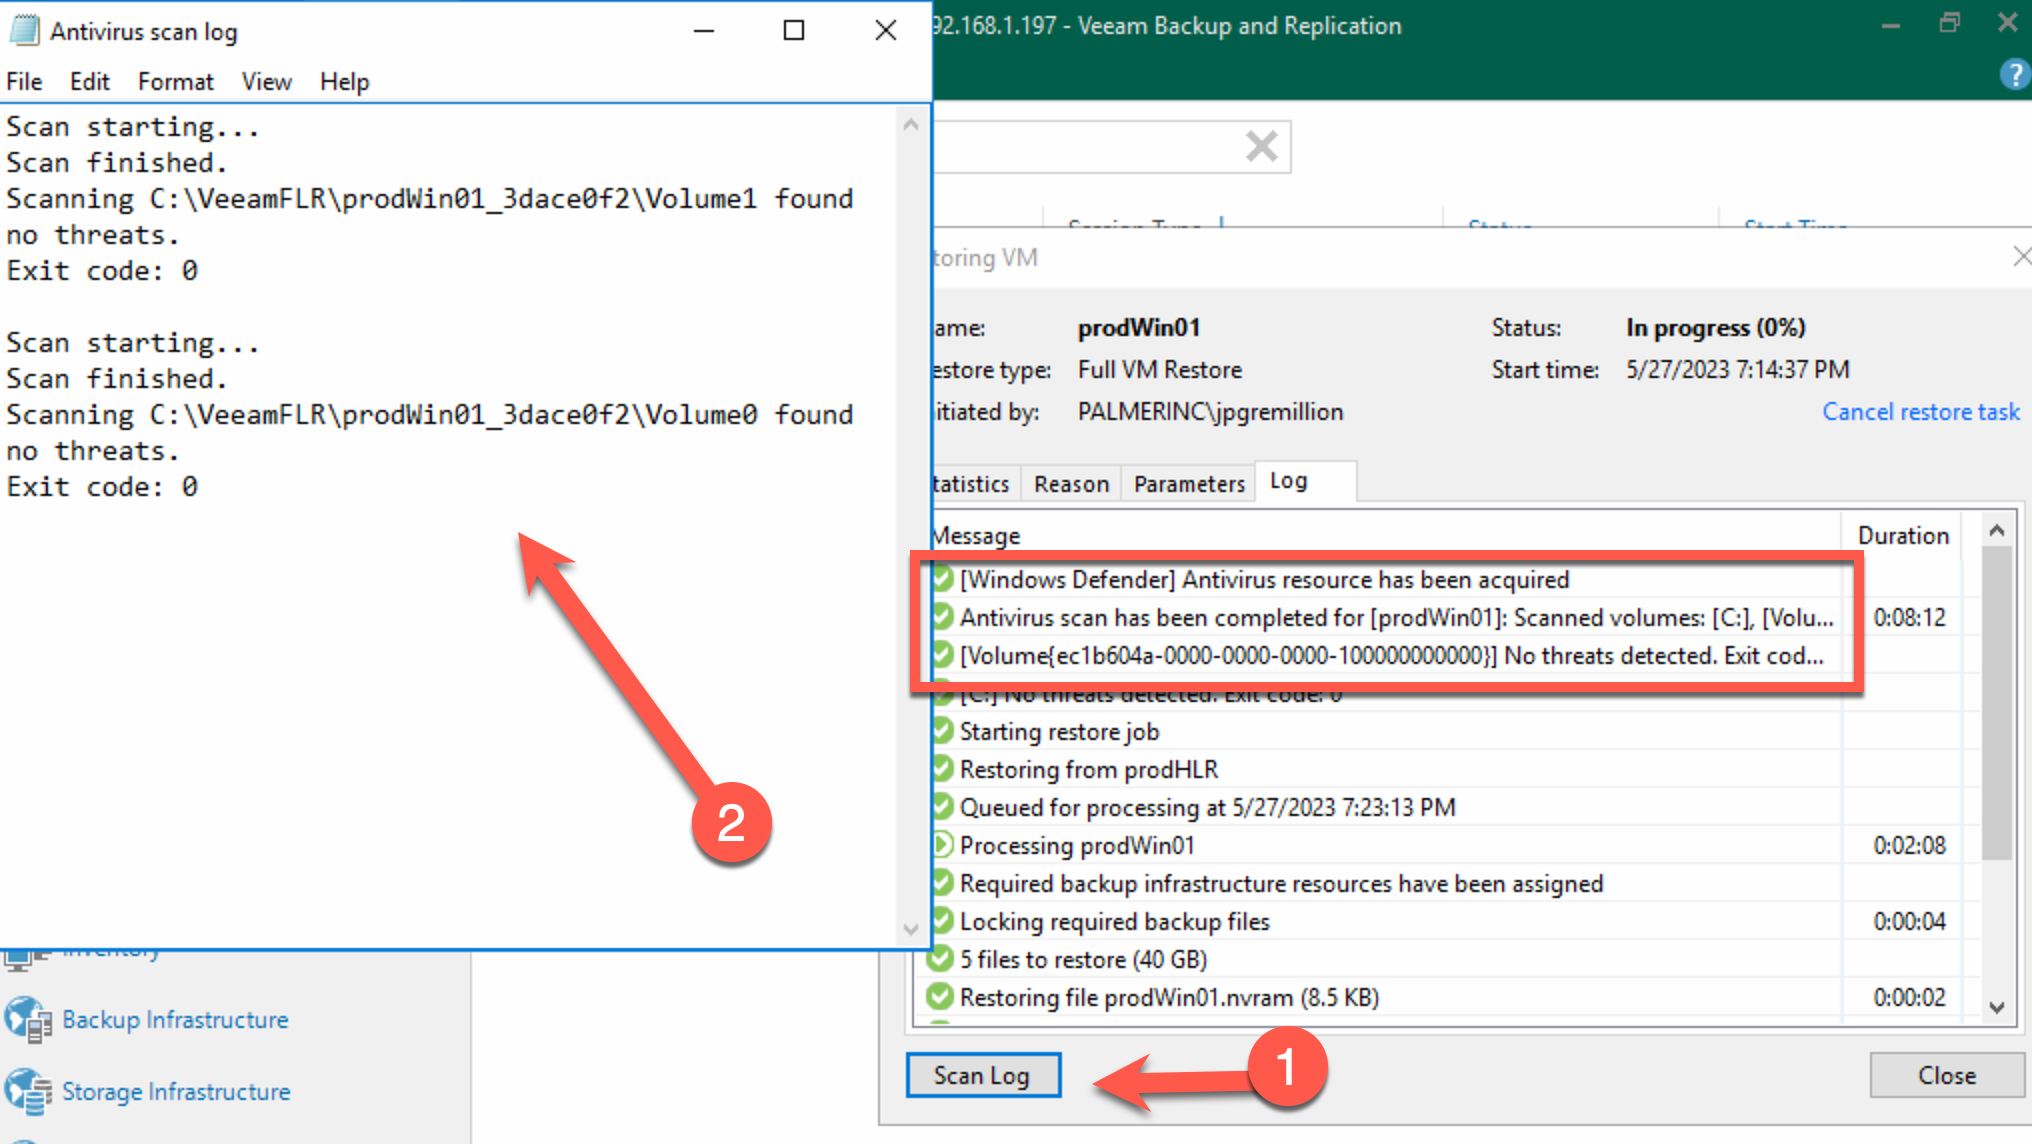
The results of the antivirus scan can be viewed from the statistics window of the restore job.
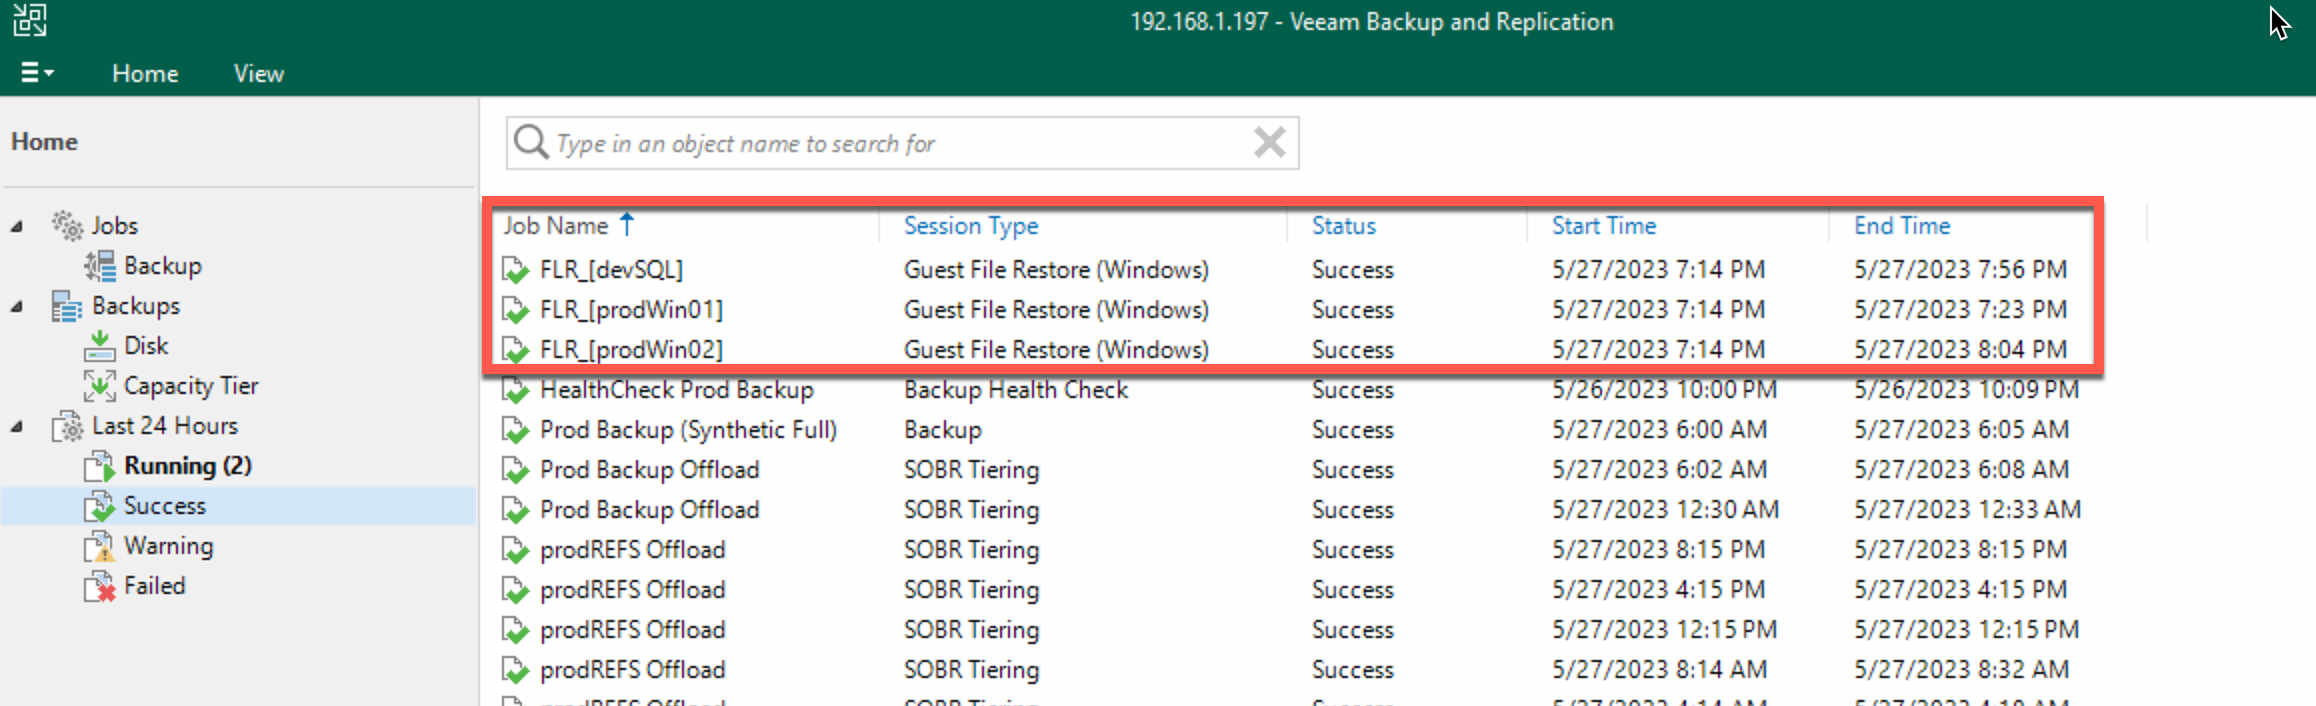
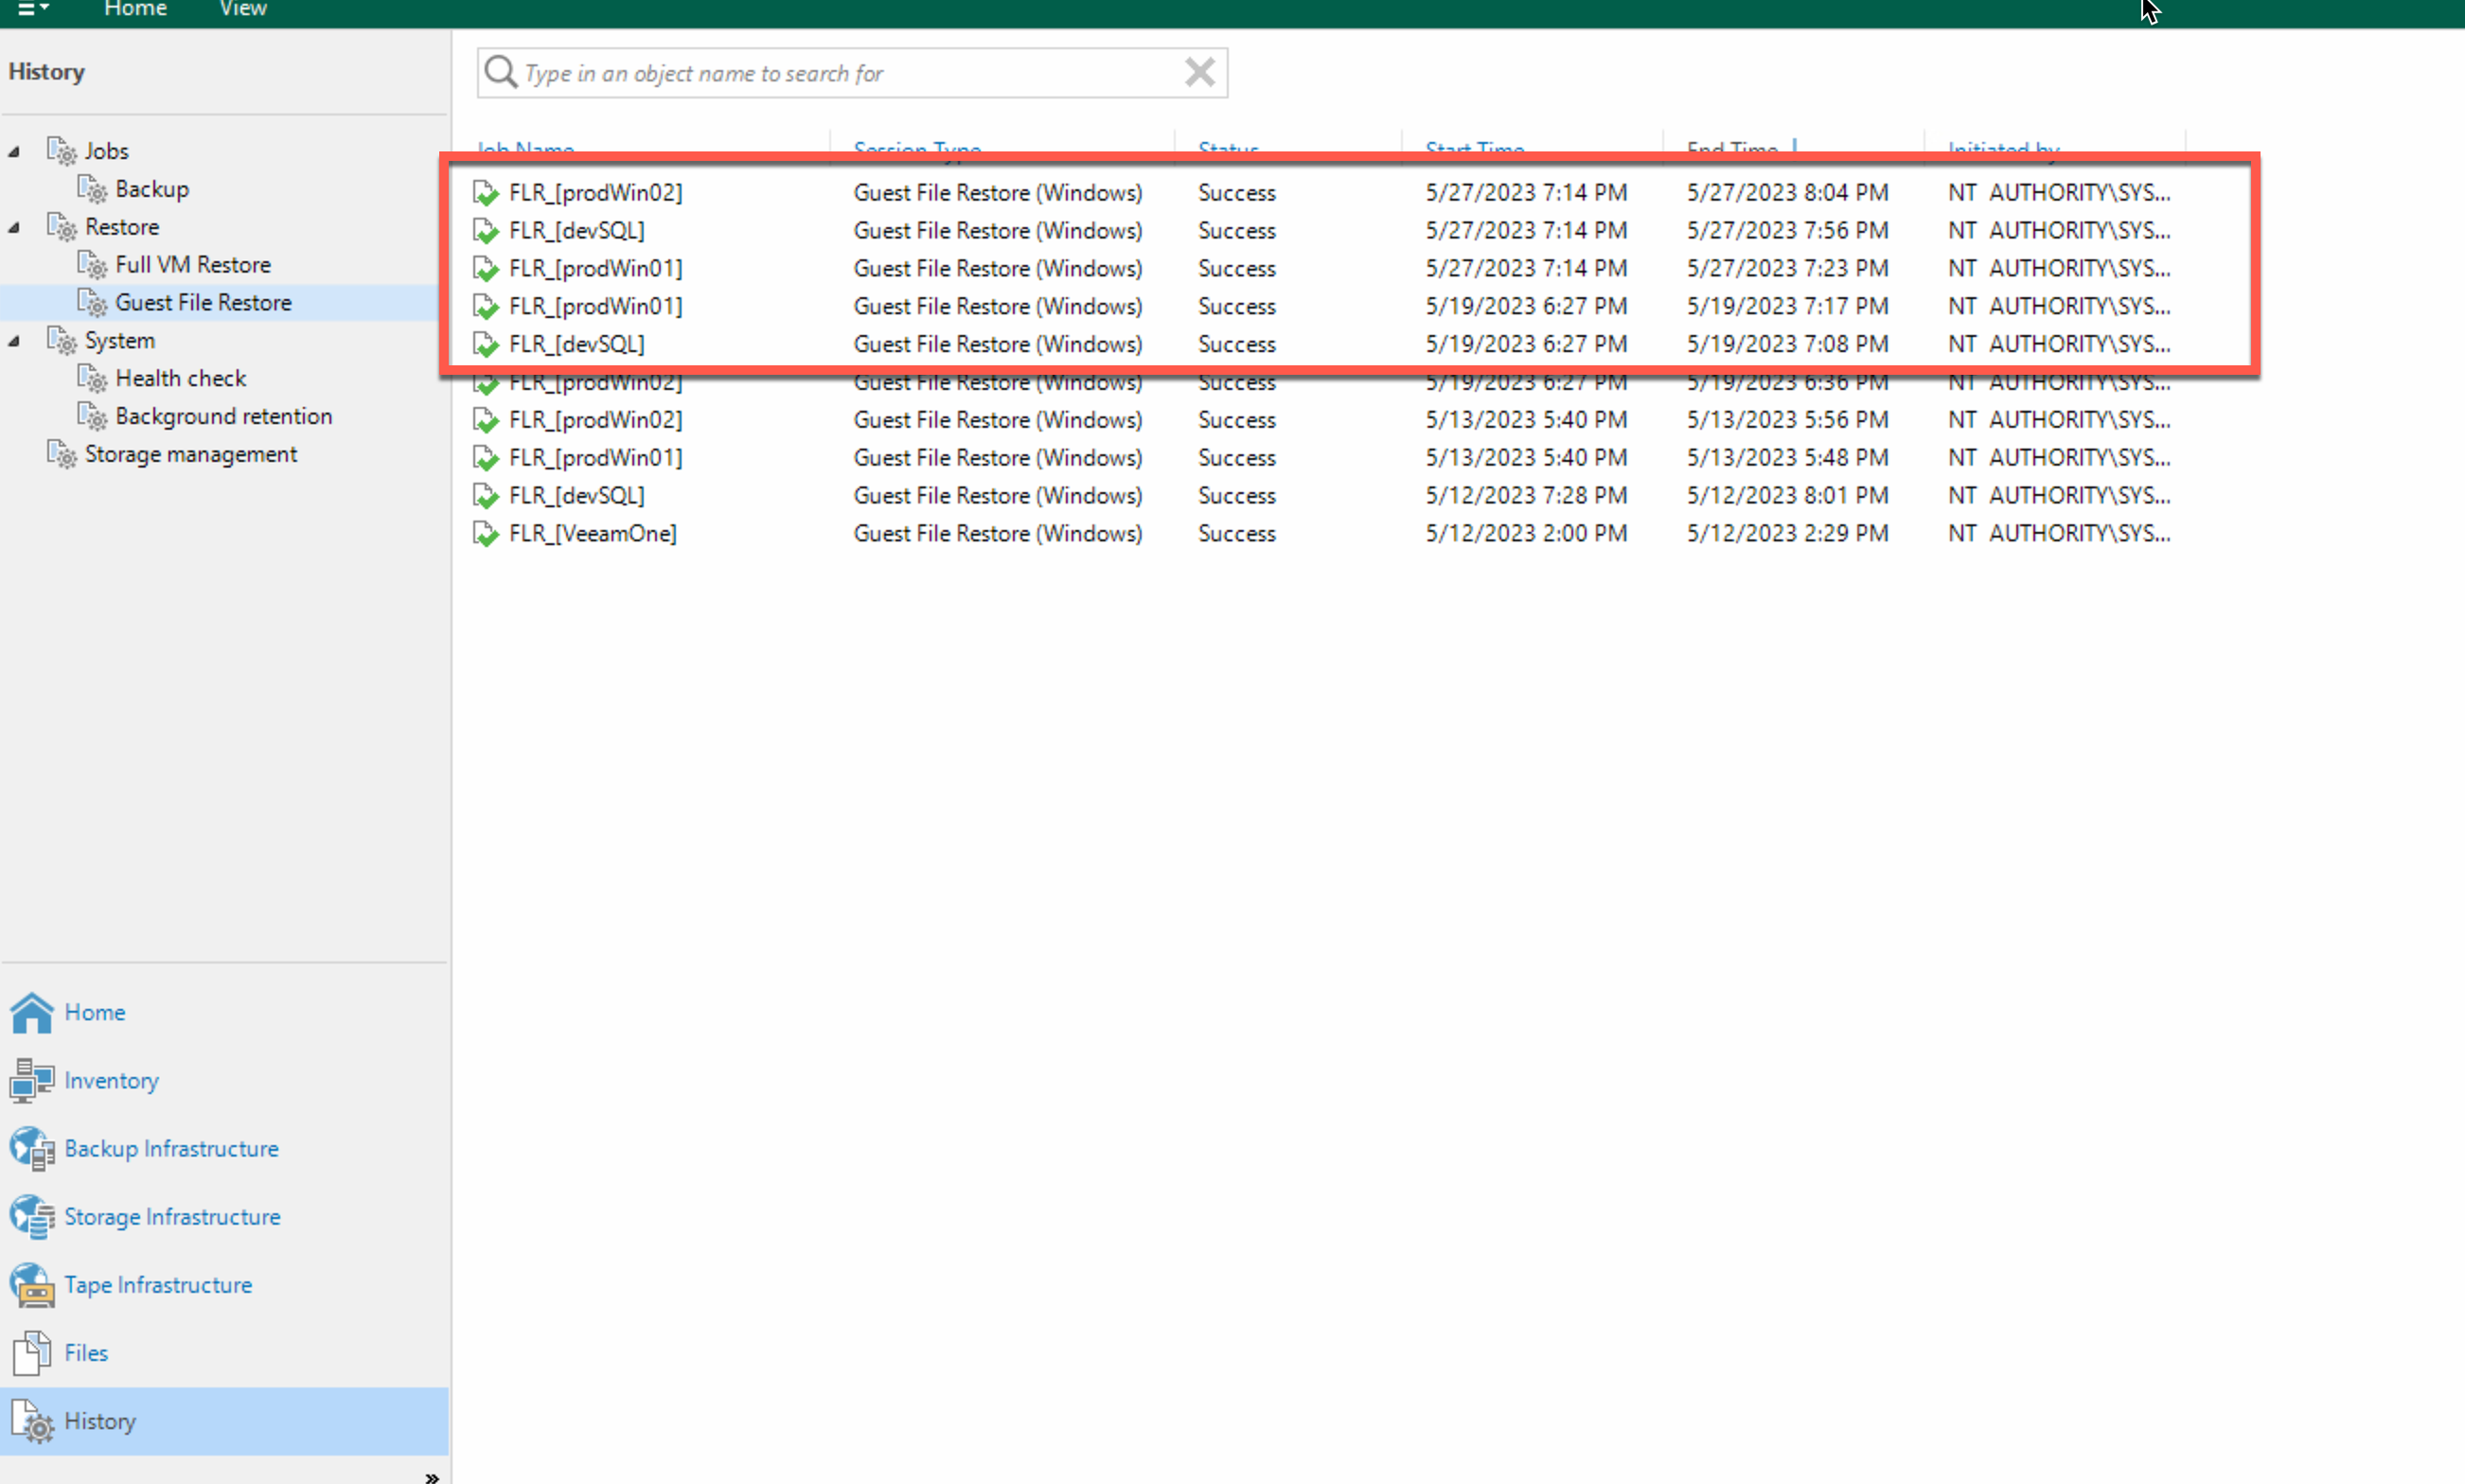
The results of the anti-virus scans get logged and can be seen in the 24 hoiur reports and historical reports.
Failed scans are kept under the Failed heading
Tips:
- If you want to be more proactive about identifying latent malware – not just entropic encryption – you can run secure restore as part of scheduled Surebackup jobs.
- Third-party applications perform all anti-virus scanning. It is recommended that the anti-virus application best practices are applied to the mount server.
Conclusion
To protect your environment from being re-infected by latent malware that went undetected before a server backup occurred, it is recommended that all restore points get scanned with Secure Restore.


