

Hello Community,
you probably already use the Powershell scripts shared with the community and run them unattended. In the past, unattended sign-in required you to store the username and password in a local file or in a secret vault/txt-file that’s accessed during run-time. But, as we all know, storing user credentials locally is not a good security practice. Microsoft will also disable access via Remote Powershell (RPS). See the following link for more details:
https://techcommunity.microsoft.com/t5/exchange-team-blog/announcing-deprecation-of-remote-powershell-rps-protocol-in/ba-p/3695597
So why not hit two birds with one stone?
The Mission
This post will talk about how to configure Exchange Online Certificate Based Authentication (CBA) to automate Exchange Online PowerShell scripts.
Prerequisites
Please make sure you meet the following requirements:
- Access to a Microsoft 365 tenant with Global Admin permissions
- A certificate. You can use a self-signed certificate
- A Windows system with Powershell (I used version 5.1.x)
It is a good idea to test everything in a test environment first.
How-to create a self-signed certificate using Powershell
Log onto any Windows Server or Desktop with Windows PowerShell (open the window as an Administrator). It’s best to generate the certificate on the machine you want to run the unattended PowerShell script. Please change the DnsName and the validity (here we use 1 year) based on your requirements.
- Create the certificate. It gets stored in the current user Personal Certificate store
$mySelfCert = New-SelfSignedCertificate -DnsName "<your domain>" -NotAfter (Get-Date).AddYears(1) -FriendlyName "EXO Reporting Script Certificate" -KeySpec Signature -KeyAlgorithm RSA -KeyLength 2048 -CertStoreLocation "Cert:\CurrentUser\My"- Export certificate to a .cer file.
$mySelfCert | Export-Certificate -FilePath "C:\Temp\EXO-Reporting-Script-Cert.cer"This .cer file is later used when you upload it to the application created in MS Azure.
Step 1 - Connect to the Azure Portal and register a new application
Let's start with the connection to Azure AD and create the application.
- Connect to https://portal.azure.com/
- Enter your credentials
- Click on Menu (top left corner - I call it BigMac Menu because of the three patties) - Azure Active Directory
- Select App Registration on the Navigation Pane and Click New Registration
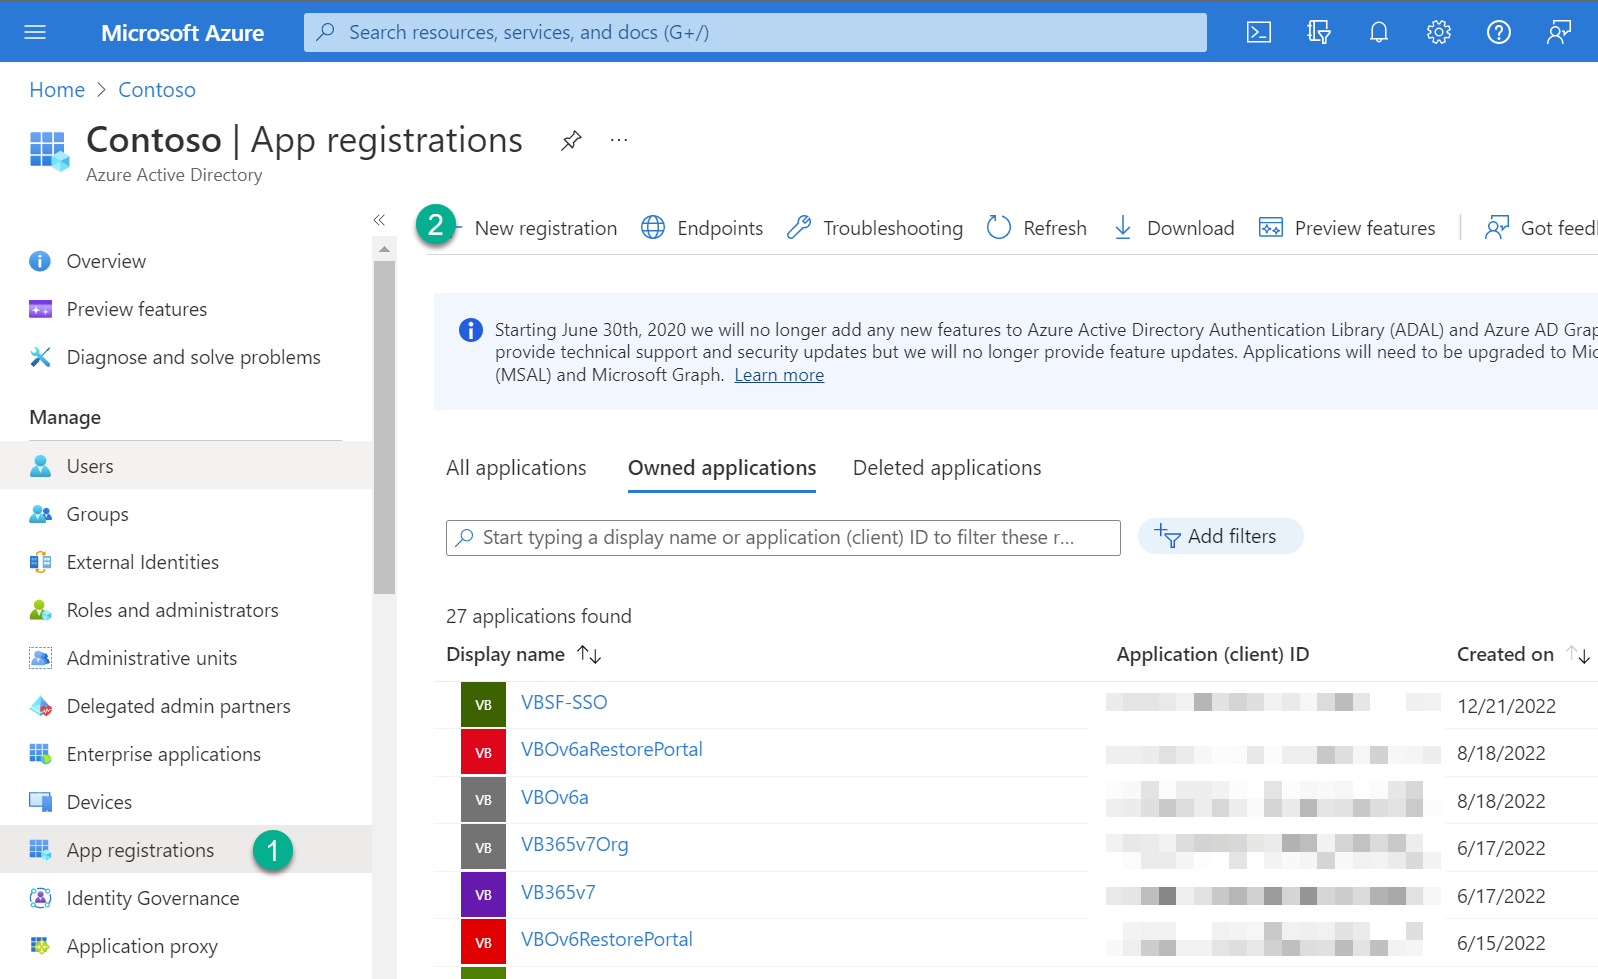
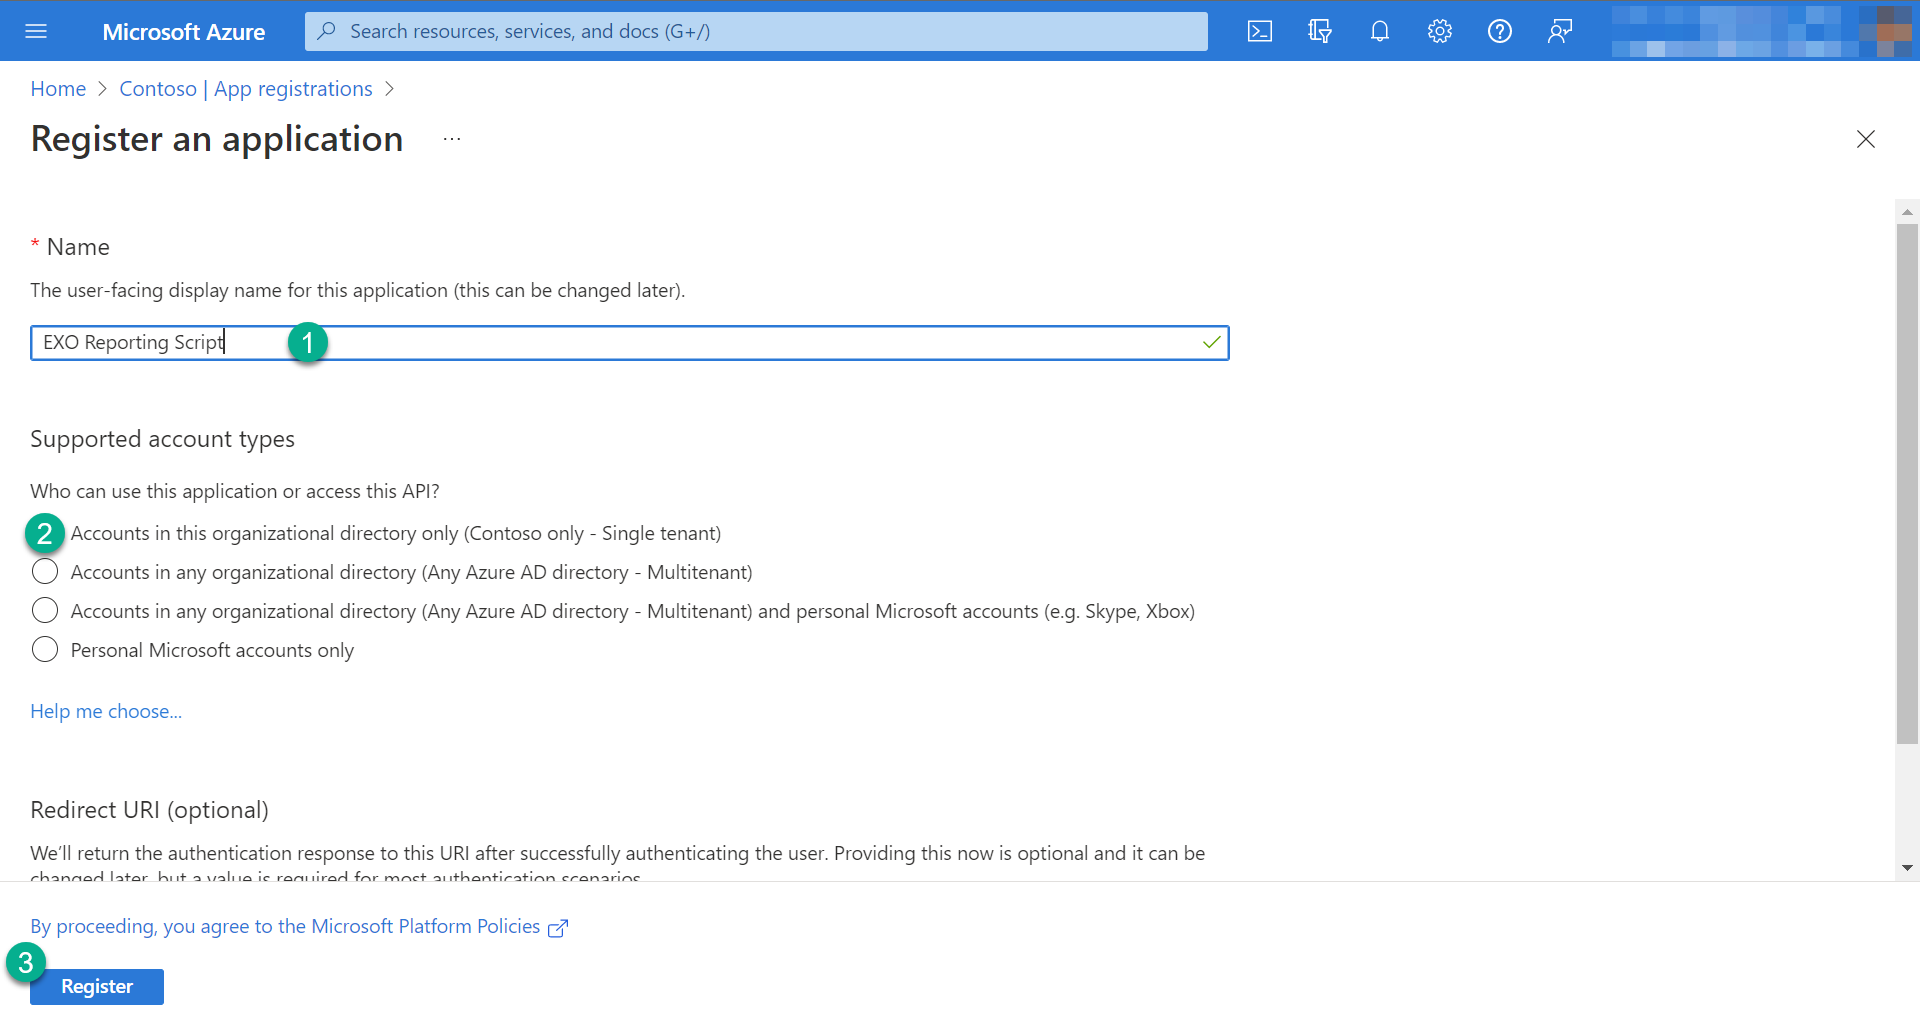
- Fill in the name “EXO Reporting Script”
- Keep the default supported account types Accounts in this organizational directory only – (Single tenant)
- Click Register
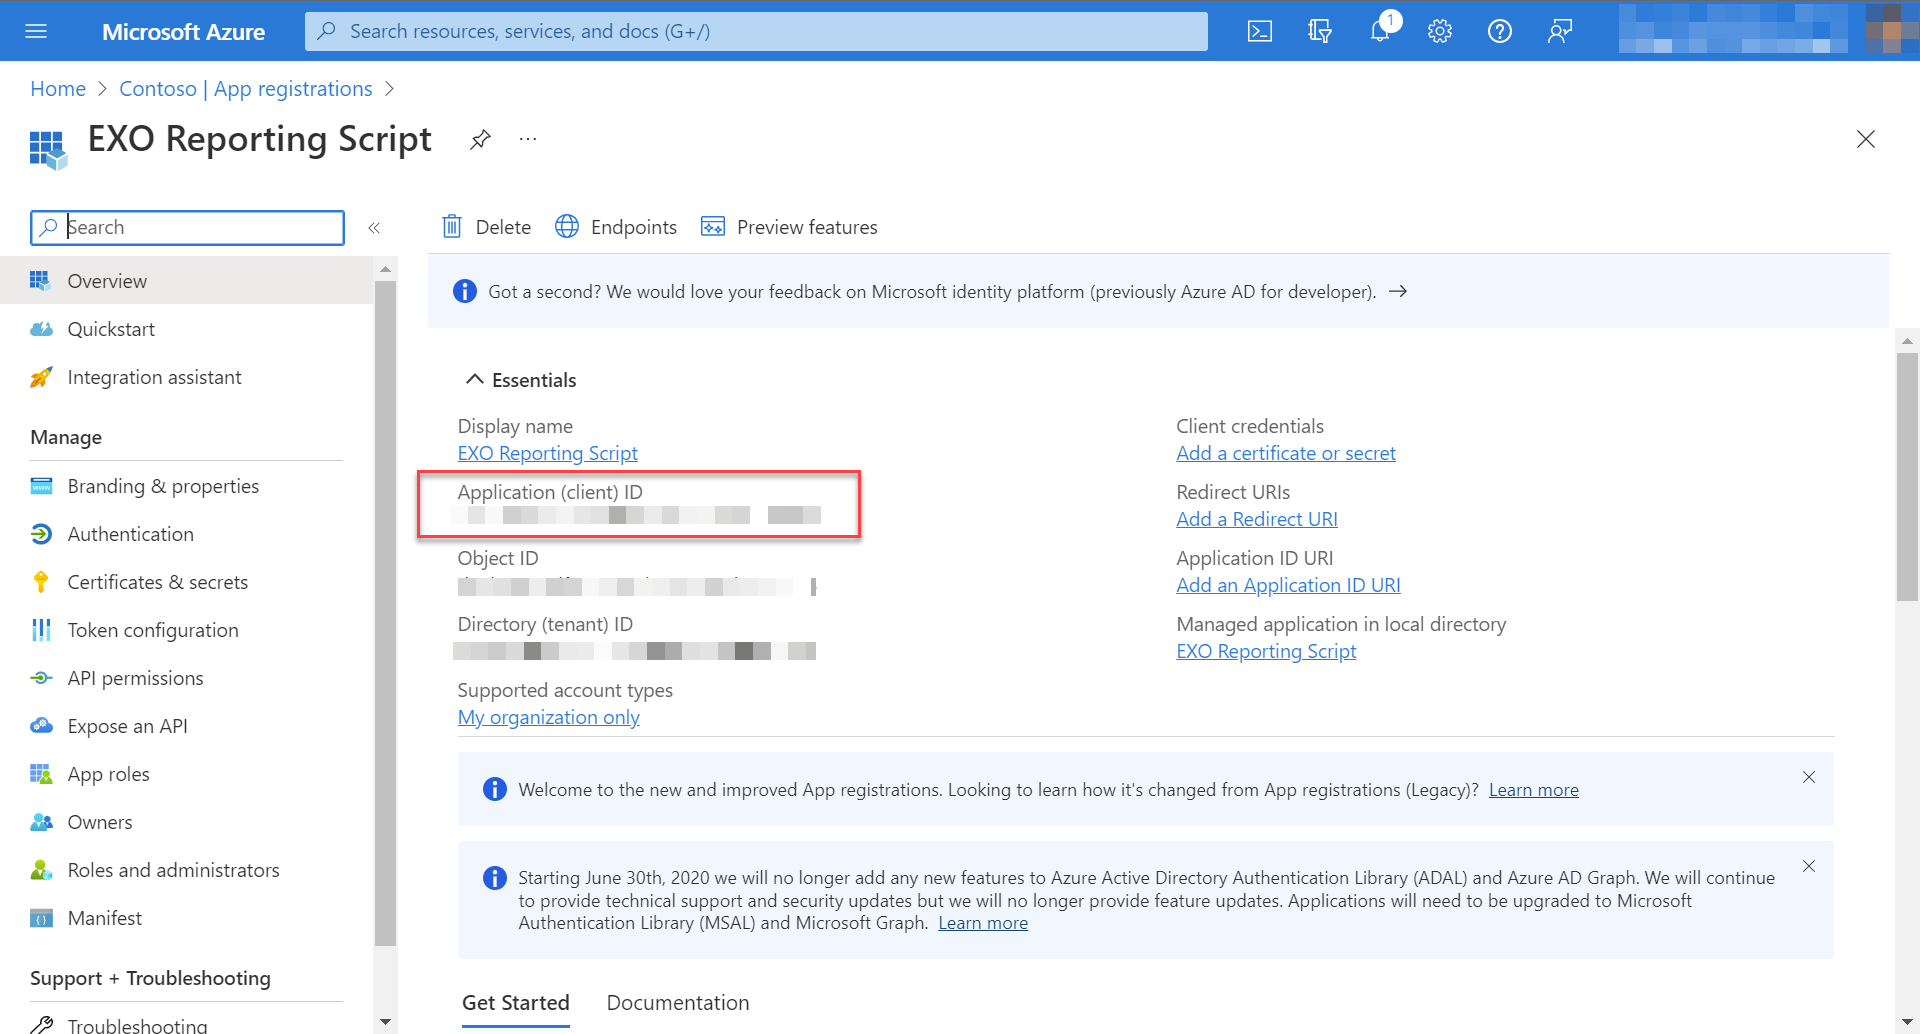
- The EXO Reporting Script application Overview appears
- Copy the Application (client) ID and paste it into a text editor. We will use this later within the script
Step 2 - Configure Azure application API permissions
Now wie will add the necessary API permissions
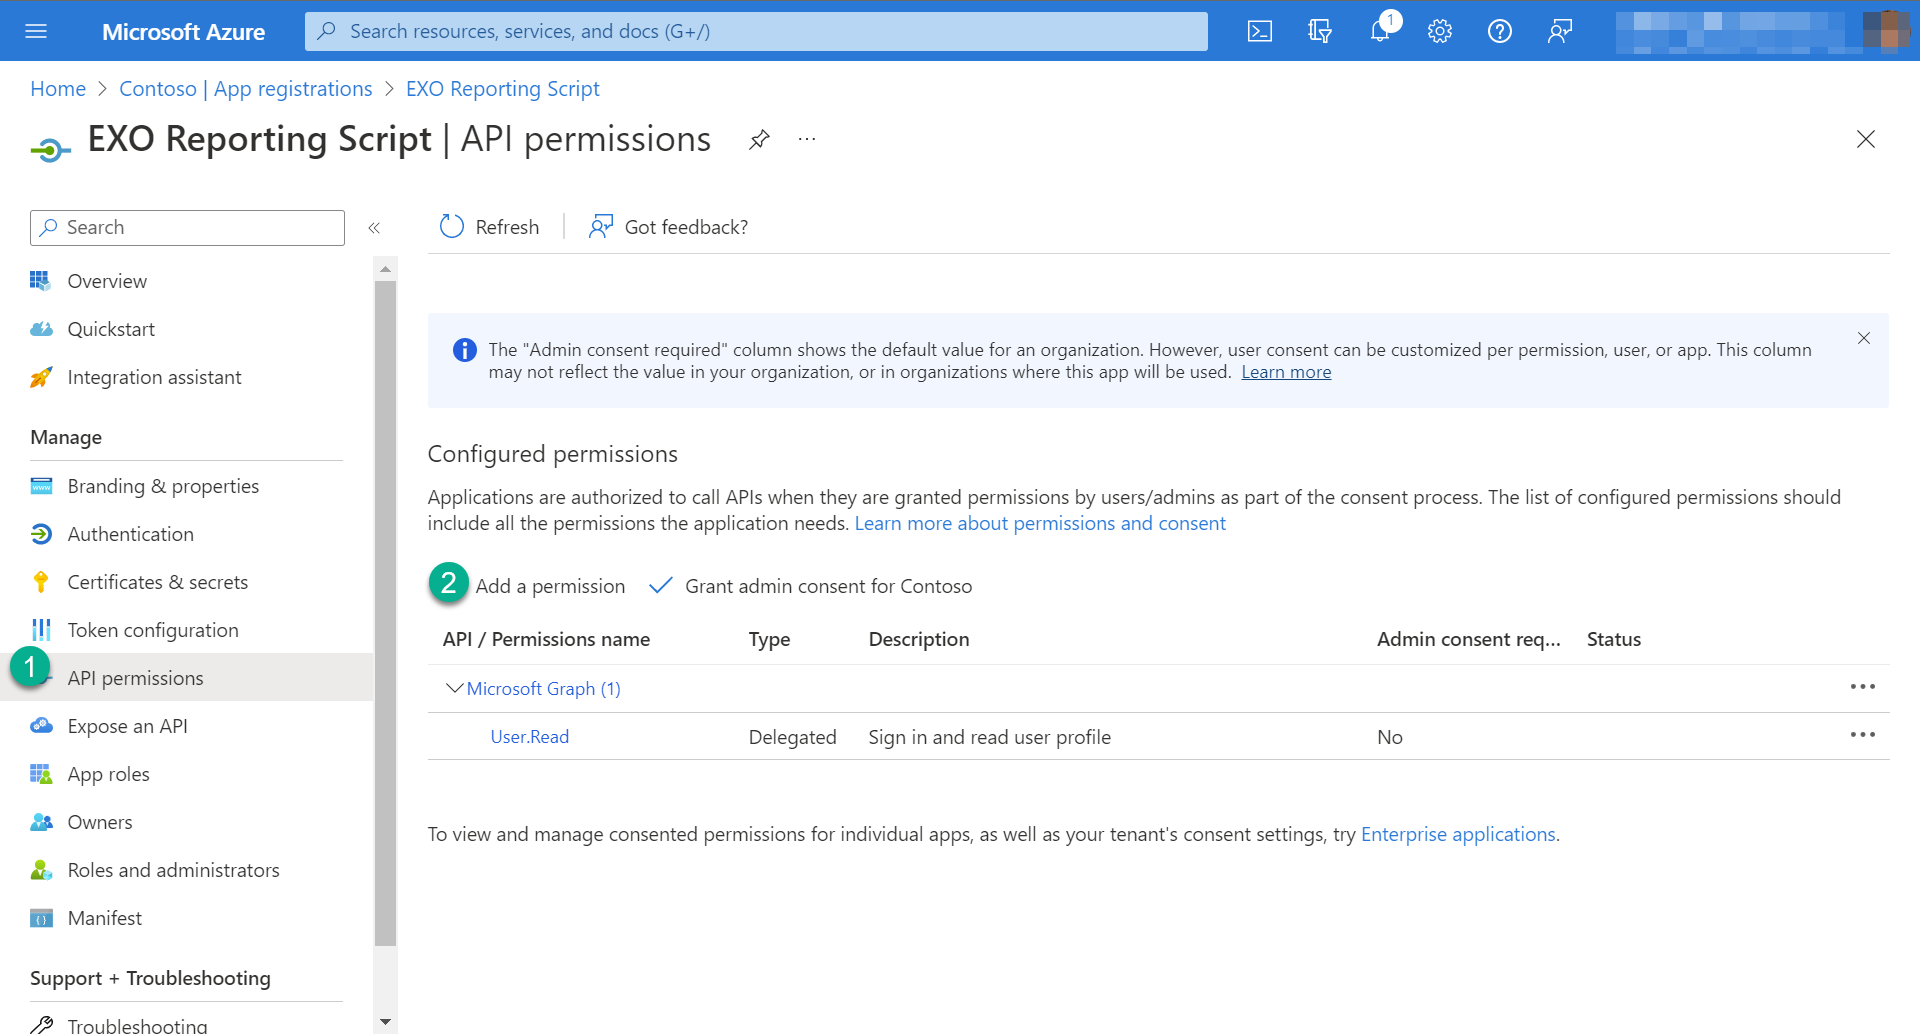
- Click on API permissions - Add a permission
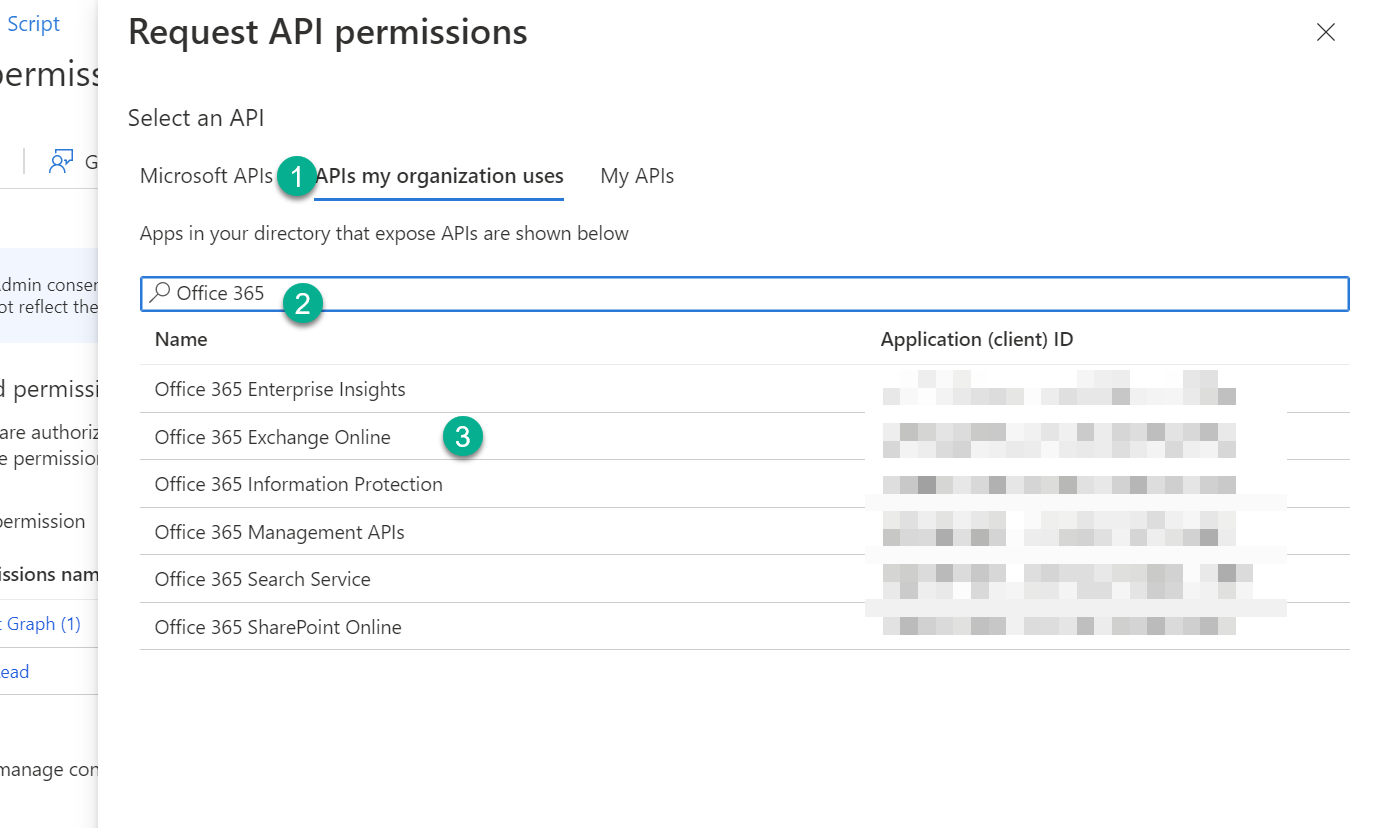
- Click the tab APIs my organization uses
- Search for Office 365
- Select Office 365 Exchange Online from the results list
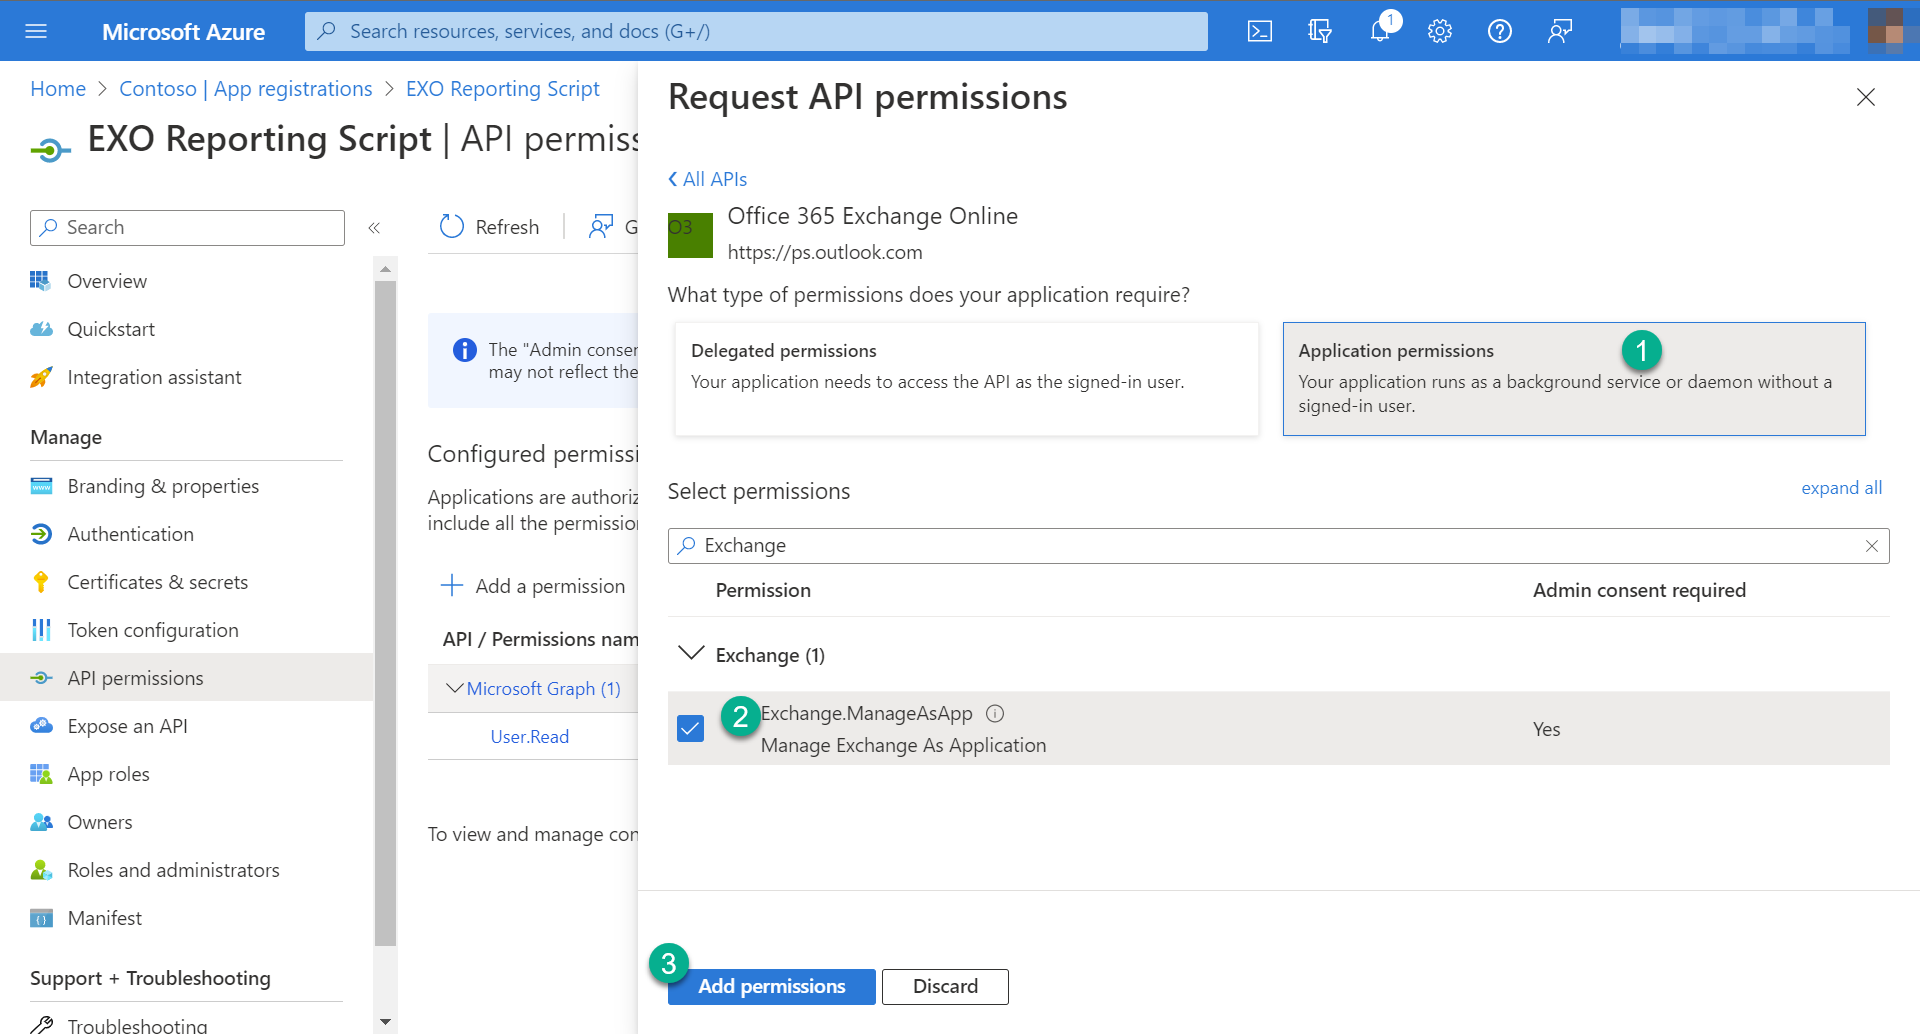
- Select Application permissions
- Expand Exchange (Type in Exchange in the search bar to find it quicker) and select Exchange.ManageAsApp
- Click Add permissions
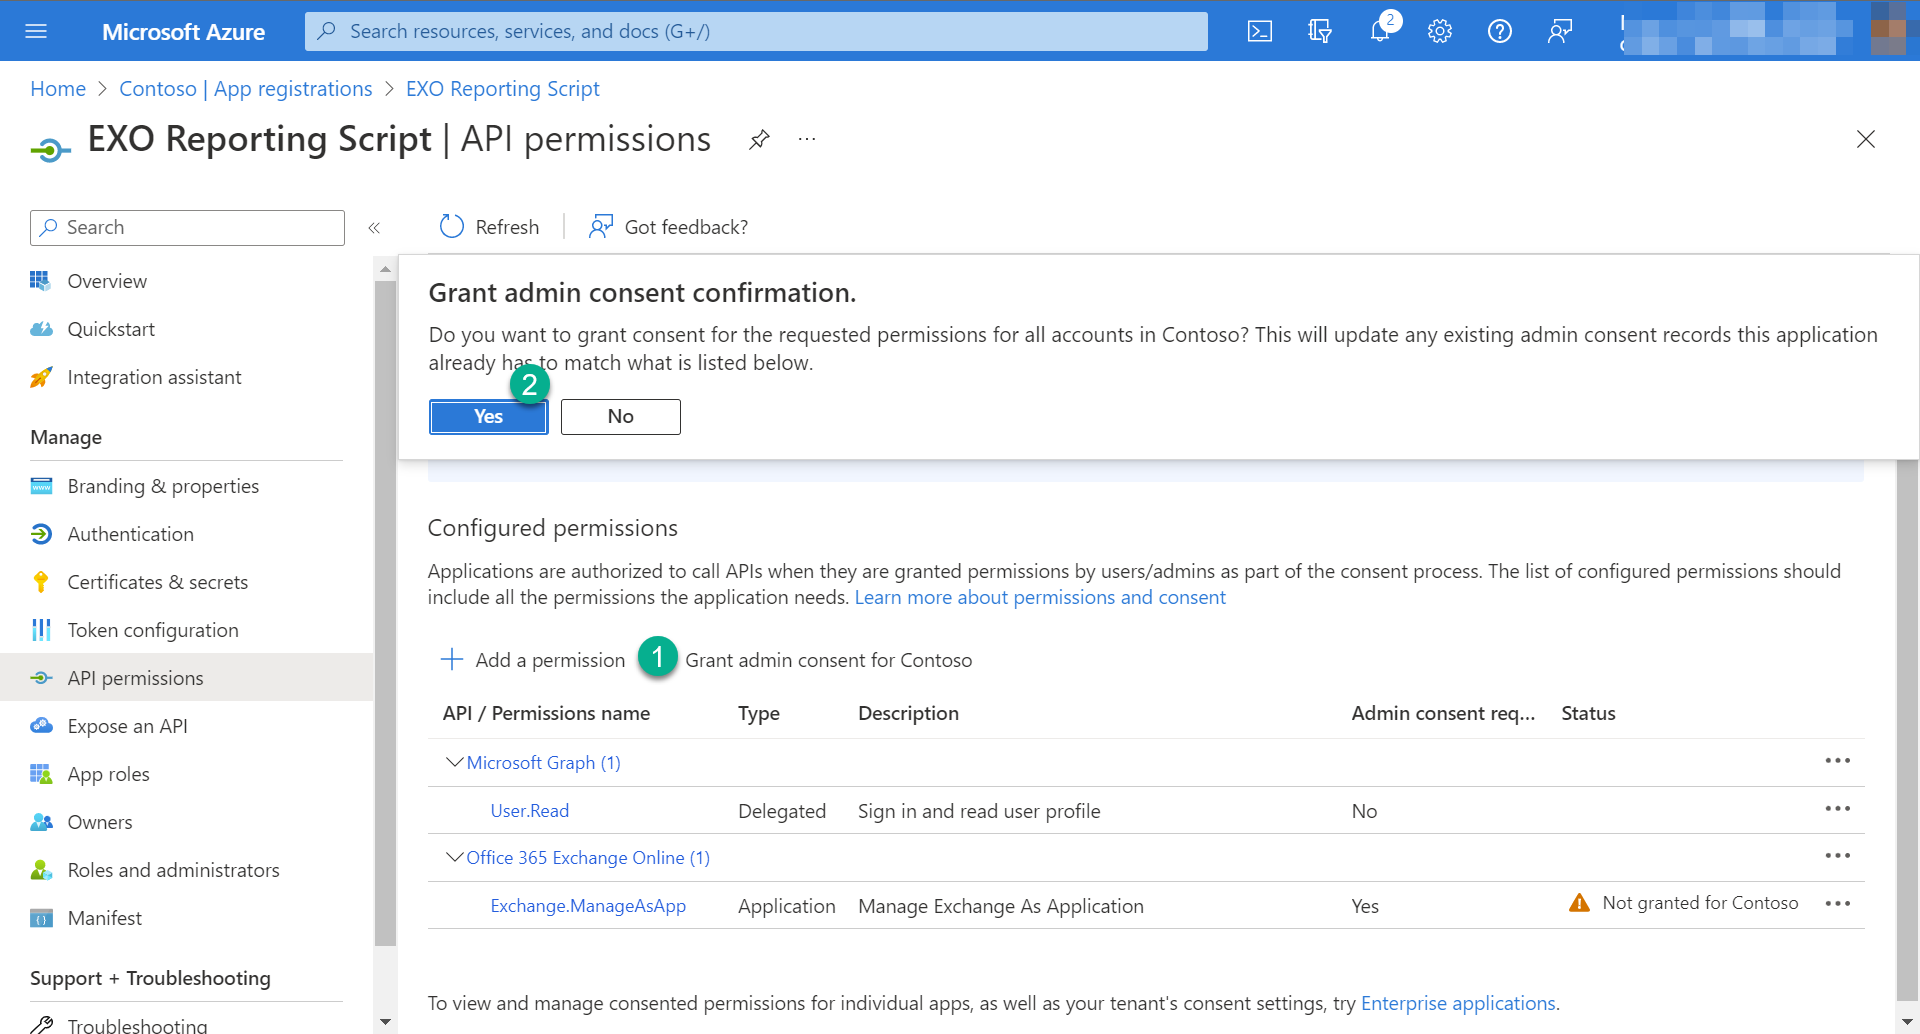
- Click on Grant admin consent
- Click Yes
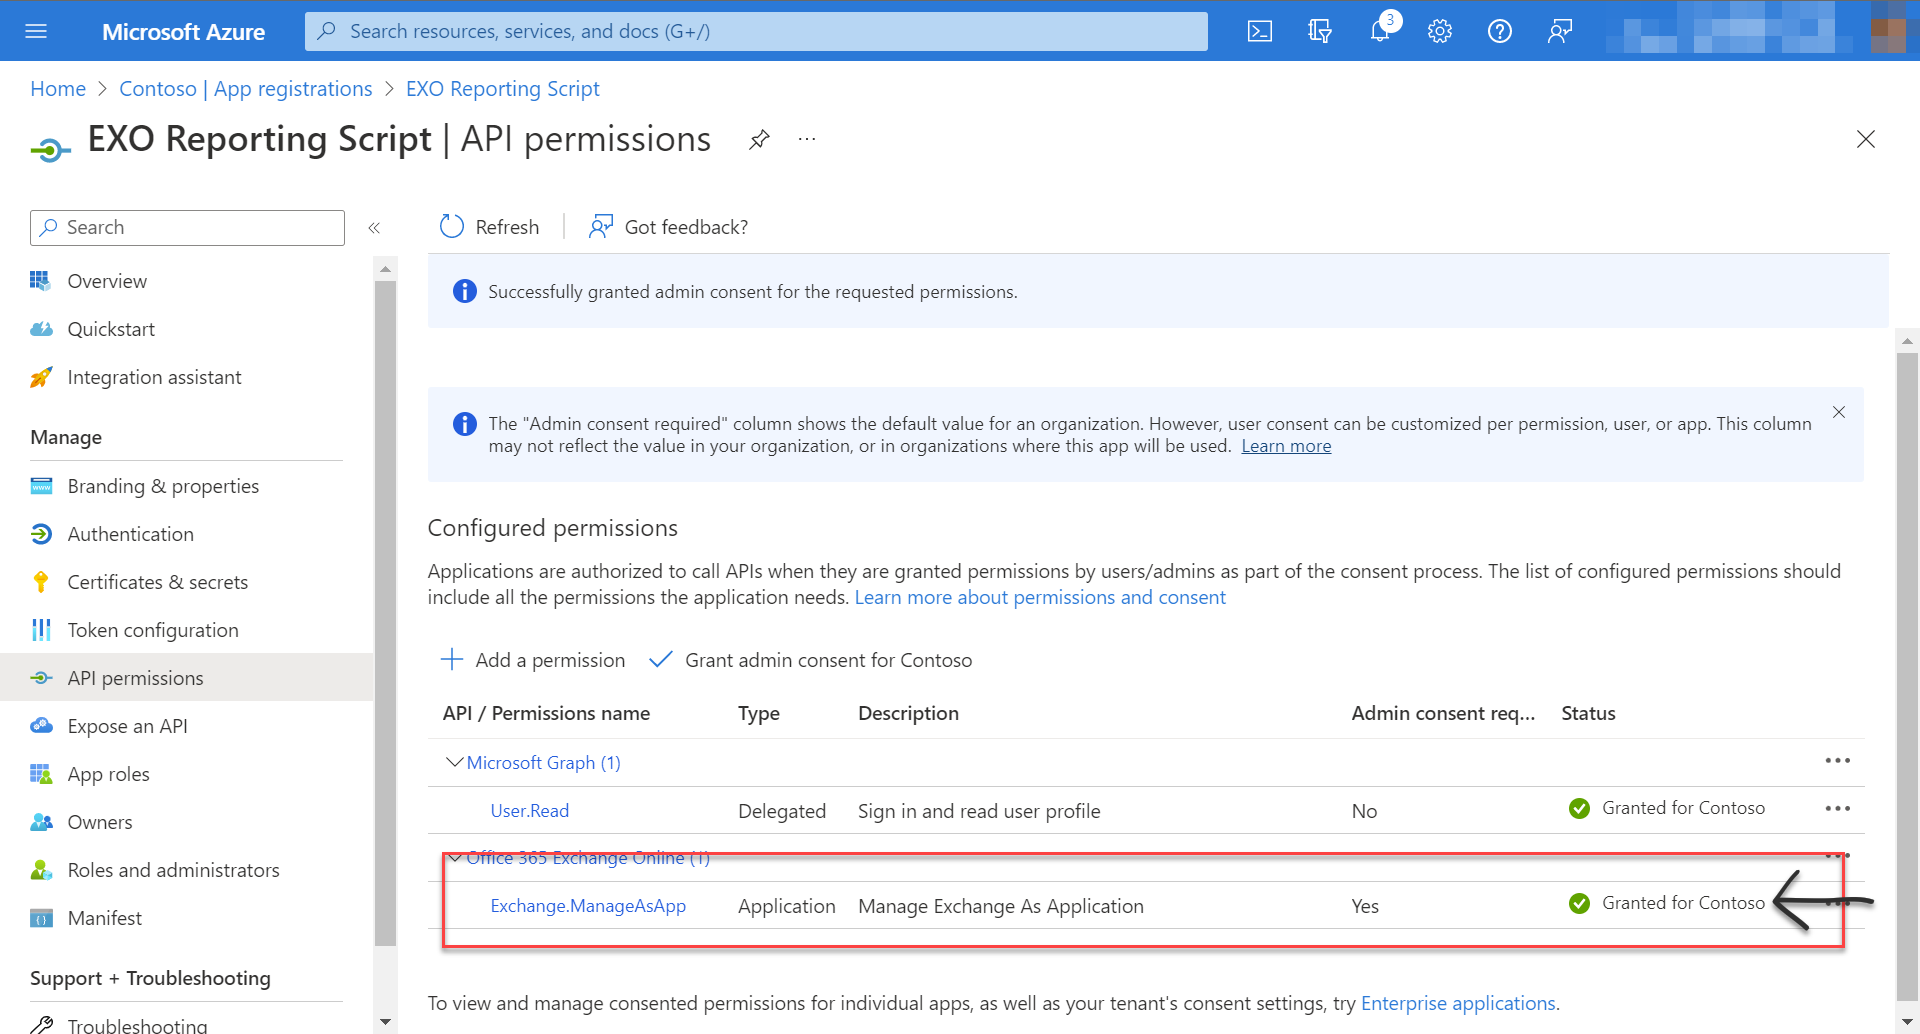
- A green checkmark should now be visible next to the added API permission
Step 3 - Upload the certificate to the application
Now it's time to upload the certificate.
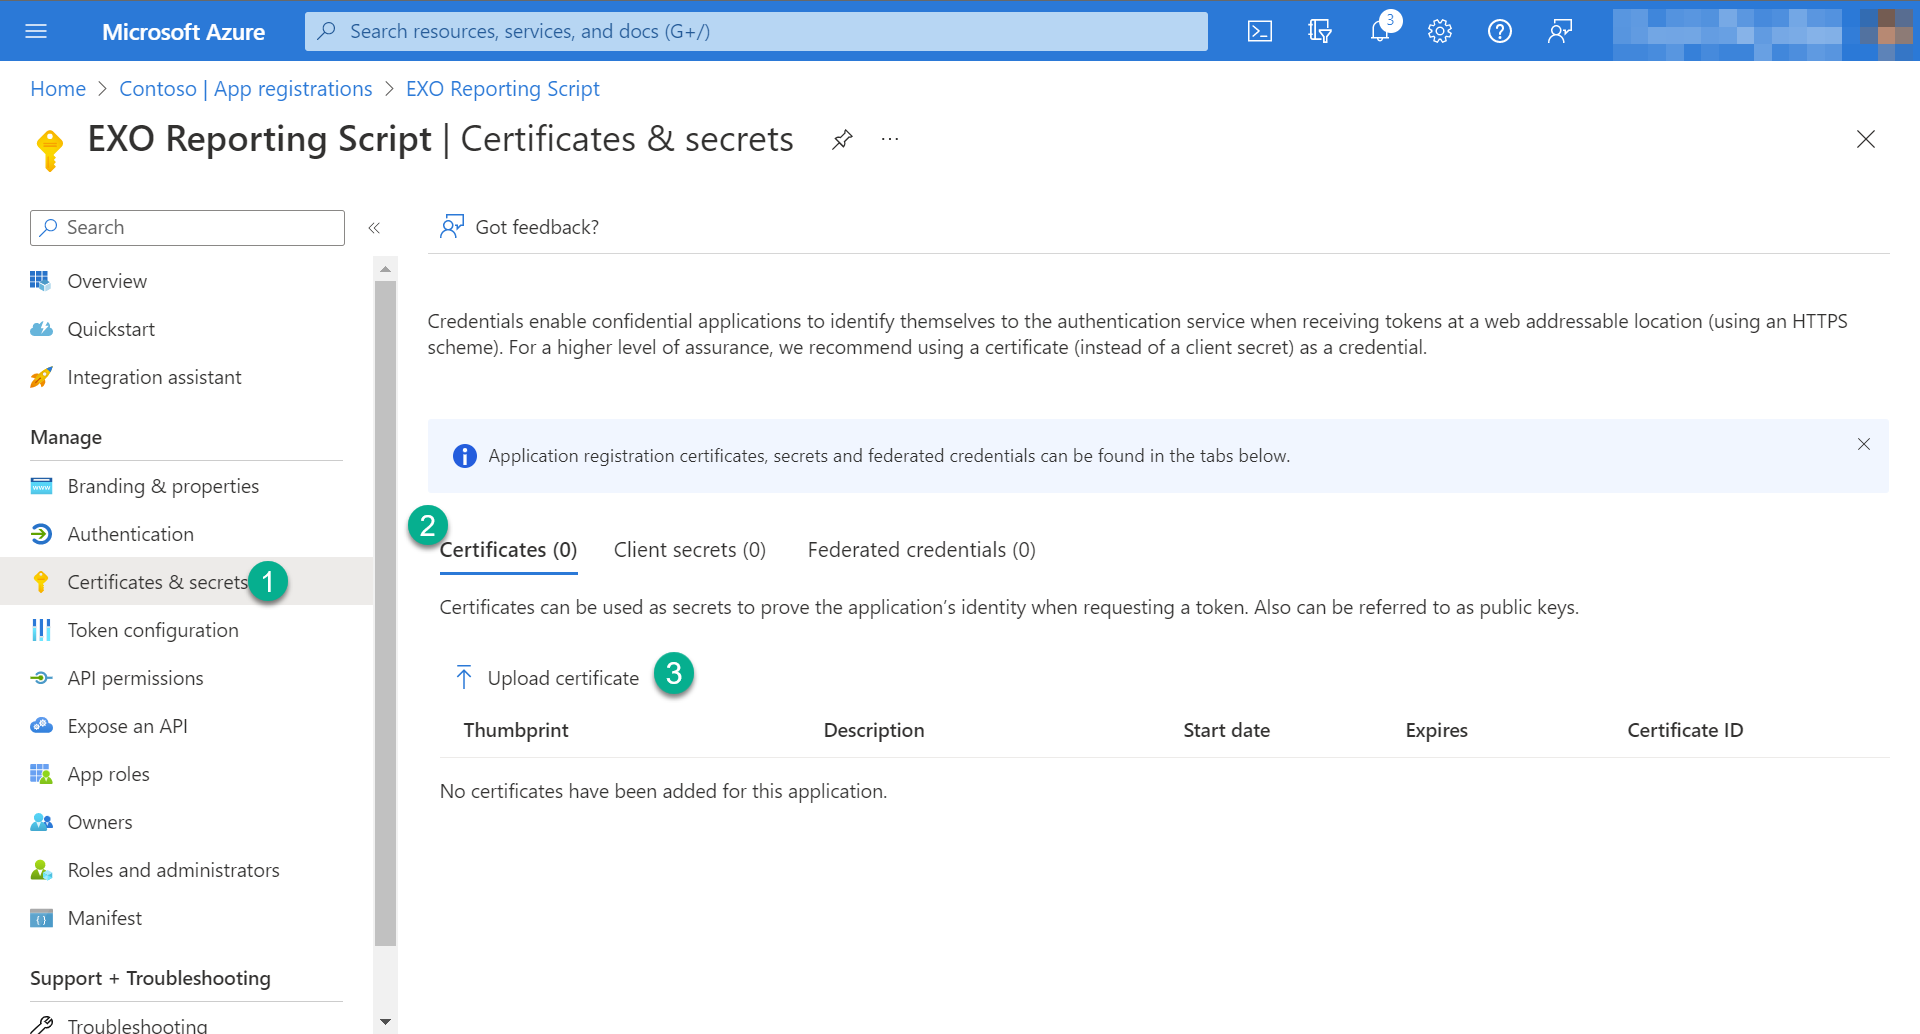
- Click on Certificates & secrets in the Navigation Pane
- Click Certificates - Upload certificate
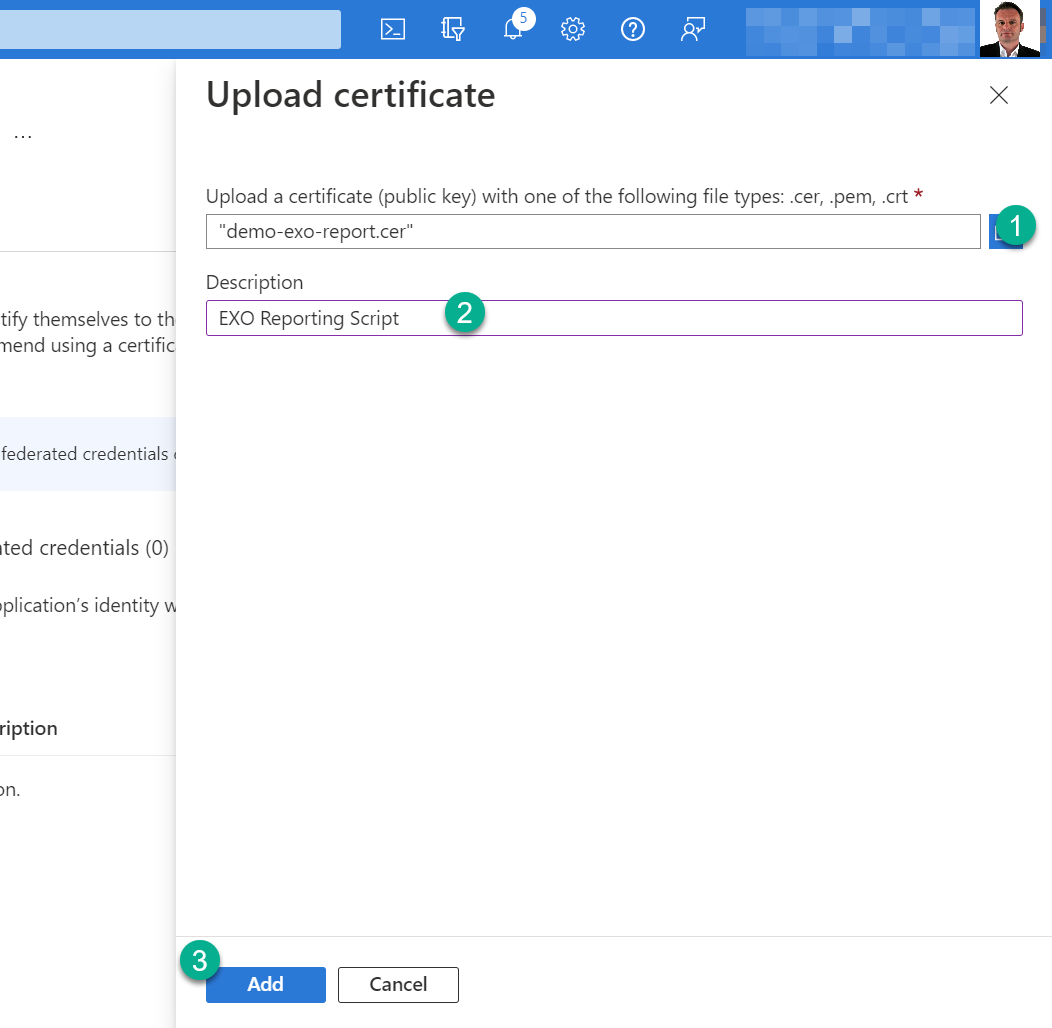
- Click on the folder icon and search and select your certificate
- Add EXO Reporting Script as description
- Click Add
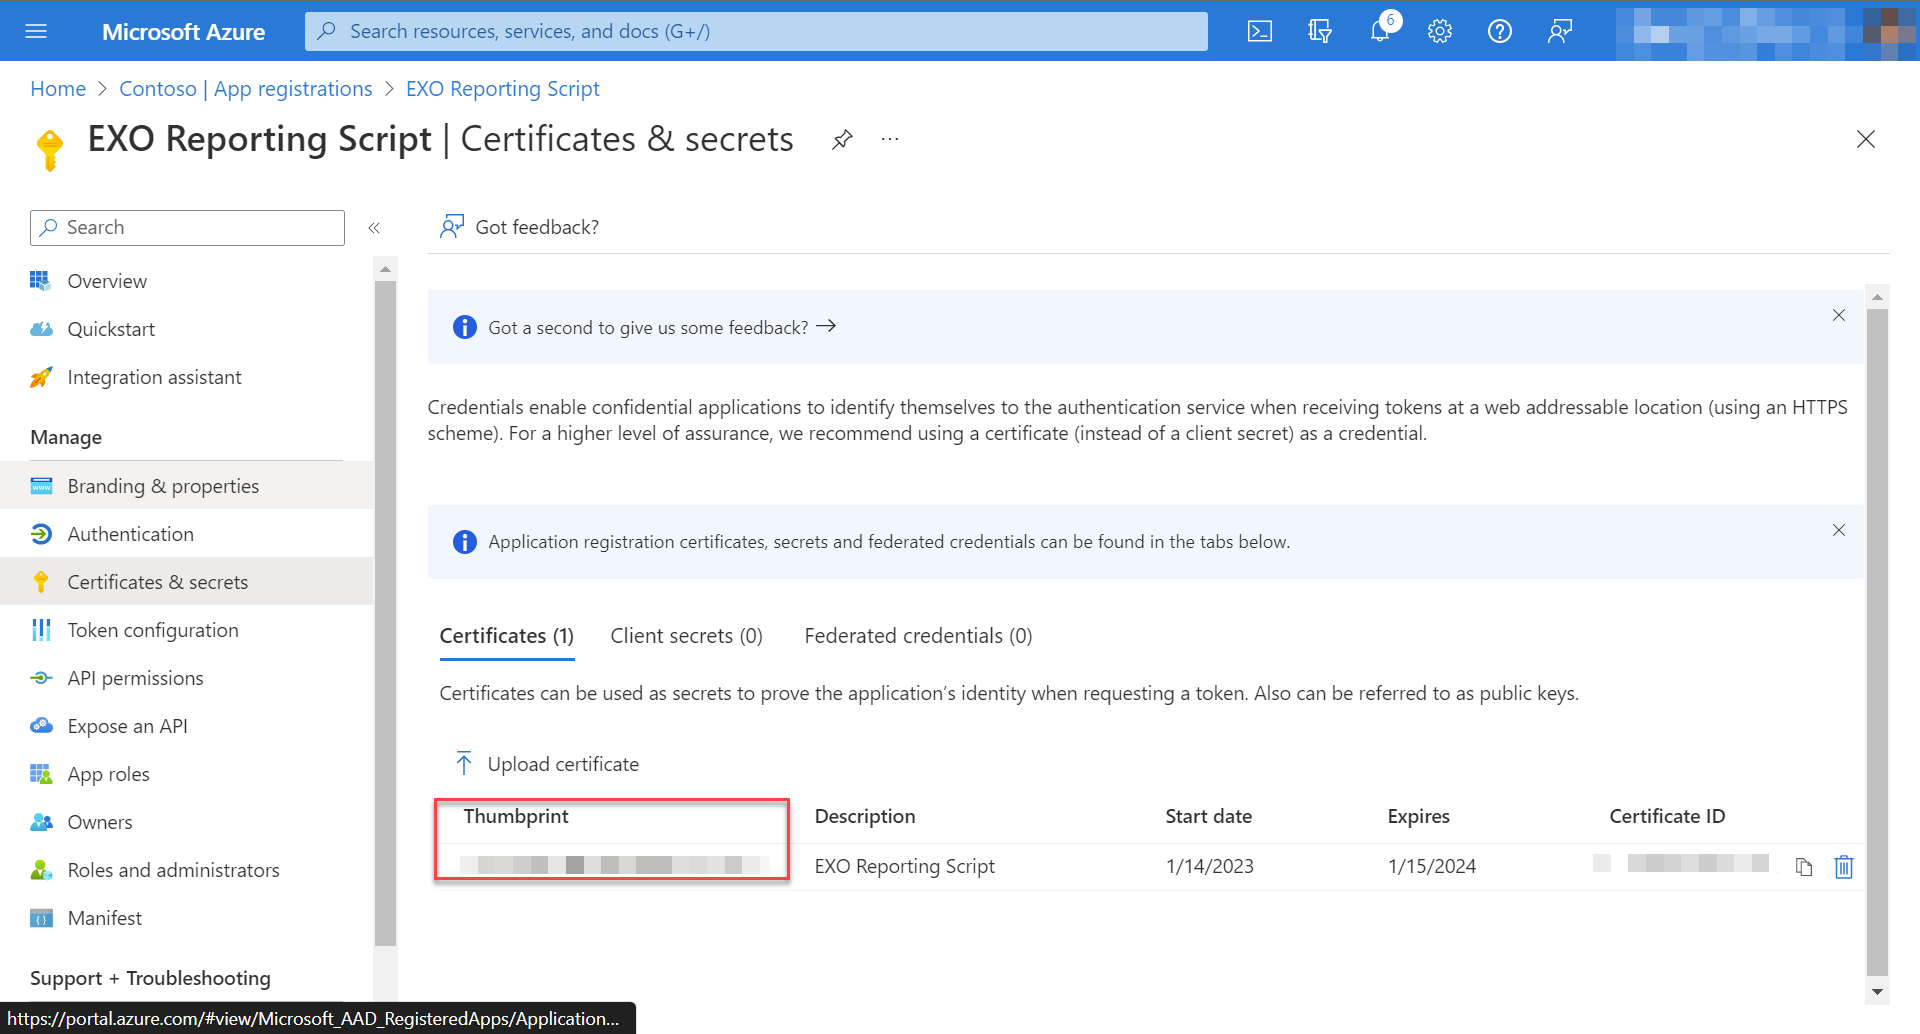
- The certificate now appears in the list
- Copy the Thumbprint and paste it into a text editor
Step 4 - Assign the application to the Exchange administrator role
The last step is to add the application as a member to the Exchange Administrator role
- Click on Menu - Azure Active Directory
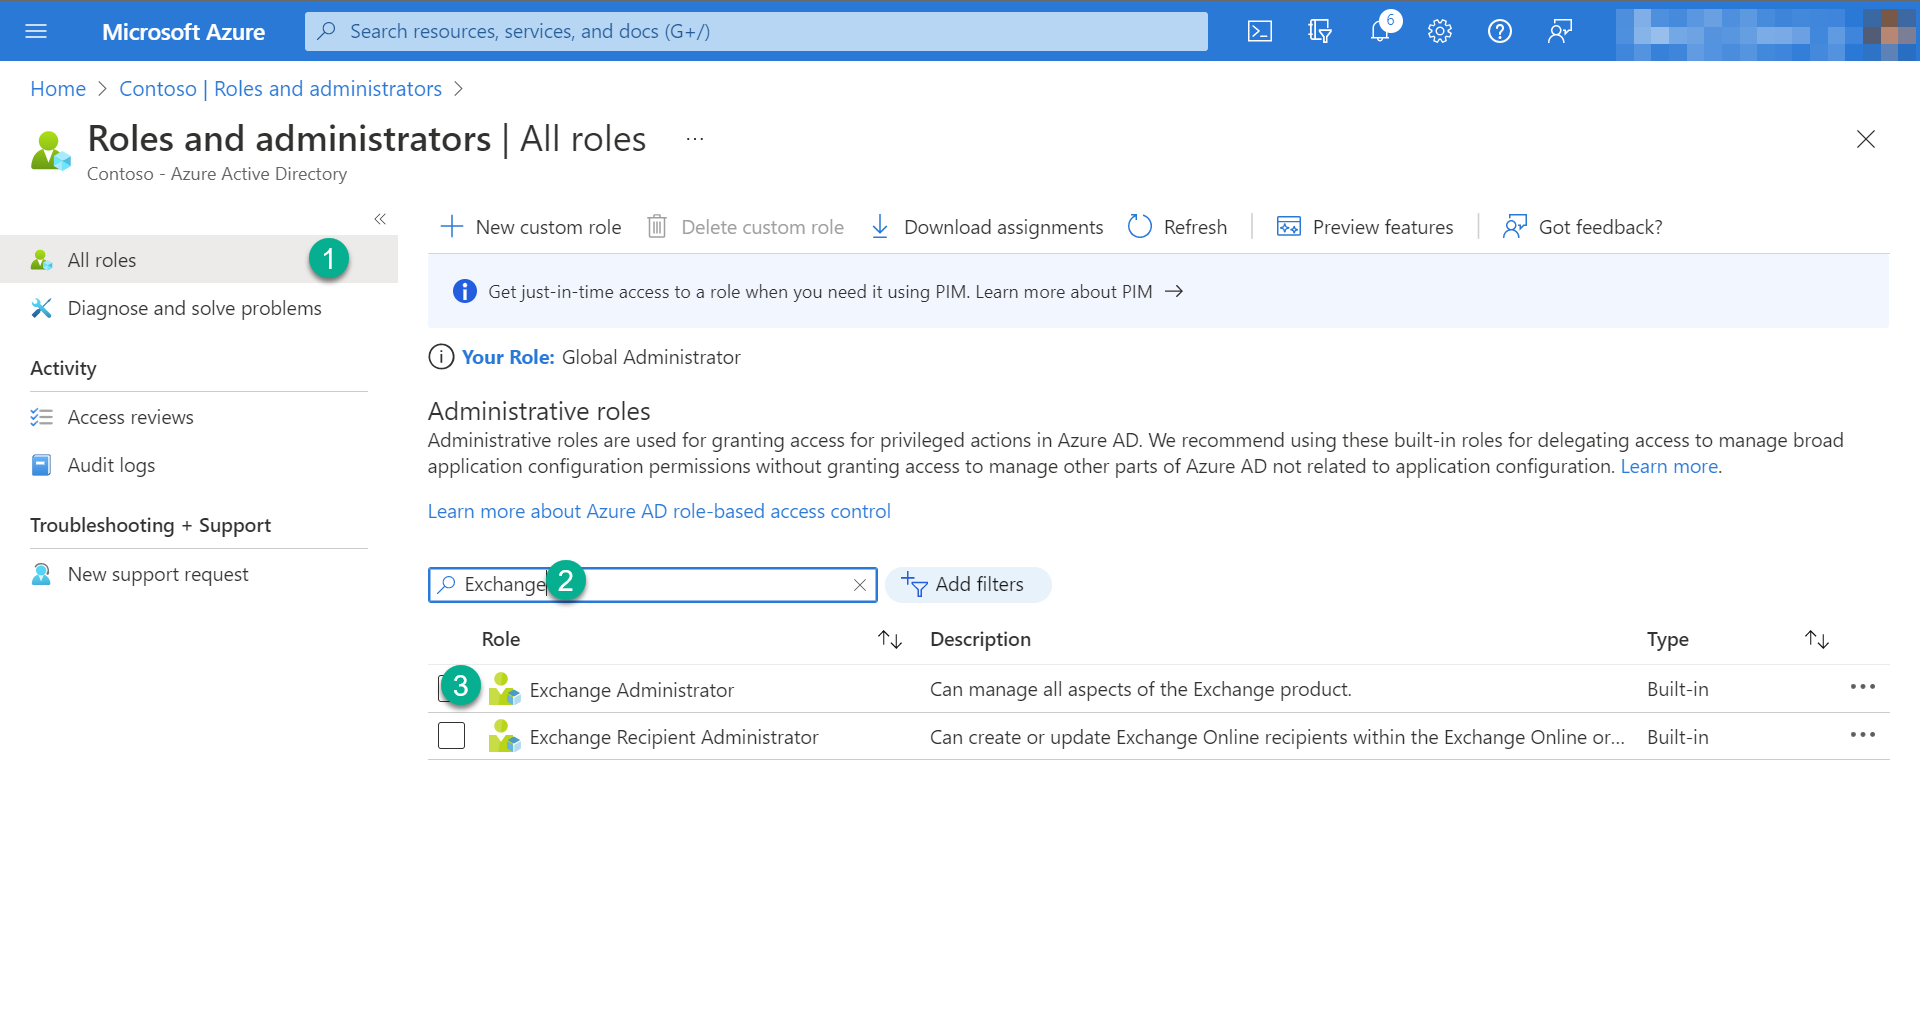
- Select Roles and administrators
- Select All roles and search for Exchange
- Click on Exchange Administrator (Important - Click not just select the checkbox)
- Click on Assignments - Add assignments - Active assignments
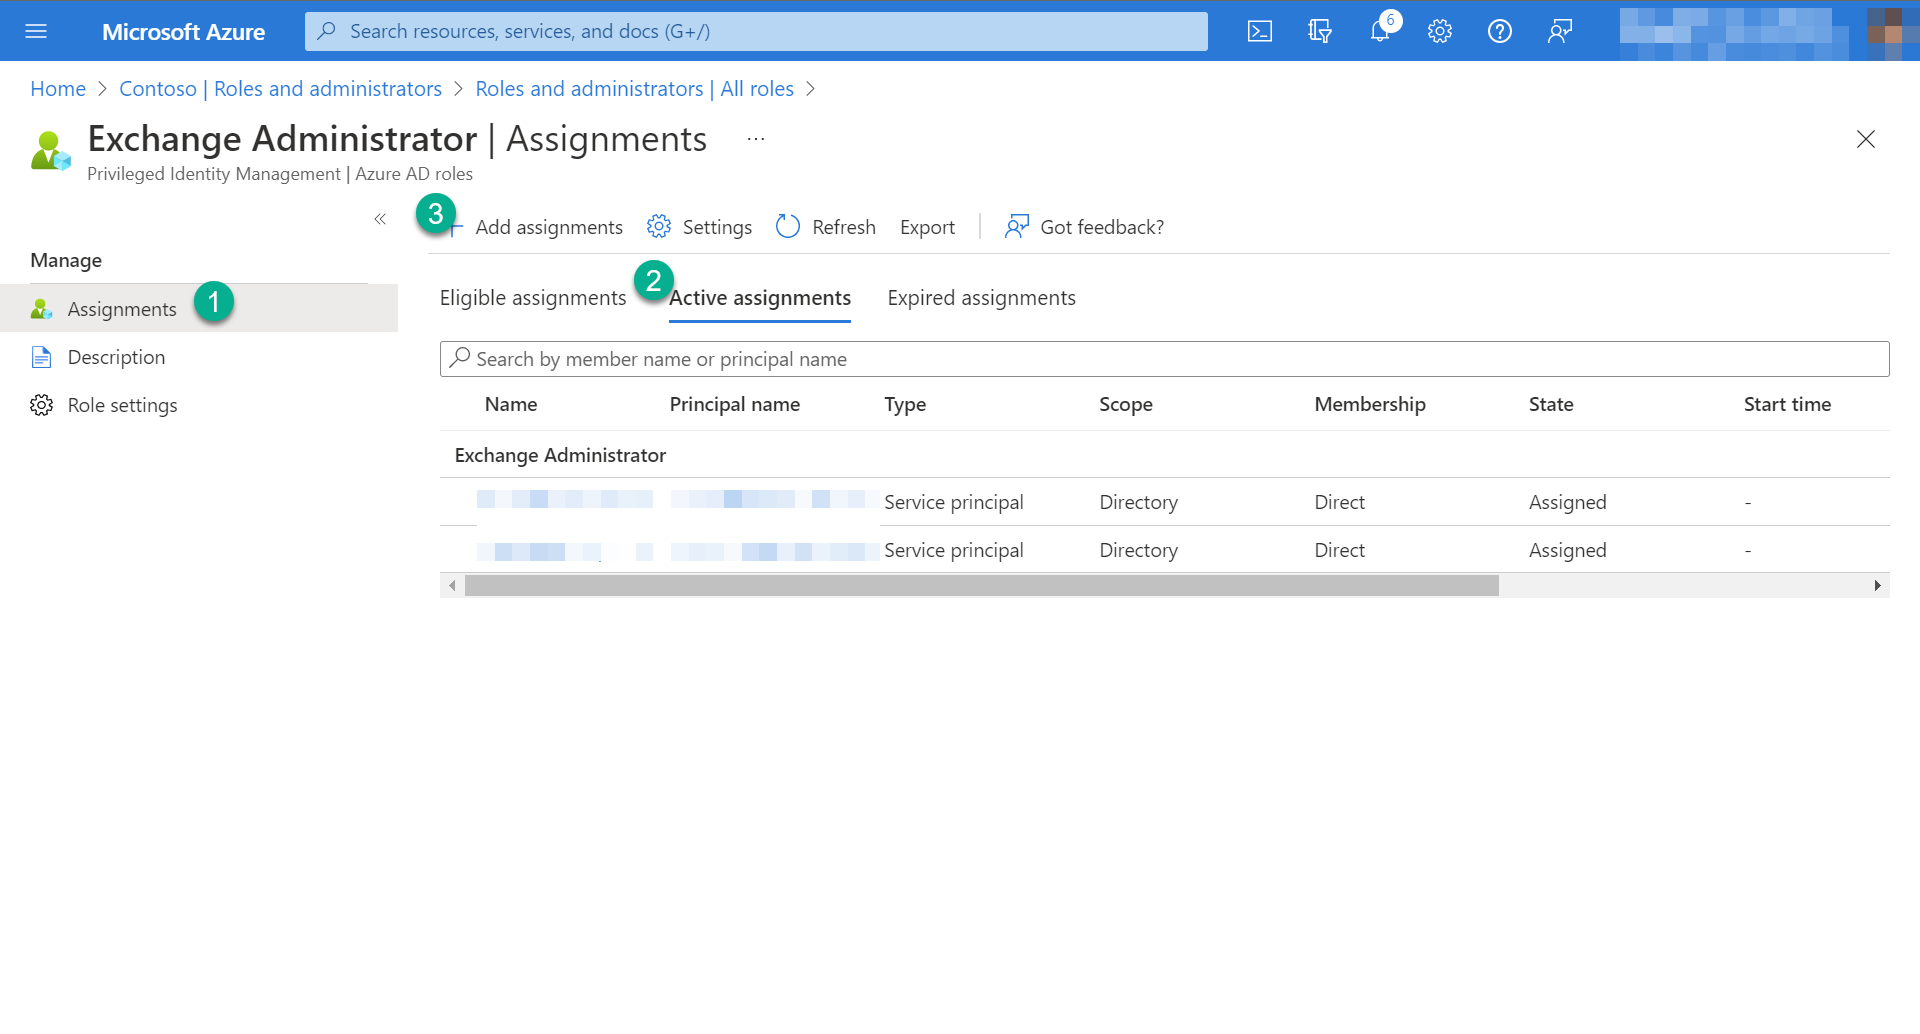
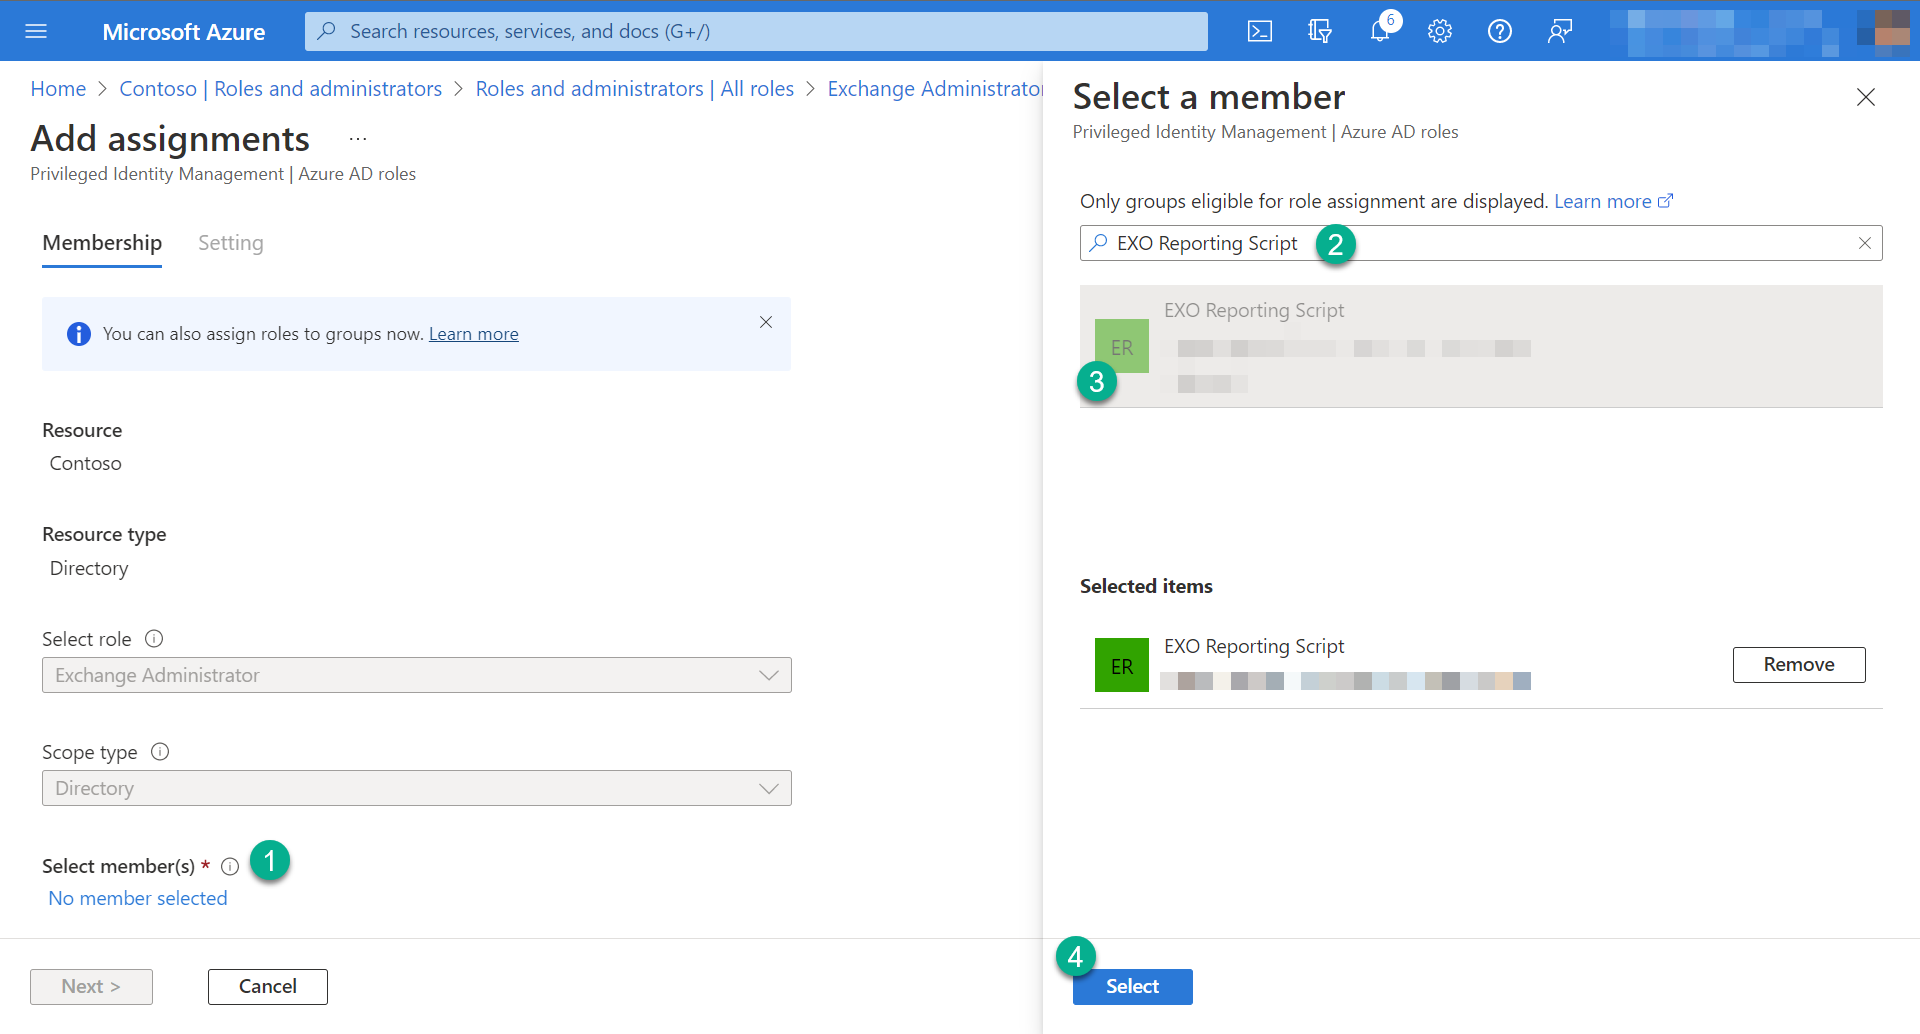
- Click No member selected
- Search for your Azure application name EXO Reporting Script
- Select the application from the results
- Click Select
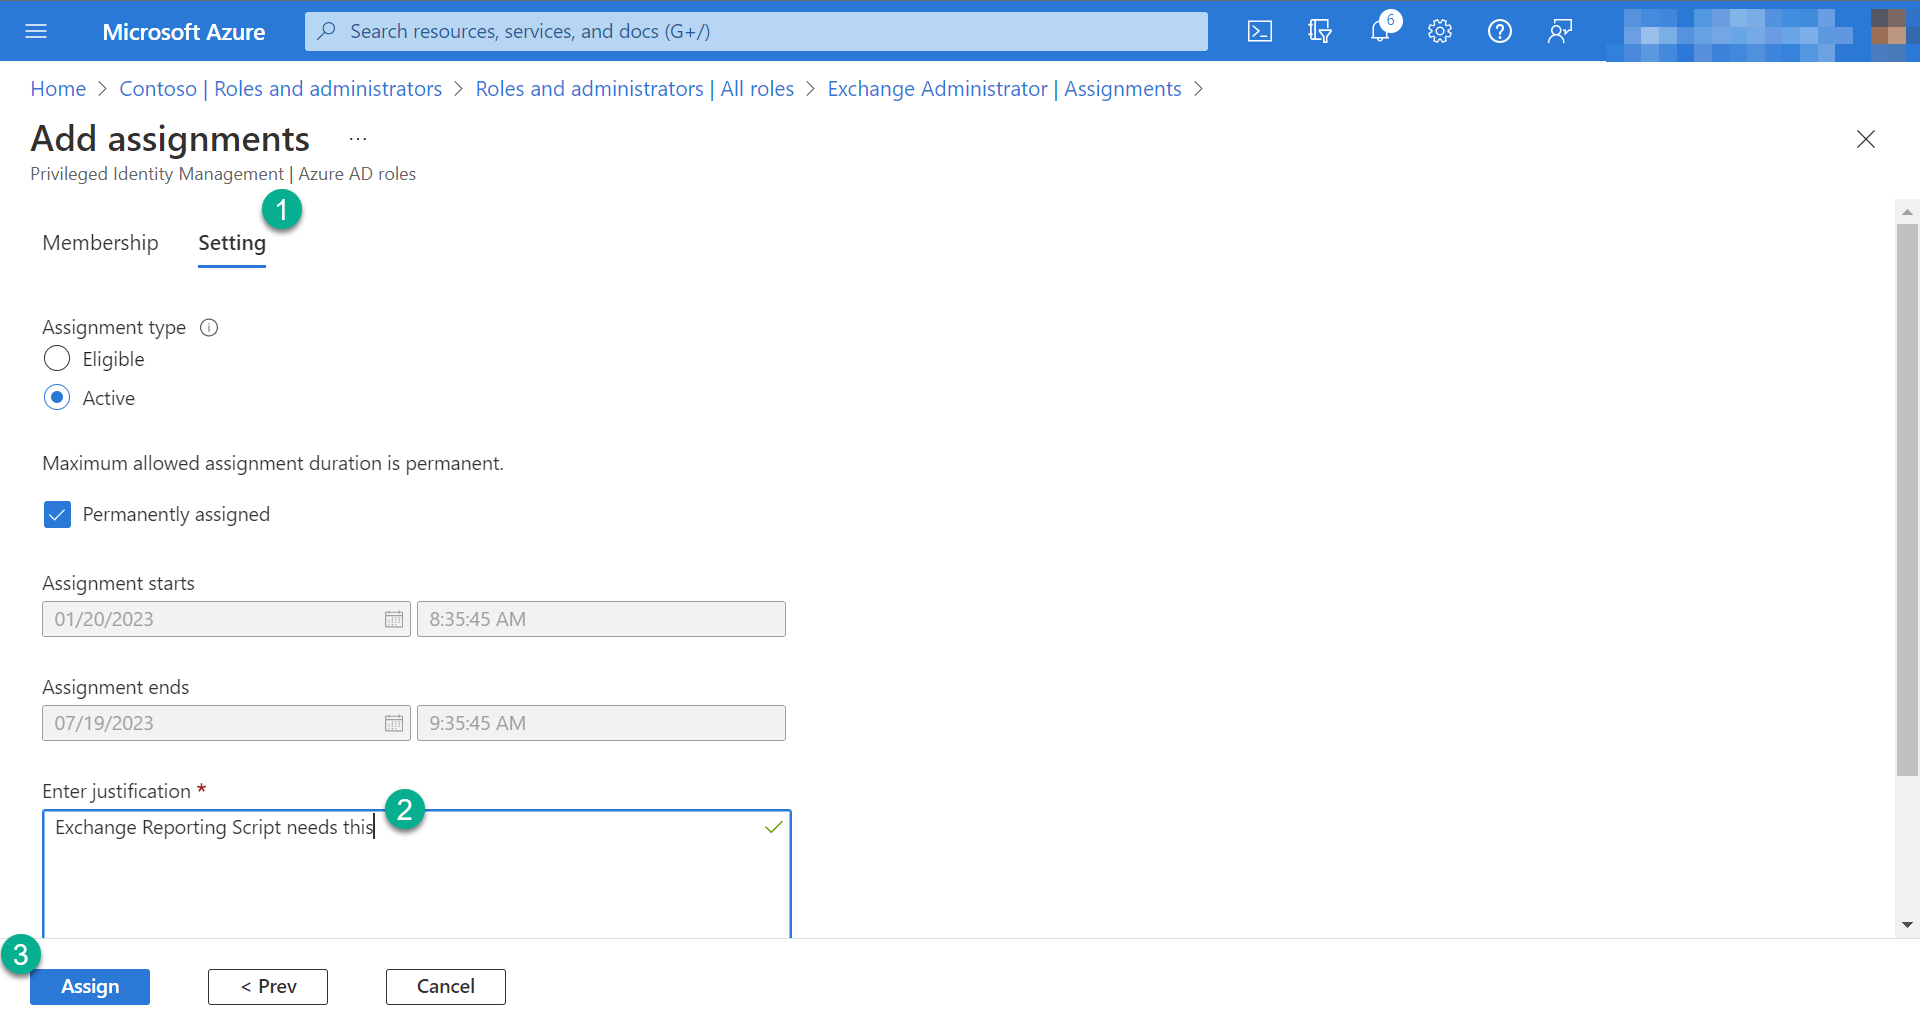
- Select the Setting tab
- Enter a meaningful text in the justification field
- Click Assign
Note: When applying in production, it might be useful to discuss the necessary permissions and settings again with a cloud architect/security engineer. I am grateful for any feedback on this topic.
Connect to Exchange Online
Let's look into one of my scripts where this approach has already been applied.
https://community.veeam.com/script-library-67/vb365-exo-usage-report-ps1-script-to-report-some-exchange-online-numbers-4010
Change the values pasted before in the $applicationID and $certificateThumbPrint variable. You can also use the following lines for doing a manual check. Just open a Powershell window and paste the following commands.
Important: The Exchange Online Powershell module must be installed on the computer you are testing on.
Install-Module -Name ExchangeOnlineManagement -RequiredVersion 3.0.0- Set the variables
$MSOrganization             = "<your organization name>"
$applicationID              = "<your application (client) id>"
$certificateThumbPrint      = "<the certificate thumbprint>"
- Connect to Exchange Online
Connect-ExchangeOnline -CertificateThumbprint $certificateThumbPrint -AppId $applicationID -Organization $MSOrganization -ShowBanner:$falseIf there is no error, everything works. You can run any EXO command from the MS documentation. Once you have completed your tests, disconnect your Exchange Online session
Disconnect-ExchangeOnline -Confirm:$falseMission complete. Feedback welcome. And yes, I already stored some Powershell scripts on my GitHub to do everything using the command line. Just drop me a PM.


