
Snapshot Replication delivers an expert solution for data backup and recovery, offering near-instant data protection with flexible scheduling.
Below is an article on “Synology - Immutable LUN Snapshots with Immutable Replication” by
In my article, I have discussed the reasons to employ snapshot replication etc and some steps and suggestions not covered in this article here. Please take a look at “How to create Synology Snapshot Replication”.
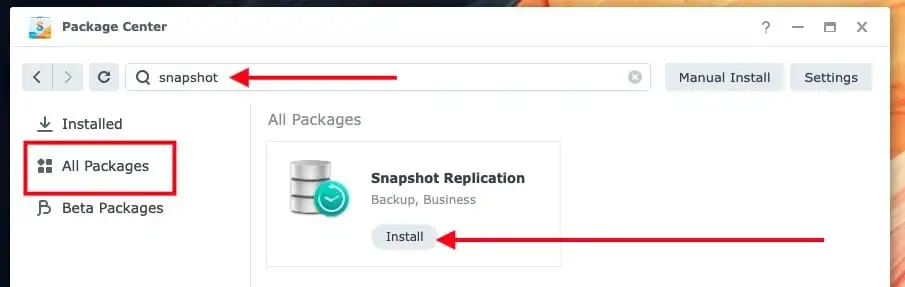
Install Snapshot Replication
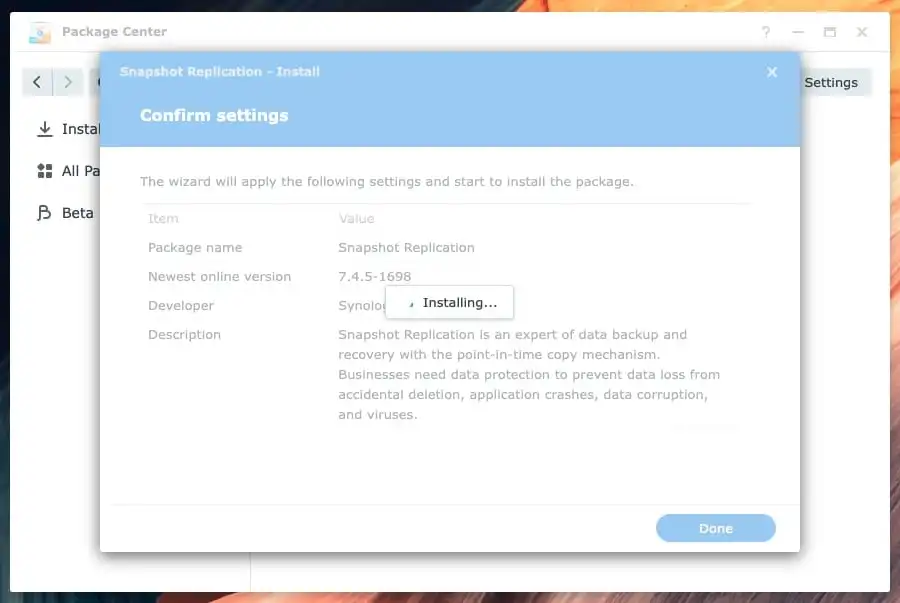
Log in to your Synology NAS and navigate to the Package Center. Search for Snapshot Replication, and click Install to add the package to your system
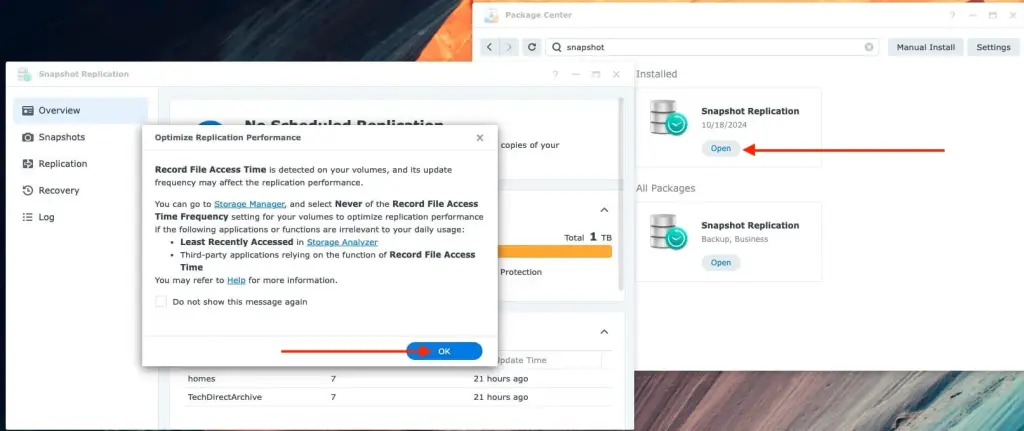
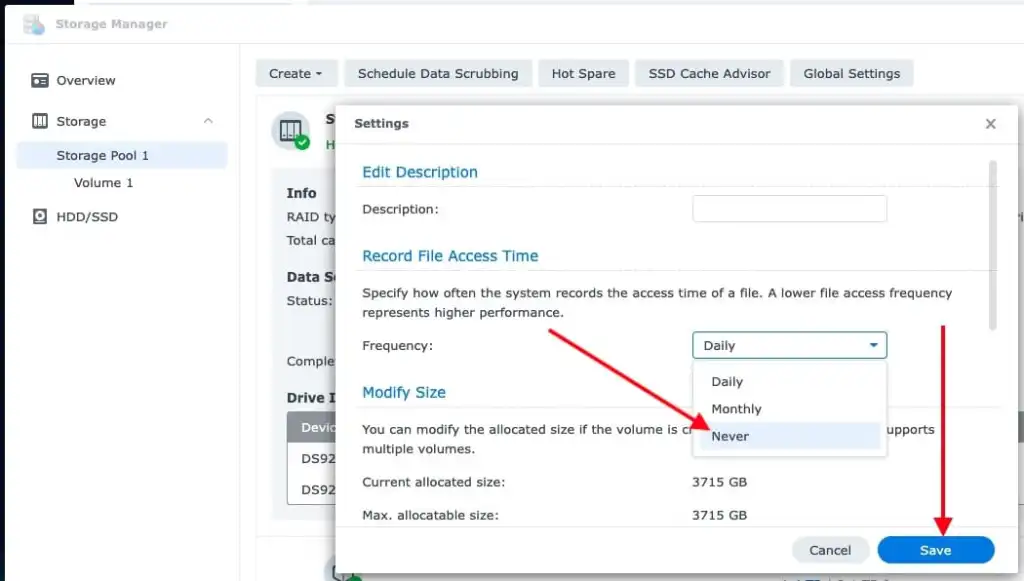
Upon launching the Synology Snapshot Replication as shown below. You will see the prompt on “Optimize replication performance”. This will require you to set the “Set Record Access time to Never” to “NEVER”.
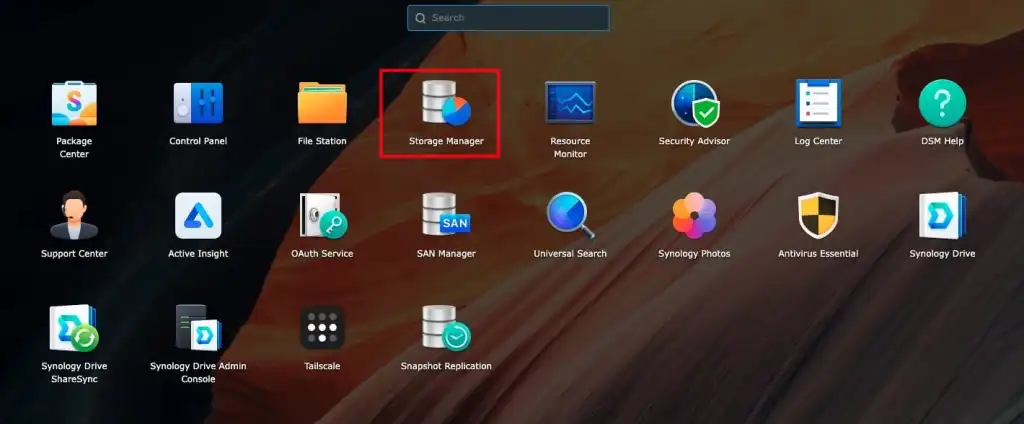
To implement this suggestion, launch Storage Manager from the Synology “Storage Manager” as shown below.
Locate the volume as shown below and click on the ellipses. That is, the three dots below, and select settings.
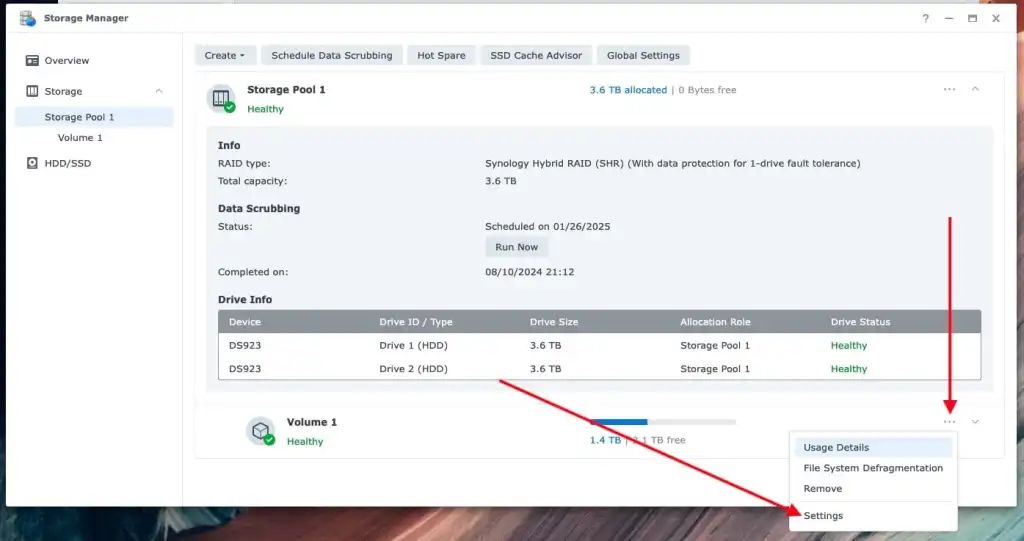
Under the Record Time Access, please set this to NEVER and click on Save.
Create Snapshot
Before proceeding with this section, please ensure that you have enough space on your volume. Snapshots cannot be taken if there is less than 100 MB of available space on the volume. Also, Snapshot Replication supports the following LUN types:
- Standard LUNs with storage acceleration must be enabled.
- Advanced LUN on Btrfs volume. If you do not have DSM 6.2 and above, you will be found wanting.
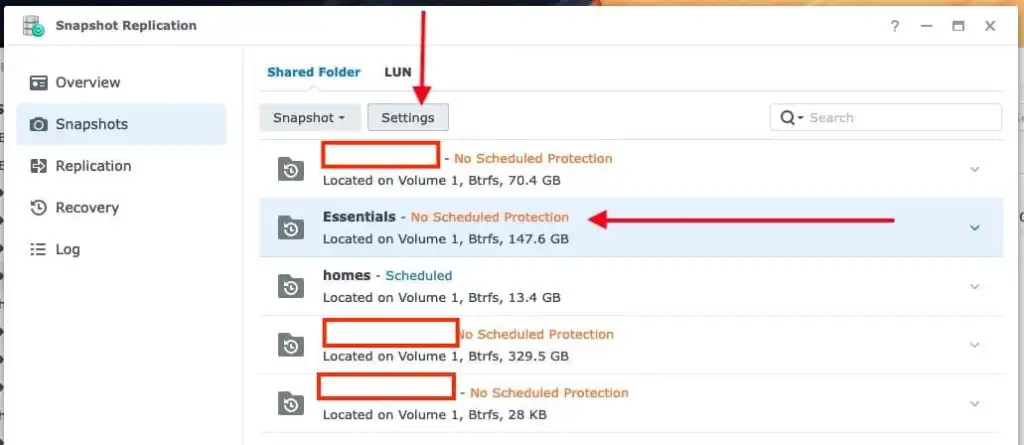
Next, launch Snapshot and replication by navigating to the Main Menu. Select the Shared Folder you wish to create a snapshot for and click on “Settings”.
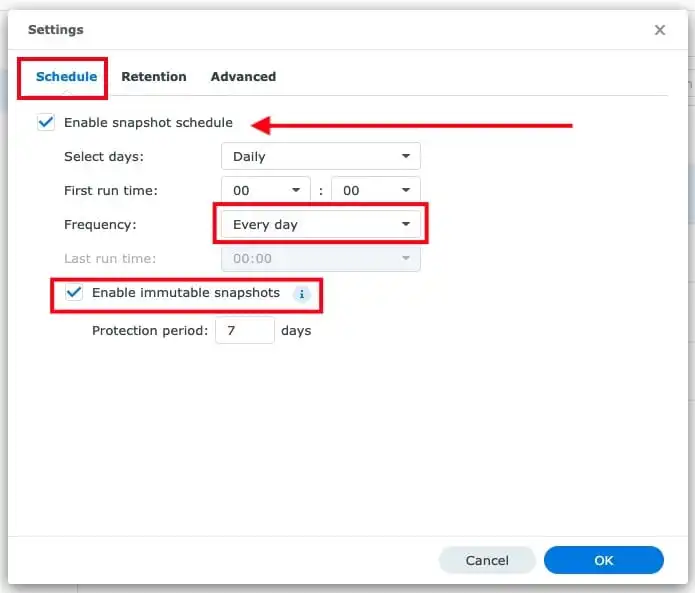
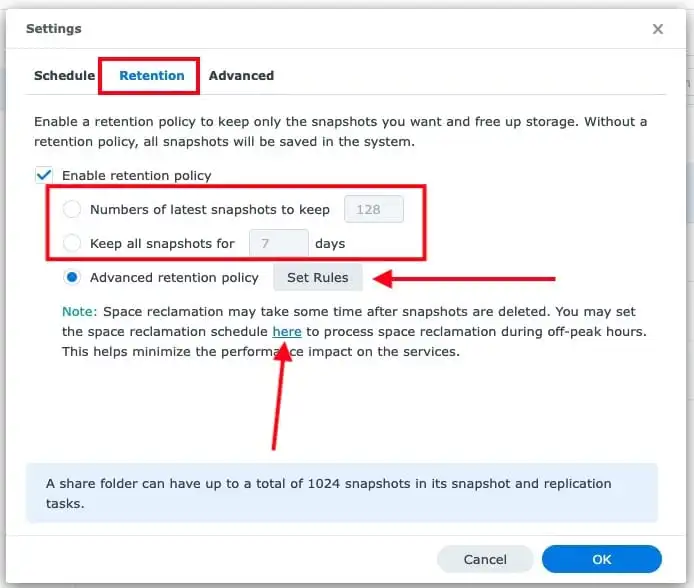
In the settings interface, select schedule and ensure you have the “Enable Snapshot Schedule” settings enabled
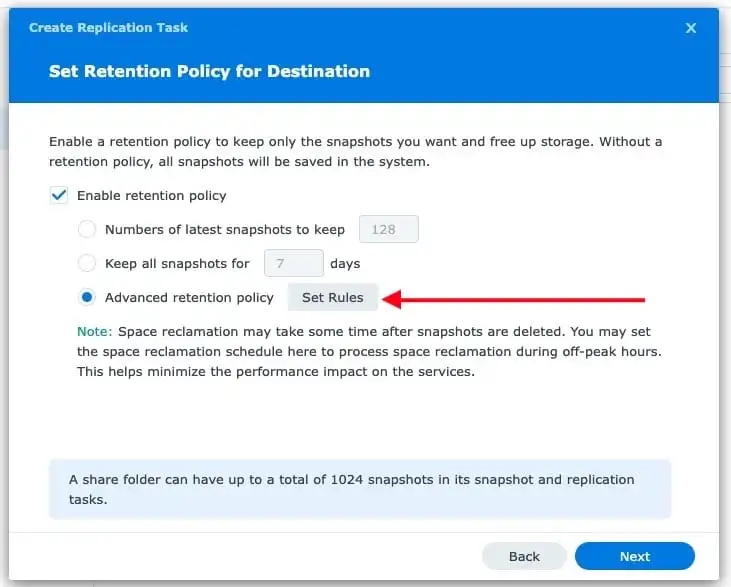
I will be using the advanced snapshot policy by clicking on “Set Rules”. Please set these rles based on your need
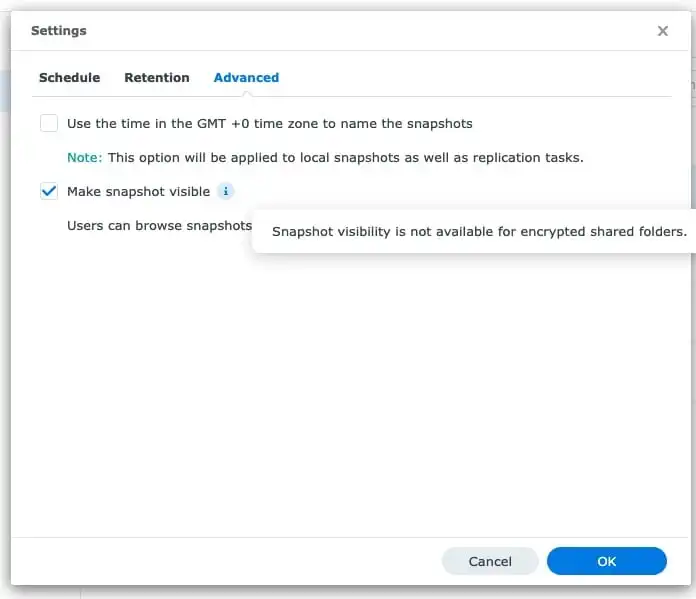
In order to browse SNAPSHOT. You will need to enable “make snapshot visible”
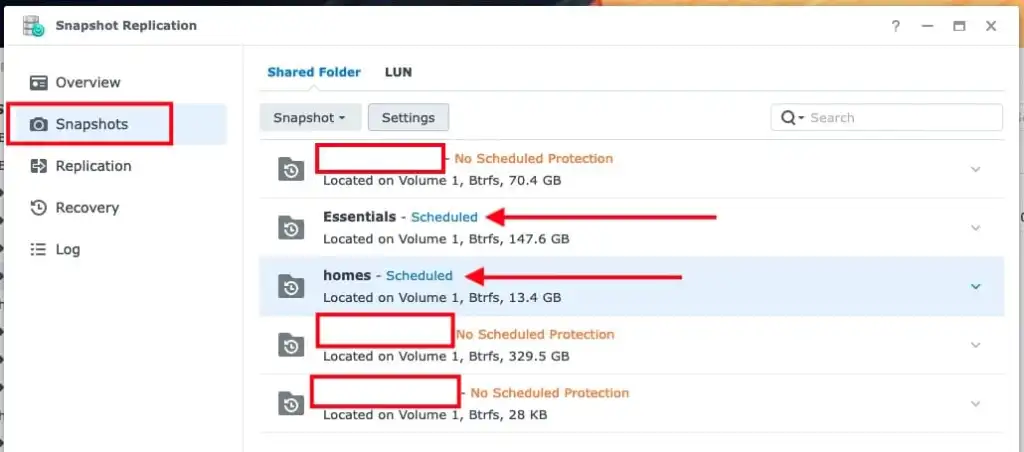
We have successfully scheduled the creation of our snapshot for the Shared folder “Essentials”.
Note that you can manually take a snapshot of your shared folders and LUN as well.
Create Replication Job
With scheduled snapshots, Snapshot Replication will automatically take snapshots at a pre-determined time and frequency.
Note: If you are using a remote Server for your snapshot replication which I highly recommend. You must first install snapshot replication the destination (remote server) server as shown below from the Package Center.

From the source server
Navigate back to the source server where you have scheduled the replication. Launch Snapshot Replication and under the Replication Tab, select shared folder and click create.

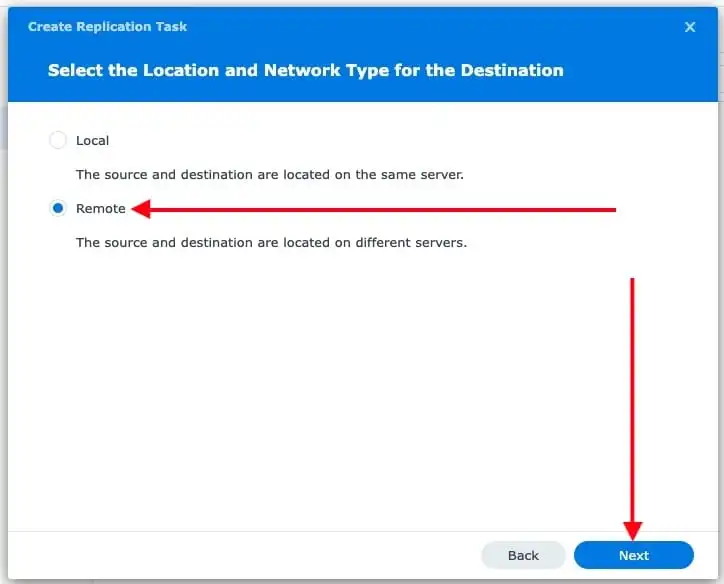
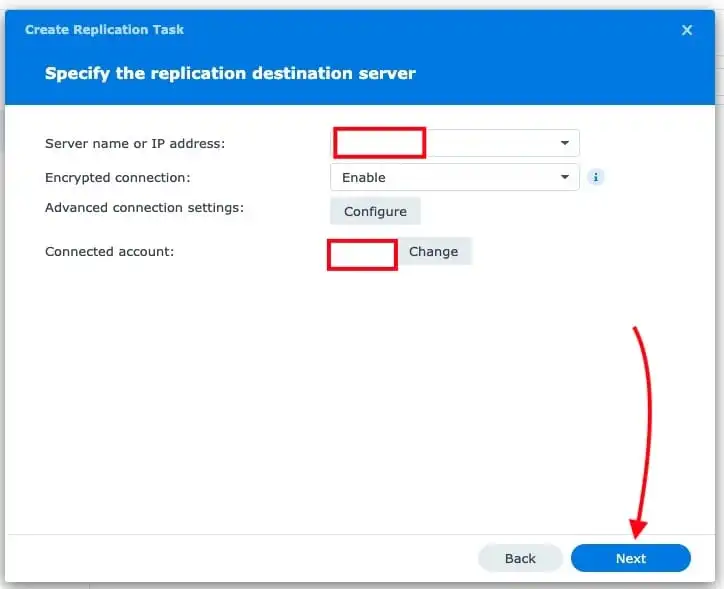
Since we want to replicate snapshots to another Synology NAS. In the Snapshot Replication interface, click on “Remote”
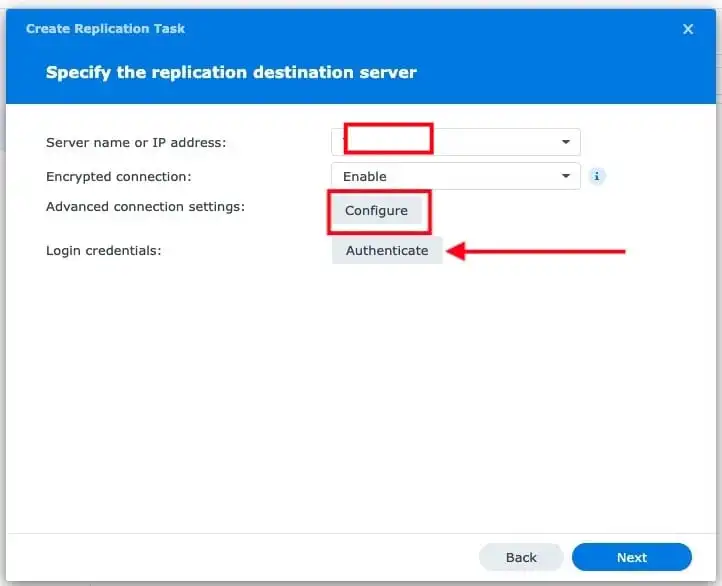
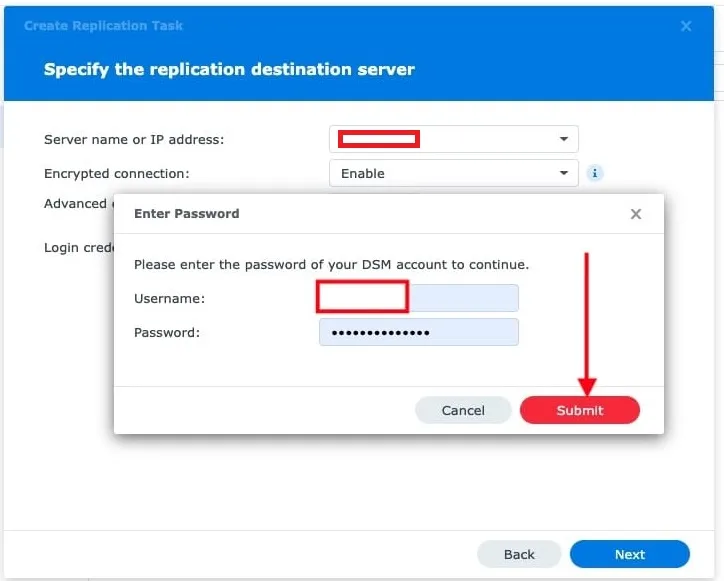
Specify the Server Name or IP. Enable Encrypted connection and click on Configure if you wish to specify these settings. I will proceed without the advanced connection settings and select “Authenticate”.
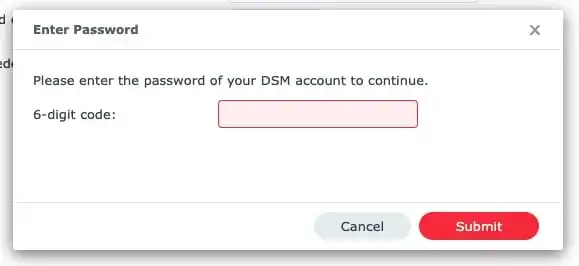
When prompted for the MFA, please enter the 6-digit code and click submit.
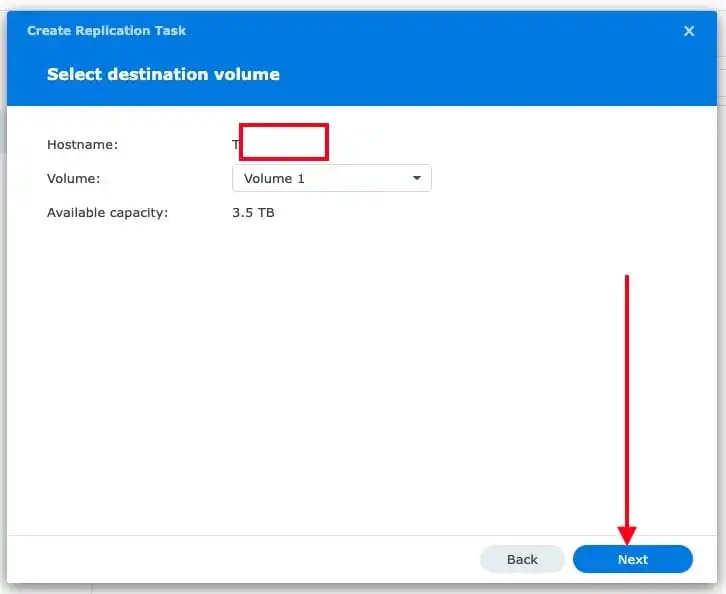
click on Next to proceed
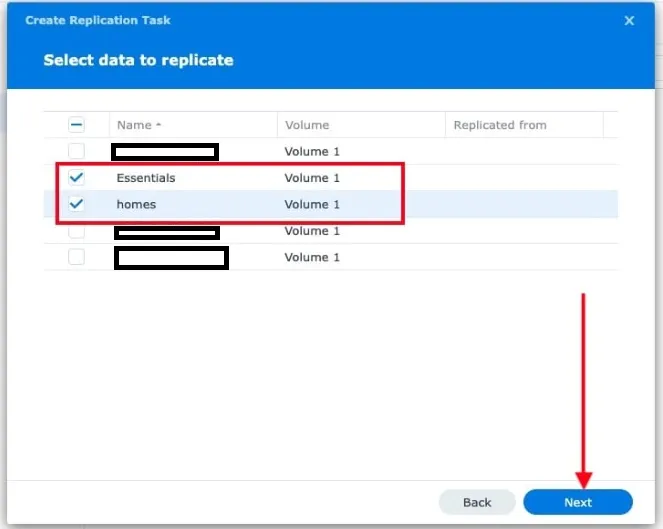
Select the data (Folders) to replicate and click on Next
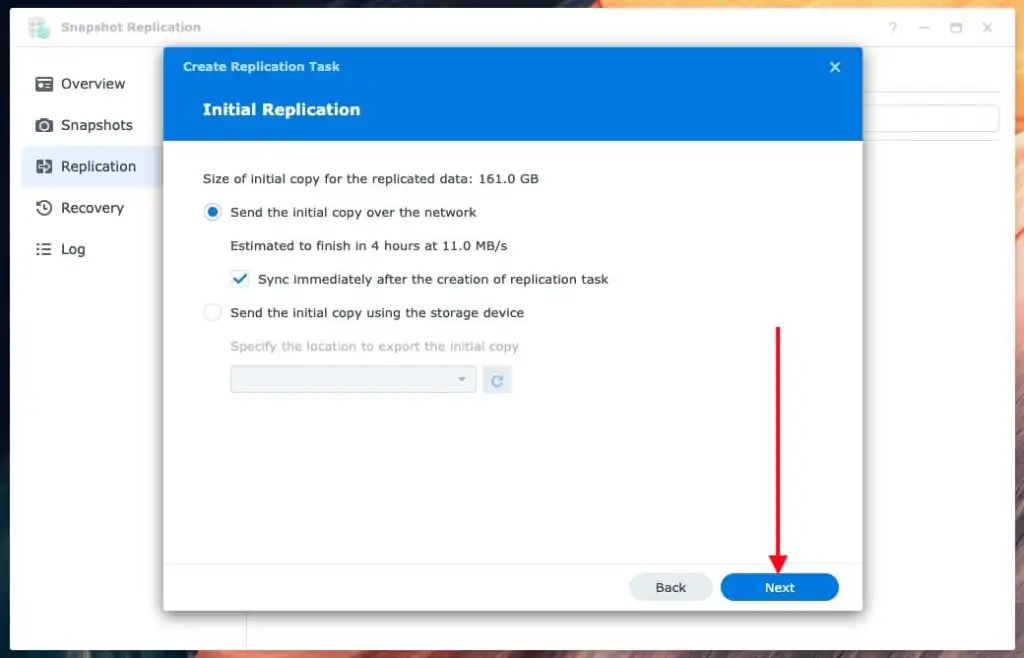
Please select “send the initial copy over the network”.
I will also select “Enable Immutable Snap on partner server”. This will ensure that these snapshots cannot be deleted within the configured retention time frame.
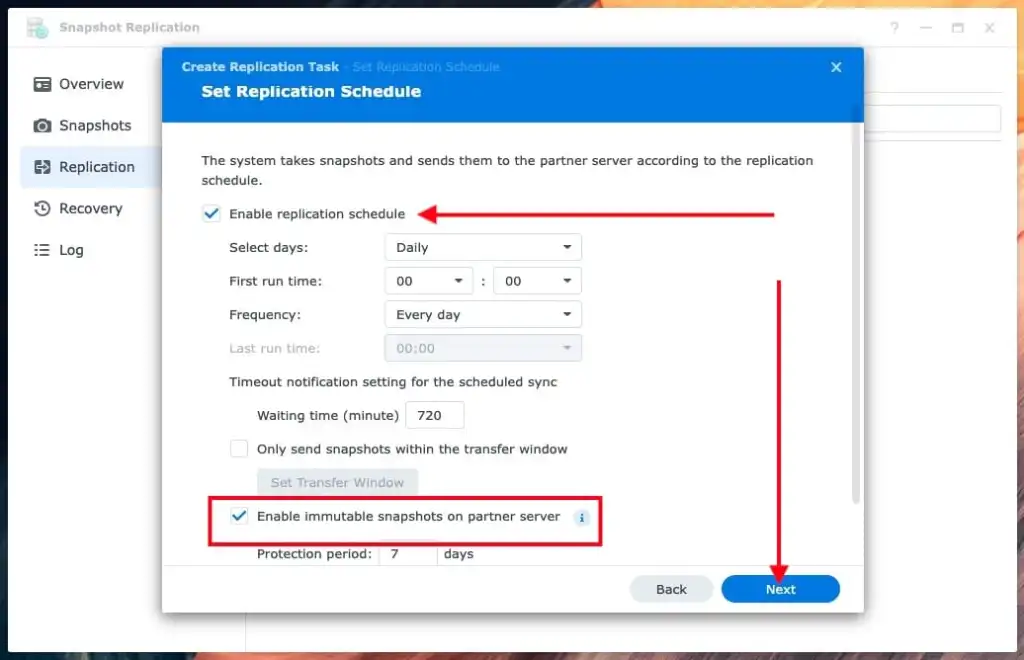
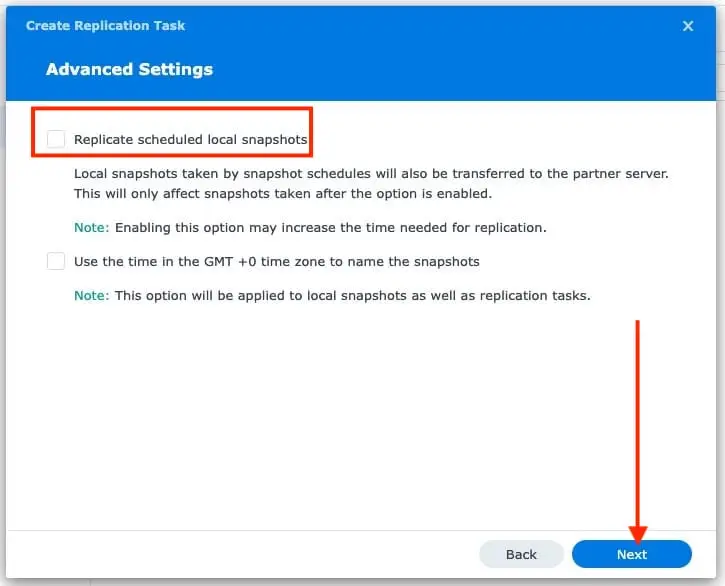
Select replicate scheduled local snapshot and click next
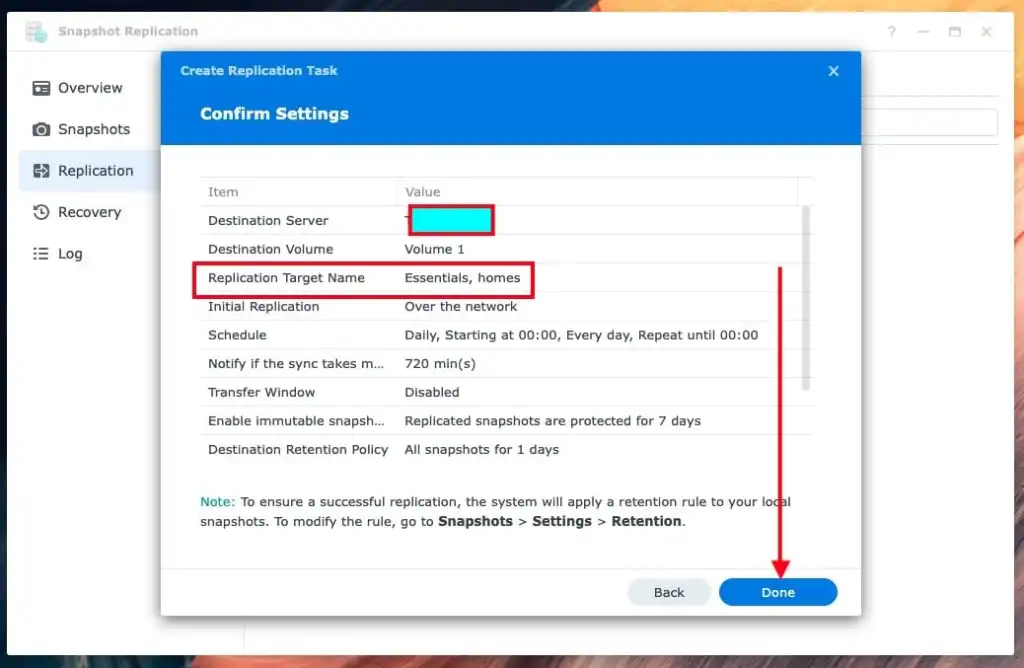
We have successfully created the replication task as shown below.

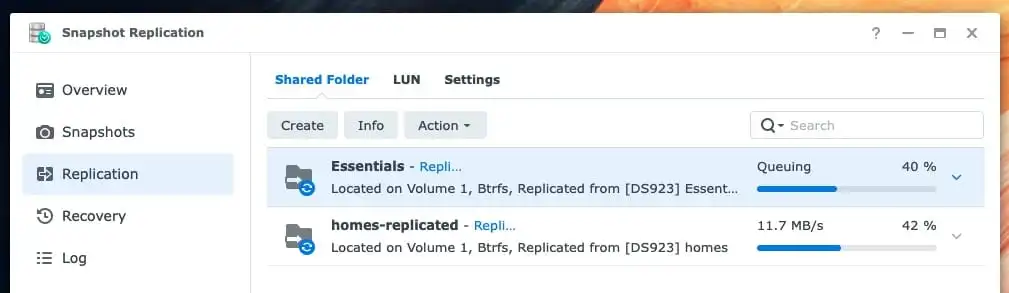
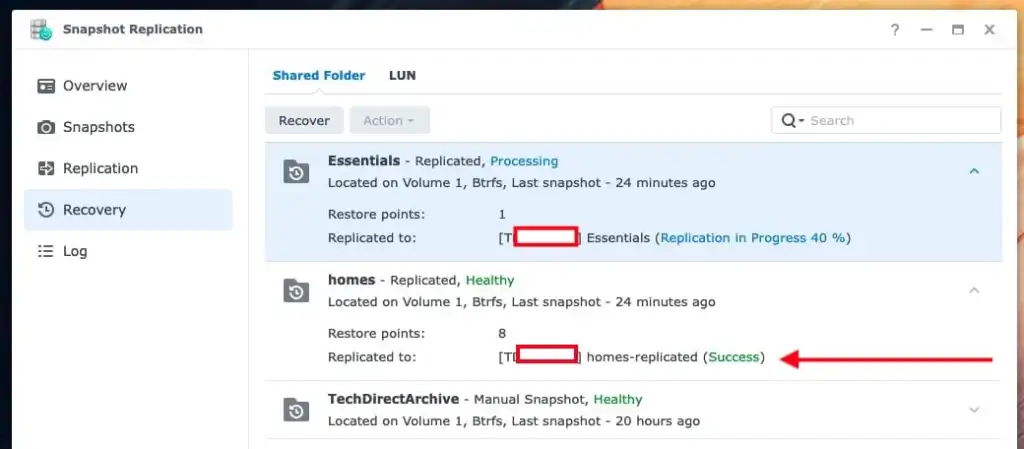
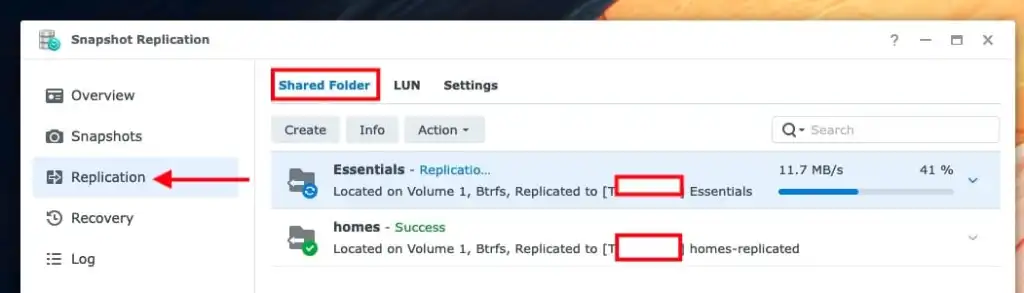
You can check the status of the replication as shown below
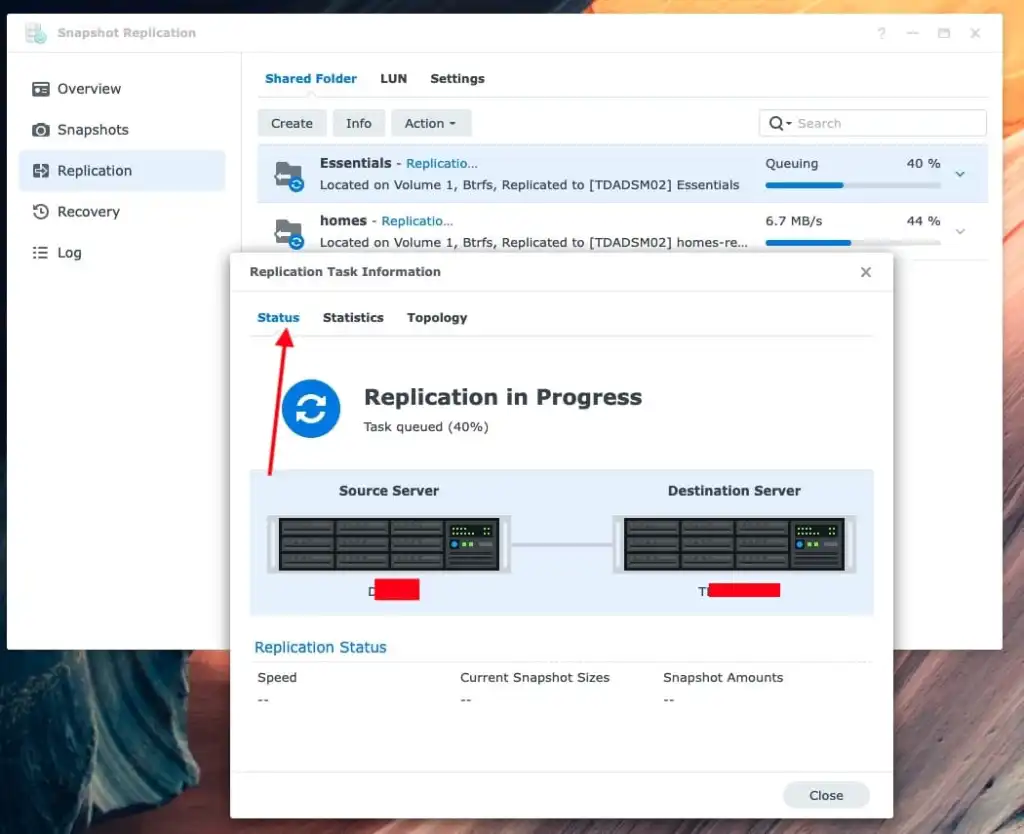
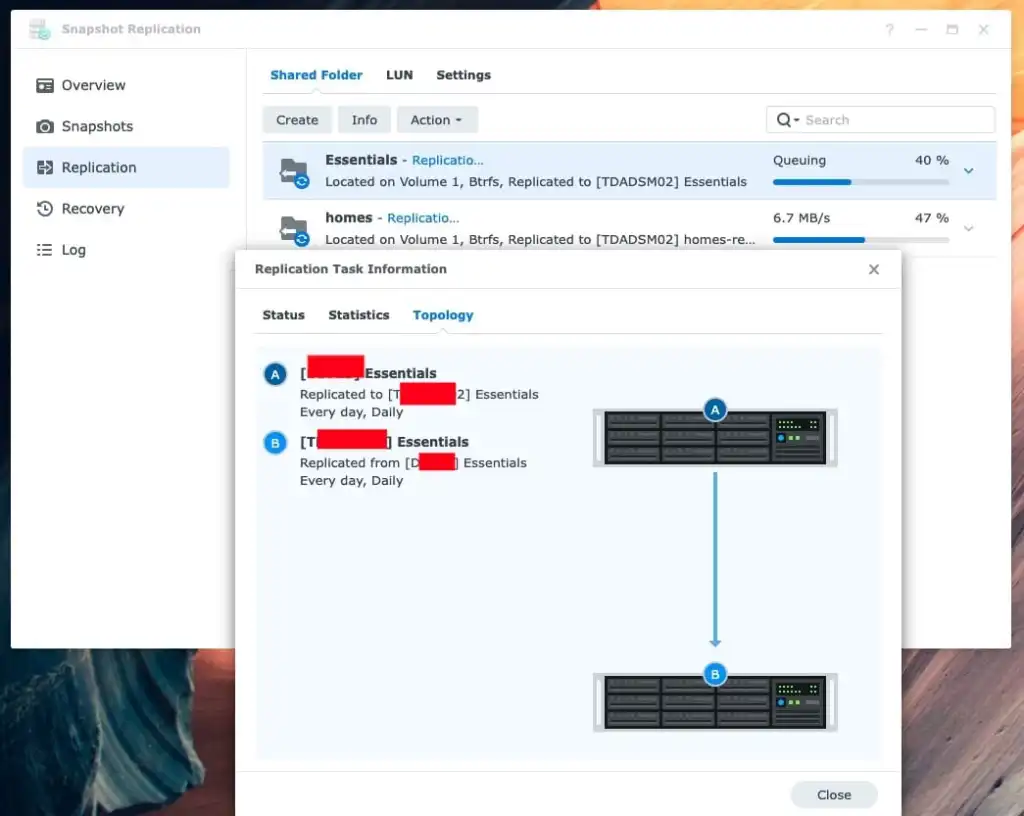
We can see the status of the shared folder replication as shown below.
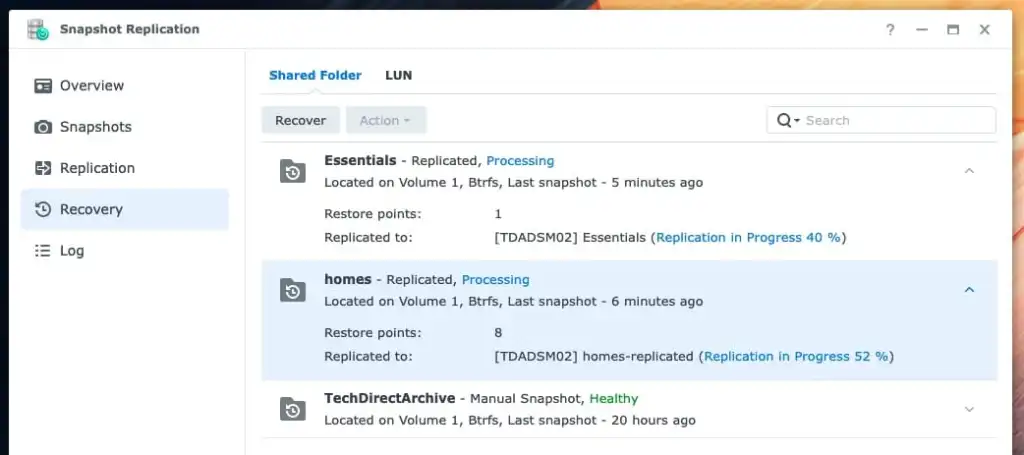
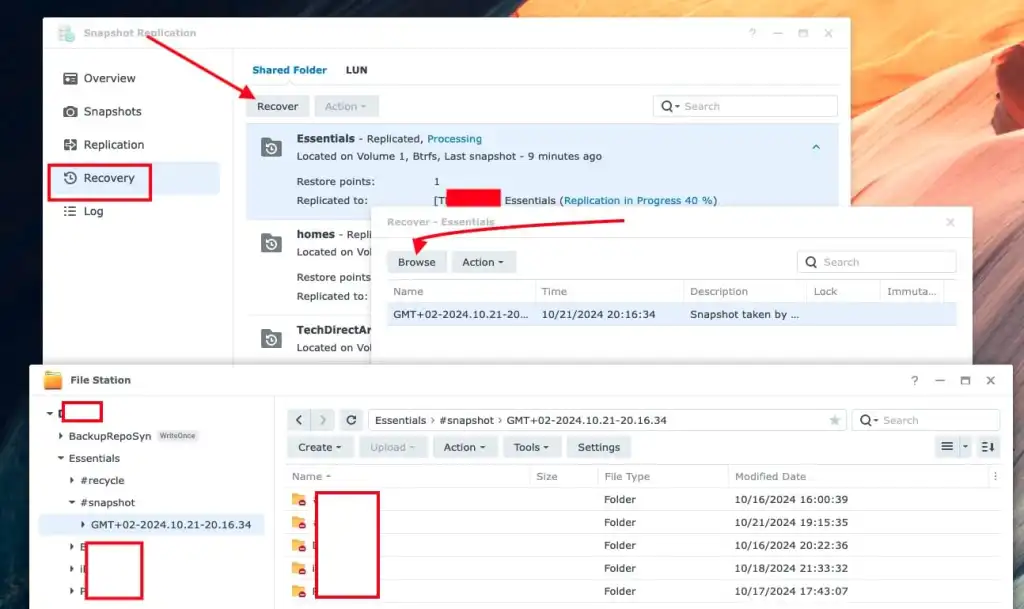
Recoveries can be performed intuitively using File Station or Windows File Explorer by users with the appropriate privileges, without the assistance of system administrator.
As you can see, we can already browser through to recover our snapshots.
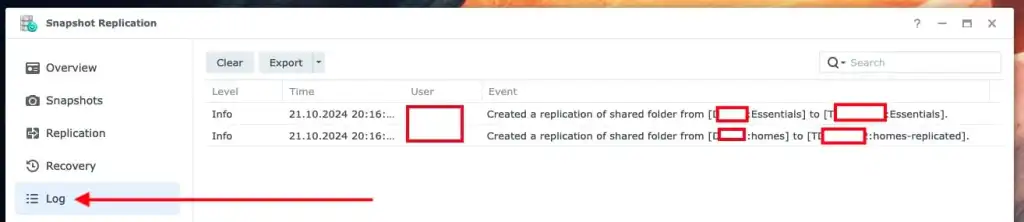
From the remote (destination) server, you can also view the logs as shown below.
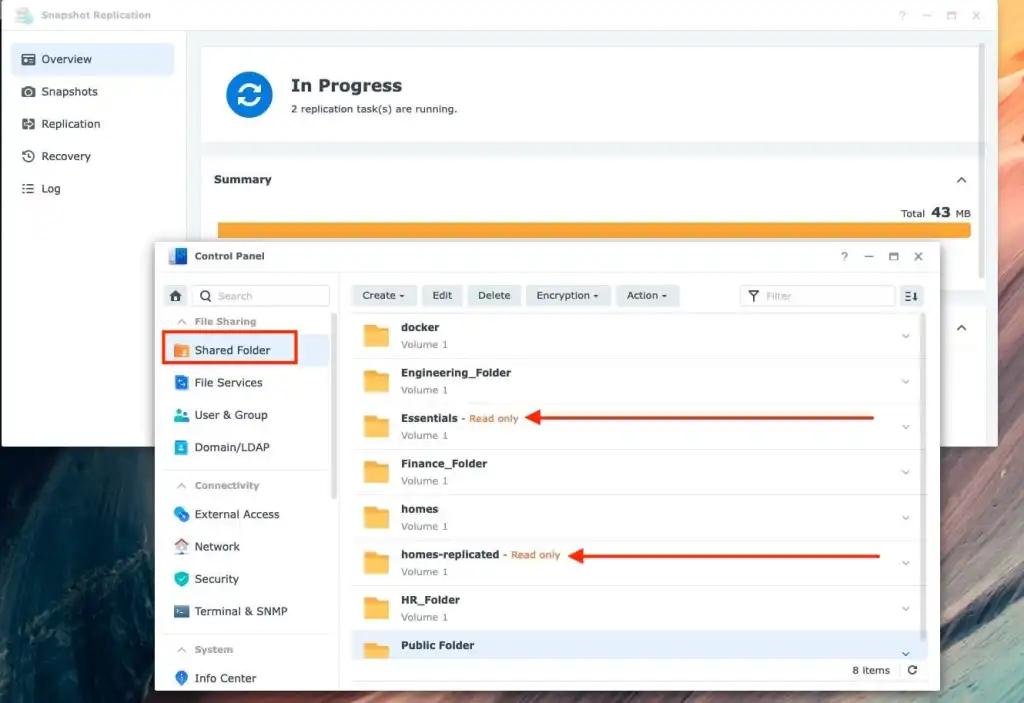
Note: When the shared folders are replication to the destination folder. They will appear as read only as shown in the image below.
For other details, please visit the link shared above to get more detailed step by steps of other scenarios not covered in this guide.
