
Hello everyone,
In this post, I will cover the steps to configure Single Sign-On in Veeam Backup for AWS and thereby use a user managed by an identity provider instead of using local users in Veeam Backup for AWS, ensuring greater security when accessing the tool.
Veeam Backup for AWS supports SSO based on the SAML 2.0 protocol, so any identity provider that uses SAML 2.0 can be used. In this article, I will use Azure AD itself as an identity provider to make it clearer how to perform each step.
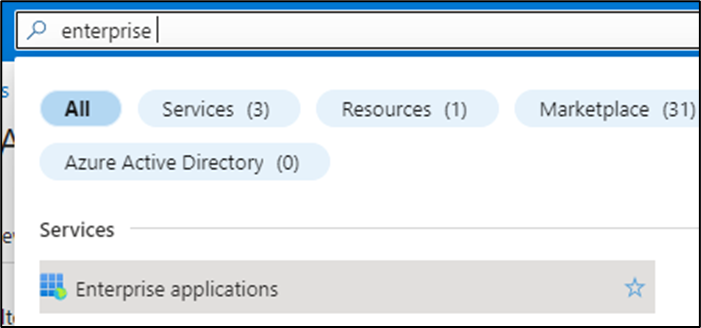
To start, log in to the Azure portal and go to Enterprise applications:
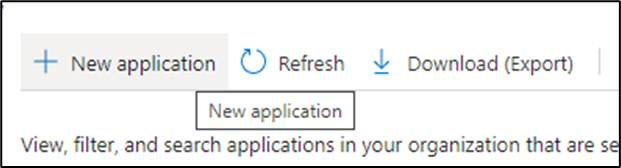
Click on "New application":
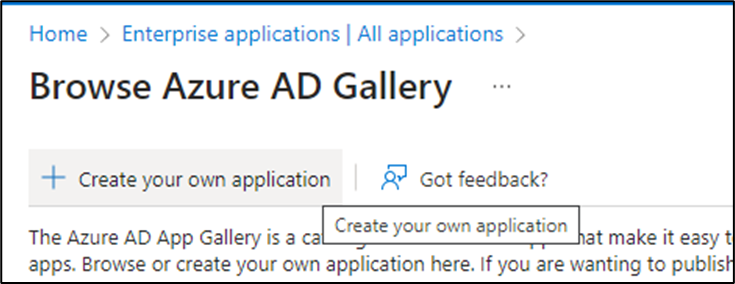
Then choose the option "Create your own application":
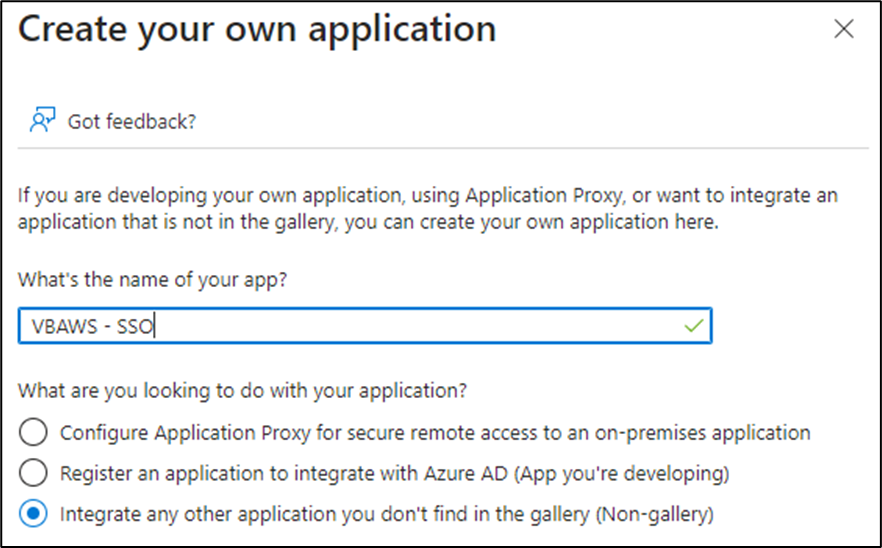
Choose a name for the app and choose the third option "Integrate any other application...":
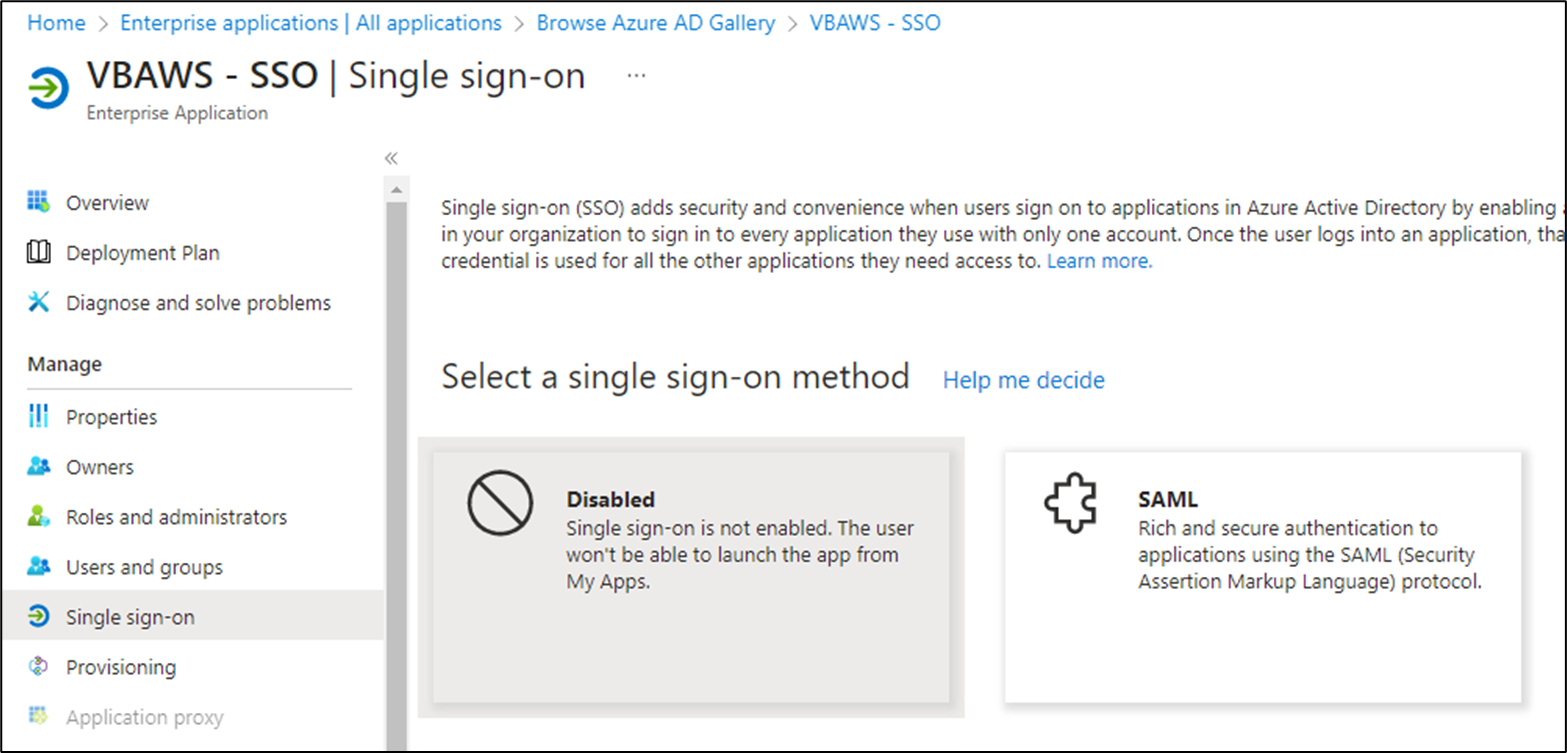
With the app created, go to the "Single sign-on" section and then choose the "SAML" option:
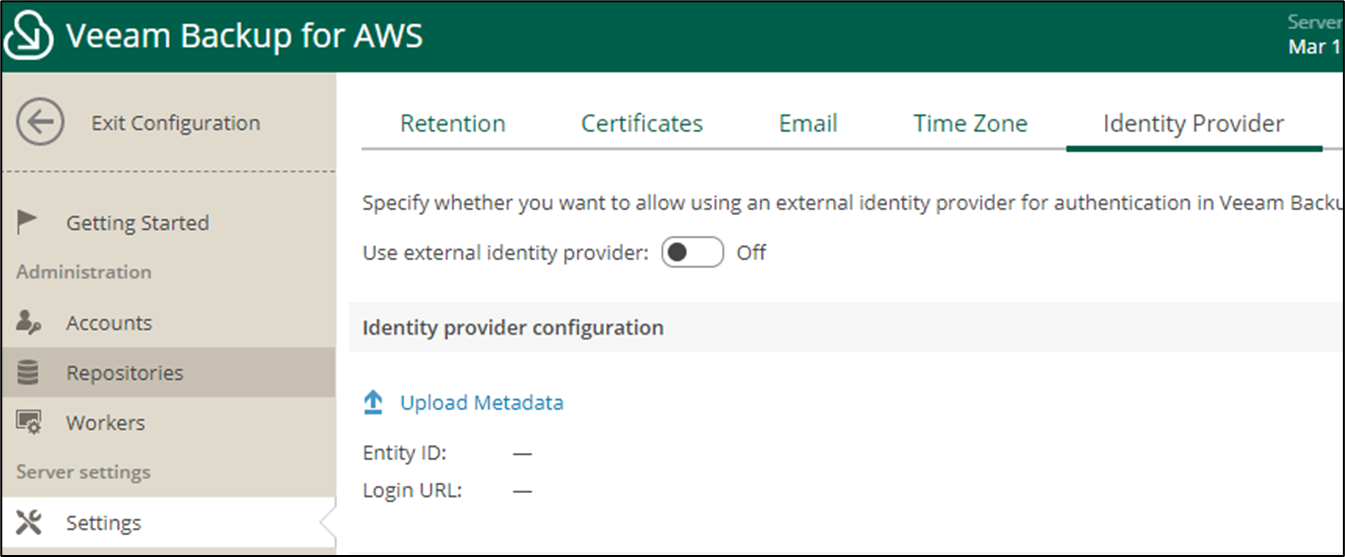
Go back to the Veeam Backup for AWS console and go to the "Identity Provider" section under "Settings":
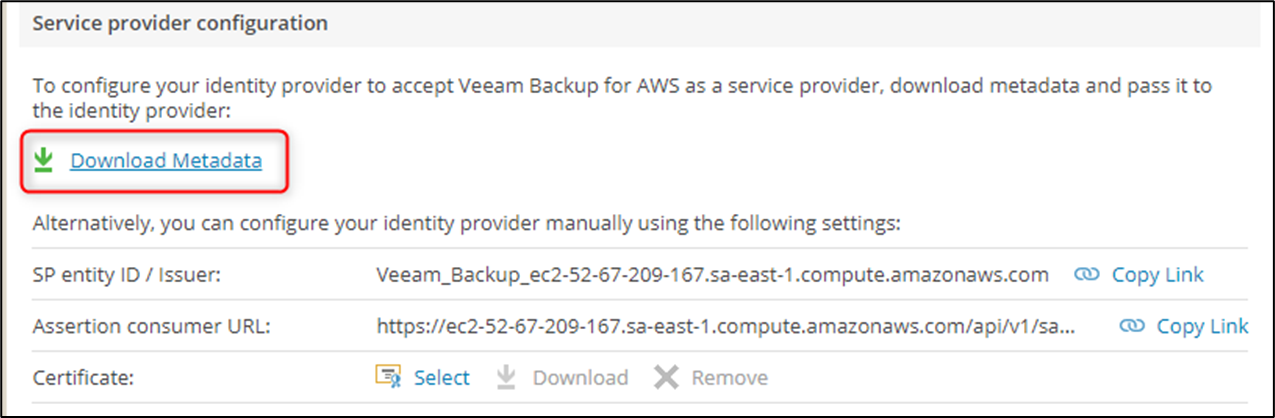
Download the metadata that we will use in our app in Azure AD:
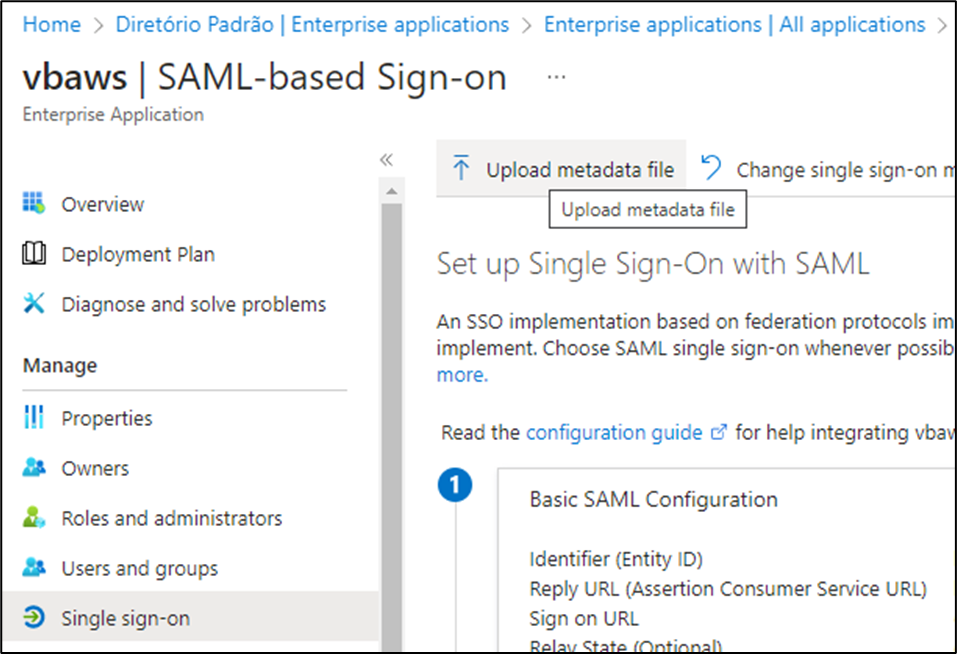
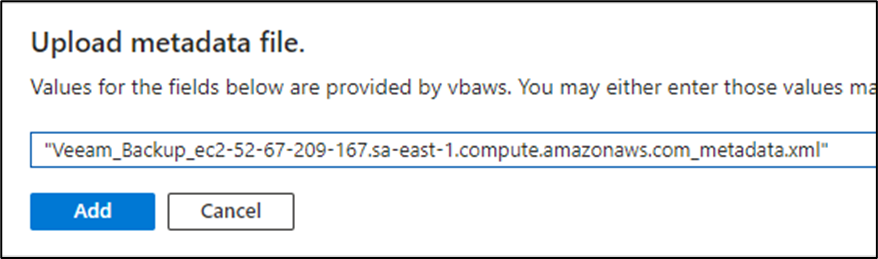
Go back to Azure and click on the "Upload metadata file" option:
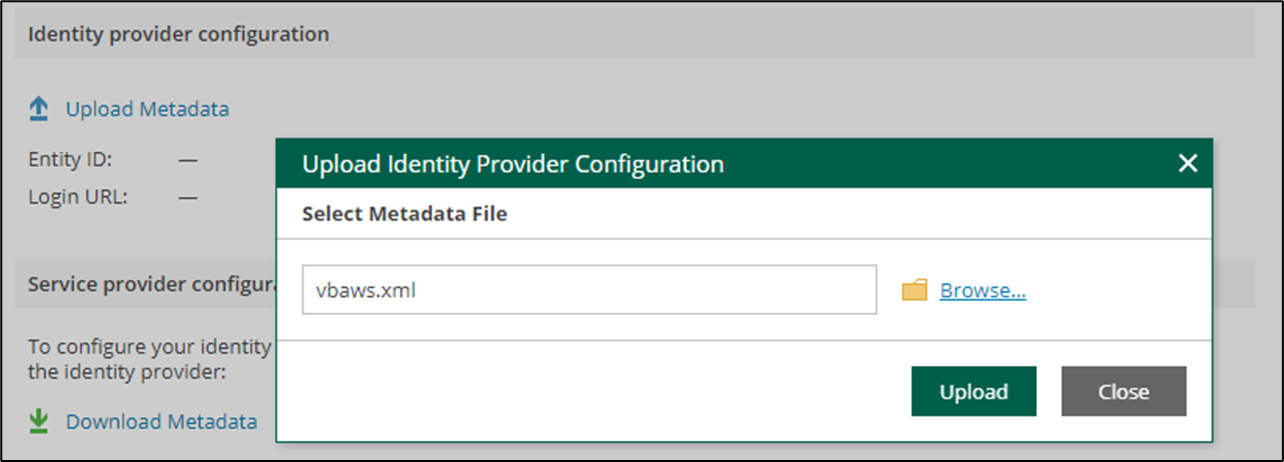
Choose the .XML file that was exported and click "Add":
The information will be populated automatically. Click "Save":

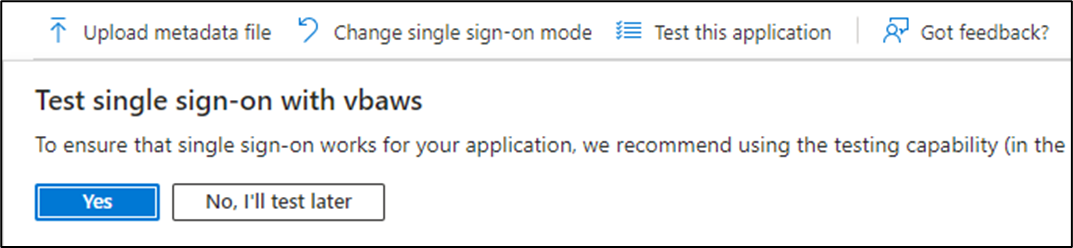
There is no need to test Single Sign-On, you can click "No, I'll test later":
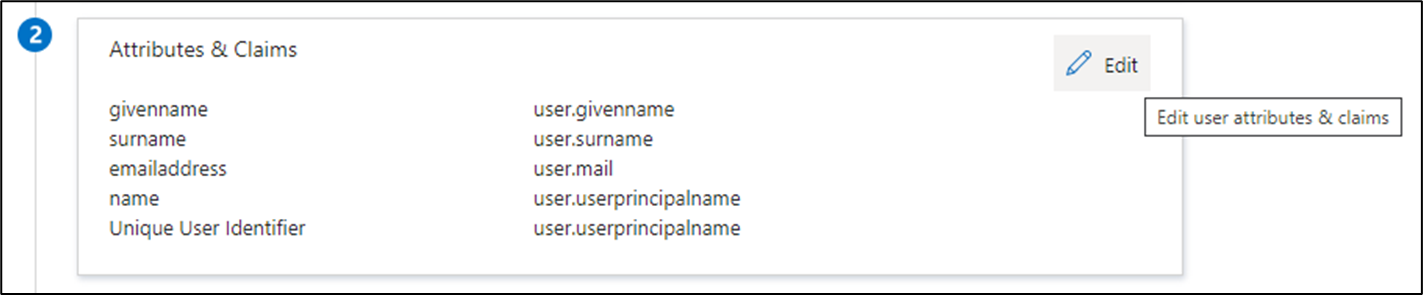
Now click "Edit" in step 2 to create a new claim:
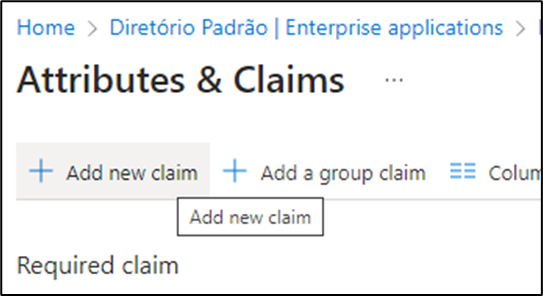
Click "Add new claim":
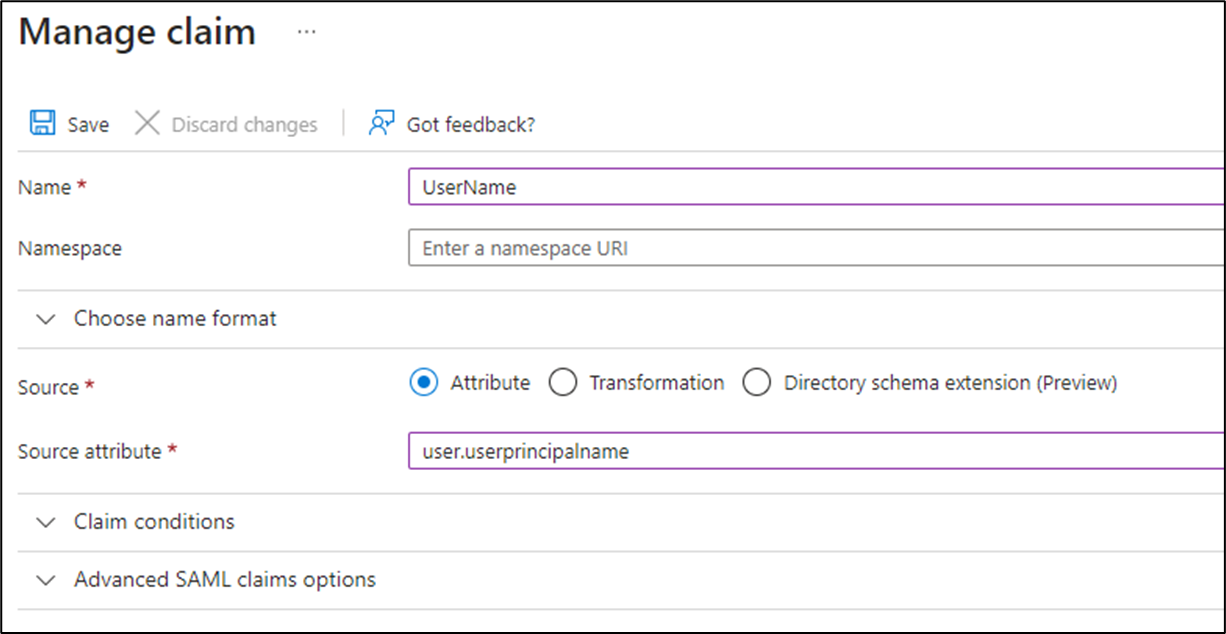
In "Name" put "UserName"
In "Source attribute" choose the option "user.userprincipalname"
The "Name" field is case-sensitive and must be filled in exactly as shown in the image below to work correctly. Click "Save" to save the new claim:
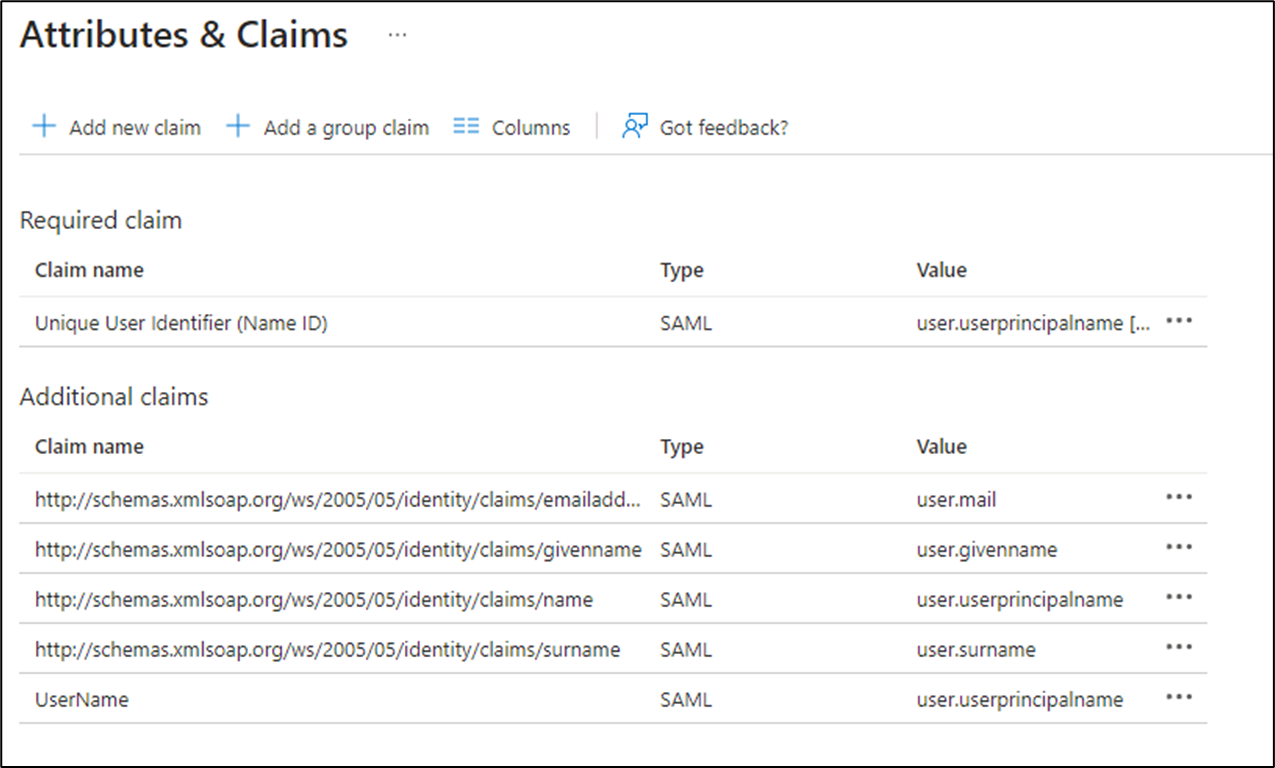
At the end, the claim should look like this:
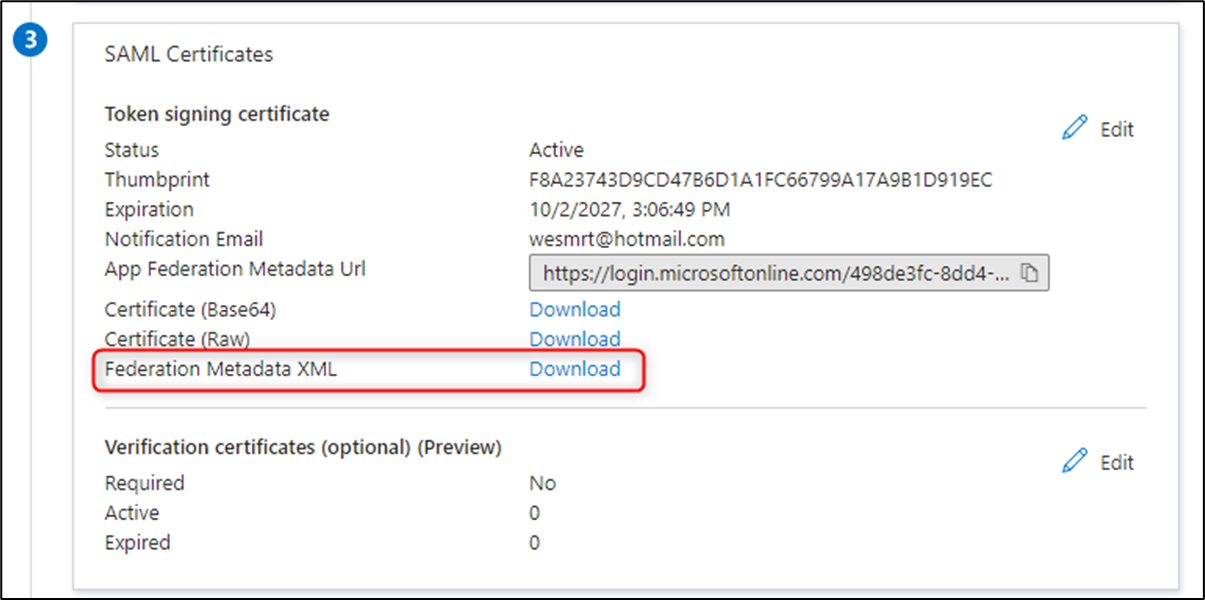
Returning to the Single sign-on settings, download the Federation Metadata XML:
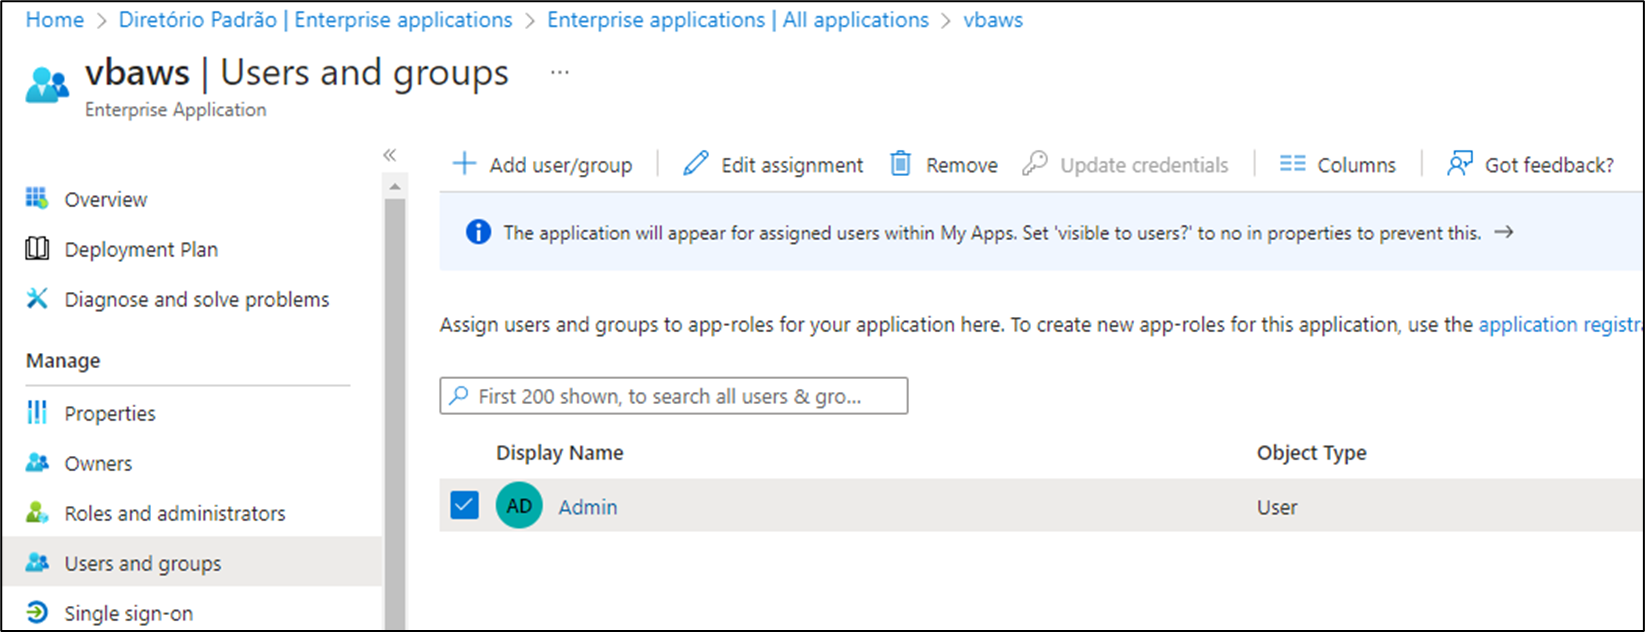
Still in our app, go to the "Users and groups" section and add the users or groups that will be able to use this application. In my example, I will only add my own user:
Returning to the Veeam Backup for AWS Identity Provider configuration screen, we must upload the Metadata:
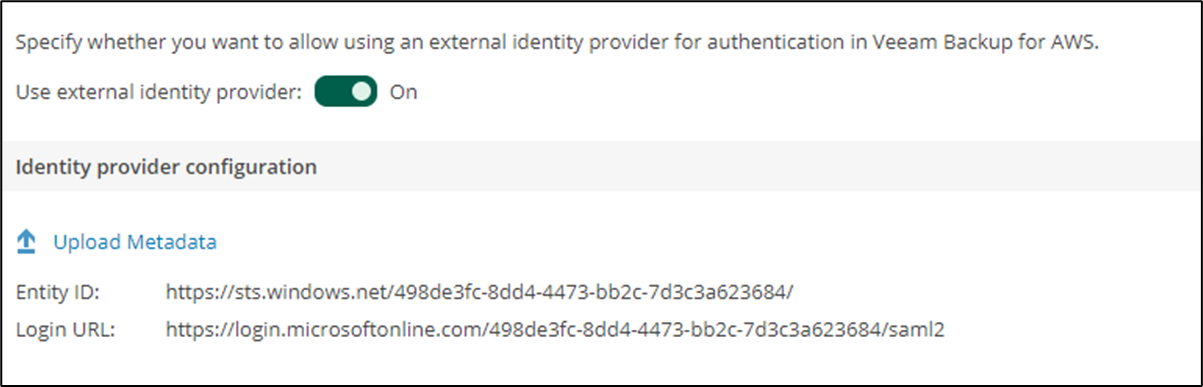
Also, modify the "Use external identity provider" option to On:
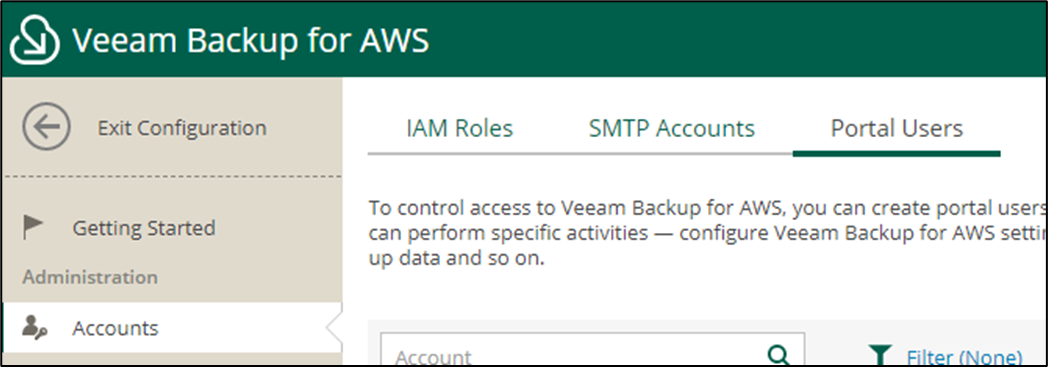
Finally, we need to add the users to "Portal Users" and define the access they will have. Go to "Accounts" and then "Portal Users":
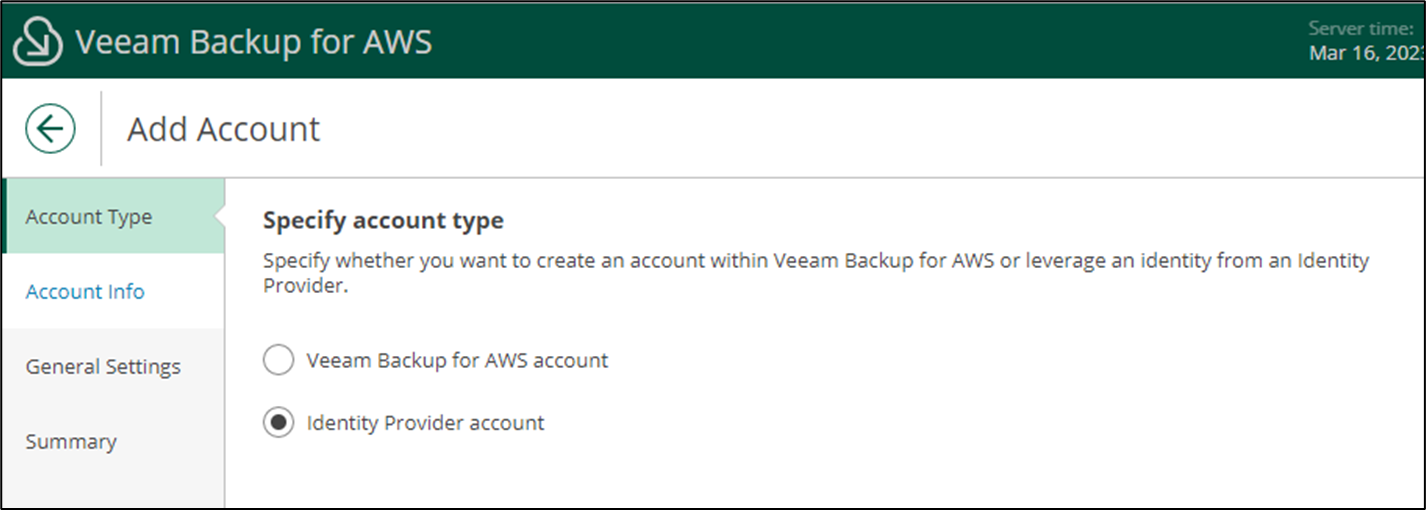
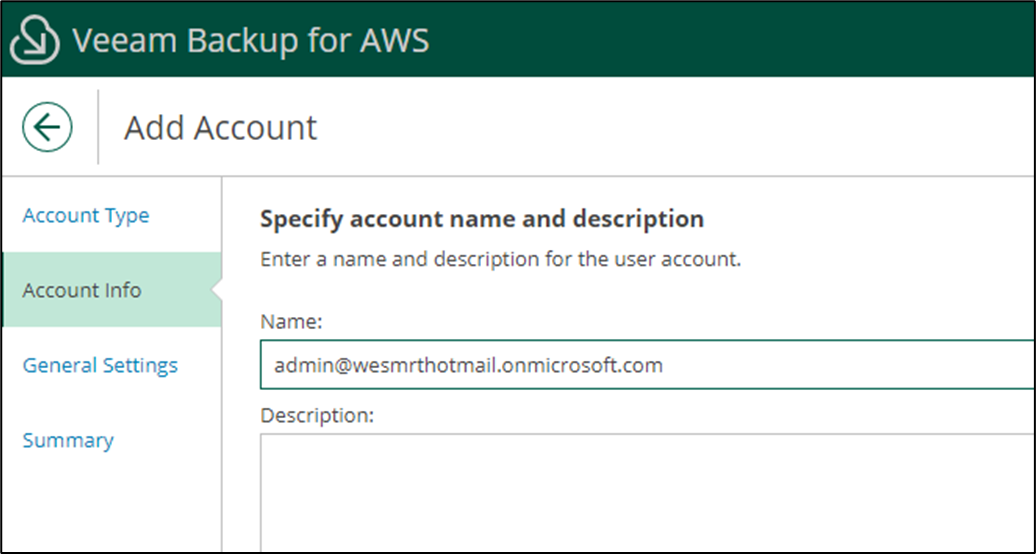
Click "Add" and choose the "Identity provider account" option:
Enter the user's access address in the Name field:
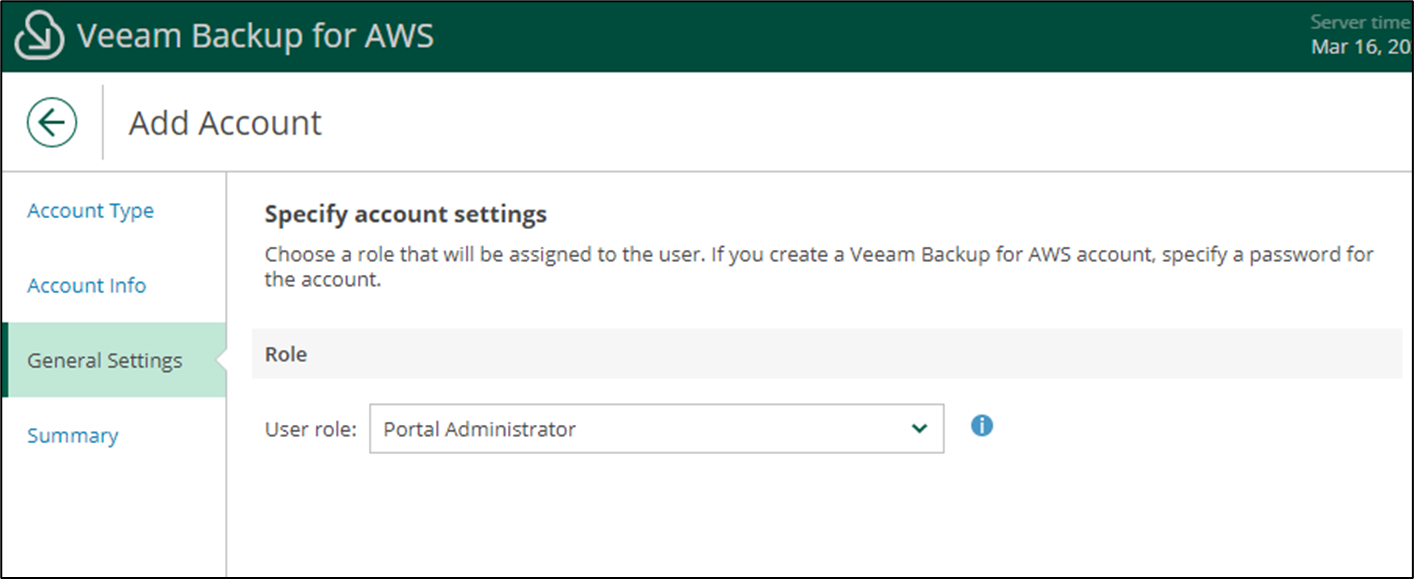
Choose the user's access level:
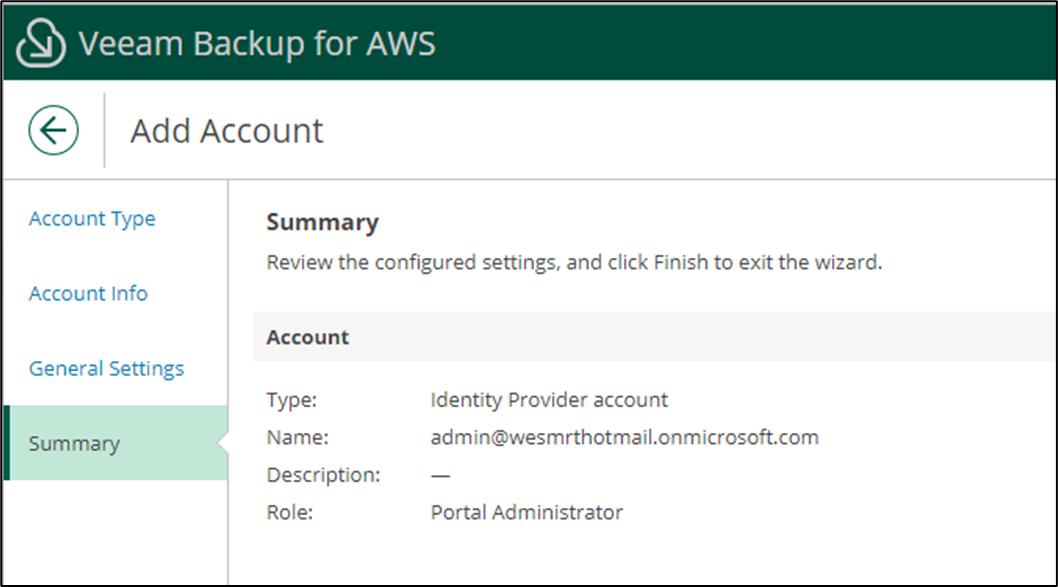
And click "Finish" to create the account:
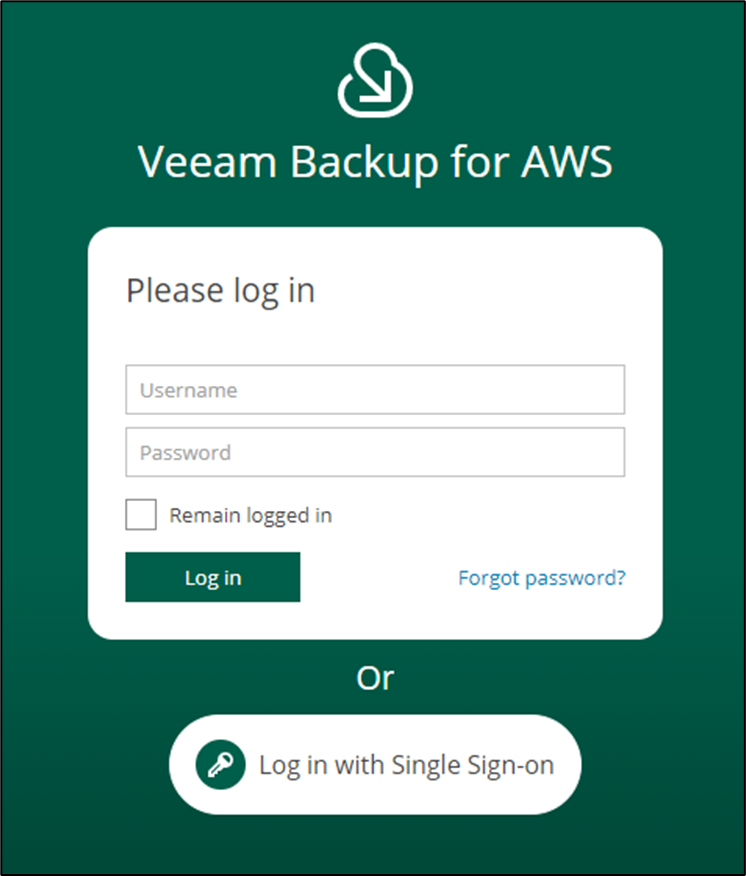
Now that we have finished creating the user, we can test it. When you return to the Veeam Backup for AWS login screen, a new option will be available with the name "Log in with Single Sign-on".
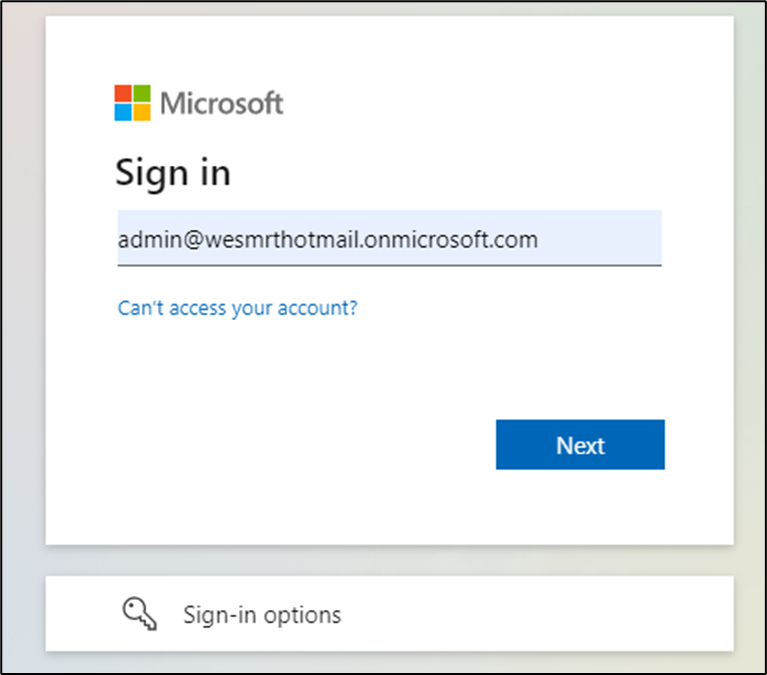
By clicking on this option, we will be redirected to authenticate through Microsoft:
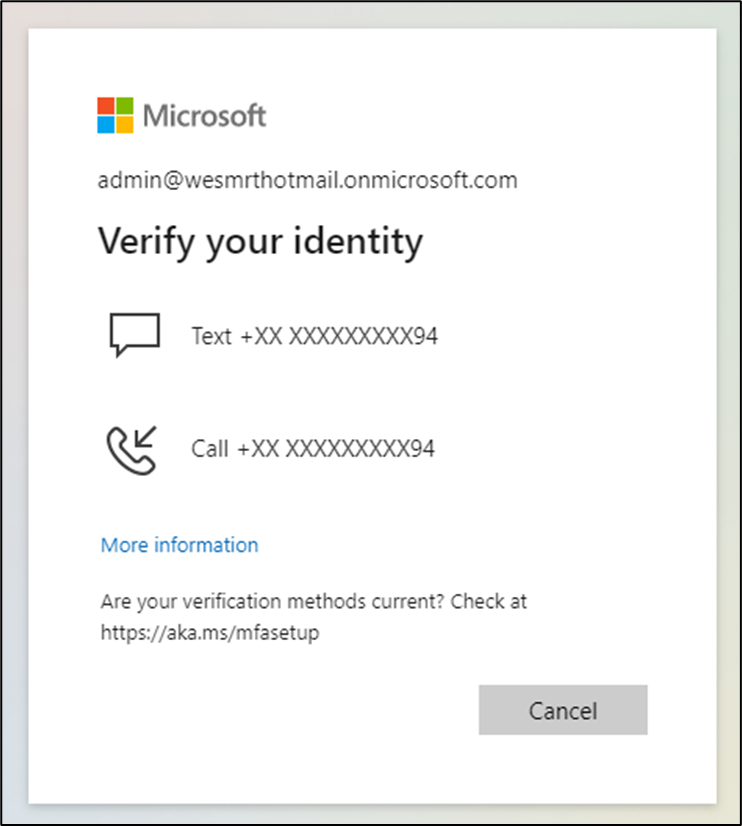
If your account has any MFA configurations, you will need to identify yourself:
If everything goes as expected, you will be able to log in with this new user:

With this, we have finished configuring Single Sign-On for Veeam Backup for AWS.
For more details, please refer to the User Guide for Veeam Backup for AWS.


