

Hello, everyone
In this article, we will explore Veeam Universal CDP (Continuous Data Protection), an advanced disaster recovery technology designed to provide critical levels of protection with minimal data loss.
Unlike traditional backups, which run every few hours, Universal CDP operates continuously, enabling companies to protect their most critical applications with a Recovery Point Objective (RPO) of just a few seconds.
What makes it “Universal” is its versatility. While Veeam's standard CDP is typically limited to virtual machines within VMware vSphere environments, Universal CDP extends this capability to protect a variety of workloads (such as physical servers or different platforms) and replicate them directly to a VMware vSphere infrastructure at a disaster recovery site.
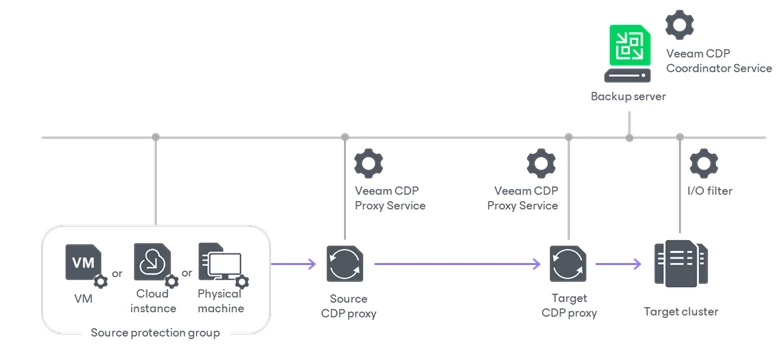
Backup infrastructure for Universal CDP
The following backup infrastructure components are required to use Universal CDP:
- Backup server
- Source workloads
- CDP proxies
- Target host or cluster
How it works
Unlike traditional backups or replicas, which rely on taking snapshots at regular intervals, Universal CDP works by intercepting and replicating read and write operations (I/O) in real time.
To achieve this, Veeam does not use hypervisor snapshots; instead, it deploys two components directly at the source: the Veeam CDP Agent Service and the Veeam CDP Volume Filter Driver. These components read the data traffic between the kernel and the system volumes and send it to a recovery destination.
The replicated data is stored at the destination in two formats:
- Restore points a corto plazo (Journal): A log (journal) that records every I/O transaction for up to 7 days (168 hours). This allows you to roll back the system to a specific point in time (seconds or minutes ago).
- Restore points a largo plazo: Traditional restore points to revert to states from hours or days ago, if necessary.
Key Features
- “Universal” Protection: Unlike traditional CDP (which only protected virtual machines within vSphere), Universal CDP allows you to protect a wider variety of workloads—such as physical servers, cloud servers, or other hypervisors—by replicating them to a VMware destination.
- ecovery Point Objective (RPO) close to zero: By continuously replicating I/O, data loss in the event of a disaster is limited to just a few seconds.
- Minimum RTO (Recovery Time Objective): In the event of a failure, the replica at the destination is already in a “ready-to-start” state, which minimizes downtime during failover.
- Network traffic optimization: The system compresses data and discards unnecessary information (such as empty or duplicate data blocks) to facilitate transmission over slow connections.
Considerations and limitations
If you plan to use Universal CDP to protect your workloads, please consider the following requirements and limitations.
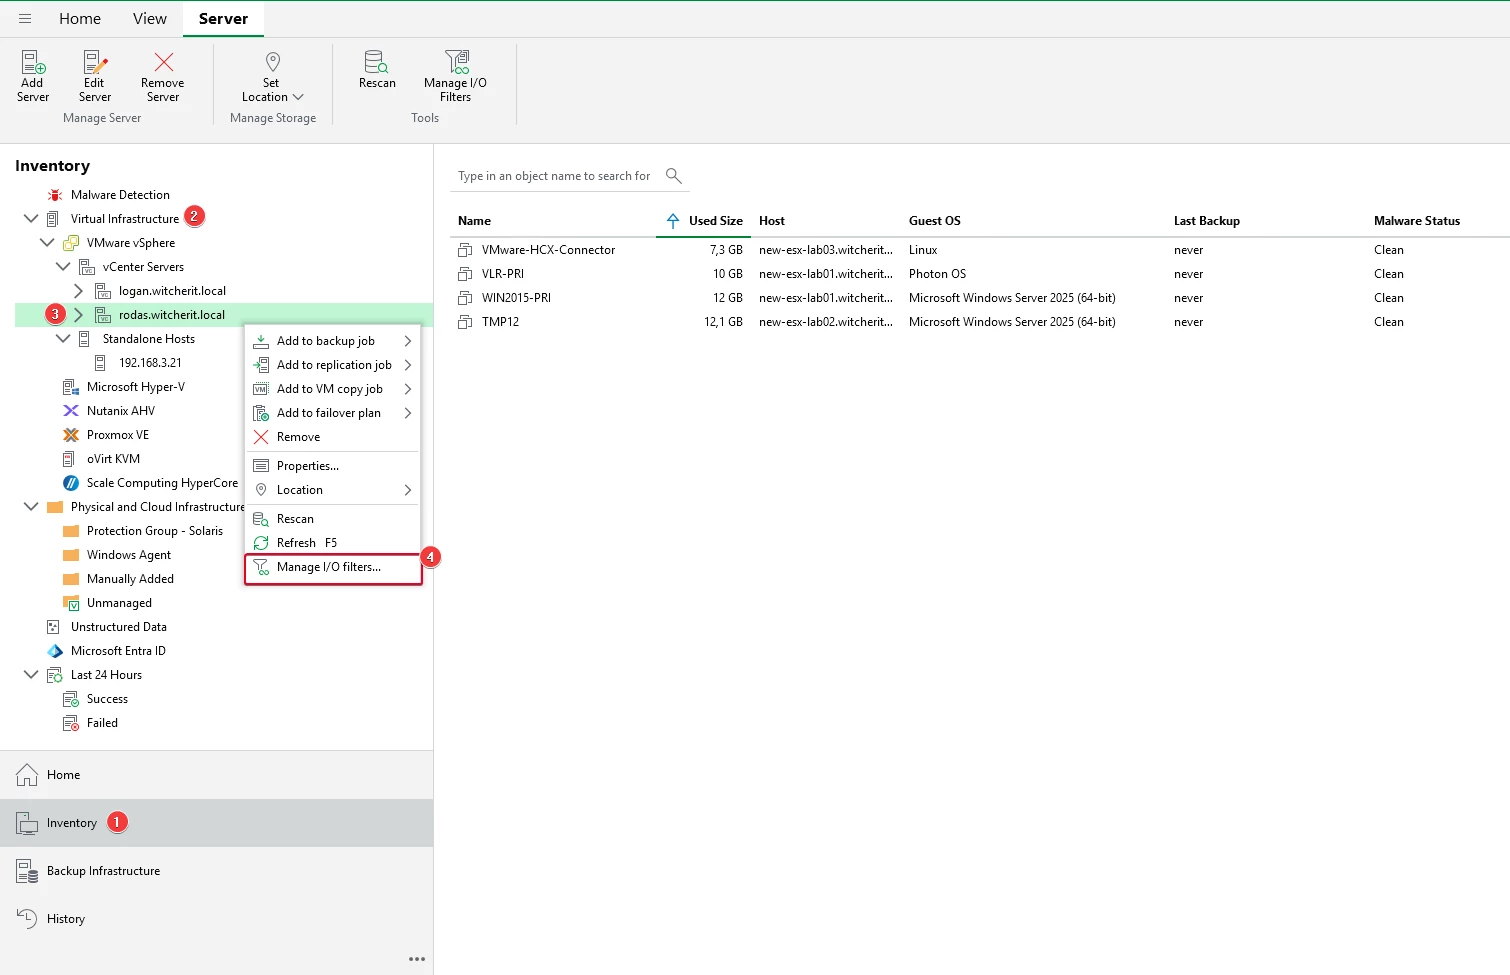
Installation of I/O filters
The first thing we’ll do is install the I/O filters on the target cluster where we’ll replicate our physical machine using Universal CDP.
In the Inventory section, right-click on our vCenter server and select Manage I/O filters.
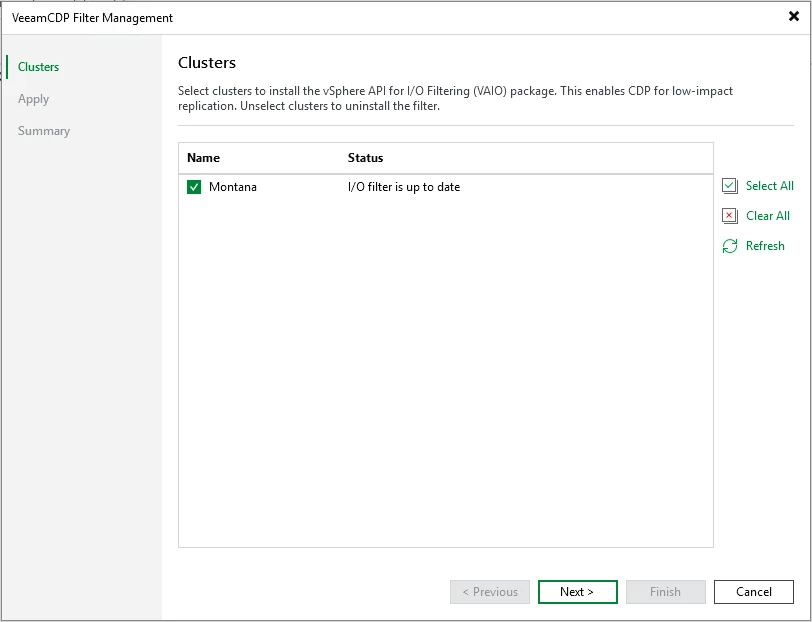
In the wizard, select the cluster (in my example, the cluster is named “Montana”) to deploy the necessary vSphere API for I/O Filtering (VAIO) packages.
We're waiting for the setup to finish.
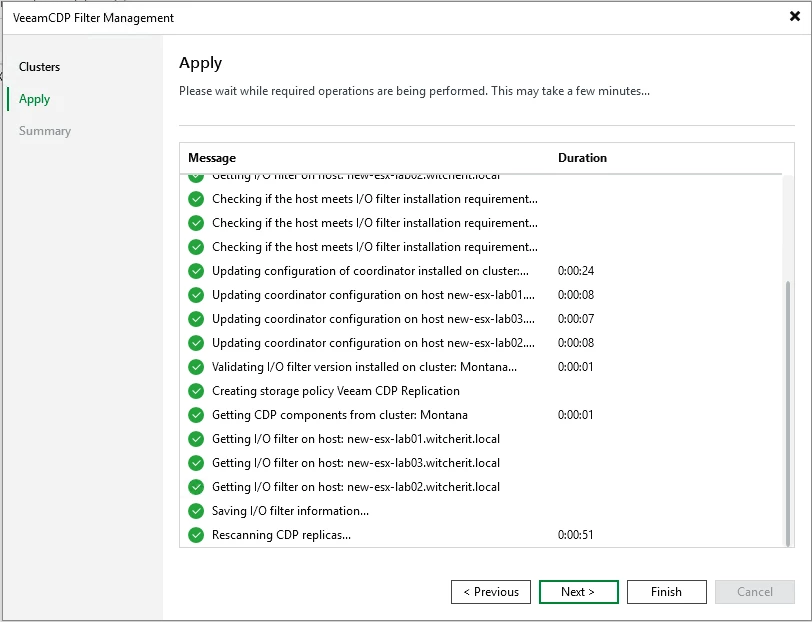
Once the configuration is complete, click “Finish”
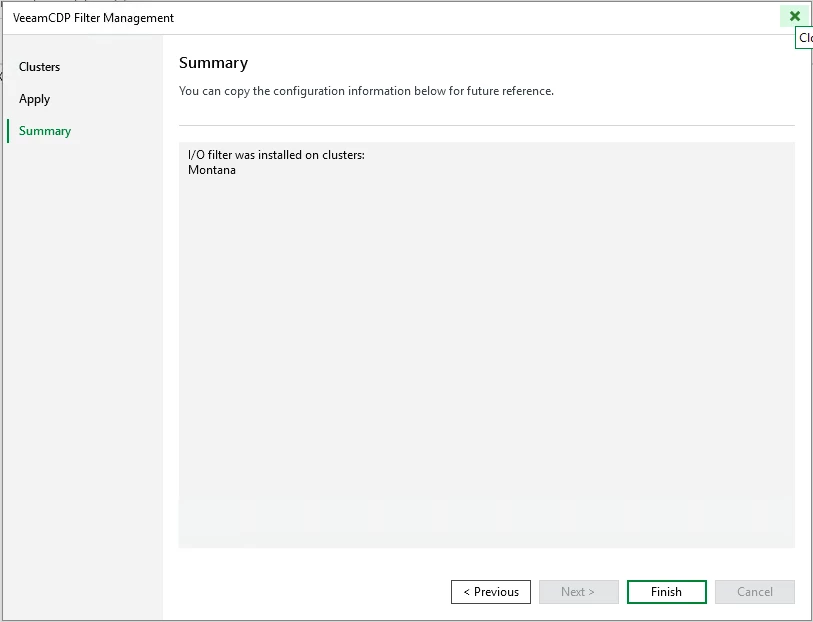
If we switch to the vSphere Client console, we can verify that the veecdp filter is installed and active on the hosts in the “Montana” cluster.

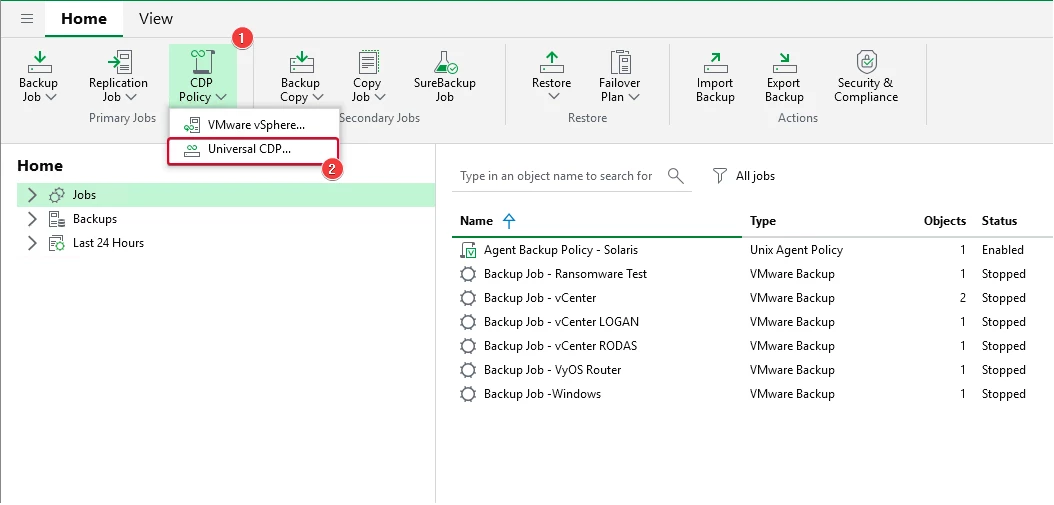
Configure Universal CDP
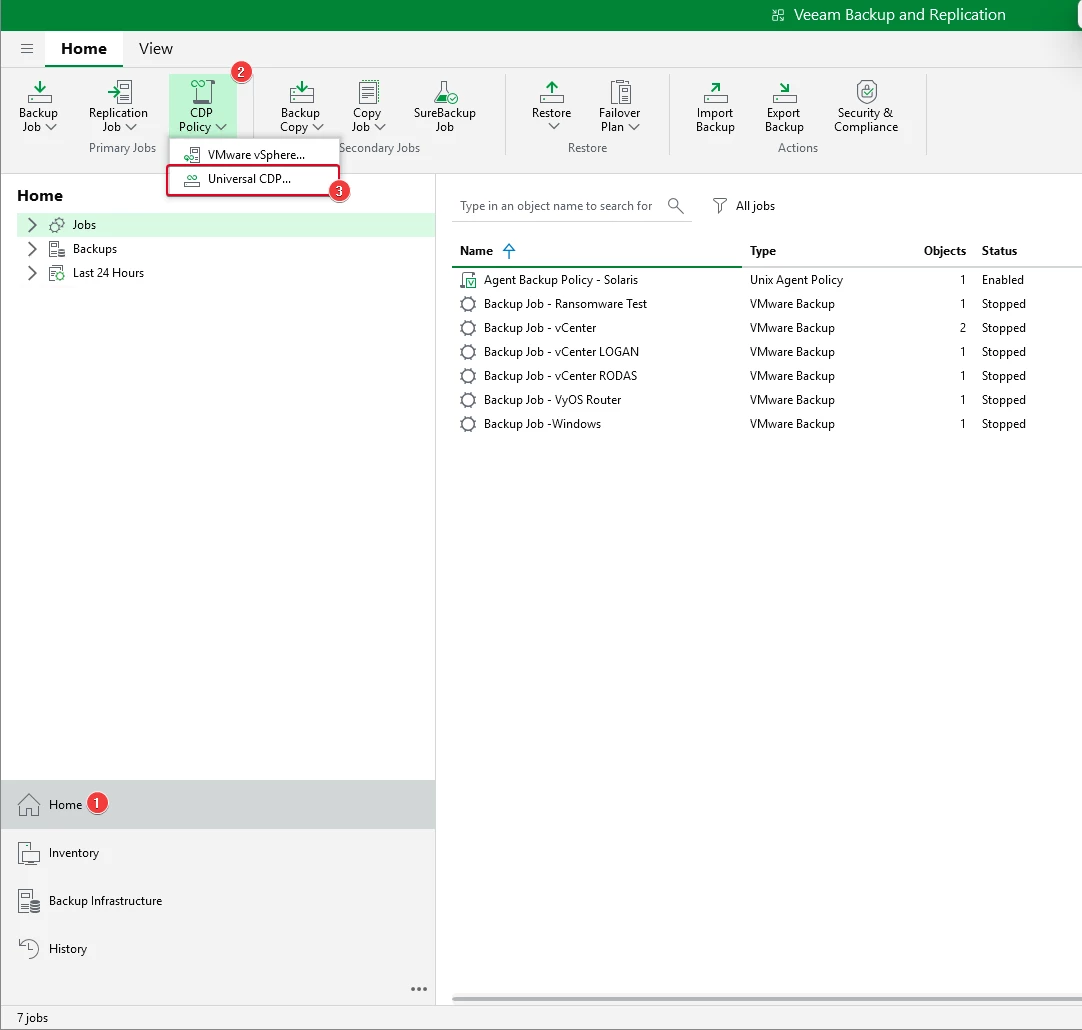
To get started, go to CDP Policy > Universal CDP.
When you use Veeam CDP for the first time, you will be prompted to deploy a CDP proxy server. Click “Yes”

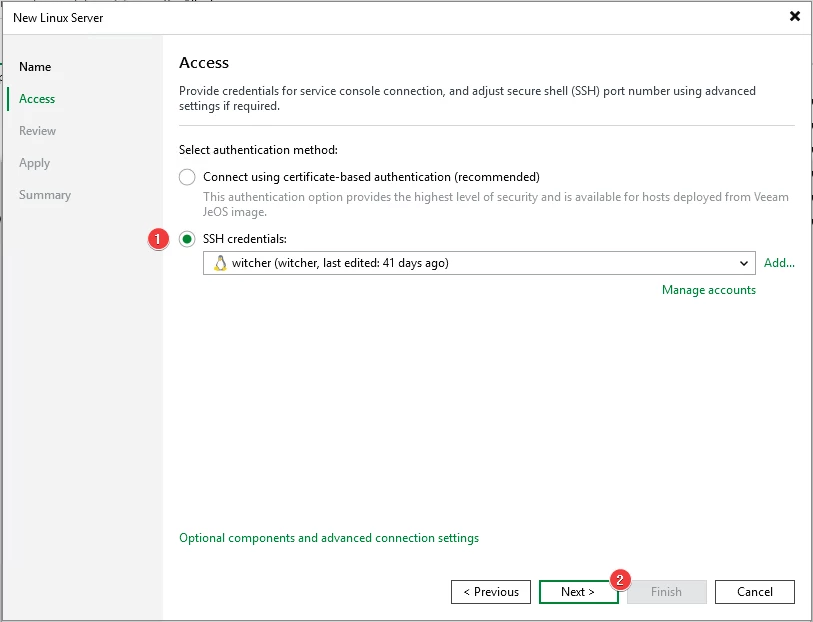
Since I don't have a server for the CDP proxy role, I'll add a new “Ubuntu” Linux server as a proxy. To do this, go to Add New... > Linux.

Enter the DNS name or IP address of your Linux server. You can also add a description.

For this example, we'll add the Linux server credentials.
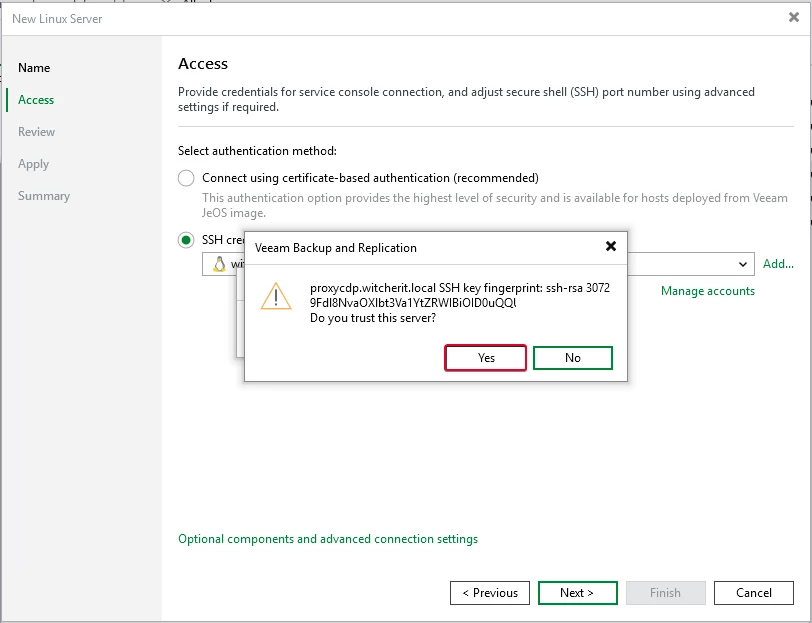
We accept the fingerprint and continue.
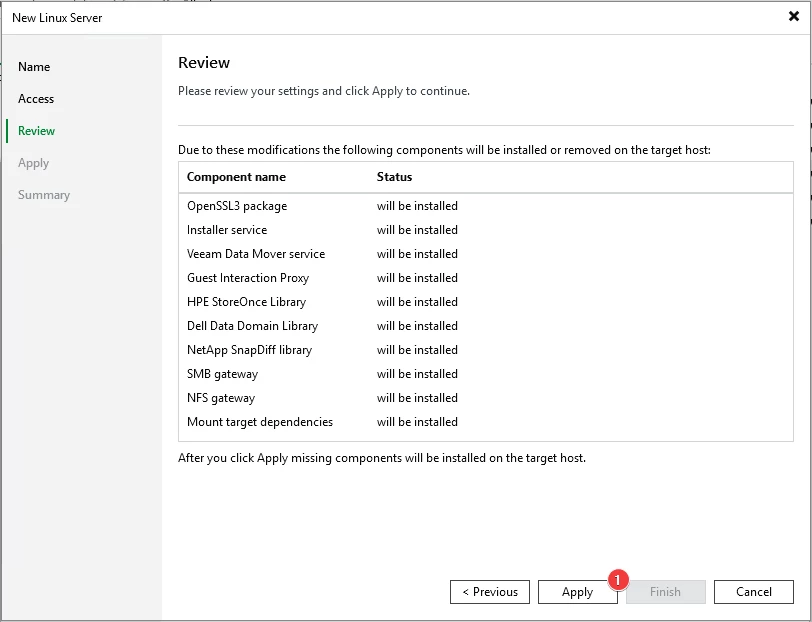
We review the list of all the components that will be installed on our server.
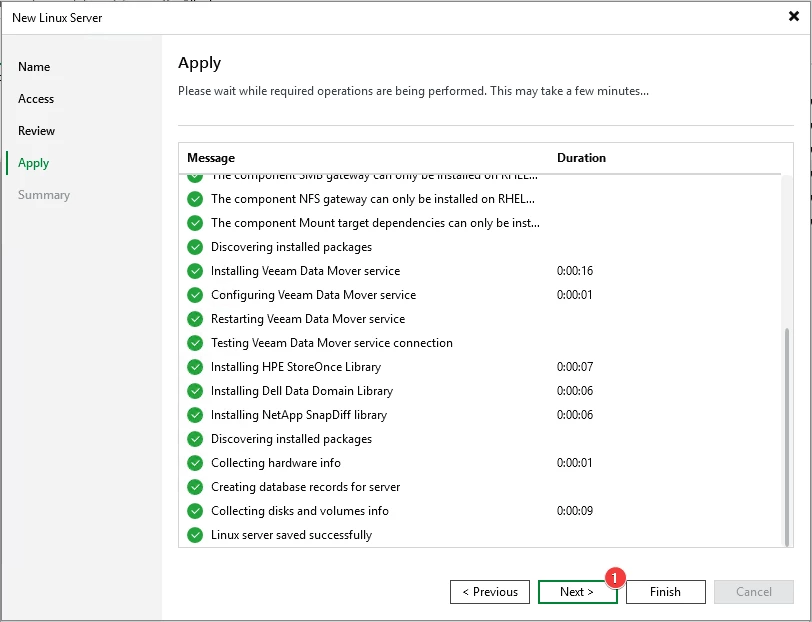
Once all the components have been installed, we can continue.
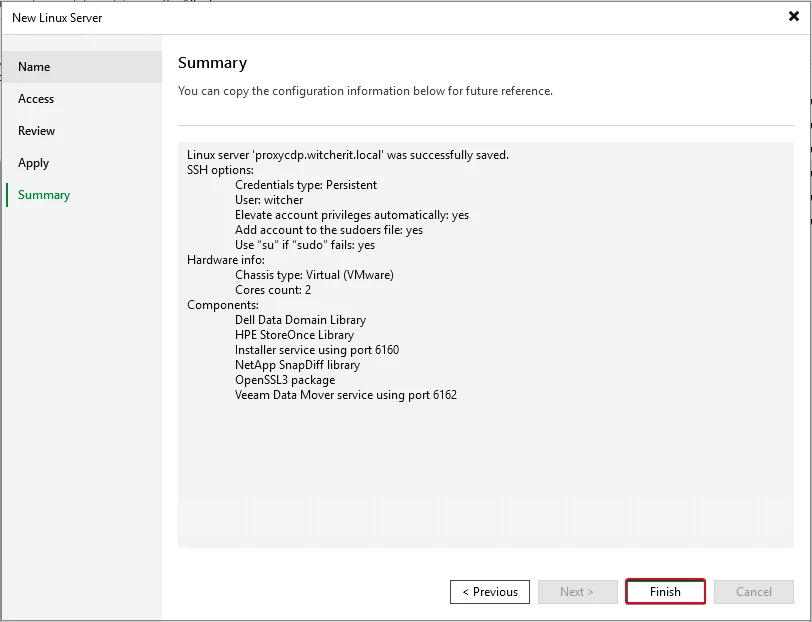
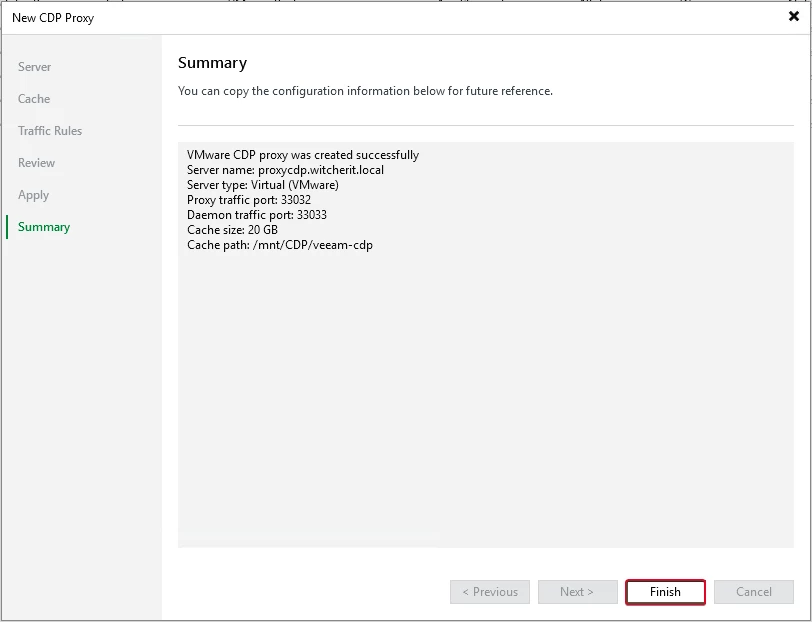
Review the configuration summary and click “Finish”
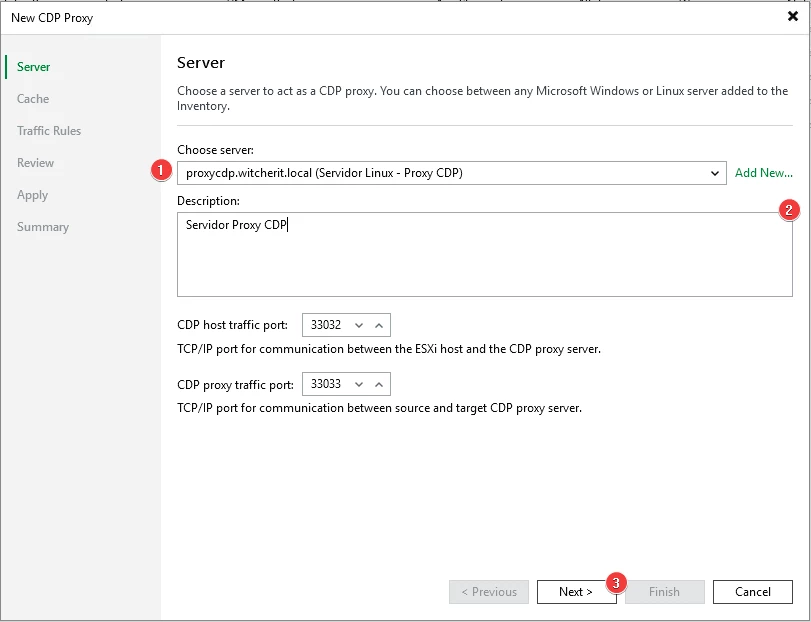
Go back to the proxy settings and select our new proxy server from the list.
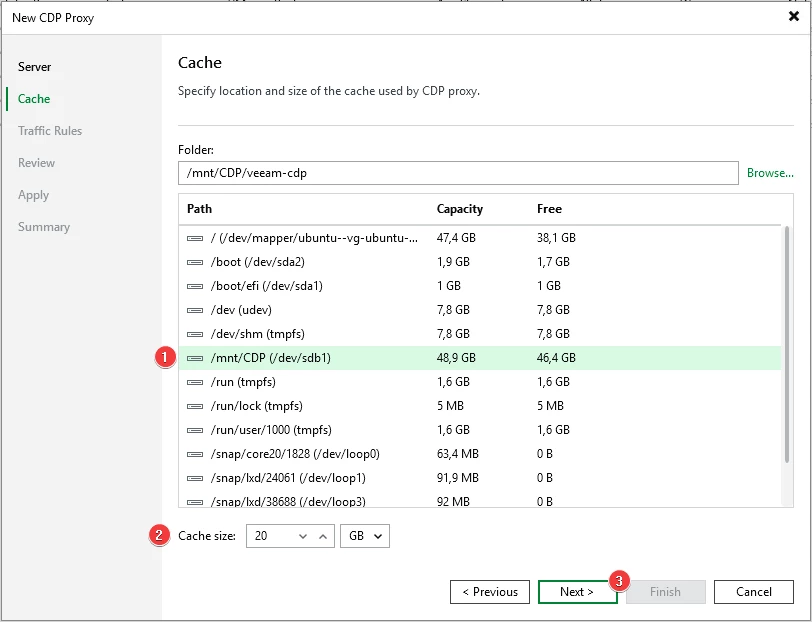
At this point, we need to select the path where we will configure the cache used by the CDP proxy. We can also change the cache size, which defaults to 10 GB. In my case, I increased it to 20 GB.
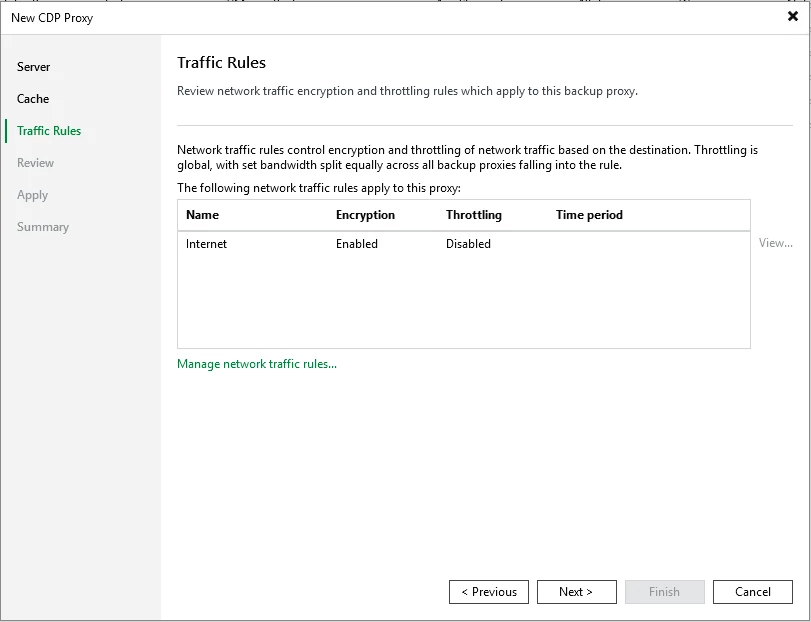
In the traffic policies, we'll leave everything at the default settings and continue.
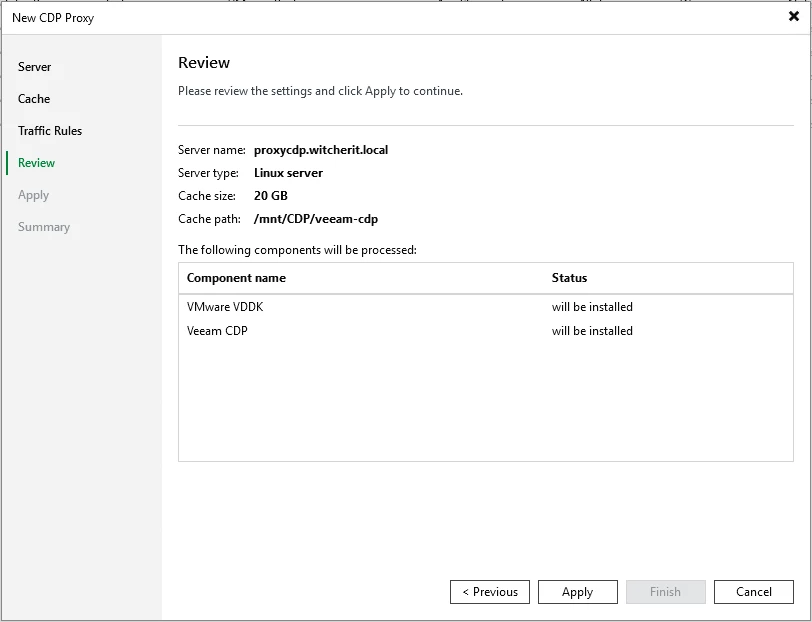
We verify that our configuration is correct. We also note that two new components will be installed on our server.
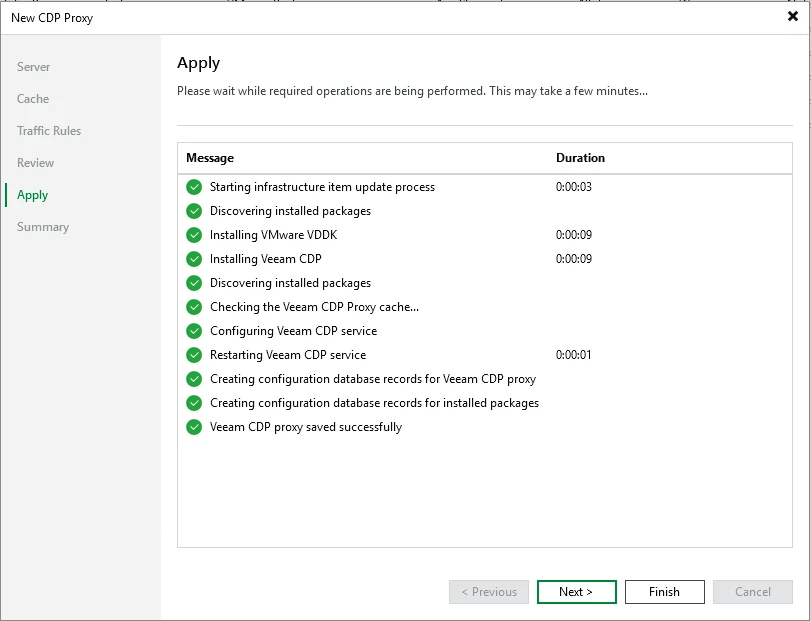
We'll wait for the setup to finish and then continue.
Review the configuration summary and click “Finish.”
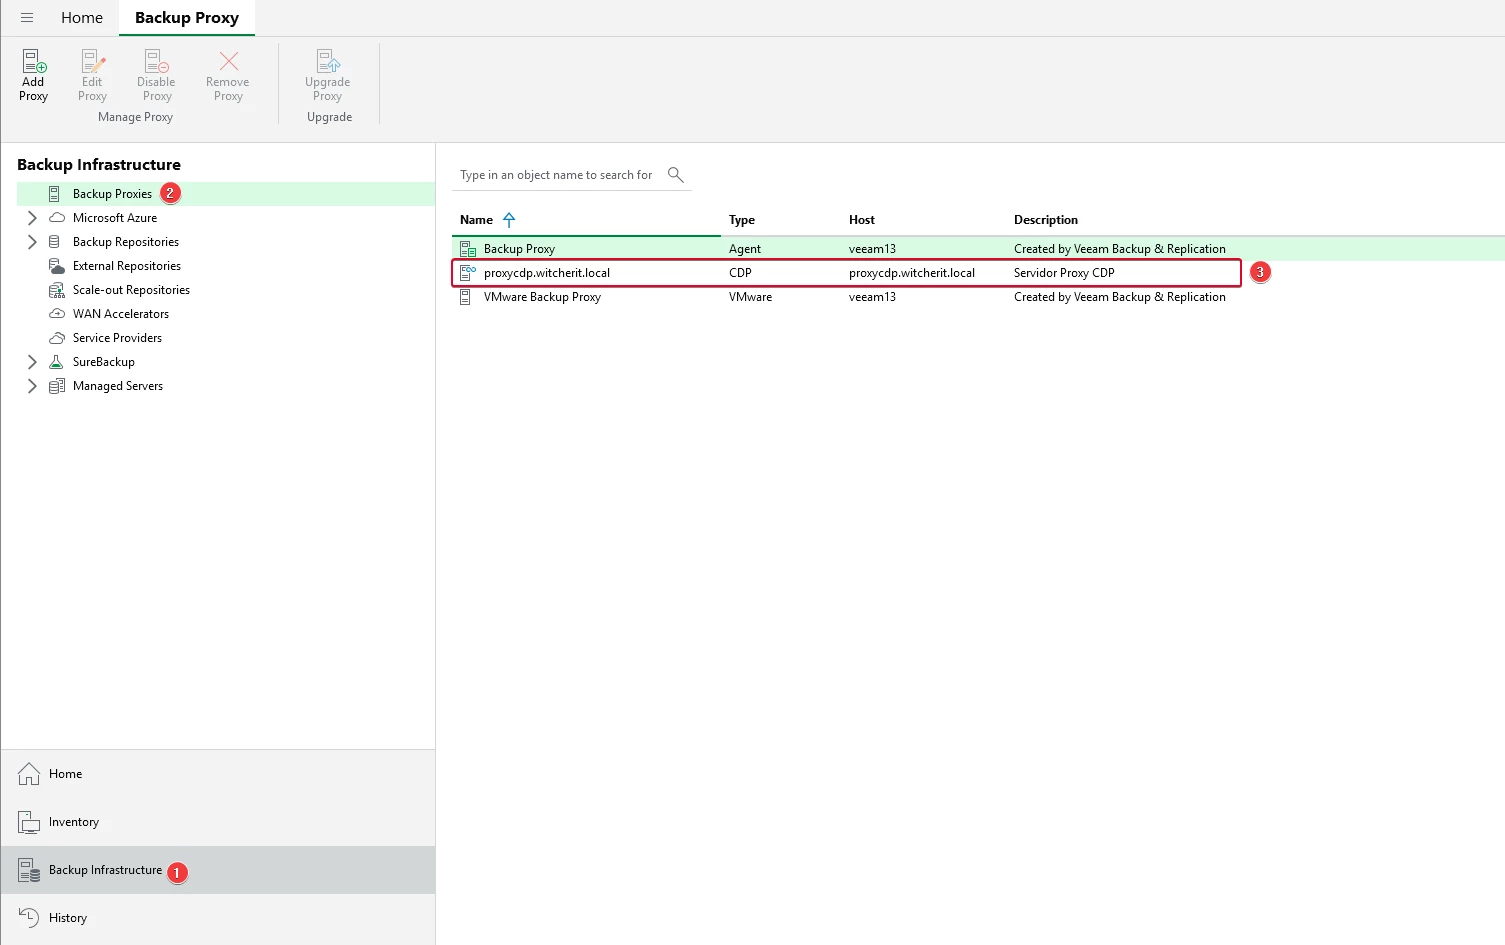
If we go to the proxy section, we'll see our new CDP proxy server.
Physical Server Configuration
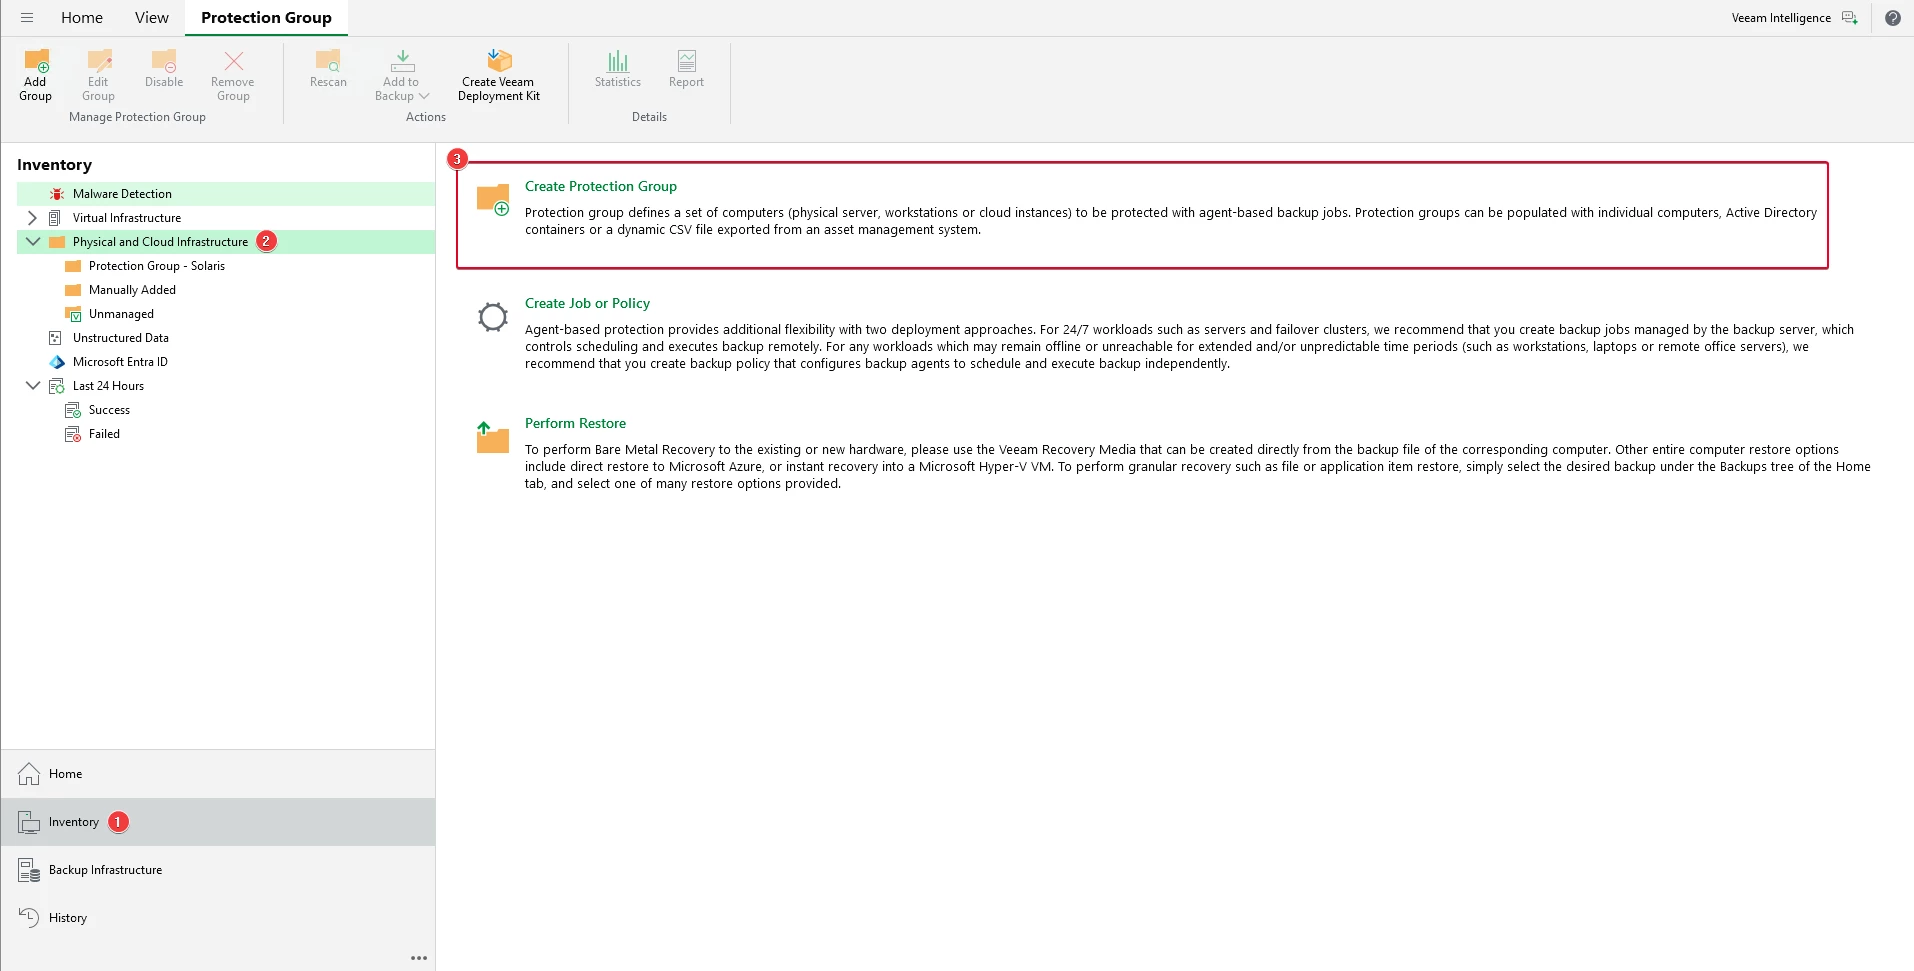
Our next step will be to configure our physical server. For this demonstration, we’ll use a virtual machine that simulates a physical server. To protect our machine with CDP, we’ll need to add it to a protection group.
To do this, go to Inventory > Physical and Cloud Infrastructure > Create Protection Group.
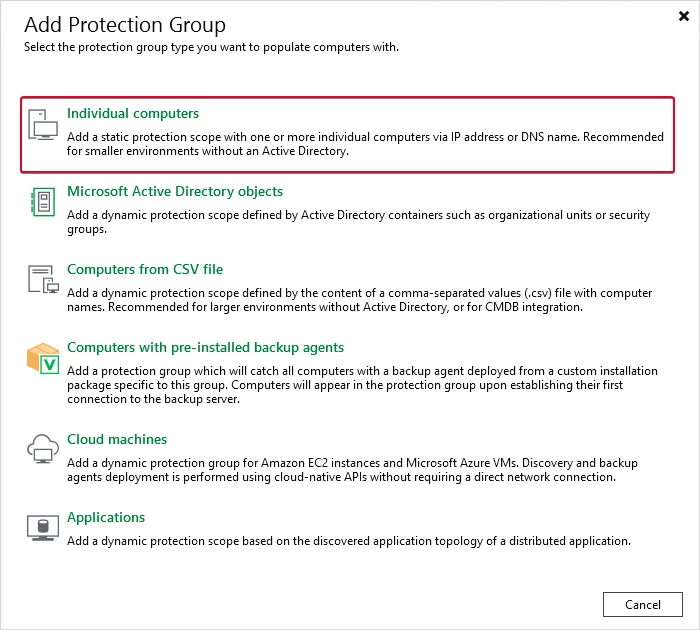
For this example, I select the “Individual computers” option
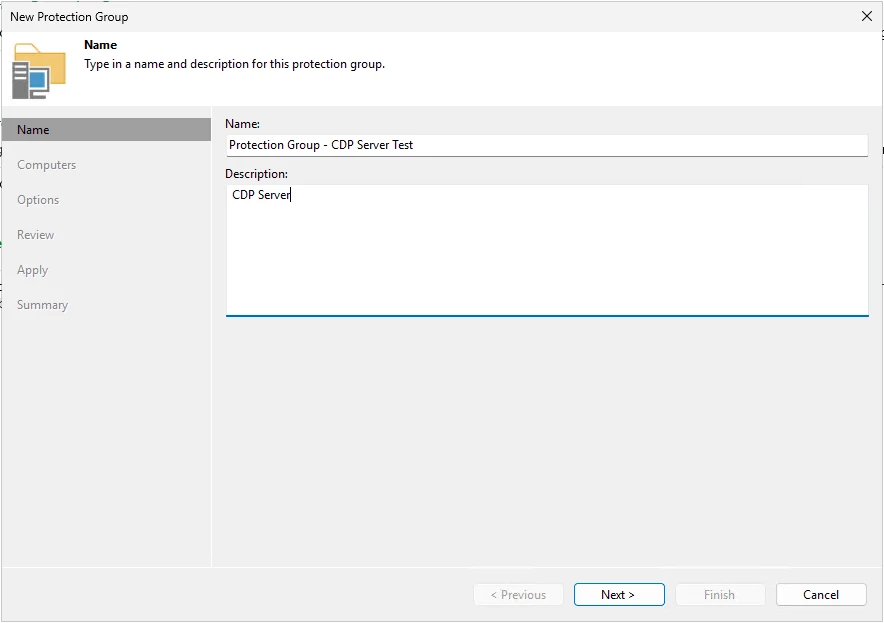
We added a name and description.
Enter the FQDN or IP address of your physical server. Click “Add” to add the machine's credentials.
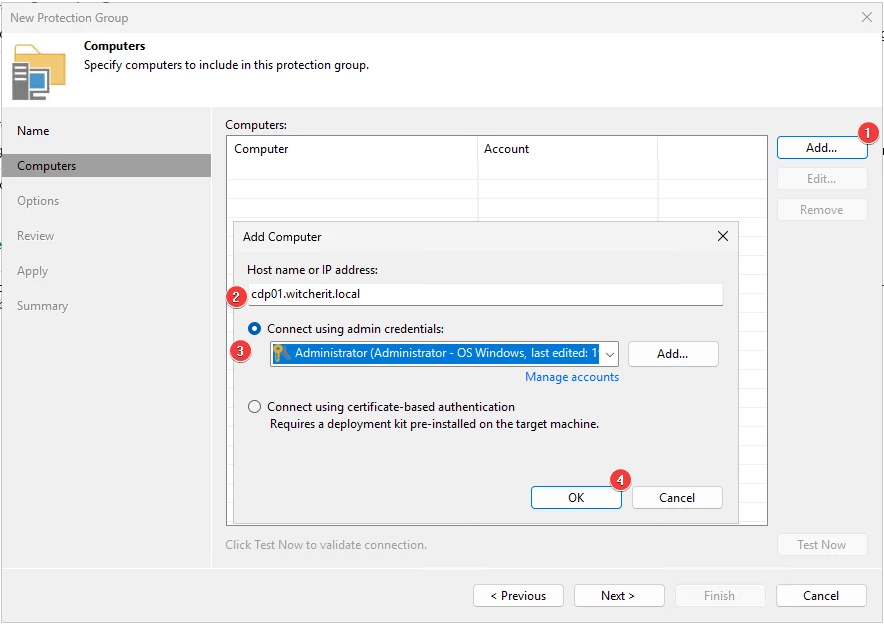
Once the machine has been added, you can click “Test Now” to test the connection to the machine.

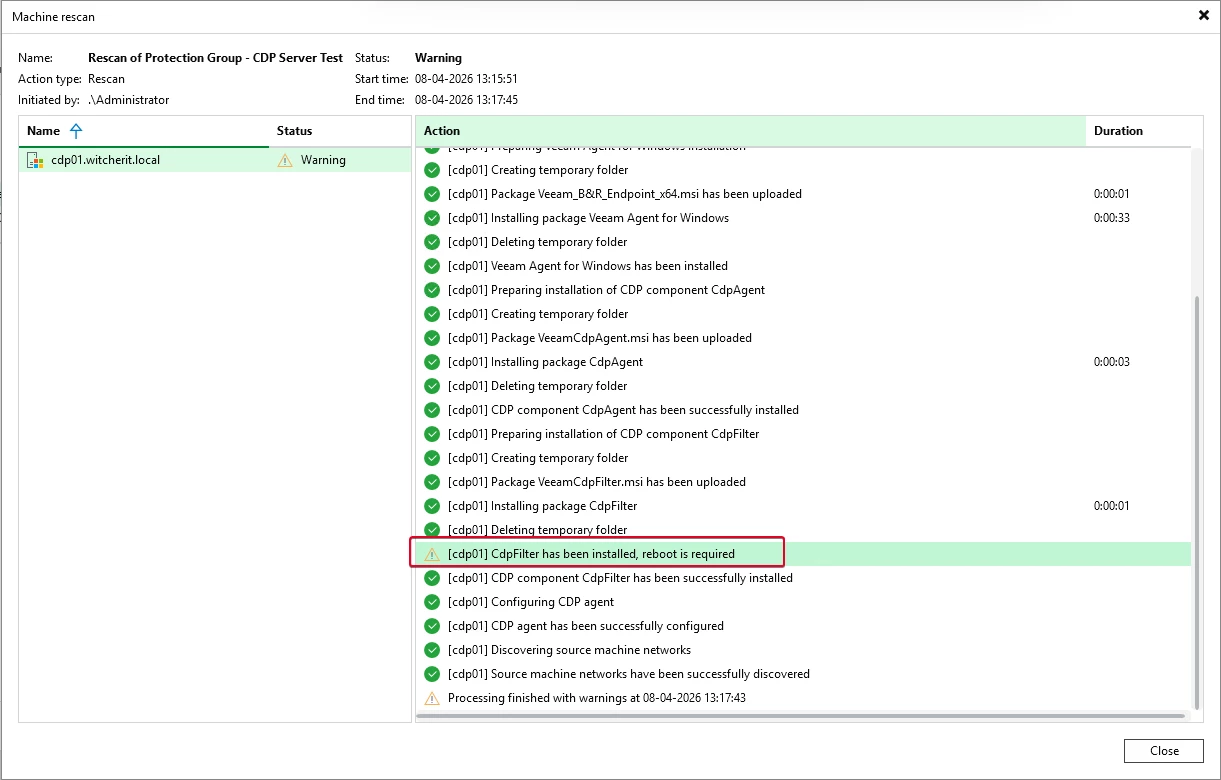
Select the “Install CDP agent” option to install the Veeam CDP Agent Service and the Veeam CDP Volume Filter Driver.
Note: It is important to restart the server where the CDP agent is installed before you can start using it.
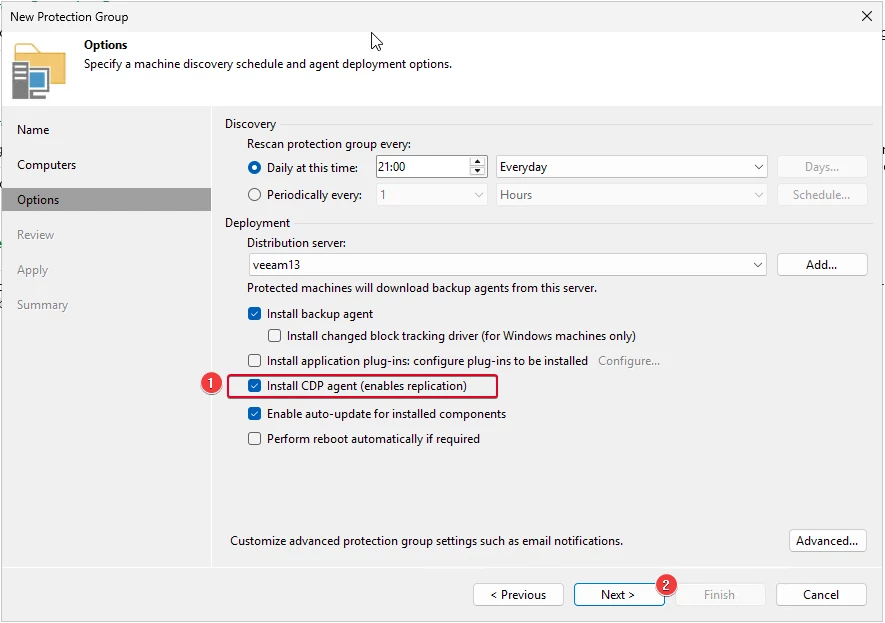
Click “Apply”
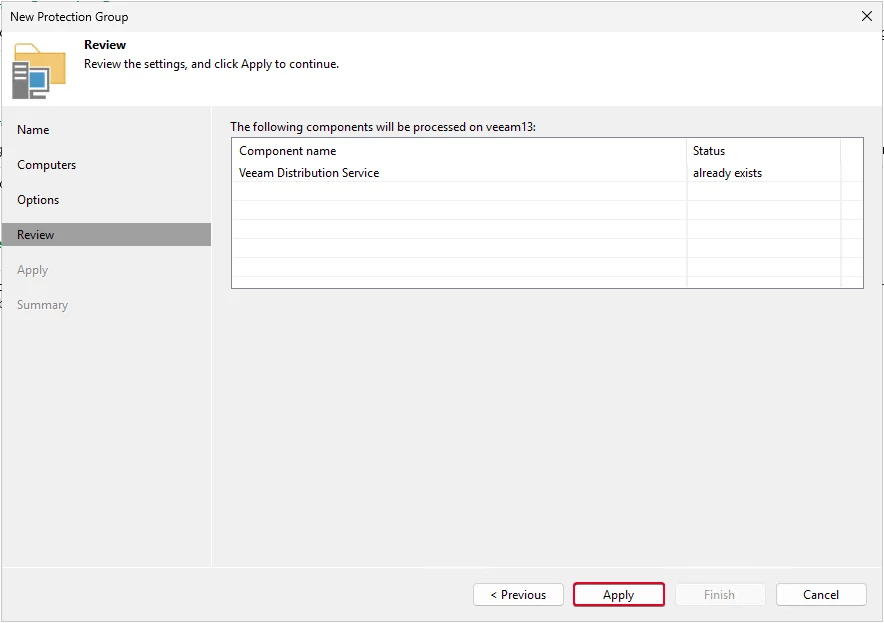
We'll wait for the changes to finish applying, and then we'll continue.
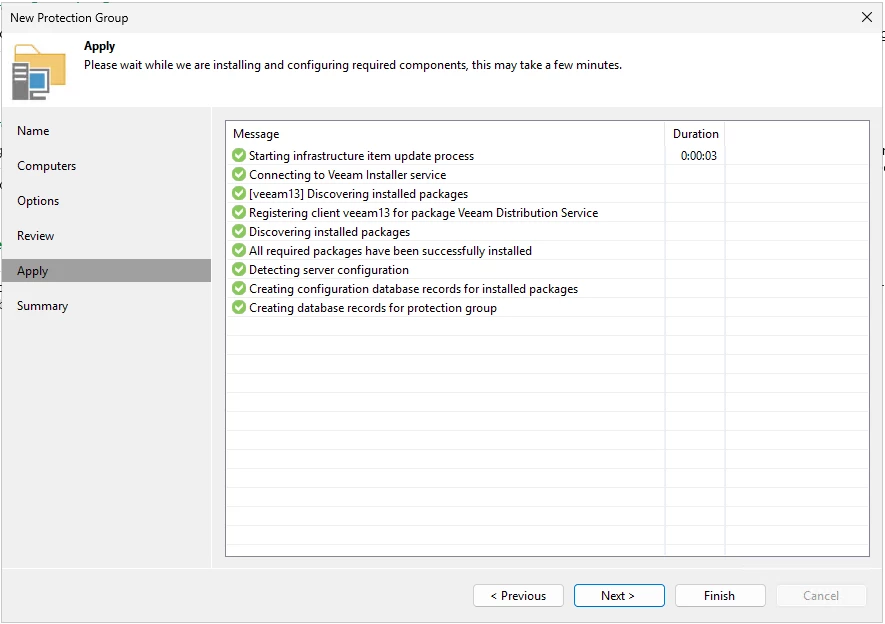
Once you're done, click “Finish.”
We're waiting for the installation to finish. We can review each step of the setup process to learn more about what's happening. You may also notice a warning, since the server needs to be restarted, as mentioned earlier.
With this, we now have the machine we need to proceed with the next steps.
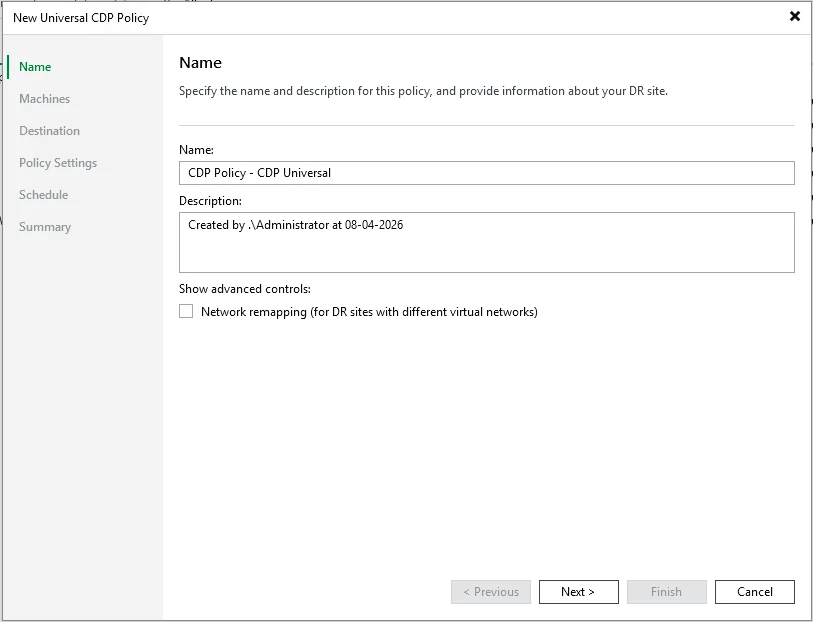
Creating a CDP Policy
To protect workloads with Universal CDP, we need to configure a CDP policy. The CDP policy defines which workloads we will protect, where the replicas will be stored, how often short-term and long-term restore points will be created, and so on. A CDP policy can cover one or more workloads.
To create the policy, go to Home > CDP Policy > Universal CDP.
We add a name to our policy and, optionally, a description.
Note: If the destination network is different from the source, it is important to perform network remapping by checking the “Network Remapping” box. In my case, since this is a lab, I will not use this option.
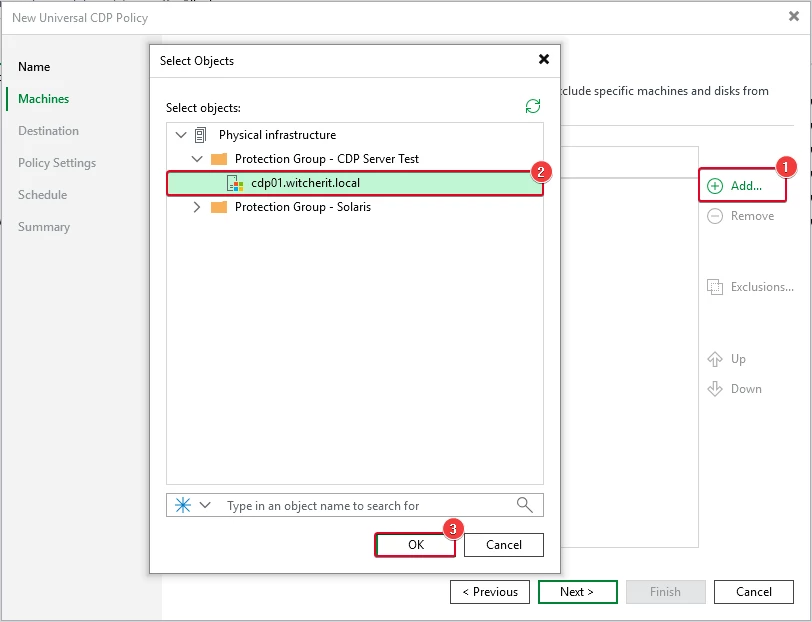
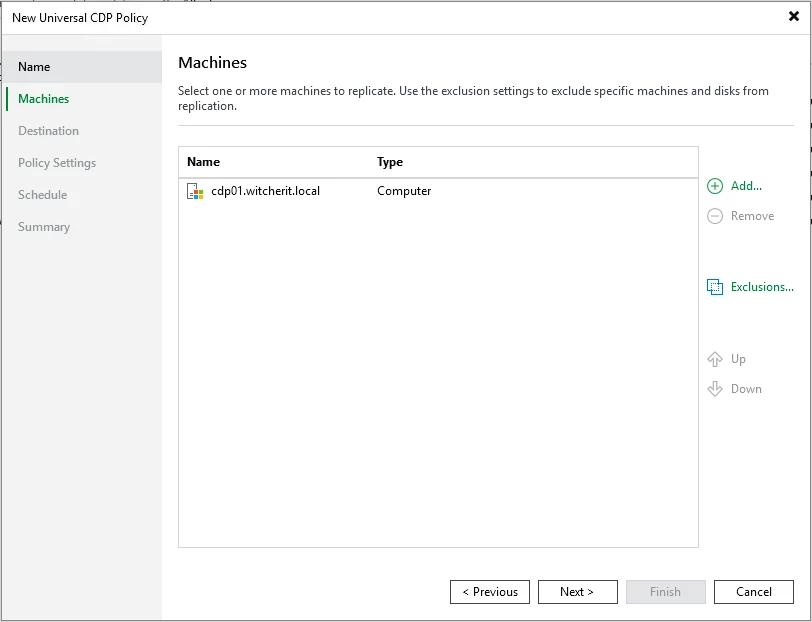
Add our physical server by clicking “Add” Select the server and continue.
Click “Next”.
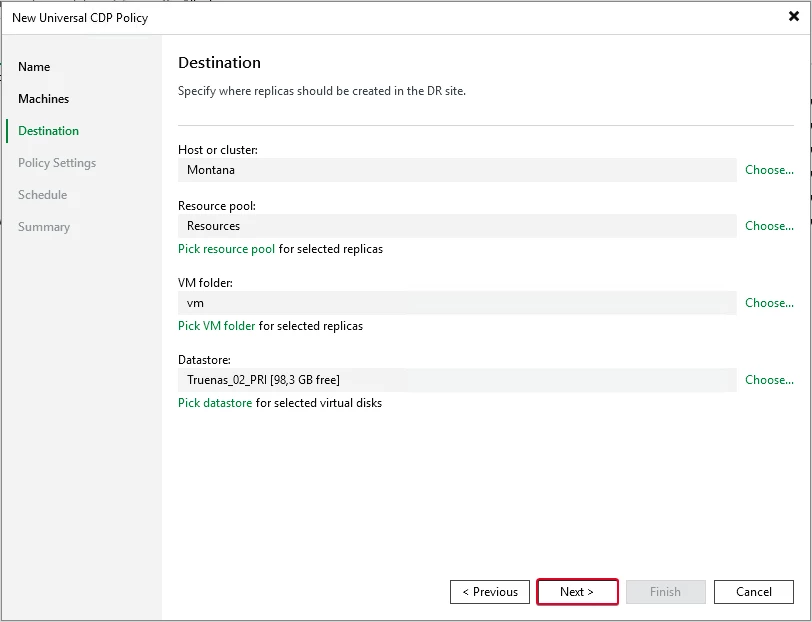
At this point, we select the target cluster in our VMware infrastructure.

We configure the target resources where we will store the replica of our physical machine.
We can leave the default setting, where Veeam Backup & Replication automatically selects the proxies. We leave the automatic selection enabled in the Source Proxy and Target Proxy fields. If we want to manually select the CDP proxy server to use, we can click “Choose” in the Source Proxy and Target Proxy fields.
For this example, I chose the CDP proxy server that I added in previous steps.
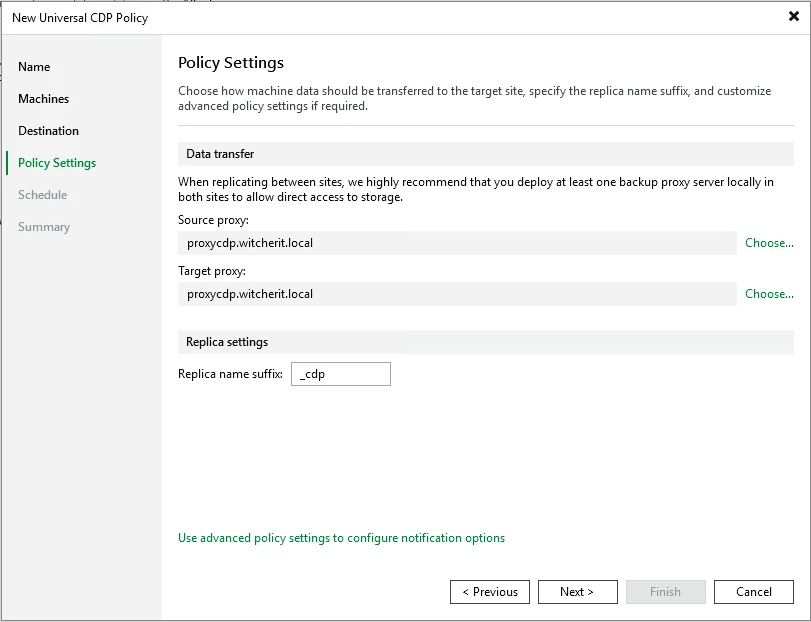
In the Recovery Point Objective (RPO) field, specify the required RPO in seconds or minutes—that is, how frequently short-term recovery points will be created.
The minimum RPO is 2 seconds; however, this may not be optimal if your CDP policy includes many virtual machines with a high workload. The optimal RPO is no less than 15 seconds. The maximum RPO is 60 minutes.
During each specified time period, Veeam Backup & Replication will prepare the data for short-term restore points of VM replicas and send this data to the target destination. It is important to note that short-term restore points are consistent across failures.
To configure the CDP policy to display a warning or error if newly created restore points are not transferred to the destination within the specified RPO, click “RPO reporting” Then specify when the policy should display an error or warning.
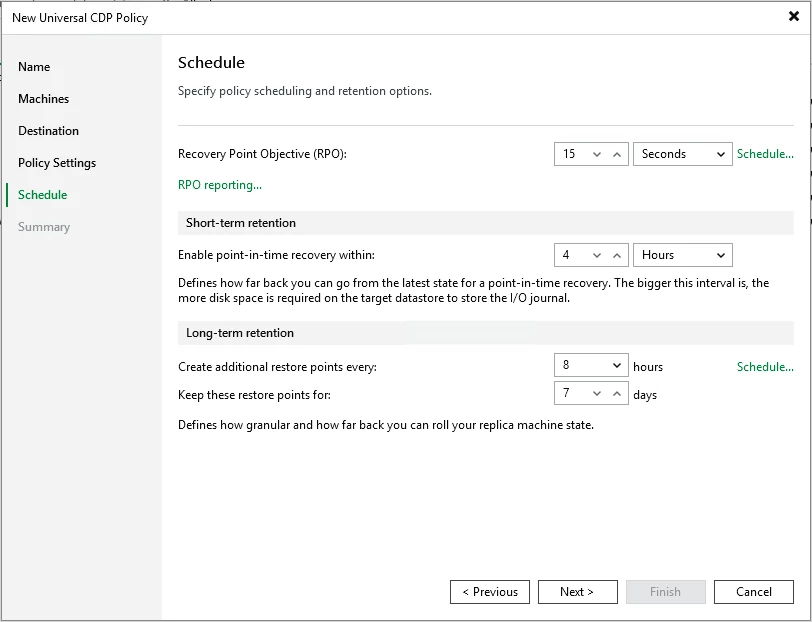
In the “Short-term retention” section, we configure the short-term retention policy—that is, we specify how long to store short-term restore points.
In the “Long-term retention” section, we specify when to create long-term restore points and how long to store them:
- Create additional restore points every, We specify how often we want to create restore points over the long term.
- Keep these restore points for, We specify how long these restore points should be retained in the long term.
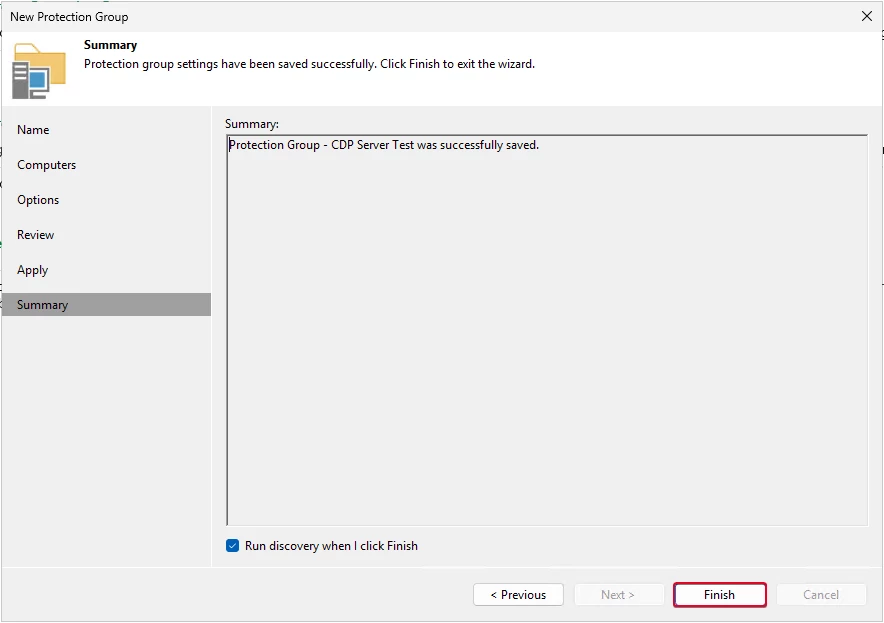
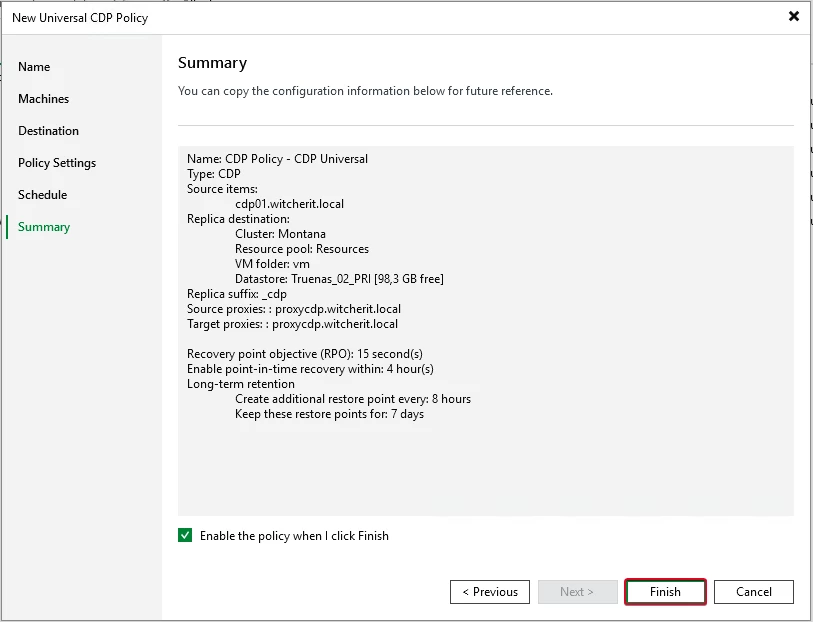
We verify that our settings are correct and click “Finish.”
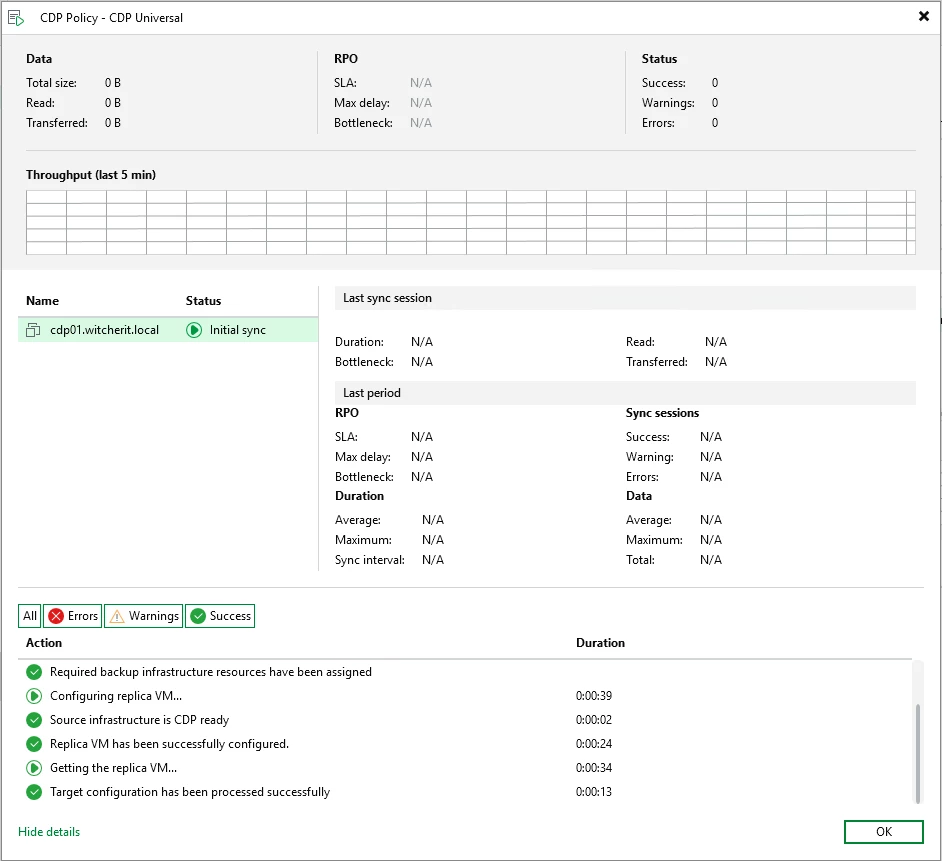
All we can do is wait for the initial synchronization to finish.
Depending on the workflow, CDP policies can have the following statuses:
- Initial sync — Initial synchronization is in progress.
- Syncing — Incremental synchronization is in progress.
- CBT mode — The replica data on the destination host is out of date. This status may appear, for example, if a CDP proxy is overloaded and cannot receive or send data. The status may change to Synchronizing after the workload decreases and the replica data on the destination host is updated to reflect the current state of the virtual machine on the source host.
- Success, Warning or Error — The CDP process was successful, encountered errors, or failed. These statuses are displayed for disabled CDP policies.
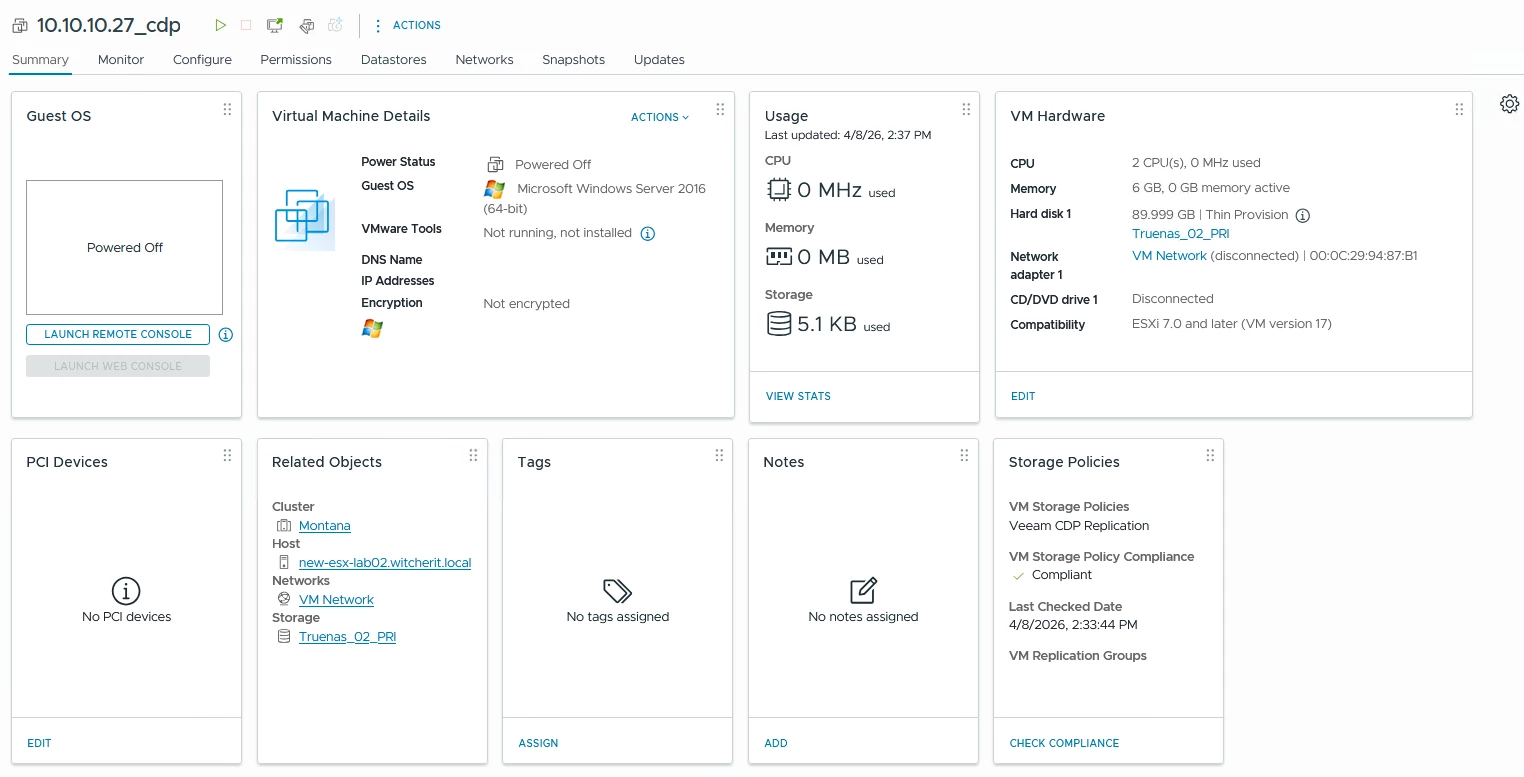
From the VMware interface, we can already see that a virtual machine replicated by CDP has been created from our physical machine.
Conclusion
The implementation of Universal CDP in Veeam v13 is a true quantum leap. We are no longer limited solely to the virtual storage layer; by introducing CDP agents, Veeam democratizes mission-critical protection, enabling us to achieve RPOs of just a few seconds across a much broader range of workloads.
In a future post, we’ll take a look at failover and failback in Universal CDP.
This is my first post in English, so please excuse any mistakes.
I hope this information is helpful. Please feel free to leave any questions or suggestions in the comments. Best regards.