

This is the English version of a selected article from Climb Japan Engineer Blog series.
-----
Veeam Backup & Replication enables the agentless protection of Hyper-V virtual machines. In order to maintain the data integrity of Hyper-V VMs, when you process a Veeam backup, a temporary Hyper-V checkpoint is automatically created and it is then deleted when the data capture is completed.
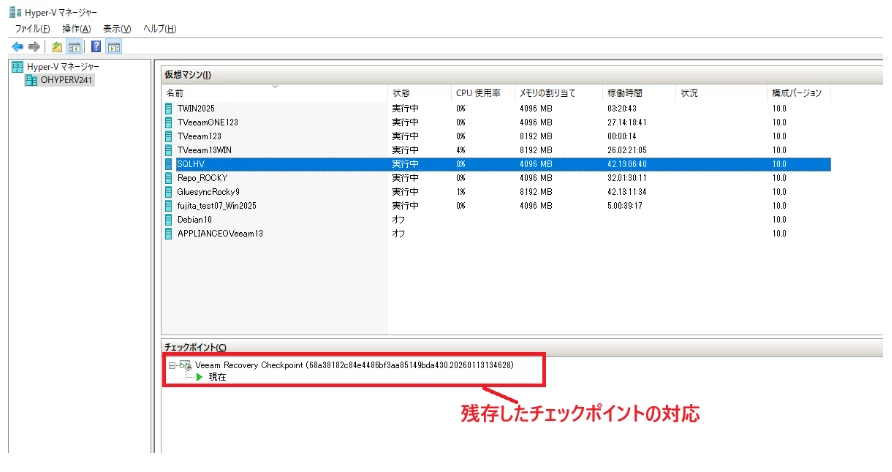
However, in some exceptional situations, e.g. as a result of antivirus software interference, the checkpoint may remain on the protected VM. In that case, you might see the remaining checkpoint named “Veeam Recovery Checkpoint (XXXX)” on the Hyper-V Manager screen as below. The red marked section shows the remaining checkpoint. Note the UI is in Japanese.
The Hyper-V checkpoint size may increase as time goes by, because it will reflect the protected VM’s data changes. Therefore, if the checkpoint is left there for a longer period, the size may become large enough to negatively impact the performance of the protected VM. It may also affect the Hyper-V host disc space.
For that reason, if you find any remaining checkpoint after processing a Veeam backup, it is recommended to delete it manually. As the Veeam-created checkpoint is always in “Recovery” type, however, you cannot delete it using the Hyper-V Manager UI. You would need to use a PowerShell command as below.
1. Open the Windows PowerShell ISE as administrator.
2. Get the checkpoint exact name with the command:
Get-VMSnapshot
Provide the VMName when prompted.
3. Run the command:
Get-VM -Name <VMName> | Get-VMSnapShot -Name <CheckpointName> | Remove-VMSnapshot
4. Verify that the checkpoint has been successfully deleted with the command:
Get-VMSnapshot